


If you use more than one computer at work or home, you probably want to have some way of accessing your internal network from each of them. The good news is that WireGuard VPN solves this problem.
In this tutorial, you’ll learn how to set up WireGuard VPN to run a full-blown VPN to connect your computers, securely giving you access.
Ready to get your hands dirty? Time to dive in!
WireGuard protects network traffic, but it does not clean up exposed personal records on data broker sites. If that is part of your privacy goal, compare MyDataRemoval privacy monitoring and data broker removal workflows before paying for a personal data removal service.
Prerequisites
This tutorial will be a hands-on demonstration. If you’d like to follow along, be sure you have the following:
- A Linux system – This tutorial uses Ubuntu 20.04 LTS, but any Debian distros will work for the demos.
- A local computer – This demo uses a Window 10 64-bit client to connect to the WireGuard VPN server. <aside> 💡 If you are using a remote server, be sure you have permission to connect to that server from your local machine. </aside>
- A non-root user with
[sudo](<https://scriptcrunch.com/add-sudo-user-permissions-linux/>)privileges.
Installing WireGuard
By default, WireGuard doesn’t come installed on your Ubuntu Linux distribution. So you’ll first install WireGuard with the APT package manager.
You can also download and compile WireGuard from the source, but a minimal setup is fine for this demo.
Run the following command to update the system’s package database.
sudo apt update -y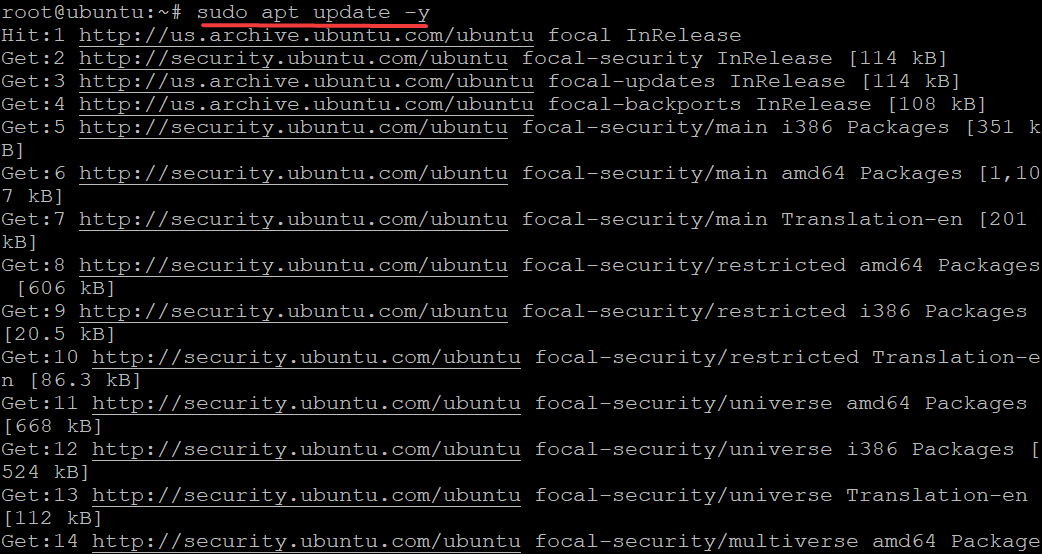
Now, run the following command to install the wireguard package. The wireguard package provides a minimalistic kernel module for supporting secure private networking and protocol.
The WireGuard protocol involves public keys, distributed in an authentication scheme similar to SSH, which is combined with symmetric encryption keys to establish private point-to-point or site-to-site connections.
sudo apt install wireguard -y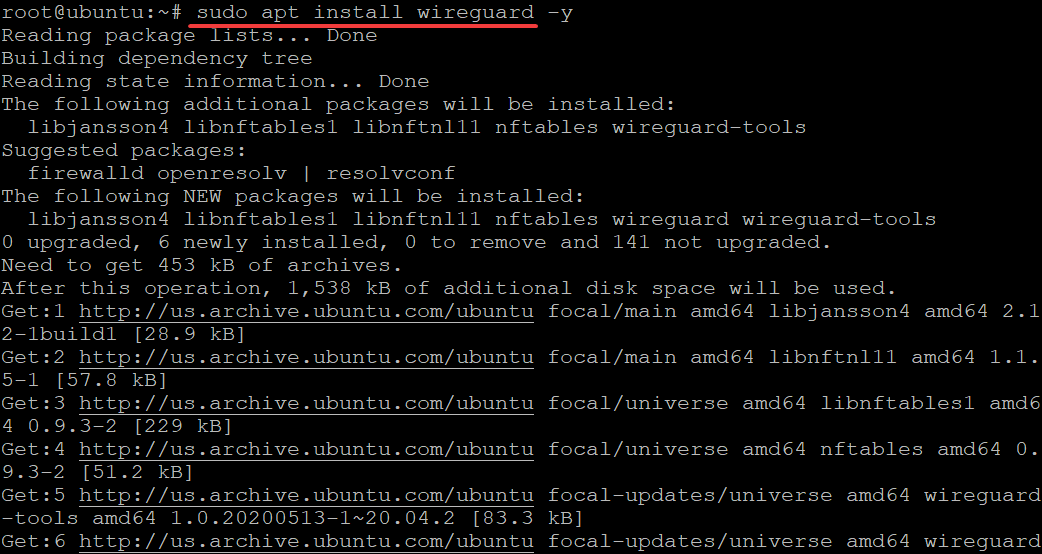
After installing, WireGuard runs as a kernel module. WireGuard runs in kernel space since WireGuard needs direct access to your network interfaces to establish a VPN connection.
Generating a Key Pair
Now that you have WireGuard installed, it’s time to generate a key pair (a public key and a private key) by running the wg genkey command. The public key is your WireGuard “identity”. Each person who wants to connect to your VPN will need access to this public key. In contrast, the private key is what you use to establish a secure connection.
Keep the private key a secret. Anyone who gets access to your private key can use it to connect to your VPN.
1. Run the umask command below to make your keypair readable. The umask command specifies the file mode creation mask and determines the permissions given to newly created files.
You’ll use a umasks value of 077 so that all newly created files are readable by everyone but writable only by their owner. This step ensures your WireGuard keys are not world-editable.
umask 0772. Next, run the below command to generate (wg genkey) a key pair.
The command writes the private key to the /etc/wireguard/privatekey file and the public key (wg pubkey | sudo tee) to the /etc/wireguard/publickey file.
wg genkey | sudo tee /etc/wireguard/privatekey | wg pubkey | sudo tee /etc/wireguard/publickeyAfter running the command, you’ll get a value on your terminal, which is your public key, as shown below. The below output confirms that you’ve generated your public key successfully.
Copy and save this public key to somewhere else as your peers will use this publish key to connect to your WireGuard VPN. Your WireGuard VPN is like a tunnel between peers.

3. Finally, run the cat command below to verify that you’ve generated your private key successfully.
cat /etc/wireguard/privatekeyNote down your private key, like in the output below, as you’ll define it in your WireGuard VPN server’s configuration.

Configuring the WireGuard VPN Server
Now that you have generated a key pair for a secure server connection, the next step to take is configuring the WireGuard VPN server.
1. Create a new file named wg0.conf with your favorite text editor, and populate the wg0.conf file with the following contents. Ensure that you replace the eth0 after POSTROUTING -o with your network interface.
Naming configuration files is up to you, but to keep the names easier to remember, choose names like wg0, wg1 (wg stands for WireGuard), or tun0, tun1 (tun stands for tunneling), and so on.
2. Populate the wg0.conf file with the following contents. Ensure that you replace the eth0 after the POSTROUTING -o with your network interface, save the changes and exit the editor.
The wg0.conf file contains all the network and security parameters of your WireGuard interface. Without it, your WireGuard interface and your peers can’t establish a secure connection.
# Defines your WireGuard interface name
[Interface]
# Sets the server's Public IP Address. This network is routed to your server's
# eth0 interface. This is an IP range of private IPv4 that you will use
# for your peers to connect to the broader internet using your VPN server.
# Your peer can use any private IPs from 10.8.0.1 to 10.8.0.255.
Address = 10.0.0.1/24
# Set the value to "true" to save your server's config file automatically
# after a connection is established or when you shut down your VPN server.
SaveConfig = true
# Sets the port that your VPN server listens on. This port should be open on your router
# so that your peers can access this port to connect to your VPN
ListenPort = 51820
# Replace <SERVER_PRIVATE_KEY> with your private key generated earlier.
PrivateKey = <SERVER_PRIVATE_KEY>
# Sets WireGuard to automatically accept new connections, which allows your peers
# to access your server with their own public IP address. Your VPN server forwards
# your peers’ connection through your private network to make it seem
# like they are coming directly from the peers.
PostUp = iptables -A FORWARD -i %i -j ACCEPT; iptables -t nat -A POSTROUTING -o eth0 -j MASQUERADE
# Reverses the PostUp values when there's a disconnection
# to make the network settings return to original state
PostDown = iptables -D FORWARD -i %i -j ACCEPT; iptables -t nat -D POSTROUTING -o eth0 -j MASQUERADE3. Run the command below to turn on the wg0 interface.
sudo wg-quick up wg0 
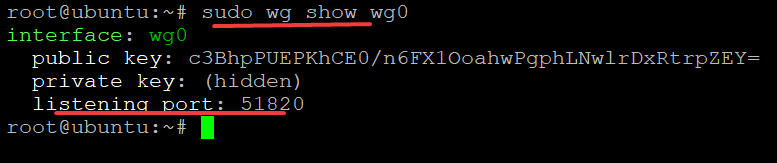
4. Lastly, run the below command to check your wg0 interface status.
sudo wg show wg0 You can see the wg0 interface is running and listening for connections on port 51820.
Configuring Server Networking and Firewall
From configuring your WireGuard server, you also need to configure your local networking and firewall. Doing so gives you more control over who can connect to your server.
You’ll forward port UDP 51820 so that your peers can connect to your VPN server, but you cannot keep this port open all the time. So you’ll configure your router’s NAT function to forward traffic on port 51820 through your VPN server.
1. Open the etc/sysctl.conf file using your favorite editor.
2. Look for and uncomment the #net.ipv4.ip_forward=1 line by deleting the “#” symbol to enable IPv4 IP forwarding and save the changes.

3. Next, run the following sysctl command to apply and make the changes permanent (-p).
sudo sysctl -p
Your WireGuard server will now forward incoming traffic from the clients of your WireGuard peers to the broader internet. Once forward, WireGuard then passes the data back to peers via the eth0 VPN ethernet interface.
But, any traffic coming from the broader internet and destined to your local WireGuard server will drop by the default Linux networking firewall. If you’re using UFW as your firewall, you will need to add a few more rules.
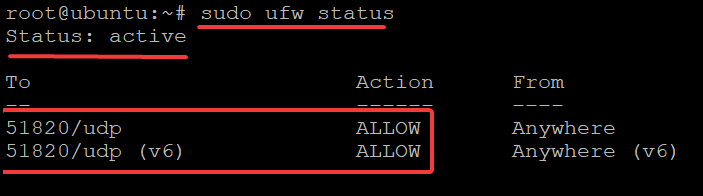
4. Run the command below to allow udp connections on port 51820 itself.
sudo ufw allow 51820/udp
5. Now, run the below command to check the status of your firewall. sudo ufw status command
sudo ufw status commandYour UFW firewall should now look like the one below:
Configuring a WireGuard Client
Your WireGuard VPN server is perfectly running, so you’ll next configure a client to test connection with your WireGuard VPN server. Your client can be Windows, MAC OS, Linux, or BSD, but this demo uses a Windows 10 64-bit client.
A WireGuard client is a device that connects to the VPN server with its own unique public key (ID). The WireGuard server authenticates the client and encrypts all traffic between itself and the client.
Note that the following steps need to be done on all the WireGuard client devices.
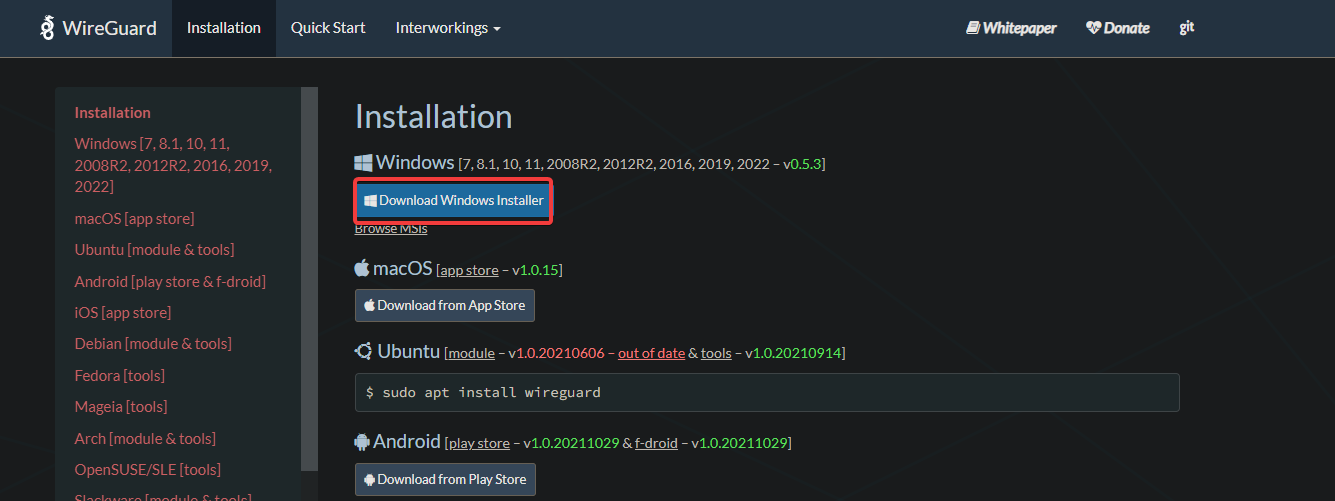
1. Navigate to the official download page for WireGuard to download the WireGuard client installer for your OS and run it. This demo uses the client for Windows.
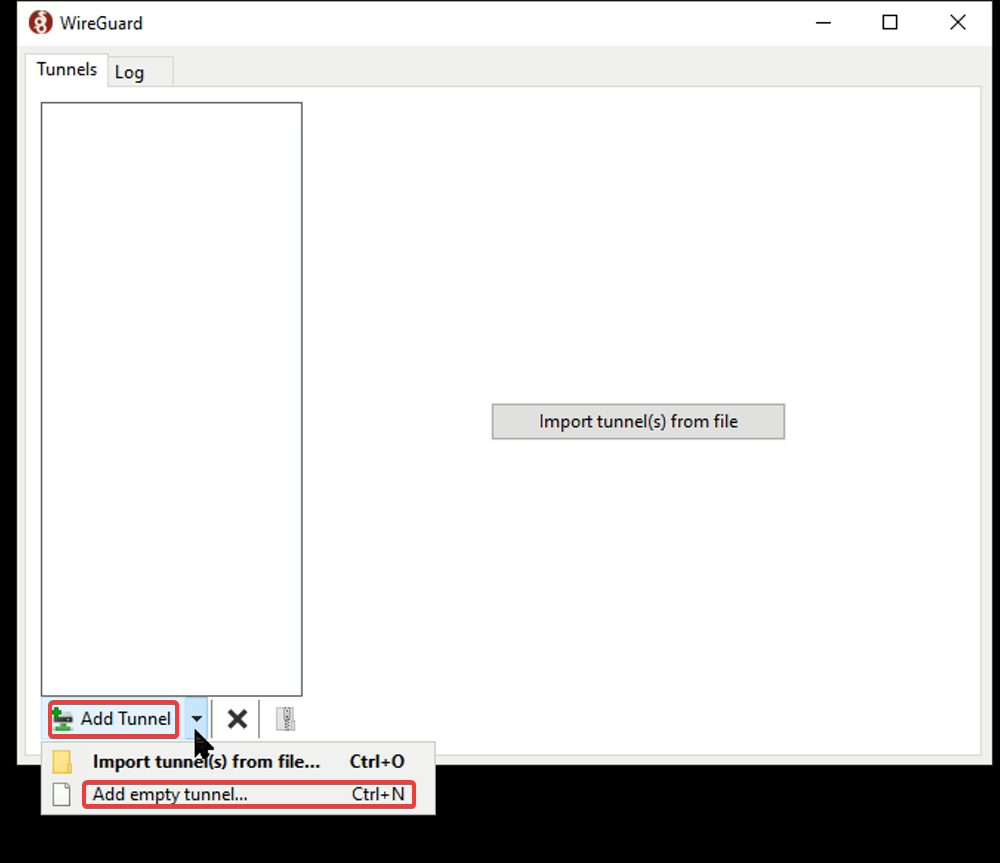
2. Open the WireGuard client application, click Add Tunnel (bottom-left) —> Add empty tunnel to create an empty tunnel. You will get a popup window to configure the VPN network connection (step three).
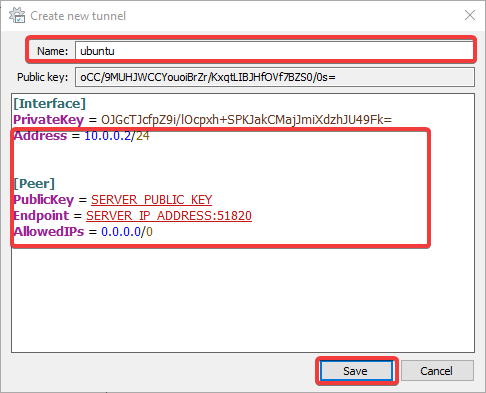
Configure the VPN network connection with the following:
- Enter the name of your VPN network connection, as shown below. But for this demo, the name is set to ubuntu.
- Leave the default generated PrivateKey, add a new line below, and type in Address = <client-IP>. Replace <client-IP> with your WireGuard client static IP.
- Add a new [Peer] block, and below, add a new PublicKey = <SERVER_PUBLIC_KEY> line. Replace <SERVER_PUBLIC_KEY> with your VPN server public key you saved in the “Generating a Key Pair” section (step two).
- Add a new Endpoint = <SERVER_PUBLIC_IP>:51820, where 51820 is the port your WireGuard server is listening to. Replace <SERVER_PUBLIC_IP> with the public IP of your VPN server.
- Add a new AllowedIPs – 0.0.0.0/0 line. This line allows the WireGuard client to access all IPv4 and IPv6 addresses on the network.
- Click Save to save the VPN network connection configuration.
4. Finally, return to your VPN server terminal, and run the below command to add the client’s public key and IP address to the VPN server.
Be sure to replace the following:
<CLIENT_PUBLIC_KEY>– with your client public key.10.0.0.2– with your client device’s IP address so that your VPN server can communicate with your client device.sudo wg set wg0 peer <CLIENT_PUBLIC_KEY> allowed-ips 10.0.0.2
Testing if the VPN Tunnel Works
By now, you already have a working WireGuard server and client at your disposal. Now it’s time to test the connection between them and see if the VPN tunnel works.
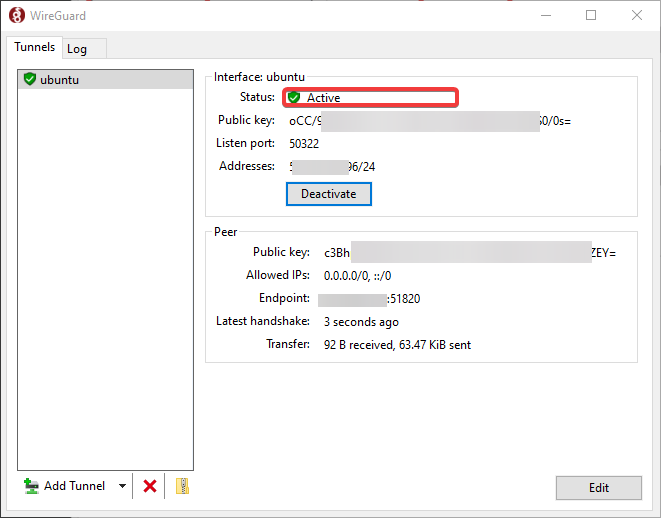
1. Open your WireGuard client application and click on the ubuntu connection (VPN tunnel) that you created.
2. Click on the Activate button to activate the VPN tunnel.
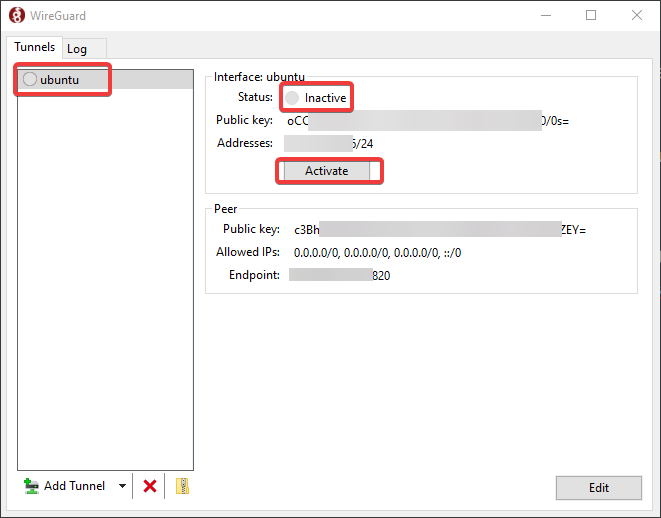
3. After activating the VPN tunnel, you’ll see the Status change to Active, as shown below. That’s it! You now have a successful connection to your VPN server.
Conclusion
Throughout this tutorial, you’ve learned how to configure a WireGuard VPN server. You’ve also configured a client to test if the connection between the WireGuard VPN server and the client is working by creating a VPN tunnel.
At this stage, you can now configure multiple WireGuard servers and clients for an encrypted private network with no centralized authority control.
How will you build on this newfound knowledge? Perhaps try Exploring Ansible via Setting Up a WireGuard VPN?


