


WinRM and PowerShell Remoting is a crucial feature to have when managing remote Windows computers. Just like other services, WinRM listens on specific ports under specific circumstances. In this tutorial, learn those WinRM ports and even how to change them, if needed.
Related: PowerShell Remoting: The Ultimate Guide
The WinRM Listener
One of the most important parts of WInRM (and the ports it runs on) is the WinRM listener.
The WinRM listener is a web server at its core. It communicates with HTTP and HTTPS and back in the pre-Windows 7 days it even used to default to the same port 80 and port 443 that most web servers use.
The listener runs as a service on your computer that is waiting for connections to attempt to be established, just like a normal web server.
A WinRm listener can listen two different ways; HTTP or HTTPS. The WinRM port for HTTP is 5985 while the WinRm port for HTTPS is 5986, by default.
- HTTP – Port 5985
- HTTPS – Port 5986
Related: PowerShell Remoting: The Ultimate Guide
Errors Connecting to Wrong Ports
And if you do not add the firewall rule when you change the port you will get the same message even when providing the port like this.
Changing WinRM Ports
While Microsoft recommends staying with the default listening ports for compatibility and ease of use, you can change them. This can be helpful in cases when this is a conflict with the default ports or a firewall restriction blocking the use of those ports.
Maybe you have a system set up that’s configured to connect to WinRM over custom ports. When you try to connect like normal, you receive the following error message:
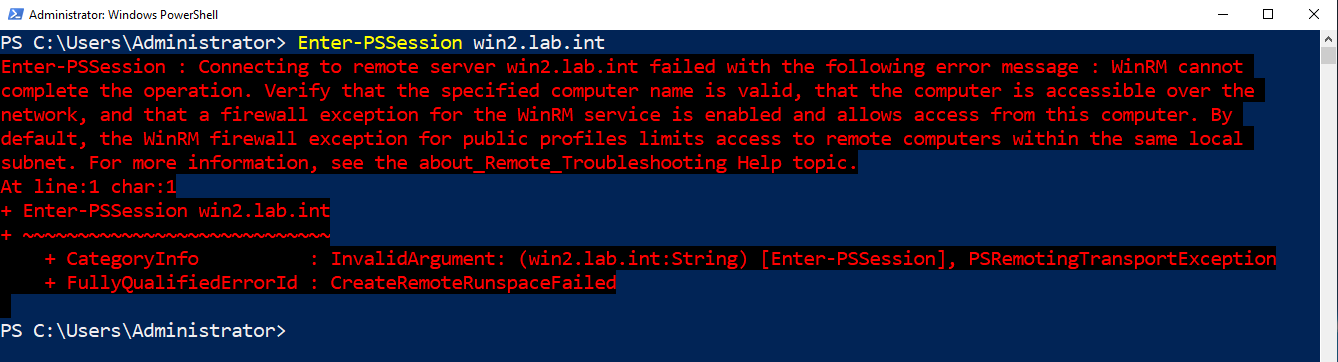
If so, it’s time to change the WinRM port on the server side!
To change the WinRm ports, you’ll first need to figure out if you already have a service listening on those ports.
Tracking Down Existing Connections
The easiest way to discover what ports are in use on a Windows machine is to use the netstat tool. Netstat checks for all active ports on your system and, if active, returns the source and destination IP and port used.
To track down listening ports prior to changing WinRm posts, run netstat -aon. The -aon switches:
- show all active connections (
a) - show the process ID for the process that opened the connection (
o) - do no attempt to resolve any DNS names of destination IPs (
n)
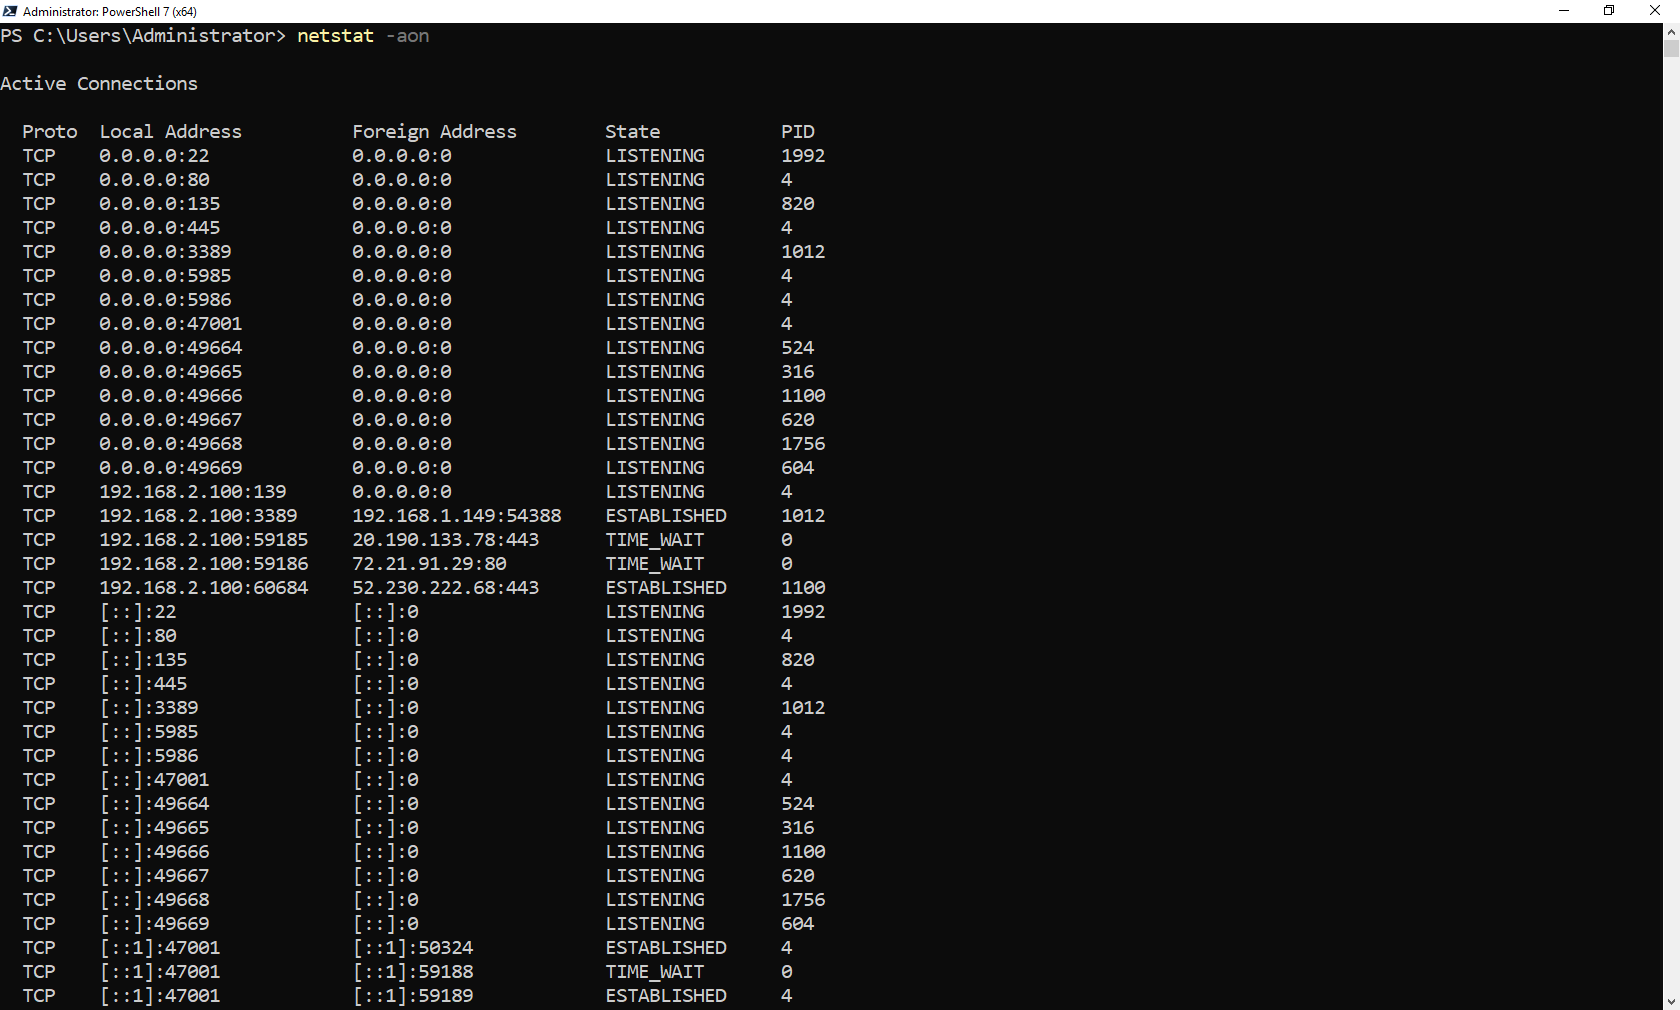
If a web server is listening on port 80, for example, you’ll see a line where the local address ended in :80 under the Local Address column. This row is where you’ll see the PID or process ID the connection is using.
Once you know the PID, you can then reference the PID to find the process name using something like the Get-Process PowerShell cmdlet.

Although in this case, you can see above that the process name is just System. This means that the process is highly integrated within the OS and is probably built into Windows.
Setting WinRM Compatibility Ports
WinRM has a feature called compatibility ports. Compatibility ports exist to be backward-compatible with some legacy systems that only work on ports 80 for HTTP and 443 for HTTPS. If you need to change WinRm to listen on these ports, enable the compatibility listeners.
Once you know that you do not have anything else running on ports 80 and 443 set the WSMan listeners to use the compatibility ports (80 for HTTP and 443 for HTTPS).
Set-Item WSMan:\localhost\Service\EnableCompatibilityHttpListener -Value $true
 Set-Item WSMan:\localhost\Service\EnableCompatibilityHttpsListener -Value $true
Setting WinRM to Listen on Any Port
If, for some reason, you need to configure WinRM to listen on a non-standard port, you can do that too. To do so:
- Find the listener name. You can do this by enumerating all of the WinRM listeners with the
Get-Itemcmdlet. The command below is listing all (*) of the listeners currently installed.
Get-Item WSMan:\localhost\Listener*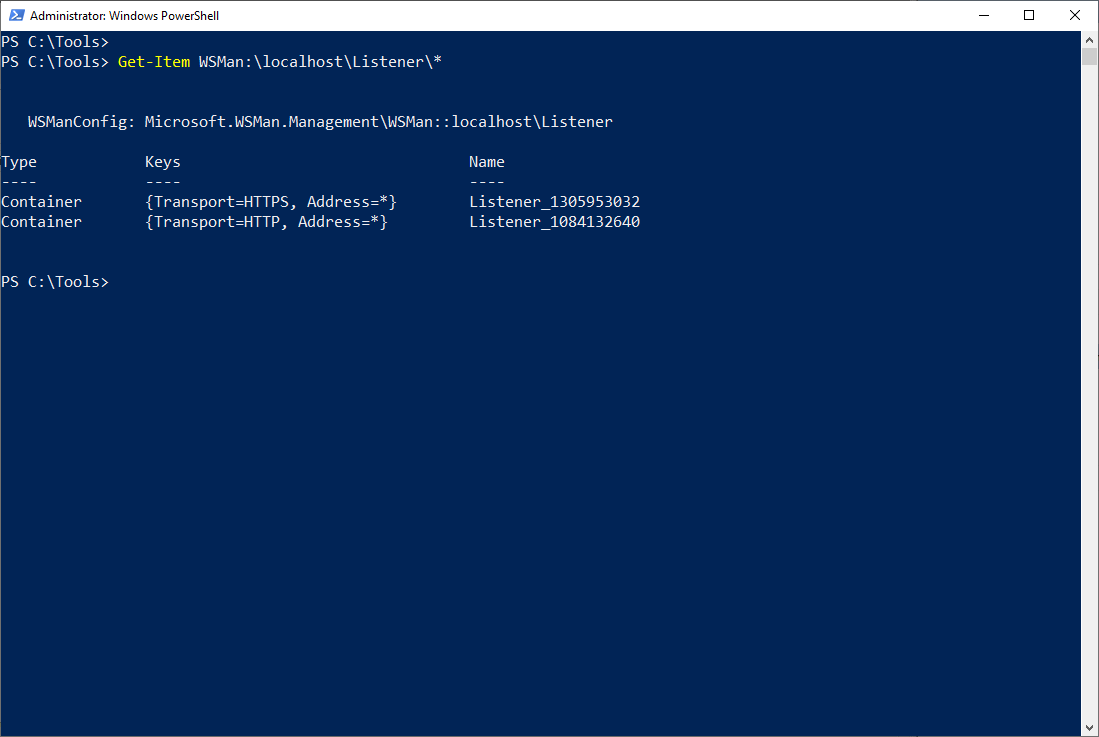
2. Next, using the listener name shown above, configure each listener using Set-Item providing the path of the listener and the port number to change it to.
Set-Item WSMan:\localhost\Listener\\Port -Value 3. At this point, the WinRM listeners are listening on the correct ports, the Windows Firewall is probably rejecting any remote connections to those ports. You need to open those ports. To do so, run the following command. The New-NetFirewallRule below is creating a Windows Firewall rule to allow all inbound TCP connections to a custom port.
$FirewallParam = @{
     DisplayName = 'Custom WinRM Port Rule'
     Direction = 'Inbound'
     LocalPort =
     Protocol = 'TCP'
     Action = 'Allow'
     Program = 'System'
 }
 New-NetFirewallRule @FirewallParam
Related: Disable Windows Firewall: Discover the Many Ways
If you would have not opened the appropriate Windows Firewall port, you would get a message like this when trying to connect:
Connecting to a Custom Port with PSRemoting
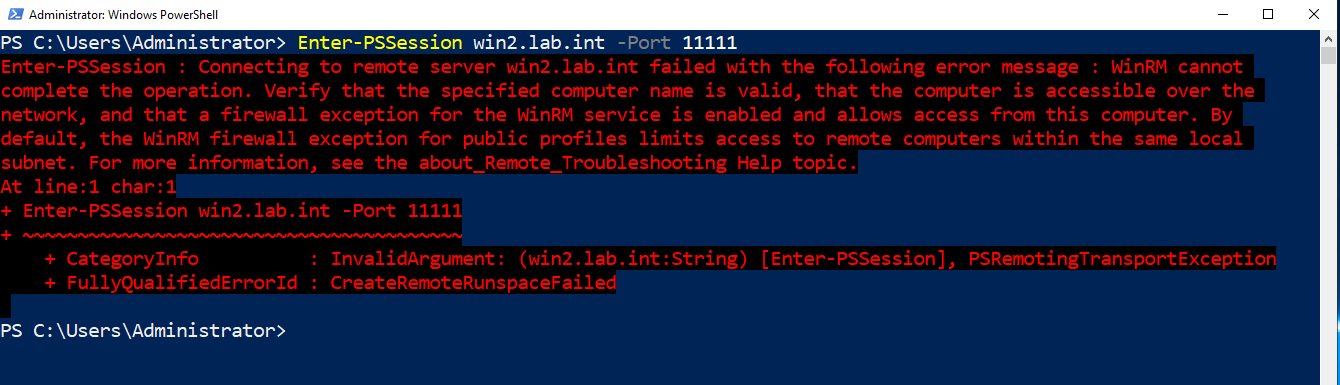
Now that you’ve set up and configured WinRM successfully on the WinRM server, you need to test connecting with the WinRM client. To do that requires just one additional parameter; Port.
Using any of the PSRemoting commands like Invoke-Command or Enter-PSSession, specify the Port parameter and the port set up to successfully make a connection.
Enter-PSSession -ComputerName <hostname> -Port 1111


