


Are you looking for ways to add another layer of security to your local computer or across a domain? Consider stepping up your game with the Windows 10 AppLocker!
AppLocker gives you the power to control which apps and files users can run. And in this tutorial, you’ll learn how to set up AppLocker and secure your Windows 10 operating system.
Feel like you need more privacy? Read on and start securing your system!
Prerequisites
This tutorial will be a hands-on demonstration. If you’d like to follow along, be sure you have the following:
- A Windows 10 Education or Enterprise computer – This tutorial uses Windows 10 Enterprise 21H2.
- An administrator user account to set up locally or access a domain controller for an organizational setup.
- A domain controller server for a multi-computer setup – This tutorial uses Windows Server 2019 Datacenter.
Configuring the Application Identity Service to Start on Bootup
Before you even begin to set up AppLocker rules and apply them to your local computer, you first need to tweak the Application Identity Service. Setting the Application Identity Service to start automatically on bootup enforces Windows 10 AppLocker rules.
Open a PowerShell console as an administrator, and run the below command to start the Application Identity service on bootup automatically.
sc.exe config appidsvc start= auto
The output below shows that the configuration was successful.

Next, run the following Get-Service command to verify the Application Identity service starts automatically and runs.
Get-Service AppIDSvc | select -Property Name, Status, StartType
Below, you can see the AppIDSvc status is Running with the start type set to Automatic.

If you see a stopped status, run the Start-Service command below to start the Application Identity Service (AppIDSvc).
Start-Service -Name “AppIDSvc”
Creating Default Windows 10 AppLocker Rules
Now that you have configured the Application Identity service, the next step is to create default AppLocker rules. Creating AppLocker rules lets you control which apps are allowed and denied.
You can set Windows 10 AppLocker rules for four categories of products, as follows:
- Executable Rules – Executable files (.exe, and the less common .com).
- Windows Installer Rules – Windows installer files (.msi, .msp, and .mst).
- Script Rules – Script files (.bat, .cmd, .js, .ps1, and .vbs).
- Packaged app Rules – Packaged apps and Packaged app installers (.appx).
The rule of thumb is to create default rules to allow all the approved apps that fall in any of the categories already running on a local computer.
To create default AppLocker rules, you’ll first need access to the Local Security Policy tool:
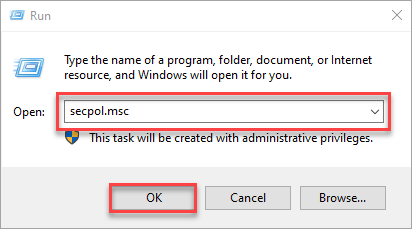
1. Open the Run dialog box, type secpol.msc, and click OK (or press Enter) to access the Local Security Policy.
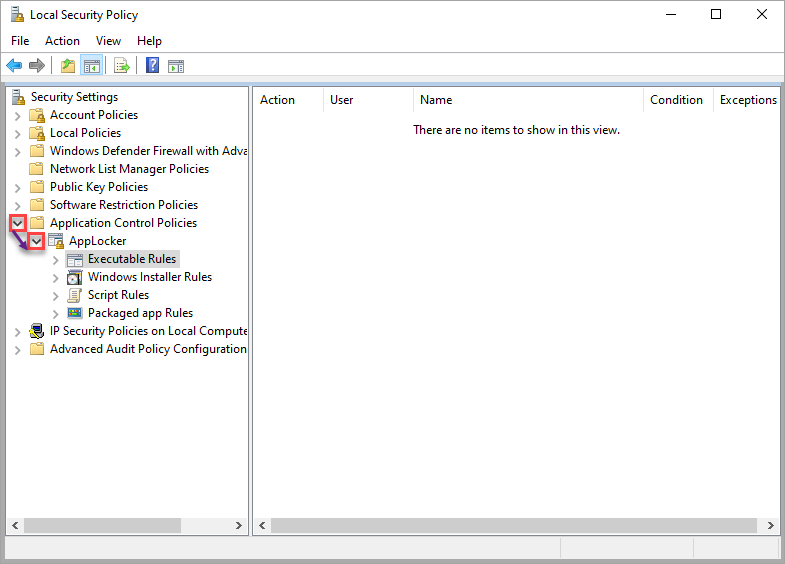
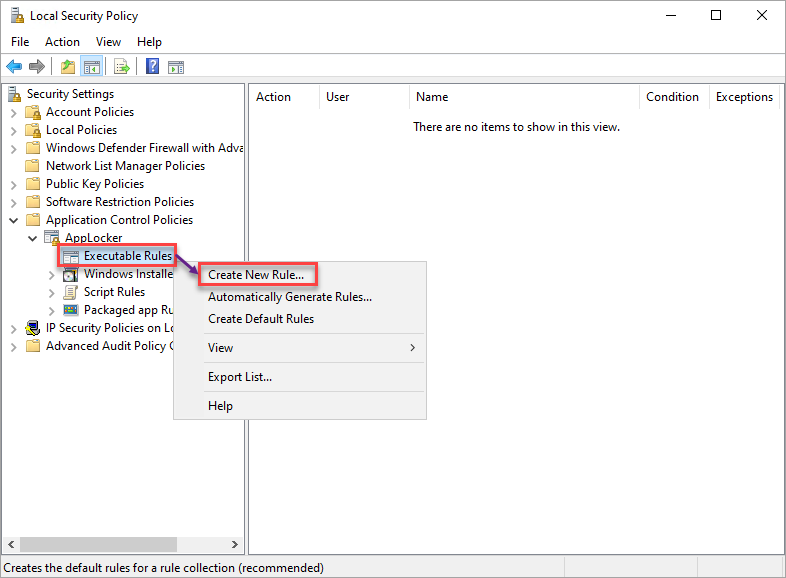
2. On the Local Security Policy window, expand the Application Control Policies and AppLocker.
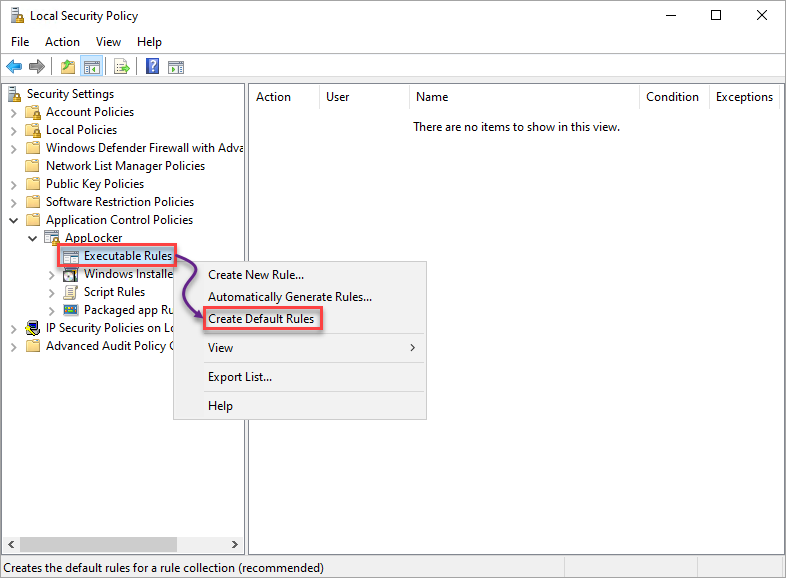
3. Select, and right-click on Executable Rules → select Create Default Rules to create the default AppLocker rules for the selected category.
Repeat this step for the rest categories (Windows Installer, Script Rules, and Packaged app Rules).
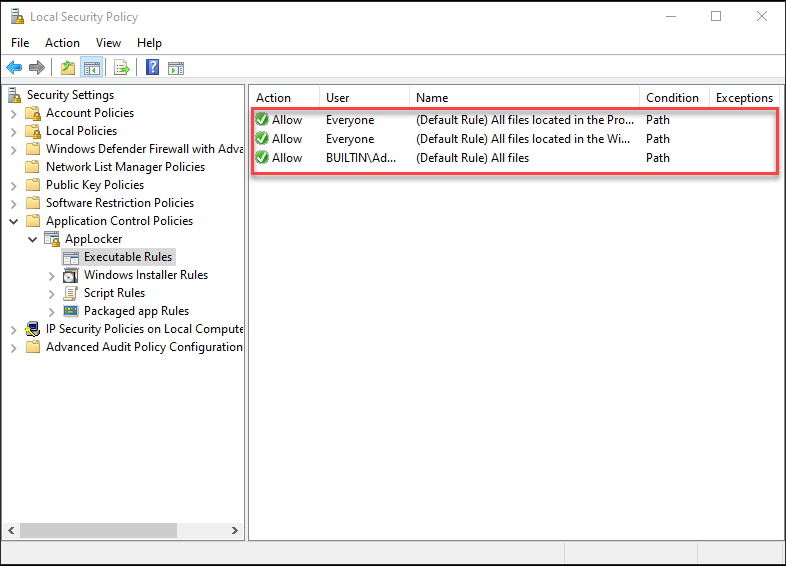
4. Lastly, select each category and verify the default AppLocker rules exist, as shown below.
Below, you can see a group of three default rules, similar to others except for Packaged app Rules, which has only one.
Creating Rules to Deny Applications
Now that your default AppLocker rules are in place, you can start creating rules to deny apps. Denying apps adds security to your machine since you get to deny access to malicious apps. The Local Security Policy also plays a part in creating rules to deny apps on your system.
In this tutorial, you’ll create rules for the Executable Rules category and test if they actually work. But once you’re confident in creating rules, you can create rules for other categories and see their differences.
Note that the steps in creating rules for each category are similar except for the Packaged app Rule.
Denying Applications via the Publisher Conditions
When you launch an app, you’re granting the publisher permissions to make changes to your system, especially if the app is constantly connected to the internet. Sounds too risky?
Creating rules to deny applications via the Publisher conditions will do the trick if you don’t trust a particular publisher.
1. Select and right-click on the category of your choice (Executable Rules) → choose Create New Rule to initiate creating a new rule.
2. Next, click Next when you see the Before You Begin page since it’s just an introductory page.
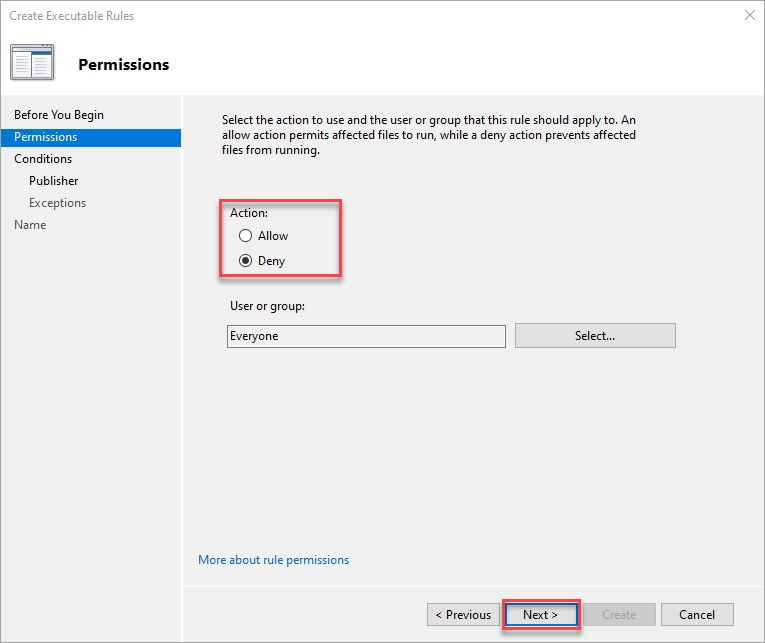
3. On the Permissions tab, choose the Deny option, which is the Action the rule will take.
Ensure you define the users affected by this rule. But leave Everyone selected for this tutorial, and click Next.
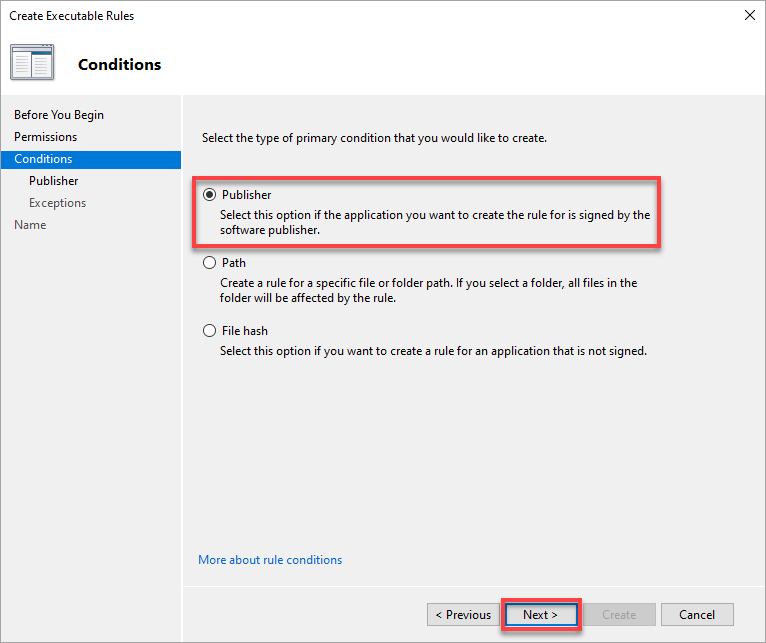
4. Now, choose from three options for creating a rule (except Packaged app):
- Publisher – For an application that the software publisher signs.
- Path – For a specific file or folder.
- File hash – For a file that is not signed.
But in this tutorial, select the Publisher option, and click Next.
Creating an AppLocker rule with the Publisher condition allows you to set a more or less specific rule about a file.
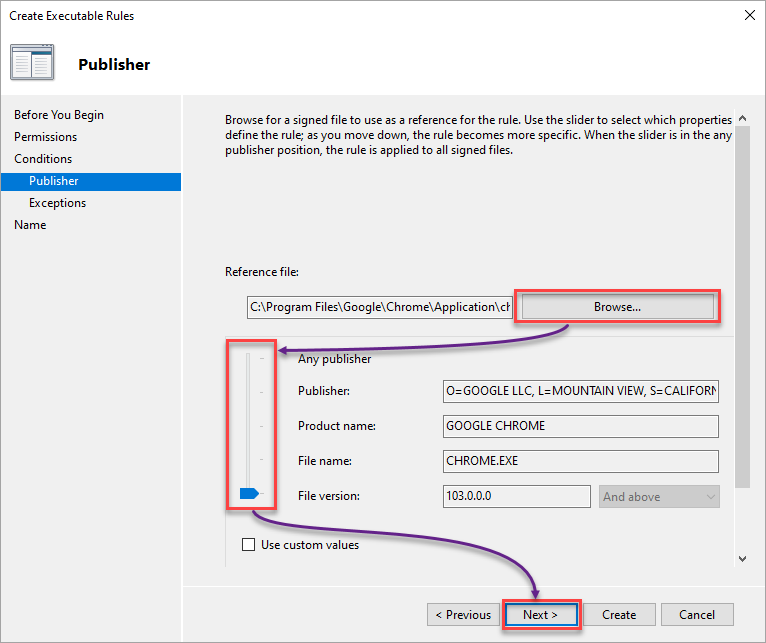
5. Configure the Publisher conditions with the following:
Choosing the Any publisher option might not be a wise decision at all. Some of your apps from the same publisher may not work, so take caution when choosing this option.
- Browse your local computer for the file you need to make a deny rule for.
- Adjust the slider according to your need to select which properties define the rule; it could be as detailed as the file version or the publisher.
In this example, the chosen property is Google Chrome’s File version.
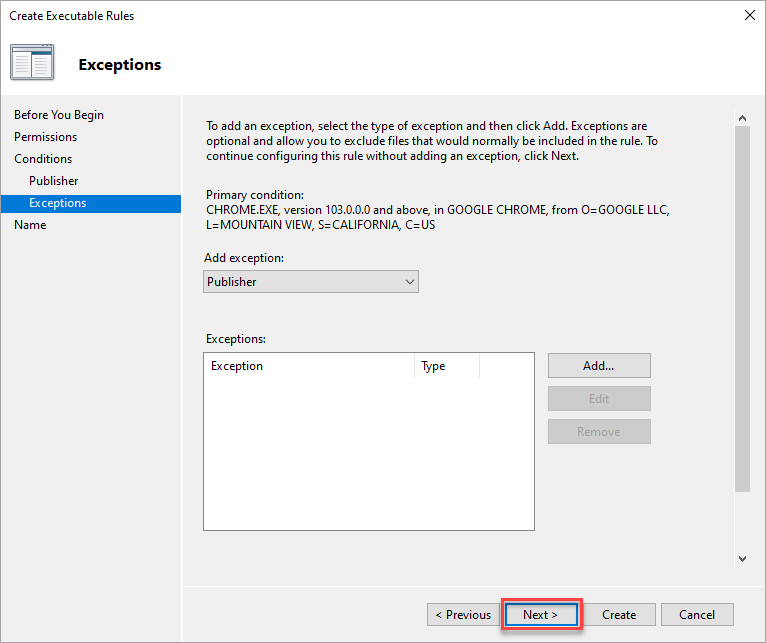
- Click Next to continue setting exceptions to the rule conditions.
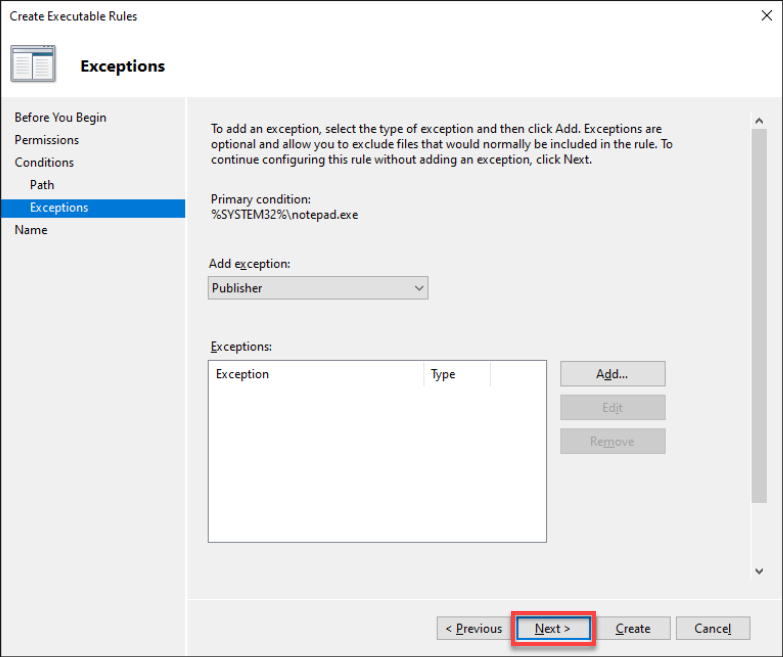
6. At this point, click Next, as there is no need to make exceptions for the deny rule.
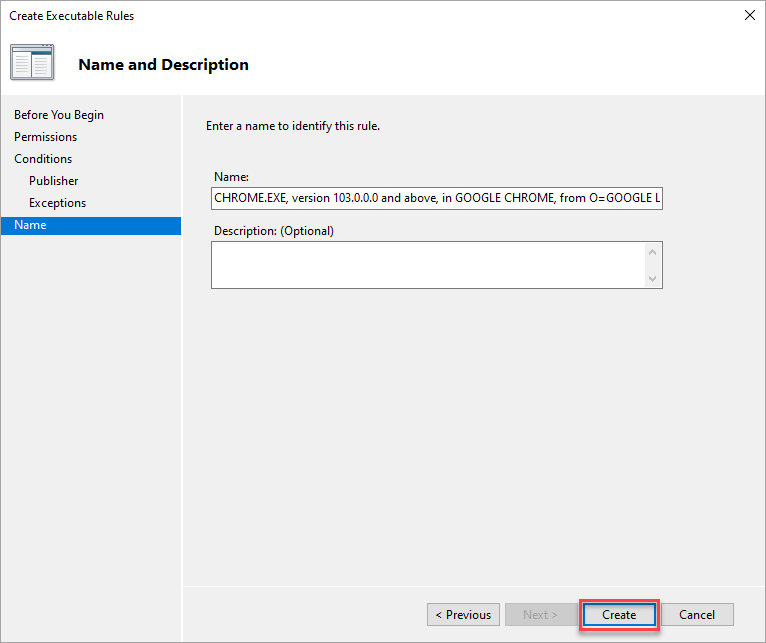
7. Provide a descriptive name for the rule, and click Create to create the rule with the Publisher condition.
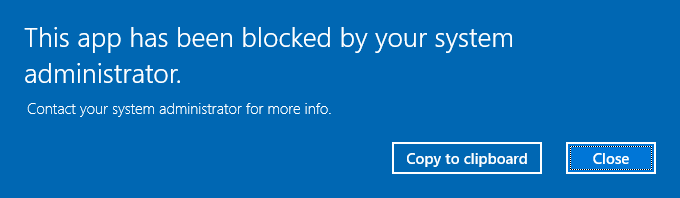
8. Ultimately, try accessing applications from the publisher you set the deny rule for. If the deny rule works, you’ll get the following message.
Regardless of your chosen condition, you’ll get the same message below when you launch an app denied under the Executable Rules category.

Denying Applications via the Path Conditions
Suppose you trust a publisher but are skeptical about one of their applications. If so, your best choice is to create rules to deny specific applications or folder paths.
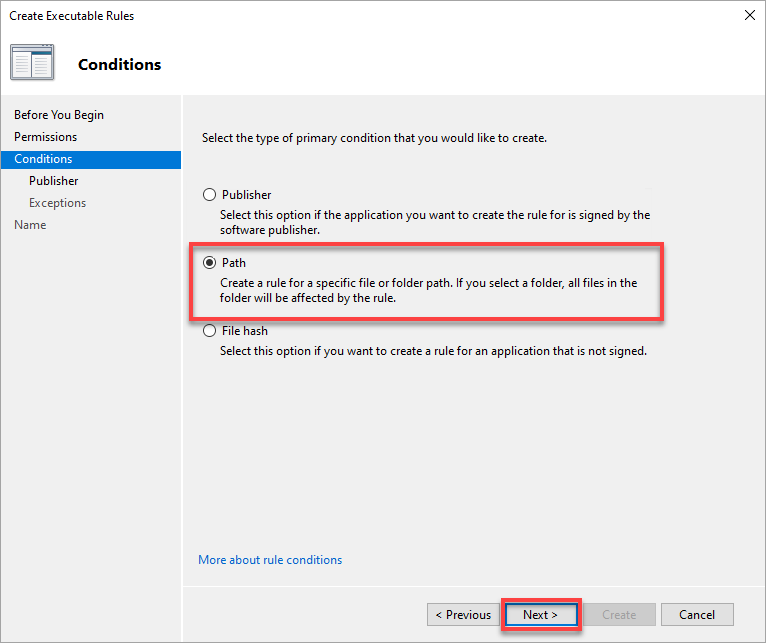
1. Create another rule as you did in steps one to four of the “Denying Applications via the Publisher Conditions” section.
But this time, choose the Path condition for a specific file or folder path.
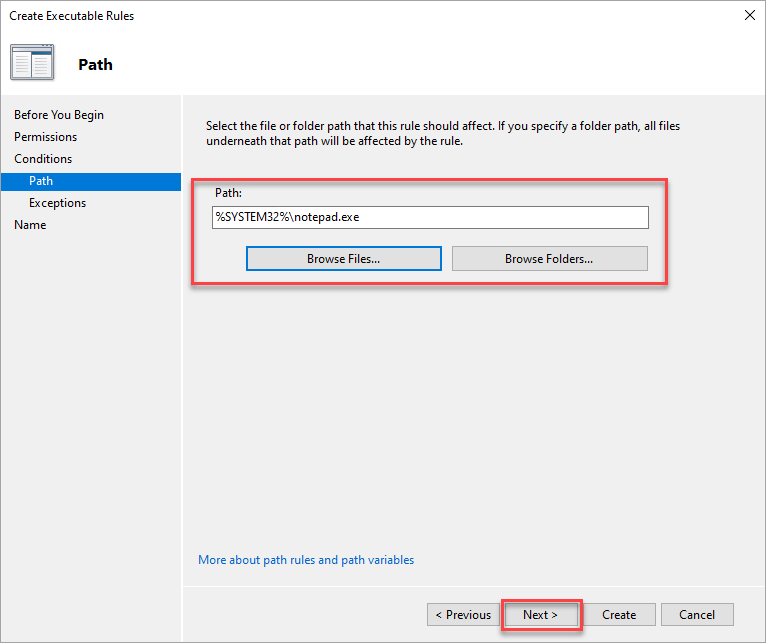
2. On the Path tab, choose the file or folder path to which you want to apply the rule, and click Next.
For instance, you want to prohibit users from pulling up Notepad. In that case, specify or browse Notepad’s full path.
Note that choosing a folder applies the AppLocker rule to all the files in that folder.
3. Skip adding exceptions in the Exceptions tab and click Next.
4. Finally, change the rule’s Name and Description, and click Create to finalize the deny rule.

Denying Applications via the File Hash
As you know, a malicious app can disguise itself as one of your daily tools that controls your system’s behavior. Stumbling upon an app (unsigned or from an unverified publisher) can wreak havoc on your machine.
How to avoid unintentionally running these malicious apps? Besides having a powerful anti-virus, creating rules to deny applications via file hash is a huge help.
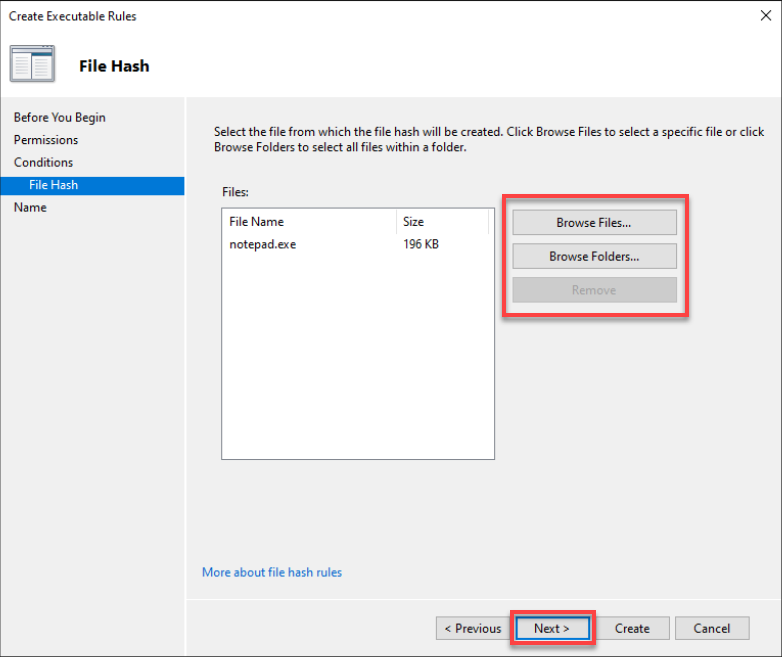
1. Create a new deny rule, and choose the File hash condition this time.
2. Next, browse, select the file or folder you need to set a rule, and click Next.
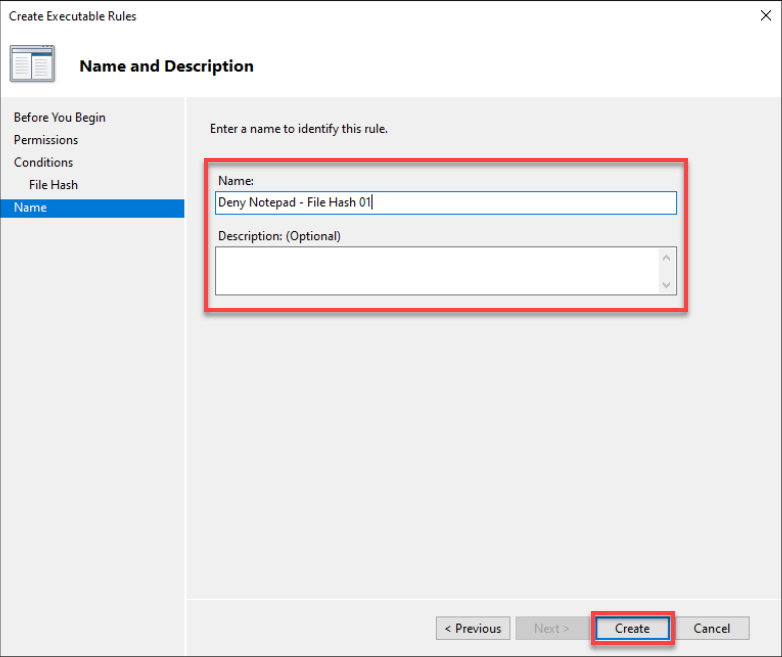
3. Lastly, change the deny rule’s Name and Description (optional), and click Create to create the new deny rule.
Deploying Windows 10 AppLocker Rules Using a Group Policy Object (GPO)
By now, you already know how to deny applications on your computer. But what if you need to apply AppLocker rules to more than one computer or for an organization? Using a GPO, you can deploy AppLocker rules to computers in an organization’s domain.
Creating a GPO lets you deploy AppLocker to multiple Windows 10 computers simultaneously without manually doing so on each computer.
To create an AppLocker GPO, you’ll first need to create an OU:
Note that it’s best practice to initially deploy a GPO in a “test organizational unit” (OU) to avoid messing things up in your AD structure.
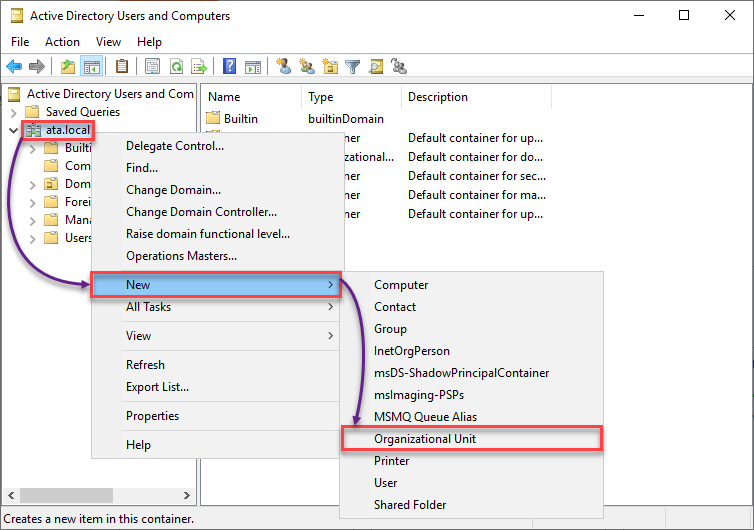
1. Launch Active Directory Users and Computers, right-click your domain (left panel) → New → Organizational Unit to initiate adding a new OU.
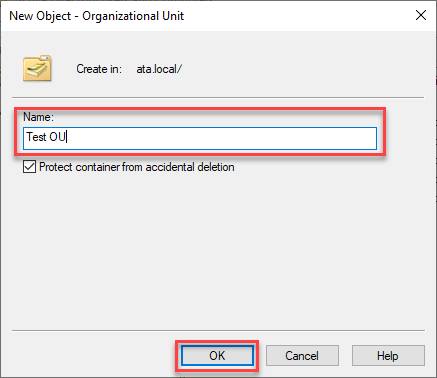
2. Next, provide a name you prefer for your test OU. Keep the accidental deletion protection checked and click OK to create the new OU.
3. Add a computer to your test OU with the following:
- Click Computers (left panel) to access the list of available computers on your domain controller.
- Drag and drop a computer to your test OU.
- Click Yes to continue adding the selected computer to your test OU when you get the warning message box.

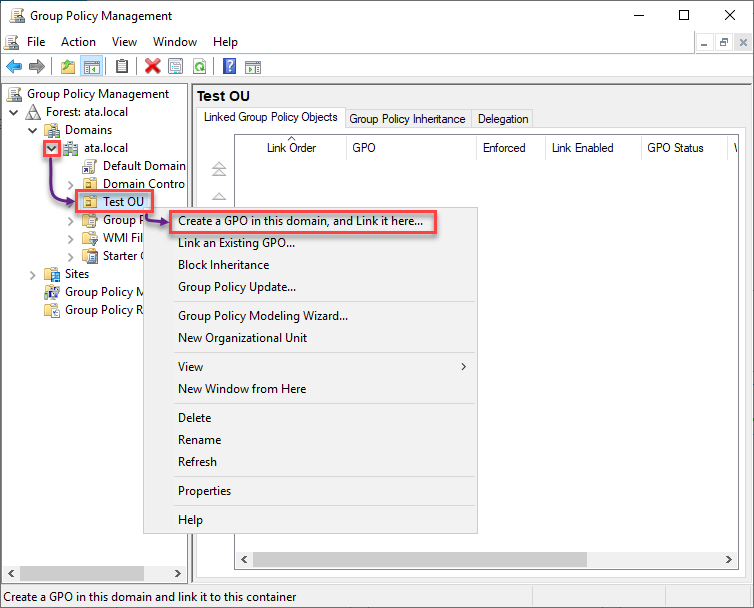
4. Now, launch Group Policy Management, where you’ll create a GPO.
Expand your domain (left panel) → right-click on your test OU → Create a GPO in this domain, and Link it here… to initiate creating a GPO.
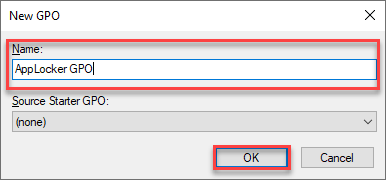
5. Name the GPO as you like, and click OK to finalize creating the GPO.
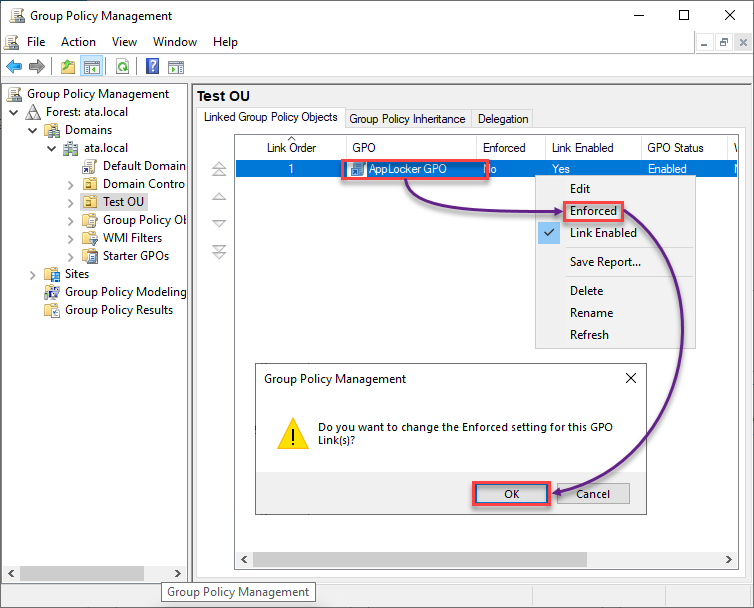
6. Once created, right-click on your AppLocker GPO, select Enforced in the context menu, and click OK in the message box.
Changing the Enforced setting for the GPO applies the settings in the GPO to the object (a Local System, Domain, Site, or Organizational Unit).
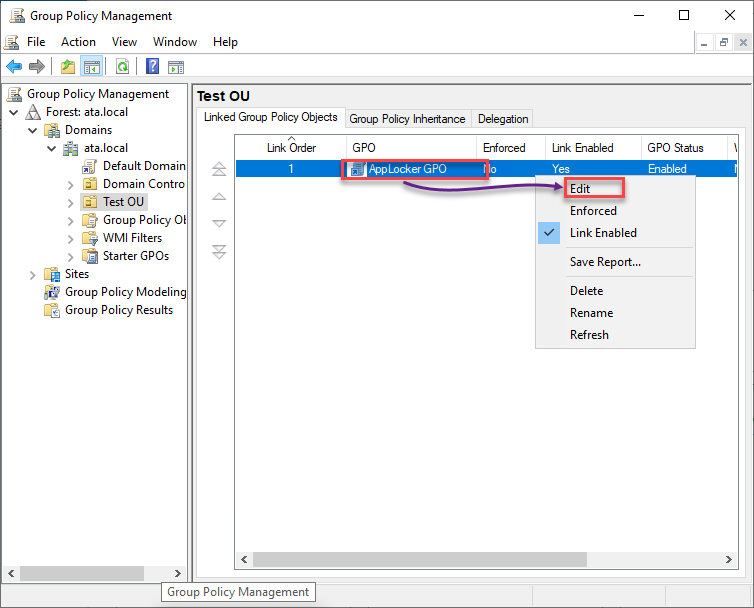
7. Next, right-click on the AppLocker GPO and choose Edit to open the Group Policy Management Editor.
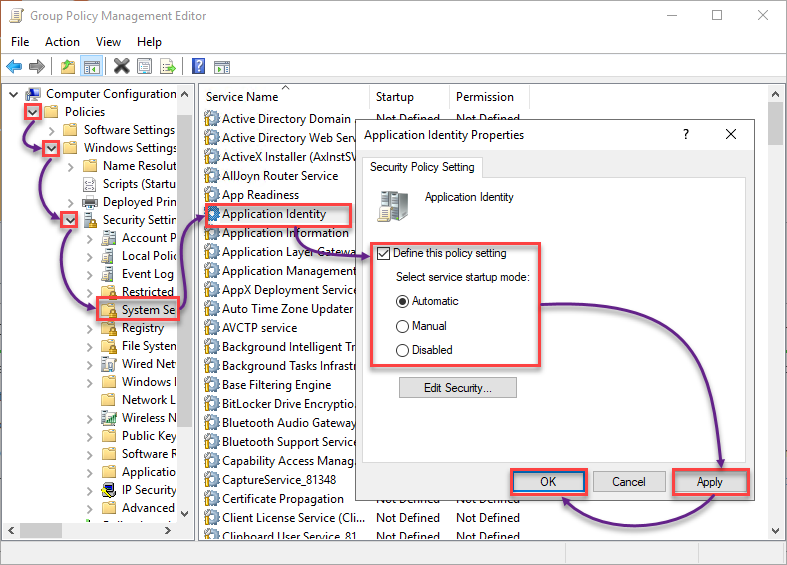
8. Configure the Application Identity properties with the following:
- Under Computer Configuration, expand Policies → Windows Settings → Security Settings.
- Select System Settings and double-click on Application Identity to access its properties.
- Tick the Define this policy setting box, and choose Automatic to set the Application Identity to start automatically on bootup.
Automatically starting Application Identity is crucial as it acts as a switch for AppLocker to work.
- Click Apply and OK to save the changes to the Application Identity properties.
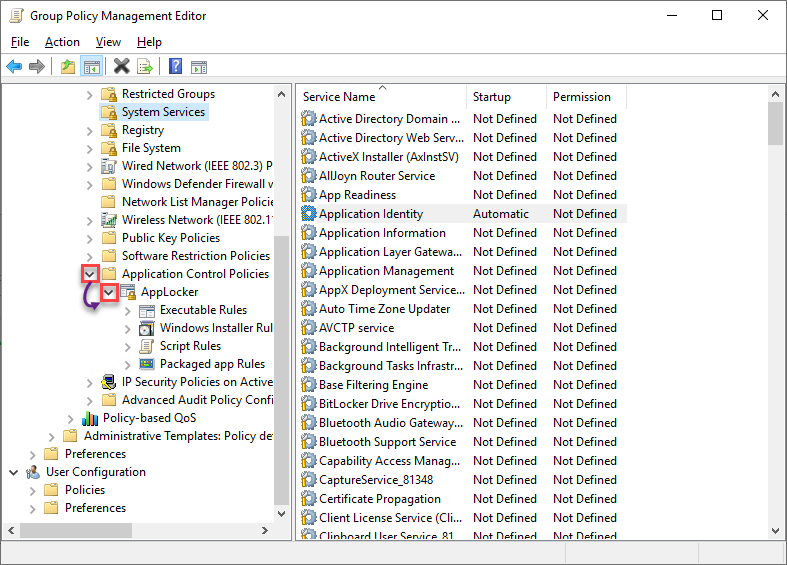
9. Scroll down and expand Application Control Policies (left panel) → expand AppLocker.
10. Now, create your default AppLocker rules by replicating all the steps from the Creating Default AppLocker Rules section.
11. Lastly, follow the steps in the Creating AppLocker Deny Rules section to create your deny rules.
Verifying Application Identity and AppLocker GPO Status
After deploying your AppLocker rules via a GPO, check the status of AppIDSvc on the computer you added to the test OU. You’ll also verify if you successfully applied your AppLocker GPO to the test OU.
1. Log in to the computer you added to the test OU.
2. Next, run the below command to check the AppIDSvc status.
Get-Service AppIDSvc | select -Property Name, Status, StartType
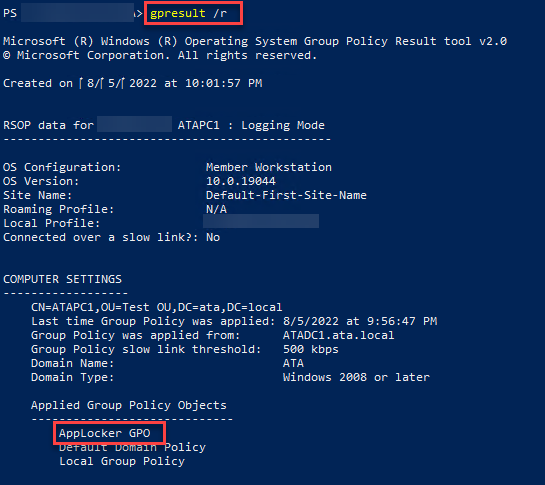
3. Now, run the gpresult command below to check the applied GPOs
gpresult /rLook for the AppLocker GPO under Computer Settings, which confirms the GPO has been applied.
4. Finally, test your AppLocker deny rules again. And if they work, you will see a message box similar to the one below.
Great job! You are now ready to replicate these steps and deploy your AppLocker to a live organizational unit.
Conclusion
Whether an application, package, or script, AppLocker lets you control which to allow or deny making changes in your system. And in this tutorial, you learned how to create Windows 10 AppLocker rules to secure your system to a local computer and deploy those rules to multiple machines with a GPO.
With this newfound knowledge, will you consider AppLocker to protect your system from malicious attacks?


