

As businesses move to the cloud, the demand for Virtual Private Server (VPS) hosting services increases. If you are on the lookout for a VPS DigitalOcean (DO) offers one that provides a secure and robust platform.
A DigitalOcean VPS lets you deploy applications in a shared environment without sacrificing performance or scalability. And in this tutorial, you will learn the basics of DigitalOcean VPSs, how to set one up, and how to manage it.
Read on and get your Virtual Private Server running in no time!
Prerequisites
This tutorial will be a hands-on demonstration. To follow along, be sure you have the following:
- A DigitalOcean account with active billing – A free trial will suffice.
- A Linux machine – This tutorial uses Debian 10, but other distributions will work.
Creating a VPS DigitalOcean via the Cloud Control Panel
Whether you manage personal websites, business websites (small to medium-sized), or eCommerce marketplaces, VPS hosting is an excellent platform. But before diving into hosting, you first need to create a VPS.
There are two different ways you can create a VPS in DigitalOcean. But for a start, you will create one via the Cloud Control Panel, an intuitive GUI web-based control panel. This control panel lets you quickly create, modify, and manage your VPSs.
1. Open your favorite web browser, and log in to the DO Control Panel.
💡 By default, you will see all your existing VMs listed. Otherwise, if no VMs exists, you will only see an empty page.
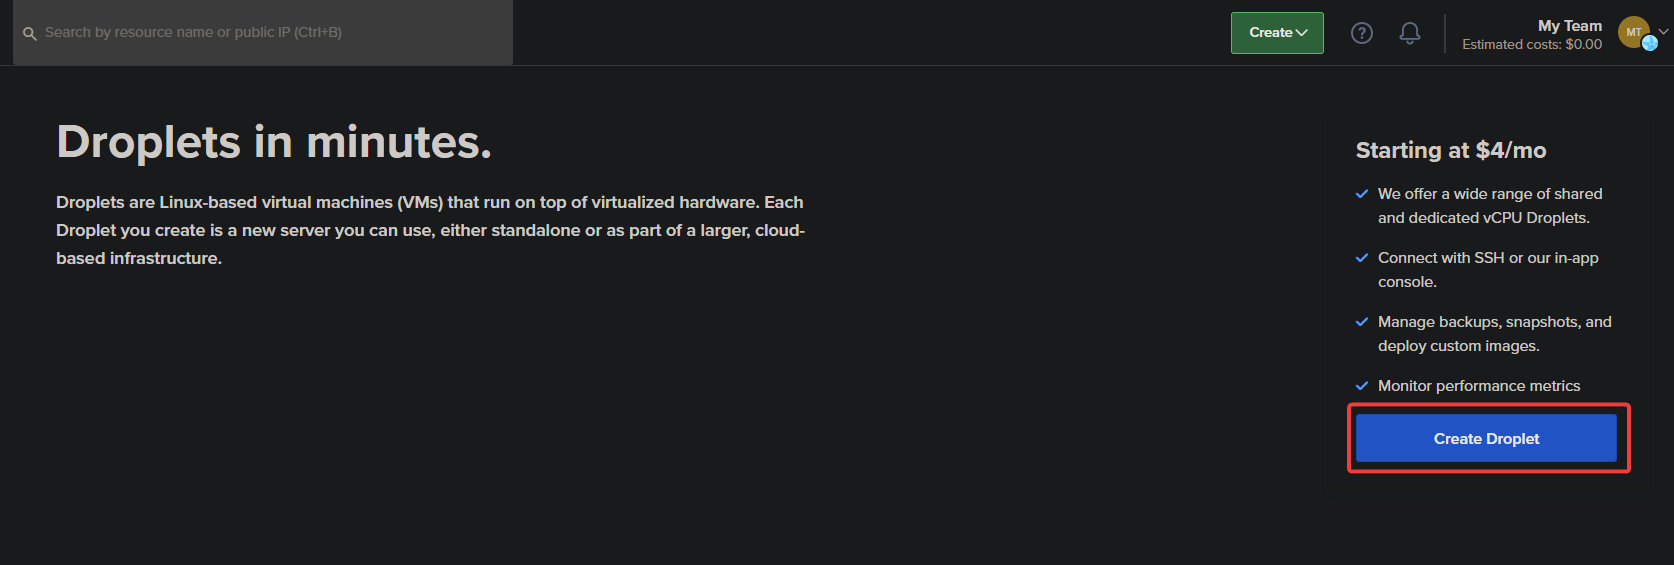
2. Next, click Create Droplet, as shown below, to initiate creating a VPS (Droplet).
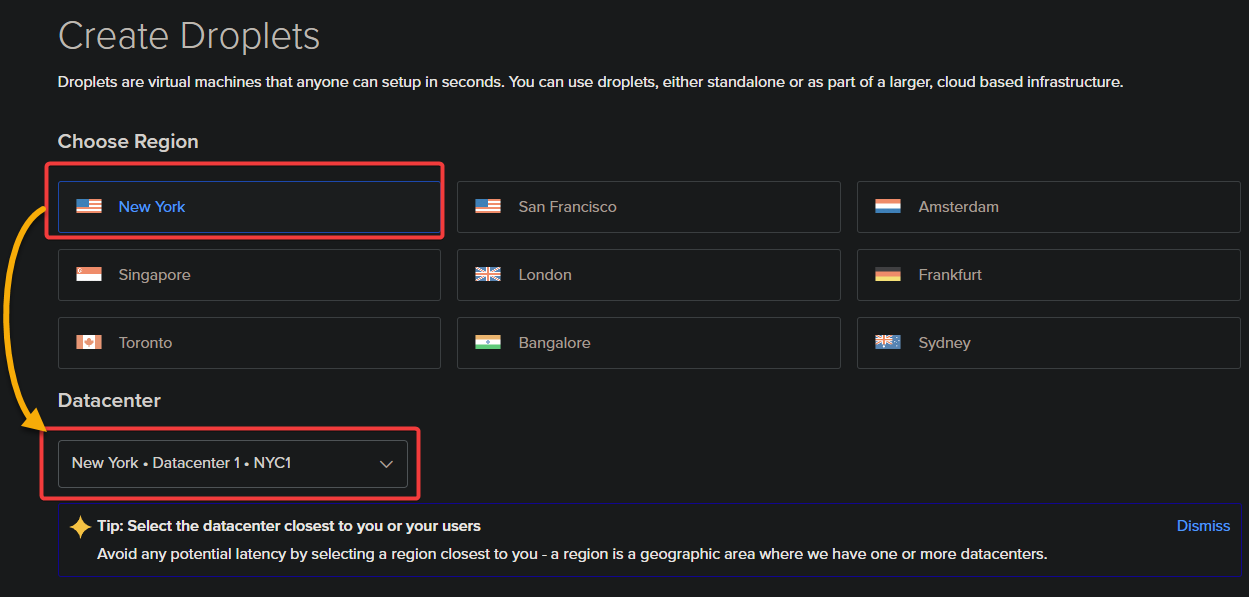
3. Choose a Region and Datacenter for your Droplet:
| Region | A region that is close to your target audience to minimize latency. |
| Data Center | A region that is close to your target audience to minimize latency. |
💡 Review the Regional Availability Matrix before deciding on the region and data center to ensure the services you need are available in the region.
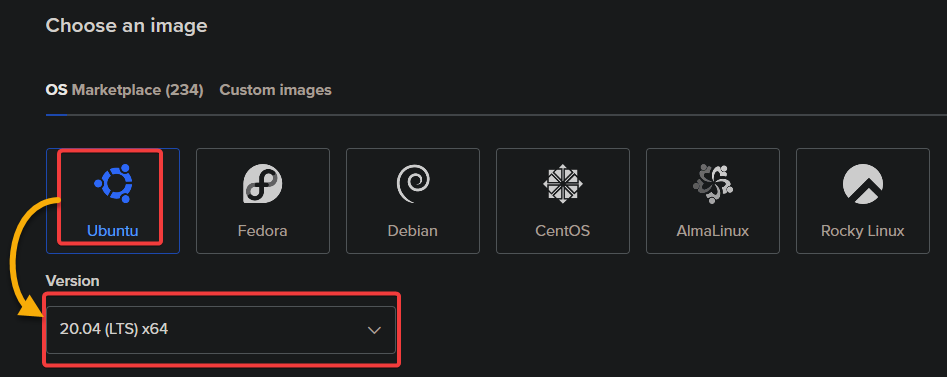
4. Choose an operating system (OS) template and version (dropdown field).
This tutorial uses Ubuntu 20.04, but ensure you choose an image compatible with your application stack and regularly updated with security patches.
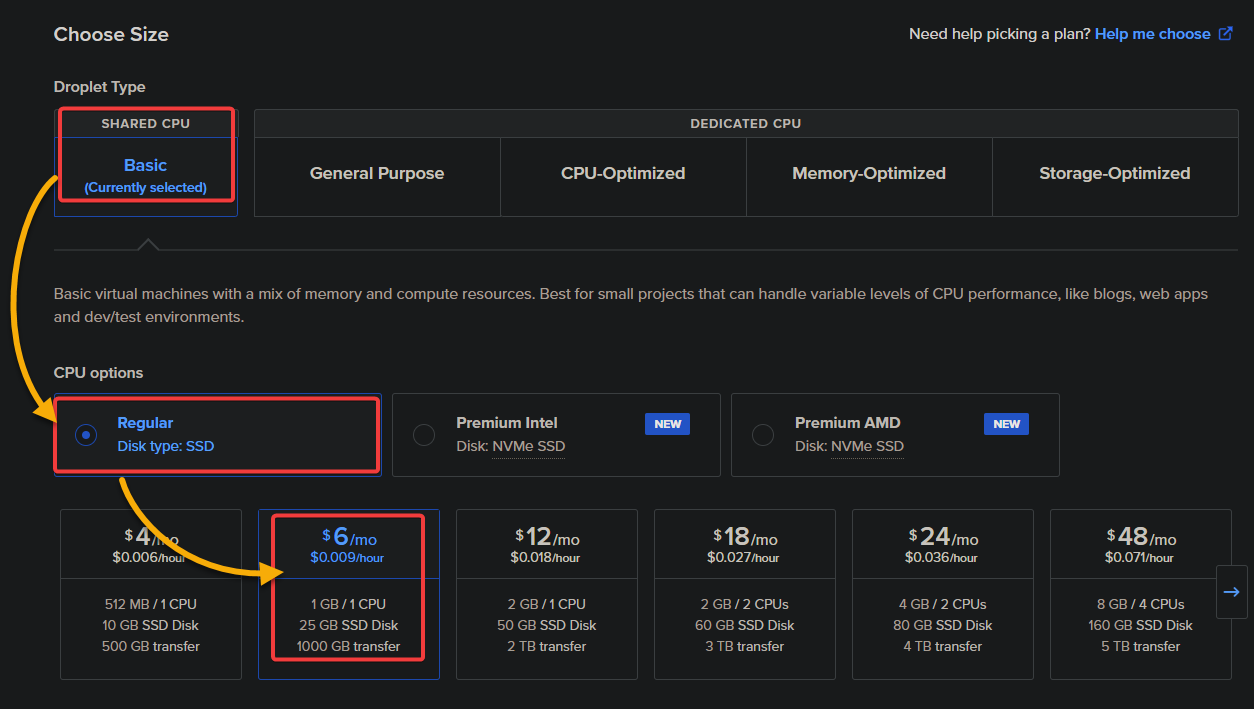
5. Choose the size of your Droplet, which determines the amount of RAM, CPU, and disk space available to your application.
💡 With DigitalOcean’s resize feature, you can always upgrade or downgrade your VM if needed. But choosing the correct size is best since resizing can be disruptive and may cause downtime.
The size of your droplet will affect the cost of your Droplet, so ensure you choose a cost-effective size for your use case. For example, choose the smallest size if you run a small web application.
This tutorial uses the Basic SHARED CPU and Regular CPU option (SSD) with one (1) CPU, 1 GB RAM, and 25 GB SSD Disk.
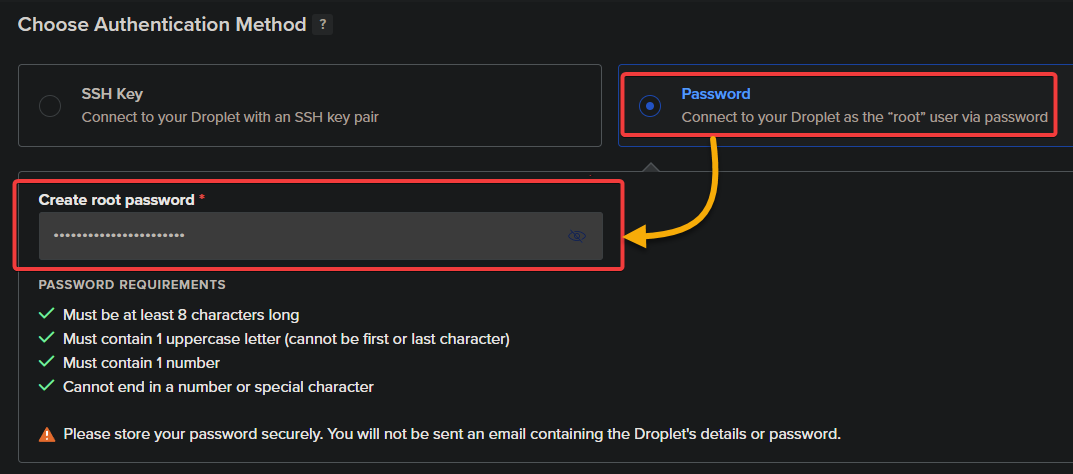
6. Choose either to use a Password or SSH Keys to access your server. This tutorial uses the Password authentication method for simplicity.
| Authentication Method | Description |
| SSH Key | SSH keys are a secure way to authenticate when connecting to your Droplet. This method uses cryptographic keys and is more secure than password authentication. To use SSH keys, you need to generate a public and private key pair and then add the public key to your Droplet. |
| Password | SSH keys are a secure way to authenticate when connecting to your Droplet. This method uses cryptographic keys and is more secure than password authentication. To use SSH keys, you need to generate a public and private key pair and then add the public key to your Droplet. |
Provide a strong password (including upper and lower case letters, numbers, and special characters.) in the Create root password field, as shown below.
Since DigitalOcean only shows the password once, save it somewhere safe, as you will need it later.
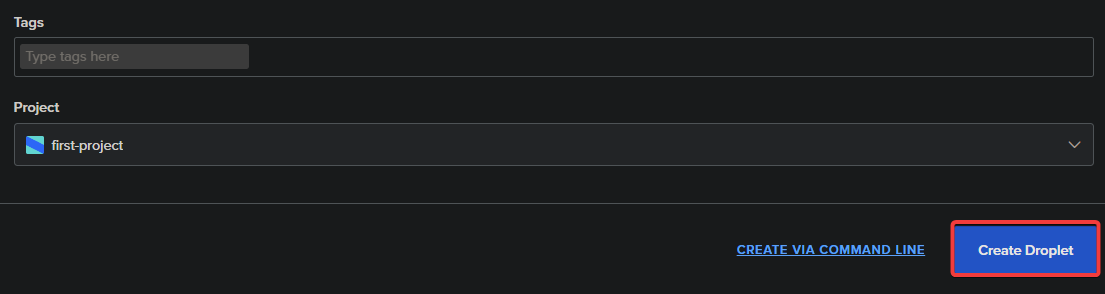
7. Next, input a unique and descriptive Hostname to identify your Droplet.

8. Finally, keep other settings as is, and click Create Droplet (bottom-right) to start creating your Droplet.
Depending on the size and plan you selected, the Droplet creation may take a few minutes.
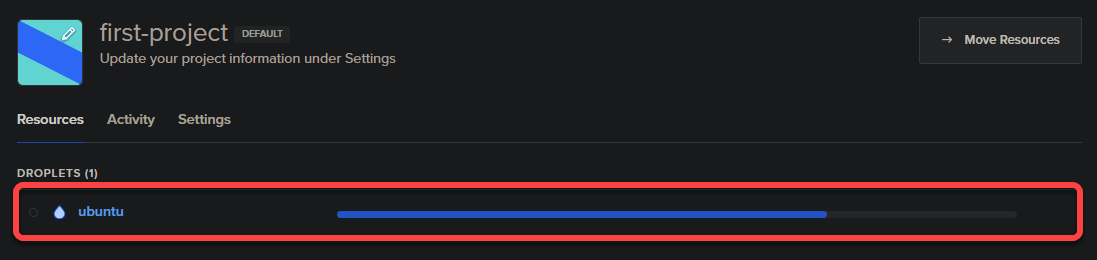
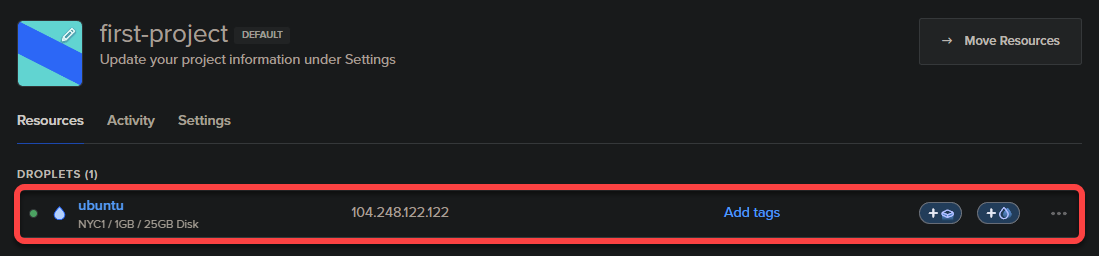
Once the Droplet is created, you will see all resources in your project, including the newly-created Droplet, as shown below.
Congratulation! You have created your first VPS in DigitalOcean that you can now use to host your application.
Creating a VPS via the DigitalOcean API
Not a fan of clicking around the DigitalOcean control panel each time you need to complete a task? Or perhaps you prefer to use a Continuous Integration Continuous Delivery (CI/CD) tool for automating your workflow?
Luckily, DigitalOcean offers a comprehensive API that lets you quickly interact with the DigitalOcean API to manage Droplets and resources within the DigitalOcean cloud.
To create a VPS via CLI, you first need a personal access token to authenticate your requests:
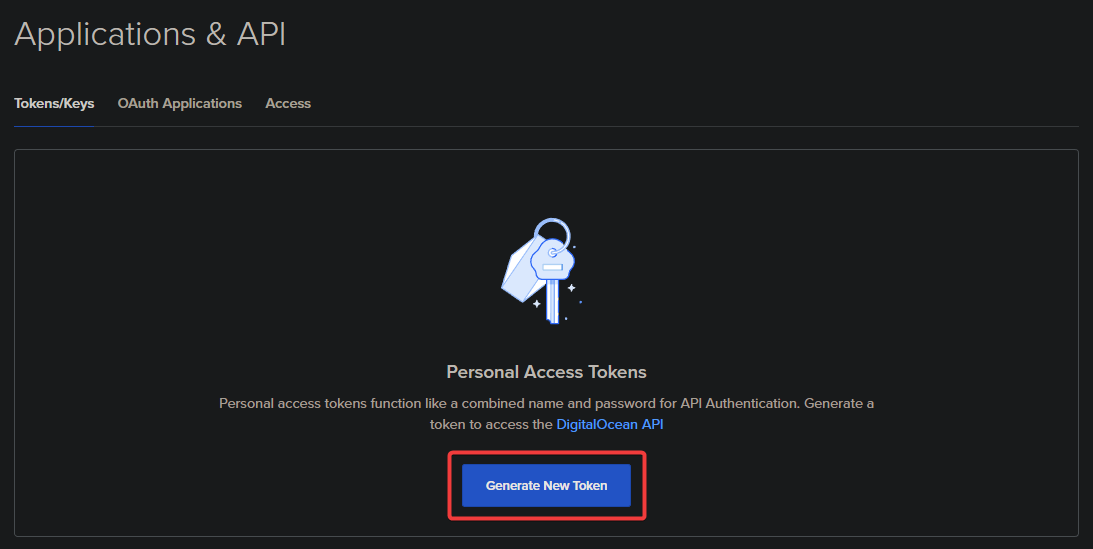
1. Navigate to the Applications & API panel (log in if prompted).
2. Next, click Generate New Token, which opens a window where you can configure your token.
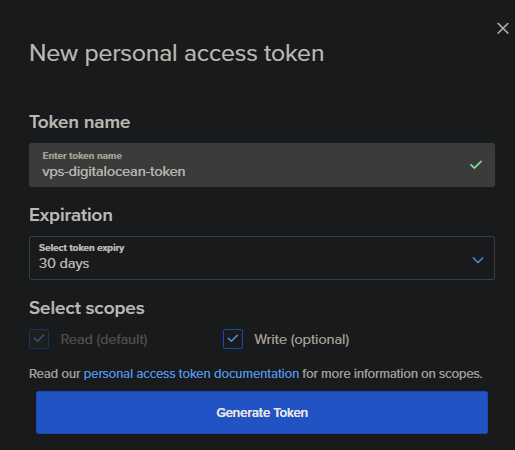
On the next page, configure the following for your token:
- Token name – Provide a descriptive token name (i.e., vps-digitalocean-token), but ensure you avoid including sensitive information.
- Expiration – Choose a certain time when the token will expire or remain valid until you delete it. If you only need temporary access to the API, choose a shorter expiration date. Otherwise, choose a longer expiration period.
Note that choosing a shorter expiration date may require you to generate a new token more frequently. This scenario can be time-consuming and may disrupt your workflow. 30 days is a good balance between security and convenience.
- Select scopes – Select the Write scope for this tutorial to create a droplet using the CLI. Remember to choose the minimum scope necessary to perform the actions you need. Doing so reduces the risk of unintended actions or mistakes and improves your API access security.
Once configured, click Generate Token to finalize creating your personal access token.
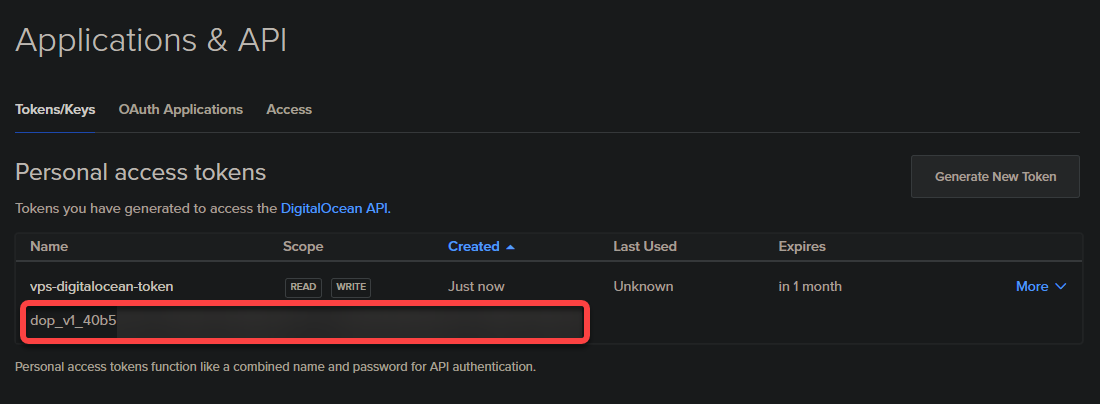
4. Now, copy the token, as shown below, and save it in a secure location. You will need this token to authenticate your requests and create a Droplet via the API.
5. Open your terminal, and run the following apt install command to install curl. You will use cURL to communicate with the DigitalOcean API.
sudo apt install curl -y
6. Next, run the below command to EXPORT your token to an environment variable. Doing so lets you avoid entering the token manually each time you authenticate your requests.
Ensure you replace MY_TOKEN with your preferred environment variable name and Your_Access_Token with your personal access token.
EXPORT MY_TOKEN="Your_Access_Token"
7. Once exported, run the echo command below to check if the token is correctly set.
echo $MY_TOKENThe output would include your token if the token was successfully exported, as shown below.

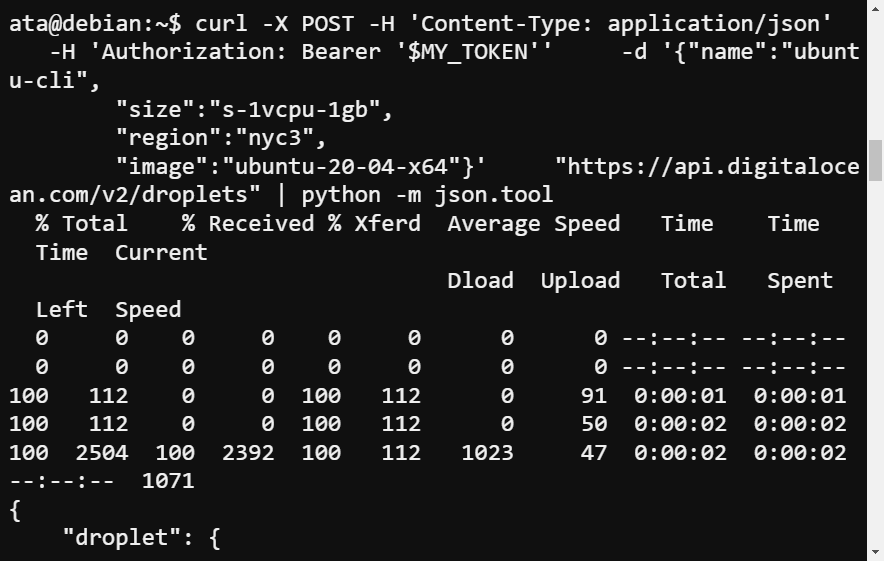
8. Now, run the below curl command to send an HTTP POST request to the DigitalOcean API to create a new Droplet (ubuntu-cli). This tutorial’s choice for the Droplet name is ubuntu-cli, but you can choose a different name.
This new Droplet will be configured as follows, but you can replace the image, size, and region as needed to customize yours.
- Based on Ubuntu 20.04 (
"image":"ubuntu-20-04-x64"}).
- Have one vCPU and 1GB of RAM (
size":"s-1vcpu-1gb").
- Located in the New York data center (
"region":"nyc3").
# Sends an HTTP POST request.
# Tell the server that the request's body will be JSON.
curl -X POST -H 'Content-Type: application/json' \
# Specifies the access token
    -H 'Authorization: Bearer '$MY_TOKEN'' \
# Specifies the data (JSON object) to be sent in the request body.
# The name, size, region, and image of the Droplet to be created.
    -d '{"name":"ubuntu-cli",
        "size":"s-1vcpu-1gb",
        "region":"nyc3",
        "image":"ubuntu-20-04-x64"}' \
# Specifies the API's URL and prints the response in a human-readable format (JSON).
"https://api.digitalocean.com/v2/droplets" | python -m json.toolWait for a few minutes until the droplet is created.
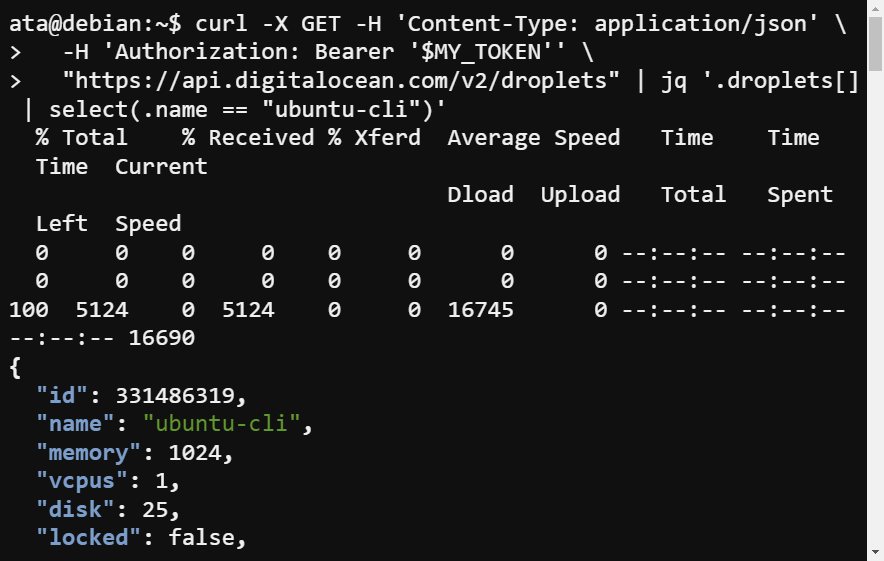
9. Lastly, run the below command to send an HTTP GET request to the DOCN API and retrieve the newly created Droplet’s information.
curl -X GET -H 'Content-Type: application/json' \
  -H 'Authorization: Bearer '$MY_TOKEN'' \
  "https://api.digitalocean.com/v2/droplets" | jq '.droplets[] | select(.name == "ubuntu-cli")'
If successful, you will receive a response, as shown below.
Testing Your DigitalOcean VPS
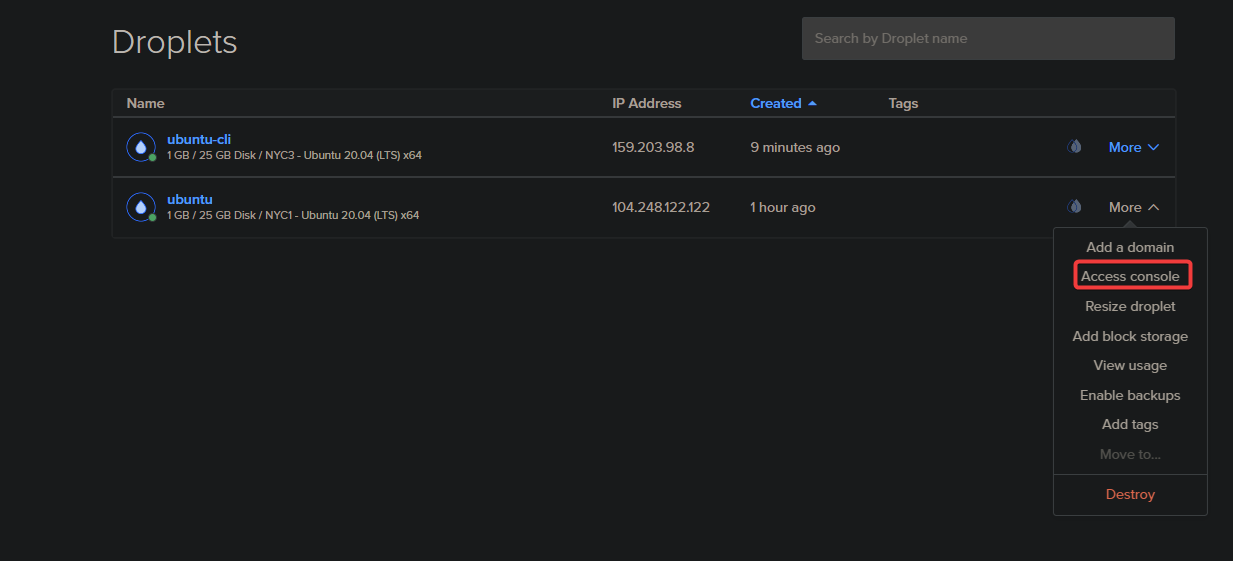
Regardless of which method (Cloud Control Panel or API) you used to create your VPS, you still have to test whether your VPS is working or not. How? You will use the console feature to connect to the Droplet.
Navigate to your Cloud Console, click on the More button, and select Access Console to get the option to access a console or terminal interface for your Droplet.
Next, click Launch Droplet Console, which opens your Droplet’s console window (step three) for your Drop.
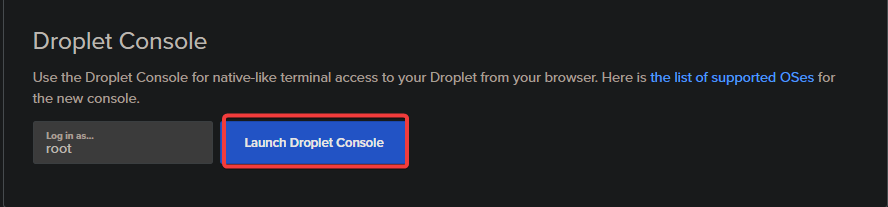
You can now run commands directly from the console and perform various tasks for your Droplet, such as installing software.

Managing Your DigitalOcean VPS
With your Droplet working correctly, you can manage it via GUI web-based interface. DigitalOcean lets you create snapshots, turn your Droplet off and on, destroy it, and so on.
1. On your project’s Resources tab, click your Droplet’s name to manage to access its detail page.
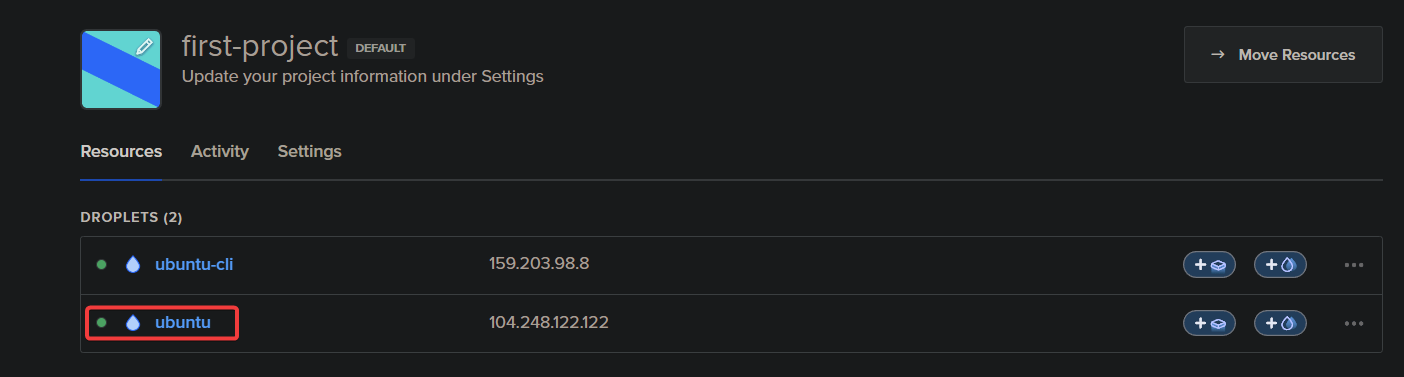
2. Next, click the toggle button, as shown below, to turn your Droplet ON or OFF. This feature comes in handy when you plan to disable your Droplet temporarily.

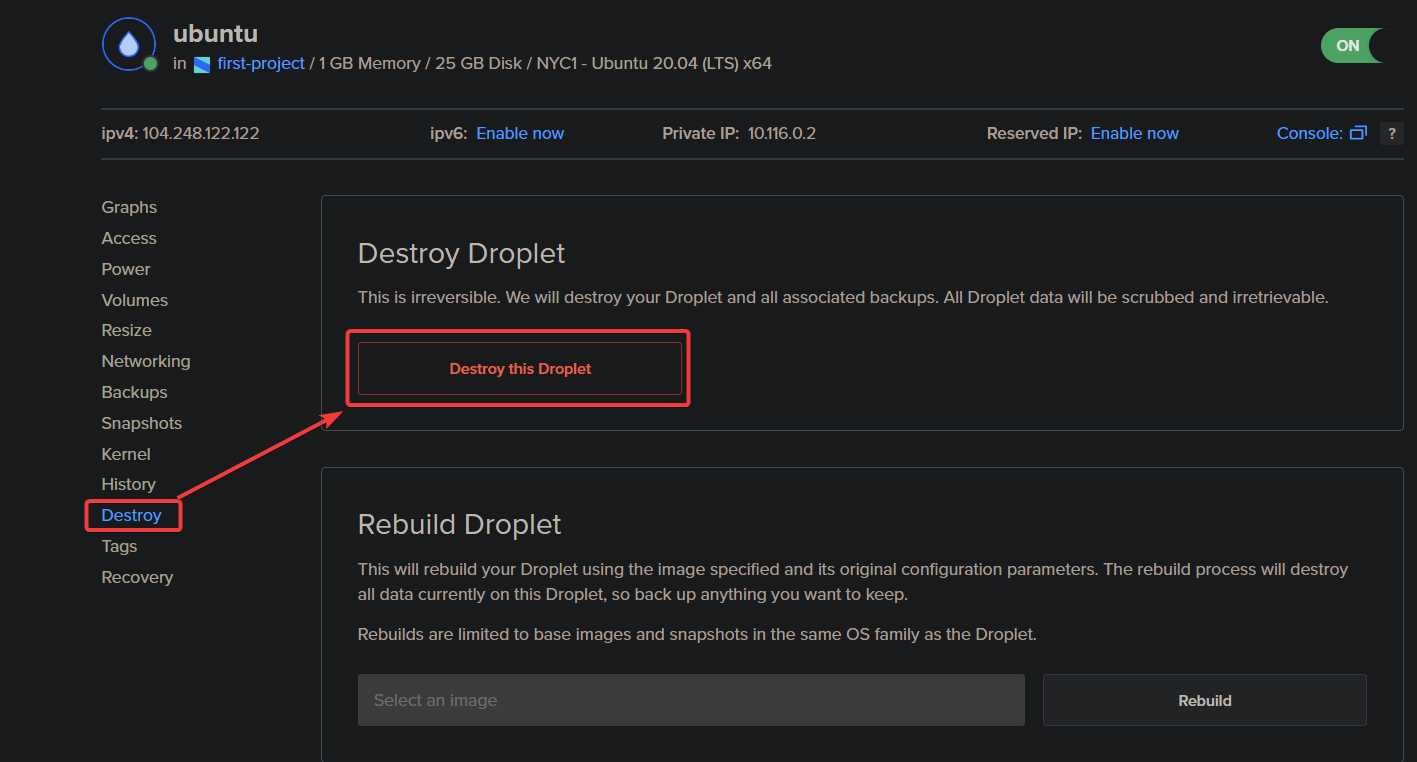
3. Now, navigate to Destroy (left panel) and click Destroy this Droplet to delete the selected Droplet. Deleting Droplets lets you keep your resources clean and eliminate unnecessary charges.
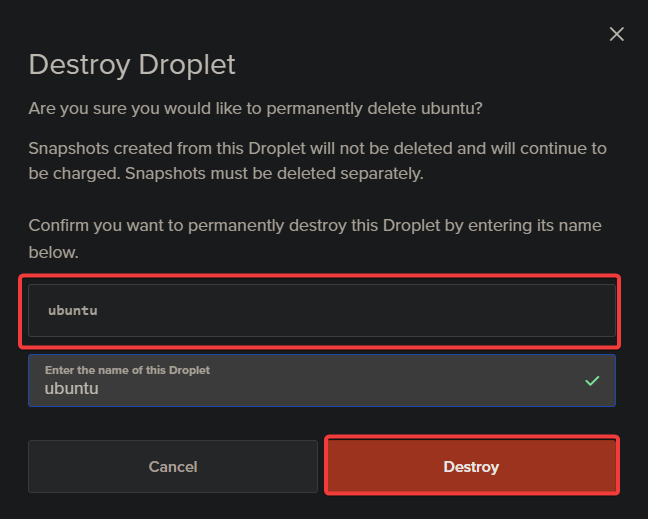
4. Lastly, provide the Droplet’s name, and click Destroy to confirm deleting the Droplet.
Droplet deletion is irreversible, so make sure you have data backups before deleting a Droplet.
Conclusion
DigitalOcean offers a low-cost and easy way to create VPSs. And in this tutorial, you have learned to create and manage a VPS in DigitalOcean using the API and the GUI interface. By now, you can already confidently test and manage your Droplets.
At this point, your Droplets will be holding data, which is crucial for any business’ success. Why not create a backup to protect your data?


