

Remote access has become critical in today’s fast-paced world, where you can work and access your files remotely from anywhere at any time. Sounds complicated? Not when you have VNC Connect on your side!
VNC Connect is a reliable and secure remote access software that lets you access your computer remotely as if sitting in front of it. And in this tutorial, you will learn how to set up and use VNC Connect to stay connected with your work and personal tasks no matter where you are.
Read on and experience remote access freedom with VNC Connect!
Prerequisites
This tutorial houses hands-on demonstrations. To follow along, be sure you have the following:
- Two machines running Windows 10 or later – This tutorial uses Windows 10 on both machines.
- A mobile device with a Time-based One-Time Password (TOTP) authentication app installed – This tutorial uses an Android device with Google Authenticator installed.
Applying for a VNC Connect Subscription
Before taking advantage of VNC Connect to remotely access your computer, you first need a VNC Connection subscription active.
This VNC Connection subscription gives you access to the following:
- VNC Server – A software installed on your remote device that accepts your host device’s remote connection request.
- VNC Viewer – A software installed on your host device that lets you request a connection to your remote device.
To apply for a VNC Connection subscription, follow these steps:
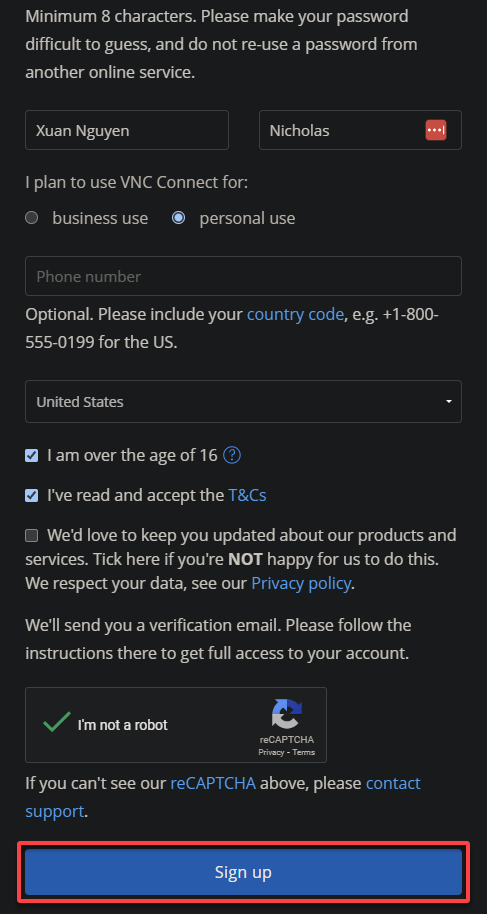
1. Open your favorite web browser, and visit the VNC Connect trial sign-up page.
2. Next, fill out the registration form with your details per your requirements, and click Sign up to sign up for a subscription.
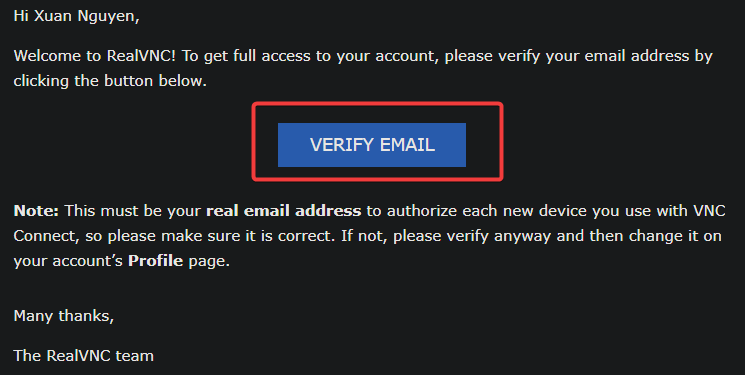
After signing up for a subscription, an email is sent to you for account verification (step three).
3. Now, click VERIFY EMAIL on the email sent to you to verify your RealVNC account. A new browser tab opens where you can choose a subscription plan (step five).
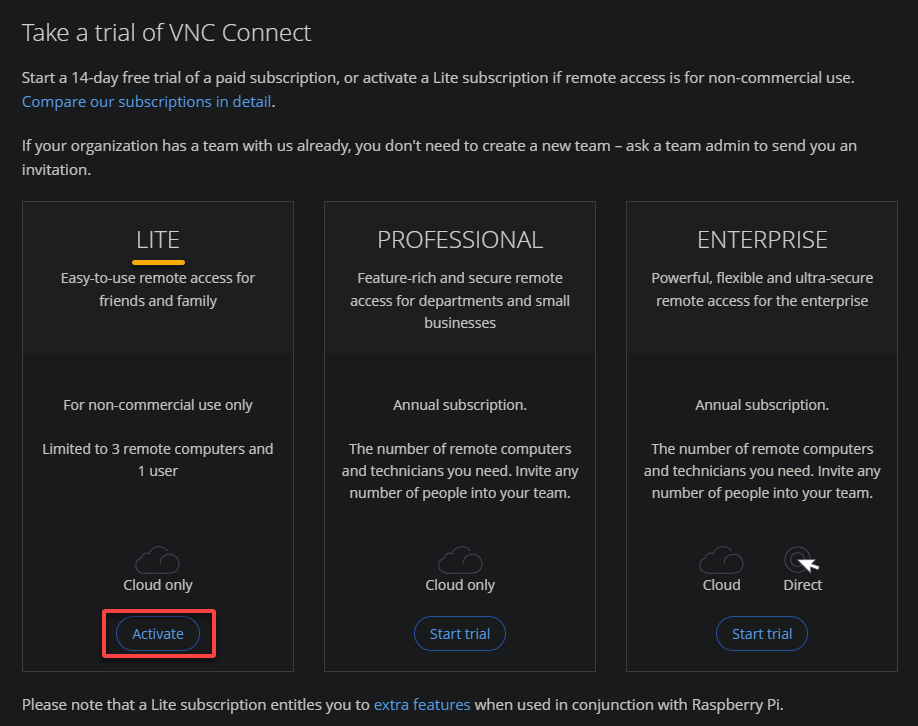
4. Lastly, choose a subscription plan that fits your needs, and click Activate to activate the subscription.
You can select the LITE plan, which is free and intended for non-commercial use.
Enabling Two-Step Verification for Your RealVNC Account
Imagine discovering someone else got into your account when you have just activated your VNC Connect subscription — distressing. The good news is that this type of crisis can be averted by setting up a two-step verification.
Enabling two-step verification in your RealVNC account adds an extra layer of security. This feature helps protect your account from unauthorized access, especially if you use VNC Connect for remote access.
To enable two-step verification in your RealVNC account, follow these steps:
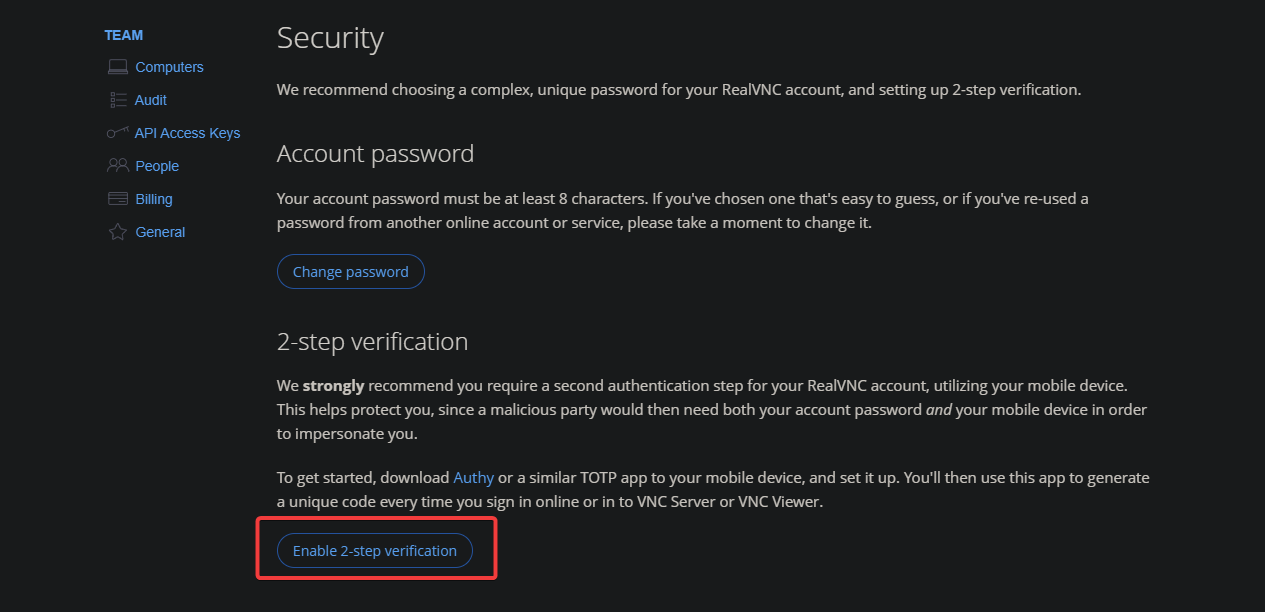
1. Log in to your RealVNC account, and navigate to the security page.
2. Next, click Enable 2-step verification under the 2-step verification section to generate the QR code you will use for the two-step verification.
A QR code window opens, containing a unique QR code specific to your RealVNC account.
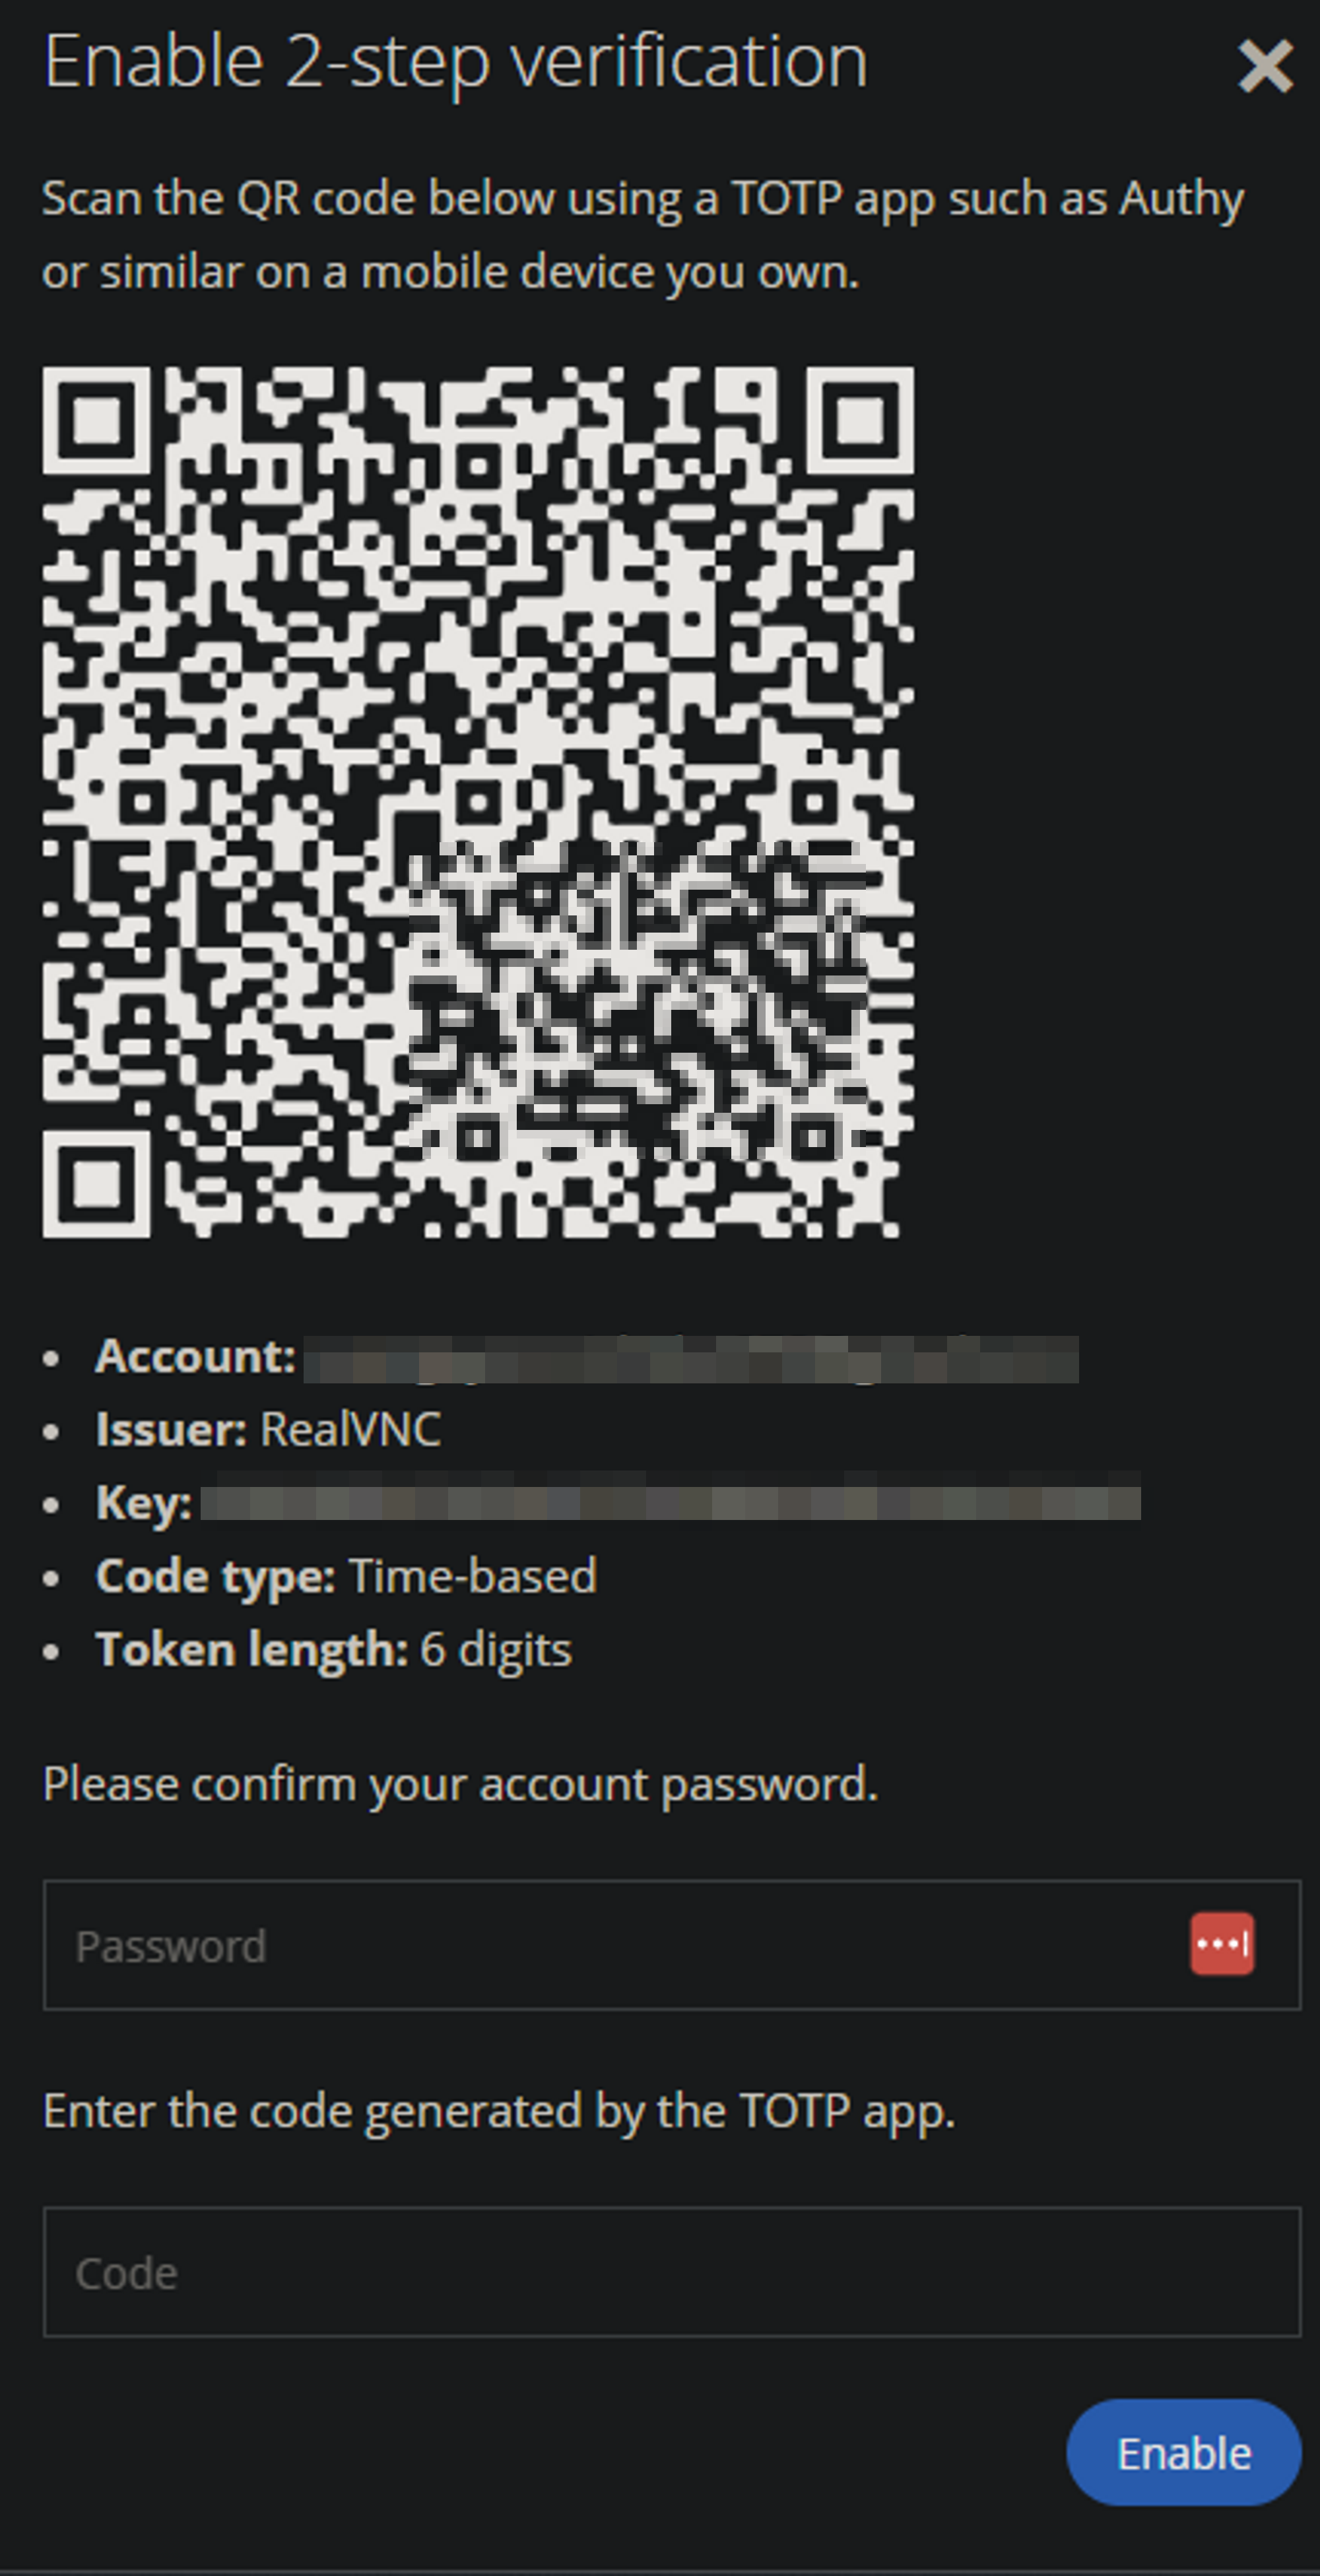
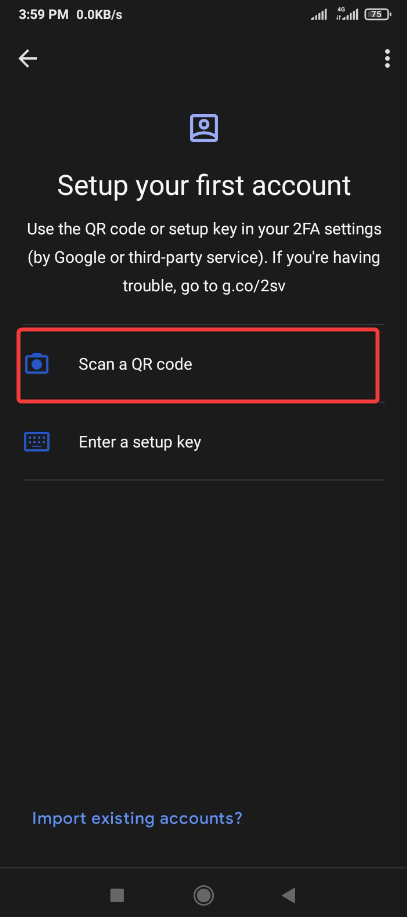
3. Open the TOTP authentication app on your Android device, tap Scan a QR code and scan the QR code you got from the QR code window. Doing so links your RealVNC account to your TOTP app.
If the TOTP authentication app does not recognize the QR code, try adjusting the angle or distance of your device’s camera.
Once linked, the TOTP authentication app generates a unique code that changes every few seconds. You must provide that verification code and password when logging in to your RealVNC account.
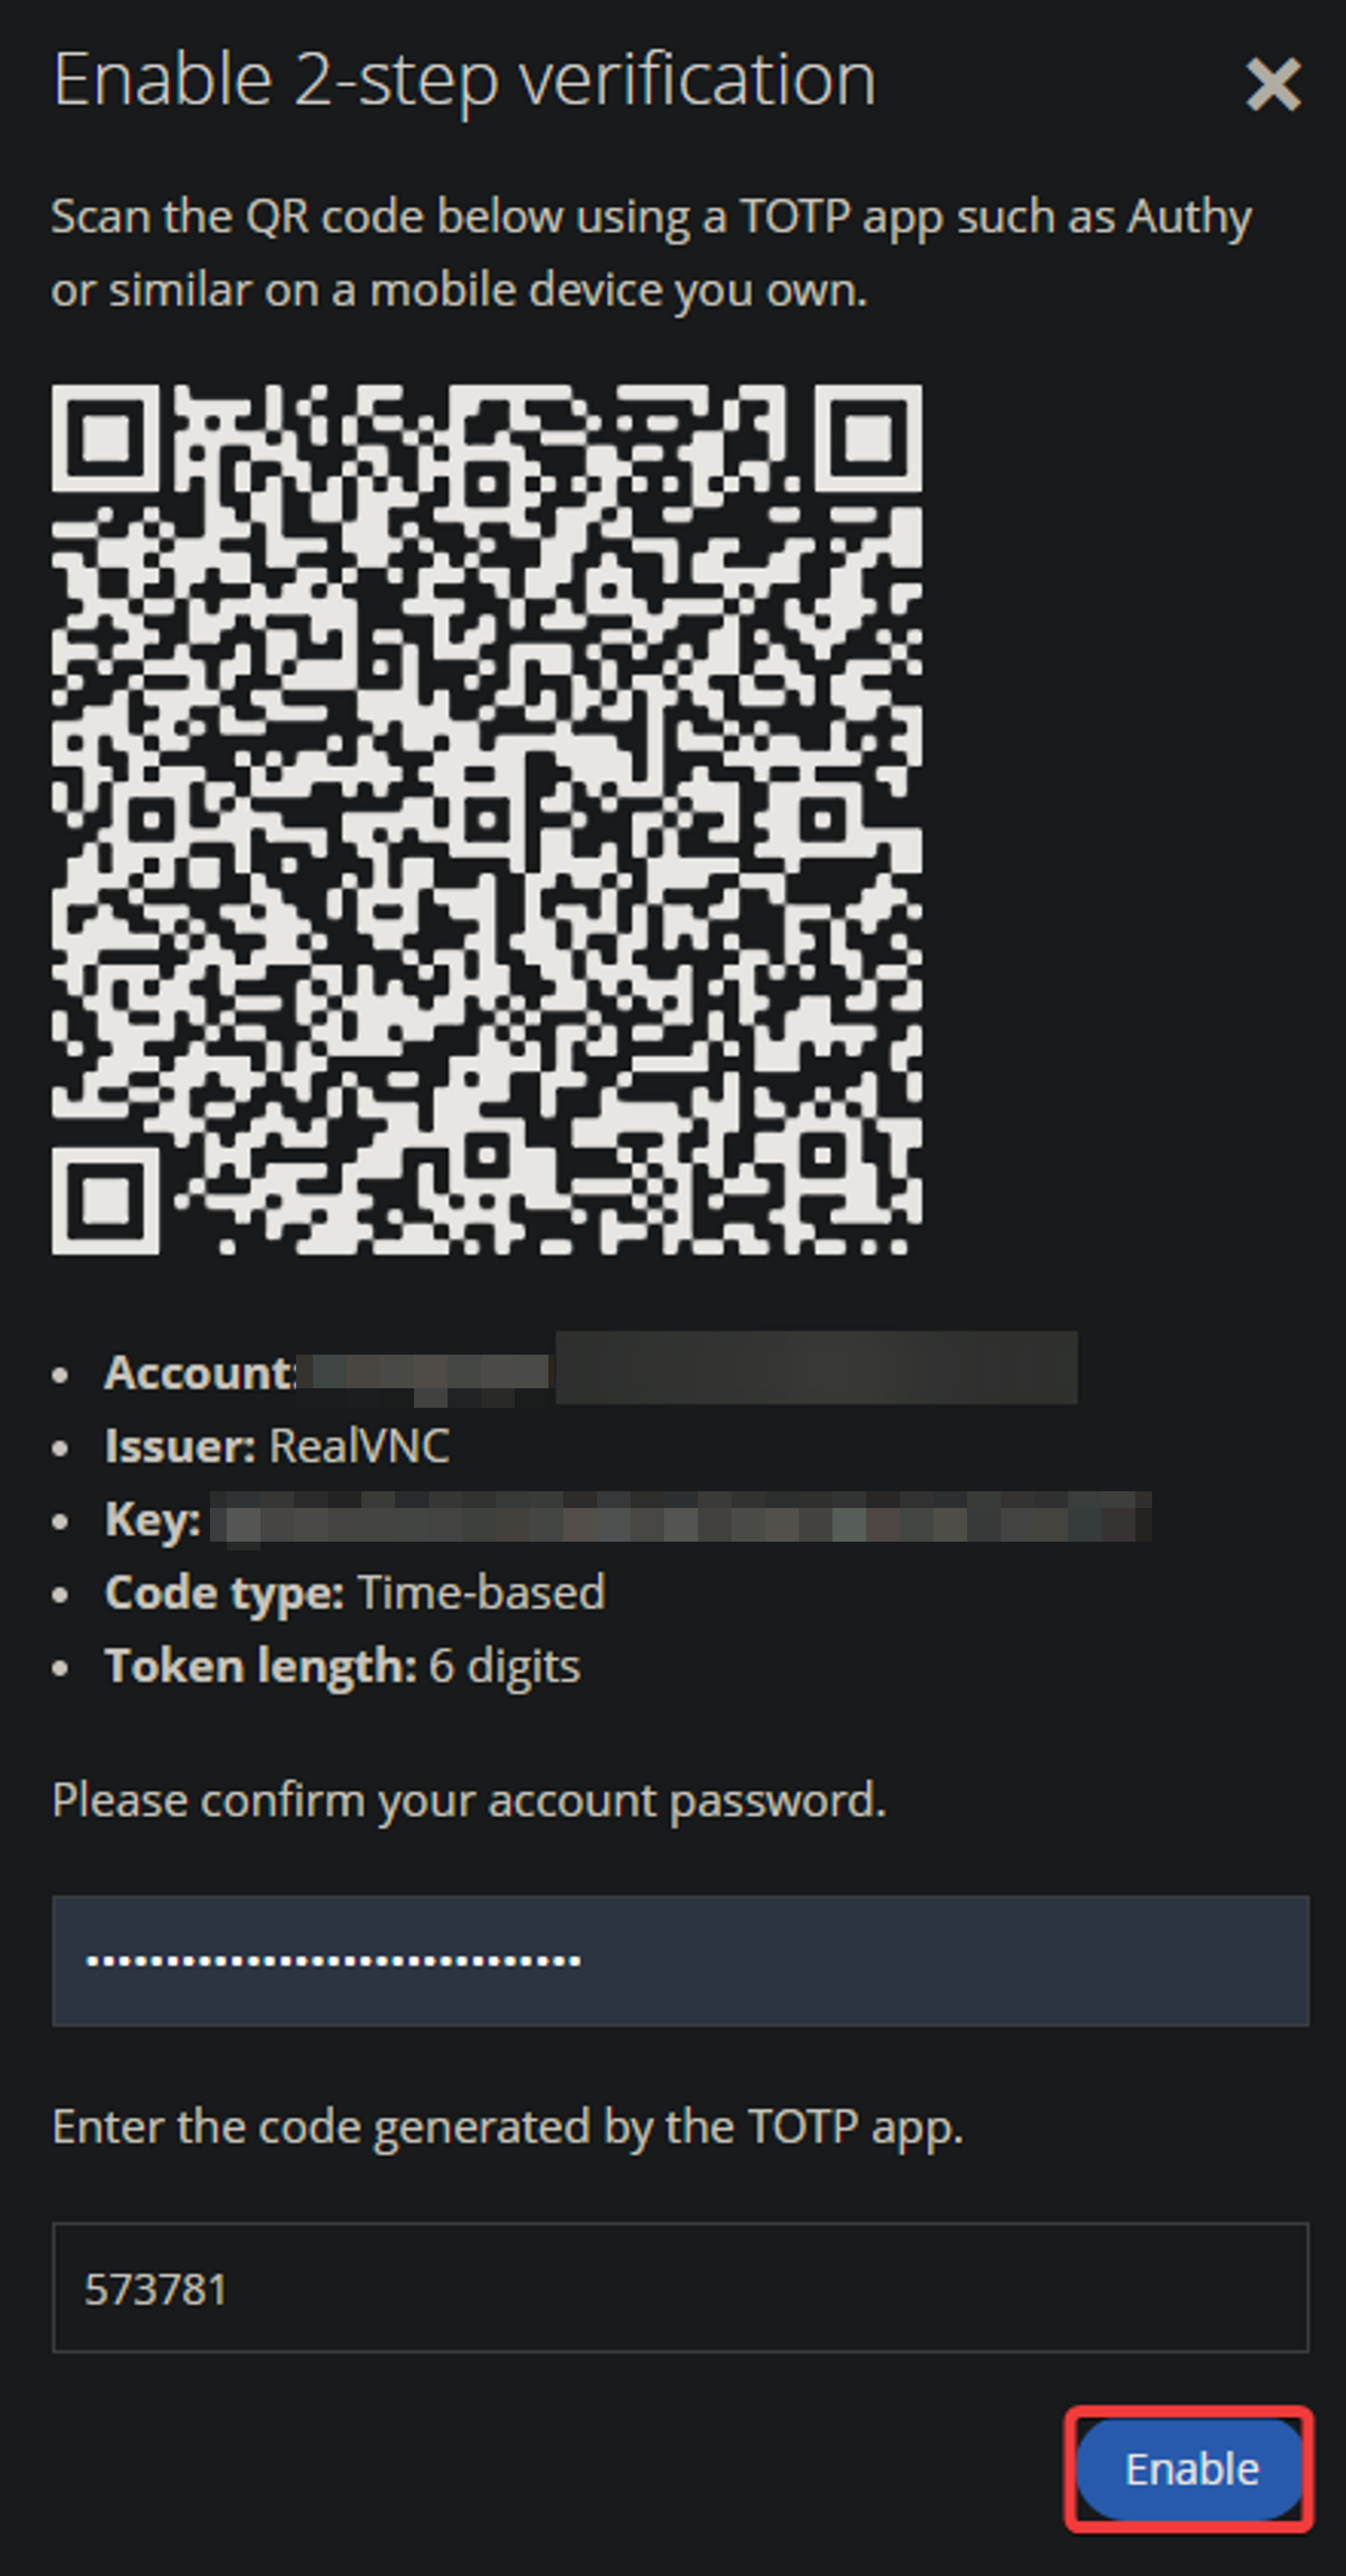
4. Now, input your password to the QR code page and a 6-digit code from your TOTP authenticator app, and click Enable to enable the two-step verification for your RealVNC account.
From now on, when you log into your RealVNC account, you will be prompted to enter your password and a TOTP code. Each time From now on,
5. Lastly, download and safely store the list of backup codes that appears after enabling the two-step verification. These backup codes will be helpful if you cannot access your TOTP authentication app.

Downloading and Installing VNC Viewer on the Host Device
With the two-step verification in place, you are now ready to ensure your host device can connect to your remote device by installing the VNC Viewer.
To download and install VNC Viewer on your host device:
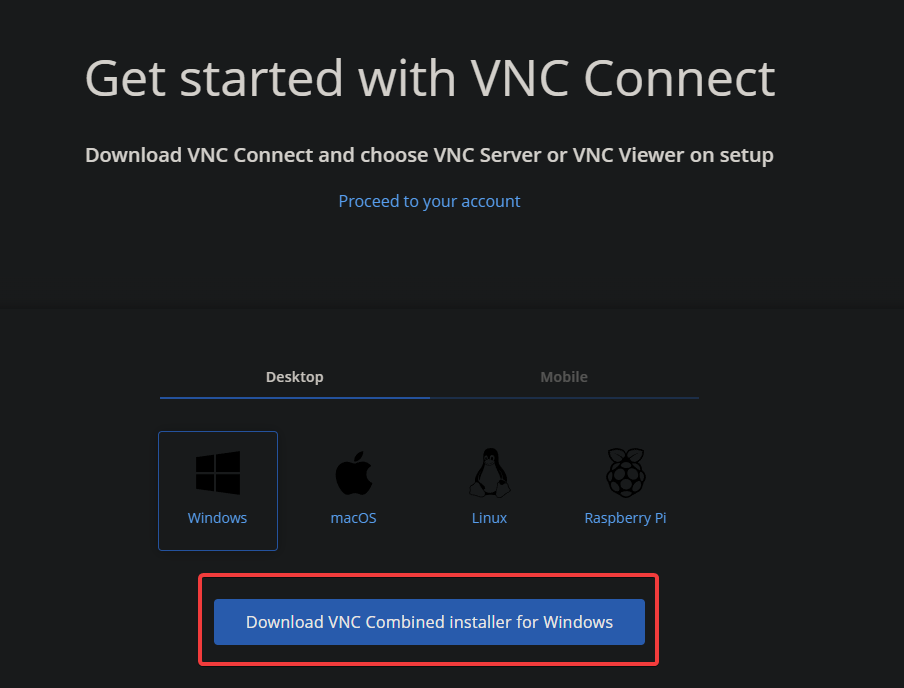
1. Log in to your RealVNC account and navigate to the VNC download page.
2. Next, click Download VNC Combined installer for Windows to download the VNC Connect installer.
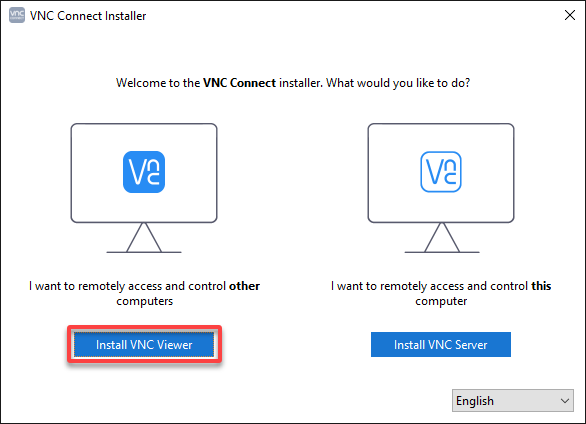
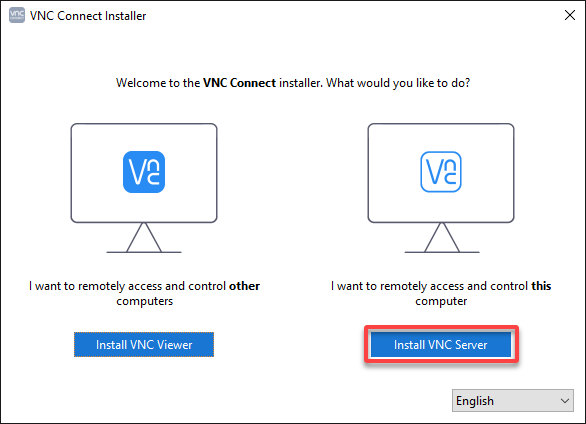
3. Once downloaded, launch the VNC Connect installer, and click Install VNC Viewer to install VNC Viewer on your host device.
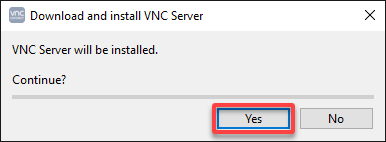
When prompted, as shown below, click Yes to continue.

4. Now, click Next on the VNC Viewer Setup wizard to continue.

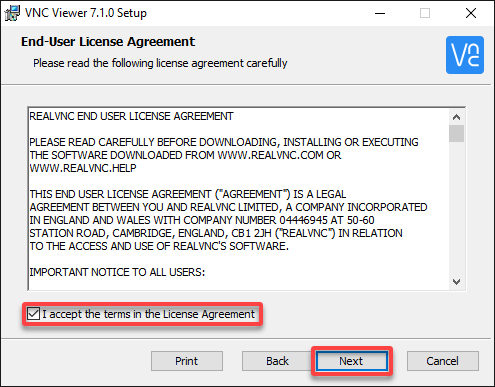
5. Tick the checkbox at the bottom to accept the license agreement, and click Next to continue.
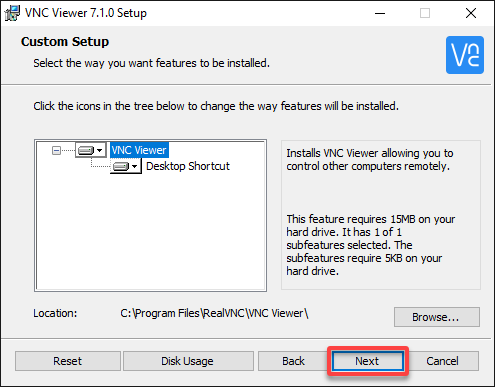
6. Leave the default settings, and click Next to continue.
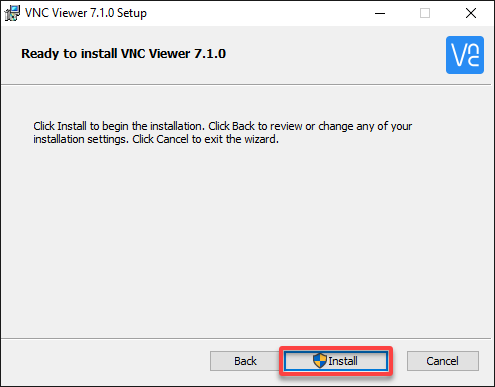
7. Now, click Install to install VNC Viewer on your host device.
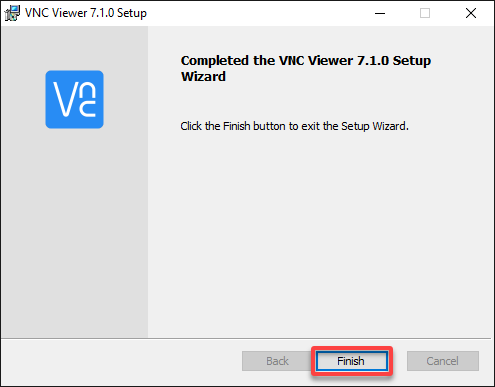
8. Once installed, click Finish to close the setup wizard.
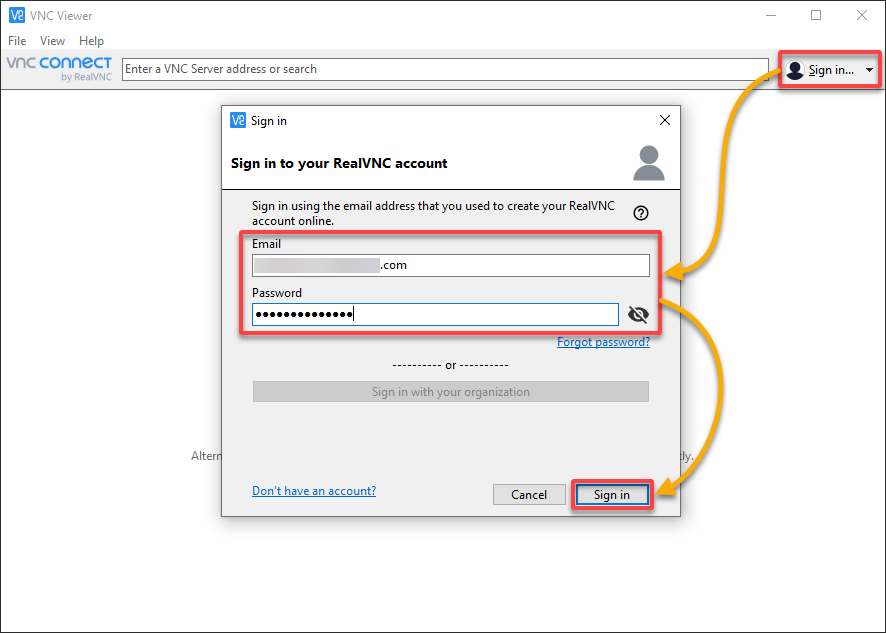
9. Open VNC Viewer on your host device and click Sign in (top-right) to sign in to your RealVNC account.
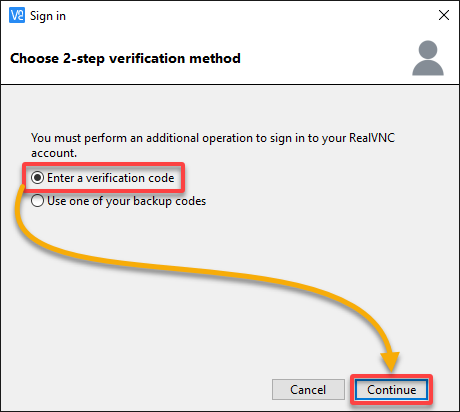
10. Choose the first option to Enter a verification code.
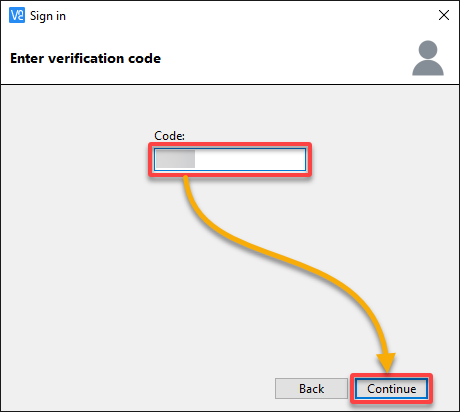
11. Now, get a code from your TOTP authentication app, input the code into the field provided below, and click Continue to confirm your identity.
This sign-in process confirms that your two-step authentication works as intended.
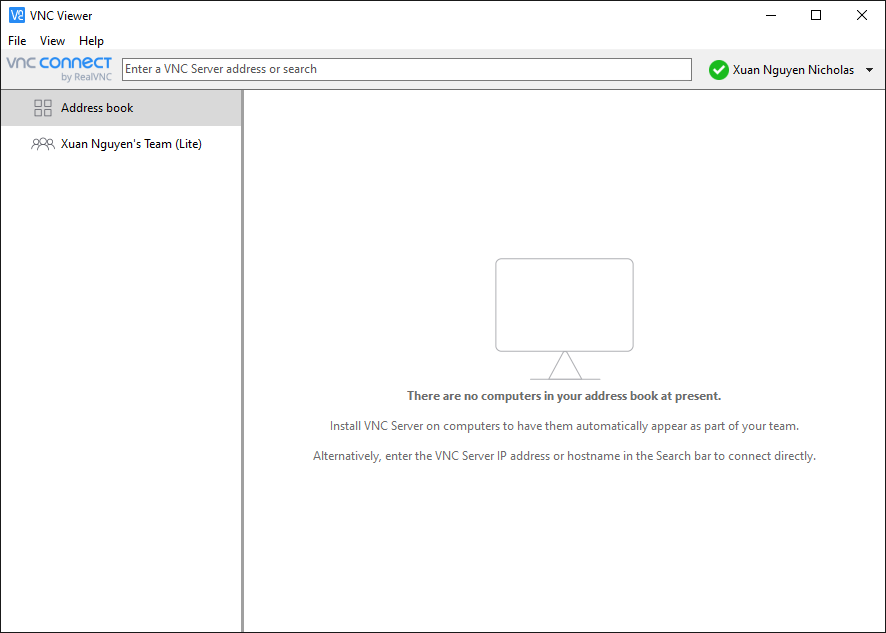
Once logged in, you will see a similar screen below, where you can connect to your remote device.
Downloading and Installing VNC Server on the Remote Device
Establishing a remote connection between your host and remote devices requires VNC Viewer and VNC server. Since you now have VNC Viewer on your host device, you must install the VNC Server on your remote device.
To download and install VNC Server on your remote device:
1. Download and open the same VNC Combined installer for Windows on your remote device.
2. Once downloaded, launch the installer, and this time, click Install VNC Server to install VNC Server on your remote device.
When prompted, click Yes to continue and install the VNC Server as you did in installing the VNC Viewer.
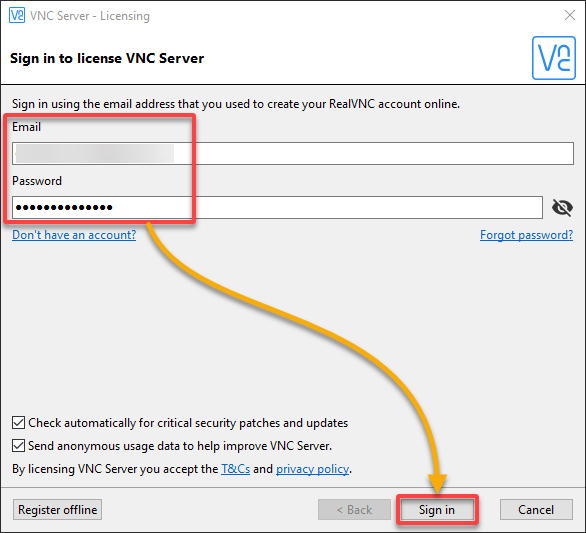
3. Open VNC Server, and sign in to your RealVNC account.
4. Now, choose a two-step authentication method as you did in setting up the VNC Viewer, and click Next.
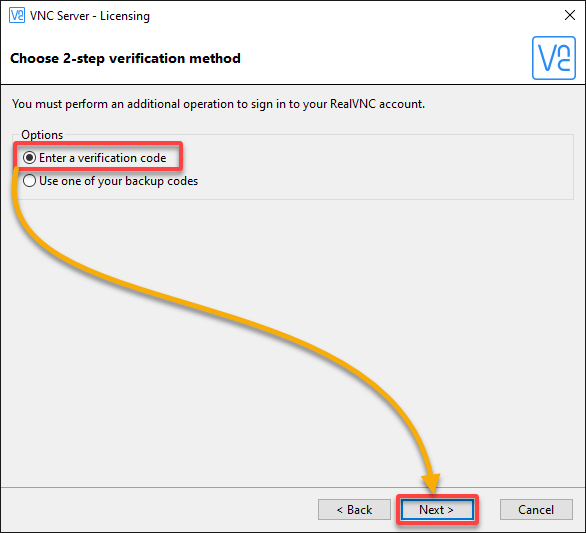
5. Input a verification code generated in your TOTP authentication app, and click Next.

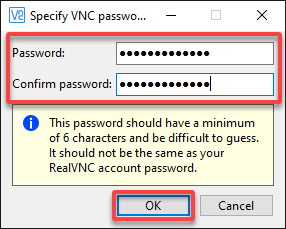
6. Next, click Set Password under VNC password to set a password for the VNC Server on your remote device.
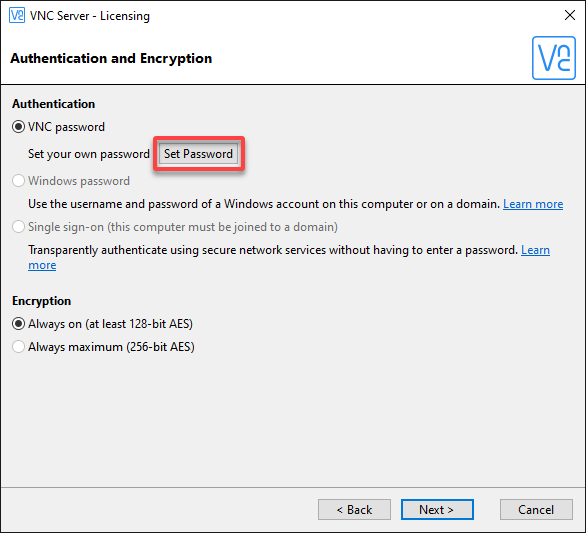
7. Provide a strong password for the VNC server, which will be required for remote access attempts to your remote device, and click OK. Ensure you save this VNC server password to a secure place for later use.
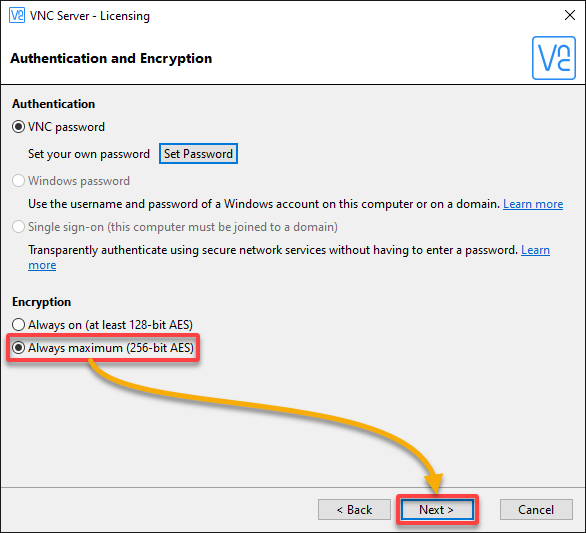
8. Next, select the Always maximum (256-bit AES) option for the encryption level to ensure your remote access sessions are secure, and click Next.
This option encrypts all data transferred between your host device and the remote device using 256-bit Advanced Encryption Standard (AES) encryption.
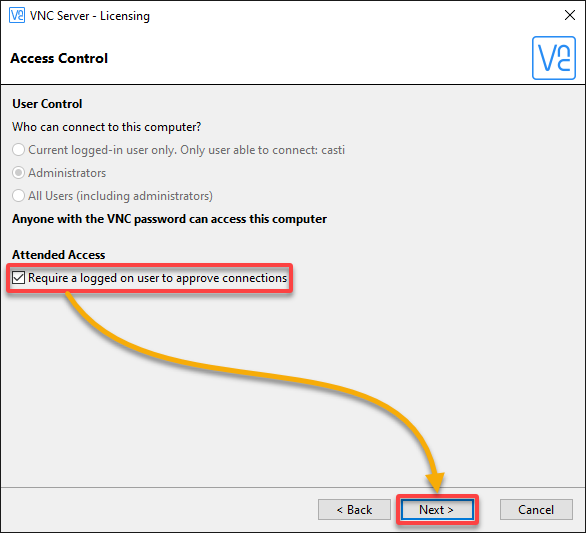
9. Tick the box under Attended Access to ensure no one can remotely access your device without your permission, and click Next to continue.
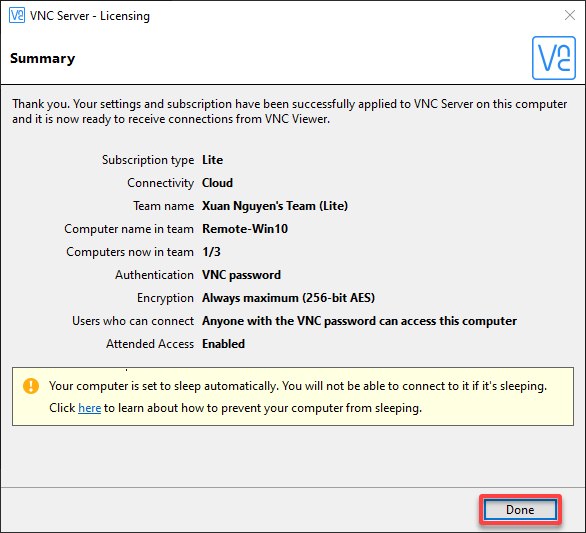
10. In the Summary page, enter a name for your remote device (i.e., Remote-Win10), and click Apply to confirm and apply your VNC Server configuration.

11. Lastly, click Done to close the VNC Server setup wizard.
You are now ready to remotely access and control your remote device from your host device via the VNC Viewer.
Accessing and Controlling Remote Devices via the VNC Viewer
With all the configurations out of the way, it is time to test if you can remotely access and control your remote device.
To access and control your remote device using VNC Viewer, follow these steps:
1. Open VNC Viewer on your host device and sign in to your RealVNC account.
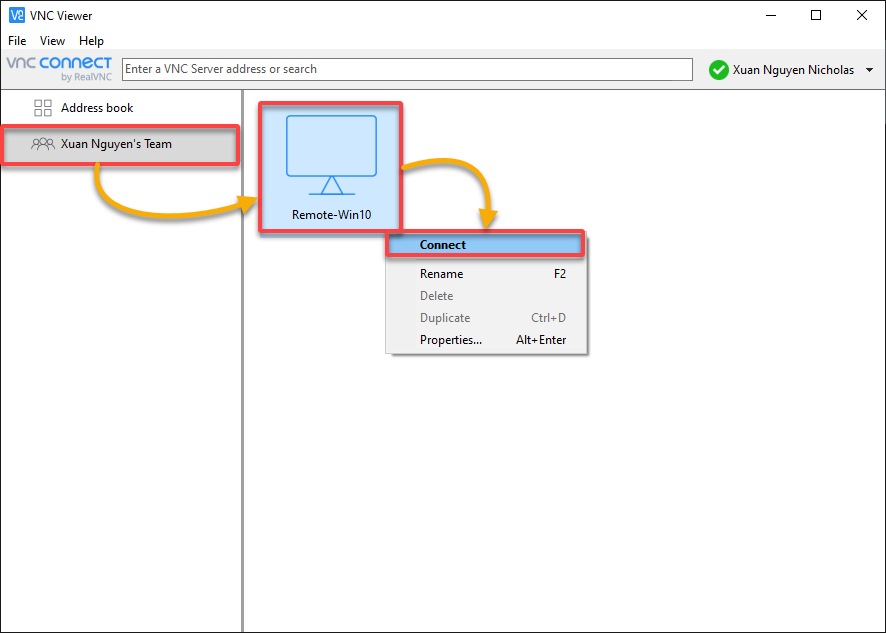
2. Next, select your VNC Connect plan (left navigation pane), right-click on your remote device (Remote-Win10), and choose Connect to establish a remote connection.
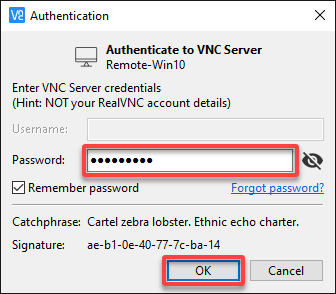
3. Enter the password you set for your VNC Server, and click OK.
You can tick the Remember password checkbox to save your password so you do not have to enter it whenever you connect to your remote device.
4. Finally, click Accept on the Connection Request window to approve the connection.
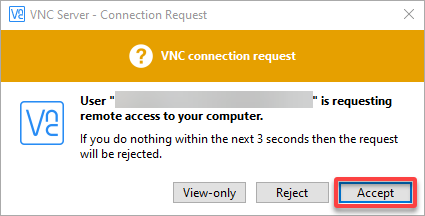
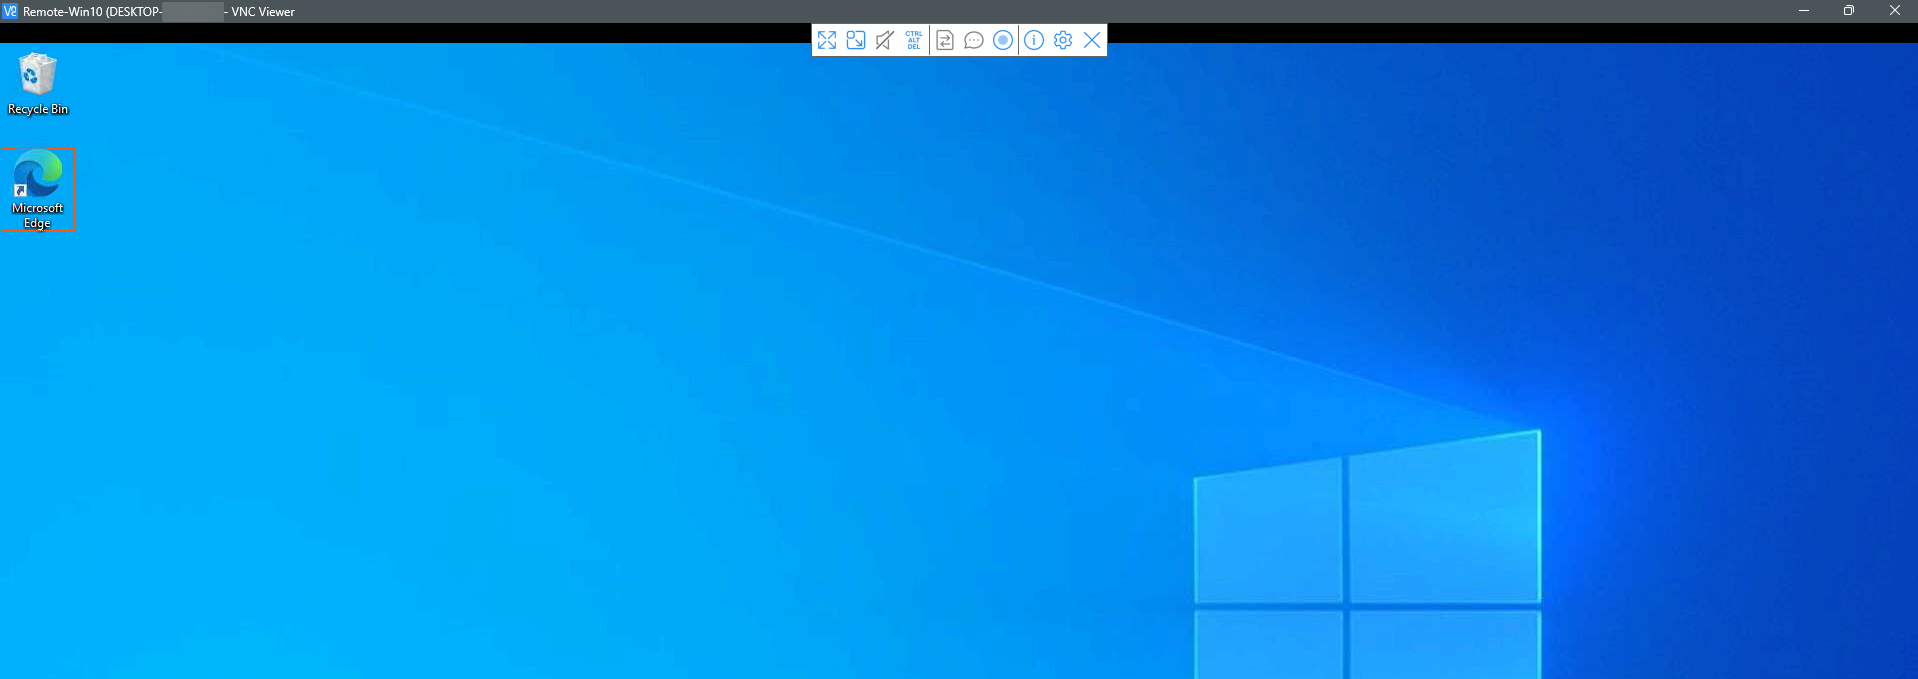
If everything goes correctly, you will see the remote device’s screen on your host device and control it as if you were physically present at the device.
Conclusion
Throughout this tutorial, you have learned to use VNC Connect as a convenient and secure solution for remotely accessing and controlling your devices.
You can now confidently access your devices remotely while keeping transferred data encrypted and protected from prying eyes.
With this newfound knowledge, why not explore establishing your direct VNC connection today? With direct VNC connections, you can quickly manage your devices even more and complete tasks no matter where you are!


