


Are you looking for a way to centralize your organization’s IT operations, providing your employees with flexible access to hardware resources with minimal costs? A Virtualized Desktop Infrastructure (VDI) will surely come in handy, and the VMware VDI solution is one to keep.
The VMware VDI solution lets you host multiple desktop environments on a single physical machine or server. And in this tutorial, you will learn to create and access virtualized desktops using the VMware VDI solution — VMware Horizon.
Read on and enjoy hassle-free centralized management of your computing infrastructure!
Prerequisites
This tutorial comprises hands-on demonstrations. To follow along, be sure you have the following:
- A host computer running Windows Operating System (OS) but can also work with other OSs – This tutorial uses Windows 10 Pro v21H2 enabled with Hyper-V capabilities.
Related: How to Add a Computer to a Domain (GUI and PowerShell).
- A Windows Server 2016 ISO image – This tutorial uses Windows Server 2016 Datacenter v10.0 Build 14393, but other server versions will work.
- Virtual machines (VMs) joined in a domain – This tutorial uses Windows Server 2016 Server Edition.
Related: The Essential Guide to Hyper-V Windows 10 VMs.
- A domain-joined thin client machine running Windows 10 Pro v21H2 operating system.
Installing VMware Horizon (a VMware VDI Solution)
Managing multiple desktops can get your head spinning. But not unless you have a VMware VDI solution to host virtualized desktops, the VMware Horizon View Connection Server.
This connection server broker the connections from the end users from the Horizon View Client to the backend VMs in the connection pools. You will install VMware Horizon View Connection Server on your domain-joined VM.
To install the VMware Horizon View Connection Server:
1. Open your preferred web browser, and visit the official VMware download page for the Horizon View Connection Server installer.
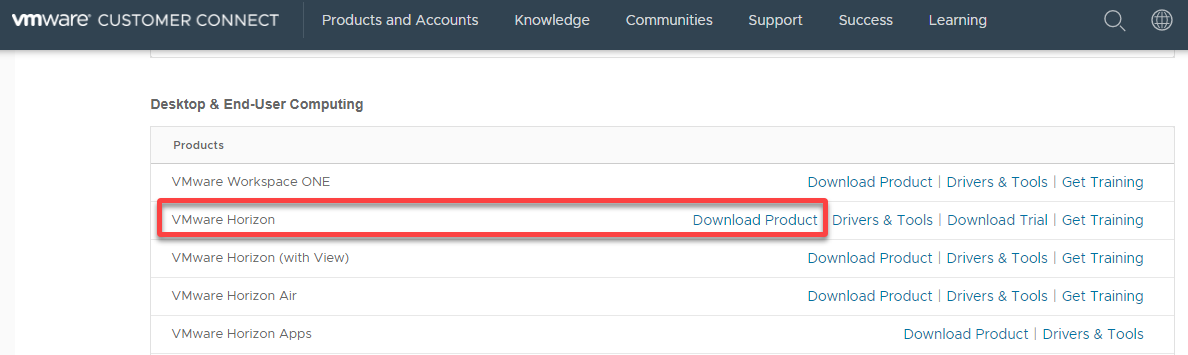
2. Next, scroll down to the Desktop & End-User Computing section, look for VMware Horizon, and click Download Product.
Your browser redirects to a page where you can see all versions of VMware Horizon (step three).
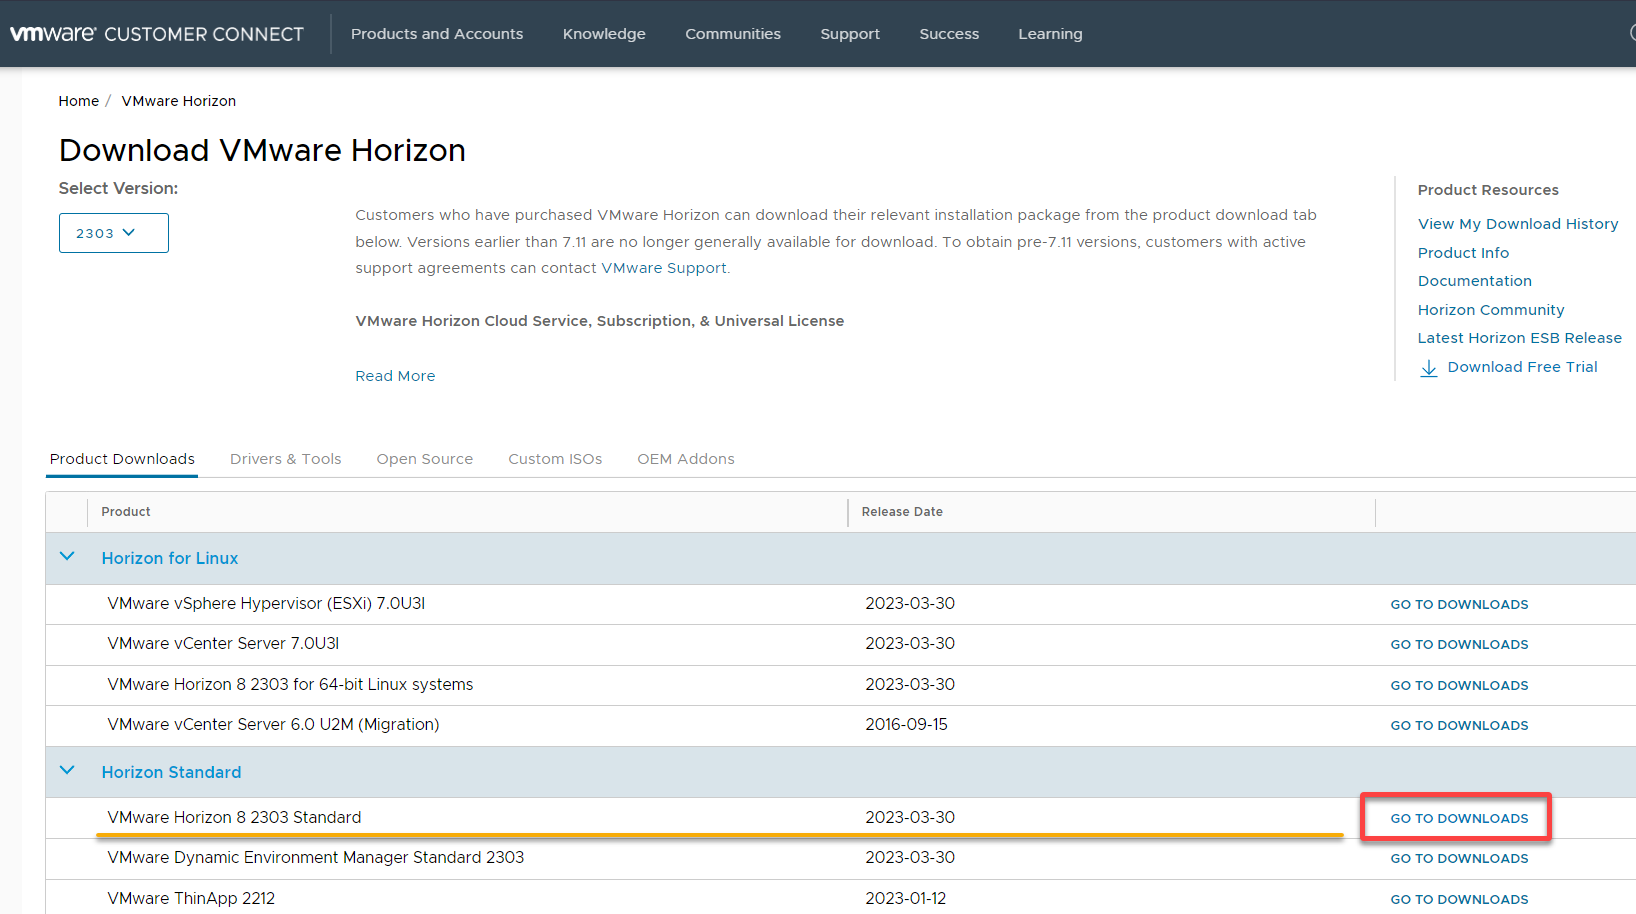
3. Look for VMware Horizon standard version, as shown below, and click GO TO DOWNLOADS.
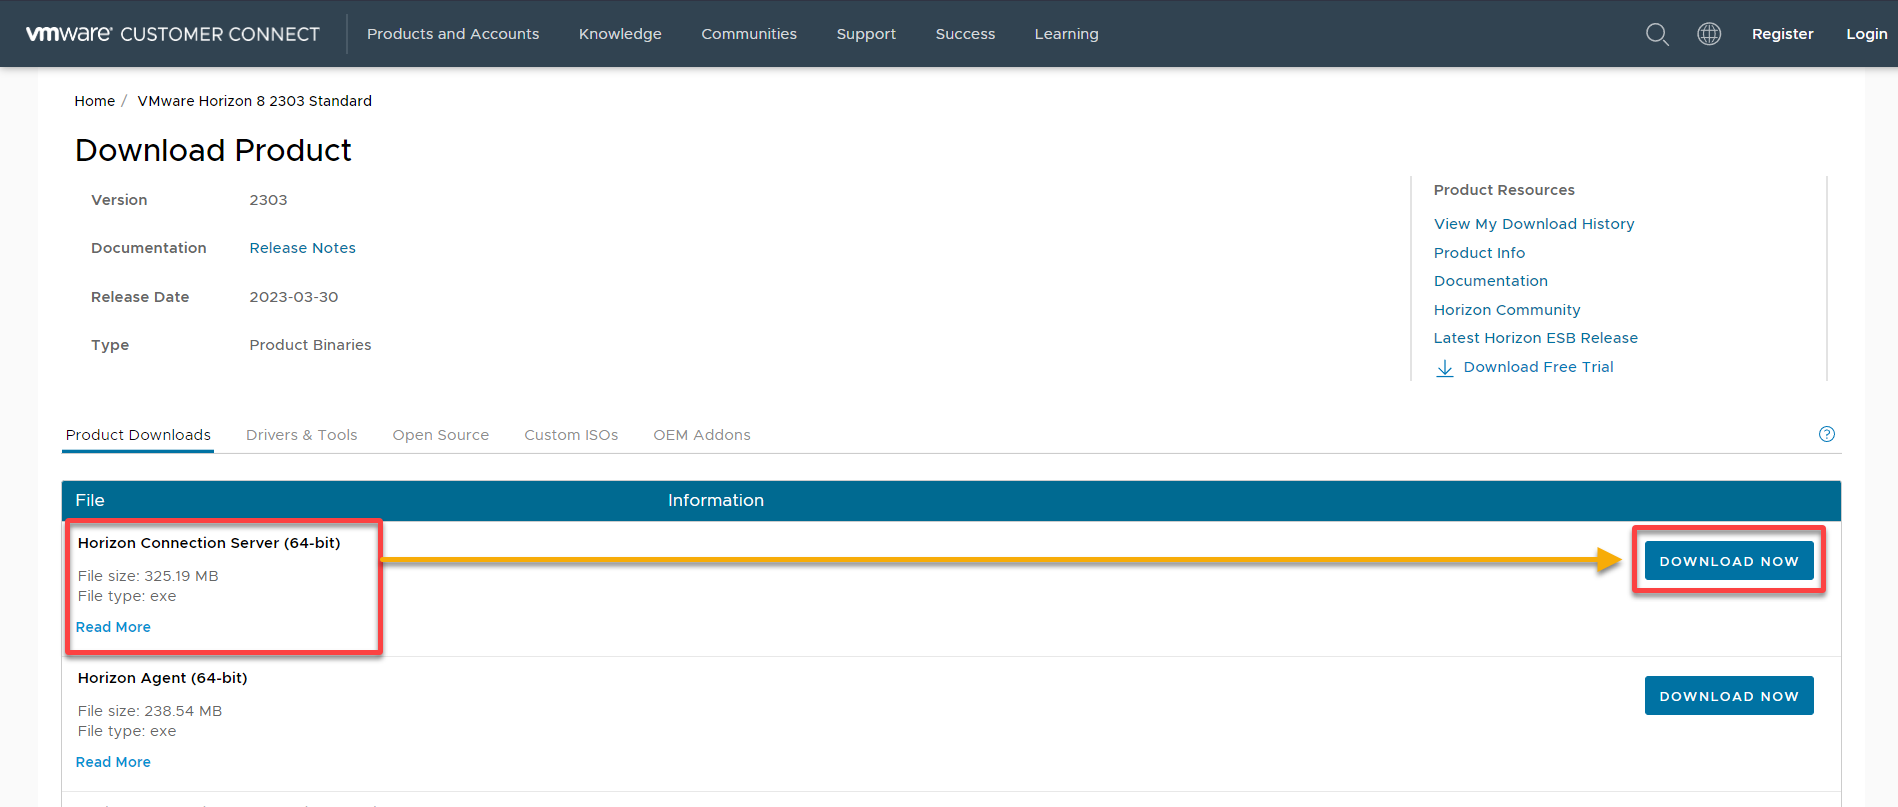
4. Now, look for Horizon Connection Server (64-bit), and click DOWNLOAD NOW to download the installer package.
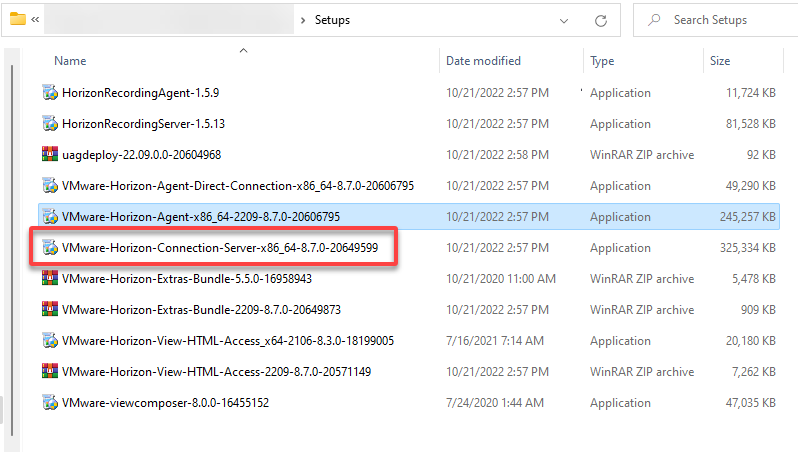
5. Once downloaded, launch the installer to start the VMware Horizon Connection Server installation.
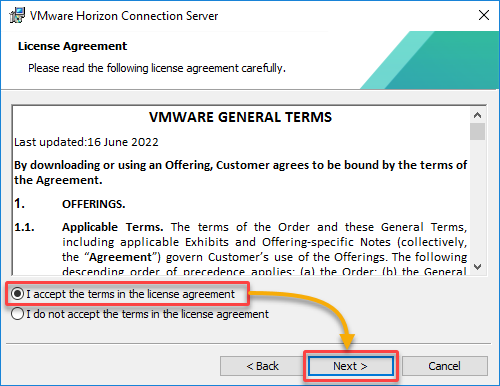
6. Now, choose the first option, and click Next to accept the license agreement.
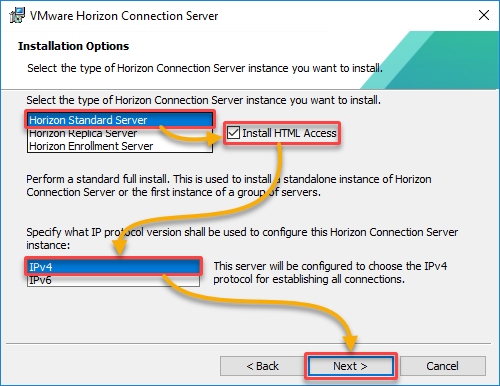
7. Configure the installation options with the following:
- Select the Horizon Standard Server installation option, and tick the Install HTML Access box. This option allows end users to connect to their desktops via a web browser.
- Select either IPv4 or IPv6 as the Internet Protocol (IP) version. Remember to install all VMware Horizon components with the same IP version.
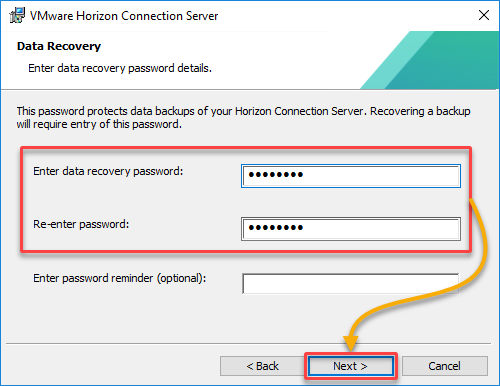
8. For Data Recovery, input a data recovery password and a password reminder (optional), and click Next.
Ensure you keep the recovery password safe as it protects data backups of your Horizon Connection Server.
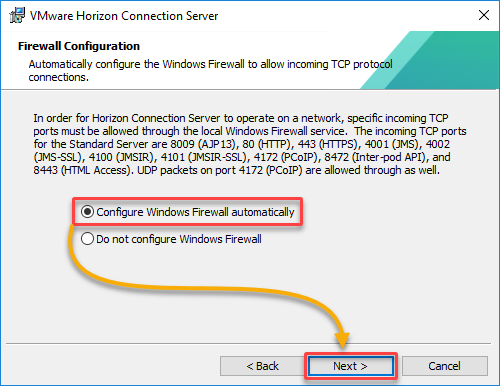
9. Next, choose to Configure the Windows Firewall automatically. This option allows you to configure the needed firewall exceptions automatically.
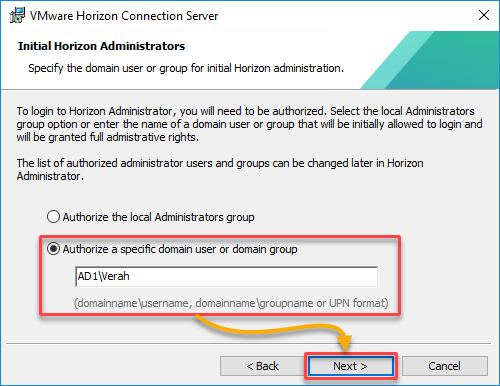
10. Choose the Initial Horizon Administrators configuration that allows you to scope the Horizon View administration, and click Next.
This option lets you scope to your target AD group to have the ability to administer the Horizon View environment.
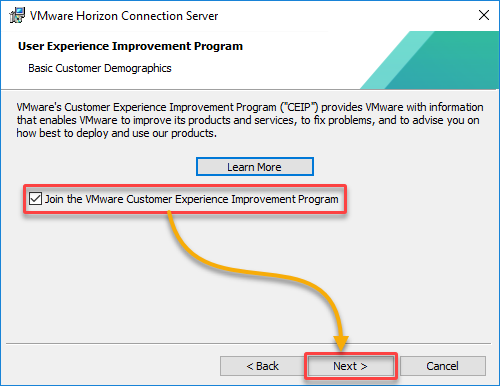
11. Choose whether or not to join the VMware Customer Experience Improvement Program (CEIP) and click Next.
The VMware Horizon Connection server installation starts with your selected settings.
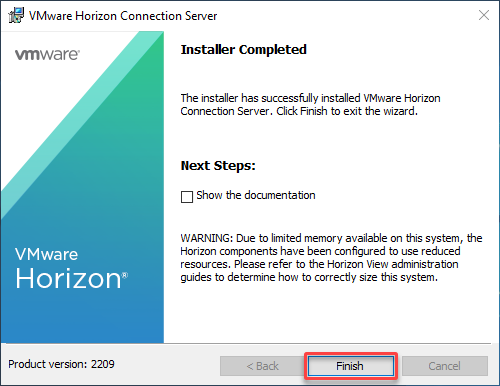
12. Finally, click Finish to complete the installation and close the VMware Horizon View Connection Server installation wizard.
Installing the Remote Desktop Services (RDS)
With the Horizon Connection Server installed, the next step is to ensure your VMs have remote desktop connection capabilities. You will install and configure RDS hosts on the VMs you wish to use as desktops.
To install RDS in Windows Server 2016:
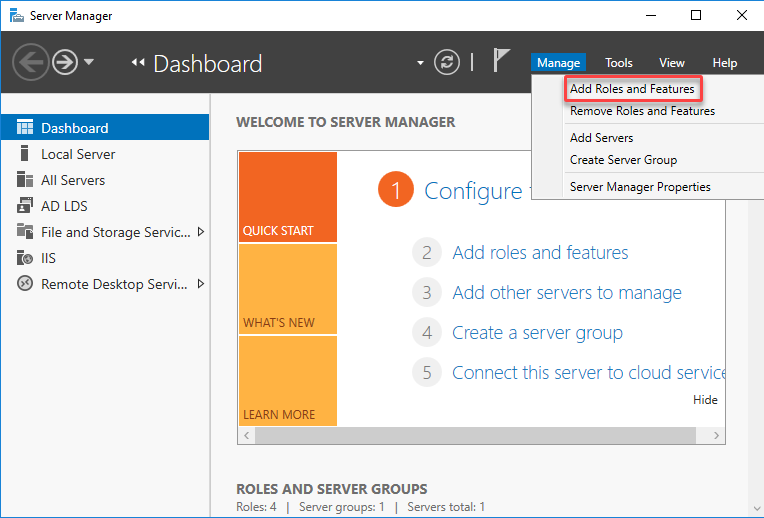
1. Open your Server Manager, click the Manage menu, and select Add Roles and Features.
2. Click Next on the Before you begin screen to continue.

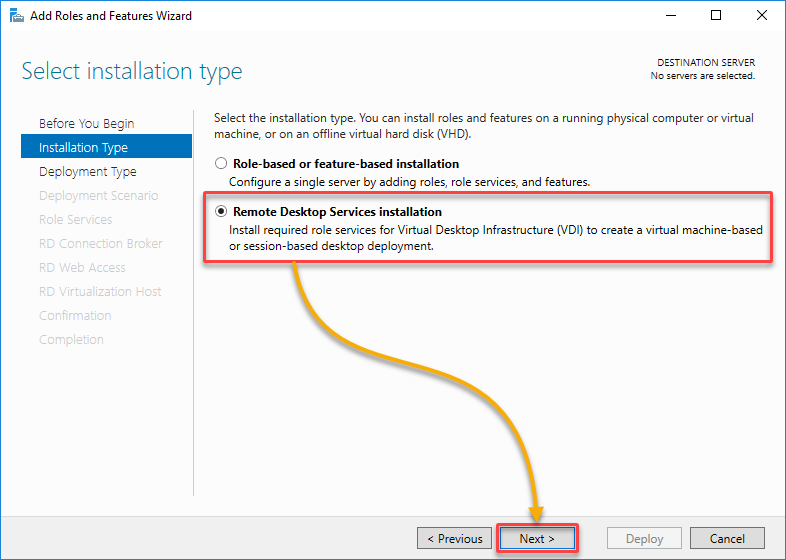
3. Under Installation Type, select the Remote Desktop Services installation option, and click Next.
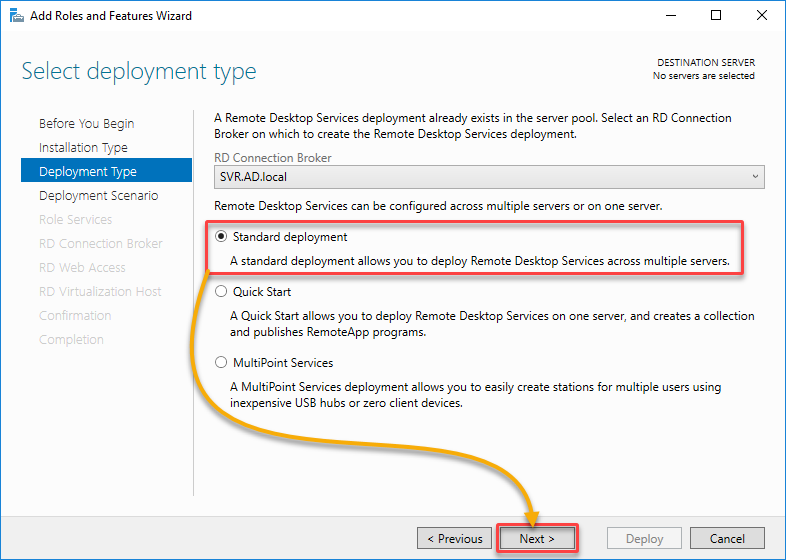
4. Now, select the Standard deployment option, and click Next. With this option, you can deploy RDS across multiple servers.
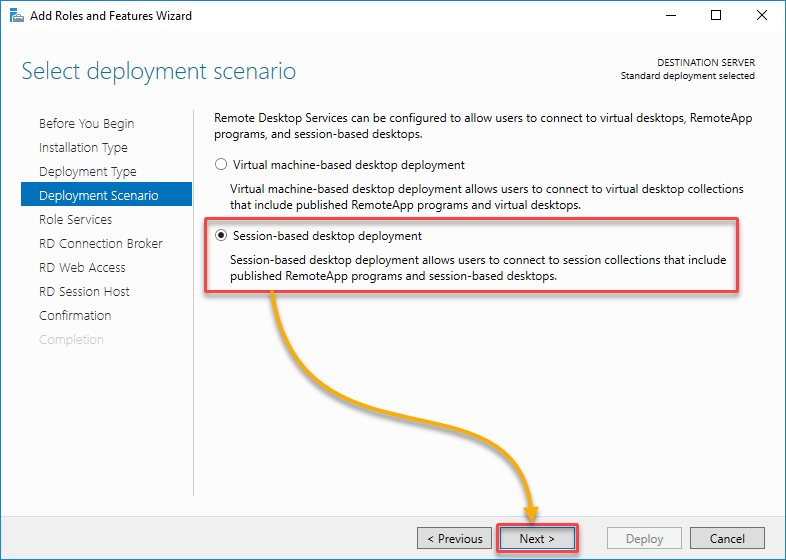
5. Select the Session-based desktop deployment option as the deployment scenario, which uses RD Session Hosts, and click Next.
A VM-based desktop deployment, on the other hand, lets you deploy personal and pooled virtual desktops on Hyper-V-enabled computers.
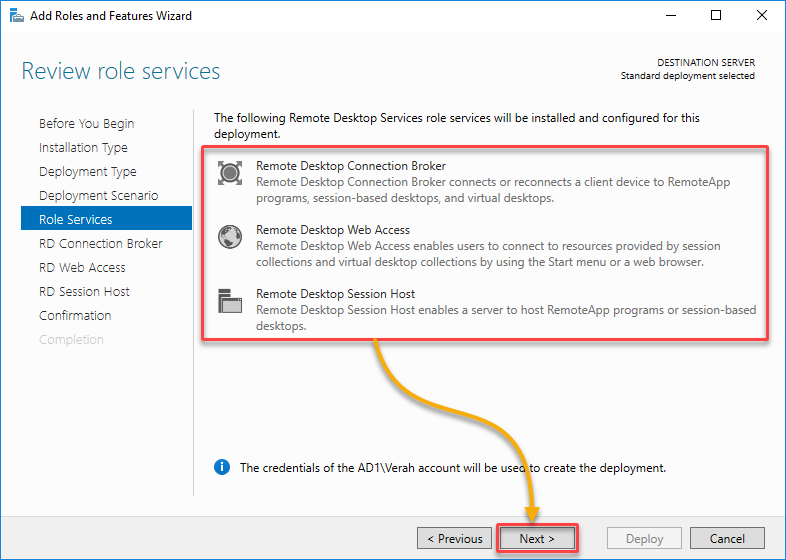
6. Review the role services to be installed and click Next to continue.
7. Now, click Deploy to start installing your chosen services.

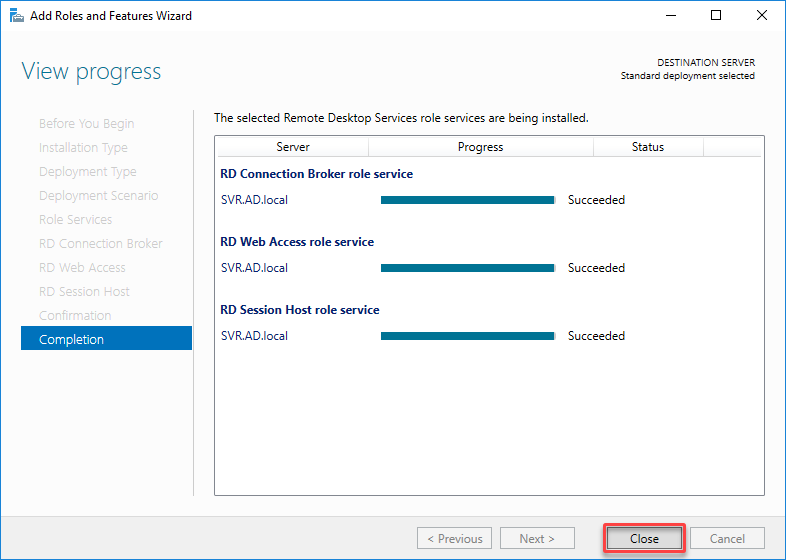
8. Lastly, wait for the installation to complete, and click Close to exit the wizard.
Adding RDS Hosts in the VMware Horizon Connection Server
After installing RDS, you need a way to provide desktop and application virtualization services to remote users. How?
You will add RDS hosts (servers that run the Remote Desktop Session Host (RDSH) role) in the Horizon Connection Server, which allows you to perform the following:
- Deliver virtual desktops and applications to end-users.
- Manage and monitor the virtual desktop infrastructure.
- Provide a secure and scalable environment for remote access.
To add RDS hosts in VMware Horizon, follow the steps below:
1. Log in to the Windows Server installed with RDS services using an admin account.
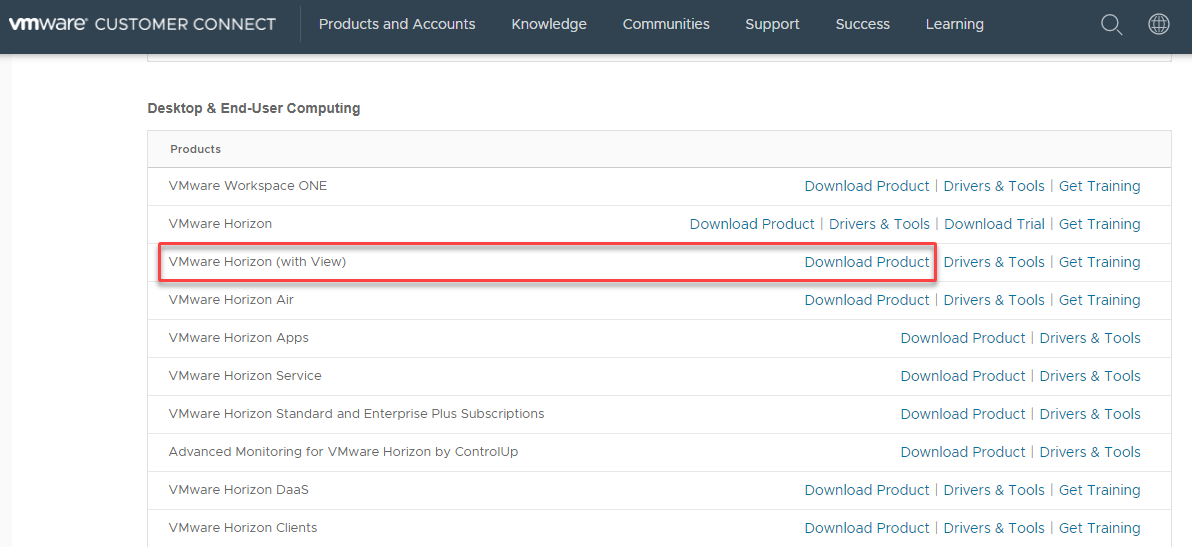
2. Next, open a web browser, re-visit the VMware download site, look for VMware Horizon (with View), and click Download Product.
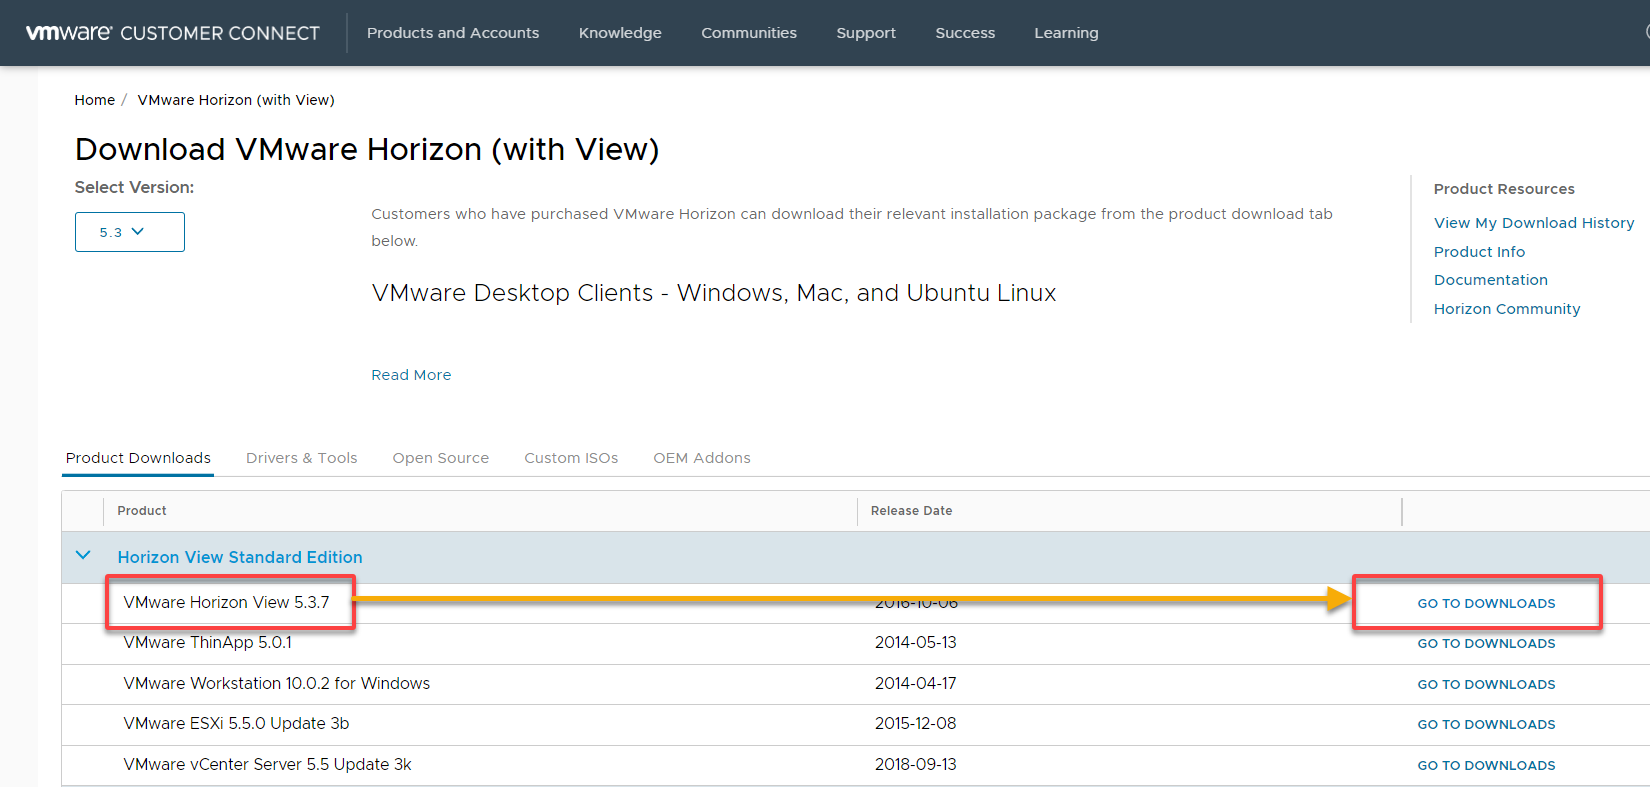
3. Look for VMware Horizon View standard version, and click GO TO DOWNLOADS to see all software included in the package.
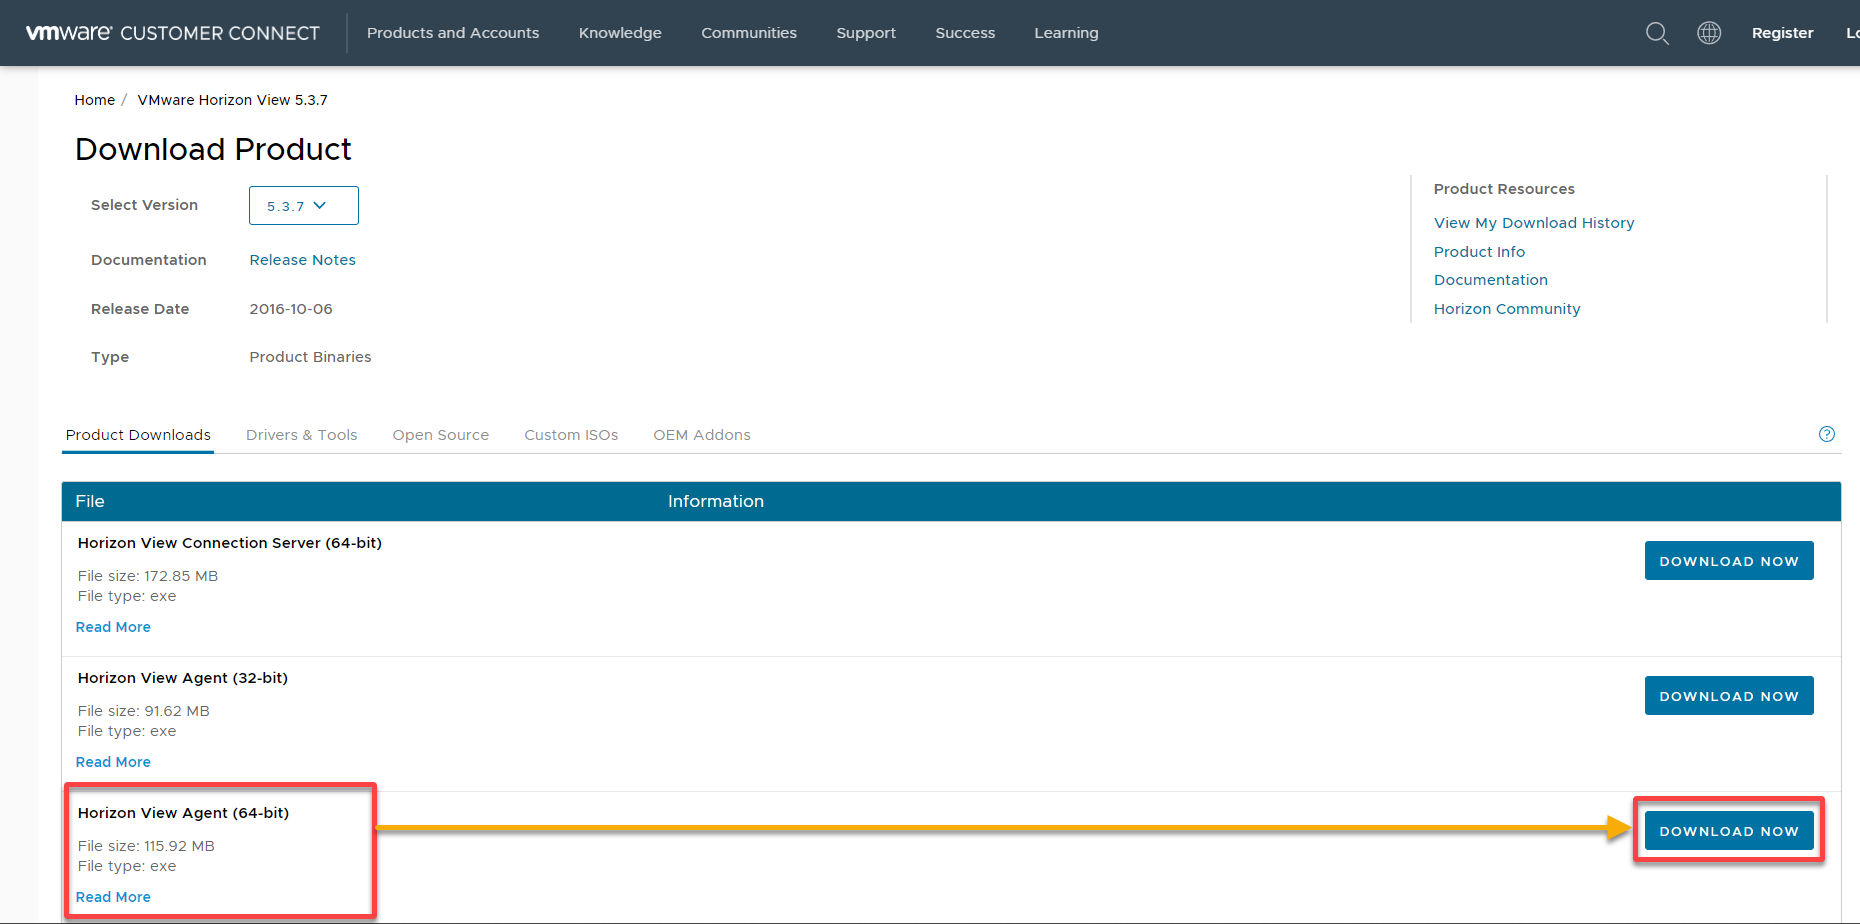
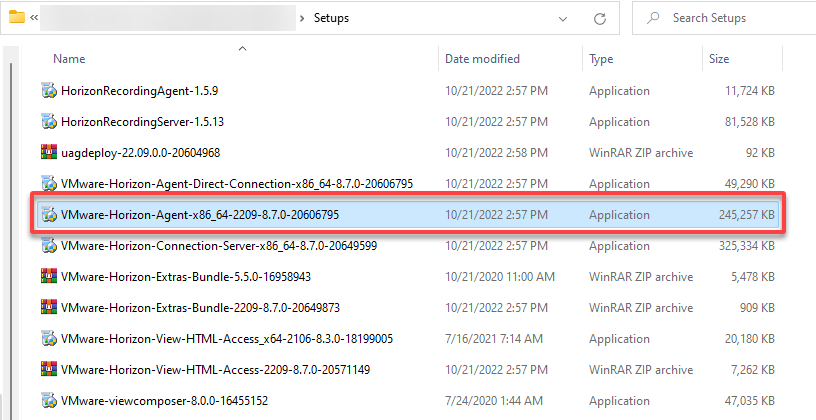
4. Now, look for Horizon View Agent (64-bit), and click DOWNLOAD NOW to download the installer.
5. Once downloaded, launch the VMware Horizon Agent installer to begin the installation process.
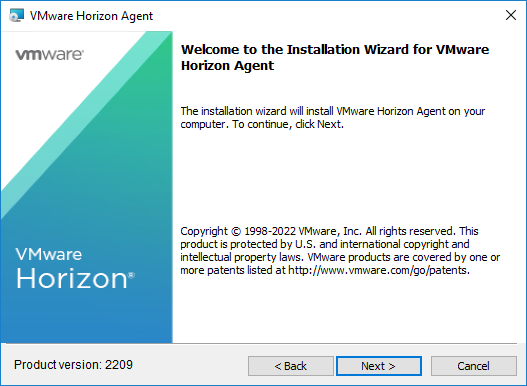
6. Now, click Next on the welcome screen to continue.
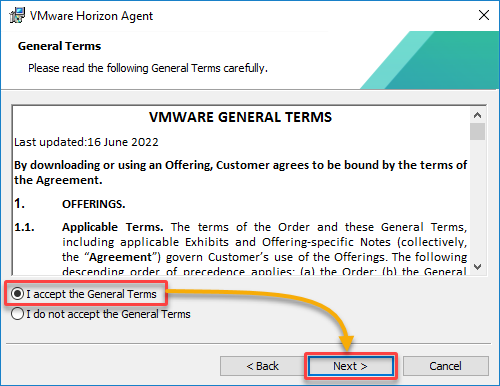
7. Accept the General Terms, and click Next.
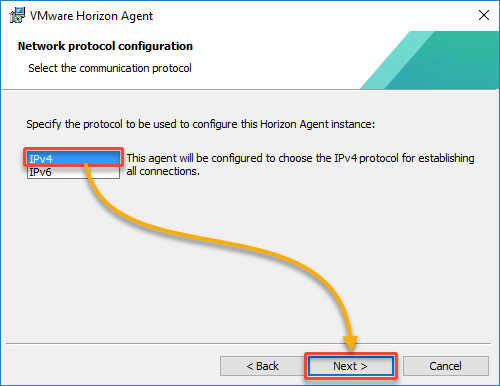
8. Select the network protocol configuration, IPv4 or IPv6, for establishing connections, and click Next.
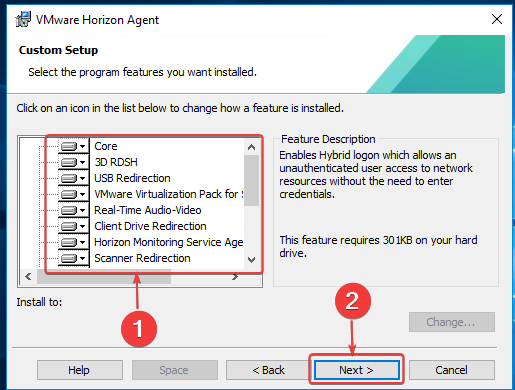
9. Select the custom features you wish to install, and click Next.
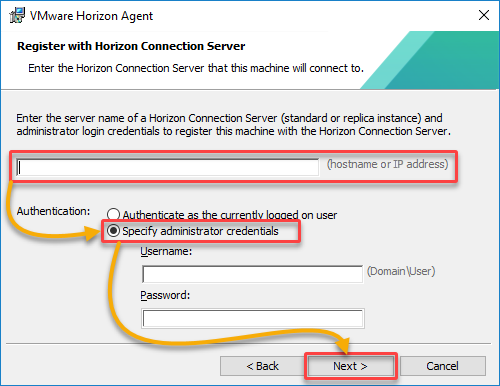
10. Now, provide the Horizon Connection Server’s IP address or hostname and authentication credentials, and click Next.
This configuration registers your machine with the Horizon Connection Server.
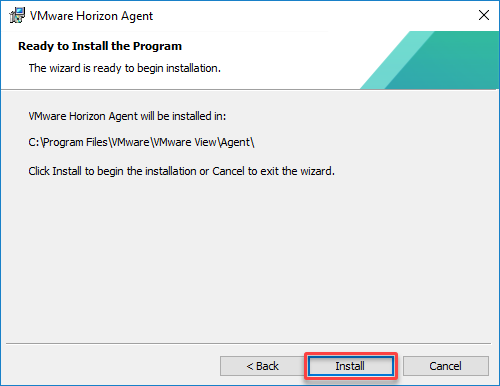
11. Review the installation summary and click Install to begin the installation process.
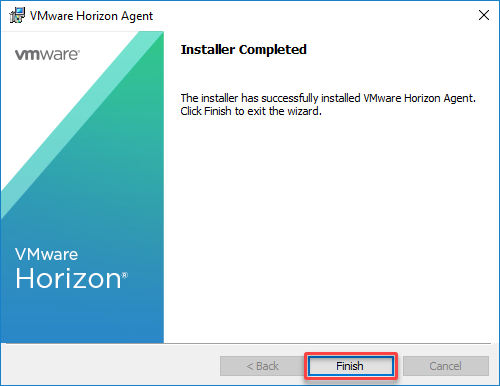
12. Finally, wait for the installation process to complete, and click Finish to close the wizard.
After installation, you may need to restart your computer for the changes to take effect.
Verifying the RDS Host Installation
With the VMware Horizon Agent installed and running, you must configure it to connect to your VMware Horizon infrastructure. But first, you must verify your RDS host installation via the VMware Horizon Administrator console.
To verify the RDS Host installation:
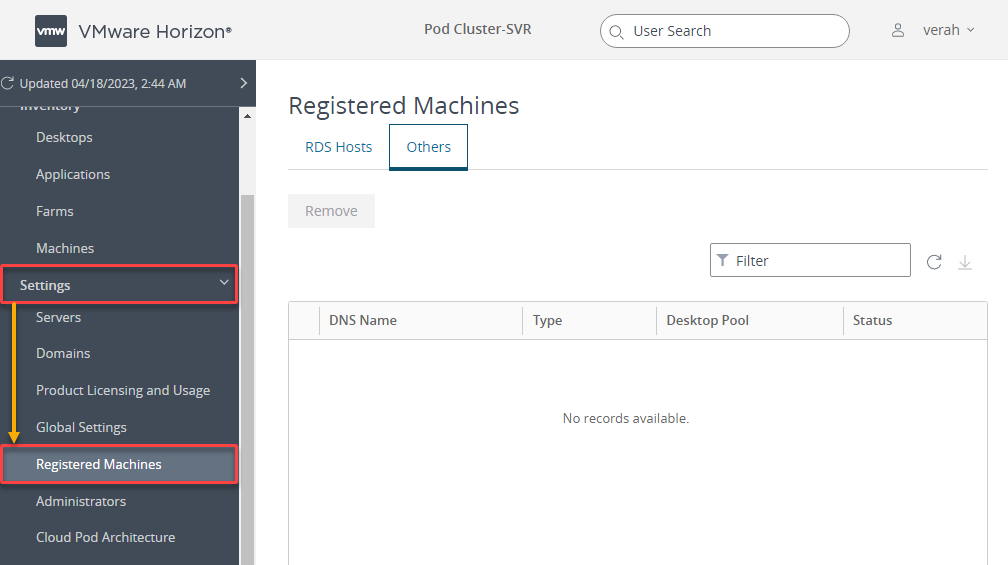
1. Launch and log in to the VMware Horizon Administrator console as an administrator.
2. Next, navigate to Settings (left navigation pane) → Registered Machines to see the list of all registered machines.
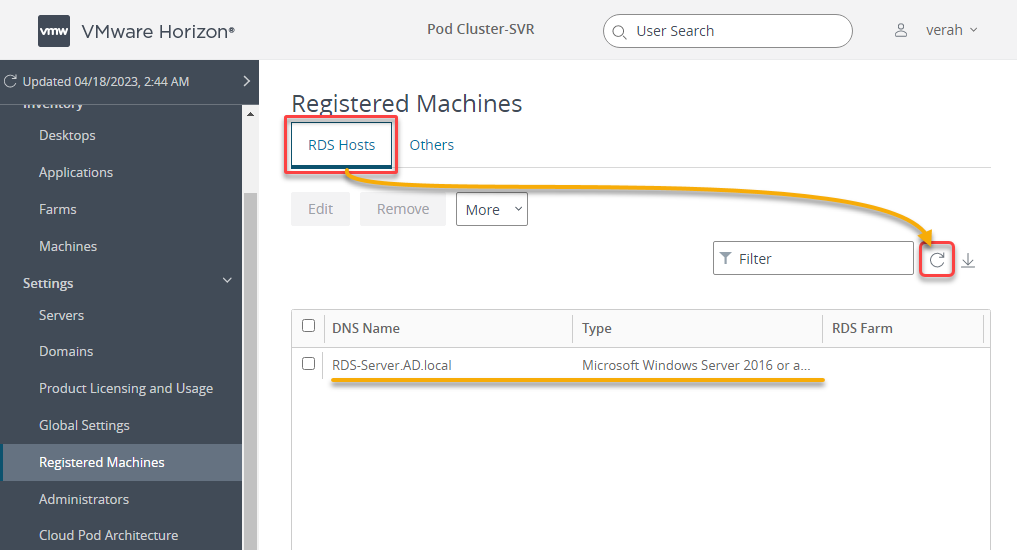
3. Now, select the RDS Hosts tab, and click the refresh button to refresh the list of registered machines.
Creating Desktop Farms to Group Virtual Desktops
Regardless of how many registered machines you have in the Horizon Connection Server, putting them in one place results in better management. Instead of applying common policies and settings to each of your virtual desktops, why not use a desktop farm instead?
A desktop farm refers to a group of virtual desktops managed and provisioned as a single entity, simplifying virtual desktop management.
To create a desktop farm via the VMware Horizon administrator console:
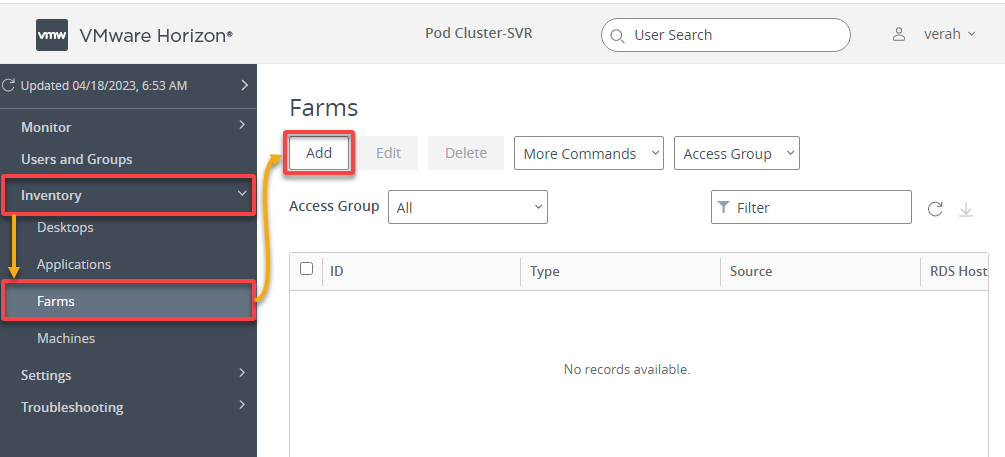
1. Navigate to Inventory (left pane) →, Farms, and click Add to initiate adding a new farm.
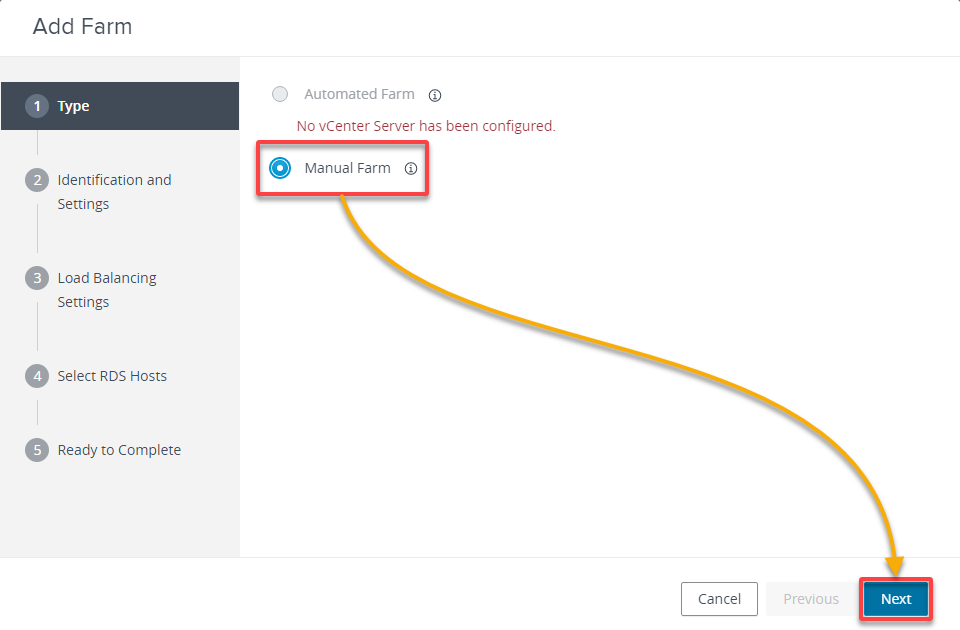
2. Next, select the Manual Farm option, and click Next.
A manual farm is a pool of virtual machines created manually outside the automated process used for instant clones. Manual farms are typically used for specific use cases that require customized configurations or applications.
Manual farms offer more flexibility and customization options than automated pools using instant clones.
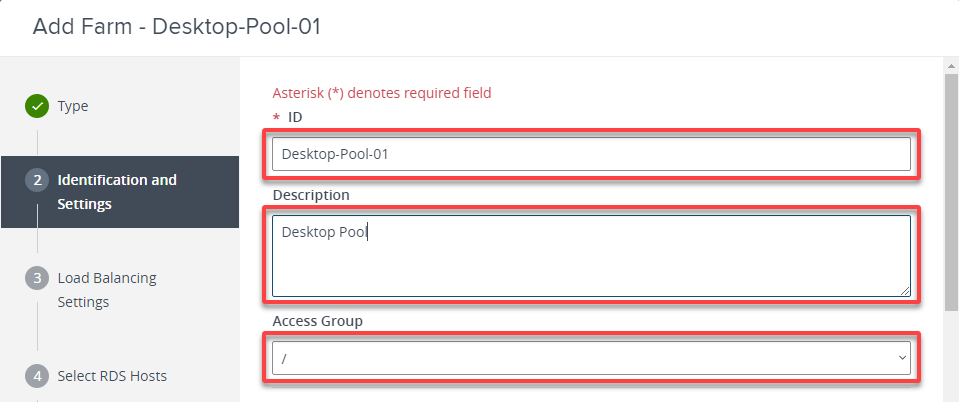
3. Configure the farm’s identification and settings as follows:
- Provide a descriptive farm ID, Description, and select an Access Group (a collection of desktop pools, farms, and RDS hosts with similar access requirements). In this case, choose the root ( / ) privileges.
Access groups simplify assigning and managing entitlements to users and groups, making controlling access to desktops based on a user’s roles and business needs easier.
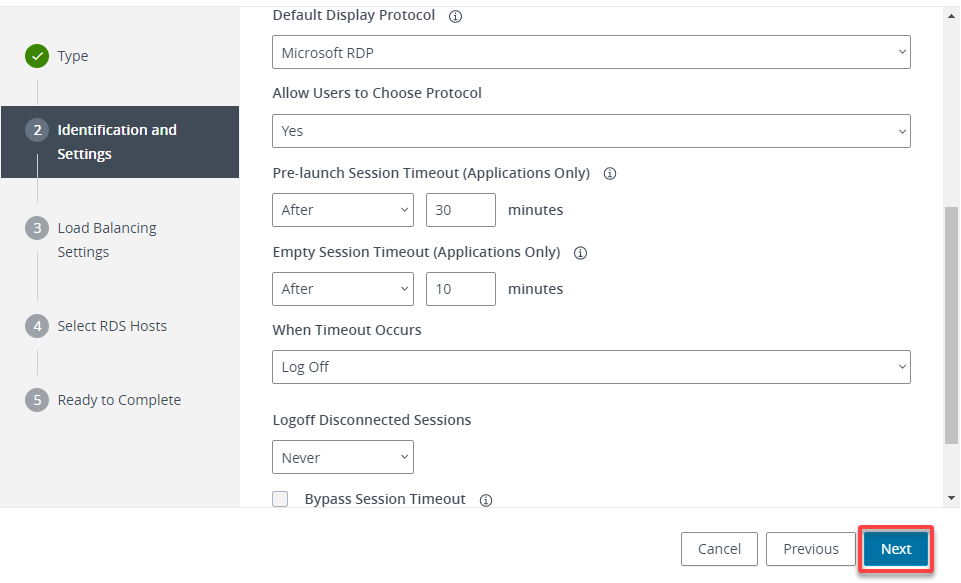
- Scroll down, configure the farm settings, such as the Default Display Protocol and session timeout settings, and click Next.
The session timeout settings determine how long an inactive session will remain open before it is terminated, which prevents unauthorized access to sensitive resources.
Configuring the session timeout settings is an important security measure that ensures sessions are not left open indefinitely.
4. Now, specify the load balancing method for the RDS farm, and click Next.
Load balancing helps with better distribution of incoming network traffic.
Hover your mouse on the information icons adjacent to each field to get more details about their functions.

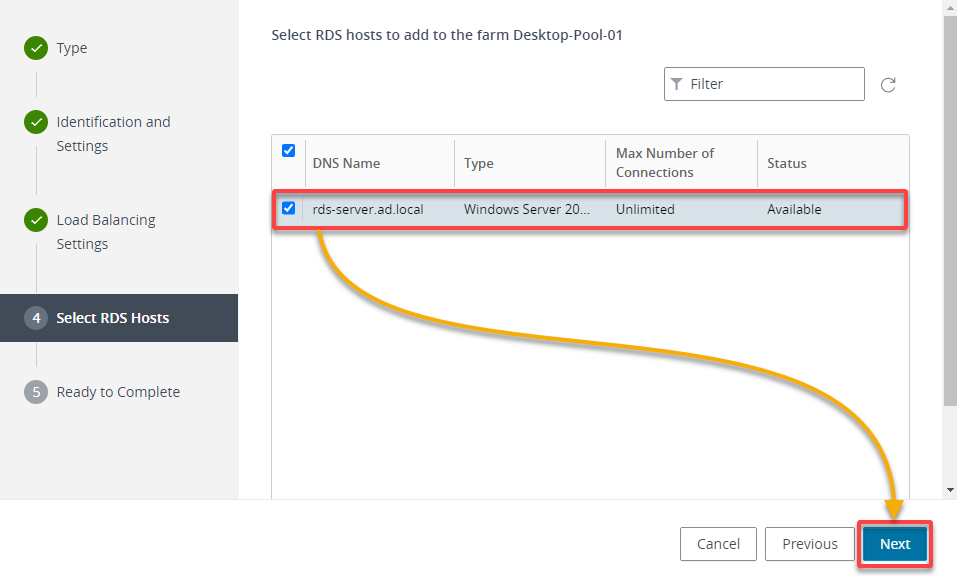
5. Select the RDS host pool you set in step three of the “Verifying the RDS Host Installation” section, and click Next to proceed.
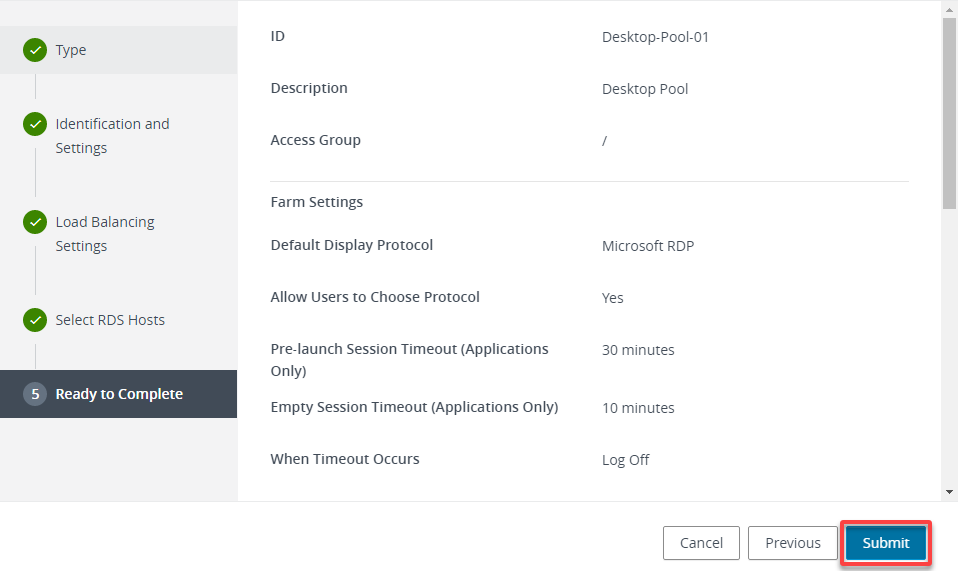
6. Now, review your selected settings and click Submit to confirm adding the RDS farm.
Creating Desktop Pools
Once you have added the RDS farm to VMware Horizon, it is time to ensure you can deliver virtual desktops to end-users by creating RDS desktop pools. A desktop pool is a collection of virtual desktops that are created from a single base image, which can be configured to meet different business needs.
To create a desktop pool, follow these steps:
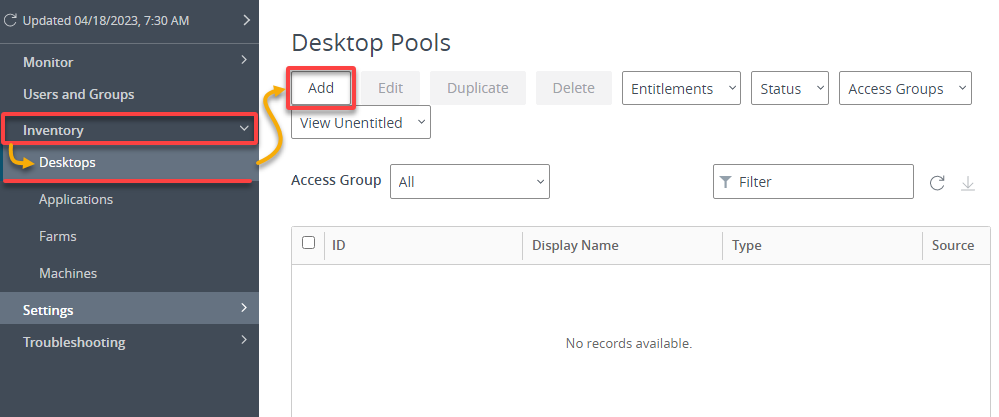
1. In the VMware Horizon Administrator console, expand Inventory, navigate to Desktops, and click Add to create a new desktop pool.
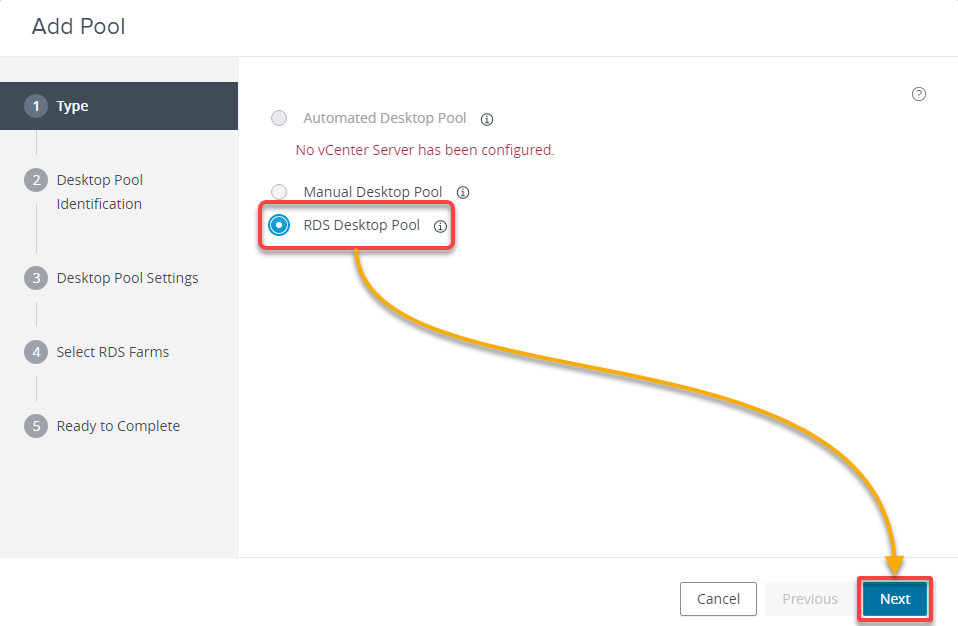
2. Next, in the Add Pool wizard, choose RDS Desktop Pool as the desktop pool type, and click Next.
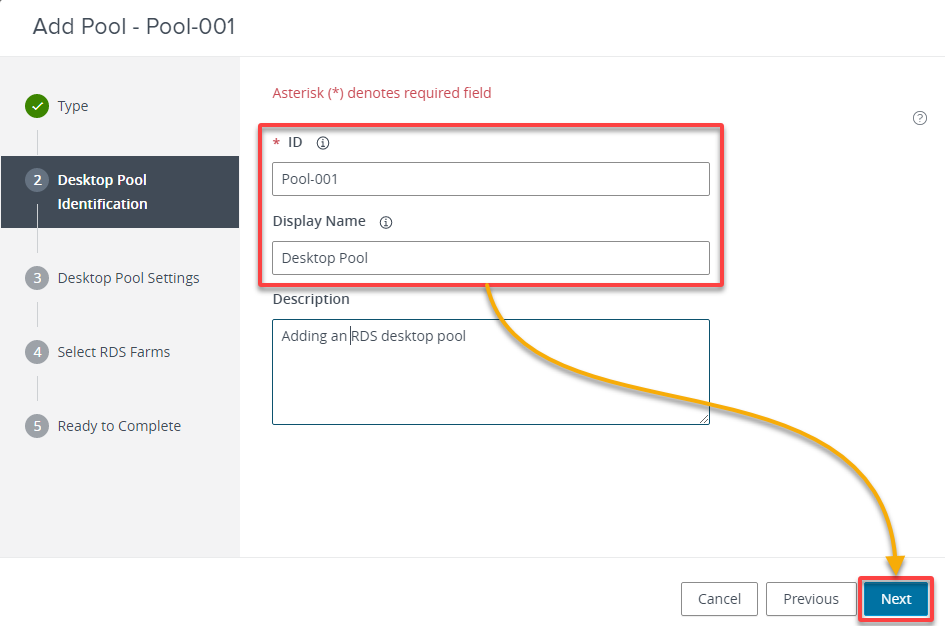
3. Input a desktop pool ID, descriptive Display Name, and Description (optional), and click Next.
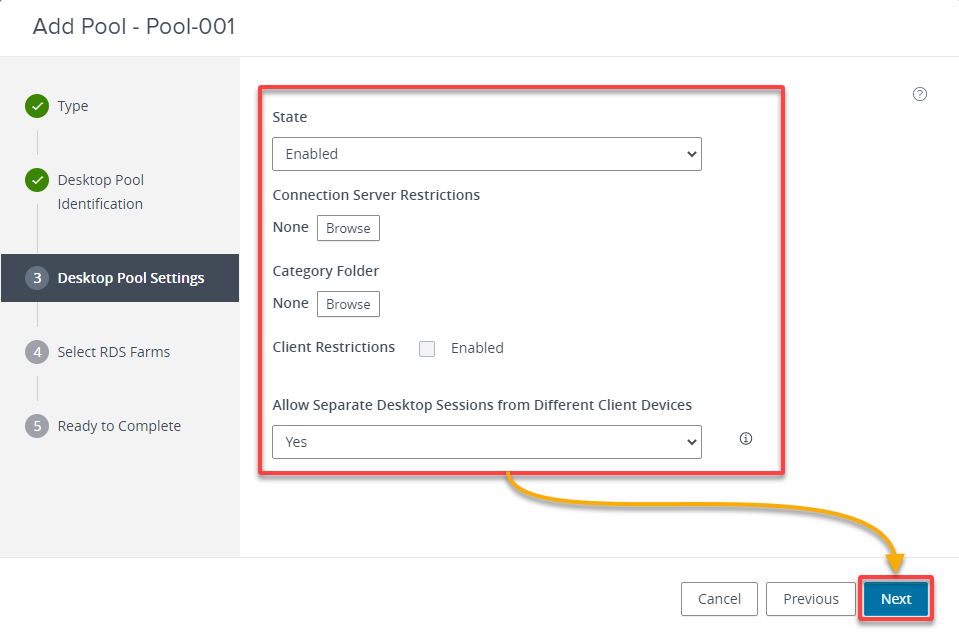
4. Now, configure the Desktop Pool Settings settings with the following:
- Status – Specifies whether the desktop pool is enabled or disabled. When a desktop pool is disabled, users cannot access resources associated with the pool until it is re-enabled.
- Connection server restrictions – Determines which connection servers users can access and how they can access them.
- Category folder – This folder groups and organizes resources, such as VMs used by the desktop pool. By assigning a category folder to a resource, you can easily view and manage the resource and other resources in the same category folder.
- Client Restrictions – Determines if client devices can access the newly created RDS desktop pool.
- Session management – Allows administrators to configure separate desktop sessions from different client devices to allow users to work on multiple desktops simultaneously.
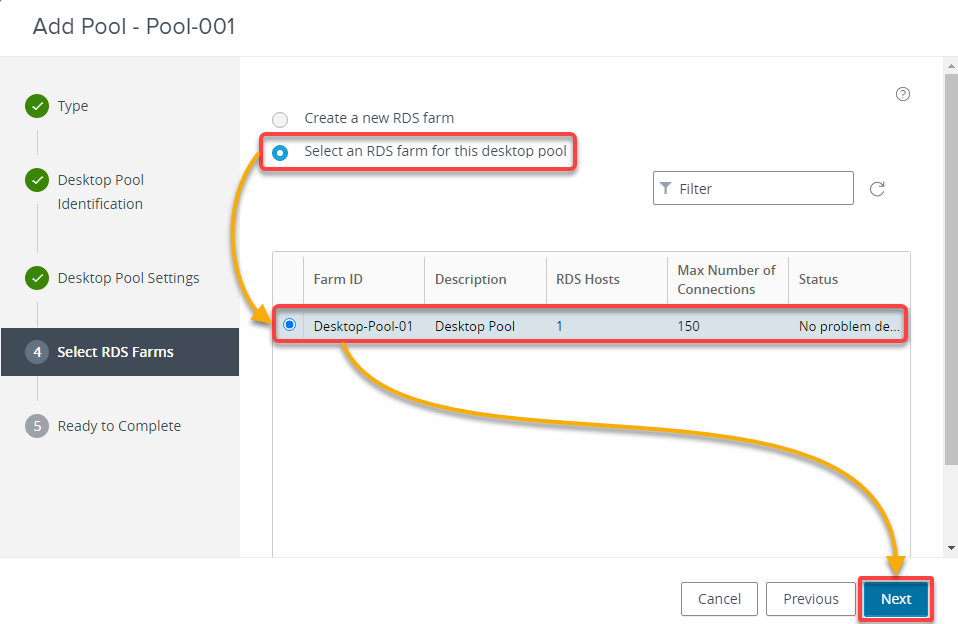
5. Choose the RDS farm you named in step three of the “Creating Desktop Farms to Group Virtual Desktops” section to use for the desktop pool, and click Next.
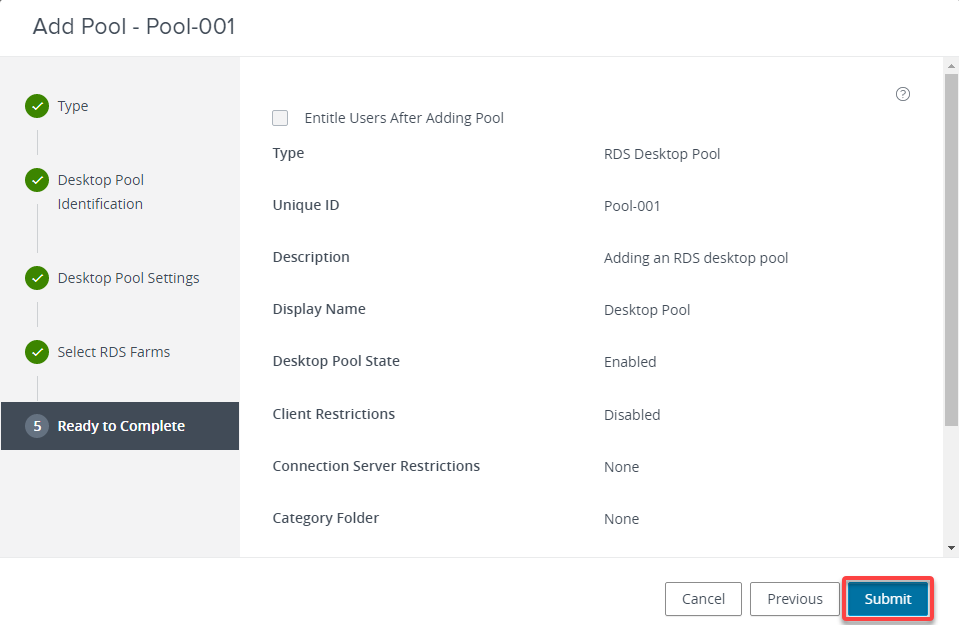
6. Lastly, review and click Submit to confirm the settings and create the desktop pool.
Once the desktop pool is created, users can access it through the Horizon Client or a web browser. How? By connecting to the Horizon Connection Server and selecting the RDS desktop pool.
Configuring User Access to Desktop Pools
With a desktop pool configured, you are almost ready to get access to your virtualized desktops. You must still configure user access to your desktop pool via the VMware Horizon Administrator console. User access in VMware Horizon refers to granting or revoking access to desktops based on a user’s identity, role, or other attributes.
User access is managed through entitlements assigned to users and groups based on their permissions and requirements.
To configure user access to your desktop pool:
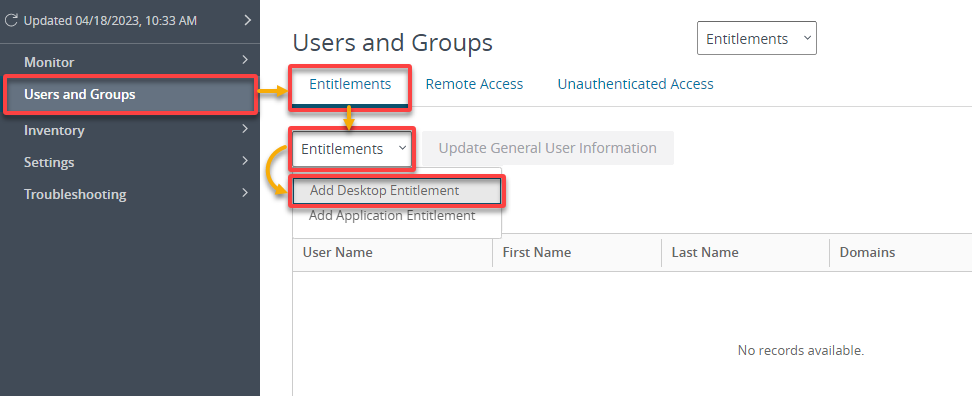
1. Navigate to Users and Groups (left pane) → Entitlements tab → Entitlements dropdown → Add Desktop Entitlement to initiate adding a new desktop entitlement.
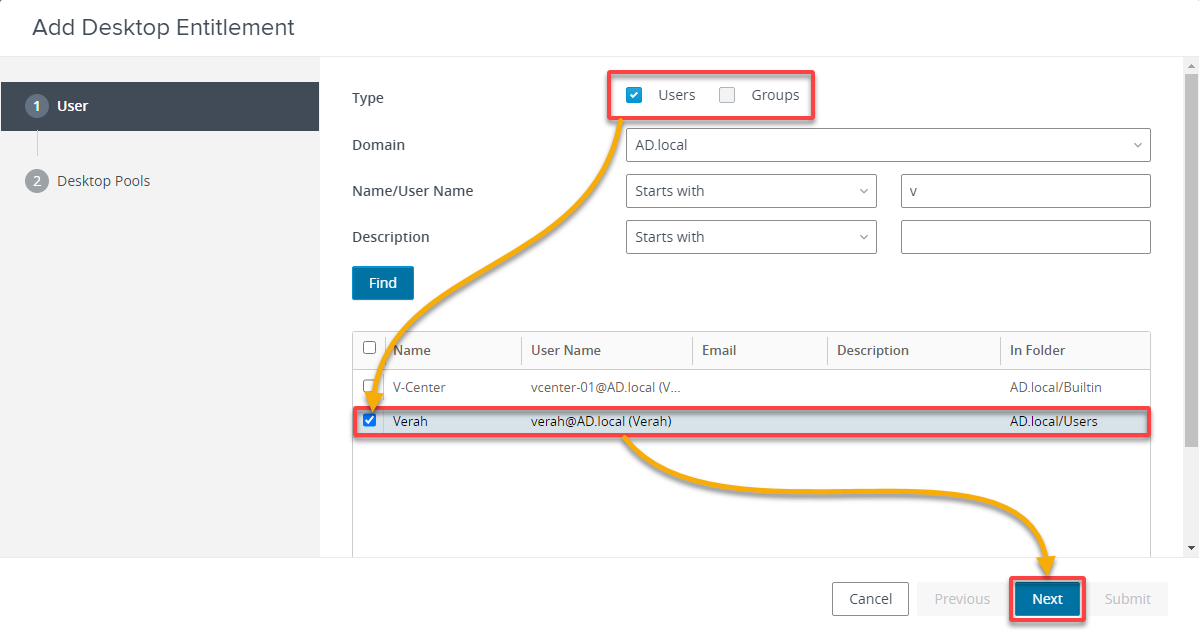
2. Next, select the Users or Groups that you want to give access to the desktop pool, and click Next.
If too many users are listed, use the search filter fields and click Find to look for a specific user to grant access to your desktop pool.
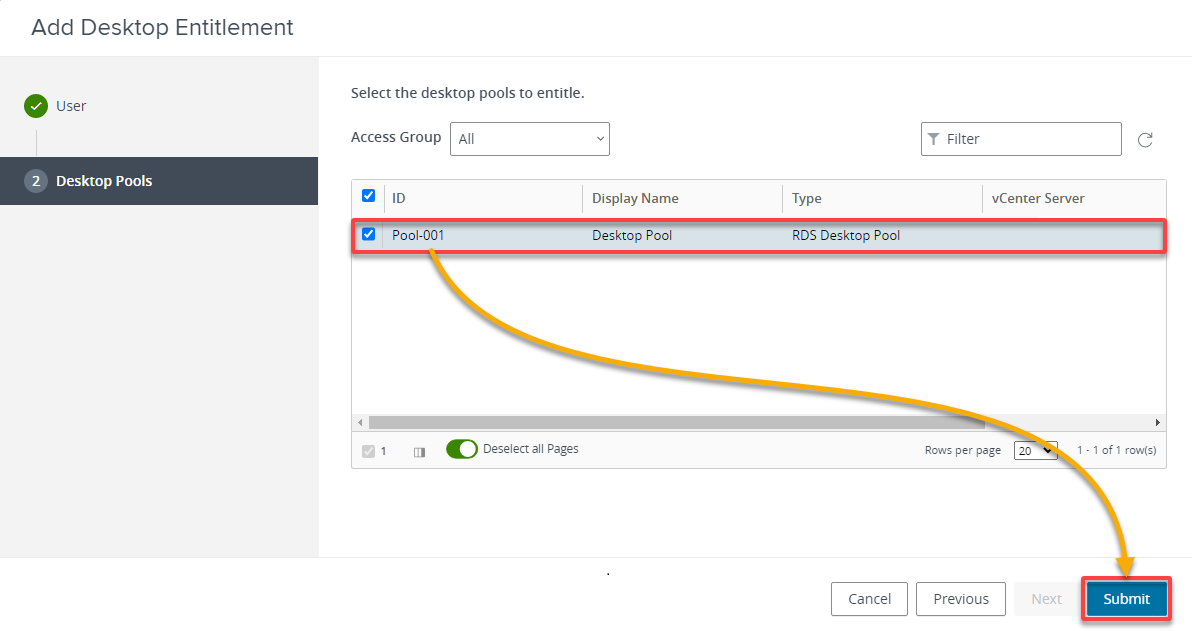
3. Lastly, select your target desktop pool, as shown below, to assign to the user or group, and click Submit to complete adding the entitlement.
Once added, the user or group you granted access can log in to the desktop pool and use the virtual desktops you configured.
Testing the Desktop Pool
You have successfully configured your desktop pool with granted user access. But how do you know your desktop pool works? You will need the VMware Horizon client to connect to your desktop pool.
To test your desktop pool, follow these steps:
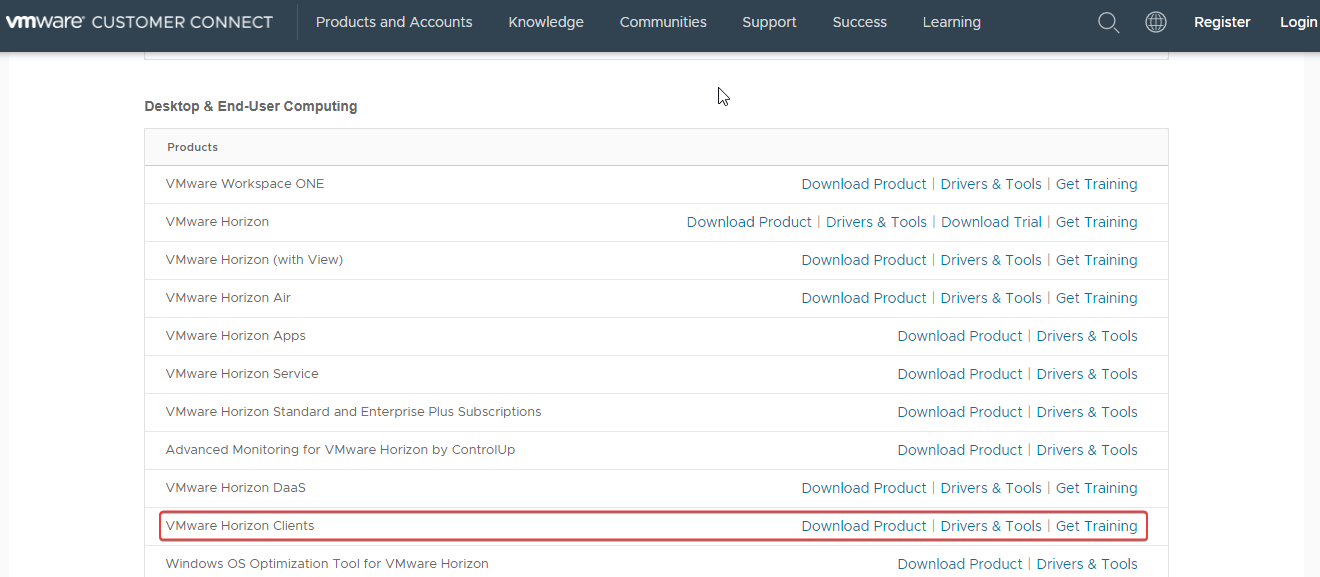
1. On your thin client, re-visit the official VMware download page, look for VMware Horizon Clients, and click Download Product.
Your browser redirects to a page listing available VMware Horizon Clients versions for different systems (step two).
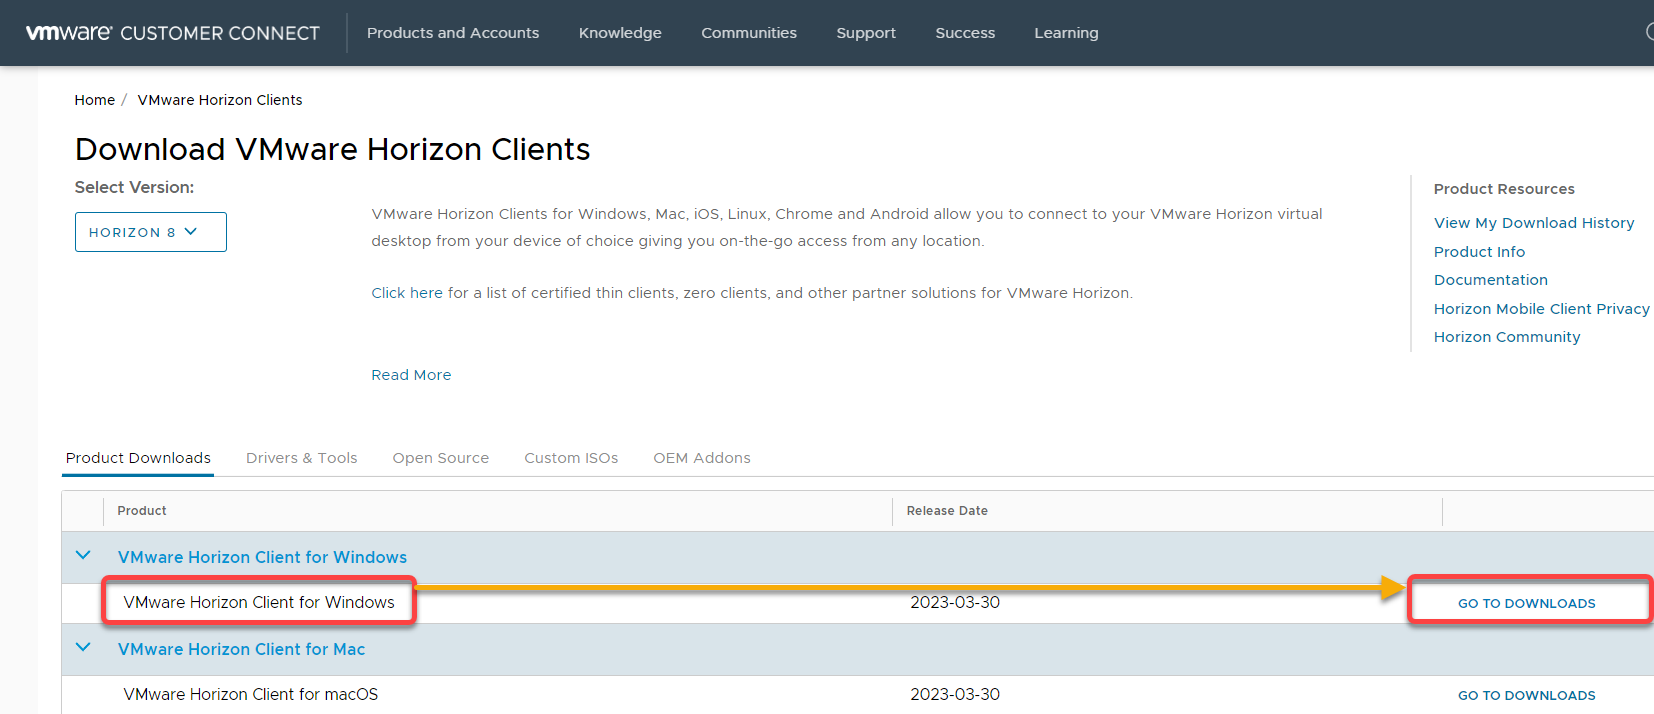
2. Next, look for VMware Horizon Client for Windows, and click GO TO DOWNLOADS.
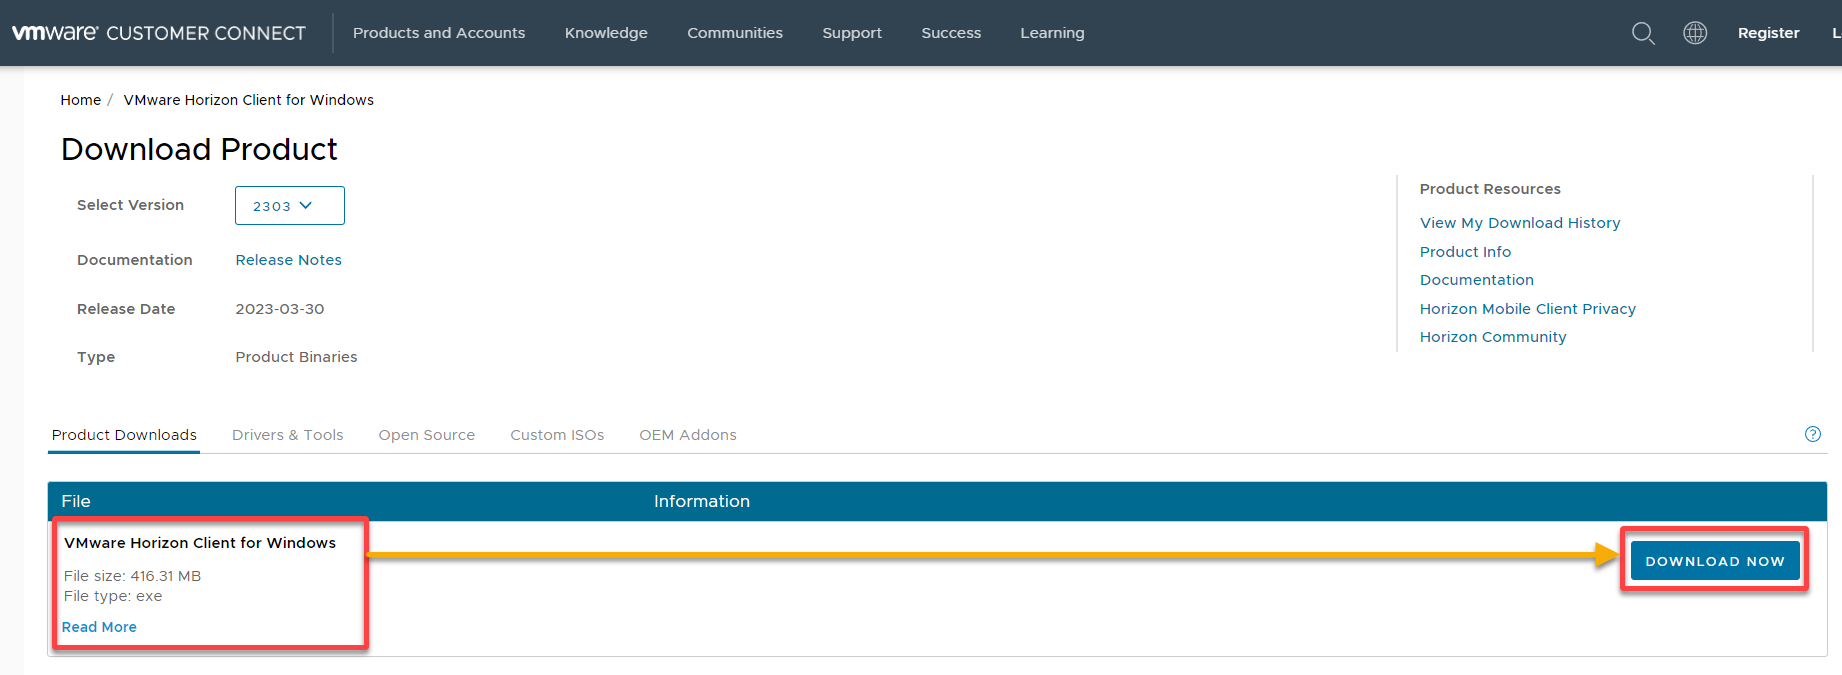
3. Look for VMware Horizon Client for Windows, and click DOWNLOAD NOW to download the installer.
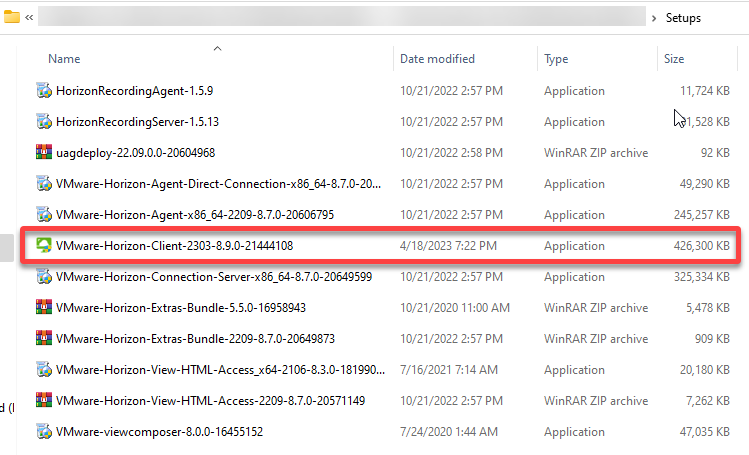
4. Now, run the VMware Horizon Client installer you downloaded.
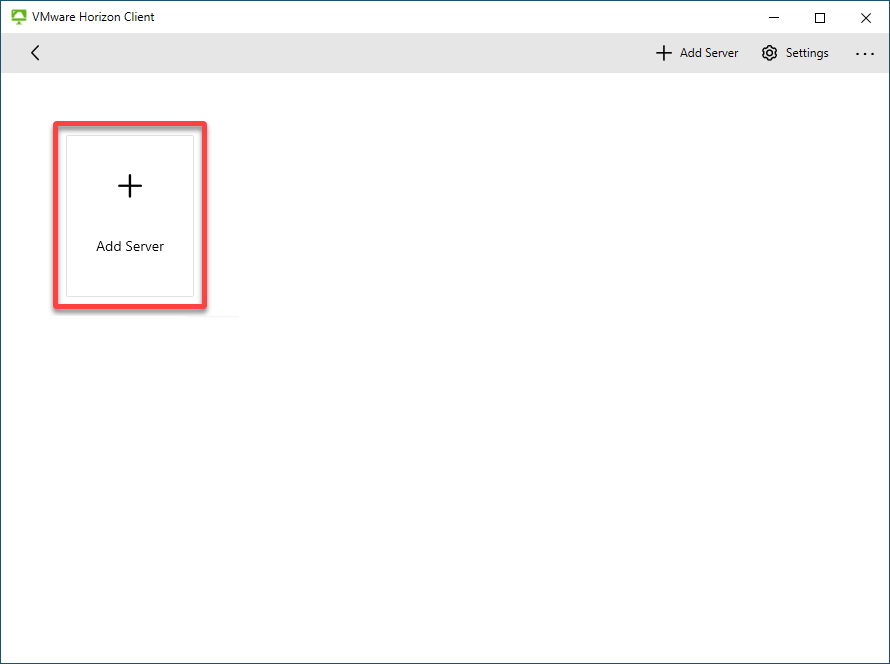
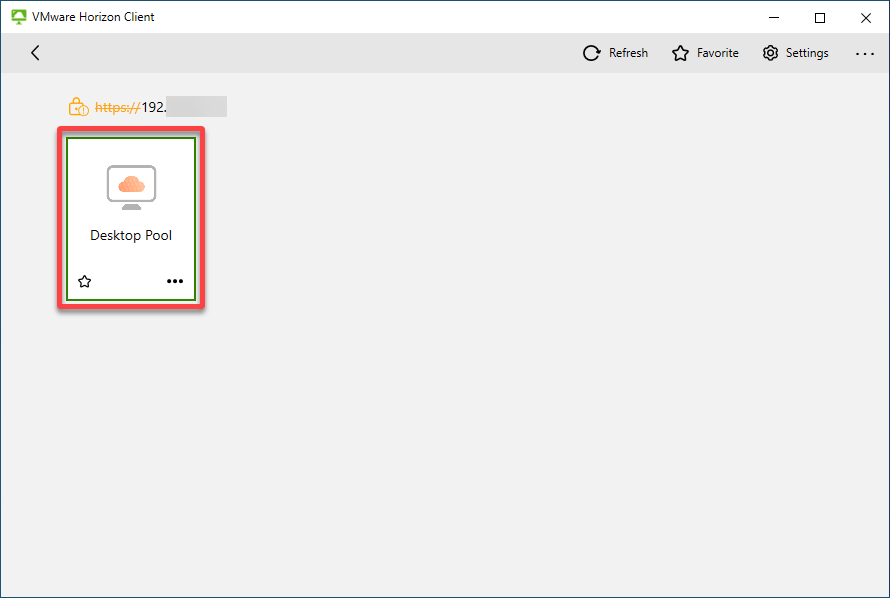
5. Once installed, launch the VMware Horizon Client, and click Add Server to initiate adding your Horizon Connection Server.
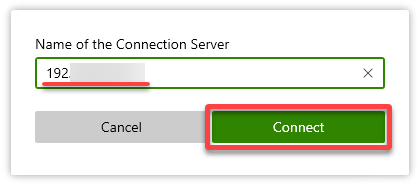
6. Next, provide the Horizon Connection Server IP address as the name of your VMware Horizon deployment.
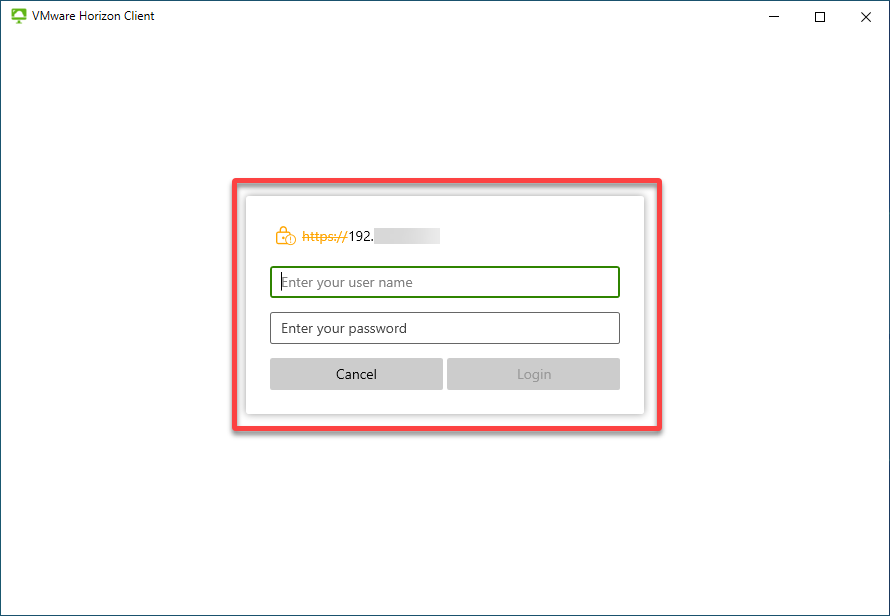
7. Provide your user credentials, and click Login to see all available virtual desktops or applications.
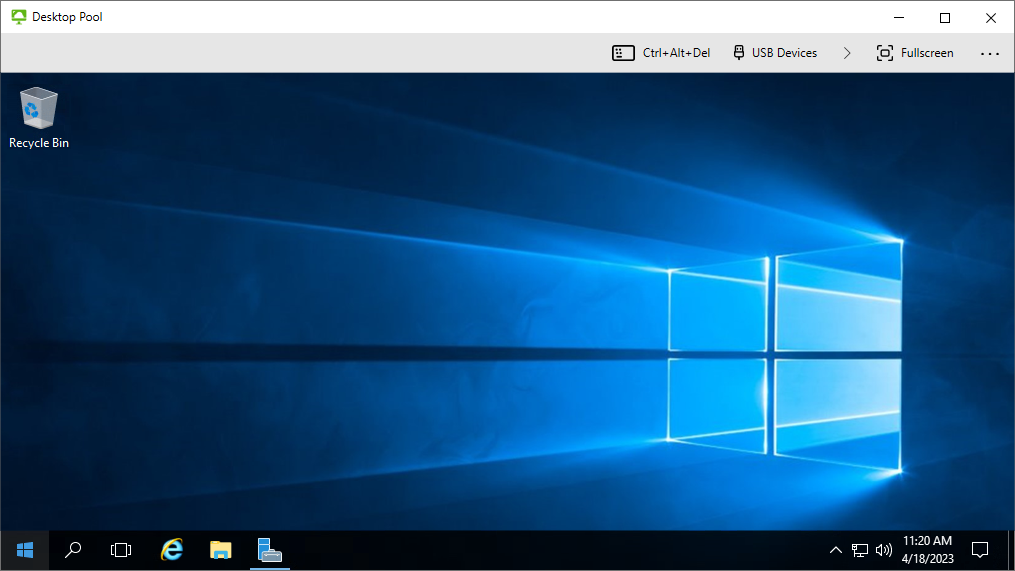
8. Double-click on the virtual desktop or application to establish a connection to your desktop pool.
If successful, you can access a virtual desktop like any physical desktop, as shown below.
Congratulations! You can now use your thin client to access your virtual desktop or application through VMware Horizon Client.
Conclusion
Virtualized desktops allow users to work from anywhere (with a stable internet connection), allowing companies to provide flexible work arrangements. And in this tutorial, you have learned to create virtualized desktops via a VMware VDI solution (VMware Horizon).
If you grant the proper user access, you can now confidently create and manage virtualized desktops without worrying about unauthorized access.
With this newfound knowledge, why not explore cloud-based VDI solutions where a third-party provider hosts the desktops and applications? With cloud-based VDI solutions, users can access desktops delivered as Desktop-as-a-Service (DaaS) over the internet.


