


You can educate users about using strong passwords but they’ll probably still do what’s easy for them — use weak passwords. Fortunately, you can prevent users from creating weak passwords by implementing Azure AD Password Protection.
In this article, you’ll learn how to enable and configure Azure AD Password Protection for your Azure AD tenant and on-premises AD. Also, learn what you can do with Azure AD Password Protection and about its limitations.
Would the Azure AD Password Protection features be enough or is there something better? Read on and find out!
This post is kindly sponsored by Specops Software.
Prerequisites
Should you plan to follow along with this tutorial, make sure to have the requirements in place as follows.
- On-premises Active Directory (AD) connected to Azure Active Directory via Azure AD Connect.
- A domain controller (DC) where you’ll install the Azure AD Password Protection DC Agent. This tutorial will be using a DC named phdc3.lzex.ml.
- A member server with internet access to install the Azure AD Password Protection Proxy Service. This tutorial will be using a member server named phprxy1.lzex.ml.
- Your servers must have the Universal C Runtime where applicable.
- You have a Global Administrator account role in Azure AD.
- You have domain administrator privileges on your on-premises AD.
- Download the required Azure AD Password Protection software from the Microsoft Download Center. Copy the AzureADPasswordProtectionProxySetup.msi file to the member server, and the AzureADPasswordProtectionDCAgentSetup.msi to the DC.
Installing and Configuring the Azure AD Password Protection Proxy Service
The Azure AD Password Protection Proxy Service is the first of the two components of Azure AD Password Protection. The Azure AD Password Protection Proxy Service role is to communicate with Azure AD and maintain a copy of the global and custom banned passwords list.
To install this Azure AD Password Protection Proxy Service, follow the below steps.
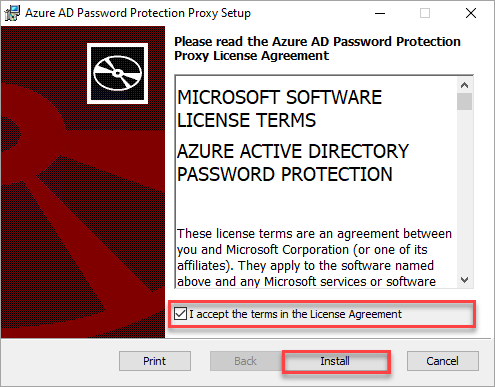
1. Login to the member server.
2. Locate and run the AzureADPasswordProtectionProxySetup.msi installer you downloaded.
3. On the Azure AD Password Protection Proxy Setup, check the I accept the terms in the License Agreement box and click Install.
4. Wait for the installation to complete and click Finish.
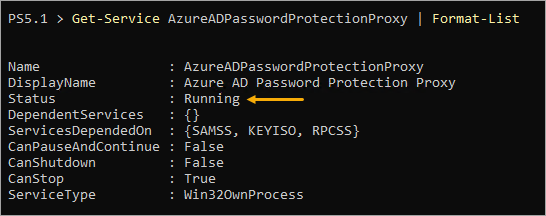
5. After the installation, verify that the AzureADPasswordProtectionProxy service status is running. To do so, open PowerShell as admin and run the command below.
Get-Service AzureADPasswordProtectionProxy | Format-ListThe image below confirms the AzureADPasswordProtectionProxy service is running.
6. Now that you’ve installed and confirmed the AzureADPasswordProtectionProxy service, you still need to register the proxy to Azure AD. To register the proxy service, run the command Register-AzureADPasswordProtectionProxy below in PowerShell.
Ensure that the -AccountUpn value is the Azure AD account with the Global admin role. This command will prompt you to enter the account credentials interactively.
Register-AzureADPasswordProtectionProxy -AccountUpn <UPN>7. Next, run the Register-AzureADPasswordProtectionForest command to register your on-premises AD forest with Azure AD. Similar to the previous command, the -AccountUpn value should also be the Global admin account.
Register-AzureADPasswordProtectionForest -AccountUpn <UPN>Installing the Azure AD Password Protection DC Agent
The final component to install is the Azure AD Password Protection DC Agent. This agent applies the filtering during password changes and is also responsible for requesting the password policy from Azure AD via the Azure AD Password Protection service.
Follow the instructions below to install the Azure AD Password Protection DC Agent.
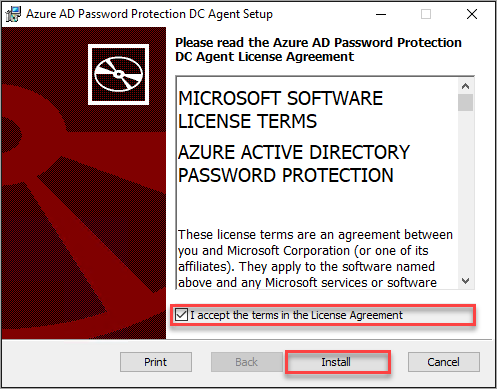
1. Login to the domain controller.
2. Locate and run the AzureADPasswordProtectionDCAgentSetup.msi installer you downloaded.
3. On the Azure AD Password Protection DC Agent Setup, check the I accept the terms in the License Agreement box and click Install.
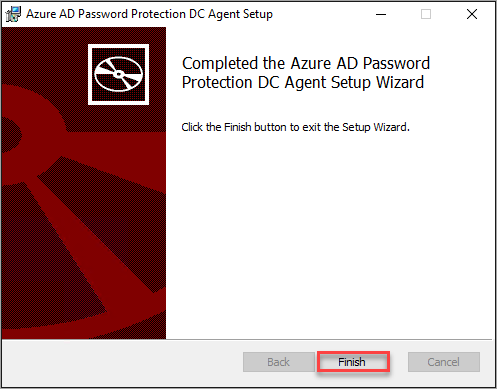
4. Wait for the installation to complete and click Finish.
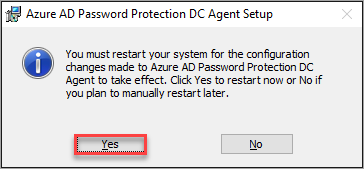
5. The Azure AD Password Protection DC Agent setup requires restarting the server. Click Yes to confirm.
There are no further configuration requirements to the Azure AD Password Protection DC Agent. After the restart, the DC agent initiates the download of the Azure AD password policy and repeats it every hour after that.
Configuring the Azure AD Password Protection Settings in the Azure Portal
After installing and configuring the Azure AD Password Protection on your on-prem servers, the next step is to configure the password protection settings in Azure AD. By default, the Azure AD Password Protection is in Audit mode — which does not enforce the banned passwords list.
To enable and configure Azure AD Password Protection, proceed as follows.
1. Log in to the Azure Active Directory admin center.
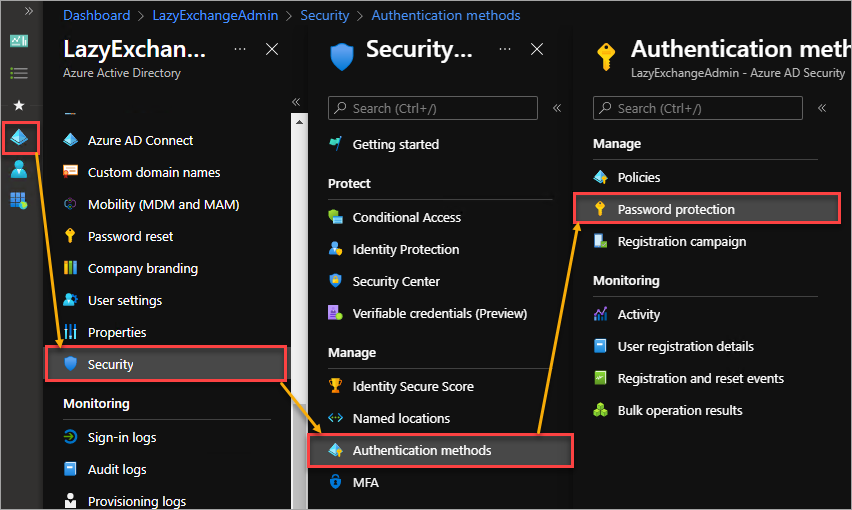
2. Next, click Azure Active Directory —> Security —> Authentication methods —> Password protection.
3. Leave the Lockout Threshold value to its default. This setting defines how many failed attempts a user had before locking out their account.
Leave the Lockout duration in seconds to its default. This value defines the initial lockout duration before the user can attempt another login.

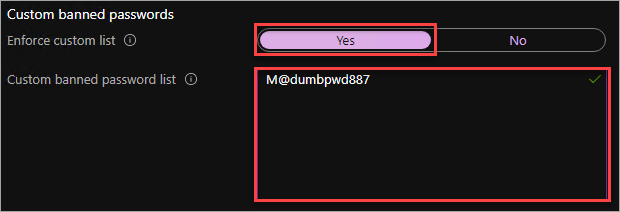
4. Under the Custom banned passwords section, set the Enforce custom list to Yes.
Enter one or more custom passwords you want to ban inside the Custom banned password list box.
The custom banned password list can contain up to 1000 entries, is case-insensitive, and automatically considers common character substitutions (i.e., “
p@ssw0rd” is also “password”).
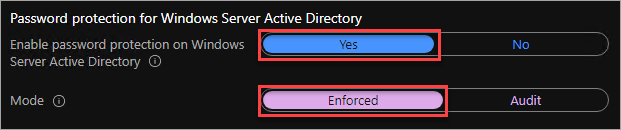
5. Under the Password protection for Windows Server Active Directory section, set the Enable password protection on Windows Server Active Directory to Yes and the Mode to Enforced.
6. Lastly, click Save at the top of the page to save the changes.

Checking the Azure AD Password Protection Status
The new password protection configuration takes effect almost immediately in Azure AD. But in the case of your on-premises AD, the new configuration may take a minimum of an hour. This delay is due to the DC agent’s regular update interval of one hour.
Follow these steps to confirm and force the Azure AD Password Protection policy enforcement.
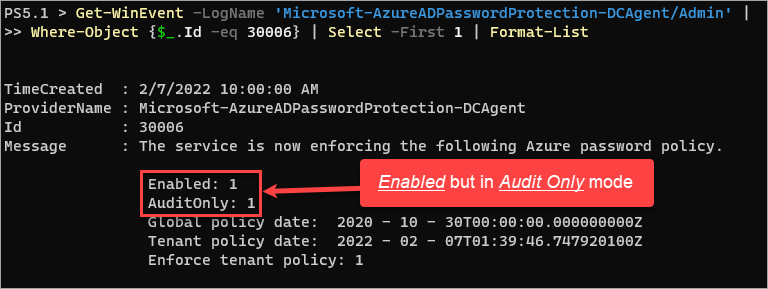
1. Retrieve the latest event ID 30006 on the DC to confirm the Azure AD password protection policy status.
Get-WinEvent -LogName 'Microsoft-AzureADPasswordProtection-DCAgent/Admin' |
Where-Object {$_.Id -eq 30006} | Select -First 1 | Format-List
The result below shows that the Azure AD password policy status is enabled (Enabled: 1) but still only in audit mode (AuditOnly: 1).
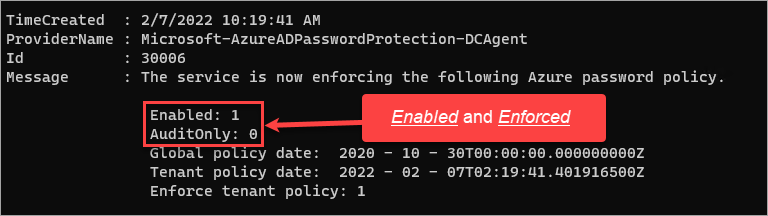
2. To force the Azure AD password protection policy update, restart the AzureADPasswordProtectionDCAgent service on the domain controller. This step will reload the DC agent filters and submit a request to download the latest Azure AD password policy via the proxy service.
Restart-Service AzureADPasswordProtectionDCAgent3. After restarting the AzureADPasswordProtectionDCAgent service, re-run the event lookup command in step 1. This time, you should see the value AuditOnly: 0, which means that the Azure AD password protection policy mode is now Enforced.
Testing the Azure AD Password Protection Policy
Now it is time to test the Azure AD Password protection to confirm that everything you did so far works. And there are two ways you can test and simulate the user experience when changing passwords.
Testing Password Change via Windows
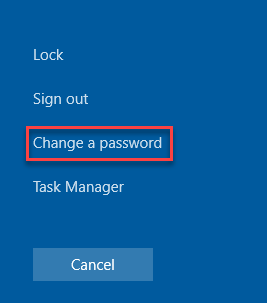
1. Initiate a password change on your domain-joined Windows computer by pressing CTRL+ALT+DEL (or CTRL+ALT+END if you’re on an RDP session) and clicking Change Password.
2. Type in your old password and the new password. The new password should be the banned password you added to the password policy. In this example, the password is M@dumbpwd887.
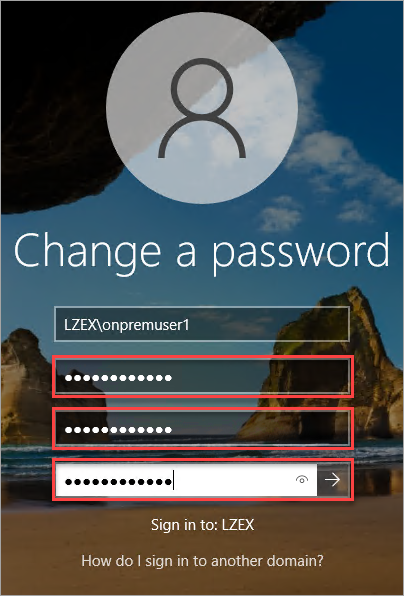
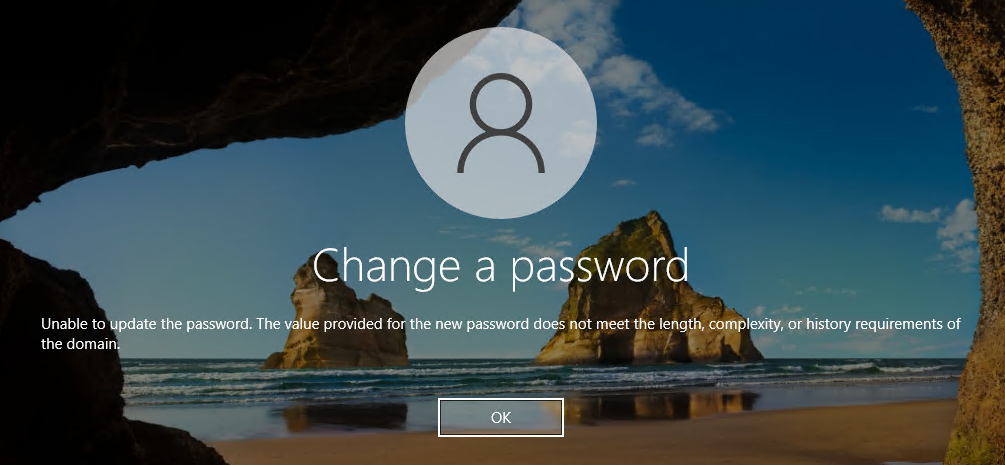
3. As a result, you should receive a message saying, “Unable to update the password. The value provided for the new password does not meet the length, complexity, or history requirements of the domain.”
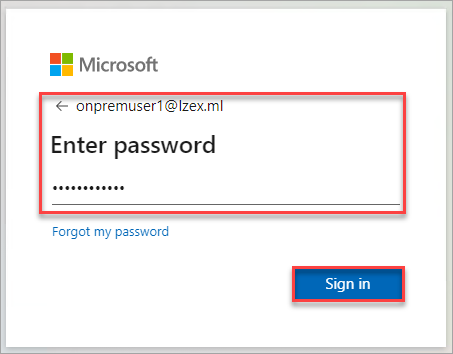
Testing Password Change via Azure AD
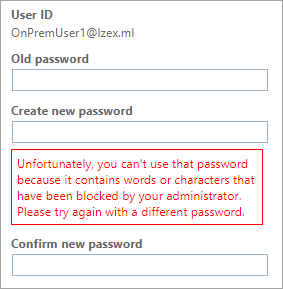
Open a browser, navigate to the Azure AD change password page, and sign with the current username and password.
On the Change password form, type the old password inside the Old password box. Next, type the new password in the Create new password and Confirm new password boxes, and click on Submit.
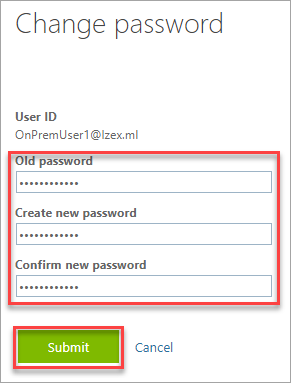
And because you entered a banned password as the new password, you will get the error message that says, “Unfortunately, you can’t use that password because it contains words or characters that have been blocked by your administrator. Please try again with a different password.”
Securing Passwords with Specops Password Policy
Implementing Azure AD Password Protection to your on-premises Active Directory domains is a significant step to increasing password security. But, a closer look would reveal that it falls short on some key features and has limited customization options.
User Experience
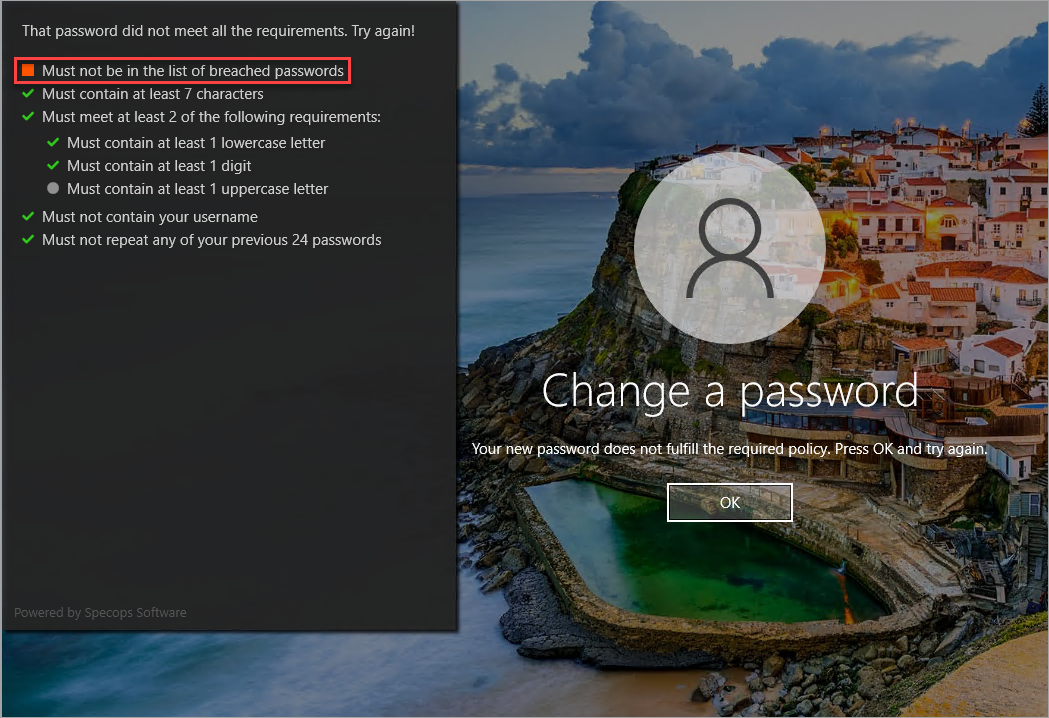
For example, changing to a banned password returns a generic message like the one below. Users would not know exactly why their attempts at changing their passwords fail. There’s no way for administrators to customize the message. This scenario potentially leads to more service desk calls.
“Unable to update the password. The value provided for the new password does not meet the length, complexity, or history requirements of the domain.”
On the other hand, Specops Password Policy (SPP) significantly improves user experience. Users see the dynamic evaluation of the password against the existing policy. This way, users understand what they need to submit a compliant password successfully. No more guessing.
Extensive Breached Password List
Regulatory and industry-standard recommendations like those from NIST and NCSC include using breached or known compromised password lists. Microsoft’s banned password list does not use such lists with Azure AD Password Protection.
Specops Password Policy provides access to a collection of over two billion compromised passwords and those found in real password attacks.
Custom Banned Password List
Microsoft’s custom banned password list has a 1000 entry limit. Perhaps this limit is more than enough for some organizations, but larger organizations can quickly reach this limit. Moreover, each entry is limited to a minimum of 4 characters long.
Specops Password Policy’s custom dictionary has no arbitrary limit on the number of entries you can add and with any length. Your banned password list may grow over the years at any rate and you wouldn’t worry about making way for more.
Conclusion
Azure AD Password Protection eliminates the use of weak passwords in your organization. But the lack of customization options and ignoring industry-standard and third-party breached password lists can be an issue and contribute to more password incident response efforts along the way.
In contrast, Specops Password Policy solves these issues and offers more benefits than Azure AD Password Protection has. Once you implement SPP, you can effectively replace Azure AD Password Protection and let SPP secure passwords on your on-prem or hybrid Azure AD environment.


