

Ever felt that nagging sense of uncertainty in the digital realm, wondering if your virtual fortress is truly secure? The fact is landscape evolves, and threats lurk. But don’t fret, keeping up-to-date with VMware patches lets you deal with the dynamic landscape of technology.
Think of this tutorial as your roadmap through the intricate journey of managing and applying VMware patches. Arm yourself with the knowledge and confidence to steer your virtual ship through the storms of the tech world.
Ready? The journey to an updated, secure, and high-performance virtual environment awaits!
Prerequisites
Before you proceed with the patching process, ensure you have the following in place:
- A VMware infrastructure running VMware vSphere, including one or more ESXi hosts.
- Administrative access to the vSphere Client or vSphere Web Client.
💡 The actual steps through this tutorial may vary slightly depending on the version of VMware vSphere and the vSphere Client or vSphere Web Client you’re using. Refer to the VMware documentation for detailed instructions specific to your environment.
- Veeam Backup & Replication software installed – This tutorial uses Veeam Backup & Replication version 9.5.
Identifying the VMware Patches and Reviewing the Release Notes
With the prerequisites met, you’ll ensure you stay abreast of the latest patches—akin to navigating a constantly evolving landscape. Identifying the right patches and thoroughly reviewing their release notes isn’t merely a routine administrative task; it’s a strategic imperative.
To identify the latest VMware Patches, follow these steps:
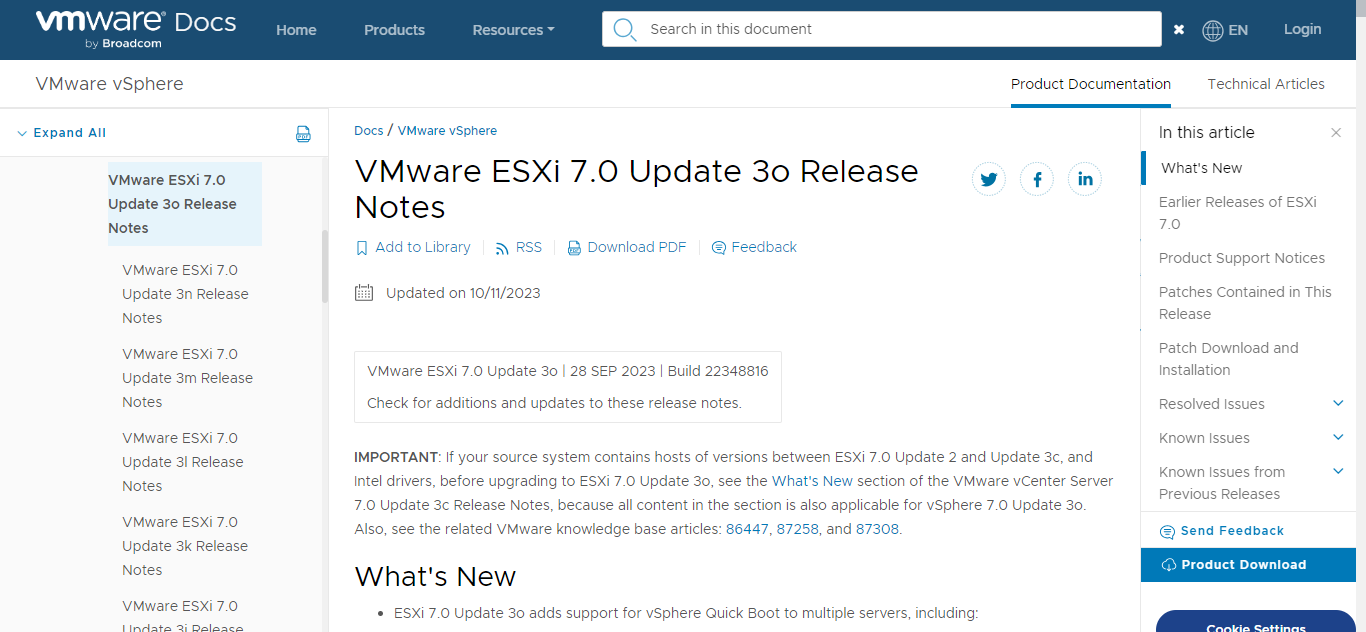
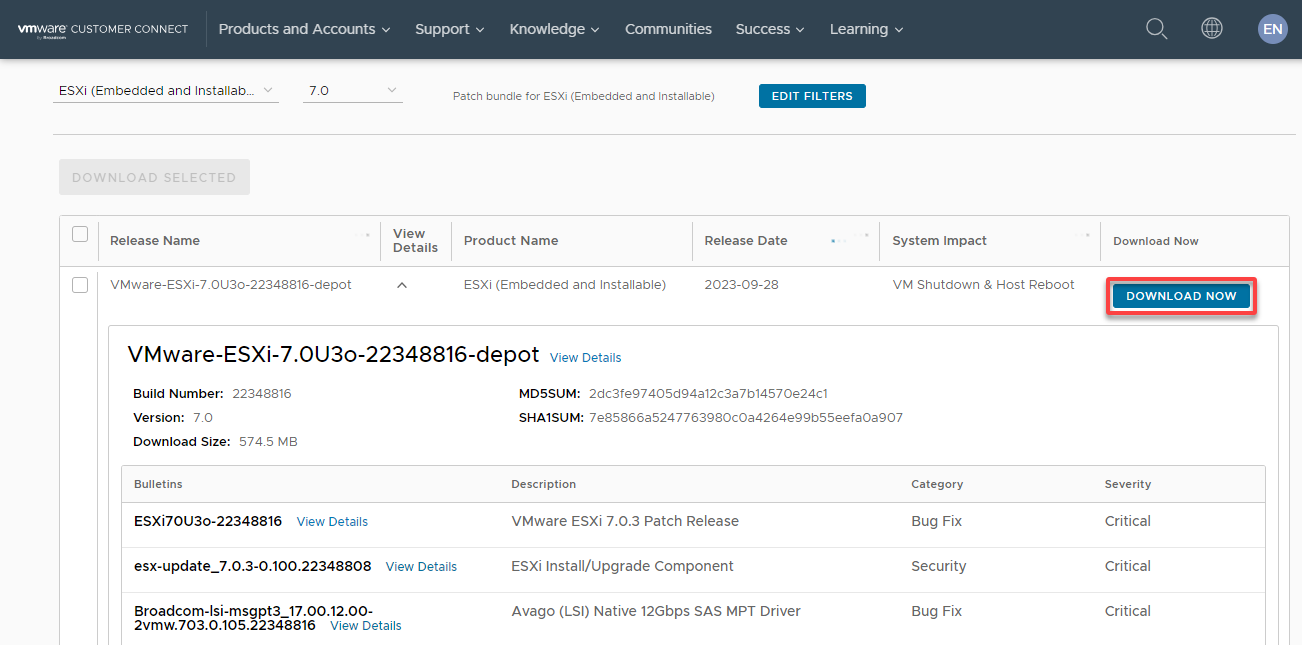
1. Launch your preferred web browser and navigate to the VMware patch download center.
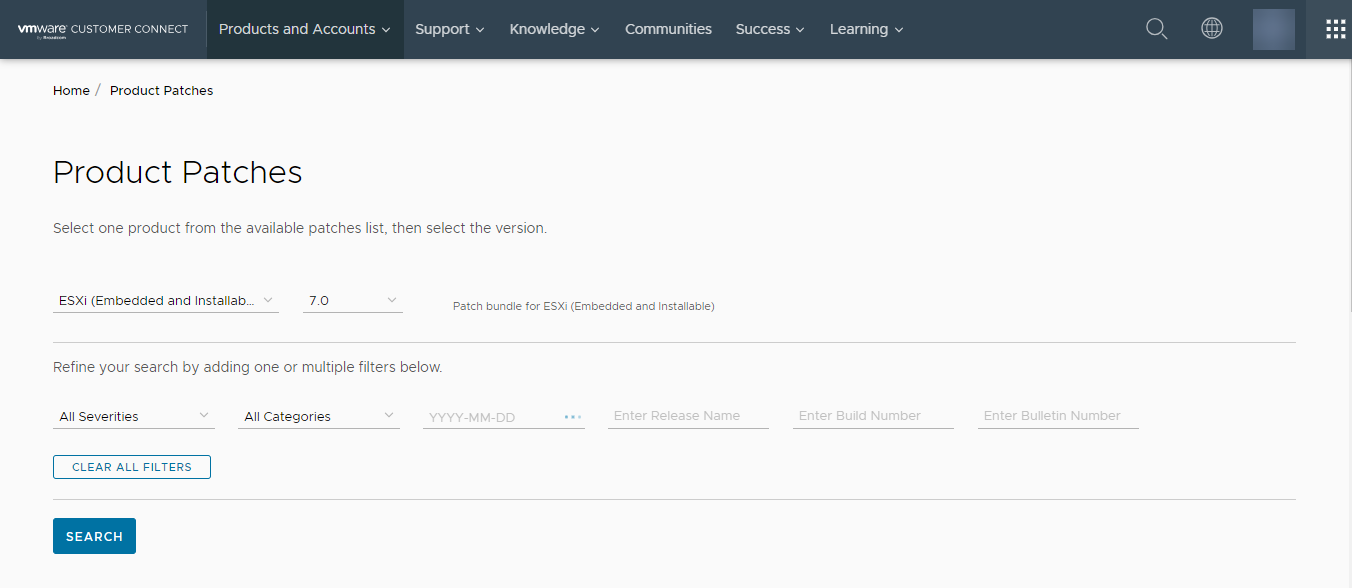
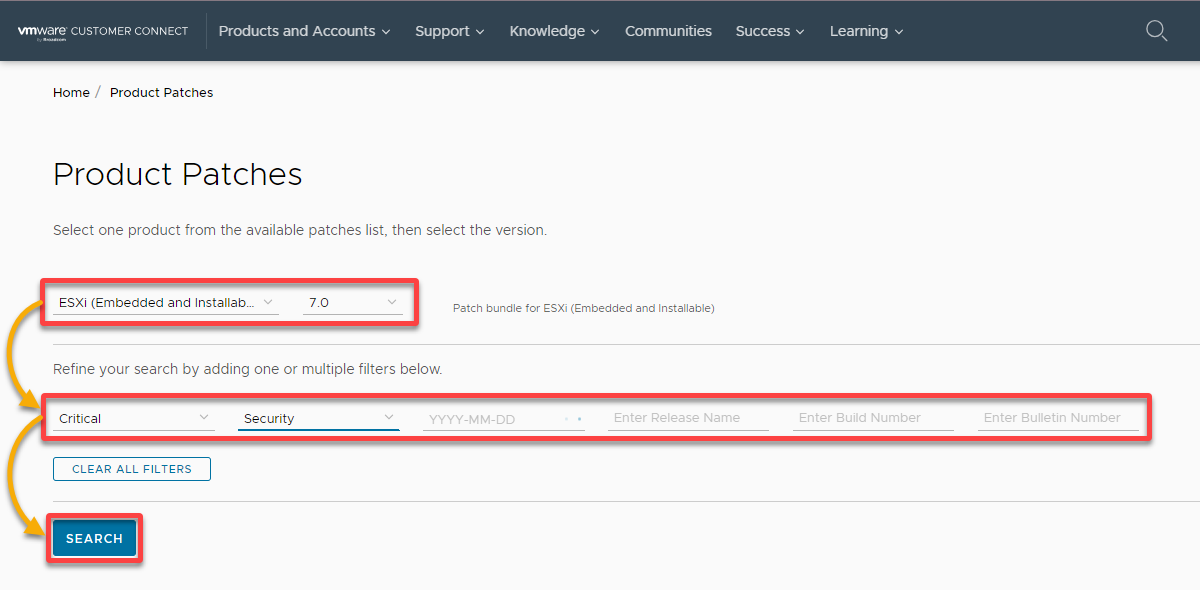
2. Next, select a product and its version from the dropdown fields, add one or multiple filters to refine your search for the latest patches applicable, and click SEARCH.
This example’s choice is searching for VMware patches of the ESXi host 7.0
3. Note the patch names and release dates, and click the View Details hyperlinks on the page to access the release notes.
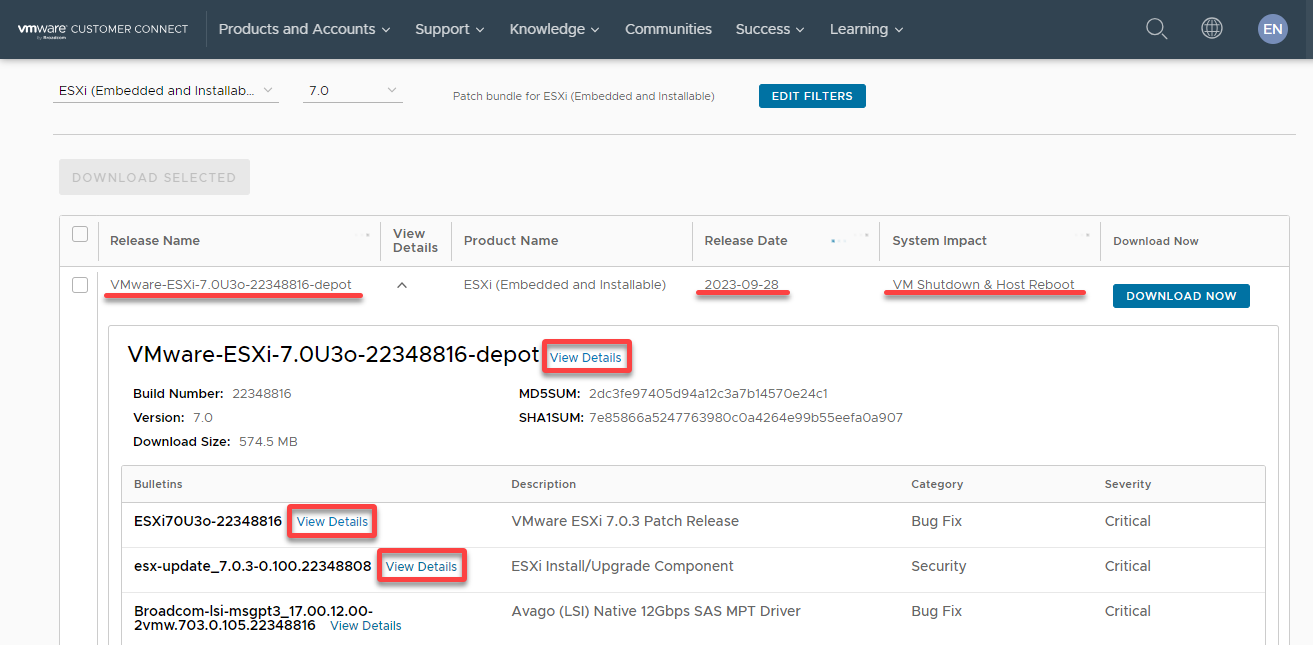
4. Now, read the release notes carefully and pay attention to the resolved and known issues and any special considerations.
VMware provides detailed release notes for each patch, including information on bug fixes, security enhancements, and any potential issues that might arise. Taking the time to review these notes ensures a smoother patching process.
Adding an ESXi Host to the Backup Infrastructure
Before proceeding with patching, you’ll need a safety net in case any issues arise during the patching process— backing up your VMware environment. But first, you must add a new server to your backup infrastructure.
In this example, you’ll use Veeam Backup & Replication, a popular solution for backing up virtualized environments, including VMware vSphere/ESXi hosts.
1. To add a server to your backup infrastructure, complete the steps below:
2. Next, navigate to Backup Infrastructure (left-hand pane) under the SERVER ribbon tab, and click ADD SERVER. A dialog box appears (step three) where you’ll choose the server type to add to your backup infrastructure.
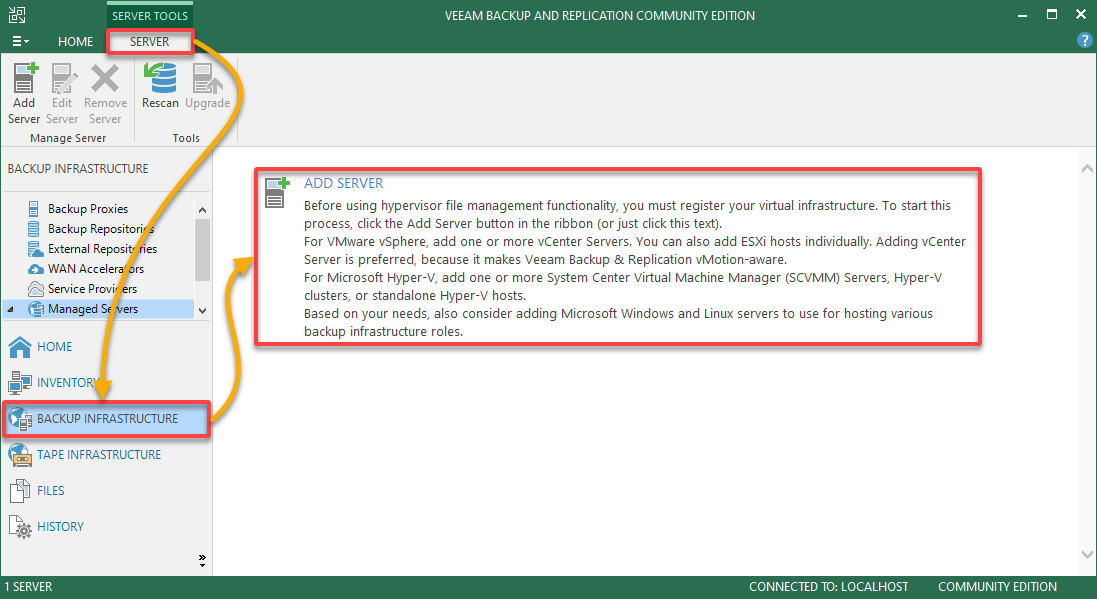
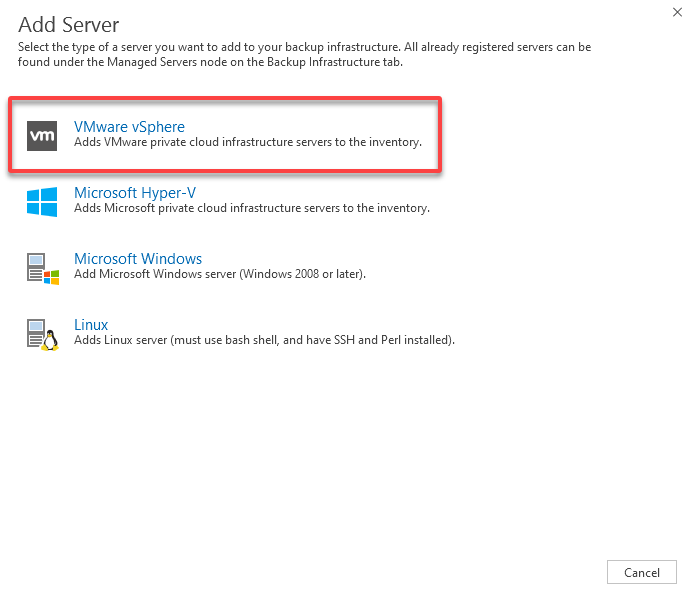
3. In the Add Server wizard, click on VMware vSphere to establish a connection between Veeam Backup & Replication and your VMware vSphere environment.
This process paves the way for seamless backup, replication, and management of your virtualized infrastructure.
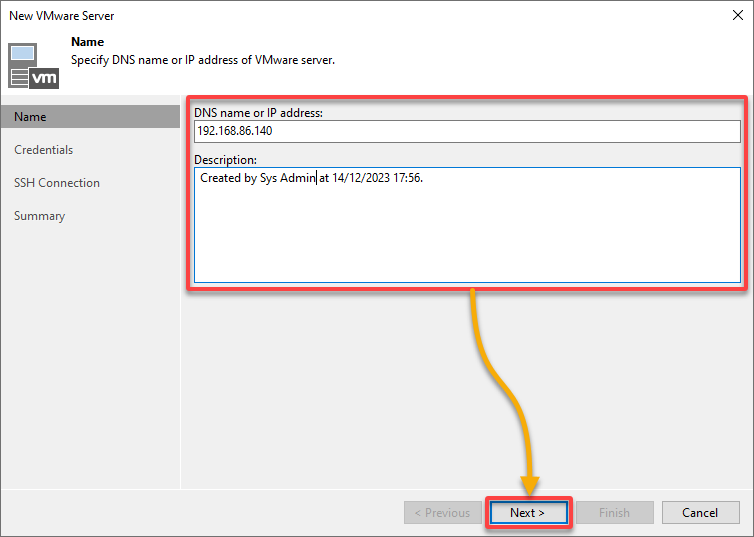
4. Now, provide a DNS name (hostname) or IP address and an optional Description for your vSphere/ESXi host server, and click Next.
This page lets you specify the connection details of your ESXi host to backup.
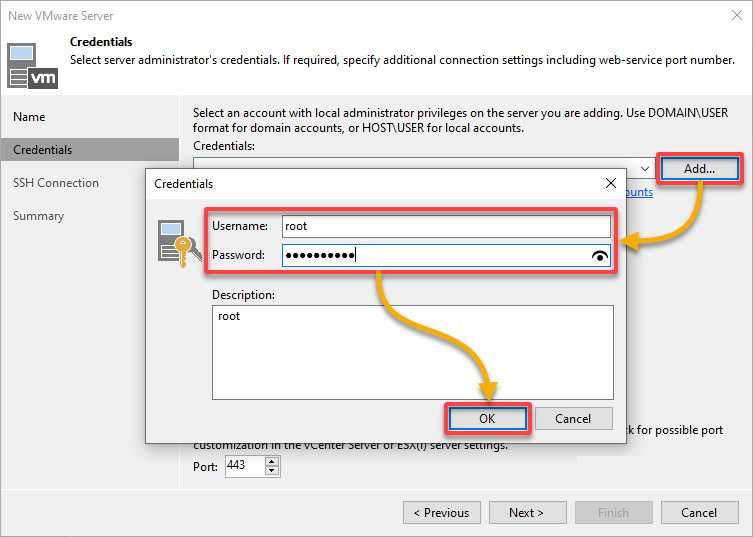
5. Configure the service account’s credentials as follows:
- Click Add (rightmost) on the Credentials page, which opens the Credentials dialog box.
- Provide the Username and Password of your account with the required permissions to access and manage the VMware vSphere or ESXi host, and click OK.
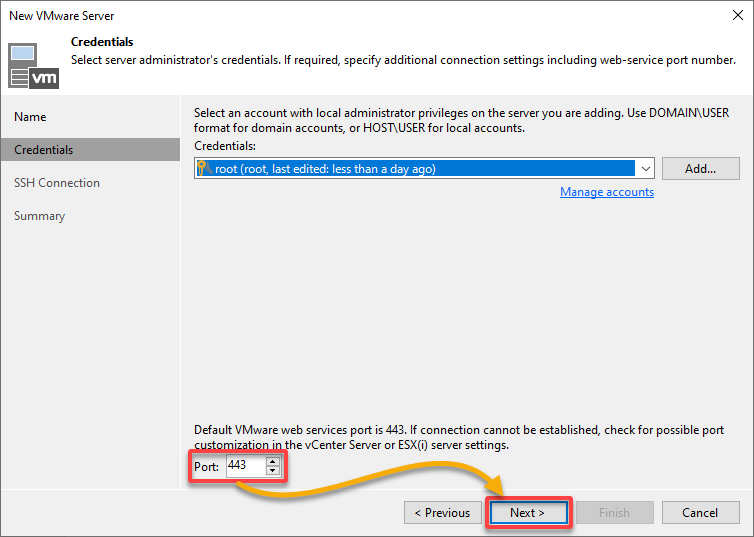
6. With the service account set, specify a port if different from the default (443), and click Next > to continue.
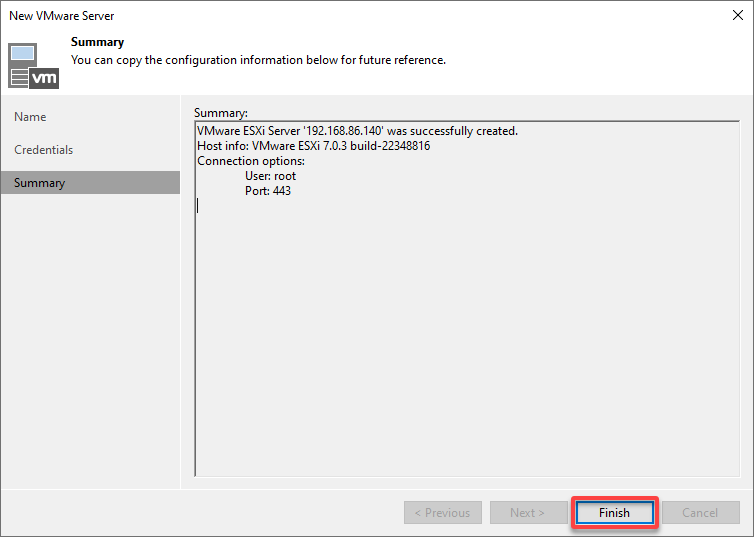
7. Review the summary of your settings, and click Finish to complete adding the new server.
8. Further, create and run a backup job for your ESXi host.
Putting the Host Into Maintenance Mode
With your VMware environment backed up, you now focus on ensuring a smooth patching process and minimizing disruption, putting your ESXi host into maintenance mode.
This mode migrates all VMs from the host to other hosts in the cluster, minimizing downtime during the patching process.
To put your host into maintenance mode, carry out the following:
1. Open the vSphere Client or vSphere Web Client and log in to your vCenter Server.
2. Put your ESXi host into maintenance mode as follows:
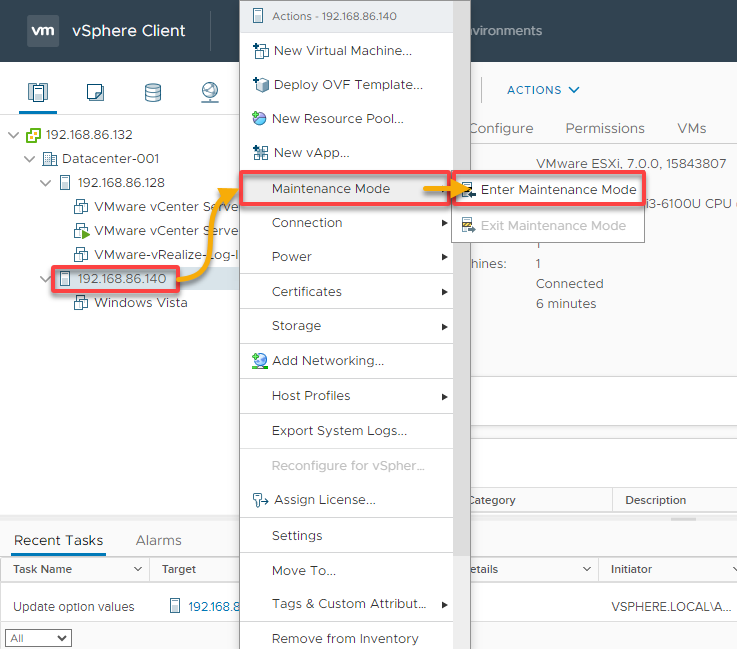
- Navigate to the Hosts and Clusters view (left-hand pane), and select the ESXi host (i.e., 192.168.86.140, in this case) you want to patch.
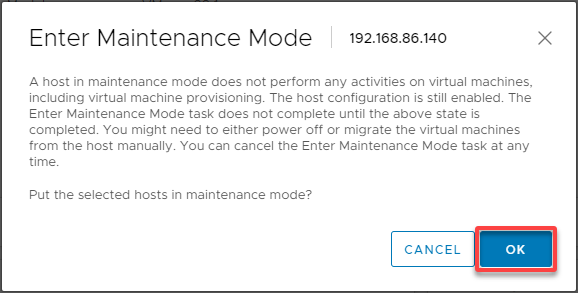
- Right click your host, hover Maintenance Mode, and choose Enter Maintenance Mode to initiate putting your host into maintenance mode.
3. Click OK when prompted, as shown below, to confirm entering the maintenance mode.
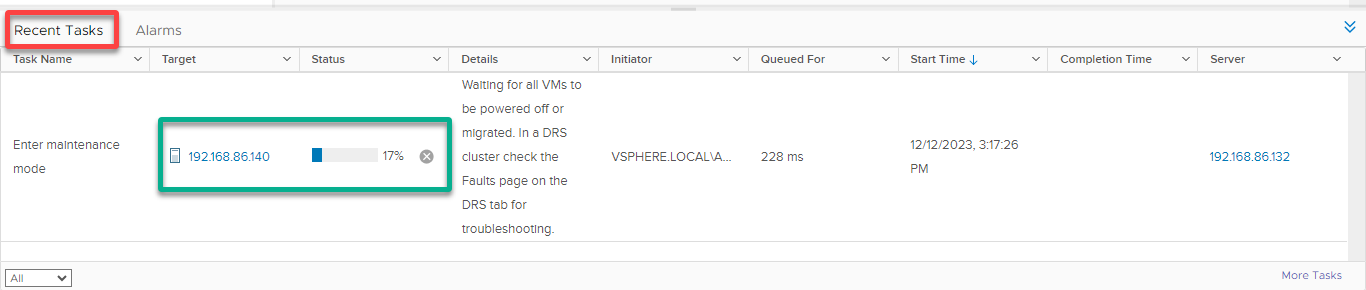
4. Now, monitor the progress of entering maintenance mode in the Recent Tasks pane at the bottom of the vSphere Client.
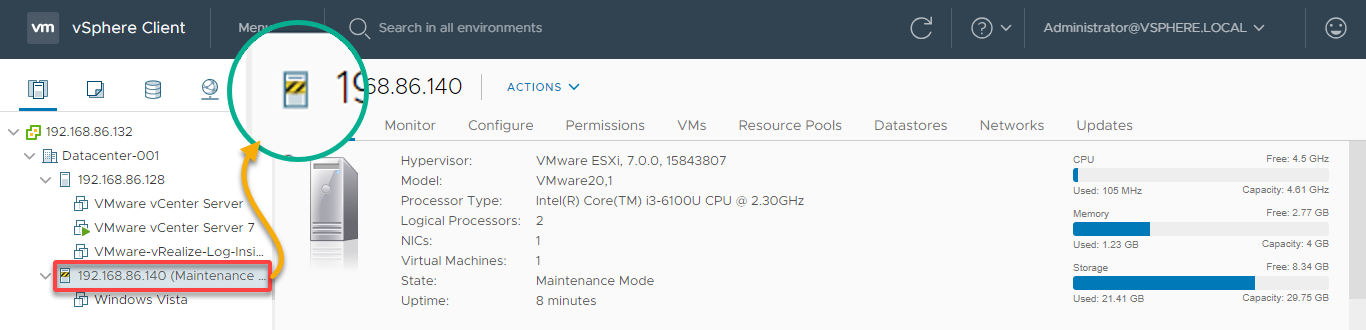
5. Once the operation is complete, check the host’s status in the Hosts and Clusters view to verify the host is in maintenance mode based on the host icon, as shown below.
Importing VMware Patches to a Baseline
Now that you’ve set up your virtual environment, you must ensure the cool updates and fixes seamlessly blend into the tech tapestry of your system. You’ll import VMware patches to a baseline – like giving your virtual space a tune-up for peak performance.
Think of a baseline as your set of golden rules, the criteria that help you determine if your software components, like patches, play by the proper standards within your VMware environment.
To import VMware patches to a baseline, proceed with these steps:
1. Download the required patches from the VMware patch download center.
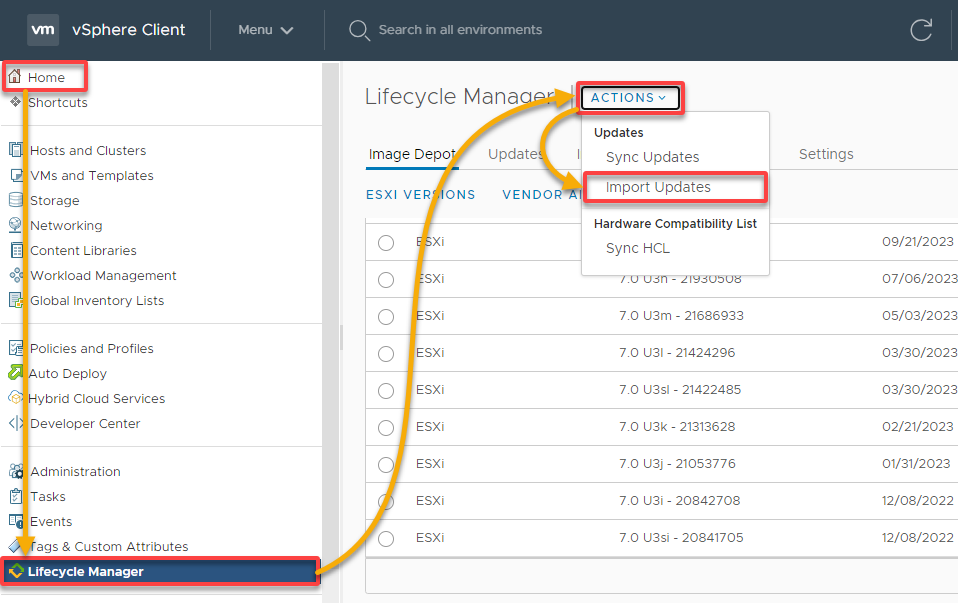
2. On the vCenter Server, navigate to Home → Lifecycle Manager (left-pane), click the ACTIONS dropdown button in the Lifecycle Manager, and choose Import Updates.
This action indicates to the vSphere Lifecycle Manager (vLCM) that you’re importing updates, like patches, into the system.
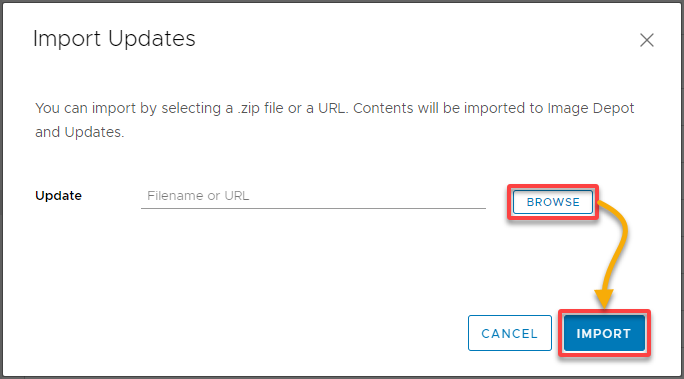
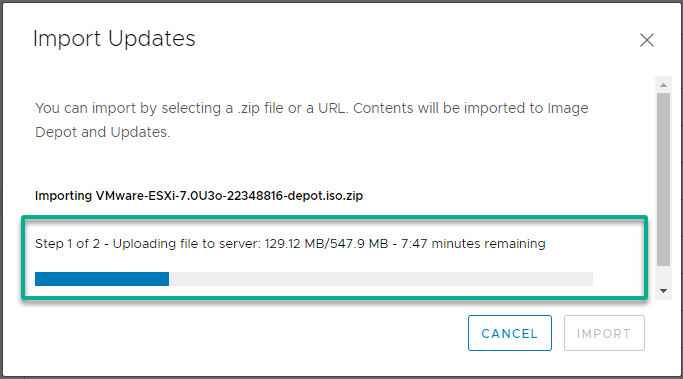
3. Now, select the ESXi patch file you downloaded in step one, and click IMPORT to confirm importing the ESXi patch.
Wait until your patch file has been imported.
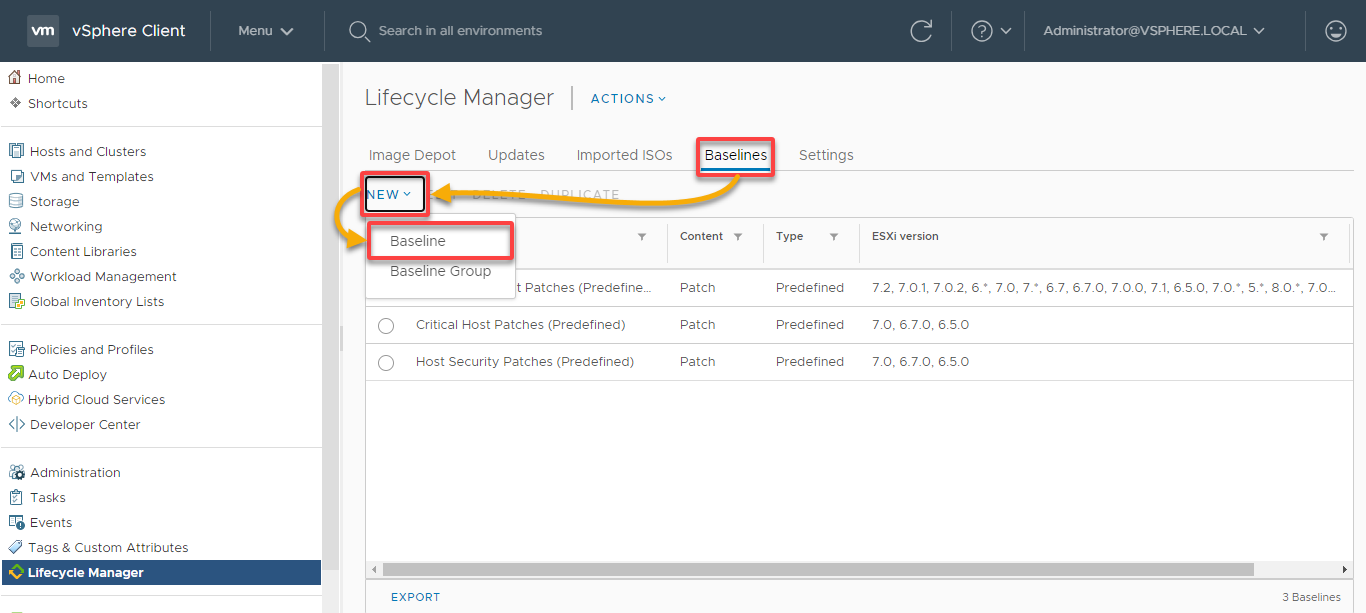
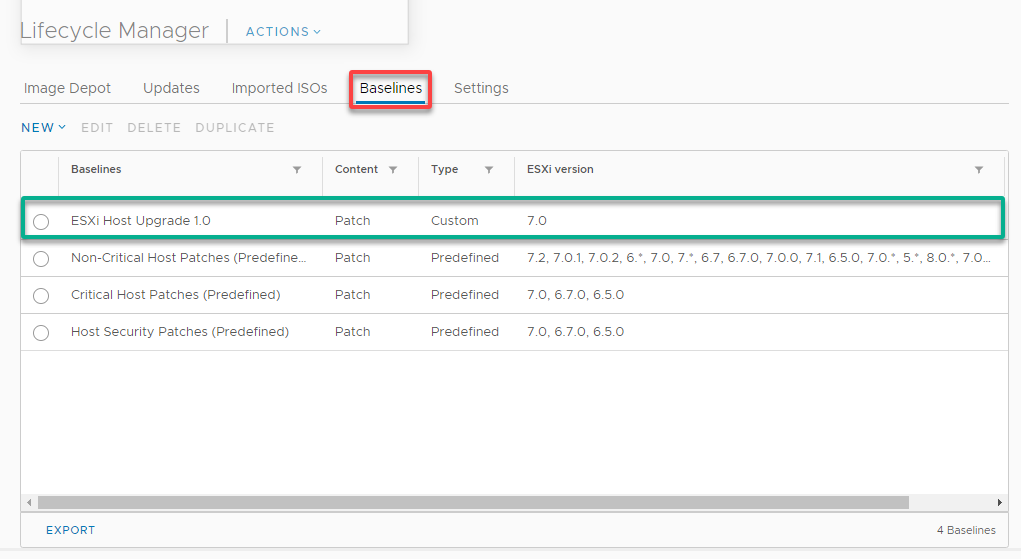
4. With the patch imported, navigate to the Baselines tab on the Lifecycle Manager page, click the NEW dropdown button, and choose Baseline to create a baseline.
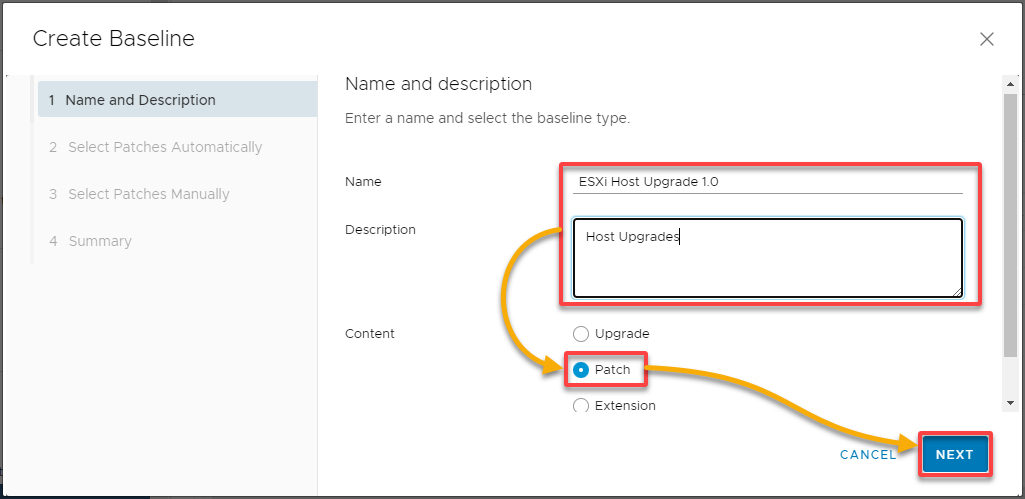
5. In the Create Baseline wizard, configure the baseline name and description as follows:
- Provide a descriptive baseline Name and Description.
- Select the type as Patch since you’re creating a baseline for ESXi host patches.
- Once configured, click NEXT to continue.
6. Next, specify settings such as Patch vendor, Product, Severity, and other criteria based on your requirements.
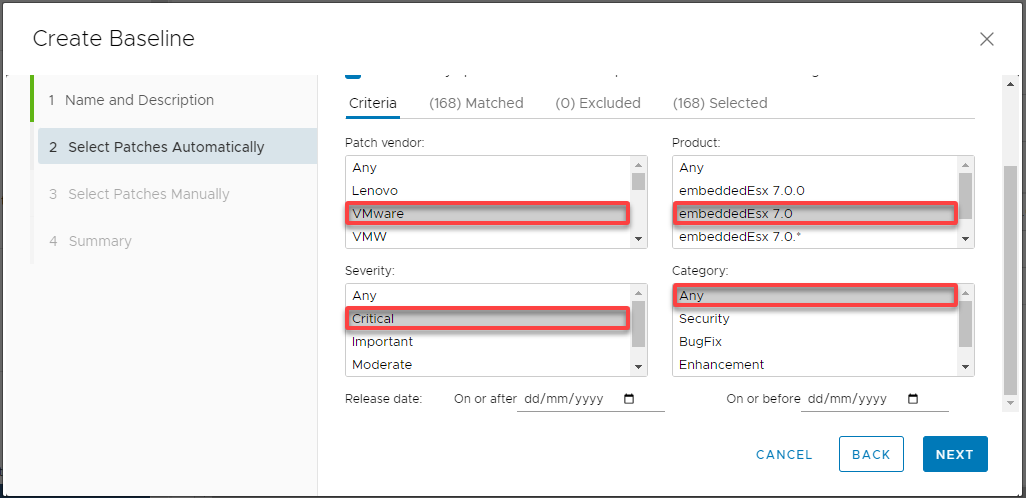
7. Under the Matched tab, choose the patches you want to include in the baseline and click NEXT.

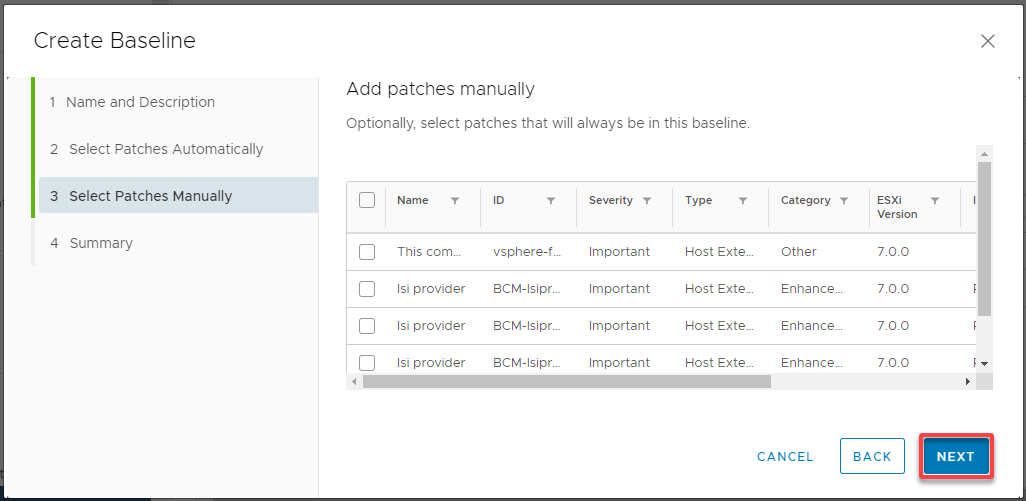
8. Select additional patches manually depending on your requirements, and click Next to proceed.
9. Review the baseline summary and click FINISH to finalize creating your baseline.
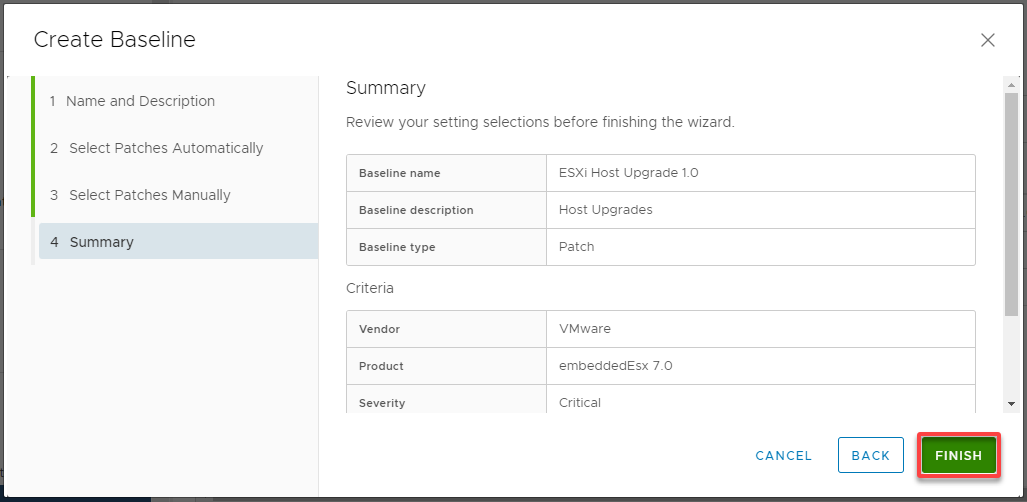
The newly created baseline can be found in the Baselines tab of the Lifecycle Manager, as shown below.
Attaching the Baseline to the Host
Coming off the heels of creating a baseline, you’ll now step into seamlessly weaving the patches within that baseline into the fabric of your virtual world.
Attaching the baseline to your host is like plugging in your upgraded system directly into the power source – ensuring your updates are where they need to be.
To attach the baseline to your host, execute the following:
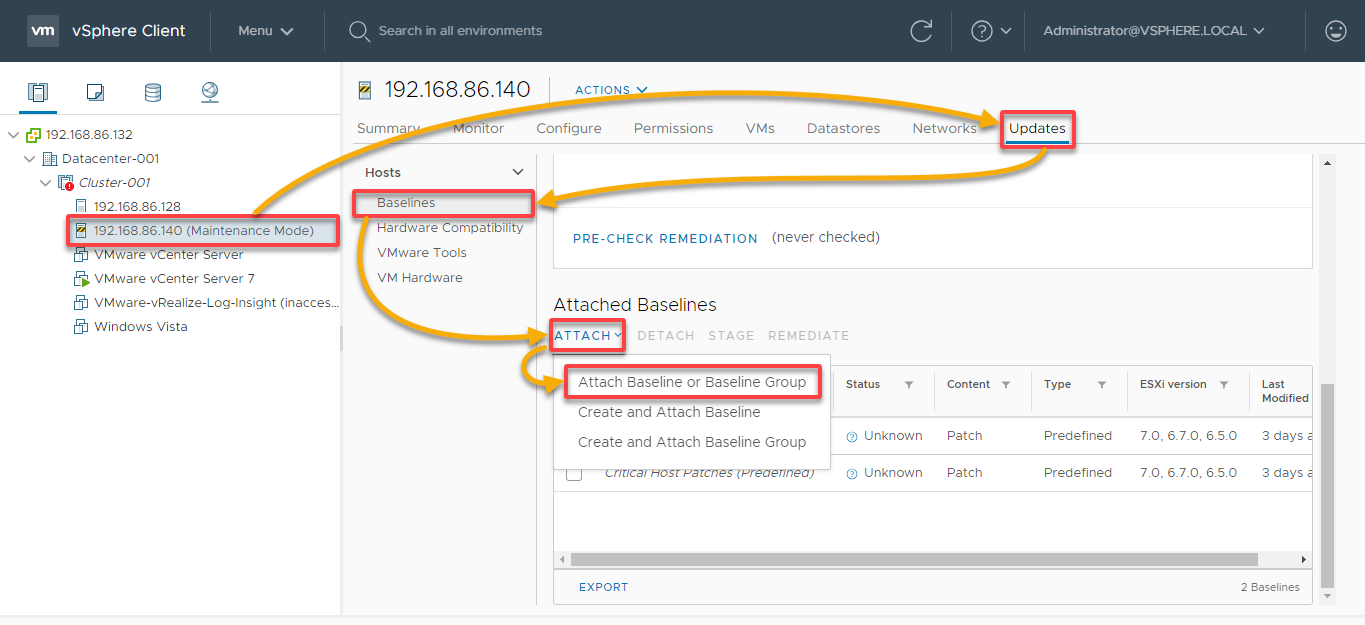
1. In your vSphere Client, initiate attaching a baseline as follows:
- Select your host (i.e., 192.168.86.140) to patch (left-hand pane) to access its information page.
- Access the Updates tab (right-hand pane) and navigate to Baselines under the Host section.
- Scroll down to the Attached Baselines section, click the ATTACH dropdown, and choose Attach Baseline or Baseline Group.
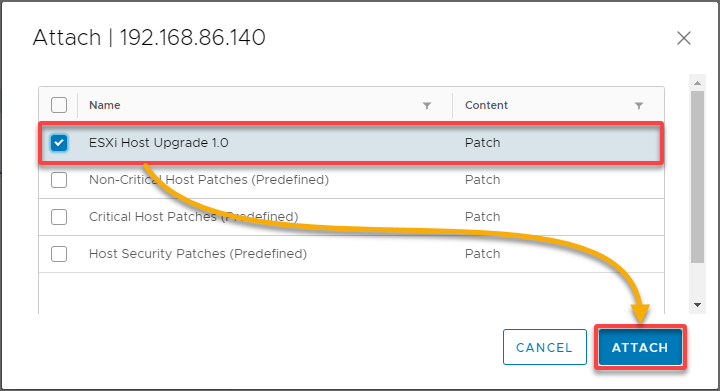
2. Next, select the custom upgrade baseline you created earlier and click ATTACH to initiate attaching a baseline to your ESXi host.
This process ensures your host is up-to-date with the specified patches and updates according to your selected baseline.
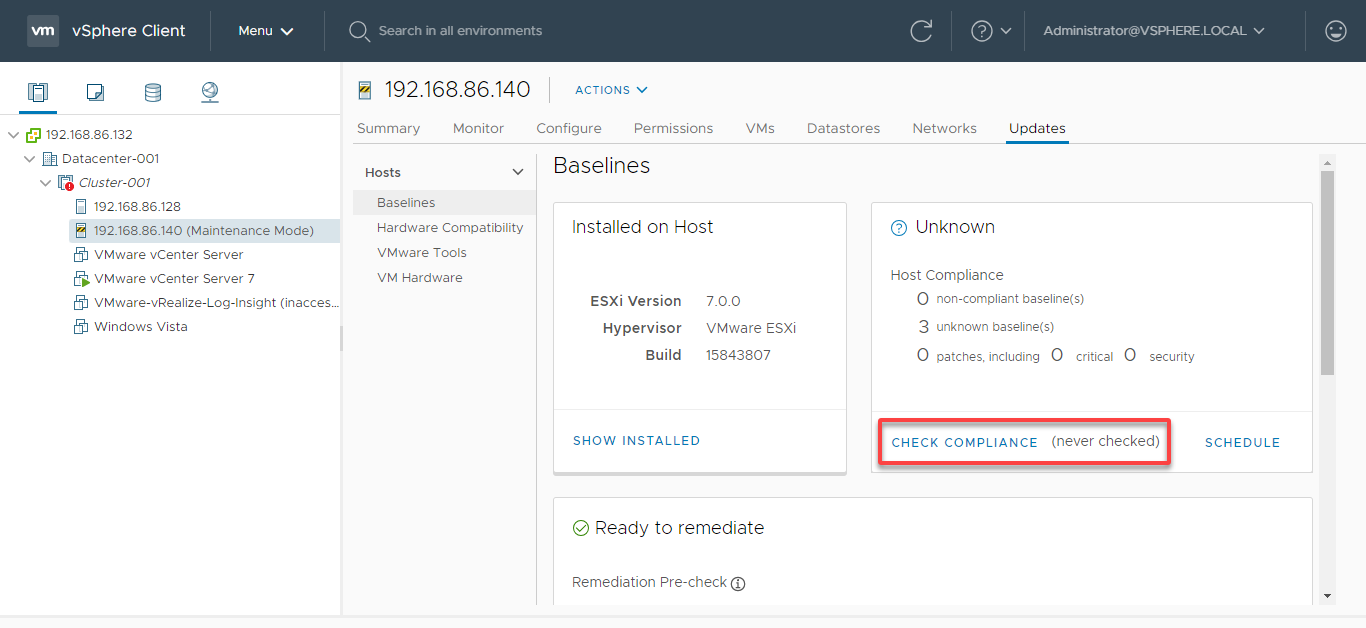
3. Look for the Host Compliance section, and click CHECK COMPLIANCE. Doing so initiates a comprehensive assessment of your attached baseline against the current state of your host.
VMware Update Manager will notify you if there’s a conflict between your update and baseline.
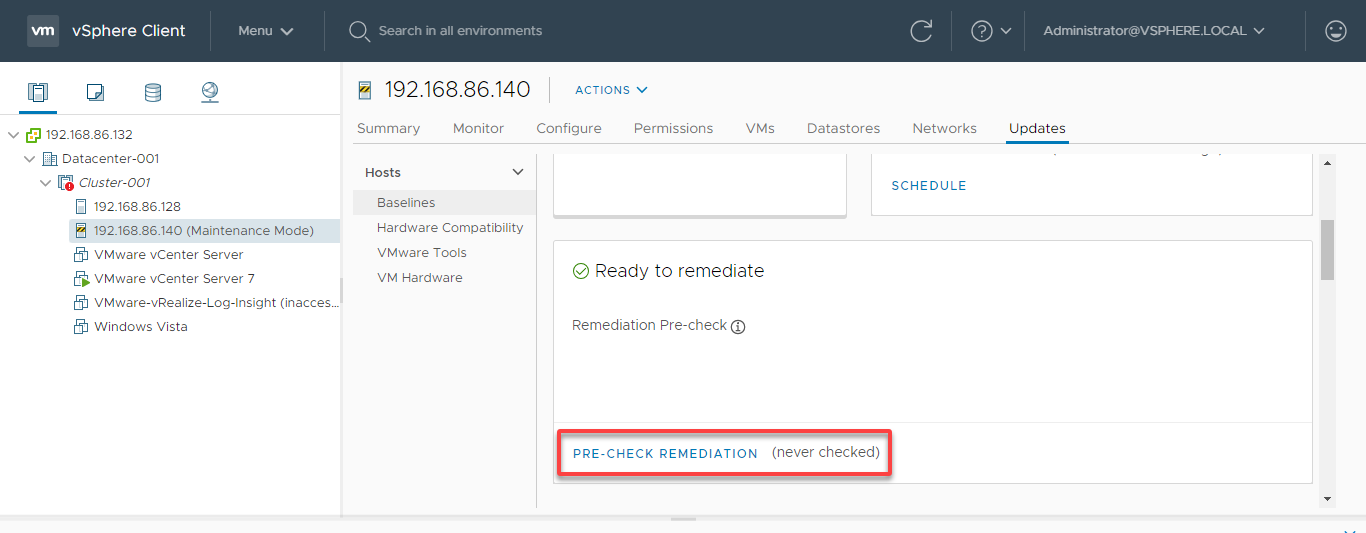
4. After checking compliance, click PRE-CHECK REMEDIATION in the Ready to remediate section, and wait until the pre-check remediation is finished.
Pre-check remediation involves scanning the hosts to determine their current patch levels and assessing the compatibility of the proposed patches.
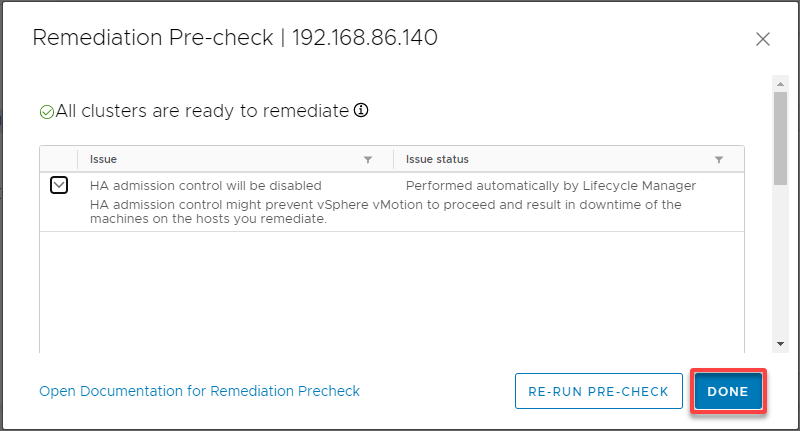
5. If you receive any warnings, apply the recommended actions to fix the issues and click DONE to proceed.
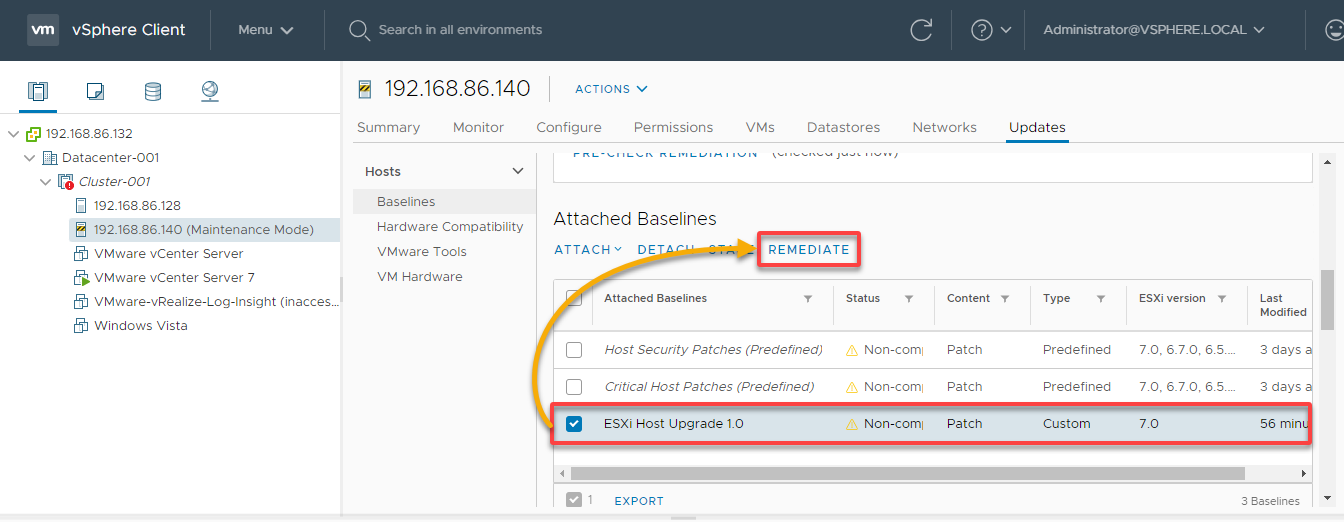
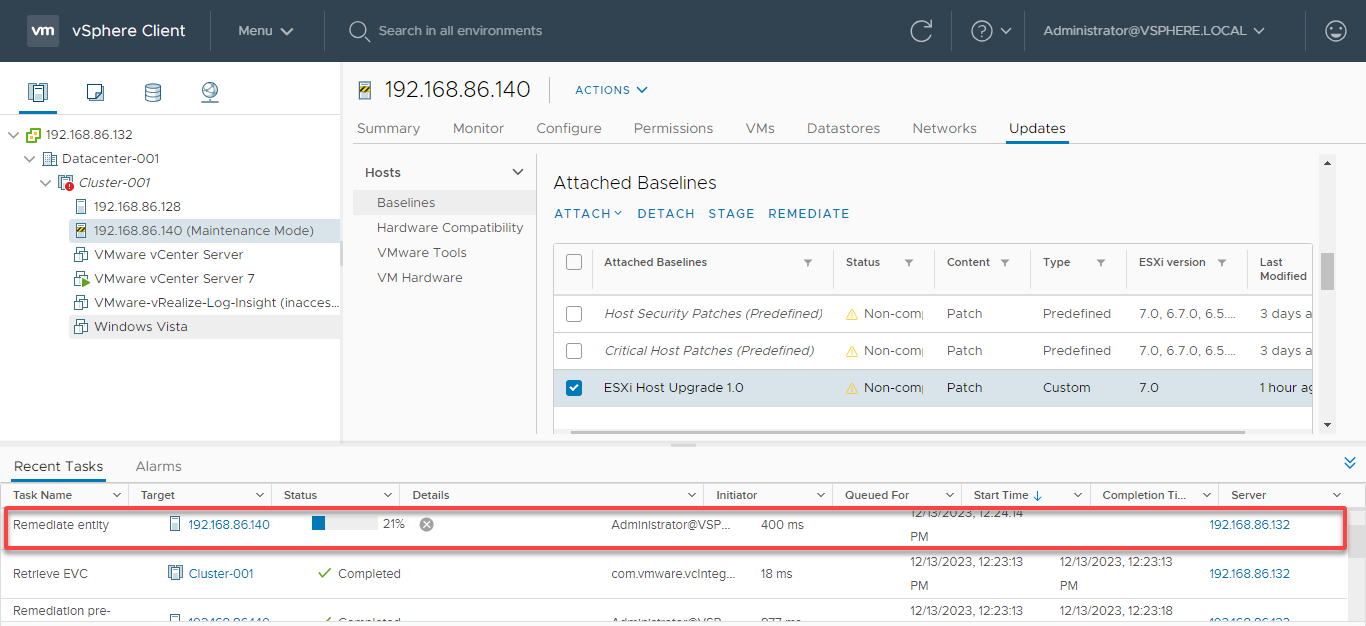
6. Select your attached baseline in the Attached Baselines section and click REMEDIATE to initiate the remediating process.
7. In the Remediate wizard that appears, review the summary information, then click REMEDIATE to start the remediation process.
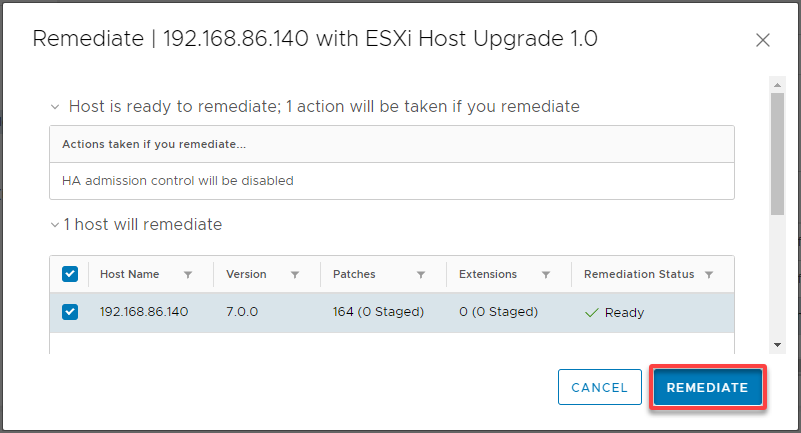
8. Monitor the remediation progress in the Recent Tasks pane. This process may involve host reboots, so plan accordingly.
Verifying the Patch Installation and System Functionality
With your baseline attached and patches applied, you must establish that the updates are in place and firing on all cylinders within your VMware environment. You’ll verify your patch installation is successful and ensure the continued functionality of your VMware environment.
To verify your patch installation and functionality, proceed with the following:
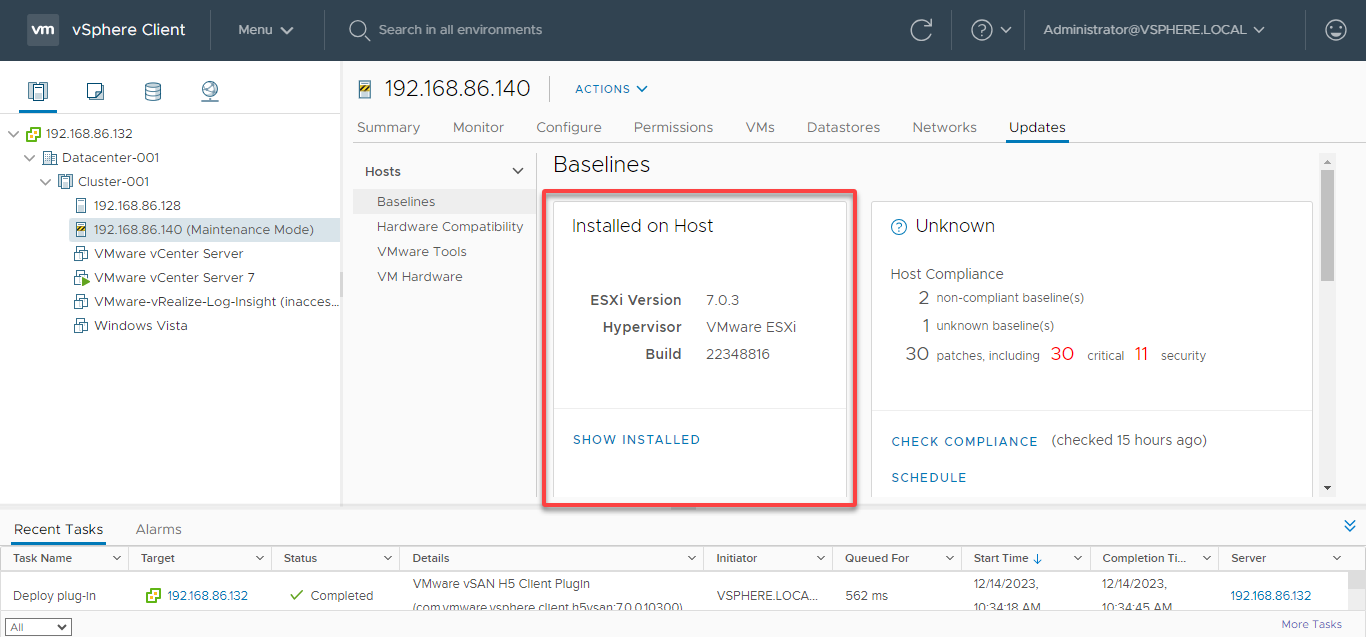
1. On the Baselines page, check the ESXi version and build, as shown below, to confirm they match the expected information after applying the patches.
2. Monitor the system for any abnormal behavior or performance issues.
By thoroughly testing the patched environment, you can promptly identify and address any issues, ensuring your VMware infrastructure’s smooth operation.
3. Finally, right-click on the host you previously put into maintenance mode, hover Maintenance Mode in the context menu, and choose Exit Maintenance Mode.
Since you’ve verified the successful patch installation and ensured the functionality of your VMware environment, you can exit maintenance mode. You can then repeat the patching process for your other ESXi hosts.

Conclusion
Embarking on this journey, you kicked things off by pinpointing those crucial patches and deciphering the release notes. Smoothly transitioning, you deftly placed your host into maintenance mode, ensuring a flawless update process. From there, you seamlessly imported VMware patches into a baseline, which found its snug place in the heart of your host.
Mission accomplished – you’ve successfully safeguarded those updates within your system’s core. With confirmed patch installation and verified system functionality, your virtual orchestra now plays in perfect harmony.
Regularly applying these patches shields against known vulnerabilities and bolsters system reliability. Thus, you must keep your virtualized infrastructure robust and stay in the loop on VMware’s patch releases. Doing so helps mitigate risks and ensures ongoing vendor support, contributing to the overall well-being of your virtual environment.
Now, why not leap into the realm of possibilities? Explore the potential of creating intricate workflows! Some of these workflows involve patching as part of broader automation processes, integrating VMware Update Manager seamlessly with orchestration tools like vRealize Orchestrator.


