

Intrigued by the boundless possibilities of VMware containers but unsure where to start? Navigating the realm of VMware containers can feel like stepping into uncharted territory. But fear not; you’ve come to the right place!
This tutorial is your key to unraveling the untapped potential of VMware containers with VMware vSphere Integrated Containers (VIC). Imagine seamlessly running containerized applications alongside your existing virtual machines (VMs) within your vSphere environment.
Dive in and harness the power of VMware containers at your fingertips!
Prerequisites
This tutorial comprises hands-on demonstrations, and below is a quick checklist to ensure you’re all set up to follow along:
- A VMware infrastructure running VMware vSphere, including one or more ESXi hosts.
- Administrative access to the VMware vCenter Server.
Downloading and Installing the VIC Server
With the prerequisites out of the way, this phase marks a crucial juncture where you’ll set up a fundamental component in your container orchestration toolkit.
Get started in this journey by downloading and installing the VIC server to lay the groundwork for seamless container management and deployment.
To download and install the VIC server, follow these steps:
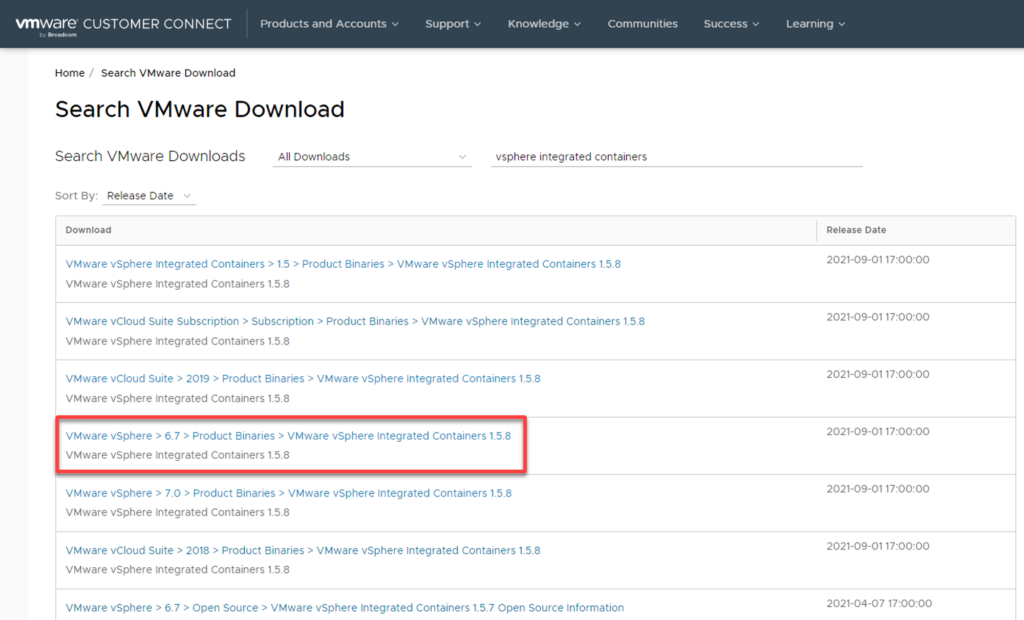
1. Open your preferred web browser, visit the official VMware VIC download page, and select the version compatible with your vSphere environment.
This tutorial uses VMware vSphere Integrated Containers 1.5.8, as indicated below.
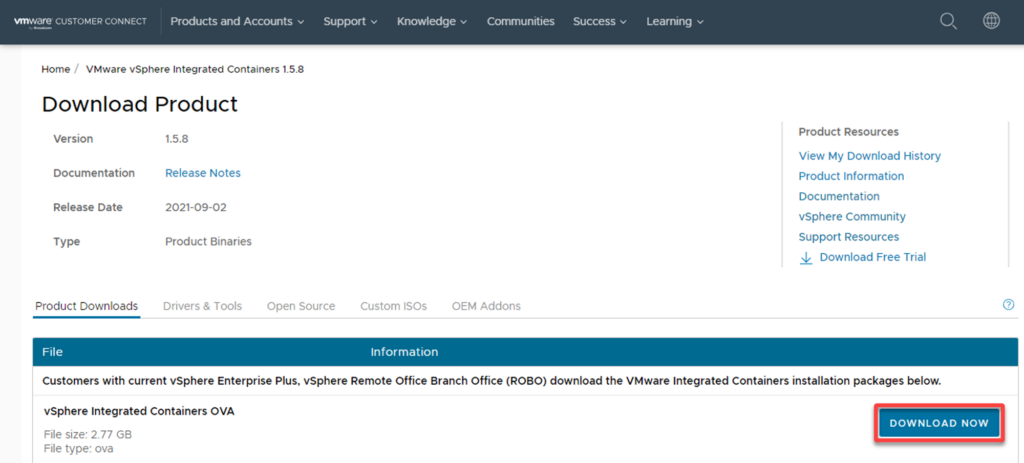
2. Next, click DOWNLOAD NOW adjacent to the vSphere Integrated Containers OVA to download the OVA package.
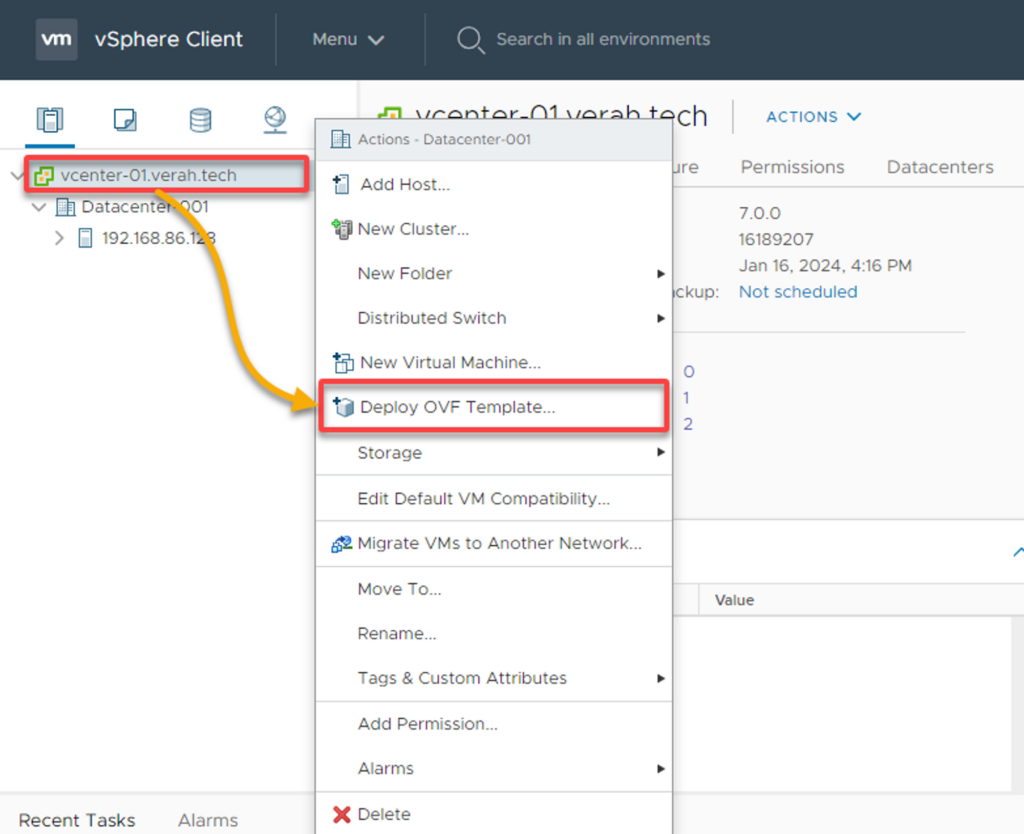
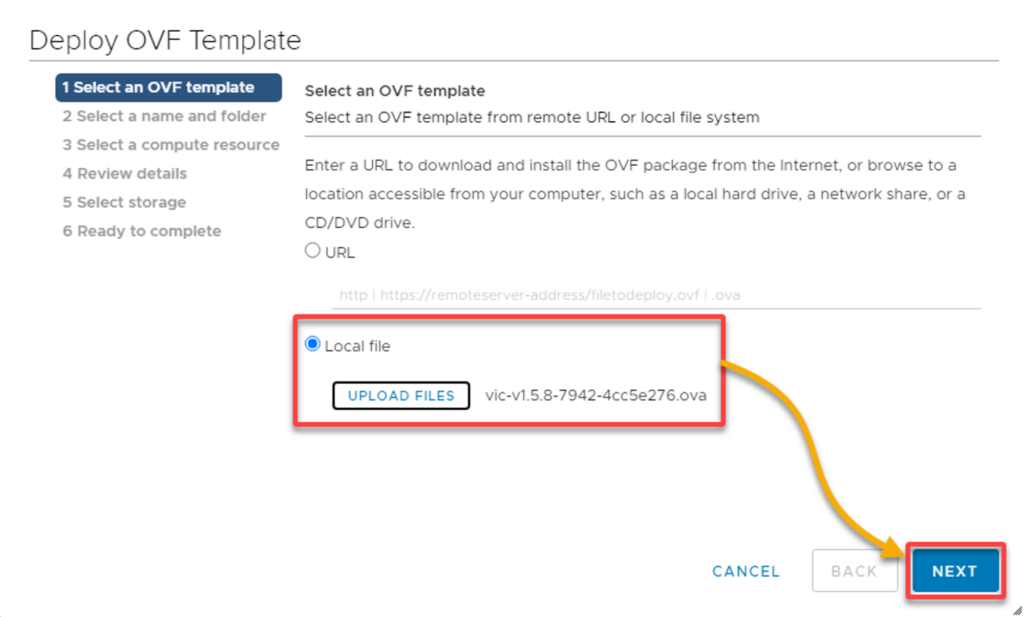
3. Login to your vCenter Server client with your credentials, right-click on the vCenter Server, and select Deploy OVF Template.
A deployment wizard appears where you’ll configure an appliance deployment using an Open Virtualization Format (OVF) template (step four).
4. Now, locate the OVA package you downloaded and click NEXT to proceed.
The selection tells the vCenter Server to use the information within the OVA to configure and deploy the appliance.
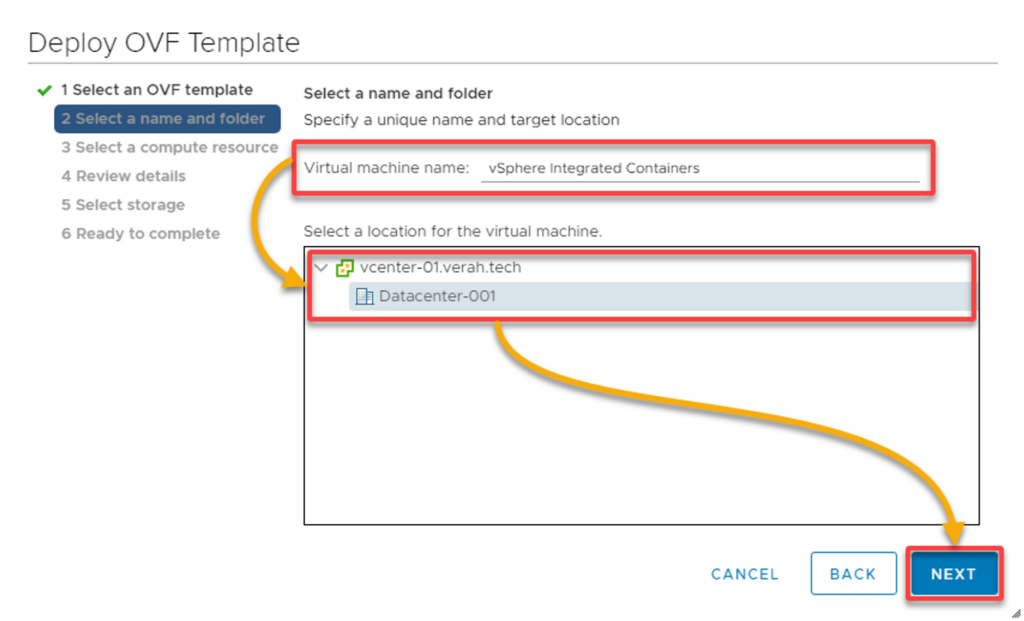
5. Select a VM name (i.e., vSphere Integrated Containers) and deployment location, and click NEXT to confirm.
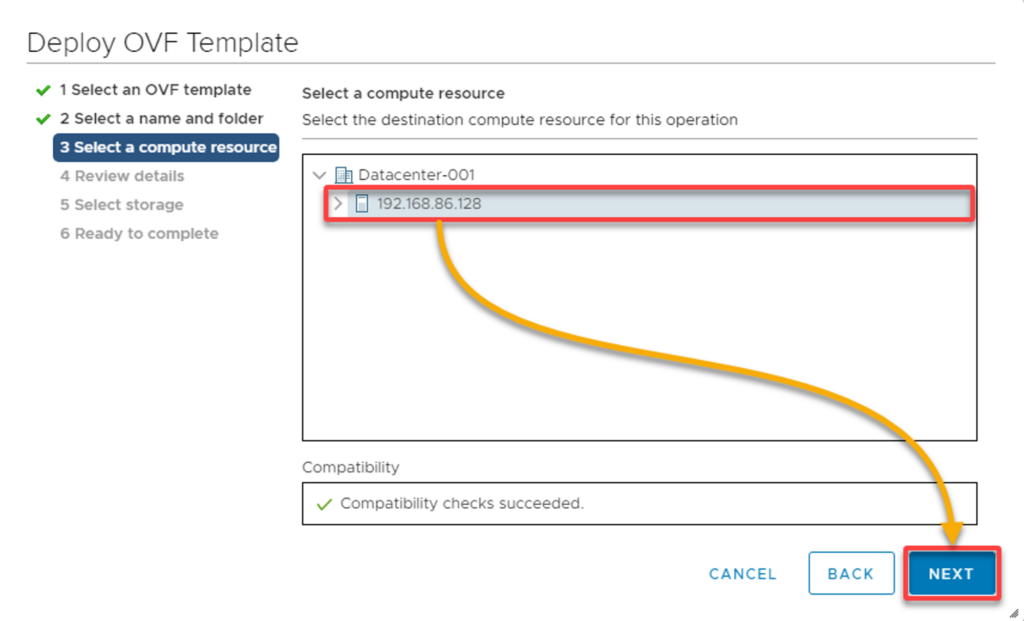
6. Select the destination host (or cluster or resource pool), then click Next to proceed.
Choosing the destination host is crucial to determining the appliance’s physical location and resource allocation. The destination you select should align with your infrastructure and resource management requirements.
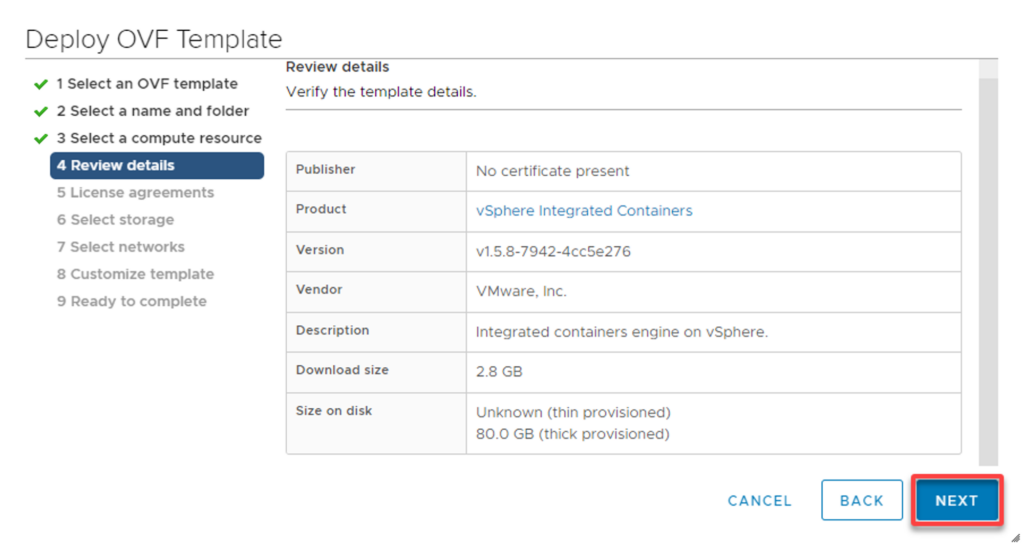
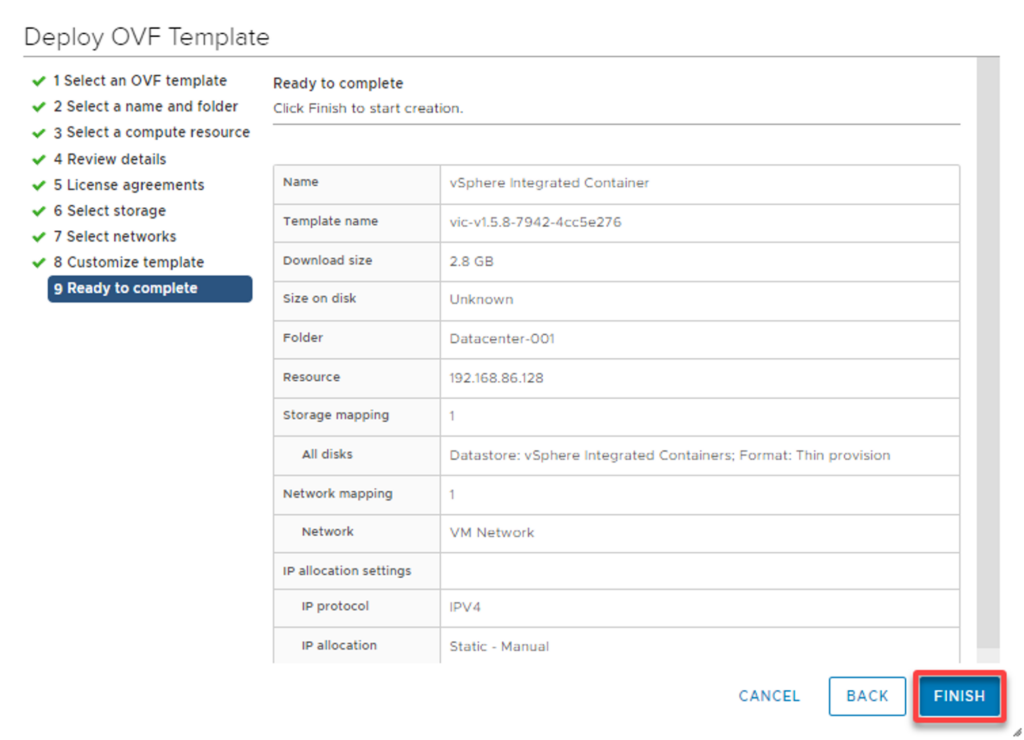
7. Next, review and verify the template details you’ve configured, and click NEXT to confirm.
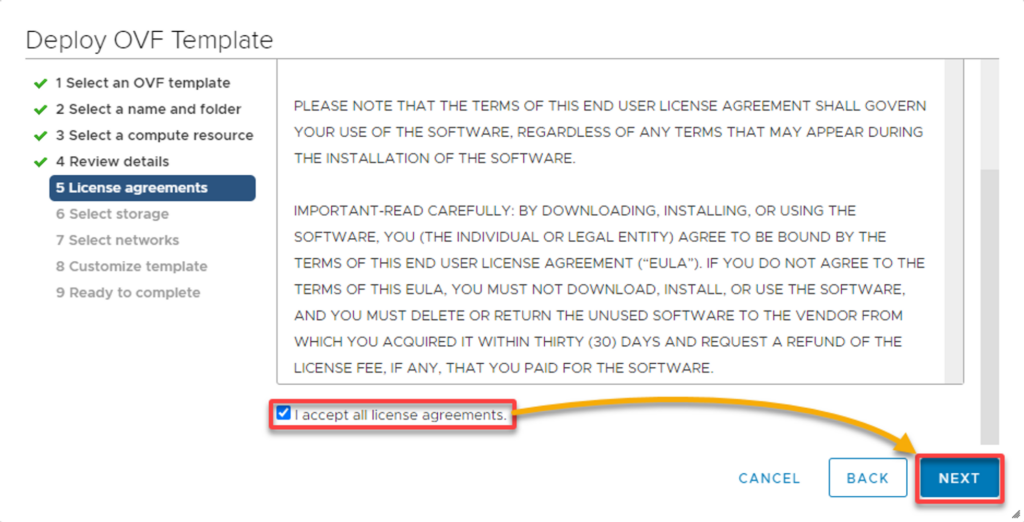
8. Accept the end user license agreements (EULA), then click NEXT to proceed.
9. Select the virtual disk format (i.e., Thin Provision) and destination datastore (i.e., vSphere Integrated Containers), then click NEXT.
This Thin Provision option allows the appliance’s disk to start small and grow as needed, using space on the datastore as necessary.

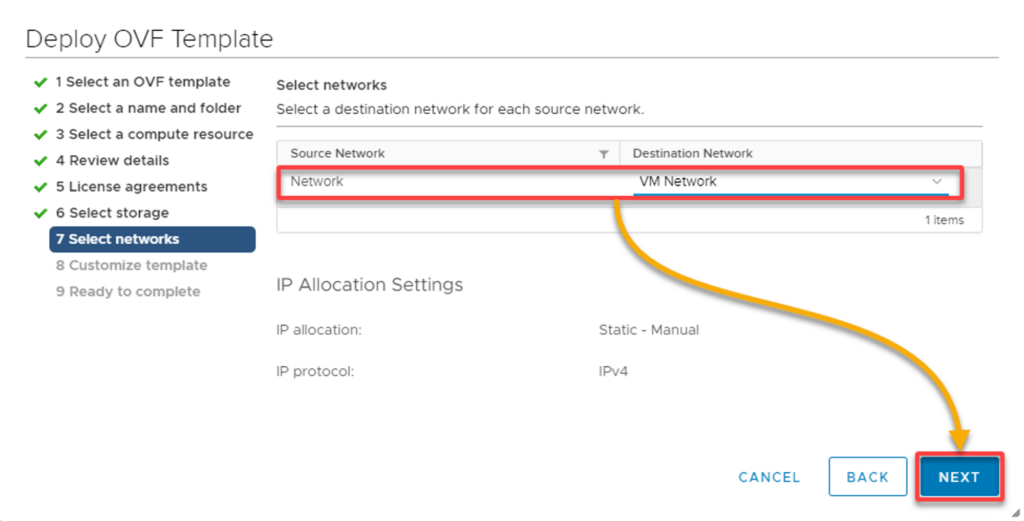
10. For the network settings, choose the Network (i.e., VM Network) to which the appliance will connect, then click NEXT to proceed.
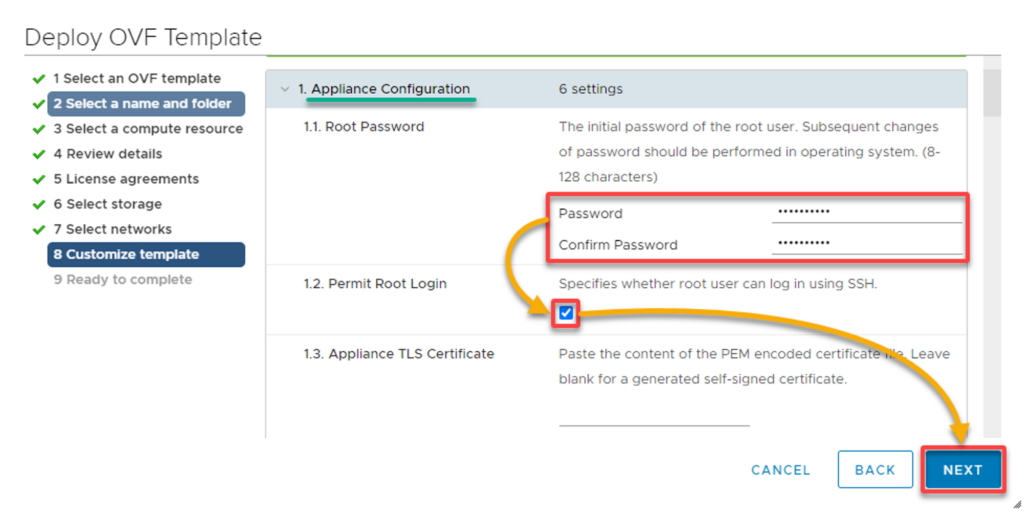
11. Now, under Appliance Configuration, set the root password for the appliance and check the Permit Root Login checkbox (option).
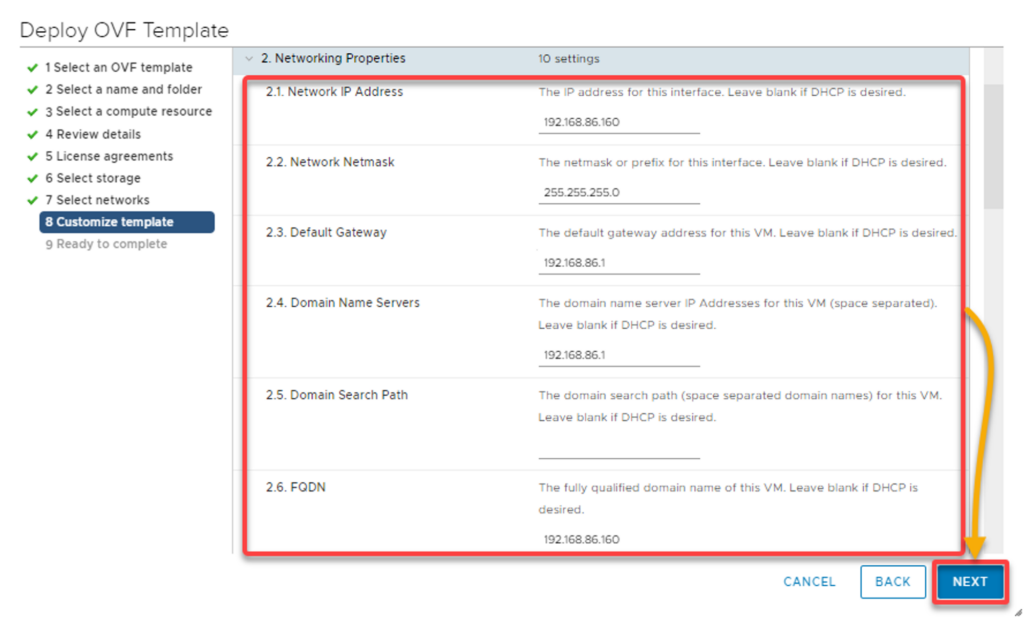
12. Scroll down, expand Networking Properties, configure a static IP address for the appliance (optional), and click NEXT.
Note: Leave the networking properties blank if you prefer to use DHCP.
13. Click FINISH to deploy the vSphere Integrated Containers appliance.
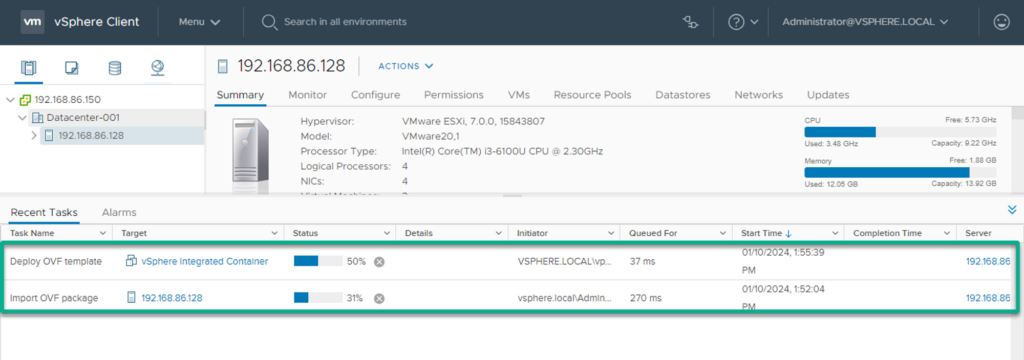
14. Lastly, follow the deployment progress in your vSphere Client’s taskbar, as shown below.
Powering on and Configuring the VIC Appliance
With the OVF template deployed, the spotlight now shifts to breathe life into your virtual environment — configuring the vSphere Integrated Container appliance.
To configure your VIC appliance, perform the following:
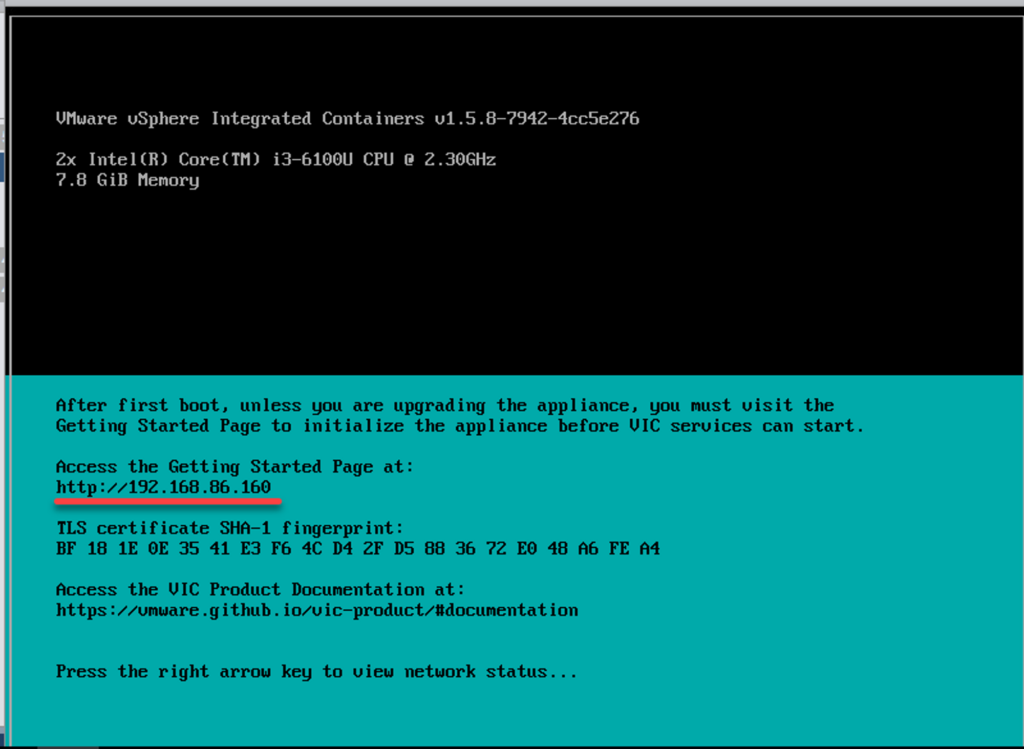
1. In the vSphere Client, navigate to the inventory and power on the appliance, and you’ll see the following screen.
Note down the IP address from the output for accessing the Getting Started Page.
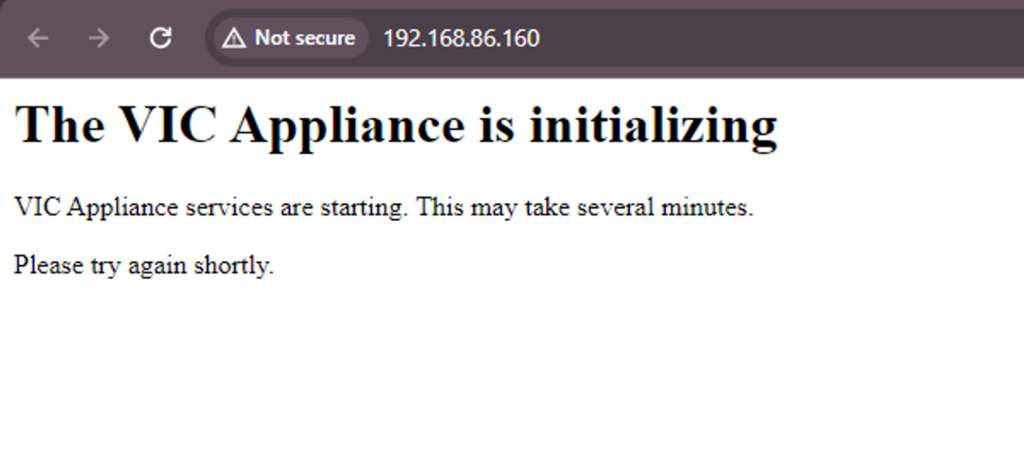
2. Next, open a browser tab and head to the Getting Started Page with the IP address you noted in step one, followed by the 9443 port (i.e., 192.168.86.100:9443).
This step initializes your VIC appliance services, which may take time. Once completed, a window form appears, where you’ll complete the VIC appliance installation (step three).
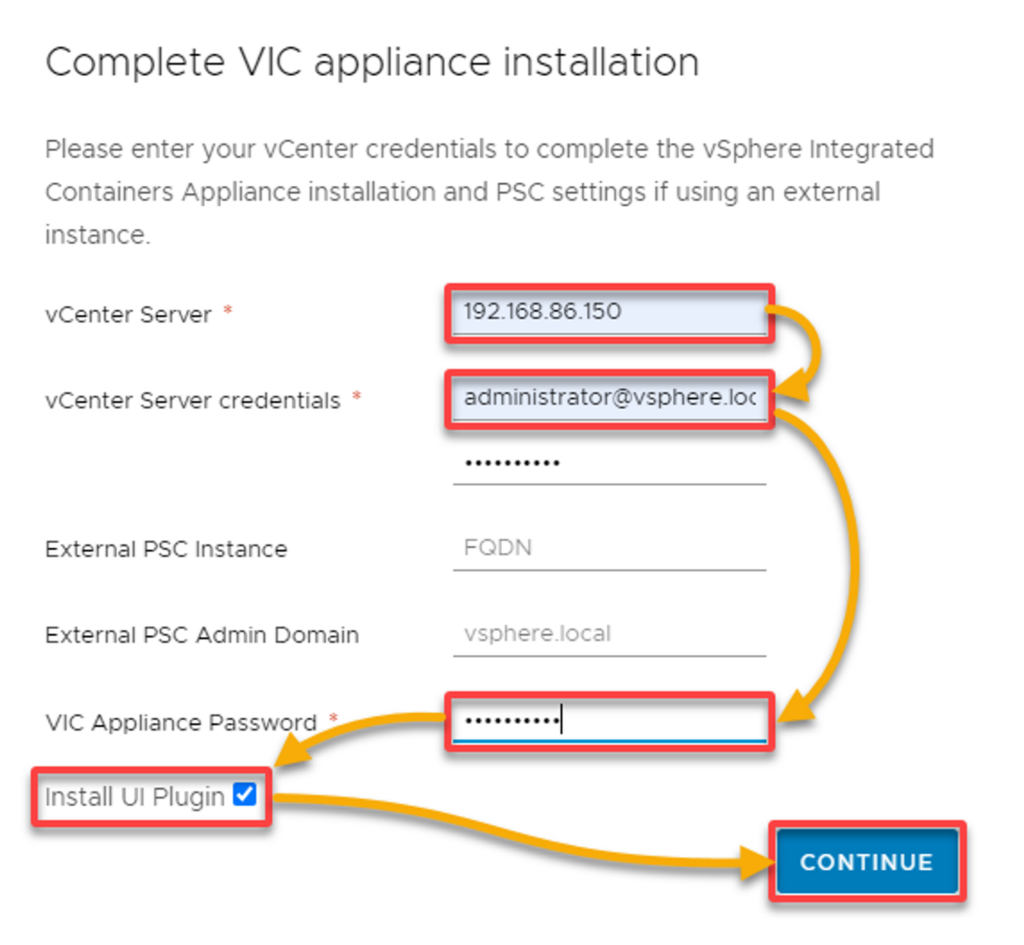
3. Configure the VIC appliance installation with the following:
- vCenter Server – Provide the vCenter Server’s IP or FQDN where VIC has been installed
- vCenter Server Credentials – Input the administrative credentials for the vCenter Serve
- VIC Appliance Password – Input the VIC root password you previously set in step 11 of the “Downloading and Installing the VIC Server” section.
- Install UI Plugin – Enable this option to initiate the installation of the VIC UI plugin directly into the vSphere Client. This plugin enhances the vSphere Client with specific functionalities and features tailored for working with containers and containerized applications.
Note: If the vCenter Server uses an external platform service controller (PSC), you must also provide the PSC’s FQDN and SSO domain.
Once configured, click CONTINUE to save the configuration.
4. Now, accept the vCenter Server certificate thumbprint and click CONTINUE to validate the certificate.
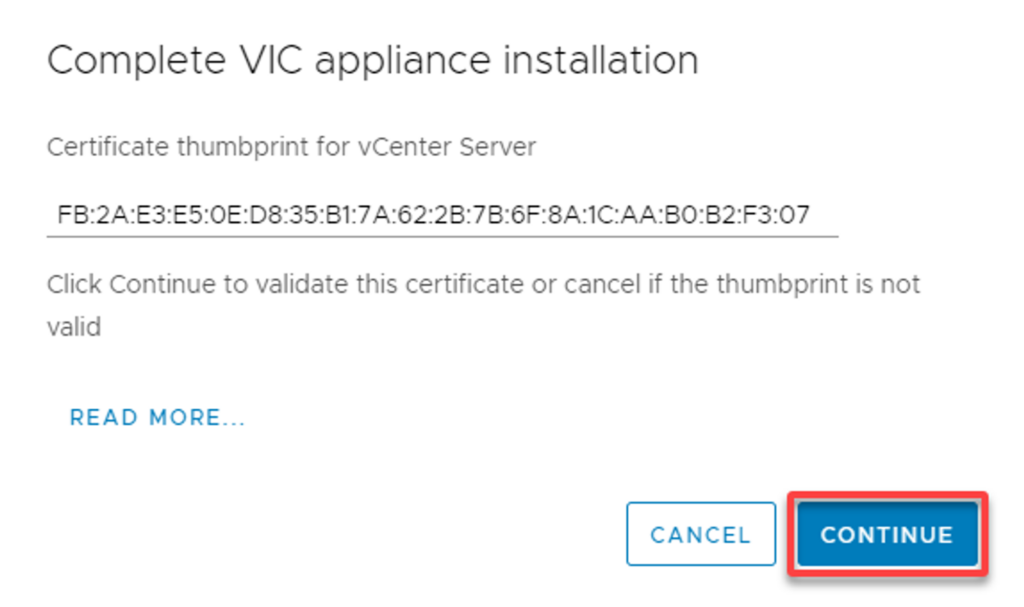
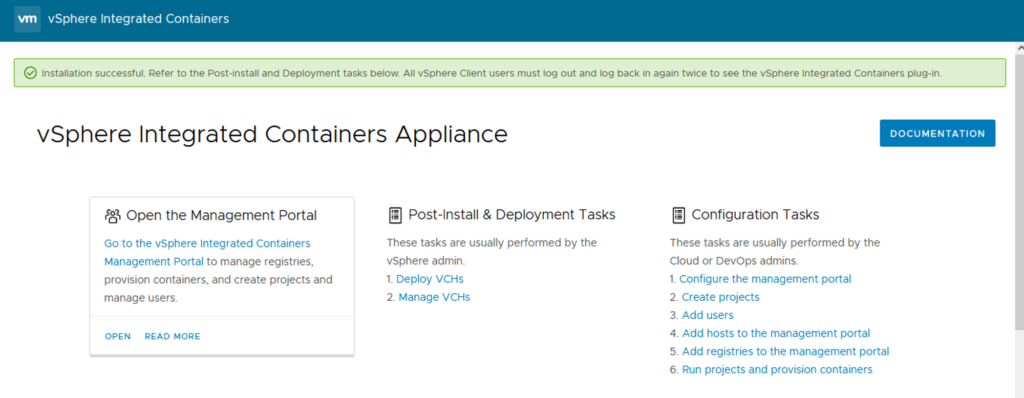
Your browser redirects to the following page after successful validation.
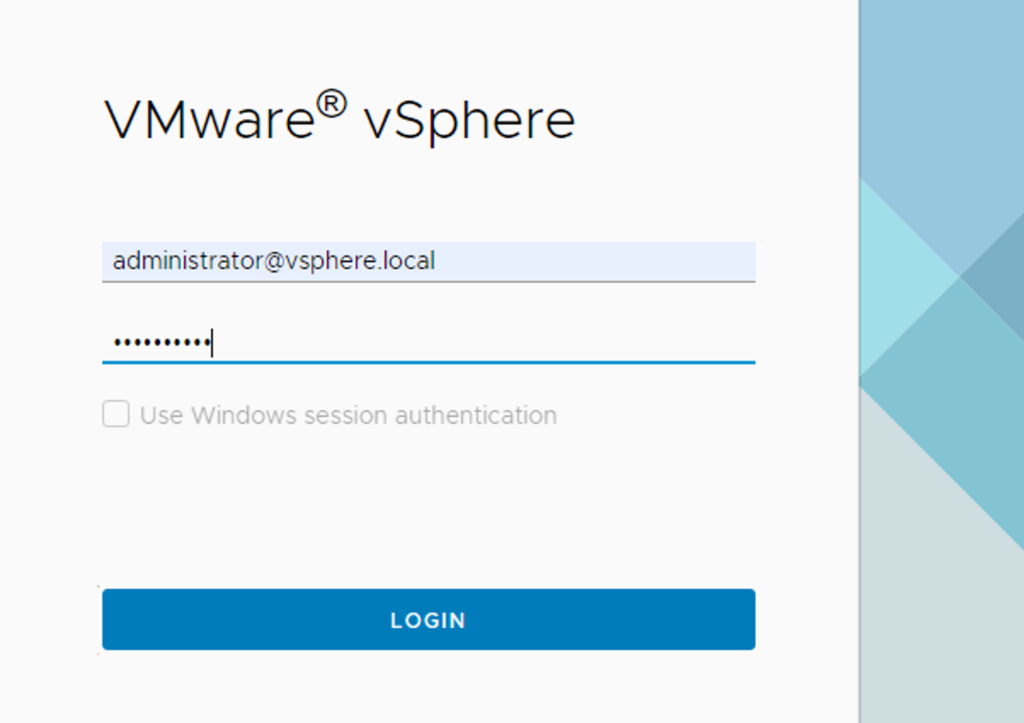
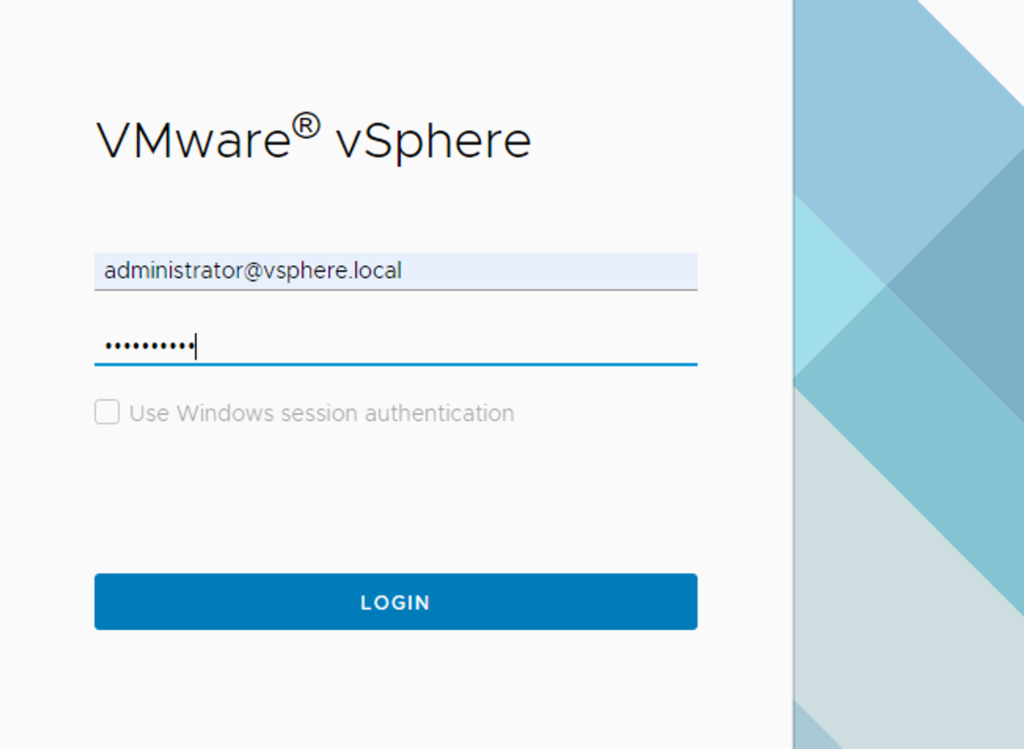
5. Next, log in to the vSphere web client with your vCenter administrative credentials in your browser.
6. Finally, navigate to Shortcuts (left pane) and select the vSphere Integrated Containers shortcut to verify the plugin has been installed.
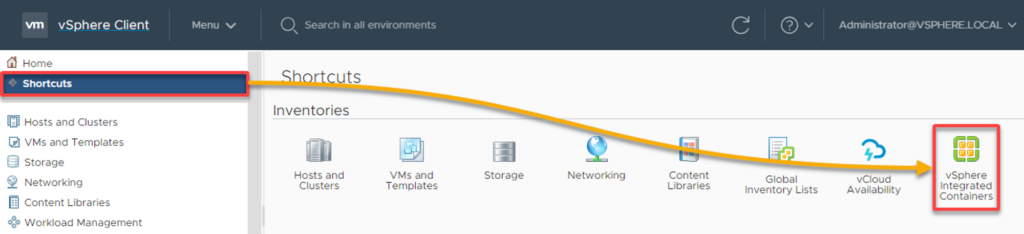
You’ll be on the following page if the web UI plugin works.
Creating a Virtual Container Host (VCH) for VMware Containers
After installing your VIC appliance, you need a bridge between the vSphere infrastructure and the containerized applications. How? By deploying a VCH on your vSphere cluster.
You can deploy a VCH using the VIC plugin for the vSphere Web Client or the VIC command-line interface (VIC CLI). But for demo purposes and simplicity’s sake, you’ll opt with the former for this tutorial.
Why manage your containers with VIC instead of Docker VM? One potential issue is if you are spinning out lots of containers on the Docker VM when you migrate it around, all resources are tied to that VM.
To deploy a VCH, carry out the following from the vSphere Integrated Containers page:
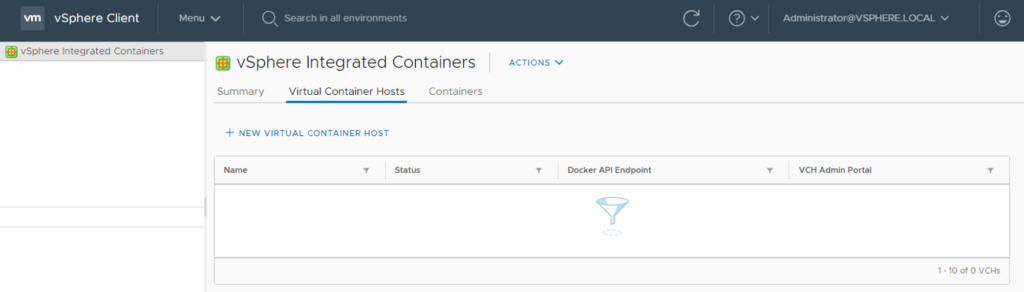
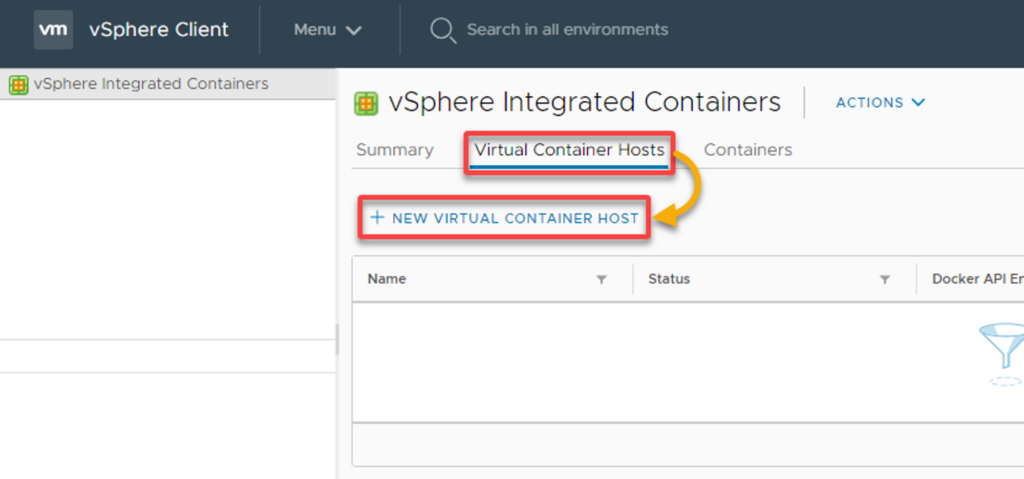
1. Switch to the Virtual Container Hosts tab, and click NEW VIRTUAL CONTAINER HOST. A wizard appears, where you’ll configure your first VCH (step two).
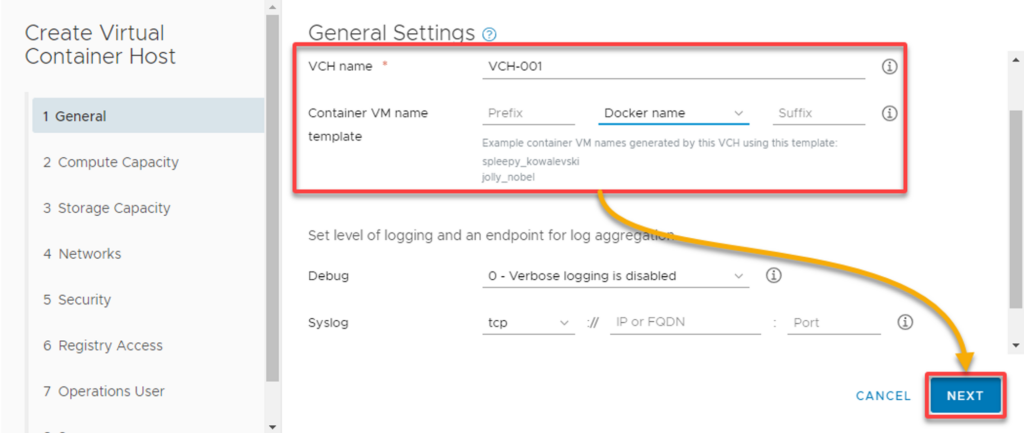
2. Next, enter a name for the VCH (i.e., VCH-001), select Docker name as the Container VM name template, leave other settings as defaults, and click NEXT.
3. Now, choose the compute cluster to allocate this VCH and click NEXT to proceed.

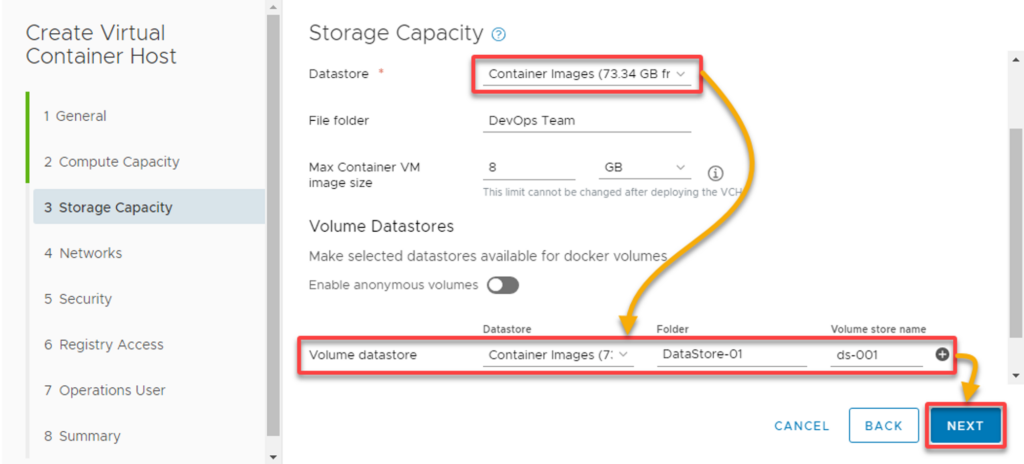
4. On Storage Capacity, configure the storage options for your VCH as follows:
- Datastore – Select a datastore to store the virtual container host’s virtual disks, configuration files, and other related data
- Volume datastore – Designate a specific storage location within your vSphere environment. This location stores persistent volumes associated with containerized applications on the virtual container host. This configuration ensures that their crucial data stays intact if these containers take a nap, reboot, or switch places between hosts.
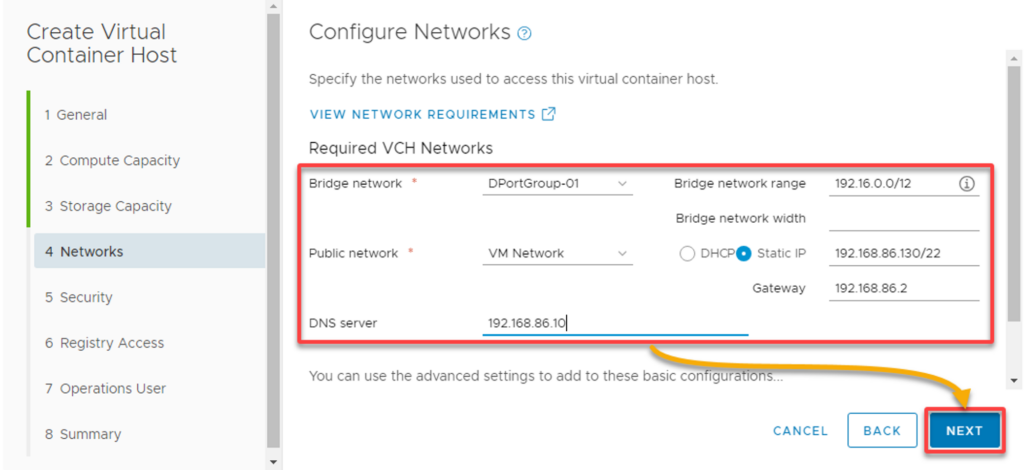
5. Configure the network settings for your VCH.
Running one bridge network per VCH and separating your bridge networks from your VM network is strongly recommended. This approach contributes to a well-organized and efficient containerized environment within your vSphere infrastructure.
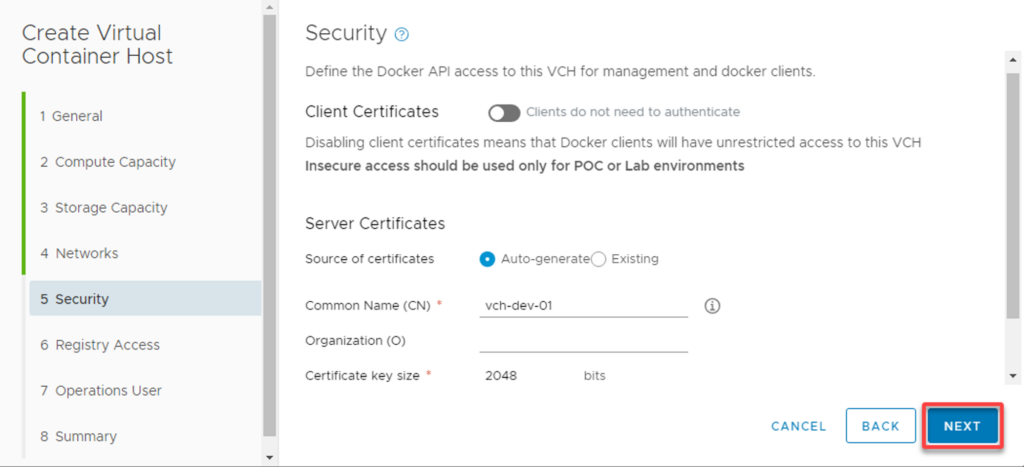
6. Leave other options as default, and click NEXT to proceed.
The default settings suffice since you’re on a demo environment that doesn’t require clients to authenticate with certificates.
While leaving options as defaults is often a good practice, reviewing the default settings to ensure they align with your specific requirements is essential.
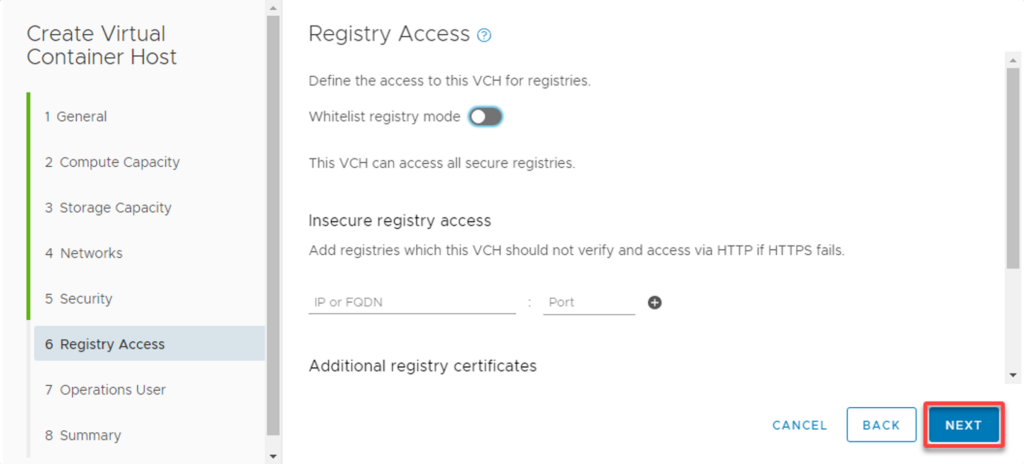
7. In Registry Access, leave the options as defaults for simplicity and to align with standard configurations, and click NEXT.
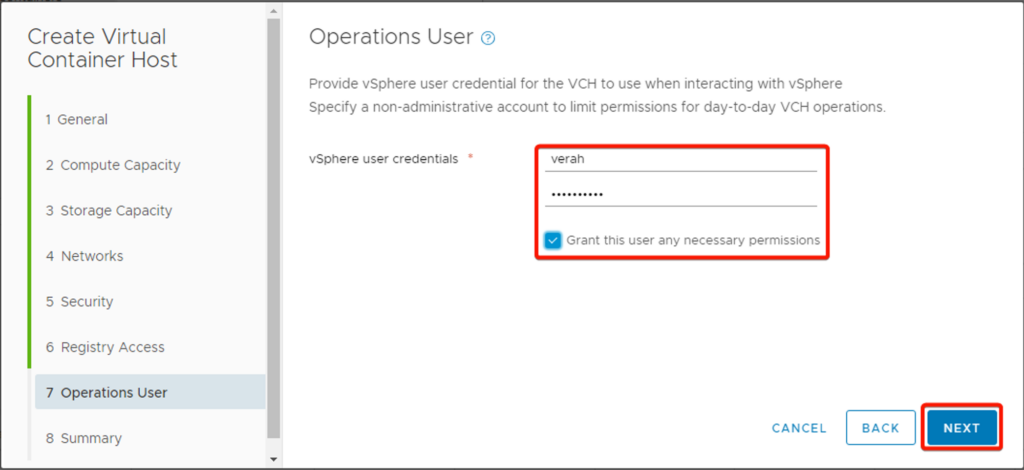
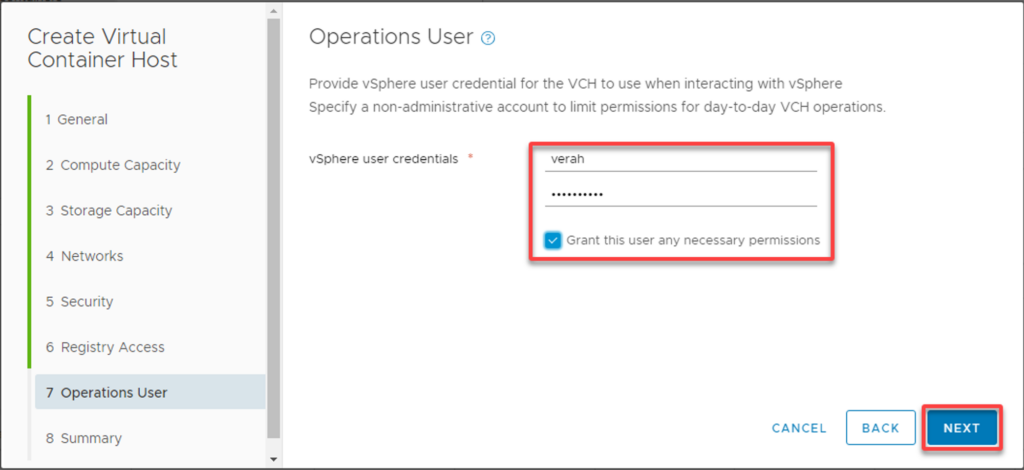
8. Next, provide a user account (non-administrative) for VCH to use to interact with vSphere.
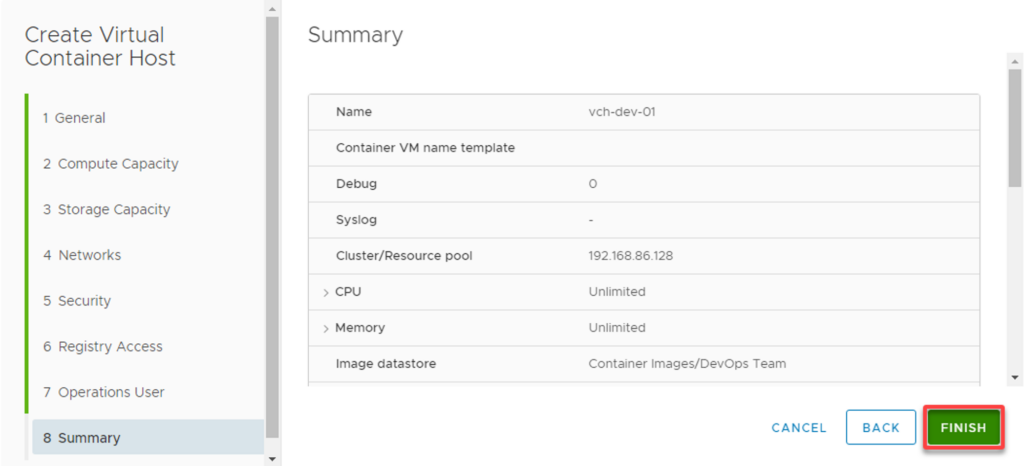
9. Review the summary of your selected settings, click FINISH, and wait for the VCH to be created.
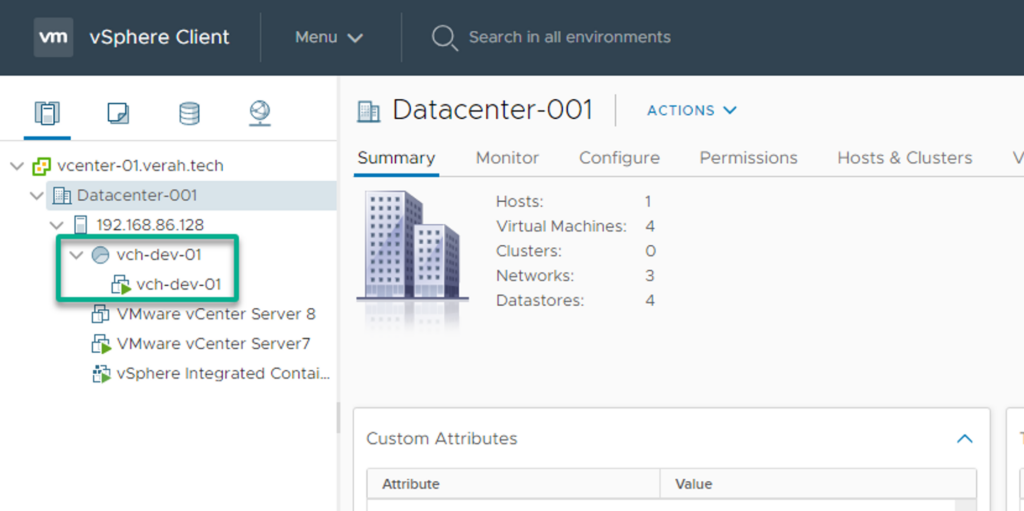
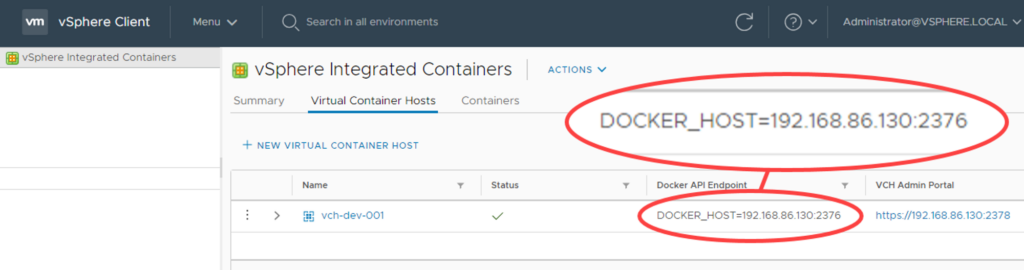
Once your VCH has been created, you can access it in the vSphere Client, as shown below.
With VIC, the Distributed Resource Scheduler (DRS) works with the container and can swap it around to another vSphere Container Host. What does it mean? Instead of deploying massive VMs for your containers, you’ll be deploying VCHs and managing your containers through there.
10. Lastly, note down your Docker API Endpoint (i.e., 192.168.86.130:2376); you’ll need it later, as it’s your direct line to the heart of container orchestration.
Congratulations! Your VCH is now ready to host and manage containers, bringing flexibility and efficiency to your virtual infrastructure.
Registering the VCH via the VIC Management Portal
Creating your VCH wouldn’t be enough to integrate into your virtual infrastructure seamlessly. You must ensure your container is registered and recognized in the grand scheme.
To register your VCH via the Management Portal, proceed with these steps:
1. Visit your VCH interface using either of the provided addresses and within the Open the Management Portal section, click on OPEN to access the VIC Management Portal.
Make sure to substitute <VIC_IP_address/FQDN> as needed.
https://<VIC_IP_address/FQDN>:8282/
https://<VIC_IP_address/FQDN>:9443/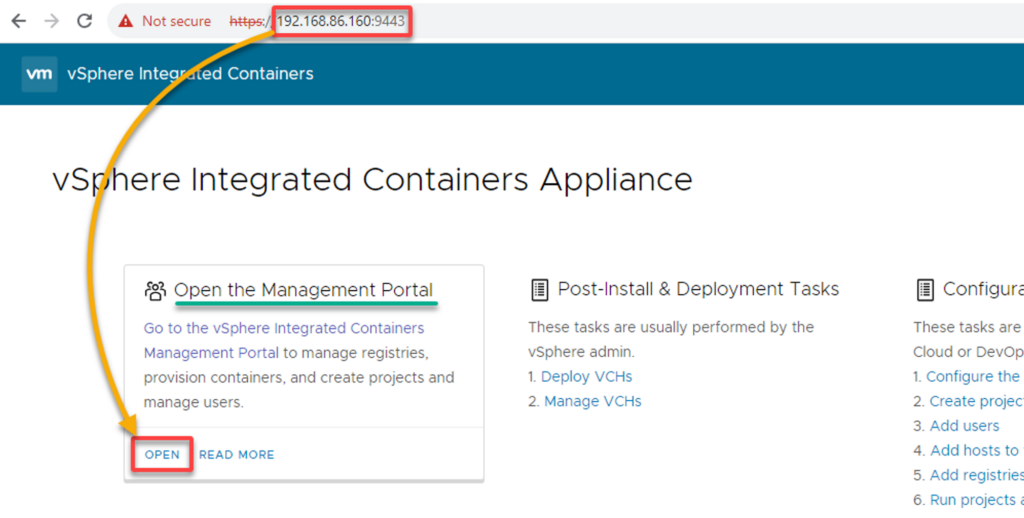
2. Log in to the portal with vSphere administrator, Management Portal administrator, or DevOps administrator user account.
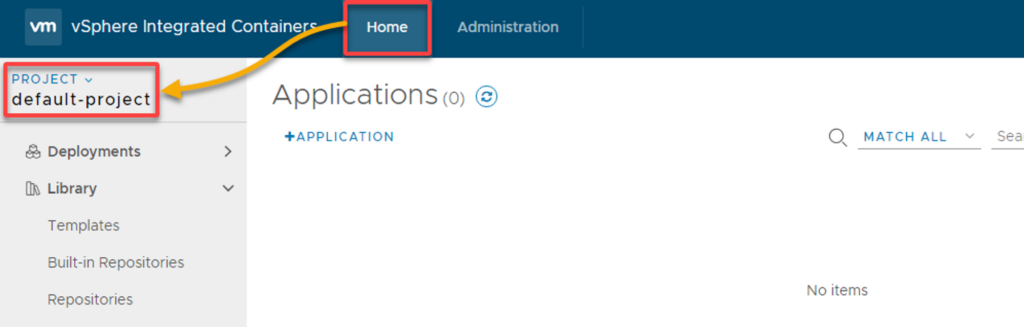
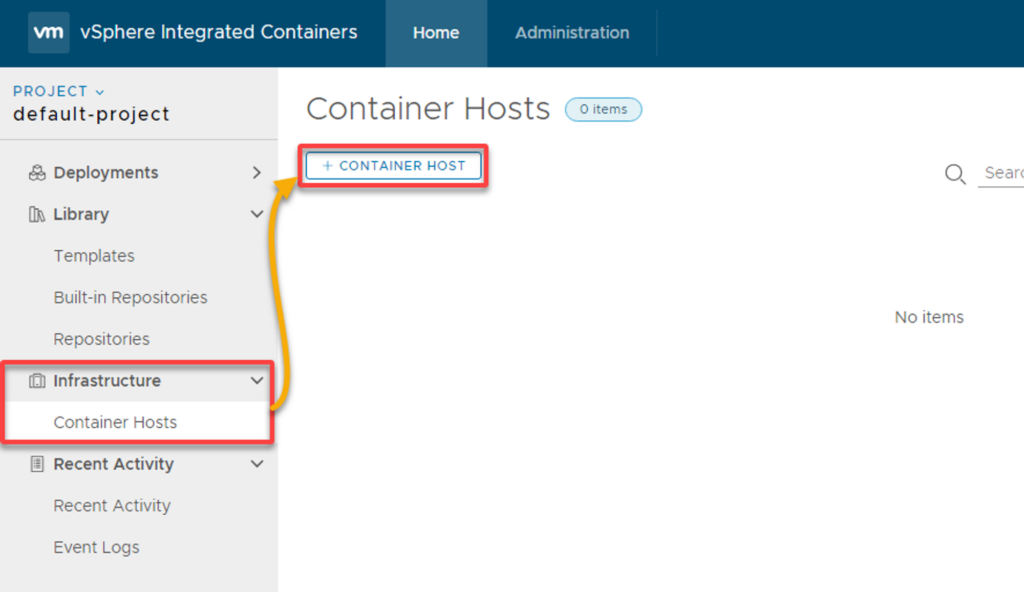
3. Next, navigate to the Home tab and ensure the project drop-down menu is set to default-project (left pane).
4. Under Infrastructure, navigate to Container Hosts and click CONTAINER HOST to initiate registering your VCH.
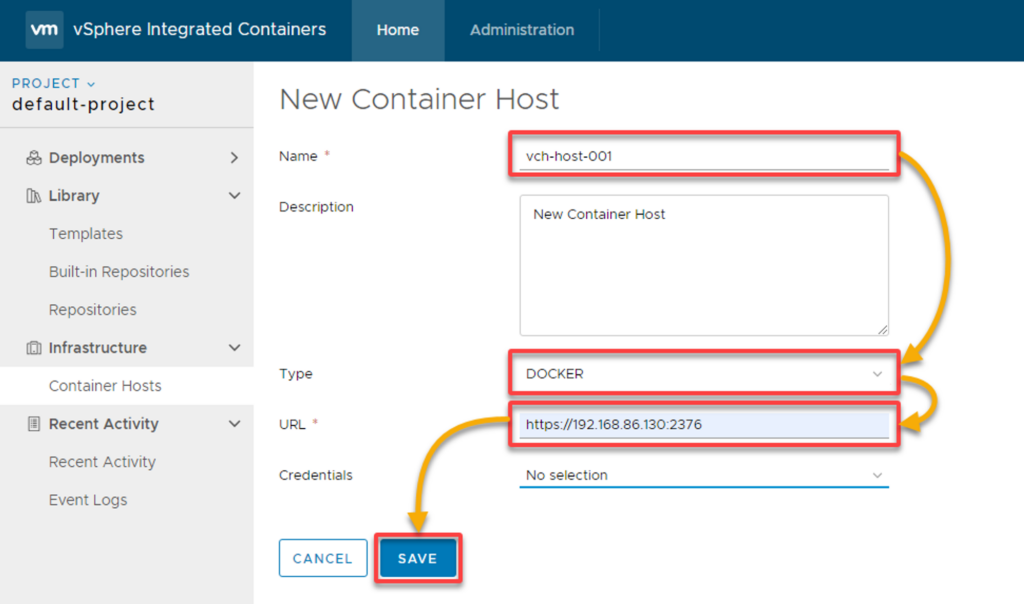
5. Now, set the following parameters for your VCH registration:
- Name – Provide a unique name for your VCH.Type – Choose DOCKER as the container host type.URL – Enter the endpoint address of your VCH you noted in the last step of the “Creating a Virtual Container Host (VCH)” section (i.e., 192.168.86.130:2376).
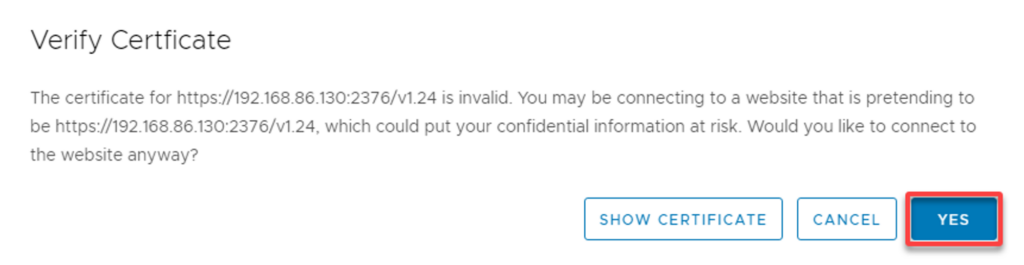
6. Ultimately, click YES in the pop-up message to accept the VCH certificate.
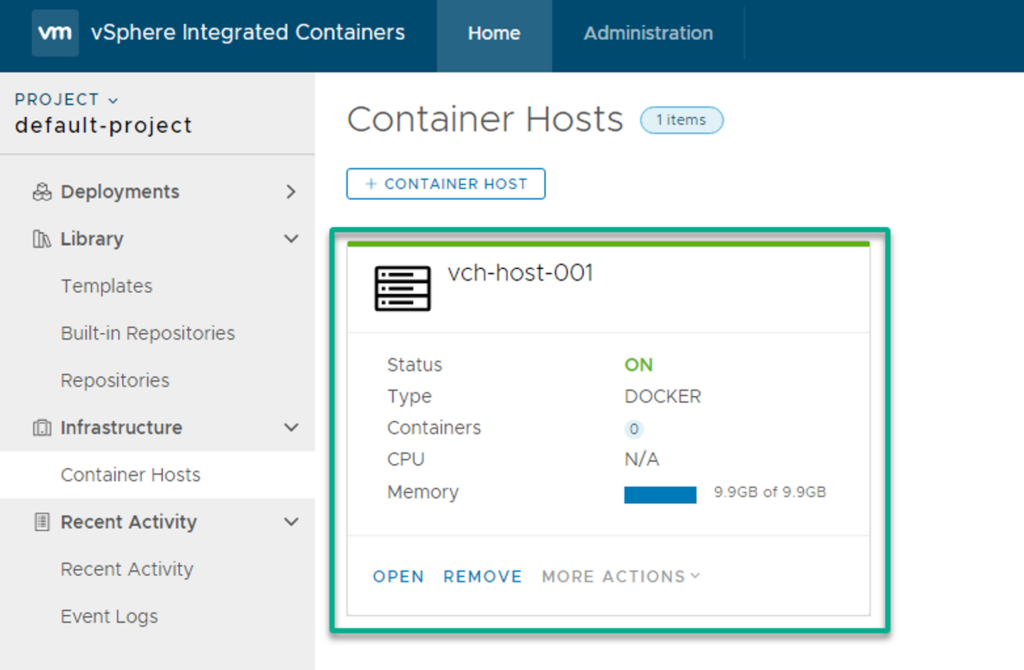
You’ll see your successfully registered VCH if all goes well, as shown below.
Provisioning a New Container
Great job on successfully registering your VCH via the VIC Management Portal. Imagine your virtual landscape as an empty canvas, awaiting the vibrant strokes of containerized creativity. That canvas is the exciting space you’re poised to fill with your container orchestration.
You’ll sculpt a dynamic entity within your virtual realm—provisioning a new container. For demonstration purposes, you’ll provision a container from a template.
To provision a container from a template, execute the following:
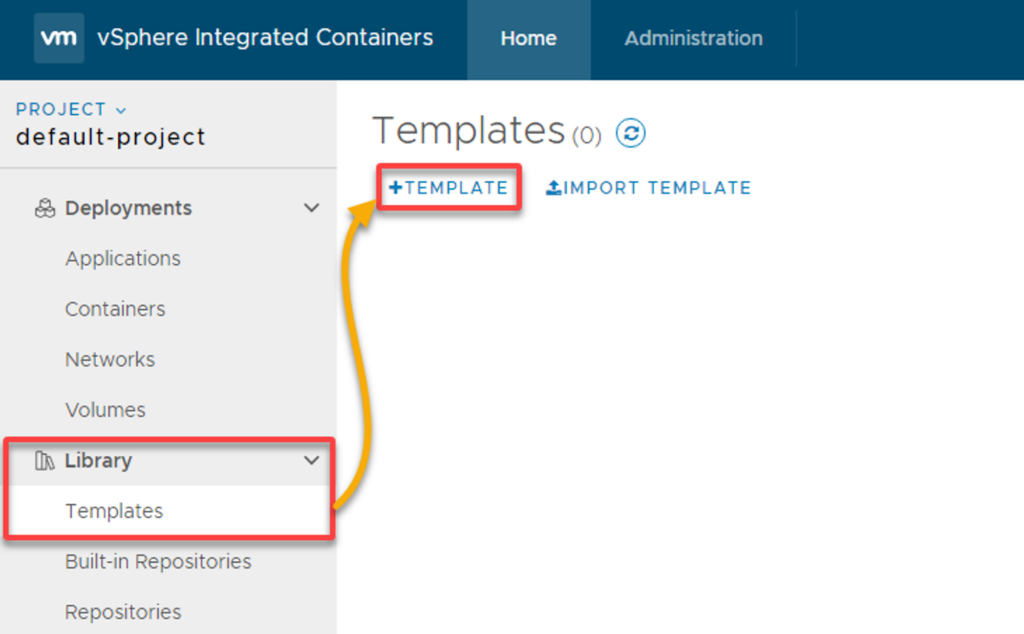
1. In the VIC Management Portal, expand Library (left pane), navigate Templates, and click TEMPLATE to initiate creating a template.
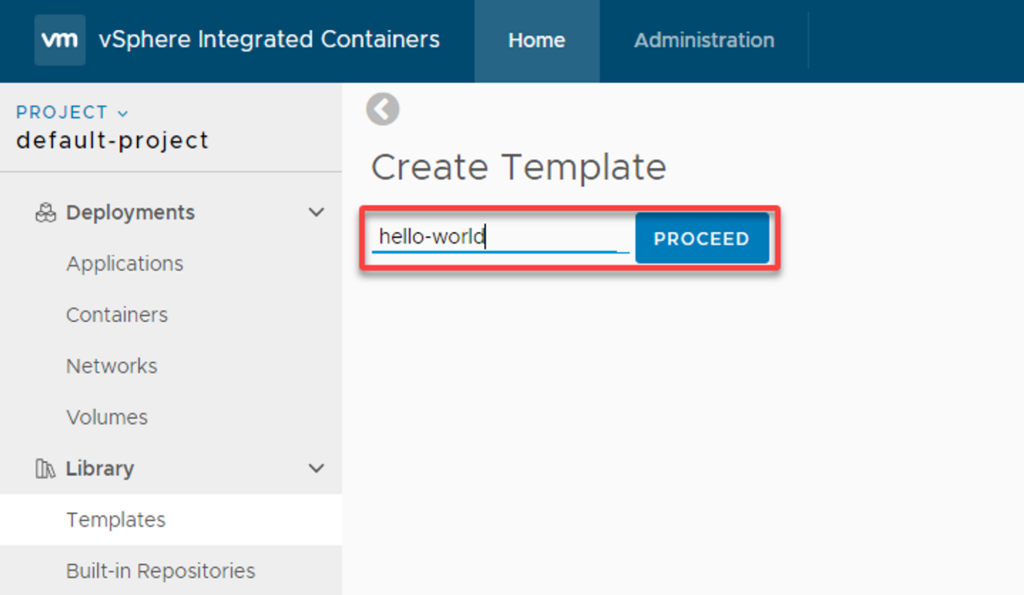
2. Next, enter the container name (i.e., hello-world) and click PROCEED.
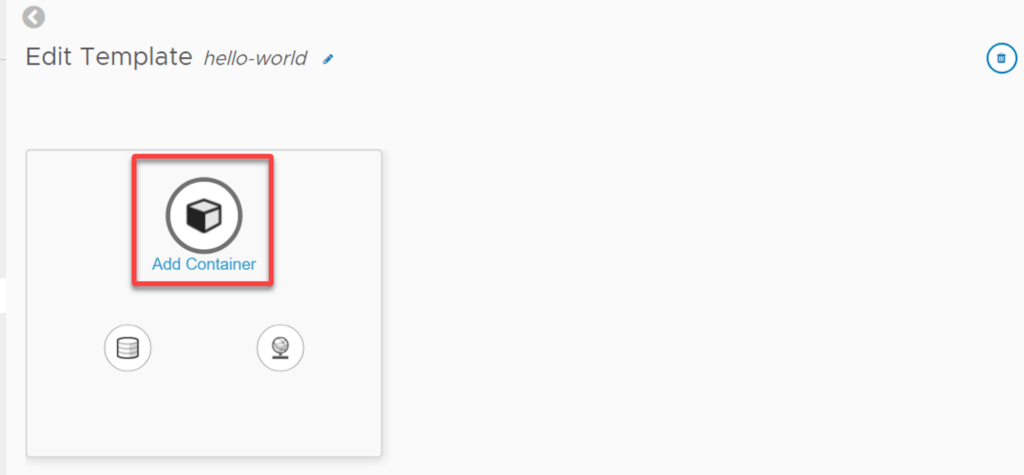
3. Click Add Container to initiate adding a container configuration to your template on the Edit Template page.
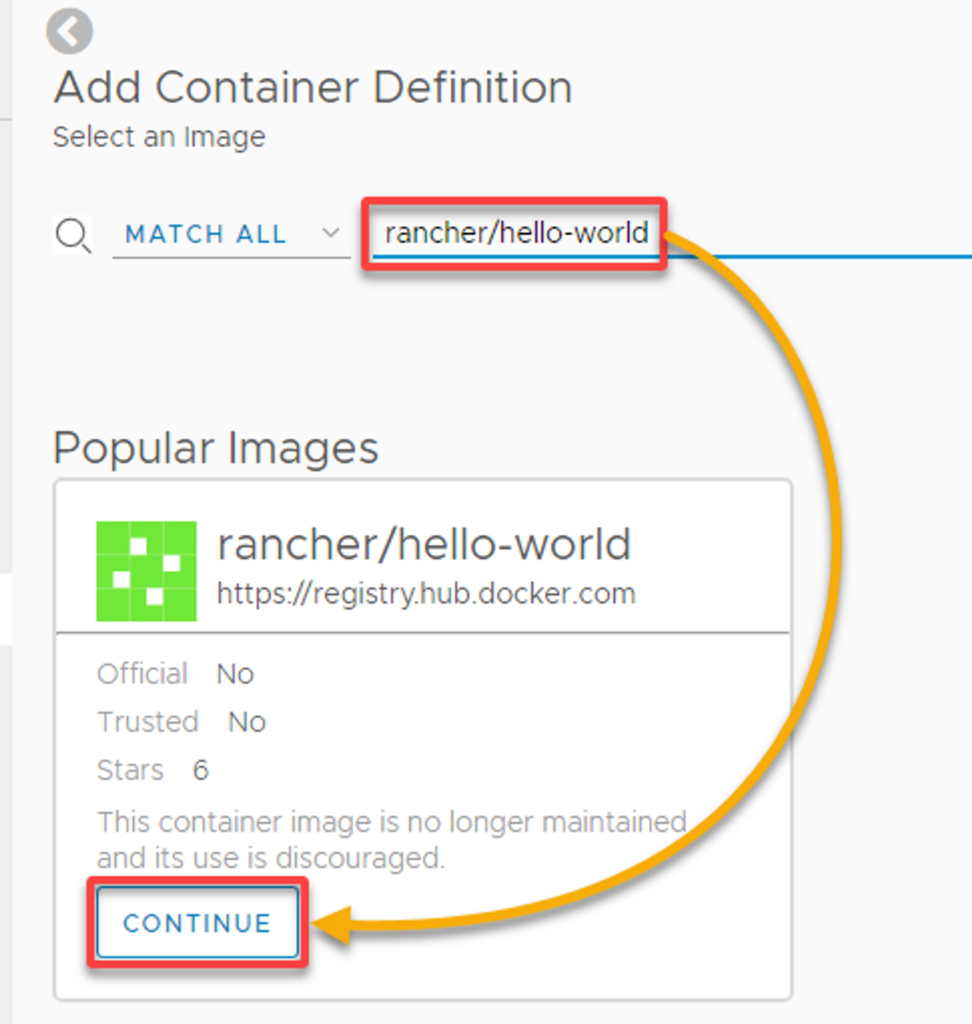
4. Now, search for rancher/hello-world container, and click CONTINUE to confirm your container image.
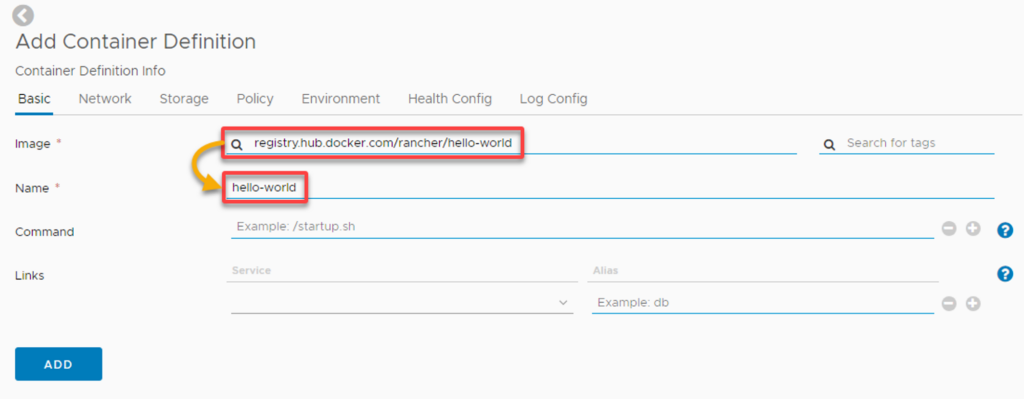
5. Under the Basic tab, configure the basic details for the container as follows:
- Image – Specify the image to instantiate the container from (i.e., registry.hub.docker.com/rancher/hello-world).
- Name – Specify the name of your template (i.e., hello-world).
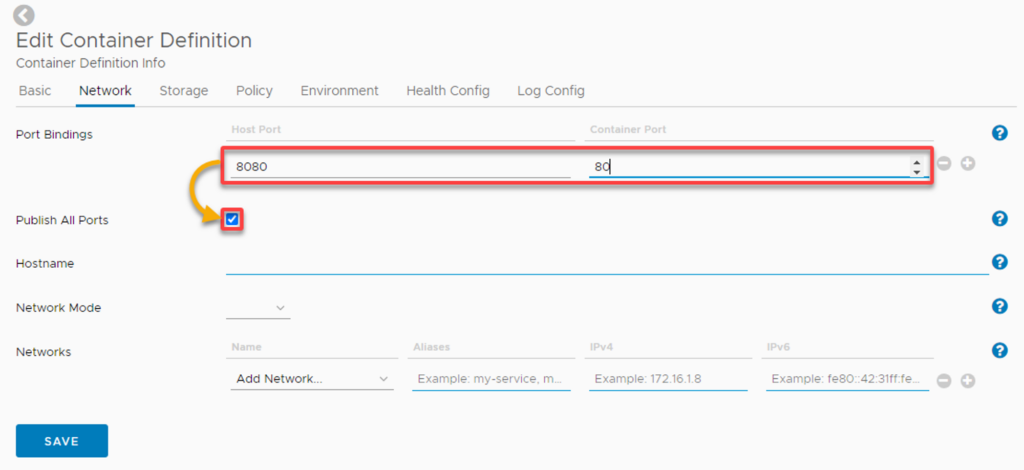
6. Navigate the Network tab and configure the network settings:
- Port Bindings – Input the host port (i.e., 8080) and container port (i.e., 80). This mapping allows traffic arriving at the specified host port to be redirected to the container port.
- Publish All Ports – Enable this option to make all ports exposed by the container accessible from outside the container.
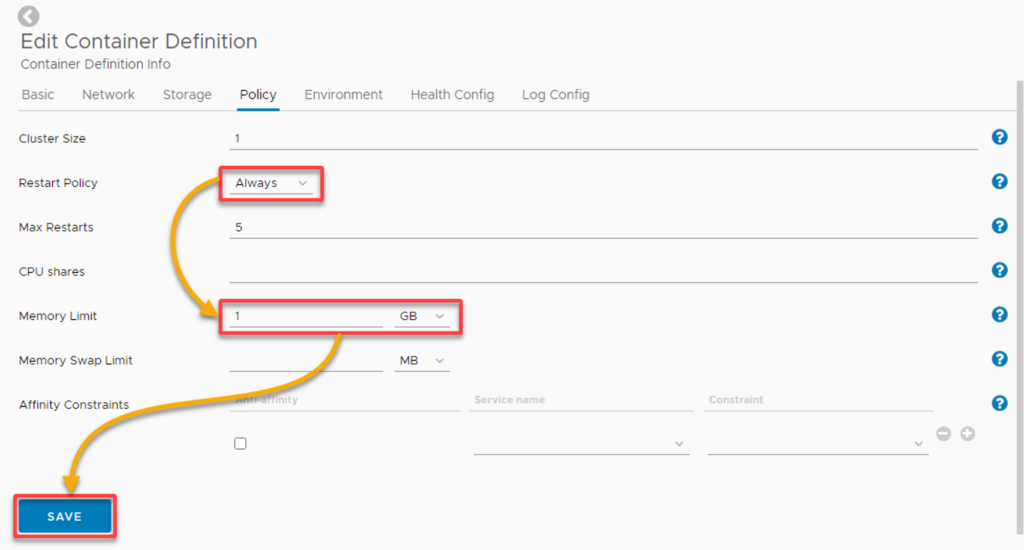
7. On the Policy tab, configure the policy settings:
- Restart Policy – Choose the Always option to ensure your container restarts automatically whenever it stops, regardless of the exit status.Memory Limit – Set the limit to 1 GB to restrict the container’s memory usage. This limit helps prevent your container from consuming excessive resources. A lack of resources can impact other applications or services on the same host.
8. Now, click the provision icon (top-right) on the Edit Template page to provision your container.

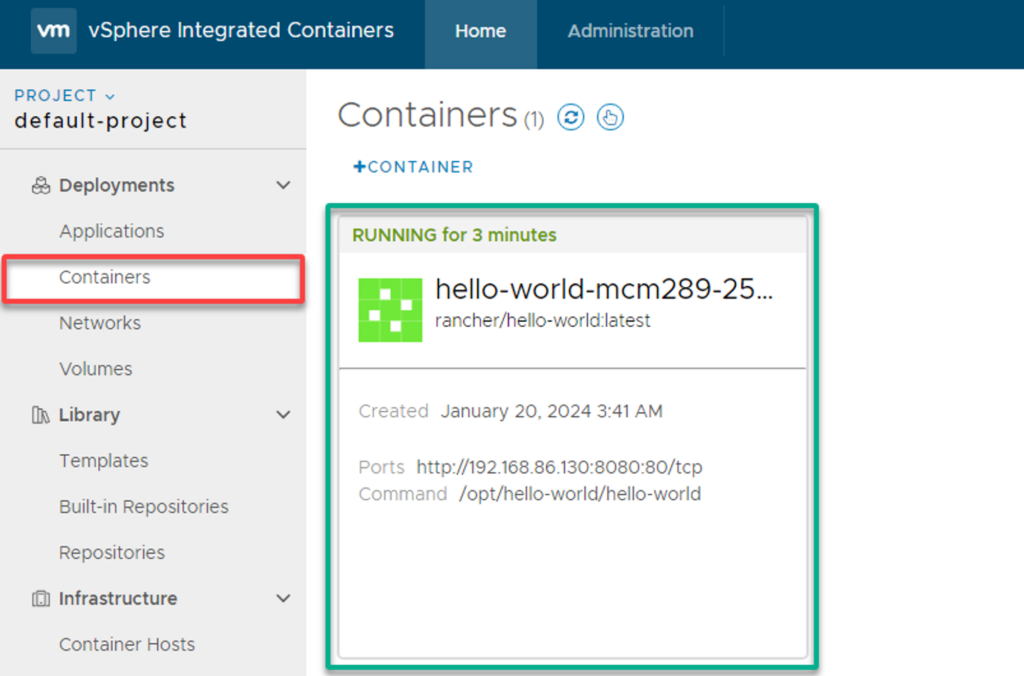
9. Navigate to the Containers tab to verify whether the container has been successfully provisioned and running, as in the screenshot below.
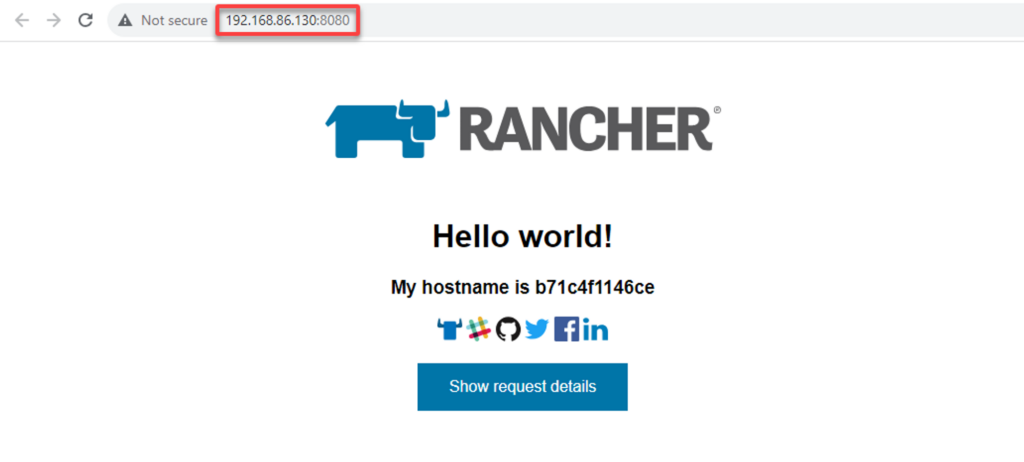
10. Finally, navigate to your VCH host IP address or FQDN, followed by the host port (i.e., https://192.168.86.130:8080).
Assuming everything works, your browser redirects to the newly created container’s web UI shown below.
Conclusion
There you have it—a journey into the realm of VMware containers! You’ve navigated through configuring the VIC Appliance, set up and registered a VCH, and even provisioned a new container. With each step, you’ve delved deeper and harnessed the power of VMware to streamline your virtual infrastructure and embrace the future of application deployment.
As part of VMware’s continuous evolution, VIC remains a robust solution for organizations seeking a bridge between virtualization and containerization within their data centers.
Now that you’ve laid the groundwork with VMware containers, why not explore more on integrating VIC with Kubernetes using VMware Tanzu?
Keep experimenting, and watch as your virtual environment evolves into a dynamic ecosystem of efficiency and innovation!


