


Need to seamlessly access and transfer files to your USB storage devices while on a guest VM in VirtualBox (VBox)? Say goodbye to manual installations and long configurations, and enable the VBox USB Passthrough feature!
VBox USB Passthrough bridges the gap between your host and virtualized environment. And in this tutorial, you will learn to enable this feature that grants your VM exclusive access to a USB device as if it were directly connected to your VM.
Read on to quickly access your USB storage device from within your VM!
Prerequisites
This tutorial comprises hands-on demonstrations. To follow along, be sure you have the following:
- A Windows machine with VirtualBox installed – This tutorial uses Windows 11 with VirtualBox v7.0 for Windows, the latest version at this time of writing.
💡 If, for some reason, Windows silently rejects the VirtualBox USB Driver, uninstall and reinstall VirtualBox as administrator.
- A guest OS – This tutorial uses a VM with Ubuntu 20.04 LTS.
- A USB storage device (i.e., external hard drive or USB flash drive). This tutorial uses an external Ugreen SSD drive.
Installing the VirtualBox Extension Pack
Before fully taking advantage of the VBox USB Passthrough feature, you need an additional package to handle the USB controllers — the VirtualBox extension pack. This extension pack is a separate package that adds extra features and functionalities to VirtualBox.
Installing this VirtualBox extension pack extends the capabilities of VirtualBox beyond its core functionality, like the USB 2.0/3.0 support. This feature lets you connect and utilize USB devices at their maximum speed.
To install the VirtualBox extension pack, follow these steps:
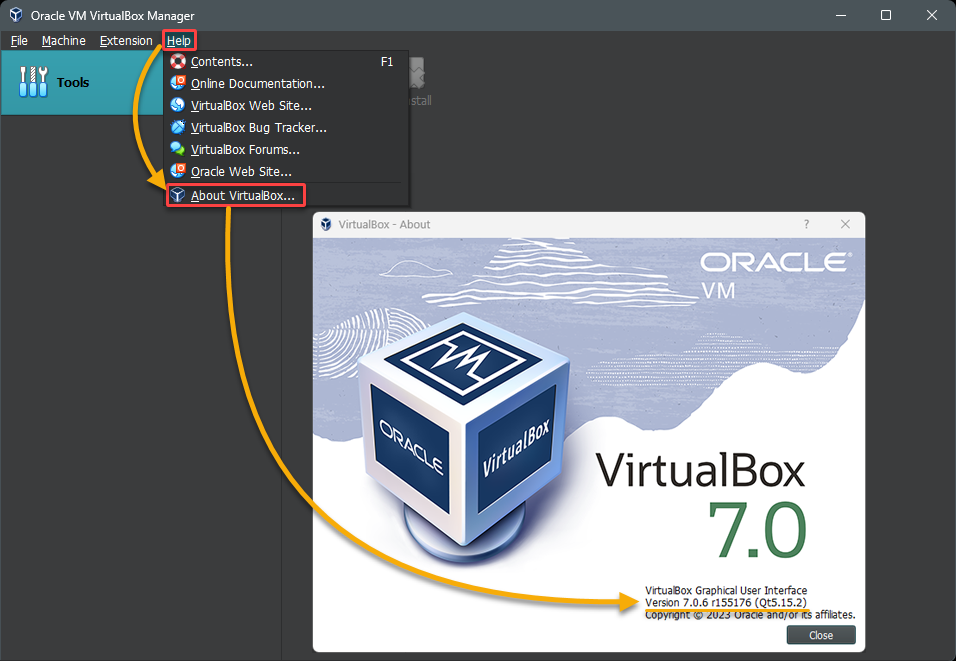
1. Open VirtualBox, click the Help menu, select About VirtualBox, and note down your VirtualBox’s current version displayed in the pop-up window.
The version number is crucial as it determines the compatible extension pack for your installation. Each VirtualBox version has its corresponding extension pack release, which should match.
💡 An incompatible extension pack version can cause compatibility issues and unexpected behavior or errors within VirtualBox.
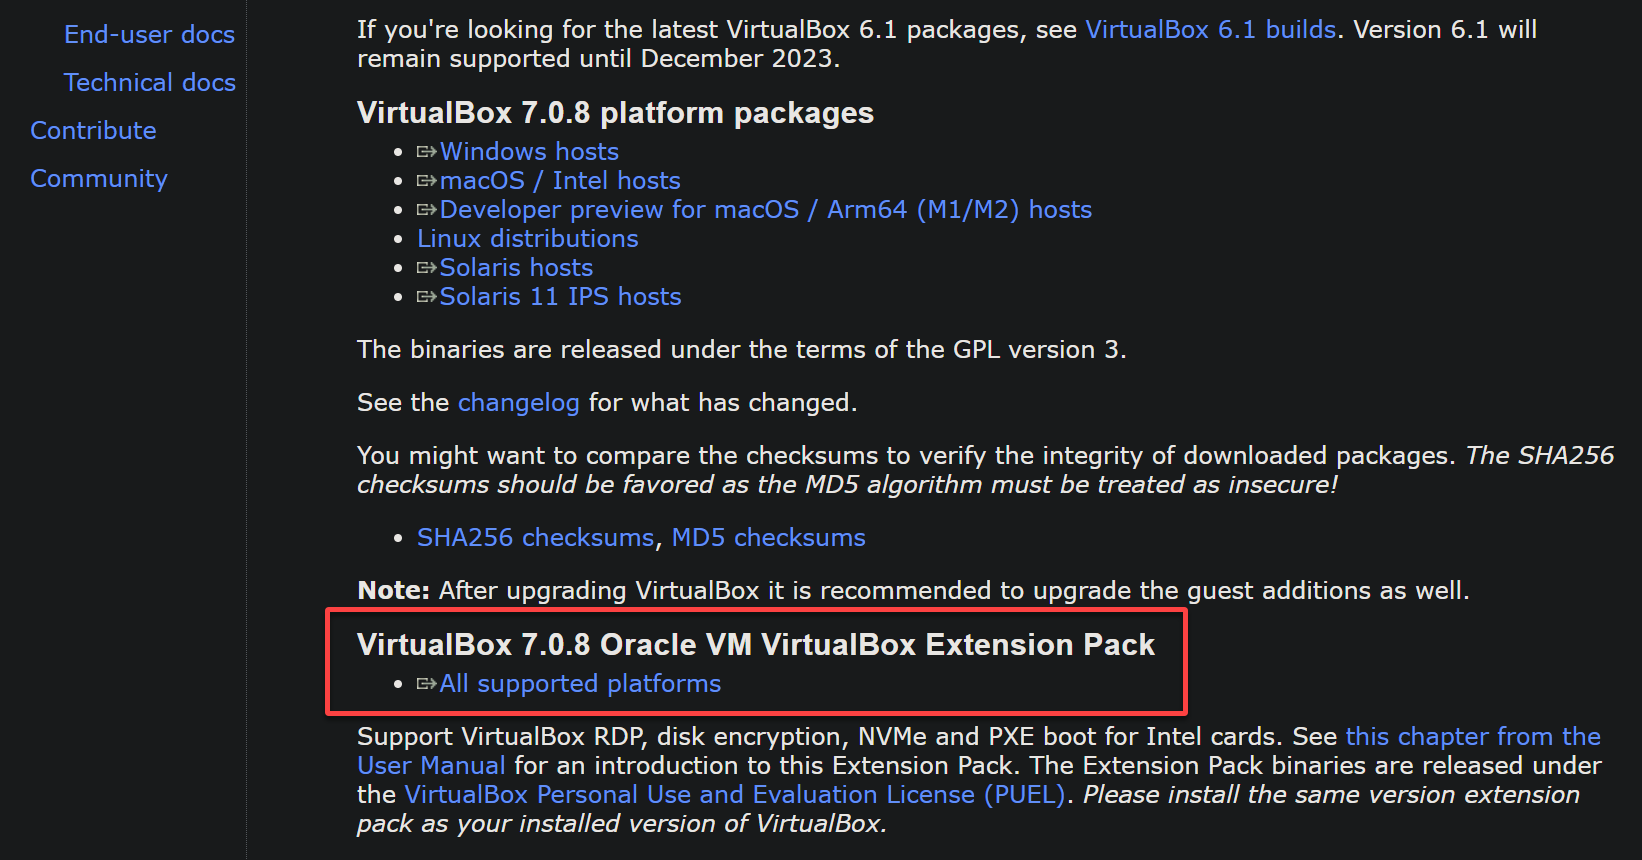
2. Next, open your favorite web browser, and navigate to Oracle’s download page.
3. Locate and click the download link corresponding to your VirtualBox version, and save the extension pack to your local computer.
The file size of the extension pack may vary depending on the version and features included.
4. Now, power off any guest VMs running in VirtualBox to ensure no interference or conflicts during installation.
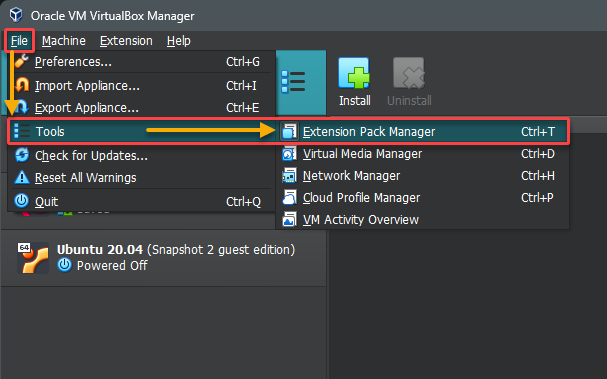
5. Click the File menu → Tools → Extension Pack Manager, and VirtualBox’s main window redirects to the Extension Pack Manager.
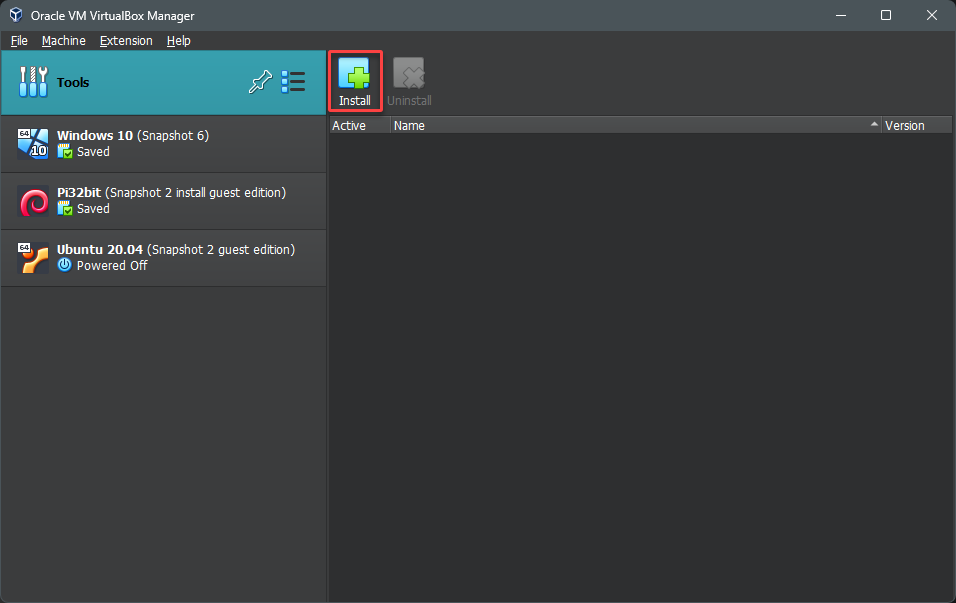
6. On the Extension Package Manager, click Install to locate the extension pack you downloaded in step three.
7. After selecting the downloaded extension pack, click Install in the message box below that appears to authorize the installation.
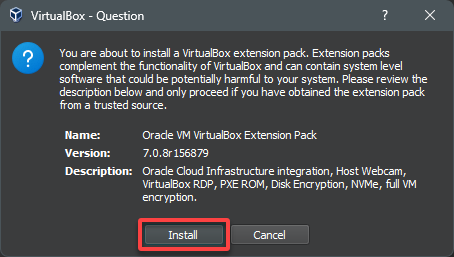
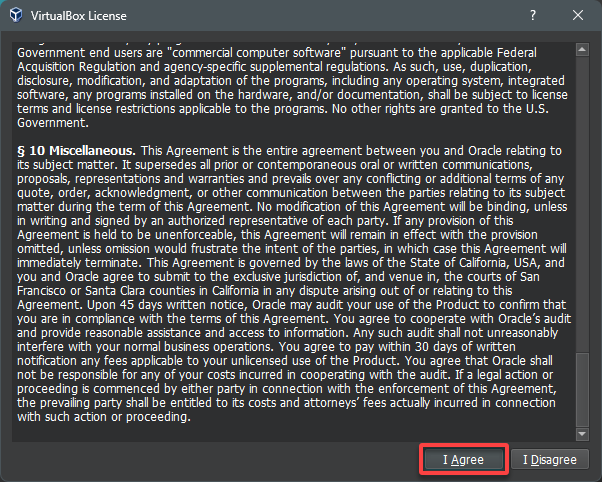
8. Read through the license agreement and click I Agree to accept the license agreement, and start the installation progress starts.
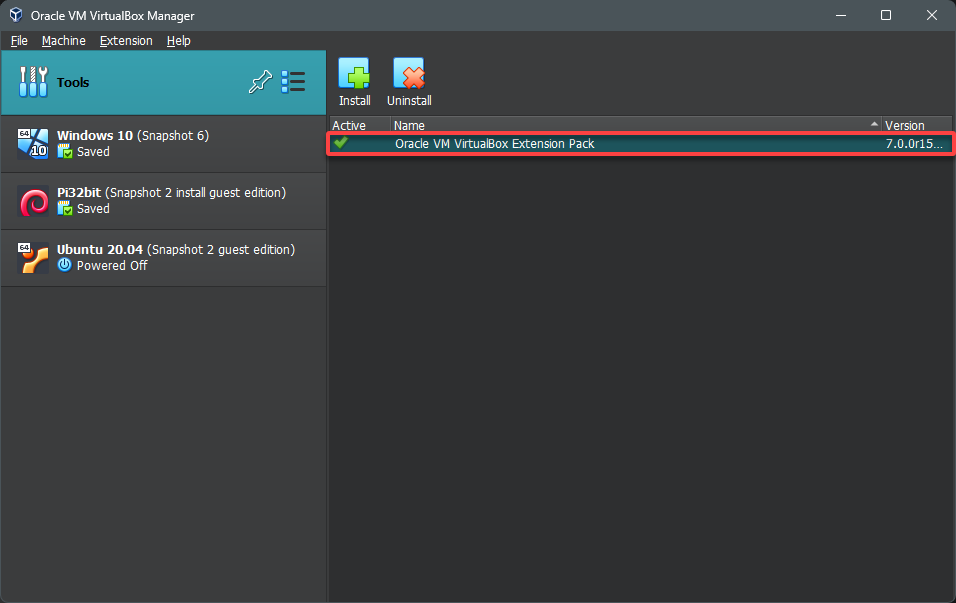
9. Finally, restart VirtualBox for the changes to take effect once the extension pack has been installed, as shown below.
You now have the added features and functionalities the VirtualBox Extension Pack provides within your VMs, typically USB 2.0/3.0 USB fast speeds support.
Enabling the USB 2.0/3.0 Controller
With the extension pack installed, you must ensure smooth access to USB storage via VirtualBox Passthrough. How? Enable USB 2.0/3.0 controller within your guest VM for faster data transfer rates between the host and guest OS than older USB versions.
To enable the USB 2.0/3.0 Controller:
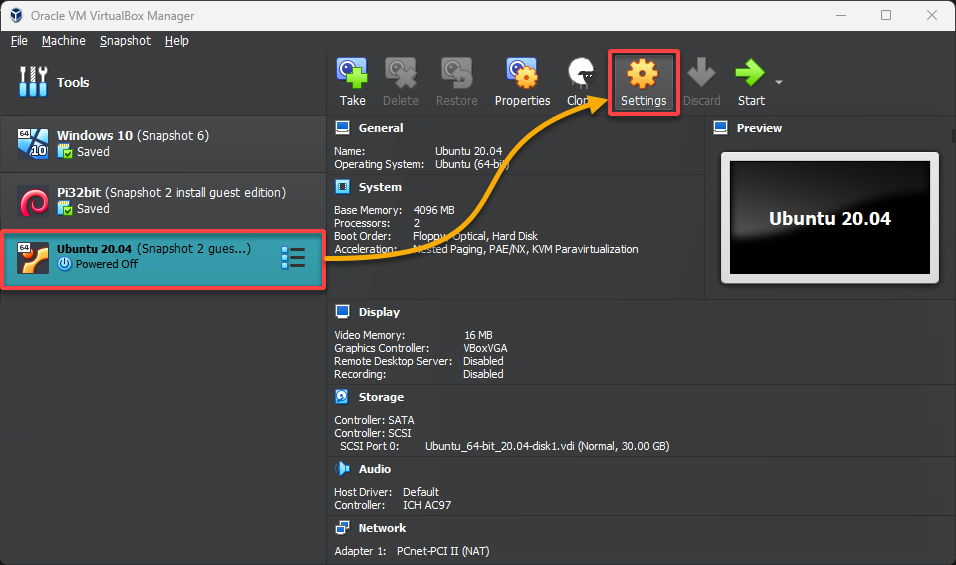
1. Select a VM you want to enable the USB controller from the VirtualBox Manager and click Settings to access the selected VM’s settings.
2. Next, click USB (left pane), and configure the USB controller as follows:
- Tick the Enable USB Controller checkbox to activate the USB controller within your VM.
- Choose your desired USB controller version, either USB 2.0 or USB 3.0. But this tutorial’s choice is the USB 3.0 (xHCI) Controller.
If you intend to select USB 3.0 as the USB controller type, ensure you use VirtualBox 5.x.x or later.
💡 Note that the USB 3.0 control’s availability (the fastest version) depends on the hardware available on your host system. If your machine does not support USB 3.0, you will only be limited to USB 2.0 speeds.
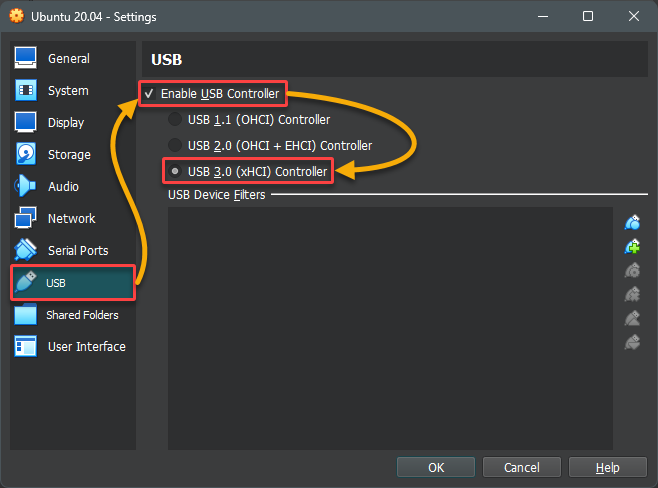
💡 VirtualBox allows you to enable only one USB controller at a time since each USB controller represents a specific version of the USB standard (USB 1.1, USB 2.0, or USB 3.0). These versions have different hardware requirements and capabilities; enabling them simultaneously would result in conflicts and inconsistencies.
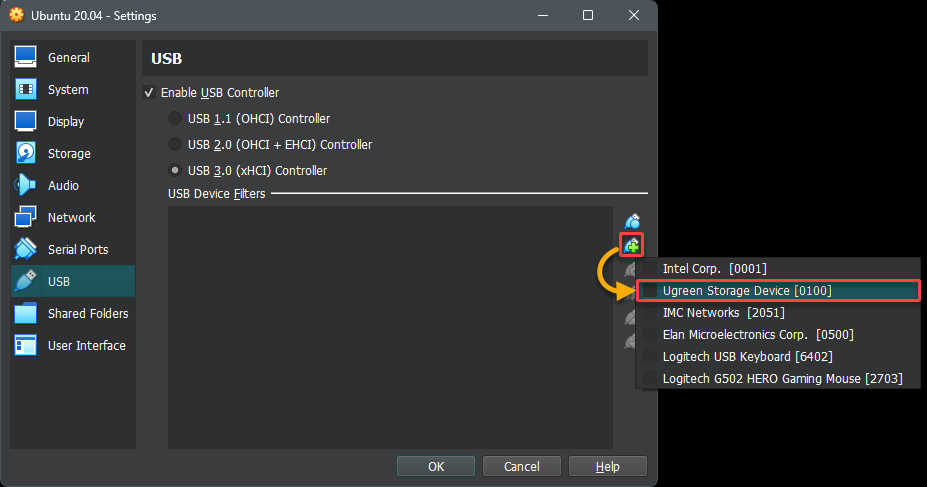
3. Insert your USB device into a USB port on your Windows machine (host). Ensure that the host OS properly connects and recognizes the USB device.
4. Now, click the second USB connection icon, and select the desired USB device to make it accessible to your VM.
The menu below shows all available USB devices connected to your host computer can be passed through to your VM.
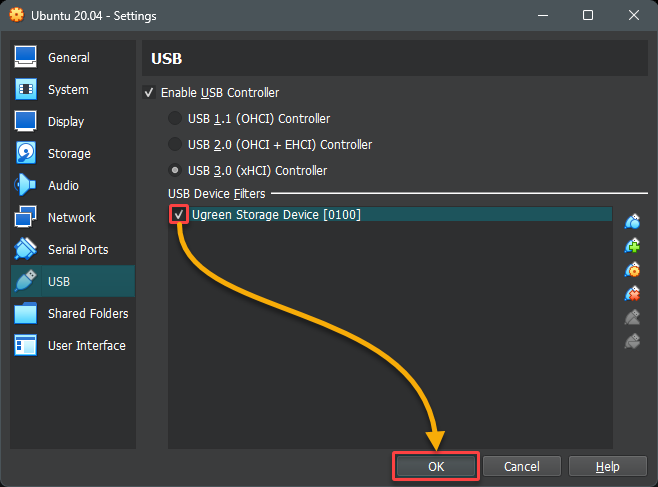
5. Lastly, ensure the USB device is selected, and click OK to save the changes.
At this point, you have attached your USB device to your VM. This setting allows your VM to access and use the selected USB device as if it were directly connected to your VM.
Accessing a USB Device via the VirtualBox USB Passthrough
Since you have successfully attached your USB device to your VM, how do you know it is accessible? You can test your newly-attached USB device by accessing it as you would on other machines.
To access a USB device in your VM:
1. Ensure your Windows machine (host) is not actively using the USB device before you boot up your VM.
VirtualBox disconnects the USB device from the host without following the proper shutdown procedure when you power on a VM. This sudden disconnection interrupts ongoing read or write operations, potentially leading to data loss or corruption.
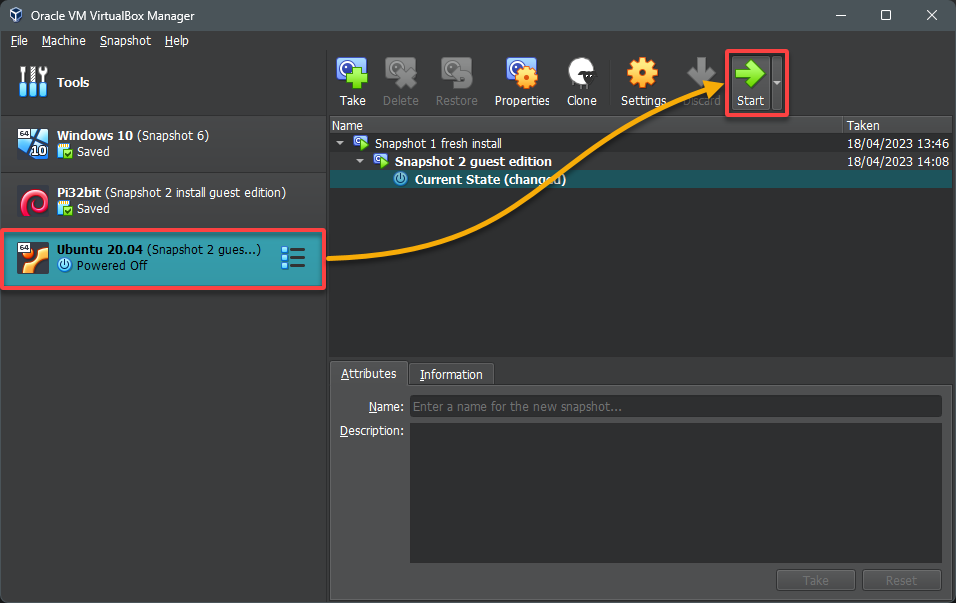
2. Next, start your VM, and wait for your guest OS to boot up.
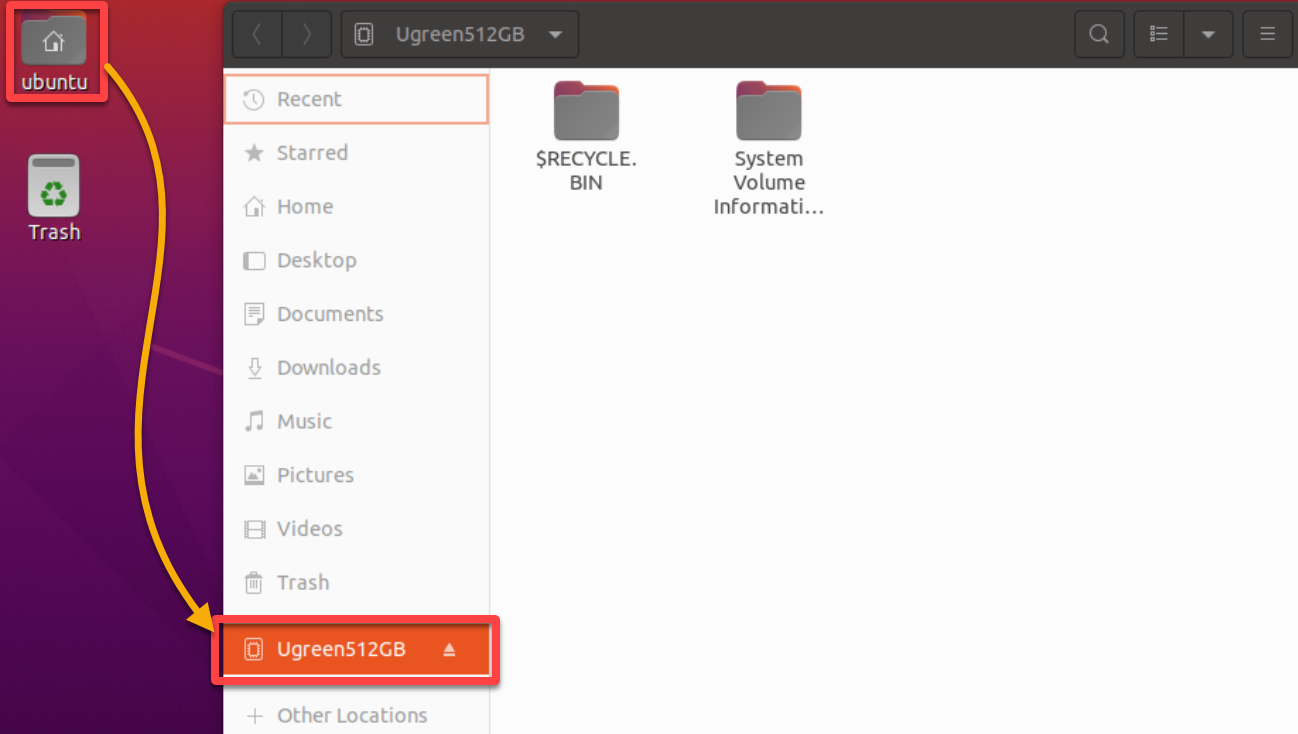
3. Once booted, open the File Manager application, look for and select your USB device from the navigation pane.
You can now seamlessly access, transfer, and interact with data stored on your USB storage devices, just as you would on your physical computer.
But remember, when you attach a USB device to your VM, and it is being used within VirtualBox, the USB device becomes exclusively available to the VM. As a result, your host’s OS cannot see or access the USB device while VirtualBox is using it.
If you need to access the USB device from your host OS, power off the guest VM to release the USB device first.
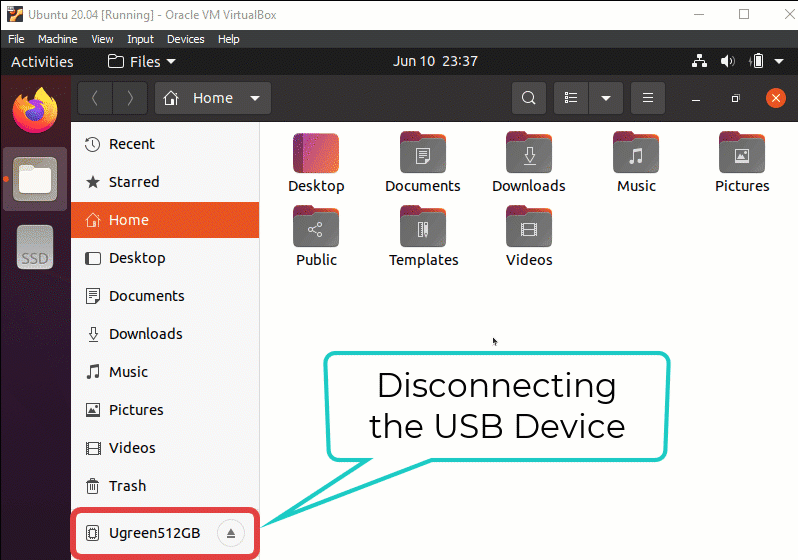
4. Finally, click on the Device menu → USB, and untick the box in front of your USB device’s name to unmount it from your guest VM. Similarly, perform the same step, but tick the box to mount the USB device, as shown below.
Conclusion
In this tutorial, you have learned how to enable VBox USB Passthrough, allowing you to easily access an external storage device connected to your host from within a VM.
Moreover, by installing the VirtualBox extension pack, you have set up fast USB communication between your host and guest OS, leveraging USB 2.0 or 3.0 support within VirtualBox.
You can now seamlessly connect and use USB devices directly from within your VMs. But your journey should not stop here. Why not consider creating a mount point for your USB drive to ensure smoother access and utilization?


