

Do you want to try a different operating system but don’t want to risk installing it on your main computer? Perhaps you need to test software on various platforms but don’t want to set up different computers? Don’t fret. You can install VirtualBox on Windows 10 and create guest VMs instead.
VirtualBox is a free virtualization program that makes it extremely convenient to set up virtual machines on different operating systems. This tutorial will teach you how to install VirtualBox on Windows 10 and the basics to get you started.
Prerequisites
This tutorial will be a hands-on demonstration. If you’d like to follow along, be sure you have the following.
- A Windows 10 computer. This guide uses Windows 10 21H2 64bit, but VirtualBox should work fine on any recent version of Windows 10 or 11.
- An ISO file for the operating system you want to install. This ISO could be of any VirtualBox-supported guest OSes.
- Free storage space. How much you need will depend on the size of the ISO you’re using, but in general, there should be at least 20 GB of free disk space.
- RAM. How much you need will depend on the operating system you want to install and how you plan on using it.
Installing VirtualBox on Windows 10
To install VirtualBox on Windows 10, you must first download the appropriate installation file for your host. From there, the installation process uses a Wizard interface, which should not be too complicated, even for a beginner.
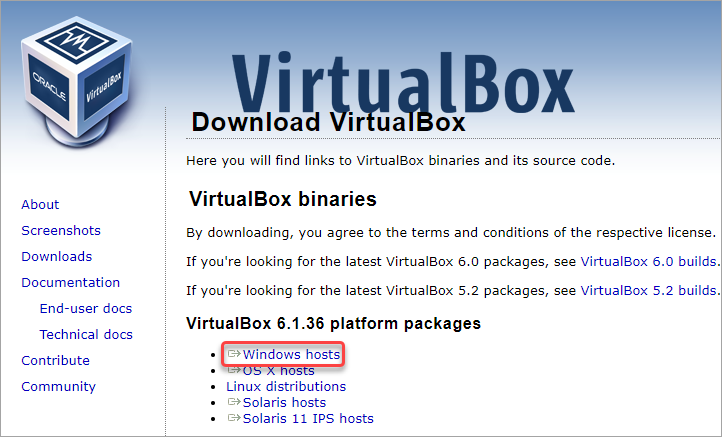
1. Open a browser and open the VirtualBox downloads page and click the Windows hosts link. The latest VirtualBox version as of this writing is 6.1.36. Save the installer somewhere you can quickly locate it, like your Downloads folder.
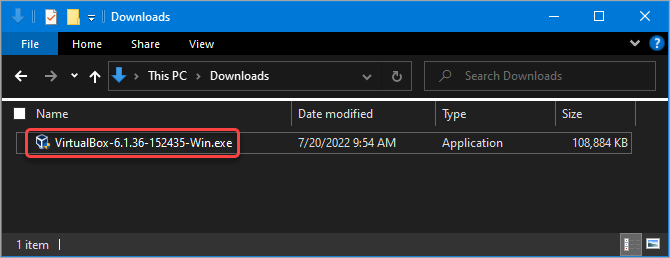
2. Locate the VirtualBox installer file using your File Explorer. Double-click the file to launch the VirtualBox Setup wizard.
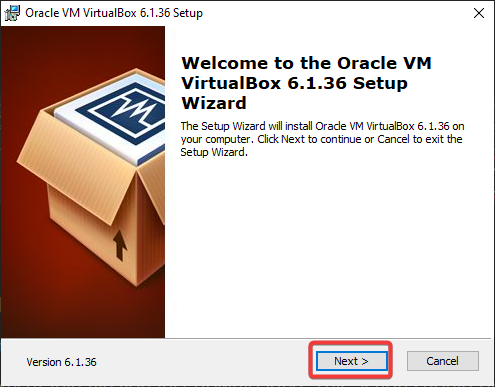
3. Click Next on the first screen. This action tells the Wizard that you want to install VirtualBox.
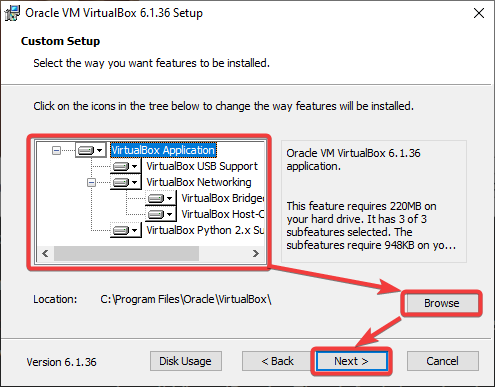
4. Do the following actions on the Custom Setup screen.
- You’ll see a list of the features the Wizard will install. In this example, leave the default selection.
- Browse and select the location you want to install VirtualBox in. The default location is fine, but feel free to change it if you prefer.
- Click Next when you’re ready to continue.
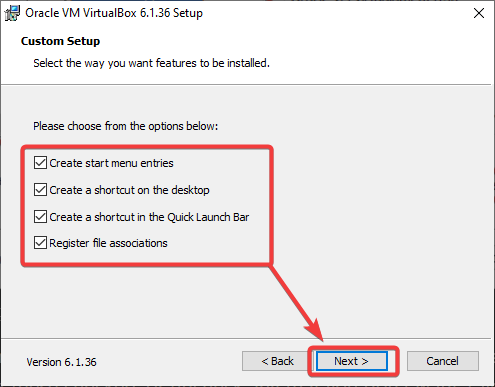
5. On the next screen, you’ll see a list of the shortcuts and file associations the installation will create. Check or uncheck the items you wish to include or exclude and click Next. This example leaves all options checked.
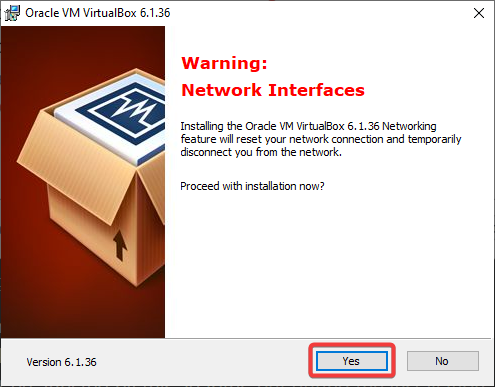
6. On the next screen, you’ll see a warning about networking. The setup process will install a virtual network adapter, which may cause your network connection to disconnect momentarily. Click Yes to continue.
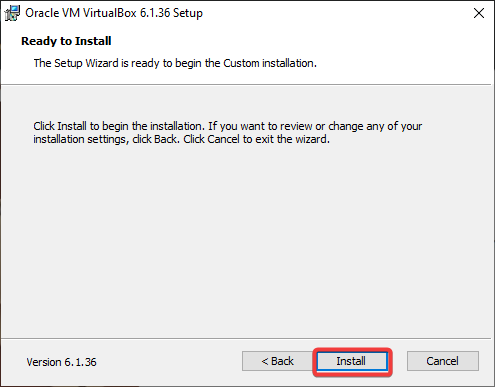
7. Finally, you’ll see a screen asking you to confirm the installation. Click Install to install VirtualBox on Windows 10.
8. The installation process takes several minutes, depending on your system speed. Click Finish to close the Wizard after the installation and start using VirtualBox.

Creating Your First Virtual Machine
After you install VirtualBox on Windows 10, your can create your first virtual machine.
Windows 11 had compatibility issues with VirtualBox, such as VMs cannot start, crashing, and having corrupted displays. But Microsoft confirmed that such issues no longer exist in VirtualBox 6.1.28 and later versions, so you can also apply all the steps below on Windows 11.
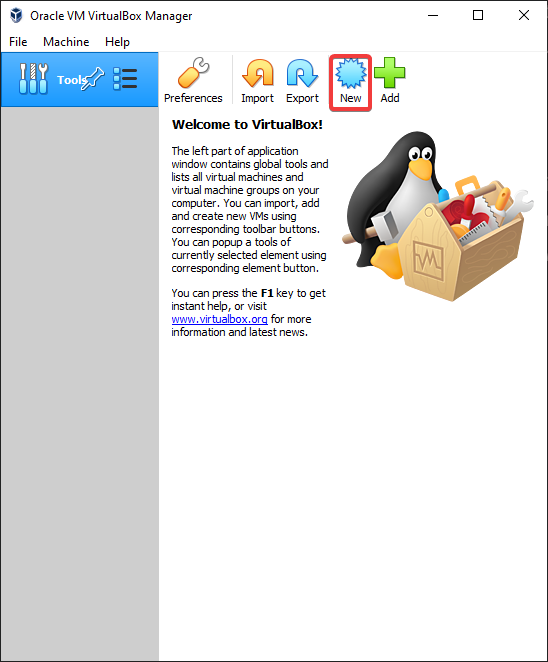
1. First, click the New button in the top-right corner of the VirtualBox window. This action brings up the Create Virtual Machine wizard. This Wizard lets you configure your new VM with the settings you want.
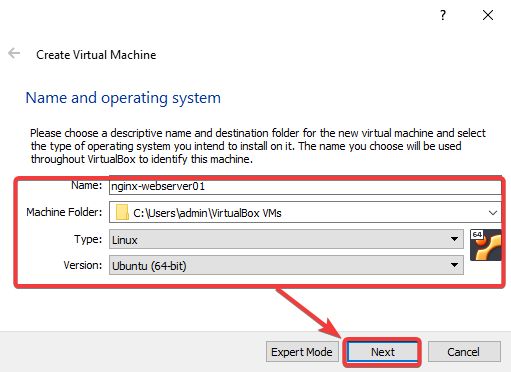
2. Configure the following on the Name and operating system page.
- Name: Give your VM a name. This name can be anything you want.
TIP: Name the VM based on its intended purposes, such as nginx-web-server or windows10-development, so you can better identify the VM later.
- Machine Folder: Specify the location to store your virtual machine files. You can leave the default location or click the Browse button to select a different one.
TIP: Ensure there’s enough space on your drive for your VM. A Linux VM can be as small as 4GB, but a Windows VM will need at least 20GB.
- Type: VirtualBox offers many different types of OSes. Select the operating system you want to install from the drop-down menu. This tutorial selects Linux for the type.
TIP: If the OS you want does not appear in the list, you can select Other at the bottom. This option tells VirtualBox to try to autodetect the features of your OS in the best possible way.
- Version: Select the version of the operating system you want to install from the drop-down menu. This tutorial goes with Ubuntu 20.04 LTS 64bit, so its version is Ubuntu (64-bit).
- Click Next to continue.
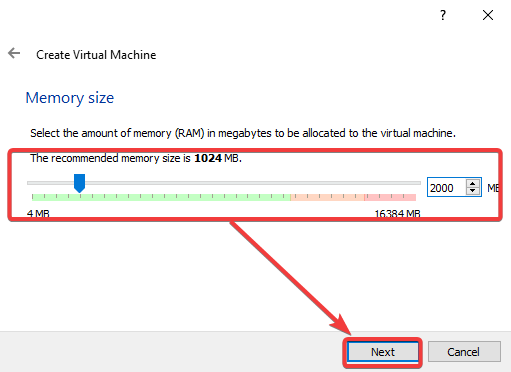
3. On the Memory size page, set how much memory (RAM) your VM will have. You can choose between 4MB (this value is too low for any OS) to 16384MB. The default is 1024MB, but you can increase it.
Generally, 2000MB is a good starting point for a Linux VM, while 4096MB for a Windows VM.
Be careful not to allocate too much memory to your VM. If you do, your host computer may start to lag or become non-responsive. On the other hand, if you set too little memory for the VM, your guest OS and apps may not have enough resources to run correctly. Choose the memory size wisely.
Click Next to continue.
4. On the Hard disk screen, decide whether to create a new hard disk for your guest VM or use an existing one. This example chooses to create a new hard disk since.
This virtual hard disk will be your guest VM’s primary hard disk that holds all the data, such as the guest OS, apps, and other files.
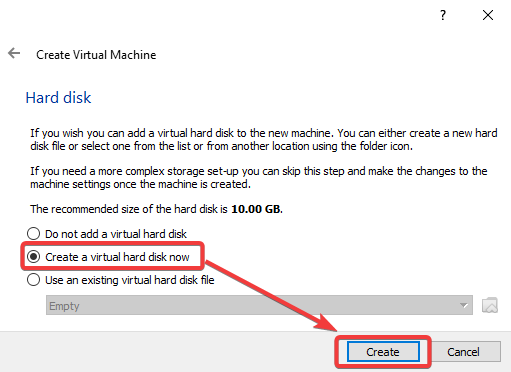
You can select Use an existing hard disk if you have an ISO image or VDI file that already contains a guest operating system.
5. On the Hard disk file type page, select VDI (VirtualBox Disk Image) and click Next to continue. This file type is the default for VirtualBox.
You may choose the corresponding option if you plan to use the virtual hard disk with other virtualization solutions, like VMware or Hyper-V.

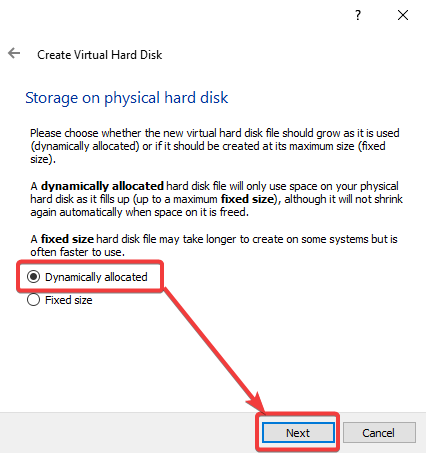
6. On the Storage on physical hard disk, select Dynamically allocated or Fixed size, depending on how you want to provision the virtual disk file size allocation. This example chooses the Dynamically allocated option. Click Next to continue.
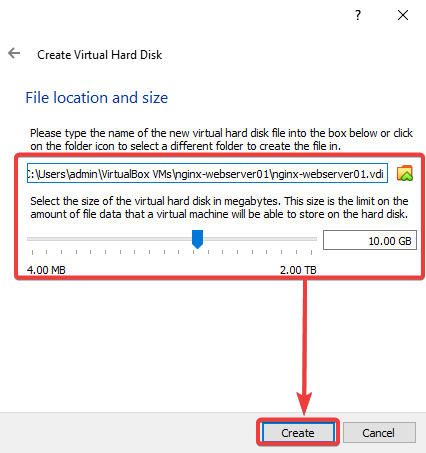
7. On the File location and size screen, specify the location and maximum size of the new virtual disk, and click Create.
A good rule of thumb is to allocate at least 10GB for a Linux VM and 40GB for a Windows VM.
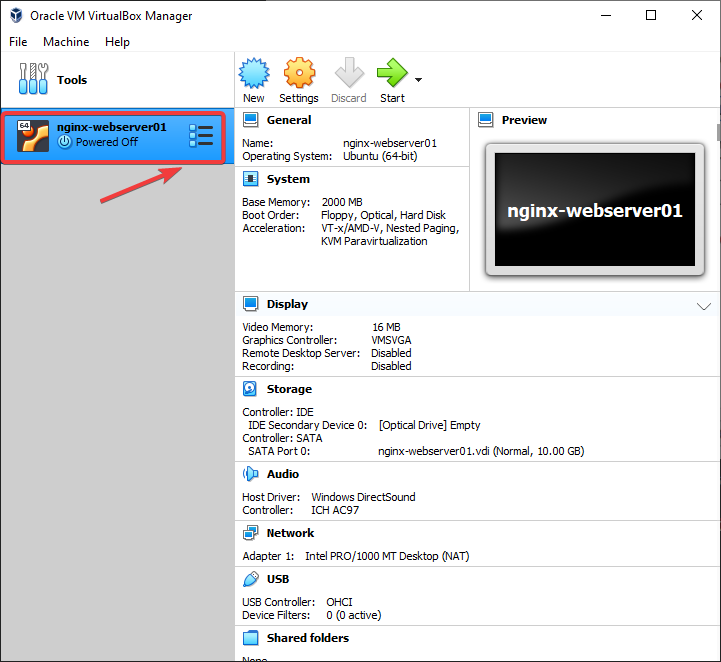
You have a new virtual VM, as shown in the VirtualBox Manager window below.
Installing the Guest Operating System
You’ve created a new virtual machine, but it’s useless without an operating system. In this section, you’ll learn how to install a guest operating system on your new VM.
You need an ISO file with the OS installation files to install the guest OS. You can download ISO files for many popular operating systems from the internet. For example, you can get a Ubuntu 20.04 ISO file from the Ubuntu official website.
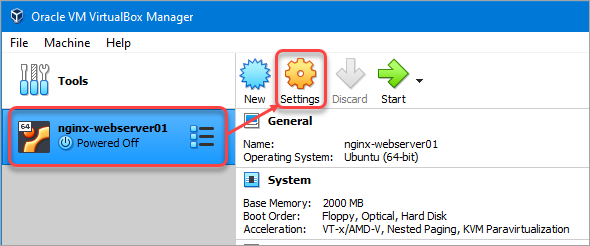
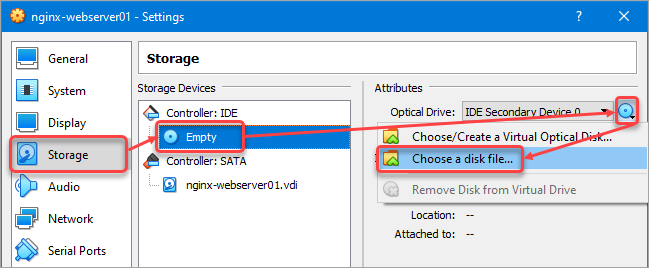
1. Click your VM on the list and click Settings.
2. On the Settings window, click Storage → Empty disk → the Optical Drive icon → Choose a disk file.
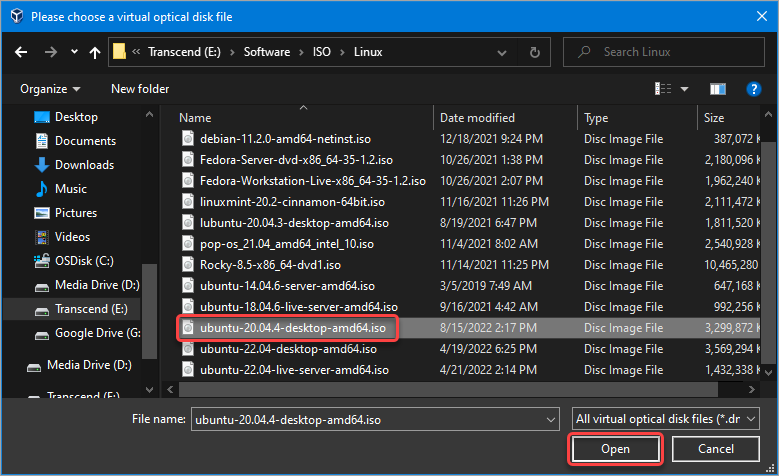
3. Locate the ISO file and click Open. This example chooses the ubuntu-20.04.4-desktop-amd64.iso file.
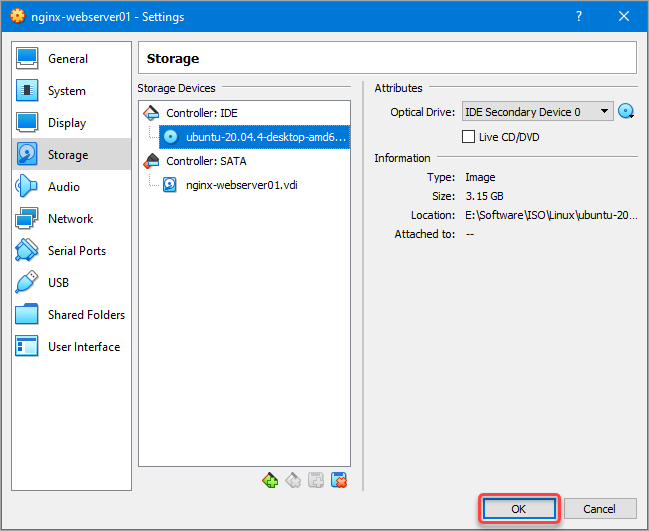
4. After loading the ISO file, click OK.
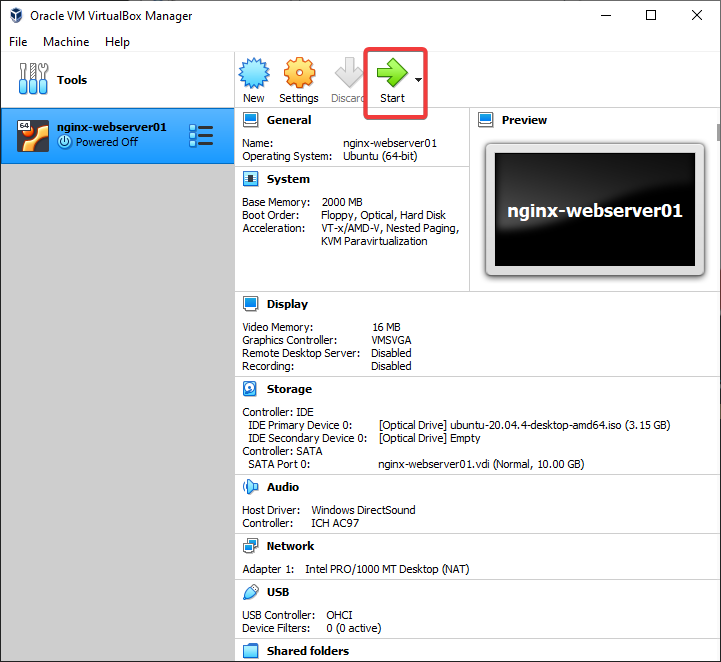
5. Start your VM by clicking the Start button in the VirtualBox Manager window. The VM will boot from the ISO file. Install the operating system as you would on a physical machine.
6. Once the installation is complete, one more task related to your new VM is to install the Virtual Box Guest Additions. The Guest Additions enable features like the shared clipboard, shared folders, mouse integration, display resize options, etc.
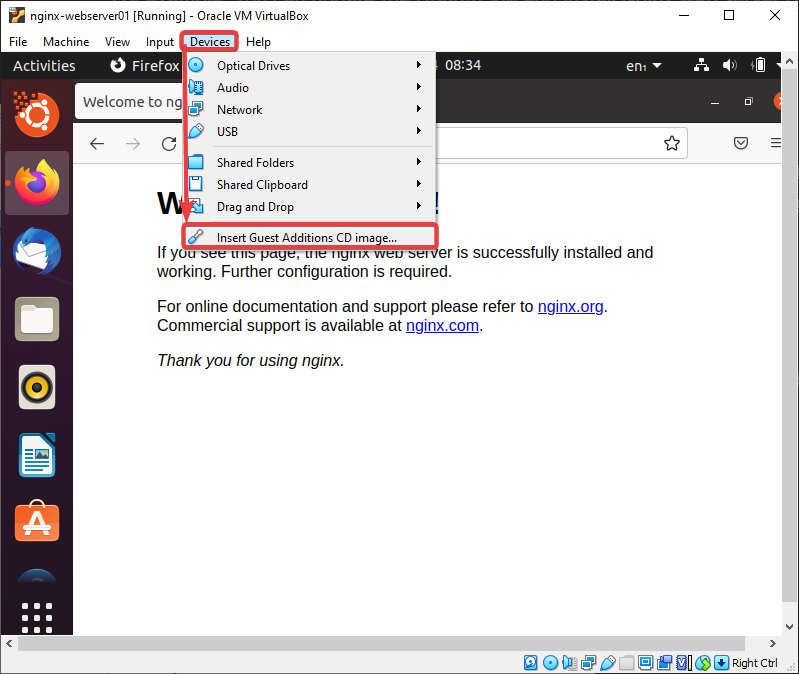
To install the Guest Additions, click the Devices menu and Insert Guest Additions CD Image. Doing so mounts the VBoxGuestAdditions.iso to your guest VM.
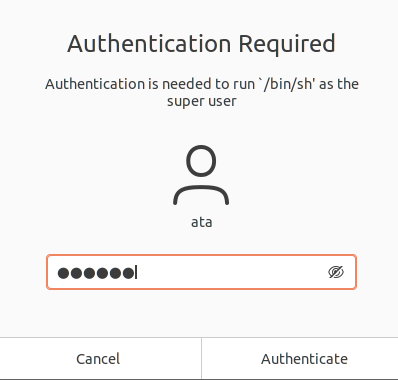
7. Provide your user password at the prompt and click Authenticate.
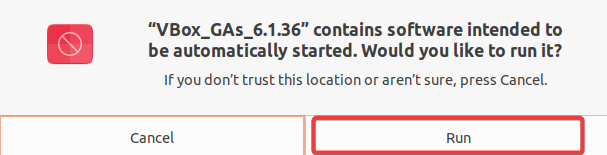
8. Next, click Run to allow the Guest Additions installation.
9. Follow the on-screen instructions to finish the installation. Once the installation is complete, reboot your VM for the changes to take effect.
Conclusion
This article taught you how to install VirtualBox on Windows 10 and create your first virtual machine. You also learned how to install the guest operating system on the VM and how to install the Guest Additions.
Now that you have a basic understanding of VirtualBox, you can experiment with different OSes and learn more about virtualization. With this new skill, why not create a WireGuard VPN connection inside a VM and access the internet safely from a public Wi-Fi network?


