

Do you need to test the website you’re developing but only have your Mac to work with? You don’t need to build a separate server or virtual machine only to test your website. One quick option is installing NGINX on Mac, and you should have a web server running right on your computer.
Stick around and learn how to install and set up NGINX on Mac. You’ll learn a couple of different ways to install NGINX, so you may choose which method works for you. You’ll also learn the basic configuration items to help you start testing.
Prerequisites
This tutorial will be a hands-on demonstration. If you’d like to follow along, be sure you have the following:
- Any recent version of macOS. As of this writing, the three in-support, non-end-of-life macOS versions are Catalina, Big Sur, and Monterey. This tutorial uses macOS Big Sur.
- Your computer must have the Xcode Command Line Tools to install NGINX from Source or Homebrew to install the NGINX package (formula).
Installing NGINX on Mac
There are two methods you can install NGINX on Mac — by compiling the source or with a package manager. But one installation method is not better than the other. Which method you choose will depend on your requirements.
In the following sections, you’ll learn how to perform both NGINX installation methods.
Method 1: Compiling and Installing from Source
Compiling and installing NGINX from Source gives you the flexibility to include modules or security patches into your NGINX installation. For example, you can compile NGINX to include the Real-Time Messaging Protocol (RTMP) module if you set up a streaming server.
Customizability requires more steps and includes manual dependencies installation. Follow these steps to install NGINX on Mac from Source.
1. Open a terminal on your Mac.
2. Run the below command to create a working directory under your home folder. This directory will contain all the source files you need for the NGINX installation.
# Create a source folder under your home directory
mkdir ~/src && cd ~/src
3. Next, run the commands below to download (curl) and extract (tar) the latest Perl Compatible Regular Expressions (PCRE). The NGINX Core and Rewrite modules require PCRE. The latest PCRE version as of this writing is 8.45.
# Download and extract the PCRE source
curl -OL https://ftp.exim.org/pub/pcre/pcre-8.45.tar.gz
tar -xf pcre-8.45.tar.gz && rm pcre-8.45.tar.gz
4. Run each command below to download (curl) the OpenSSL source to add SSL support. This addition is an example of customizing the NGINX build. The latest OpenSSL version as of this writing is 1.1.1m.
# Download and extract the OpenSSL source files
curl -OL http://www.openssl.org/source/openssl-1.1.1m.tar.gz
tar -xf openssl-1.1.1m.tar.gz && rm openssl-1.1.1m.tar.gz
5. After downloading the requirements, run the below commands to download (curl) and extract (tar) the NGINX source. The latest stable version as of writing is 1.20.2.
# Download and extract the NGINX source files
curl -OL http://nginx.org/download/nginx-1.20.2.tar.gz
tar -xf nginx-1.20.2.tar.gz && rm nginx-1.20.2.tar.gz
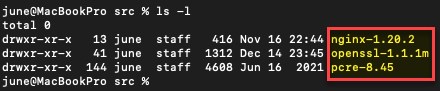
# List the files/folders in the working directory
ls -lAt this point, you should now have three new directories total, as shown below.
6. Now, run the commands below to compile (make) and install NGINX.
# Enter the NGINX source folder
cd nginx-1.20.2

# Create the NGINX configuration
## Parameters:
## --with-pcre=../pcre-8.45/ : Specifies the PCRE source location
## --with-http_ssl_module : Enables the HTTPS support
## --with-openssl=../openssl-1.1.1m/ : Specifies the OpenSSL source. Required by the http_ssl_module
./configure --with-pcre=../pcre-8.45/ --with-http_ssl_module --with-openssl=../openssl-1.1.1m/

# Compile NGINX
make
# Install NGINX
sudo make install
7. Next, execute the below command to add the NGNIX path to the system $PATH by appending the full path /usr/local/nginx to /etc/paths. After this step, you can run nginx commands without specifying the full path.
# Append NGINX to the /etc/paths file
echo /usr/local/nginx/sbin | sudo tee -a /etc/paths
8. Quit the terminal by pressing CMD+Q and open a new terminal session to apply the new $PATHS.
9. Run the nginx command below to start NGINX since the NGINX server does not automatically start after the installation.
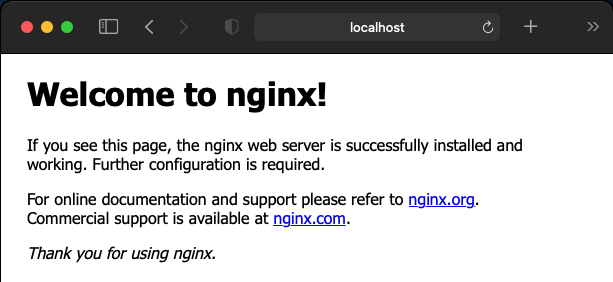
sudo nginx10. Lastly, confirm that NGINX is running. Open a web browser window and enter the address HTTP://localhost. You should see the default NGINX welcome message page like the one below.
Installing NGINX from Source sets the default listening port 80.
Because you installed NGINX on Mac from Source as root, you’ll need to prefix every
nginxcommand you issue withsudomoving forward.
Method 2: Installing NGINX using Homebrew
Installing NGINX with Homebrew is more convenient and less prone to mistakes. This method installs dependencies automatically. If you don’t need to customize the NGINX installation, this method is the quickest option and only requires one command to install!
To install NGINX on Mac using Homebrew, proceed as follows.
1. Open a new terminal session.
2. Run the below brew command to install NGINX.
brew install nginxCan you install NGINX as root with Homebrew? – No (not officially). The brew install command refuses to run with the sudo prefix. If you try, you’ll get the error message below.
” Er” or: Running Homebrew as root is extremely dangerous and no longer supported. As Homebrew does not drop privileges on installation you would be giving all build scripts full access to your system.”
3. After installing, invoke the below command to start NGINX. This command runs NGINX as a background daemon.
By default, Homebrew installs NGINX in /usr/local/Cellar/nginx/<version> and creates symbolic links at /usr/local/opt/. The nginx binary has a symbolic link in /usr/local/bin and this folder is already included in the $PATH.
nginxTo run NGINX without a background service, run the below command instead. This command issues a global directive NOT to run nginx as a daemon.
nginx -g “da” mon off;”
You can stop NGINX by pressing CTRL+C on the terminal in this mode.
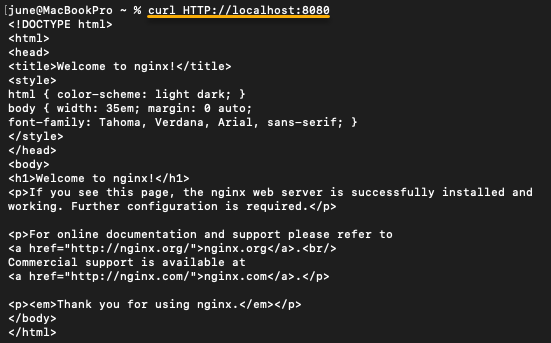
4. Finally, invoke the curl command below to confirm that NGINX is now running.
Installing NGINX via Homebrew sets the default listening port 8080. This default port assignment ensures that you can run nginx without sudo.
curl HTTP://localhost:8080As you can see below, the curl command downloaded the default NGINX webpage, which indicates that the server is running.
Setting up NGINX for Testing
So far, you’ve installed NGINX, but it’s still working on the default settings. There are a few fundamental changes that you might consider before you start testing your website.
Do you want NGINX to autostart with the computer boot up? Where will you store the files for the website you’re testing? Should you retain the default listening port assignment?
These are some of the items that you’ll need to configure after installing NGINX, which you’ll learn to set up in the following sections.
The succeeding sections demonstrate the Homebrew-installed NGINX configuration file(s) steps unless the instructions explicitly state.
Customizing the Server Listening Port
Depending on the installation method, the default listening port would either be 80 or 8080. Port 8080 is typically acceptable for testing and development. But you might still want to change the port number in some cases, perhaps due to conflict with other services, or you just feel like it.
Whatever your reason, follow the steps below to change the NGINX default listening port.
1. First, run the below command to send the stop signal (-s stop) to ensure that NGNIX is not running. nginx -s stop
nginx -s stop2. Next, run the nginx command below to find out the NGINX configuration file path.
nginx -tThe result below shows that the configuration file is at /usr/local/etc/nginx/nginx.conf.

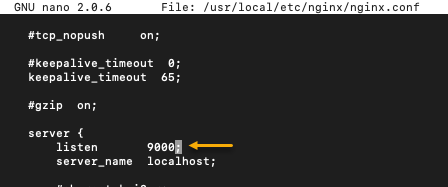
3. Open the configuration file in your preferred text editor, such as nano, on the below example.
nano /usr/local/etc/nginx/nginx.conf4. Now, locate the line listen inside the server {} block. As you can see below, the listening port value is 8080.

5. Change the listen port number to another unique port number value, such as 9000, in this example. Save the change and exit the file.
6. Now, rerun the nginx command below to start NGINX again.
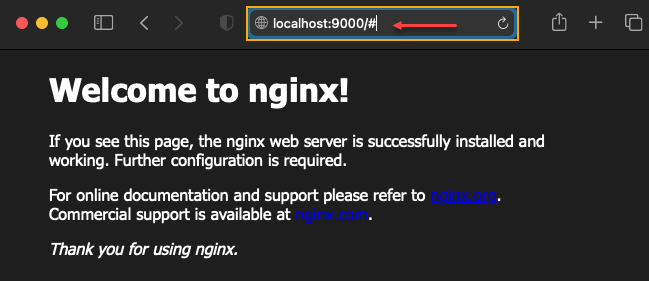
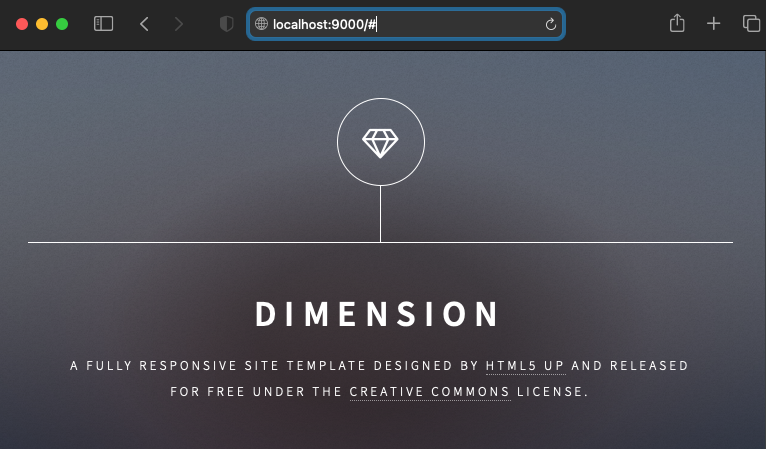
nginx7. Finally, open a new browser window and navigate to HTTP://localhost:9000. NGINX should now serve the website on port 9000, as shown below.
Pointing to your Development Web Directory
By default, the installation of NGINX on Mac serves the web directory from /usr/share/nginx/html (Source-installed) or /usr/local/Cellar/nginx/<version>/html (Hombrew-installed).
But what if your website files are somewhere else, perhaps on another drive? Don’t worry. Follow the steps below to point NGINX to your development web directory.
1. First, run the below commands to stop NGINX and open the configuration file in the text editor, as you did in the “Customizing the Server Listening Port” section (steps one to three).
# Stop NGINX
nginx -s stop
# Run test to find the configuration file
nginx -t
# Open the configuration file for editing
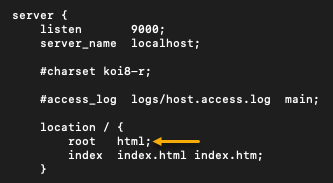
nano /usr/local/etc/nginx/nginx.conf2. On the text editor, search for the line that says root html; inside the server {} block.
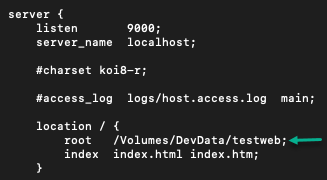
3. Edit the root value and change it to your custom folder. In this example, the web directory is at /Volume/DevData/testweb. Save the changes and exit the editor.
The test website in this example is a static website called Dimensions downloaded from HTML5 Up. This sample website is free to download and use, subject to The Creative Commons Attribution 3.0 License.
4. Now, start the NGINX server again.
nginx5. Lastly, browse the address HTTP://localhost:9000 using your web browser. NGINX is now serving your test website from your custom web directory like the screenshot below.
Enabling NGINX Autostart for a Source-Based Installation
NGINX does not start automatically by default, regardless of your chosen installation method. In development or testing, NGINX autostart may not be a requirement. But if you need to, you can configure NGINX to run at boot using the launchd process.
You can enable NGINX to autostart either for source-based or homebrew-based installation. But for this demo, start with the source-based installation.
To enable NGINX to autostart for a source-based installation, follow these steps.
1. Run the touch command below to create a new property list (PLIST) file for NGINX.
The /Library/LaunchDaemons location stores the global daemons that run on behalf of the root or a specified user. The file name can be anything you want, but it would be helpful if the filename contained the name of the daemon you’re creating.
sudo touch /Library/LaunchDaemons/ata.nginx.plist2. Now, open the PLIST file for editing.
sudo nano /Library/LaunchDaemons/ata.nginx.plist3. Copy the code below and paste it into the text editor. Save the file and exit the editor.
In a nutshell, the code below defines a daemon with the name ata.nginx. The program to run is /usr/local/nginx/sbin/nginx and the RunAtLoad value means the program will run during the computer boot up.
<?xml version="1.0" encoding="UTF-8"?>
<!DOCTYPE plist PUBLIC "-//Apple//DTD PLIST 1.0//EN" "http://www.apple.com/DTDs/PropertyList-1.0.dtd">
<plist version="1.0">
<dict>
        <key>Label</key>
        <string>ata.nginx</string>
				<key>Program</key>
				<string>/usr/local/nginx/sbin/nginx</string>
        <key>RunAtLoad</key>
        <true/>
</dict>
</plist>
4. Lastly, run the below launchctl command to load the daemon. This command starts NGINX right away. And from this point forward, NGINX will start automatically after each computer restart.
sudo launchctl load -w /Library/LaunchDaemons/ata.nginx.plistSuppose you change your mind and prefer to disable the NGINX autostart, run the below command. This command stops and disables the NGINX daemon autostart.
sudo launchctl unload -w /Library/LaunchDaemons/ata.nginx.plistEnabling NGINX Autostart for a Homebrew-Based Installation
Unlike source-based installation, for Homebrew-based NGINX installation, you only need to run one command for enabling or disabling NGINX autostart behavior. Isn’t that convenient?
Run the below command to enable NGINX to autostart. The start command starts NGINX immediately and registers it to launch at boot.
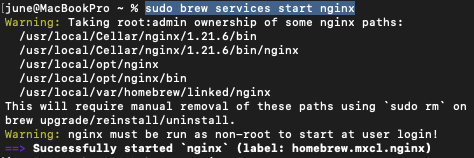
sudo brew services start nginx
After running the command, you’ll get a similar output to the image below.
To disable the NGINX autostart state, run the below command. As you can see, the only part of the command to change is from start to stop. This command also gracefully exits the NGINX server immediately.
sudo brew services stop nginx
Conclusion
There you have it! Setting up NGINX on Mac is a surefire way to have a web server running in no time for testing. You have installation options based on your setup requirements, and customizing its settings is quick through plain-text configuration files — no special tools are necessary.
NGINX does not limit testing and running to a single website only. You can run multiple development domains and websites simultaneously without interfering with each other. Or if you’re feeling adventurous, you could run NGINX in Docker in Mac, too!


