
Mounting drives in Ubuntu is essential for anyone using Ubuntu, as it is one of the most common tasks for managing data and applications. But if you struggle to mount a drive in Ubuntu, worry not! This tutorial has got you covered.
Learn, step-by-step, how to mount drives in Ubuntu in many ways to save time and effort when working with your system.
Keep reading and start mounting drives like a boss!
Prerequisites
This tutorial involves hands-on demonstrations. To follow along, be sure you have an Ubuntu system with an external drive or partition to mount. This tutorial uses Ubuntu 20.04, but other distributions will work, while the steps may vary.
Mounting a Drive in Ubuntu via the GUI
The process of mounting drives in Ubuntu can be frustrating, but Ubuntu’s GUI will alleviate your frustrations. The quickest way to mount a drive (if not the easiest) in Ubuntu is by taking advantage of its GUI, allowing users to interact with the system via a user-friendly interface.
To mount a drive in Ubuntu via the GUI, follow these steps:
1. Plug in the external drive you wish to mount to your machine.
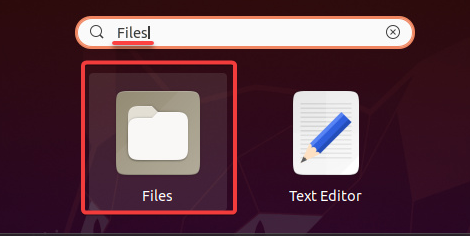
2. Once plugged in, open the file manager application (Files) in Ubuntu.
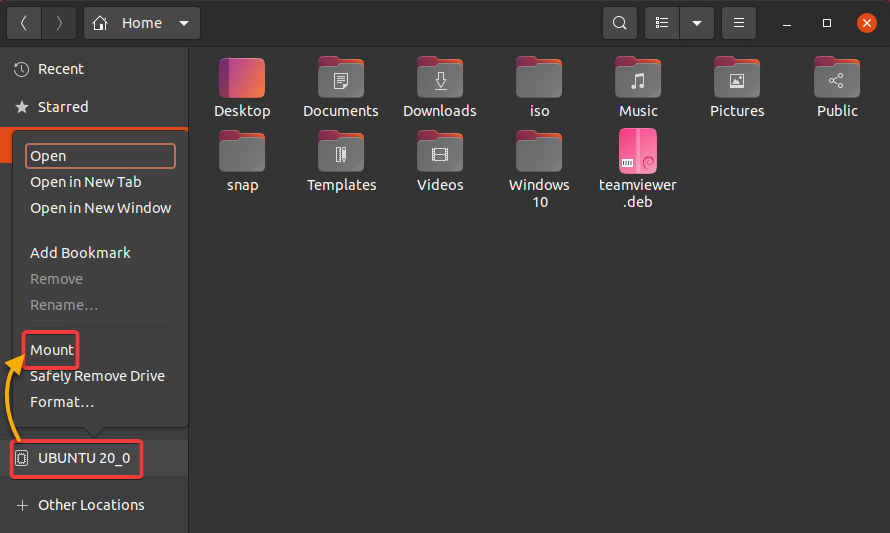
3. Locate the drive or partition you wish to mount in the list of devices shown in the file manager. The drive may be listed under Other or Computer.
💡 If the drive is not showing up, it may not have been properly detected by the system. Try unplugging and re-plugging the drive, or check for any hardware issues with the drive itself.
4. Now, right-click on the drive, and select Mount from the context menu to mount the drive to your system.
Mounting a drive denotes attaching it to your OS’s file system, which makes it accessible for reading and writing.
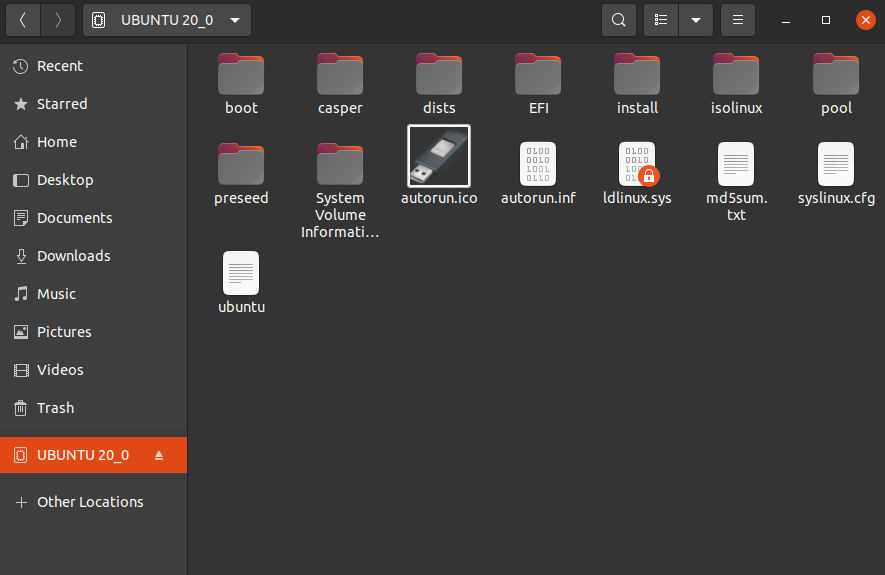
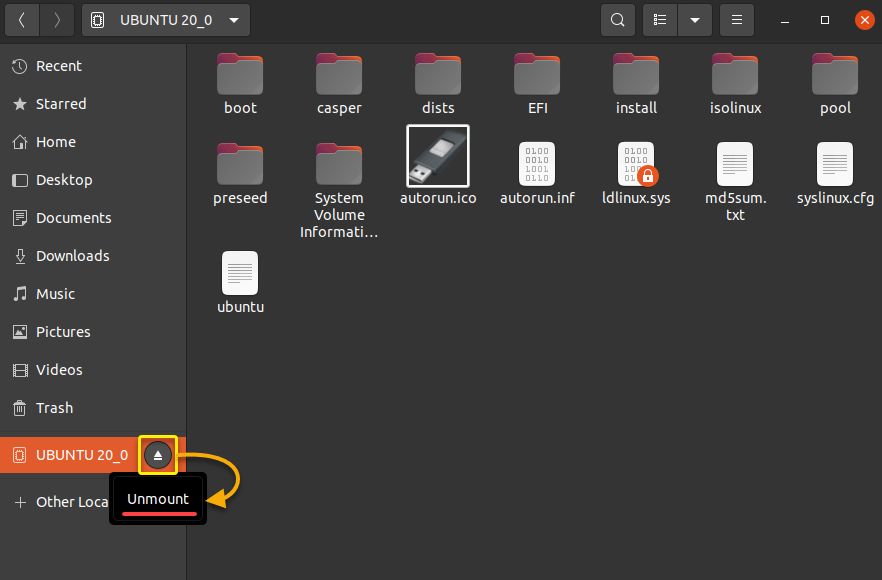
5. Once mounted, navigate to the drive, and you will have access to the contents, as shown below.
You can now read from and write to the drive just like on any other drive on your system.
6. Now, click the icon next to the mounted drive’s name, and select Unmount to unmount the drive from your system.
Unmounting the drive first severs the connection between the drive and the OS. Doing so allows you to remove the drive without data loss or damage safely.
💡 While a drive is mounted, the OS treats it as an active storage device and may access it to read or write data at any time. If you simply unplug the drive, you could disrupt ongoing read or write operations, causing data loss or corruption.
Mounting Drives via the CLI in Ubuntu
If you work mainly in the terminal, mounting drives using the CLI in Ubuntu is within your expertise. Using the CLI can be more efficient for some tasks, particularly for experienced users who are comfortable with running commands and navigating directories using a terminal.
Below are some reasons, but are not limited to, for using the CLI to mount a drive in Ubuntu:
- Mounting drives via the CLI is helpful if you do not have a graphical desktop environment installed or running a server with no GUI.
- The CLI allows you to automate tasks and write scripts in CI/CD pipelines that can mount drives automatically. Mounting drives via the CLI can be useful for administrators who manage multiple servers or perform frequent mount/unmount operations.
- The CLI allows you to perform more advanced tasks, such as specifying mount options or editing the file system table (
fstab) to configure automatic mounting.
Whatever the reason, mounting drives via the CLI in Ubuntu truly comes in handy. So read on and see how to mount drives via the CLI.
Mounting the Partition
Assuming that your USB drive is already partitioned, which divides the drive into separate sections that can be treated as independent storage volumes, you will mount the USB drive to the system.
1. Run the below fdisk command to list (-l) the current partitions of all the drives attached to your system.
sudo fdisk -lDrives are typically referred to by their device names, such as /dev/sda, /dev/sdb, /dev/sdc, etc. These device names refer to the physical disks attached to the system, with sda being the first disk, sdb being the second, and so on.
Identify the partitions you wish to mount in the list below. This tutorial’s choice is the /dev/sdc disk, but your case may differ.

2. Now that you have identified the device to mount, you must create a mount directory to link the device to. Run the mkdir command below, which does not provide output but creates a mount point directory called /mnt/sdc.
sudo mkdir /mnt/sdc3. Next, run the below mount command to mount the partition to your mount point directory (mnt/sdc). No output is printed with this command, but you will later check all mounted partitions in your file system.
When you mount a device or partition to a mount point, the partition becomes accessible like any other directory in the file system.
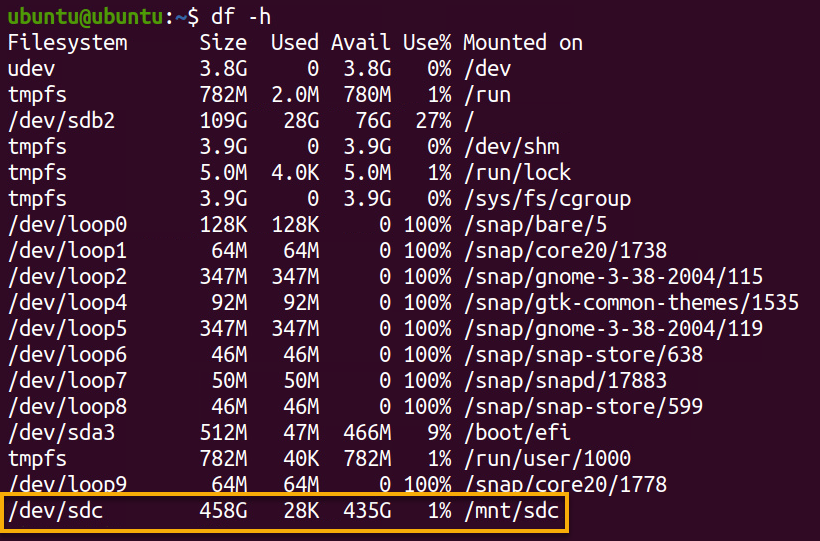
sudo mount /dev/sdc /mnt/sdc4. Once mounted, run the df command below to view all the mounted file systems in human-readable form (-h).
df -hBelow, you can verify the partition has been successfully mounted.
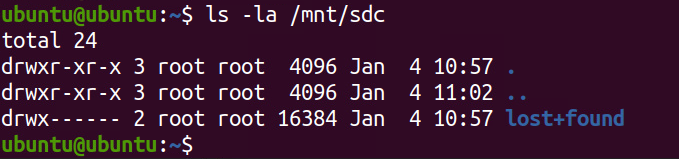
5. After verifying the mounted partition, run the below ls command to print a long-list format of all (-la) contents of the mounted partition (/mnt/sdc).
ls -la /mnt/sdcIf everything has been set up correctly, you will see the contents of the mounted partition, as shown below.
6. Now, run the following umount command, which does not provide output, but unmounts the drive (/mnt/sdc). Unmounting drives is good practice to avoid accidentally making changes to their contents.
sudo umount /mnt/sdcConfiguring Auto-Mounting Partitions
Mounting partitions to your system manually each time you access them can be frustrating. Save yourself the frustration by configuring auto-mount for your partitions. By configuring the partition to auto-mount, you gain access to the files on the partition each time you start up your system.
Additionally, the persistence of the partition across reboots can be helpful when setting up a server or an automated system.
To configure a partition to mount automatically, you must add an entry to the /etc/fstab file. This configuration file contains a list of the file systems set to auto-mount at boot time.
1. Open the /etc/fstab configuration file with a text editor of your choice.
sudo nano /etc/fstab2. Next, add the following entry at the end of the /etc/fstab file, save the changes, and close the file. This entry tells the system to perform the following:
- Mount the partition
/dev/sdcto the/mnt/sdcmount point at boot time.Specifies the file system type asext4, the default mount point (defaults).Sets the dump and pass values (0 0), which specify the order in which the file systems are backed up and checked by thefsckutility.
/dev/sdc /mnt/sdc ext4 defaults 0 0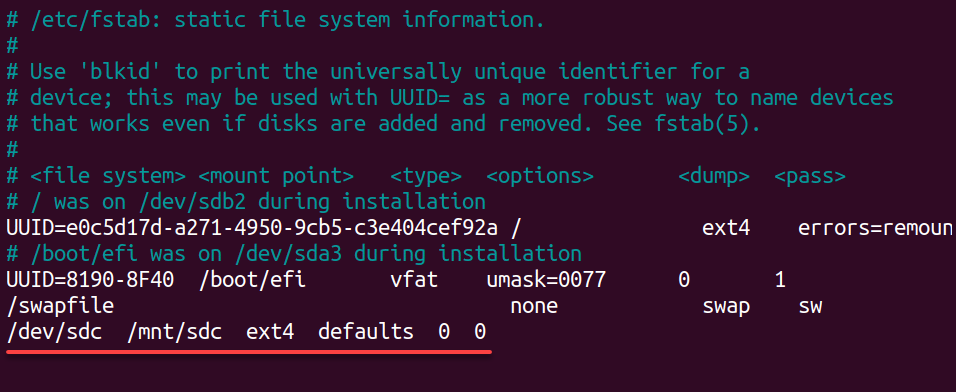
3. Finally, reboot your system; the partition will be automatically mounted when your system starts up.
Creating a Partition
Although the drives you have mounted up to this point are already partitioned, perhaps you have a USB drive that is not. This process is typically done when setting up a new drive or repartitioning an existing one.
To create a partition on a drive, you can use a utility such as gparted and fdisk. These utilities allow you to view the current partition layout of the drive and create, delete, or resize partitions as needed.
1. Run the below fdisk command to list (-l) the current partitions of all the drives attached to your system.
sudo fdisk -lDrives are typically referred to by their device names, such as /dev/sda, /dev/sdb, /dev/sdc, and so on. These device names refer to the physical disks attached to the system, with sda being the first disk, sdb being the second, and so on.
In the list of partitions below, identify the one you wish to mount. This tutorial’s choice is the /dev/sdc disk, but your case may differ.

2. Next, run the following parted command to open the parted utility for a specific drive. Replace /dev/sdc with the actual device name of the external drive.
💡 Note that modifying the partition table on a drive can be risky, as it can potentially cause data loss or corruption. Be cautious when using the
partedutility, and ensure you have backed up any critical data before proceeding.
sudo parted /dev/sdcYou will now be in the parted interactive shell, as shown below. An interactive shell is a CLI that allows you to enter commands and interact with the program in real time.

3. Run the mklabel command below on the parted shell to create a new gpt partition table. For modern systems, GPT is the recommended partition table. GPT is more flexible and supports larger drives than traditional MBR partition tables.
mklabel gptType Yes, and press Enter to confirm creating the GPT partition table.

gpt partition table4. Now, run the below mkpart command to create a new primary partition on the selected drive, starting at the beginning of the drive (0GB) and ending at 4GB. Primary partitions are the basic building blocks for any drive.
This command does not produce output, but the new partition will be formatted with the default file system (typically ext2, ext3, or ext4). Moreover, the partition will be given the next available partition number.
mkpart primary 0GB 4GB5. Once the partition is formatted, run the below quit command to exit the parted shell.
quit
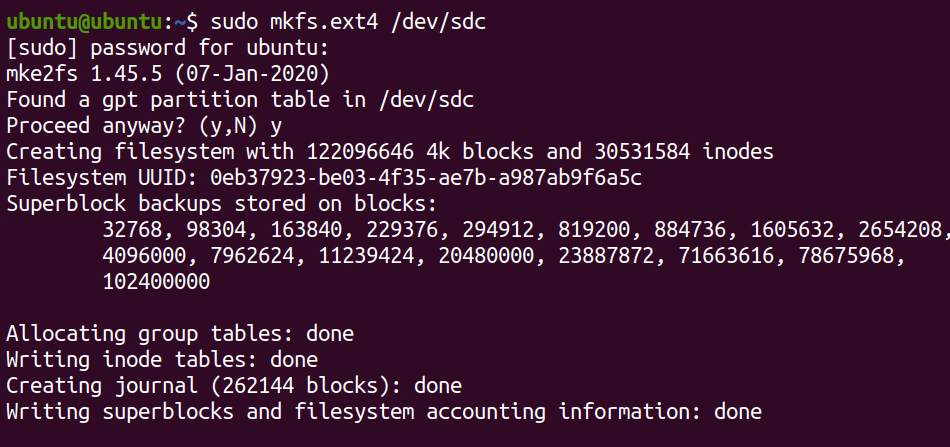
6. Lastly, run the following mkfs.ext4 command format the partition (/dev/sdc) with the ext4 file system, a popular file system for Linux systems.
This step is necessary to make the drive accessible from Ubuntu.
sudo mkfs.ext4 /dev/sdcType Y and press Enter when prompted to confirm formatting the partition.
Conclusion
Whether you are storing important files, transferring data between systems, or creating backups, mounting drives on your system is a crucial skill. And in this tutorial, you learned ample ways to manually mount a drive in Ubuntu, including an auto-mount configuration.
Now, why not expand your drive mounting knowledge? Perhaps delve into attaching and mounting an EBS volume to your Ubuntu EC2 Linux Instance?


