


As an efficient and user-friendly operating system (OS), Ubuntu offers numerous tools and techniques to manage disk space and keep your system running smoothly. But without proper attention and maintenance, your Ubuntu disk space can quickly become cluttered and run out of room.
This comprehensive guide will provide many tools for managing your Ubuntu disk space, including installing and using various tools and techniques.
Read on and say goodbye to disk space anxieties with Ubuntu!
Prerequisites
This tutorial will be a hands-on demonstration. To follow along, be sure you have an Ubuntu system. This tutorial uses Ubuntu 20.04, but other versions will work.
Using the Disk App
If you are looking for a quick way to work on disk space management, GNOME-based desktop environments like Ubuntu have a default graphical partitioning tool. So long as the gnome-disk-utility is installed, you can access the Disks app.
The Disks app provides a visual representation of disk usage, which is intuitive for users who prefer a GUI when working with files and directories.
To see the Disks app in action with disk space management, follow these steps:
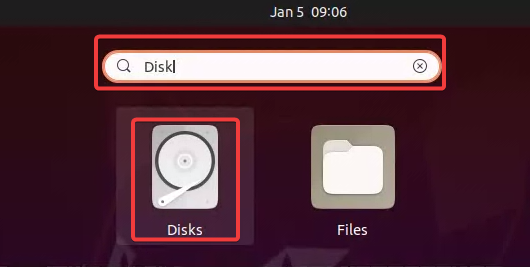
1. Search for and open the Disks app, as shown below.
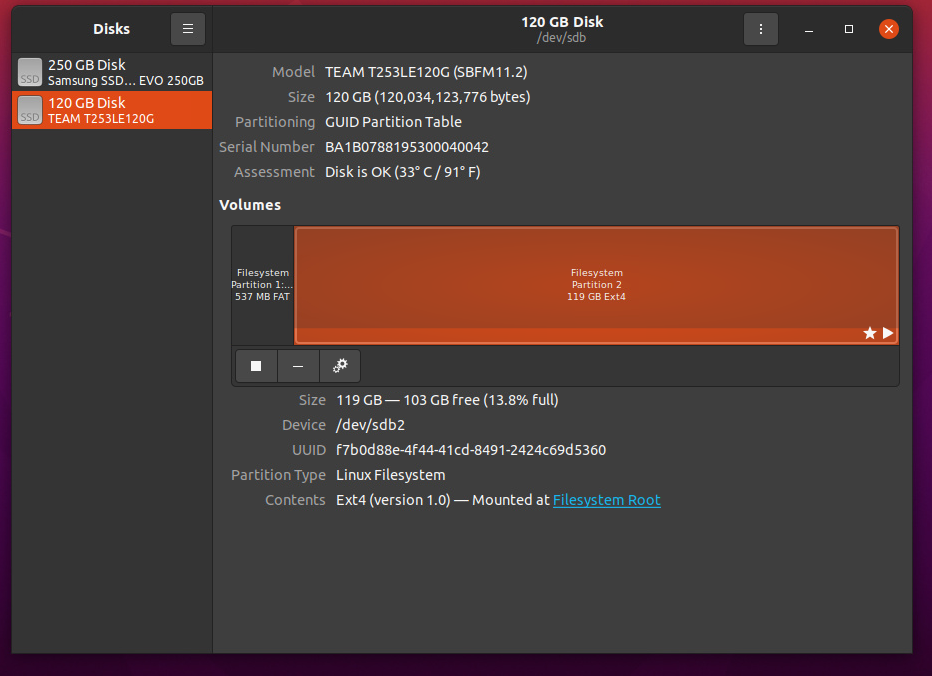
2. When the Disk app opens, click on any disk to view more detailed information, including the total size, the model, and so on.
Under the Volumes section, you can see a list of all partitions in your system and their associated details. The details include the device name, the partition type, the mount point, the total size, and the UUID (Universally Unique Identifier), which identifies a volume or a partition).
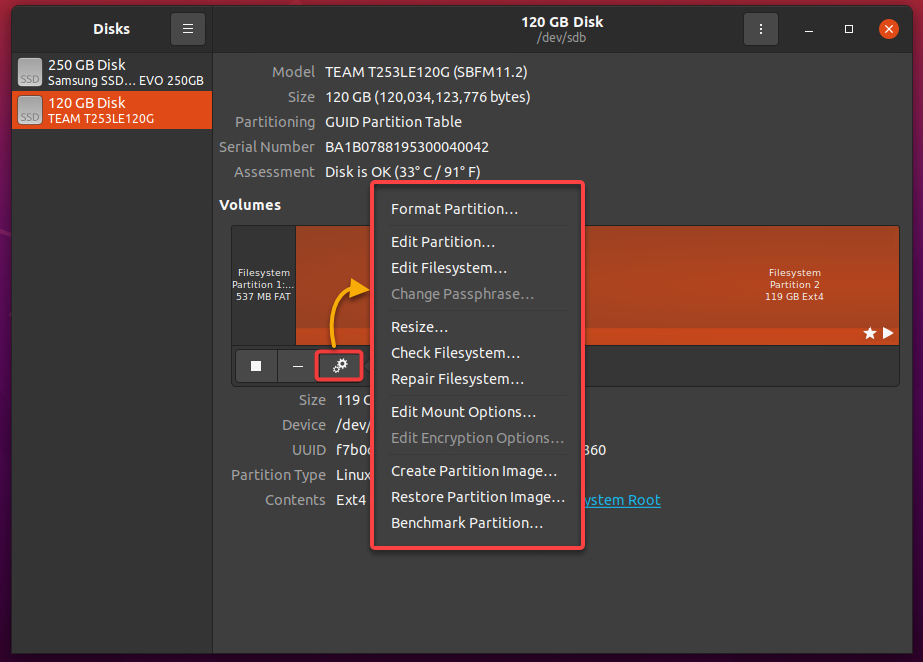
3. Lastly, click the gear icon and choose any option you wish to perform from the context menu. Some of the actions you can take include but are not limited to the following:
| Option | Function |
| Format Partition | Formatting a partition erases all its data and creates a new empty filesystem. This option is useful when you plan to reinstall your OS. |
| Edit Partition | Editing the partition allows you to change the partition’s size, format, and filesystem type without deleting any data. |
| Edit Filesystem | This option lets you change the label or name of a partition on your system. The label or name of a partition is a short, descriptive string that identifies the partition on your system. |
| Check or Repair Filesystem | This option performs a filesystem check on the volume, which can help identify and fix any problems, such as corruption or inconsistencies with the filesystem. |
💡 Note that filesystem checks take some time, especially if the volume is large or there are many problems with the filesystem. Moreover, filesystem repairs may cause data loss, so back up your data before proceeding.
Using the df Command
When you mainly work in the terminal and need to check available space on your system’s disks and partitions, the disk file system (df) command will do the trick. The df command displays information about the file systems on your computer, including the device name, total size, used space, available space, and the mount point.
To see how the df command works, follow these steps:
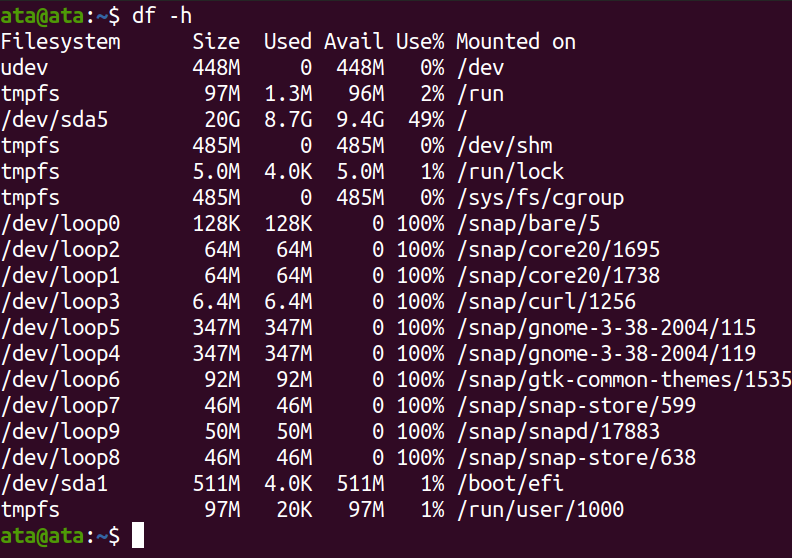
1. Open a terminal, and run the below df command to display a list of all file systems and their associated information in human-readable form (-h). You can use the -h option to display the sizes in “human-readable” format.
df -hBelow, you can see several file systems mounted on the system, as follows:
- A main partition (
/dev/sda5) with a total size of 20GB and 9.4GB of available space.
- A /boot/efi partition (/dev/sda1) with a total size of 511MB and 511MB of available space
- Several snap packages (filesystems for software packages) are mounted at /snap/.
- Many tmpfs filesystems, which are memory-based filesystems used for temporary storage.
df command displays sizes in bytes, which is difficult to read. The -h option changes the display of sizes to use units such as kilobytes (K), megabytes (M), gigabytes (G), and terabytes (T). For example, the 1024000000 bytes size is displayed as 976M.
Overall, 49% of space is used in the main partition (/dev/sda5), with 9.4GB available, as shown below. With this information, you can decide whether to delete unnecessary files to free up disk space.
2. Next, run the below watch command to execute the df command at regular intervals (5 seconds) and display updates of your disk usage in real-time.
The watch command, along with the -n option, comes in handy for monitoring changes in the system state or tracking the progress of a long-running command.
watch -n 5 df -h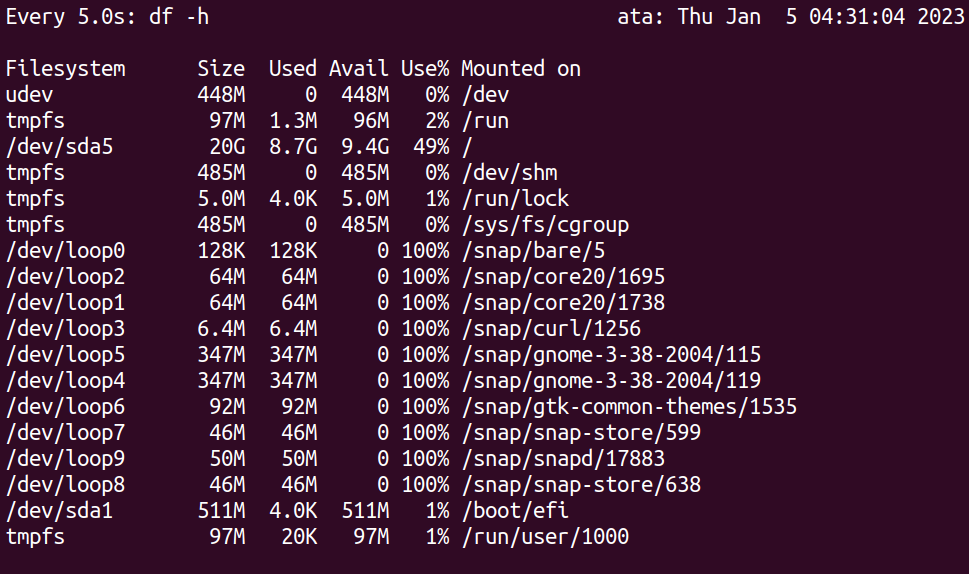
3. Lastly, run the following df command to list all filesystems but limit the output to specific filesystem types (-t), in this case, ext4 ones.
By limiting the output to specific types, you can focus on the filesystems that are most important to you and filter out the rest. This approach can be helpful in troubleshooting a problem or if you are interested in a particular type of filesystem.
df -t ext4Below, you can see the df command returned only one ext4 filesystem, which is the root partition (/dev/sda5).

Using the du Command
Instead of getting the consumed space of an entire filesystem, you may want to determine how much space was consumed by a file or directory. How? By using the disk usage (du) command.
The du command estimates used space of a file, and a directory, down to its subdirectories.
💡 The
ducommand can be helpful for understanding how disk space is being used on a more granular level.
To see how the du command works for disk space management, follow these steps:
1. Run the following du command to retrieve a summary (-s) of the /tmp directory’s usage in a human-readable format (-h).
du -sh /tmpThe output below shows that the /tmp directory and its subdirectories are using a total of 6.1GB of space.
In Unix-like OSes, /tmp is a special directory used to store temporary files. Monitoring the /tmp directory is crucial as it quickly fills up.

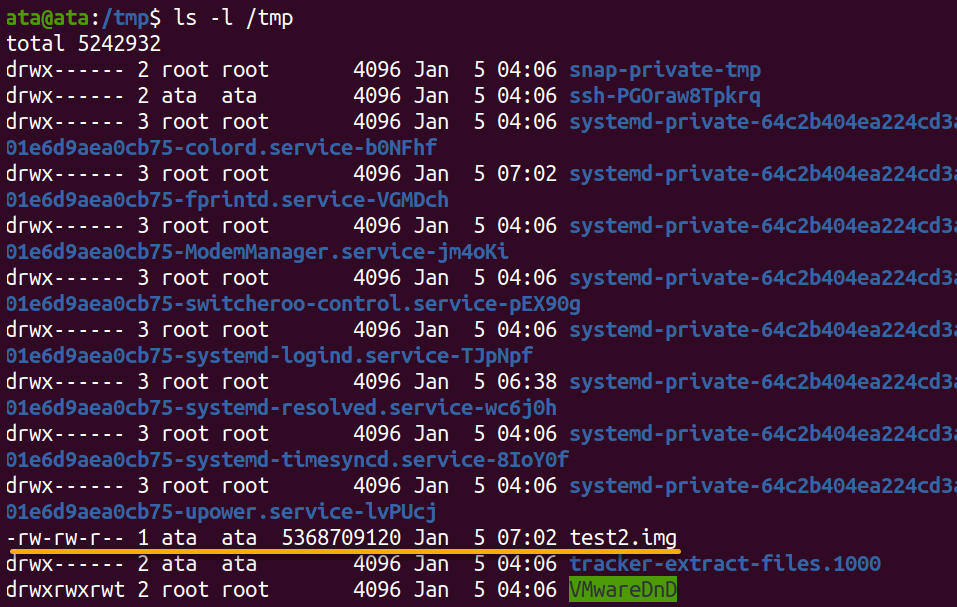
2. Next, run the below ls command to list the files the /tmp contains in a long format (-l).
The long list format includes the directory’s permissions, owner, size, and modification time for each file. With this information, you can easily identify large files you may need to delete or trim down in size.
ls -l /tmpIn the output below, you can see that the largest file in the /tmp directory is the test2.img file, which you can delete if it is no longer needed.
3. Now, run the following rm command, which does not produce output, but deletes the specified large file (test2.img) to free up space in your system.
sudo rm -f test2.imgAutomating Disk Space Checking and File Deletion
Monitoring directories you do not want to be inflating helps keep your system at its peak. Why? Running out of disk space causes problems for programs that need to write temporary files.
But manually checking your disk space becomes a tedious task in the long run. So why not automate the task with a script?
In this example, you will create a script to check your disk space and delete unnecessary files automatically.
1. Create a Bash script file with your preferred editor and name it as you like, but this tutorial’s choice is temp_file_terminator.sh.
2. Next, populate the code below to the temp_file_terminator.sh file, save the changes and close the file.
The code below checks the current size of the /tmp directory. If the size is larger than the maximum size declared, the code runs a command to delete all files in the /tmp directory. Otherwise, a message prints on the console without deleting a single file.
#!/bin/bash

# Set a maximum size for the /tmp directory
MAX_SIZE=2097152

# Check the current size of the /tmp directory
CURRENT_SIZE=$(du -sk /tmp | awk '{print $1}')

# If the /tmp directory is larger than the maximum size, delete some files
if [ "$CURRENT_SIZE" -gt "$MAX_SIZE" ]
then
  echo "The /tmp directory is larger than the maximum size of 2GB. Deleting files..."

  # Find all files in /tmp that are older than three days and delete them
  find /tmp -type f -mtime +3 -delete

  # Check the size of the /tmp directory again
  CURRENT_SIZE=$(du -sk /tmp | awk '{print $1}')

  # If the /tmp directory is still larger than the maximum size, delete all files
  if [ "$CURRENT_SIZE" -gt "$MAX_SIZE" ]
  then
    rm -rf /tmp/*
    echo "All files in /tmp have been deleted."
  else
    echo "Files in /tmp have been deleted. The /tmp directory is now below the maximum size of 2GB."
  fi
else
  echo "The /tmp directory is not large enough to trigger file deletion. No files have been deleted."
fi
3. Finally, run the below bash command to execute your script (temp_file_terminator.sh) from the working directory (./).
sudo bash ./temp_file_terminator.shDepending on the size of the /tmp directory, the script will either delete files or print a message indicating no files were deleted.

Conclusion
Managing disk space in Ubuntu is an essential skill for any Linux administrator. With the right tools and techniques, you can keep your system running smoothly with plenty of free Ubuntu disk space.
And in this tutorial, you have learned many ways to view and manage disk space from the command line and via GUI (Disks app).
Now, why not put these tools into practice and take the next step by mastering Amazon EFS file system objects?


