

Managing Terraform state files manually, especially migrating between on-premise and cloud-based environments can be a huge pain. But lucky for you, Terraform Cloud can solve this problem. Terraform Cloud lets you manage your Terraform state file in the cloud, so the changes in your infrastructure are tracked and can be viewed in the web-based user interface.
In this tutorial, you’ll learn how to migrate your existing Terraform state file into Terraform Cloud. Doing so lets you manage your state file on your local machine and use Terraform Cloud to access it seamlessly.
Get your hands dirty and jump right in!
Prerequisites
This tutorial will be a hands-on demonstration. If you’d like to follow along, be sure you have the following:
- A Terraform Cloud account.
- An EC2 instance with Terraform installed.
- An Admin user with admin privileges.
- AWS CLI installed and configured on the EC2 instance.
- A Linux machine – This demo uses Amazon Linux 2, but any Linux distribution will work.
Setting up a Local Environment
Kick-off this tutorial by setting up a local environment. Why? You will want to maintain your local state file and not depend on Terraform Cloud all the time. With a local environment set up, you can revert to your local state file for testing or if you’re not connected to the Internet.
1. SSH into your EC2 instance, open your terminal and run the yum command below to install git on your system. You will later use Git to clone the main Terraform Cloud Git repo.
sudo yum install git -y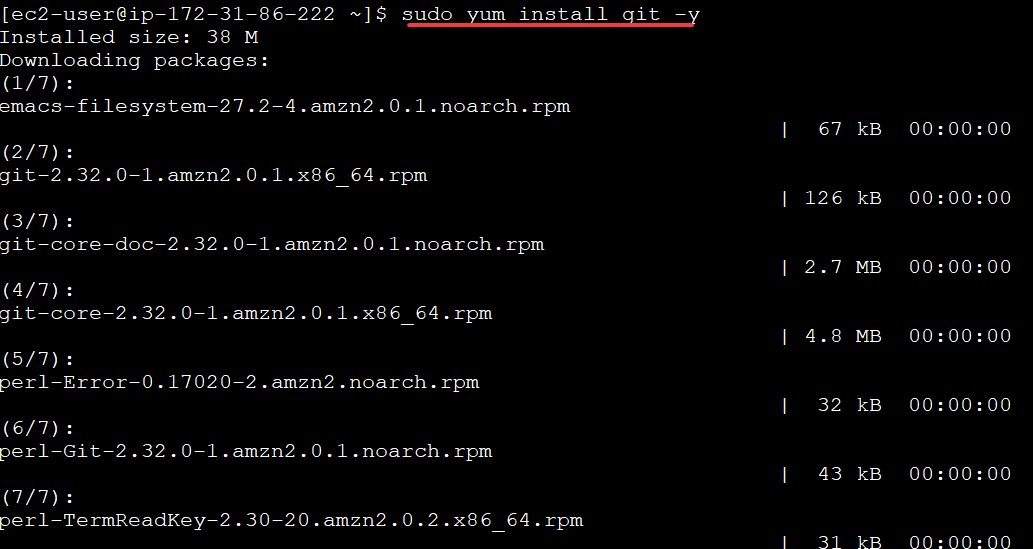
2. Next, run the git clone command below to clone the Terraform cloud repository to your current directory.
sudo git clone https://github.com/Adam-the-Automator/terraform-state.git
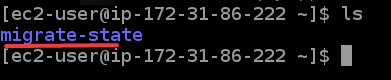
3. Run the ls command to list files and directories in the current directory.
lsAs you see below, you have a new directory called migrate-state. This directory will be the directory you use to follow this tutorial.
4. Now, run the following commands to switch (cd) to migrate-state directory and list (ls) all the files and directories.
cd migrate-state && lsBelow, you can see that this directory contains a main.tf file. All Terraform projects have a main.tf file, which is the entry point to your infrastructure. So, when you run terraform apply, the Terraform engine runs the code in this file.

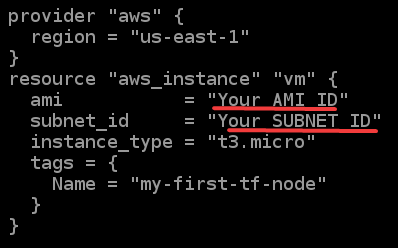
5. Open the main.tf in your favorite text editor. Change the highlighted value below with your EC2 instance’s ami and subnet_id, then save the changes and close the editor.
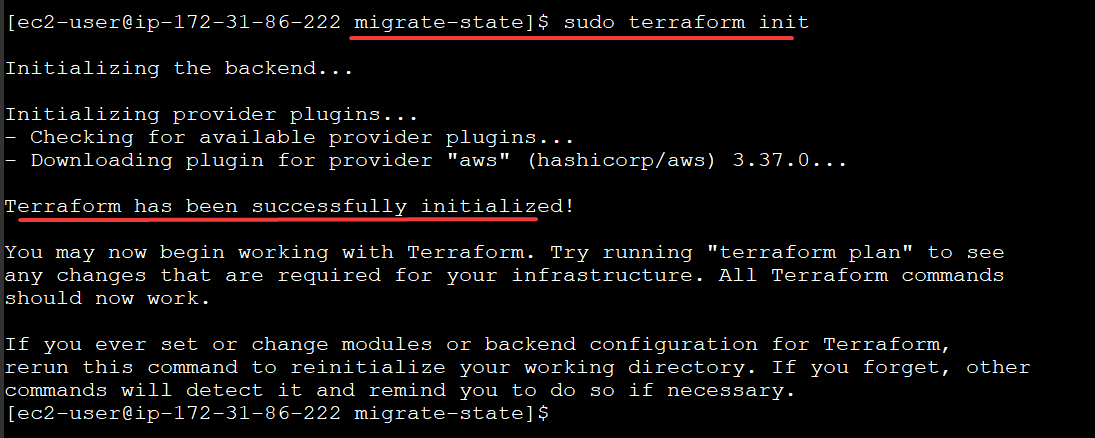
6. Now run the terraform init command to initialize your working directory.
This command reads all the files in the current directory, determines which are Terraform configuration files, and translates them into a dependency graph. sudo terraform init
sudo terraform initYou can repeatedly run the
terraform initcommand without any harm to pull changes from the configuration files.
Finally, run the terraform apply command below to apply your changes to the working directory. Type Y and press Enter when prompted.
You will run this command every time you make a change and wish to push your changes to the cloud. terraform apply
terraform apply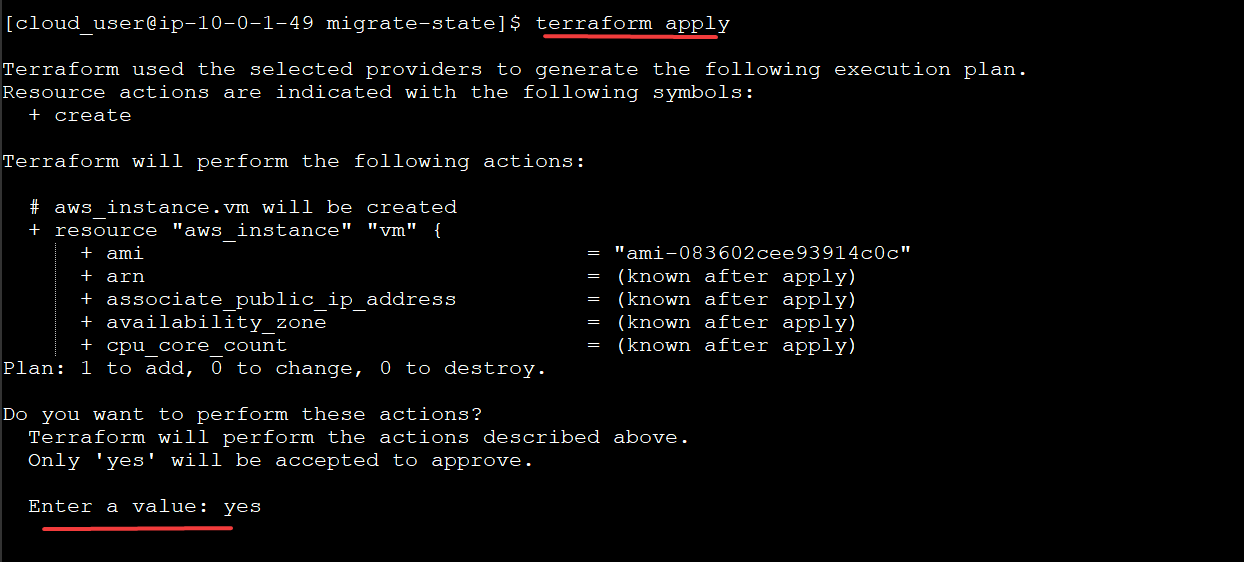
Setting up a Terraform Cloud Environment
Now that your local environment is ready, it’s time to set up your Terraform Cloud environment. Setting up a Terraform Cloud Environment enables you to access the remote state storage and sync it with various providers and your local state files.
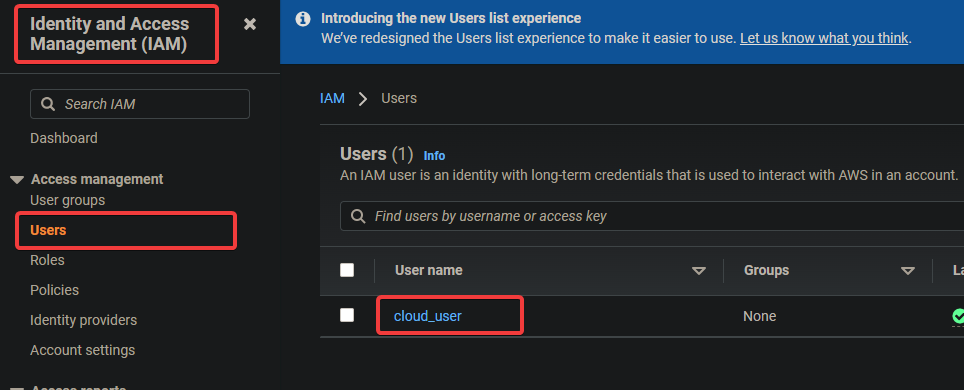
1. Open your preferred web browser and log in to the AWS IAM dashboard with your Admin user account.
Click on the Users menu at the left panel and click on your admin account from the list of users to access the account’s information. The admin account is named cloud_user for this demo, as shown below.
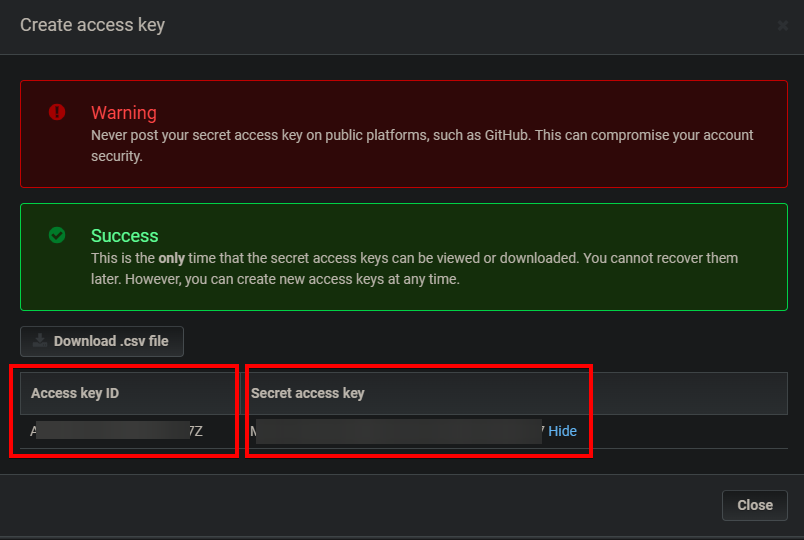
2. Next, click on the Security Credentials tab, and click on Create Access Key to create an access key. An access key allows you to enable Terraform Cloud service to communicate with your AWS account.
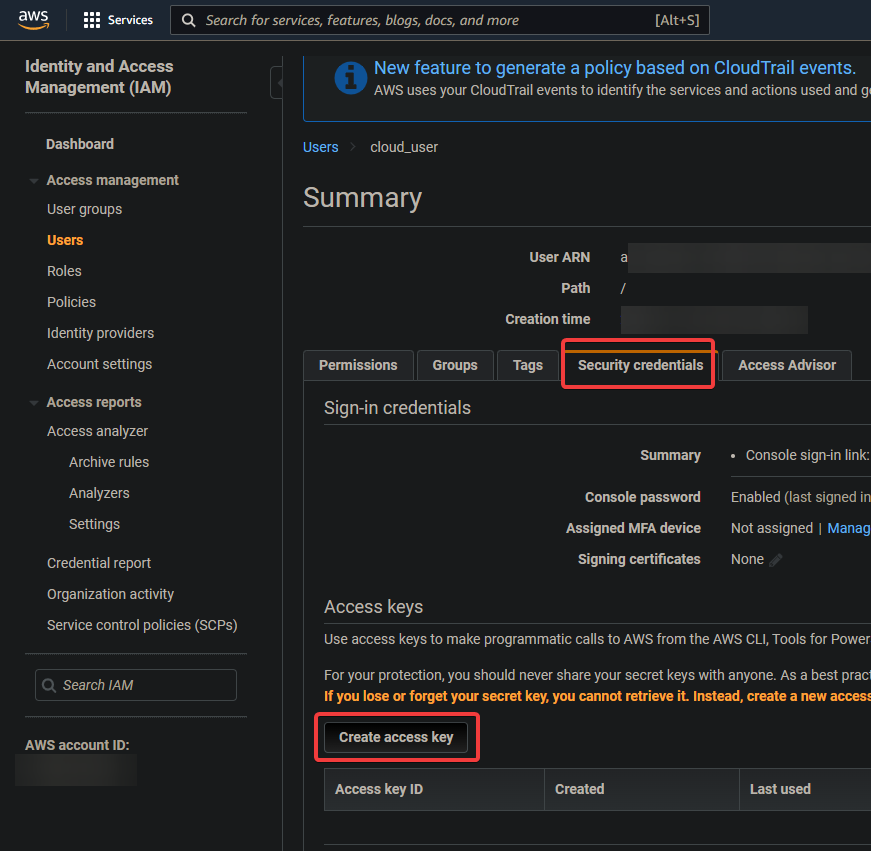
Below, you can see the admin user’s credentials (Access key ID and Secret access key). Save these credentials as you will need them later.
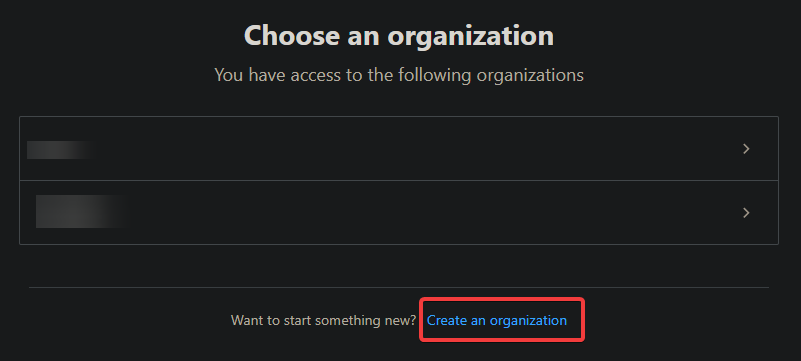
3. Navigate to your Terraform Cloud dashboard, and click on Create an organization. Creating a new organization will help you organize your Terraform Cloud resources and users under a single organization.
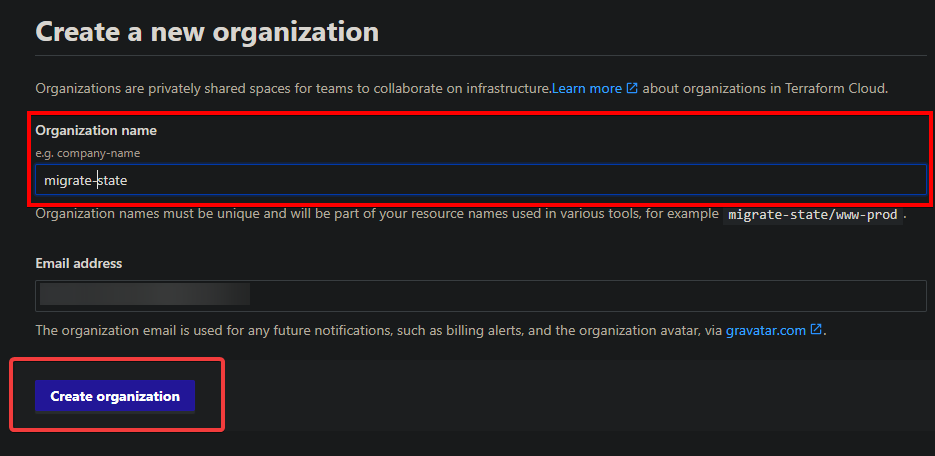
4. Provide your Organization name (migrate-state) and your Email address, then click on Create organization. You set the email address where Terraform Cloud will send email notifications about your organization (updates to your users, billing info, etc.).
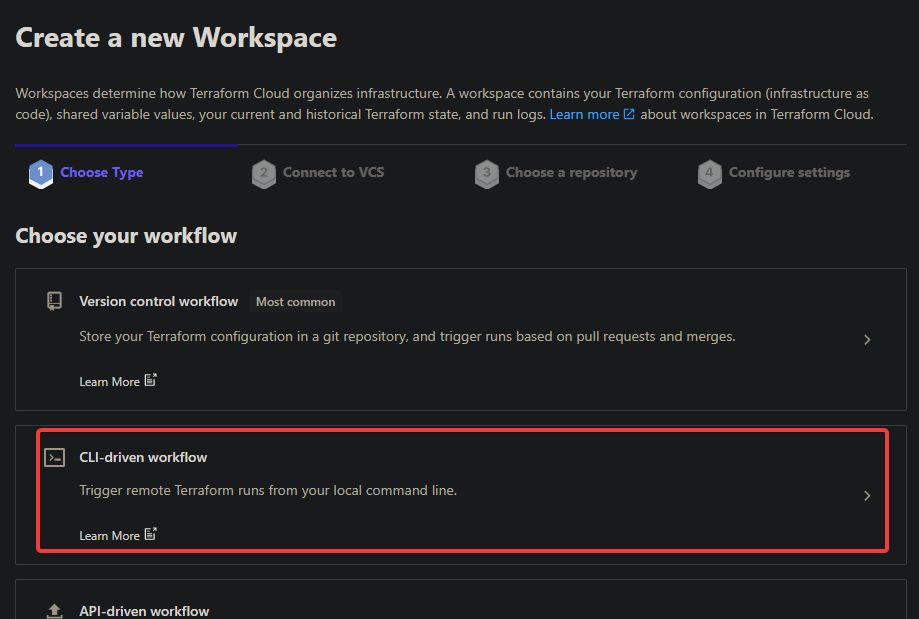
5. Select the CLI-driven workflow option to have a command-line interface to your Terraform Cloud. The command-line interface can work with your existing CI/CD pipelines.
6. Provide your preferred Workspace Name, but the workspace name is migrate-state for this demo. Click on Create workspace to create the new workspace.

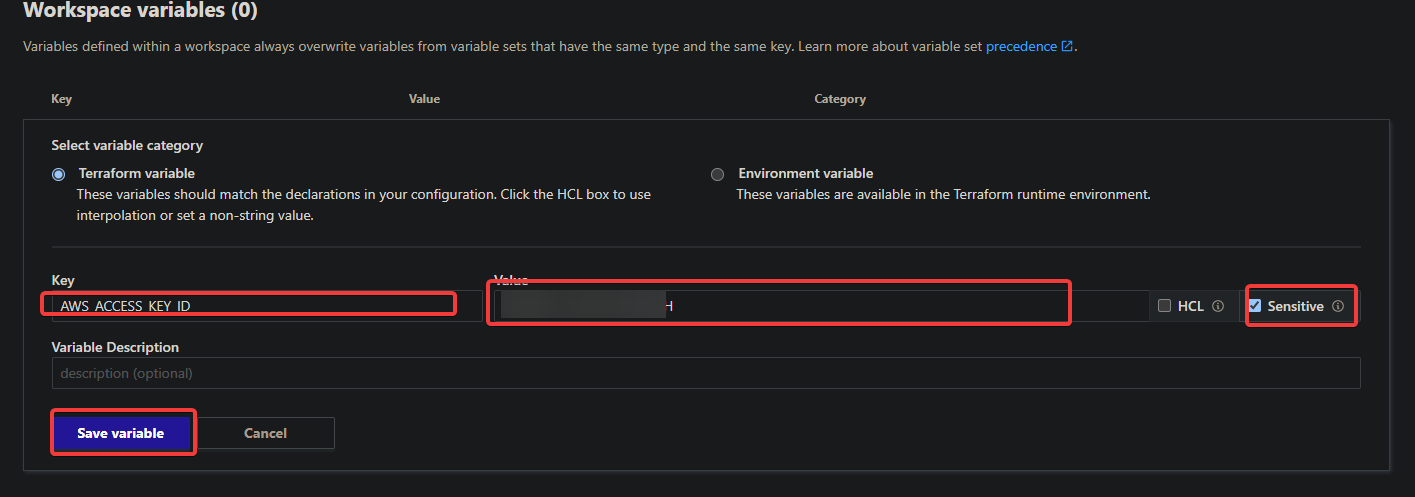
7. Now, click on the Variables tab in the workspace’s (migrate-state) settings page, and click Add variable to add variables.

8. Configure a variable for your access key ID with the following:
- Enter a preferred name in the Key text box, but the variable name is set as AWS_ACCESS_KEY_ID for this demo.
- Enter the access key ID you noted in step two in the Value text box.
- Tick the Sensitive box, and click on the Save variable to add the variable to your workspace. The Sensitive box’s state controls the visibility of the sensitive fields in your Terraform Cloud.
Ticking the Sensitive box is recommended when creating keys and values. The sensitive fields will show in any UI like the Terraform Cloud dashboard. So, if a workspace is shared with other users, they will not see your keys and values.
9. Repeat the steps (seven to eight) to add a variable for your admin user’s secret access key you noted in step two. But this time, enter a different name for the variable, like AWS_SECRET_ACCESS_KEY.
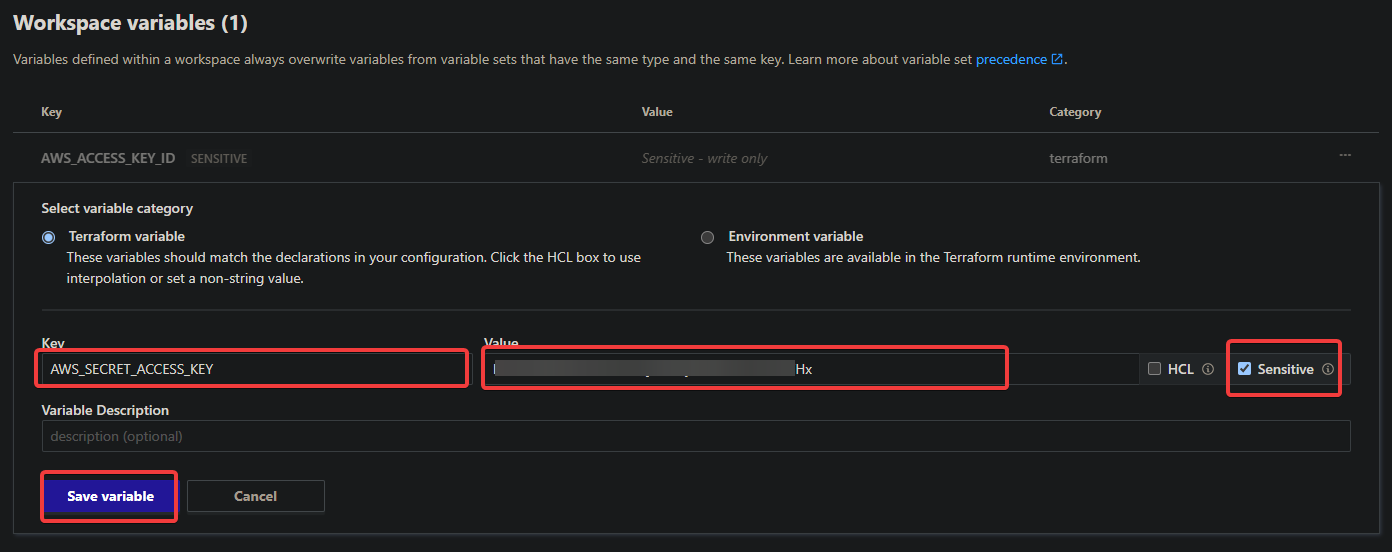
After adding the variables, you can see your keys in the list of variables.
Setting up a Terraform Cloud Backend
From creating your account on Terraform Cloud, it’s now time to set up your Terraform Cloud backend. Terraform Cloud Backend lets you centrally configure resources, variables, and back-end configurations.
Terraform Cloud backend allows you to work with multiple teams or generate different configurations for different environments without hard coding the variable values.
But before you can set up your Terraform Cloud backend, you’ll first create a Terraform Cloud API token. You’ll use the API token to authenticate your Terraform Cloud backend. This token ensures that nobody else can access or change your infrastructure without permission.
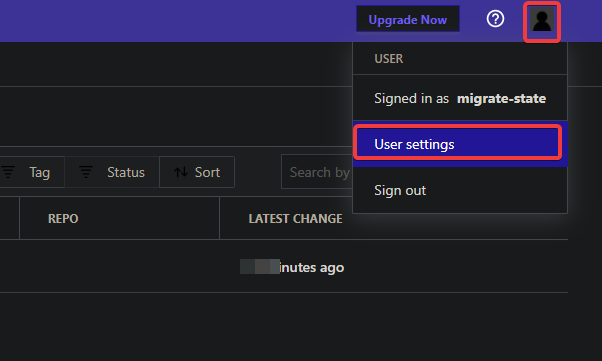
1. On your Terraform Cloud dashboard, click on your profile name on the top right corner, and choose User Settings.
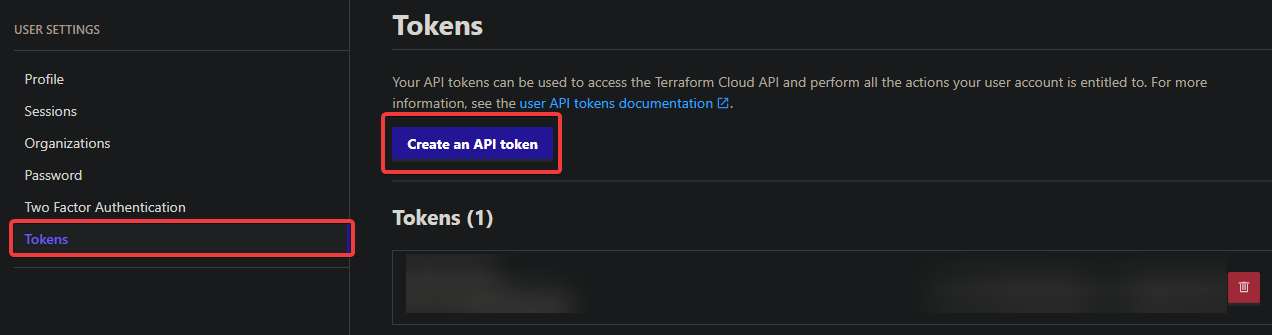
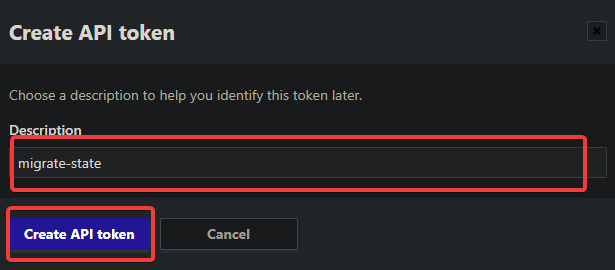
2. Next, click on the Tokens tab on the USER SETTINGS page, then click on Create an API token to generate a new API Token. A new popup will open where you’ll create a new API Token (step three).
3. Provide a token name (migrate-state) in the Description text box, and click Create API token to finalize creating the token.
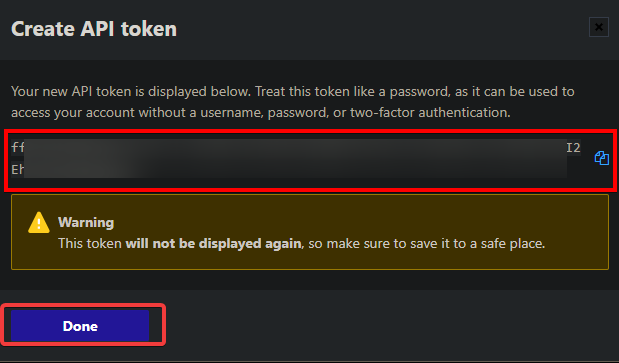
4. Copy and save your API Token in a secure place, then click on Done.
5. Return to your terminal, and run the terraform login command below to log in to Terraform Cloud from your command-line interface. Type yes and press Enter when prompted, as shown below.
terraform login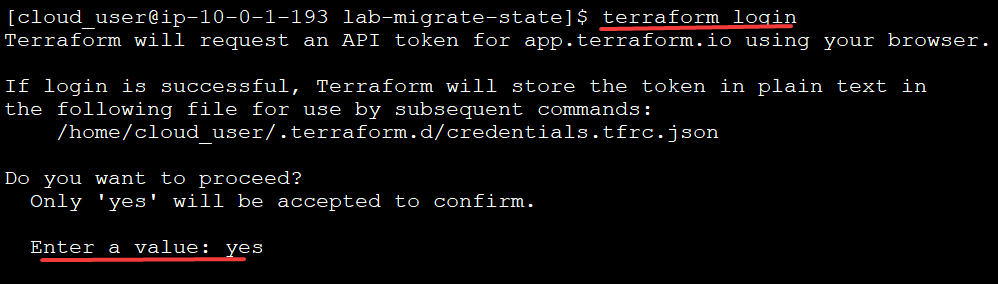
6. Enter your API token you saved earlier when prompted to Enter a value.
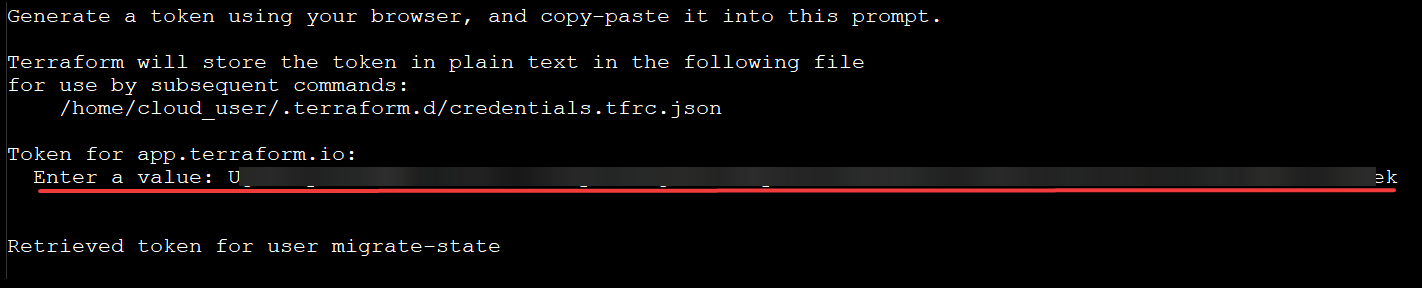
You will get the following output if you have successfully logged in to Terraform Cloud.
7. Now, open the main.tf file in your text editor and add the following backend codes at the beginning of the file’s content to set your backend provider.
Replace the following values with your preferred values, and save the changes:
YOUR_ORG_NAME– The name of your Terraform Cloud organization. This demo uses migrate-state as the organization name.YOUR_WORKSPACE– The workspace name you want to use for this project. Ensure that the value matches the name of the workspace you configured in your Terraform Cloud dashboard. This demo uses migrate-state as the workspace name.
# Sets your backend provider
terraform {
   backend "remote" {
     organization = "YOUR_ORG_NAME"
     workspaces {
       name = "YOUR_WORKSPACE"
     }
   }
	# This line is a required setting when you initialize a backend config.
	# You can set this multiple times to add additional providers.
   required_providers {
			# Sets your aws backend config.
			# You can also set custom providers like azurerm, gcp, and vsphere here.
      aws = {
				# Specifies the location of your config for this backend.
        source  = "hashicorp/aws"
				# Specifies the version of your Backend Provider.
        version = "~> 3.27"
      }
   }
}
Your main.tf file’s content should look like the one below.

Applying the Backend Configuration
You’ve set up your backend configuration, but it’s not doing much right now unless you apply the backend configuration to your Terraform Cloud.
1. Run the terraform fmt command to automatically format the source code in your main.tf file to make it human-readable. terraform fmt
terraform fmt
2. Next, run the terraform init command to initialize the working directory. Type Y and press Enter when prompted.
terraform init 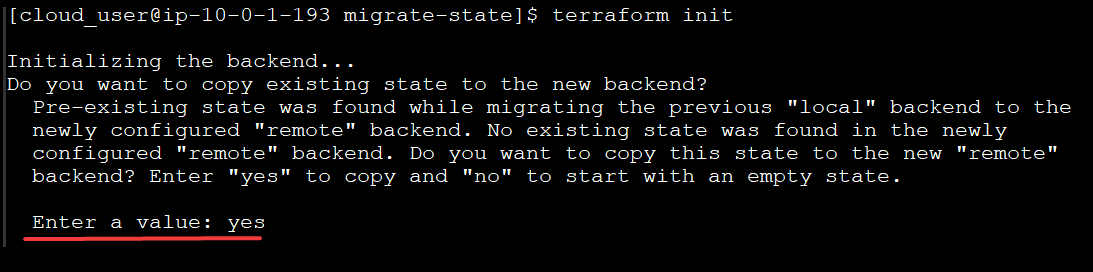
3. Run the rm command to delete the existing state file. You will want to use a new state file generated by Terraform Cloud when applying the backend configuration.
There is no risk of losing any changes when you run the
rm -rf terraform.tfstatecommand since you have a backup copy of your state file. Terraform automatically creates the state file when you run theterraform initcommand.
rm -rf terraform.tfstate
4. Now, run the ls command to list the files in your working directory to ensure that terraform.tfstate is gone and the backup copy of your state file exists.
ls 
5. Run the terraform apply command below to apply the backend configuration.
terraform applyThe command might take some time to complete since it’s calling the provider APIs. Once the process is complete, your backend configuration is applied.

6. Navigate back to your Terraform Cloud main page, then click on the workspace’s hyperlink to access your workspace overview.
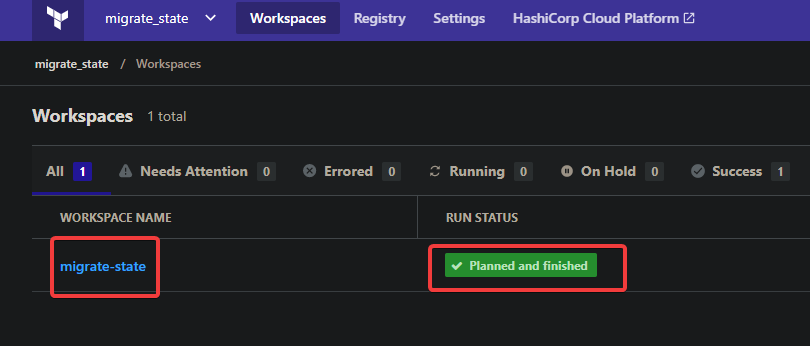
7. Next, click on the Runs tab and see that your last run appears in your workspace, as shown below.
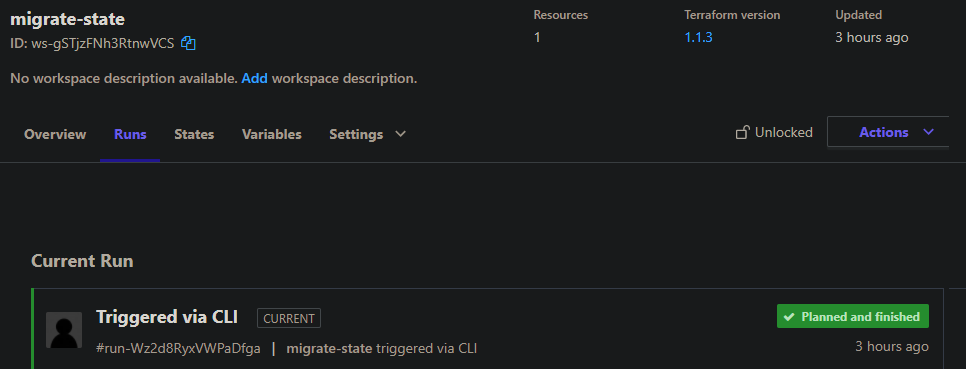
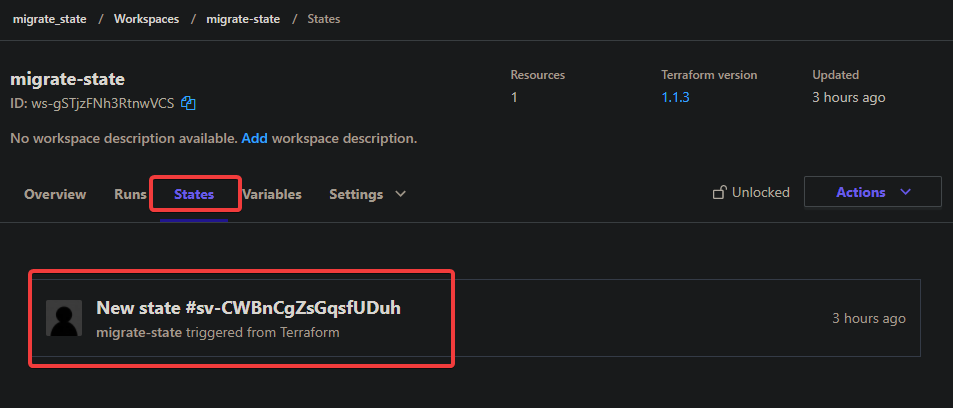
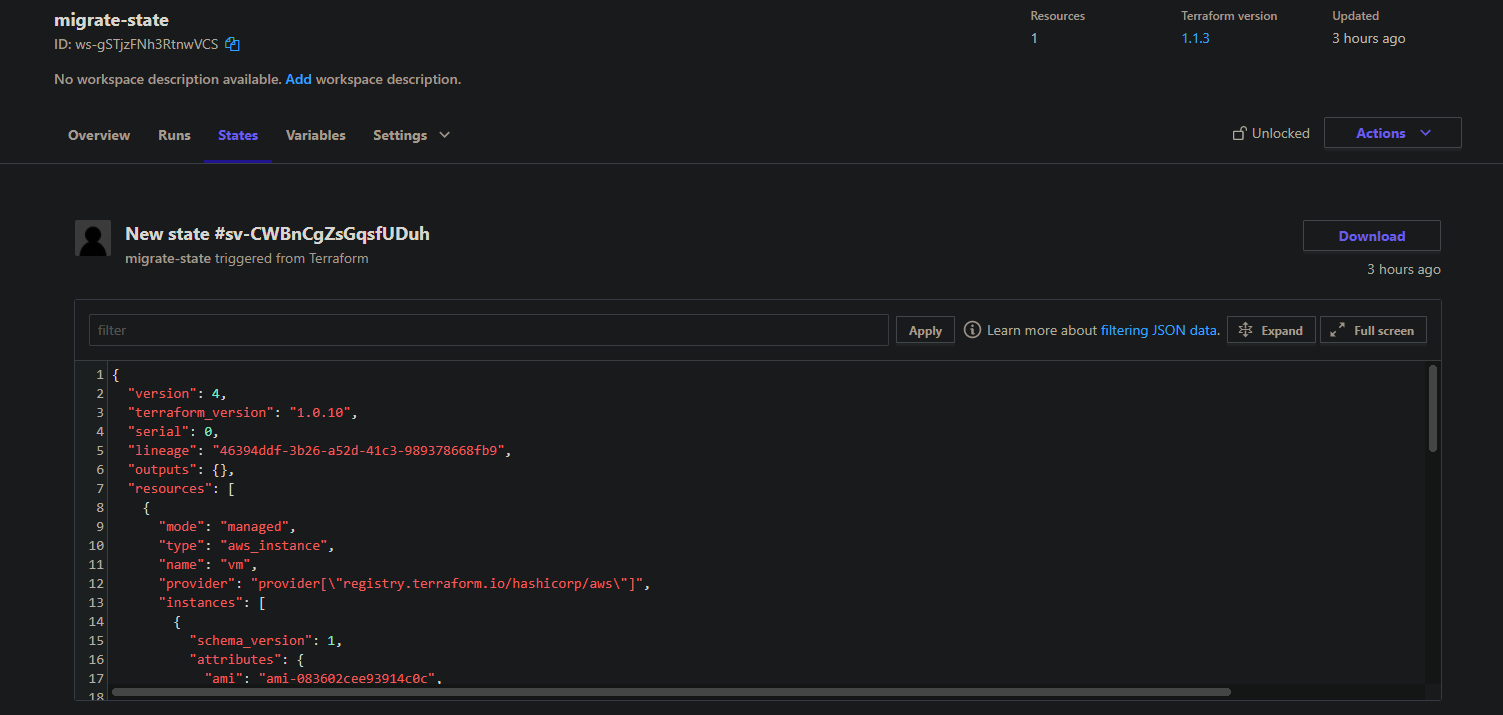
8. Navigate to the States tab, as shown below, and click on the state file to view the contents.
Like in the image below, you can now view and confirm that you’ve successfully migrated your state file in your Terraform Cloud.
Conclusion
Throughout this tutorial, you’ve learned how to migrate an existing Terraform state into your Terraform Cloud by setting up a Terraform Cloud environment and backend.
At this point, you should have a fully functional backend configuration you can rely on migrating your Terraform state file in your Terraform Cloud.
Now, how do you plan to build on this newfound knowledge? Why not migrate all your Terraform state into Amazon S3?


