


Has your business struggled with the high costs of upgrading server storage? Ensure higher reliability, availability, and performance of your server storage with Storage Spaces Direct (S2D).
S2D can help your business, or a small enterprise significantly cut down on server storage costs by providing fault-tolerant storage. And in this tutorial, you will learn how to deploy S2D on a four-node cluster of servers.
Read on and ensure your organization’s data remains online!
Prerequisites
This tutorial will be a hands-on demonstration. If you would like to follow along, be sure you have the following:
- A workstation PC running Windows Operating System with Hyper-V role capabilities – This article uses Windows 10 Pro v21H2 build 19044.1889.
- Three Storage Server VMs installed with Windows Server 2016 Datacenter Core Edition – This tutorial uses Storage Server VMs called Storage1, Storage2, and Storage4.
- A Virtual Machine (VM) installed with Windows Server 2016 Datacenter Desktop Edition, providing Active Directory and Domain Services (AD DS) to the Storage Server VMs.
Creating a New Cluster
When setting up S2D, you will need to create a new cluster. But first, you must validate that your hardware environment software supports clustering.
1. Launch PowerShell as administrator from one of the storage VM servers with the Failover-Cluster role installed.
2. Next, run the Test-Cluster command below to test if your hardware environment supports clustering.
Test-Cluster -Node Storage1, Storage2, Storage4 -Include Inventory,Network,"System Configuration”Upon running the Test-Cluster command, there will be warnings reported. Running the Validate Cluster option from the Failover Cluster Manager GUI is a sure way to troubleshoot cluster configurations.
Note that you are not running the Storage Spaces Direct cluster tests, as these will report errors in a virtual environment.

3. After completing the cluster tests, run the following command to create a new cluster (New-Cluster) called (-Name) HC -Cluster.
New-Cluster -Name HC-Cluster -Node Storage1, Storage2, Storage4 -NoStorage -StaticAddress 10.0.0.101
PowerShell
New-Cluster -Name HC-Cluster -Node Storage1, Storage2, Storage4 -NoStorage -StaticAddress 10.0.0.101
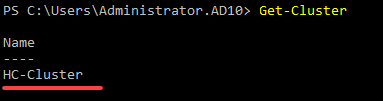
4. Now, run the Get-Cluster command to verify the newly created hyper-converged cluster.
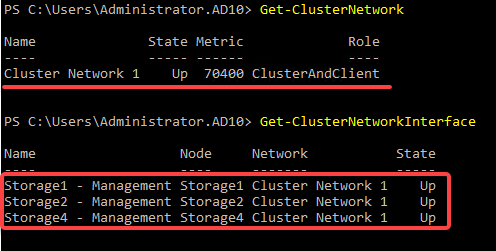
5. Once verified, run the Get-ClusterNetwork and Get-ClusterNetworkInterface commands to validate the cluster health.
6. Next, run the below Get-ClusterSharedVolume command, which does not provide output, but queries for the cluster storage configuration.
Get-ClusterSharedVolumeThe image below is expected since you earlier set the -NoStorage flag when creating a new cluster.

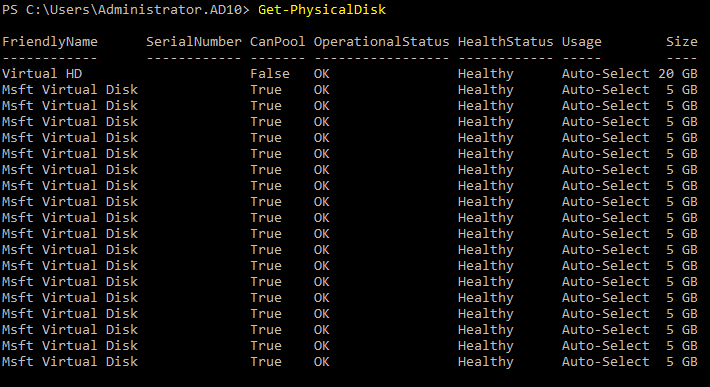
7. Lastly, run the Get-PhysicalDisk command on one of the storage servers to list all physical disks available.
Get-PhysicalDiskAs shown below, you get the list of all physical disks with more than six original virtual SCSI disks.
Notice the cluster has now collected the disk drives on all four storage servers. As a result, each server now displays 18 local disk drives.
Configuring Storage Spaces Direct
Even after creating a cluster, you still have to configure S2D to ensure it works correctly. In most environments, running the Enable-ClusterS2D command performs the following:
- Enable Storage Spaces Direct services.
- Create the Software Storage Bus.
- Create a Storage Spaces Pool.
- Scan the cluster for all eligible disks for pooling.
- Add the disks to the pool.
- Create storage tiers Capacity and Performance.
In this tutorial, you will perform these steps manually to understand each better.
Checking Existing Pool Data and Enabling S2D Services
Since you are working in a virtual environment, there might not be any legacy Storage Spaces data existing. But if any disk has been used in a pool, existing data should be removed.
1. Run the below Get-StoragePool command to return a set of StoragePool objects.
Get-StoragePool
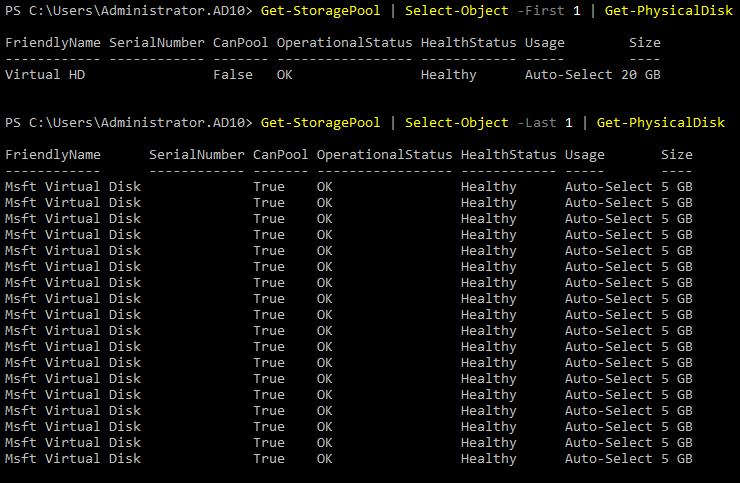
2. Next, run the below commands to check the disks (Get-PhysicalDisk) inside each StoragePool object.
Get-StoragePool | Select-Object -First 1 | Get-PhysicalDisk
Get-StoragePool | Select-Object -Last 1 | Get-PhysicalDisk
As you can see below, one pool is a default containing all the physical disk drives other than the OS disk, while the other pool only contains the OS disk.
When the storage pool is created later in this tutorial, and all unallocated disks are added to the new pool, these disks will still reside in the primordial pool.
3. Lastly, run the following Enable-ClusterS2D command on any storage cluster node to enable the Storage Spaces Direct services and perform the following:
- Query every node and eligible disk.
- Run a battery of tests to guarantee the storage infrastructure will provide reliable storage services.
But other than enabling Storage Spaces Direct software services, no storage configurations have been performed.
Enable-ClusterS2D -CacheState Disabled -AutoConfig:0 -SkipEligibilityChecks -Confirm:$false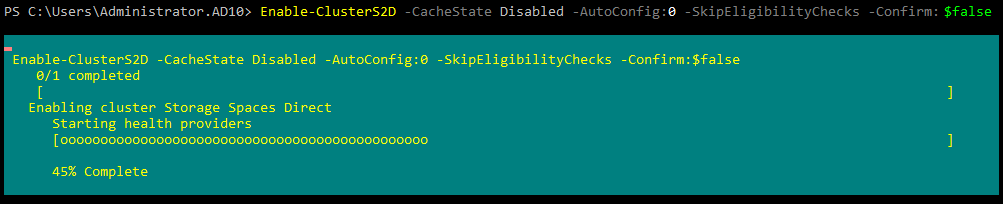
Creating a Storage Pool and Adding Disks
You have just enabled S2D services, and it is time to see S2D in action. You will manually create a storage pool and add disks to the pool. Storage spaces help protect your data from drive failures. In addition, you can extend storage over time by adding drives to your computer.
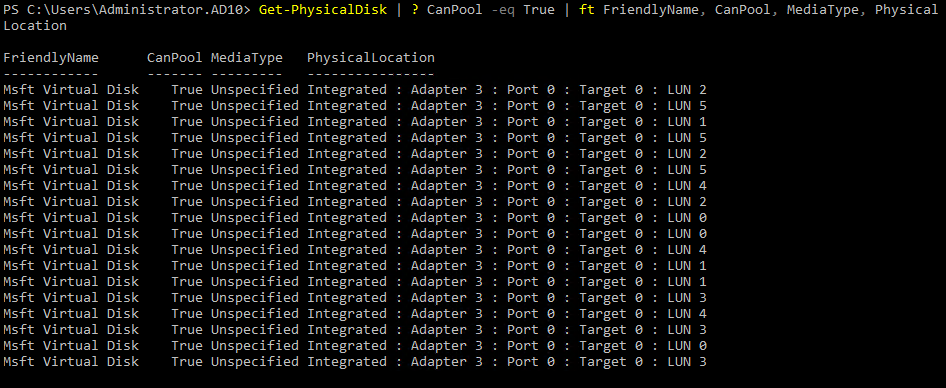
1. Run the Get-PhysicalDisk command to display the list of physical disks.
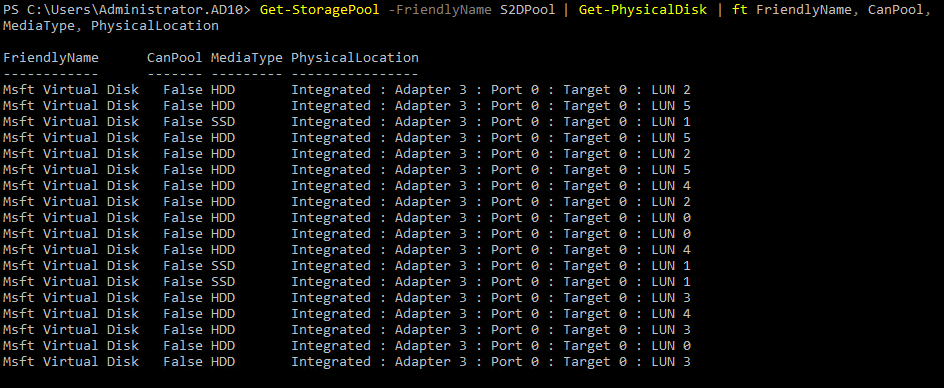
Get-PhysicalDisk | ? CanPool -eq True | ft FriendlyName, CanPool, MediaType, PhysicalLocationNotice that the (FriendlyName) and (MediaType) values are not helpful and can be changed.
The MediaType parameter on the disk drives is set to Unspecified by default when making virtual storage servers.
2. Next, run the below command to create a pool with the name S2DPool, and add all the disks attached to the virtual SCSI LUN address of 3.
$Disks = Get-PhysicalDisk | ? PhysicalLocation -like "*LUN 3"
New-StoragePool -StorageSubSystemFriendlyName Cluster -FriendlyName S2DPool -ProvisioningTypeDefault Fixed -PhysicalDisk $Disks
3. Once created, run the below commands to display the storage pools and the disks inside the newly-created pool (S2DPool).
Get-StoragePool
Get-StoragePool -FriendlyName S2DPool | Get-PhysicalDisk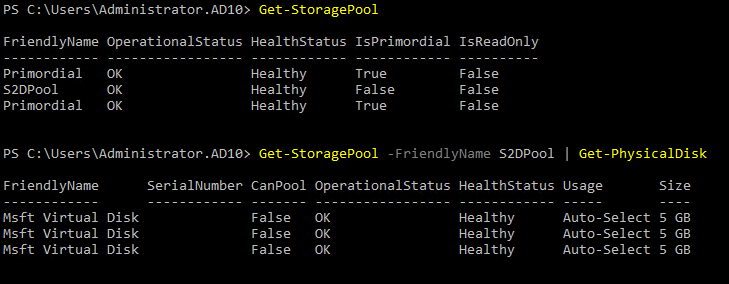
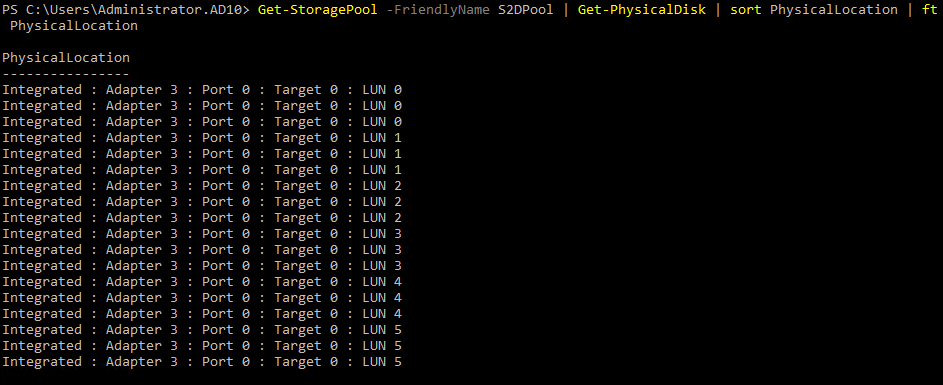
4. Now, run the below command to verify the newly-created storage pool’s (S2DPool) PhysicalLocation.
Get-StoragePool -FriendlyName S2DPool | Get-PhysicalDisk | ft PhysicalLocation
5. Run each command below, which does not provide output, but add the disks from LUN addresses 0,1,2,4 and 5 to the S2DPool.
$Disks = Get-PhysicalDisk | ? PhysicalLocation -like "*LUN 0"
Add-PhysicalDisk -PhysicalDisks $Disks -StoragePoolFriendlyName S2DPool
$Disks = Get-PhysicalDisk | ? PhysicalLocation -like "*LUN 1"
Add-PhysicalDisk -PhysicalDisks $Disks -StoragePoolFriendlyName S2DPool
$Disks = Get-PhysicalDisk | ? PhysicalLocation -like "*LUN 2"
Add-PhysicalDisk -PhysicalDisks $Disks -StoragePoolFriendlyName S2DPool
$Disks = Get-PhysicalDisk | ? PhysicalLocation -like "*LUN 4"
Add-PhysicalDisk -PhysicalDisks $Disks -StoragePoolFriendlyName S2DPool
$Disks = Get-PhysicalDisk | ? PhysicalLocation -like "*LUN 5"
Add-PhysicalDisk -PhysicalDisks $Disks -StoragePoolFriendlyName S2DPool
6. After adding the disks, run the below command to sanity-check them and verify their physical locations.
Get-StoragePool -FriendlyName S2DPool | Get-PhysicalDisk | sort PhysicalLocation | ft PhysicalLocationIf all goes well, there should be 16 disks in the S2DPool, as shown below.
7. Next, run the below command to display the disks within the new S2DPool.
Get-StoragePool -FriendlyName S2DPool | Get-PhysicalDisk | ft FriendlyName, CanPool, MediaType, PhysicalLocationThe S2DPool now contains disks on each storage server, as shown below.
8. Ultimately, run the Set-ClusterS2D command below to enable S2D.
Set-ClusterS2D -CacheState Enabled -Verbose
Update-StorageProviderCache -DiscoveryLevel Full
The below output will be displayed upon running the above commands.
Creating Storage Volumes
The storage cluster is now configured as a four-node cluster. This environment will support all the Storage Spaces resiliency settings for storage volumes (virtual disk volumes).
Resiliency settings can be configured as follows:
| Mirrored | Data is synchronously replicated across two or three nodes. |
| Parity | Data is striped across multiple disks, efficiently storing parity data. |
| Tiered | Volumes can be created using both Mirrored and Parity resiliency tiers. |
In the following sections, you will create different volumes to understand these resiliency settings better, starting with mirrored volumes.
Mirrored Volumes
Mirrored resiliency has the advantage of speed since reads are distributed across multiple nodes, where data is synchronously replicated across two or three nodes.
Run the following New-Volume commands to create two-way (Mirror-2-Vol1) and three-way (Mirror-3-Vol1) mirrored volumes in the S2DPool.
New-Volume -FriendlyName "Mirror-2-Vol1" -FileSystem CSVFS_ReFS -StoragePoolFriendlyName S2DPool -Size 1GB -ResiliencySettingName Mirror
New-Volume -FriendlyName "Mirror-3-Vol1" -FileSystem CSVFS_ReFS -StoragePoolFriendlyName S2DPool -Size 1GB -ResiliencySettingName Mirror -PhysicalDiskRedundancy 3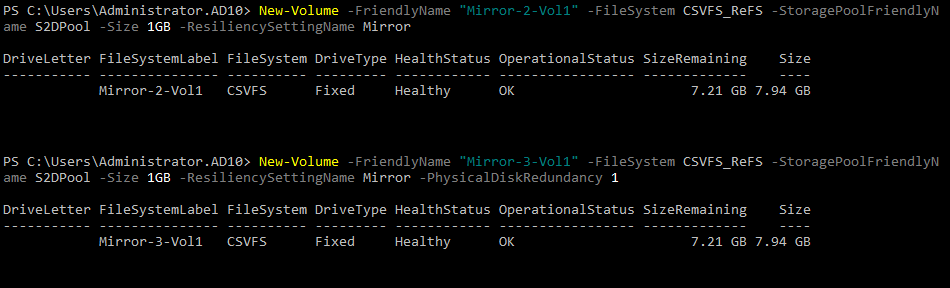
Parity Volumes
Unlike mirrored resiliency, which stores multiple copies of data, parity resiliency stores data more efficiently across multiple disks. But note that parity has reduced read performance since data is not distributed to various nodes and disks.
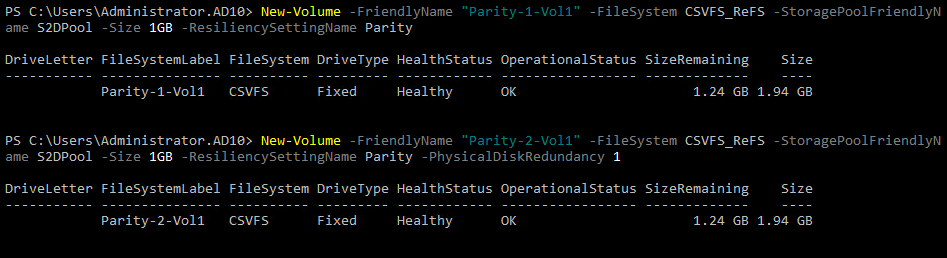
Execute each command below to create both Single Parity and Dual Parity volumes.
New-Volume -FriendlyName "Parity-1-Vol1" -FileSystem CSVFS_ReFS -StoragePoolFriendlyName S2DPool -Size 1GB -ResiliencySettingName Parity
New-Volume -FriendlyName "Parity-2-Vol1" -FileSystem CSVFS_ReFS -StoragePoolFriendlyName S2DPool -Size 1GB -ResiliencySettingName Parity -PhysicalDiskRedundancy 2
The above PowerShell commands will display the below results.
Now, run the below Get-VirtualDisk command to display the newly-created volumes (Virtual Disks).
Get-VirtualDisk | ft FriendlyName, ResiliencySettingName, PhysicalDiskRedundancy
Tiered Volumes
Perhaps you need the strength of both mirrored and parity volumes. If so, a tiered volume is what you need. Tiered volumes provide the speed advantage of mirrored volumes and the capacity advantage of parity.
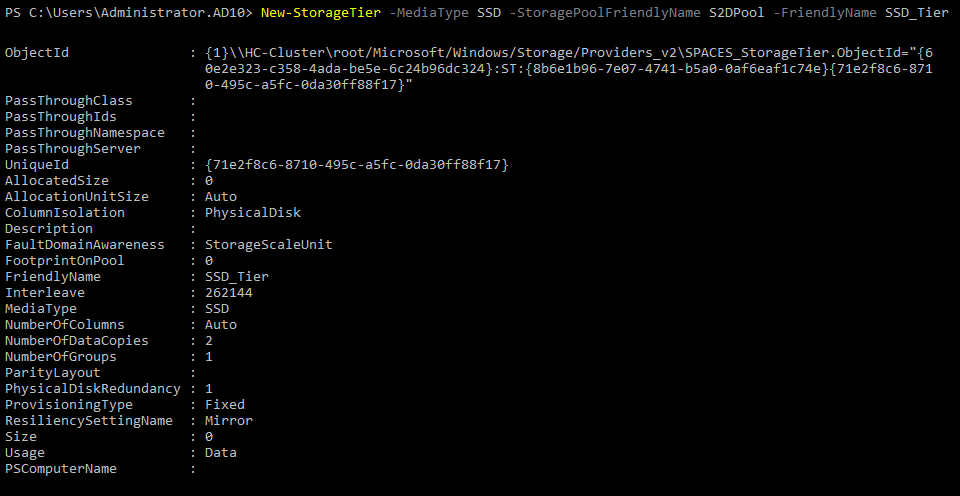
Run the below commands to create a tiered mirror and parity volumes, and verify them.
New-StorageTier -MediaType HDD -StoragePoolFriendlyName S2DPool -FriendlyName HDD_Tier
New-StorageTier -MediaType SSD -StoragePoolFriendlyName S2DPool -FriendlyName SSD_Tier
Get-StorageTier | Select FriendlyName, ResiliencySettingName, PhysicalDiskRedundancy
Creating a new HDD storage tier

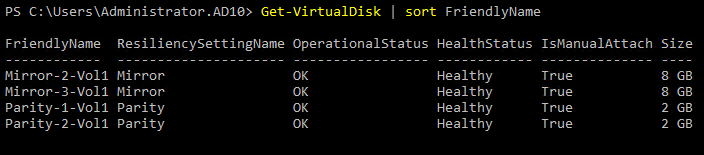
Now, run the Get-VirtualDisk command below to list available volumes sorted by the FriendlyName property.
Get-VirtualDisk | sort FriendlyNameBelow, you can see all the volumes with each significant resiliency setting.
Conclusion
Throughout this tutorial, you have created a virtual environment using Storage Spaces Direct, which is now a base infrastructure to build into a complete hybrid cloud environment. A hybrid cloud can be constructed by adding roles and configurations and clustering the servers. As a result, each server is compatible with the S2D and Hyper-V roles.
At this point, you have configured a relatively raw virtual environment. Why not turn it into a robust storage environment?


