

Missing data can be a nightmare, especially critical work-related files or treasured family photos. But the question is, can data still be recovered? In these situations, you need a reliable data recovery solution. And guess what? Stellar Phoenix Windows Data Recovery can get the job done quickly and effectively.
Stellar Phoenix Data Recovery is a powerful software designed specifically for recovering lost or deleted data from any system like Windows, Linux, macOS, etc. And in this tutorial, you’ll learn how to recover missing data from your system with Stellar Phoenix Data Recovery.
Feel excited yet? Read on and recover data like they never went missing!
Prerequisites
This tutorial will be a hands-on demonstration. If you’d like to follow along, be sure you have a Windows 10 machine.
Downloading and Installing Stellar Phoenix Windows Data Recovery
Even though Stellar Phoenix Data Recovery works in many OSs, it doesn’t come installed by default. So before you can recover data, you’ll first have to download and install Stellar Phoenix Data Recovery on your machine.
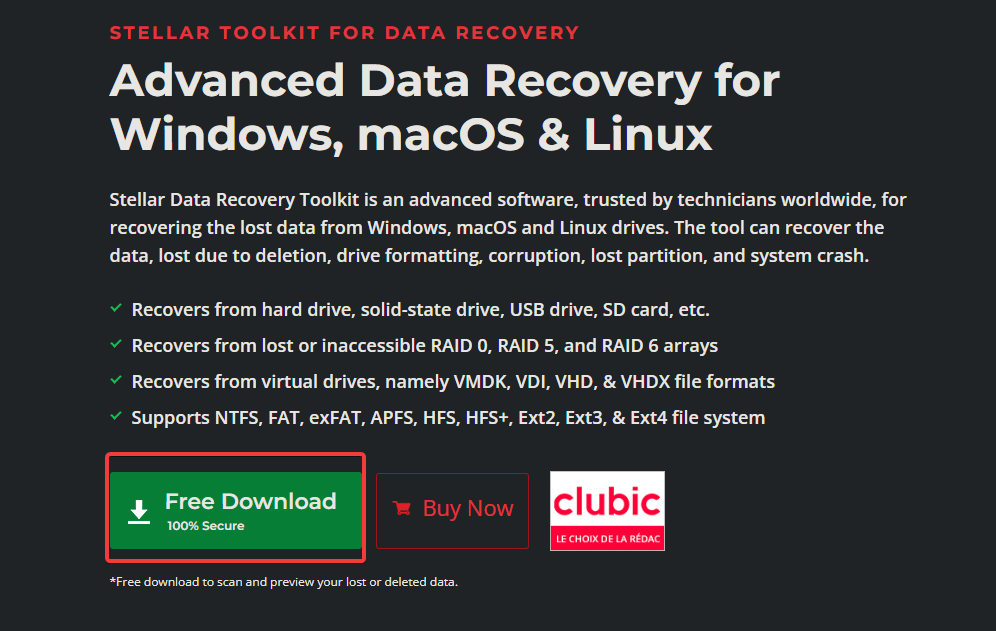
1. Open your favorite web browser, navigate the official website, and click on the Free Download button to download the free demo version.
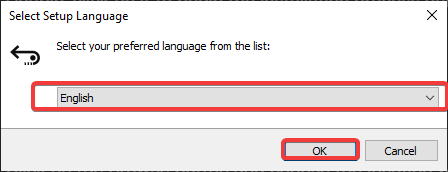
2. Launch the installer you downloaded, select your preferred language on the pop-up window, and click on OK.
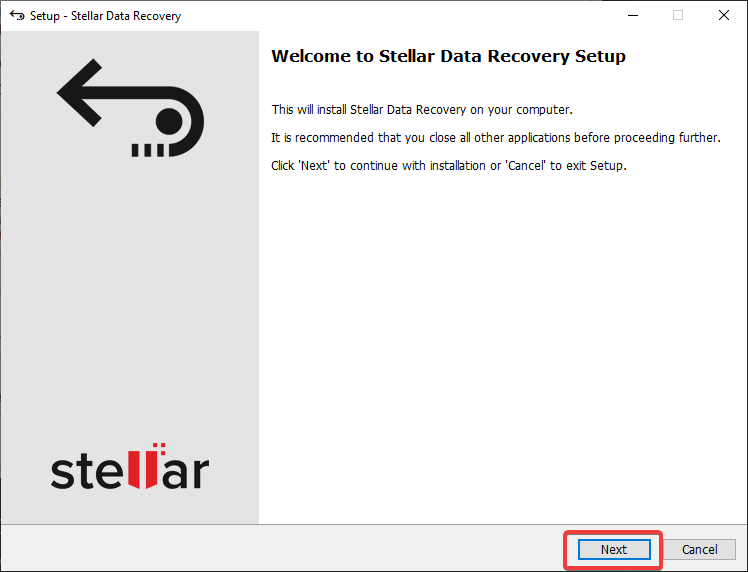
3. Click on Next on the welcome page below to continue with the installation.
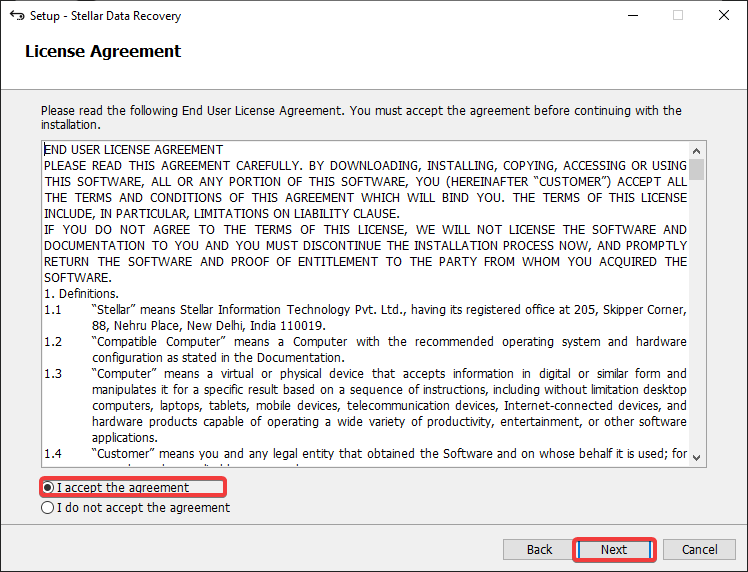
4. Now, select the I accept the agreement option and click on Next.
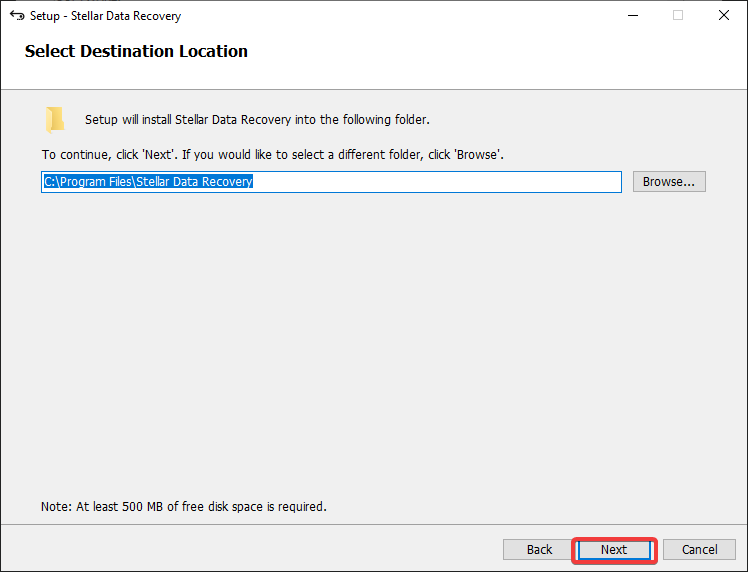
5. Click on Browse to choose a location to install the software, and click Next. But the default location (C:\) is usually fine. But ensure your target disk has enough free space for the program and associated recovered data.
If you have a solid-state drive SSD, don’t hesitate to select it as your installation drive for Stellar’s core product and any associated tools. Why? The Stellar Phoenix Windows Data Recovery uses a lot of disk activities (reads and writes) when recovering data. Your SSD can handle the increased disk activities more than a hard drive(HDD).
Installing might take a few minutes to complete depending on your internet connection speed, as the installer downloads additional files required for the software to run.
So relax and grab a cup of coffee while you wait. Once the download completes, the program will automatically be installed on your machine.

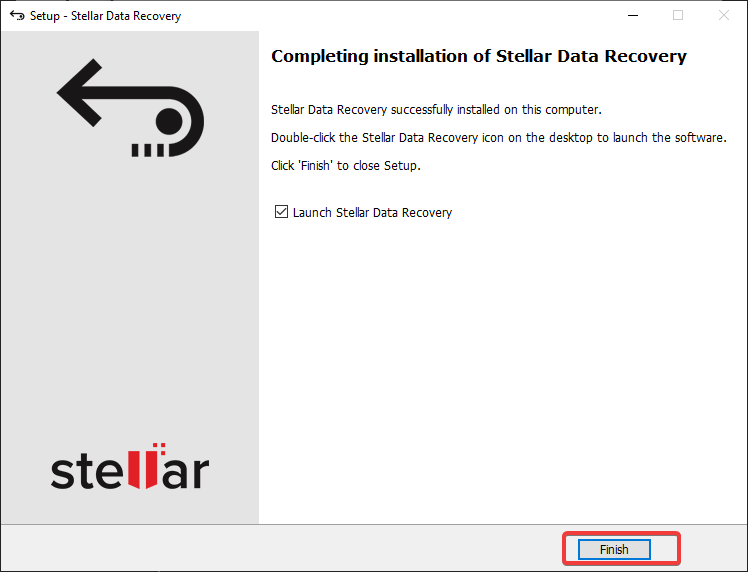
6. Finally, click on Finish to exit the installer and launch Stellar Phoenix Data Recovery once the installation completes.
Discovering Files to Recover
Now you have Stellar Phoenix Windows Data Recovery installed on your machine, it’s time to dig into your disks and recover data. But first, you’ll scan for files that you can recover with the software. Scanning is the most crucial part of the data recovery process because it allows you to select which files you want to recover.
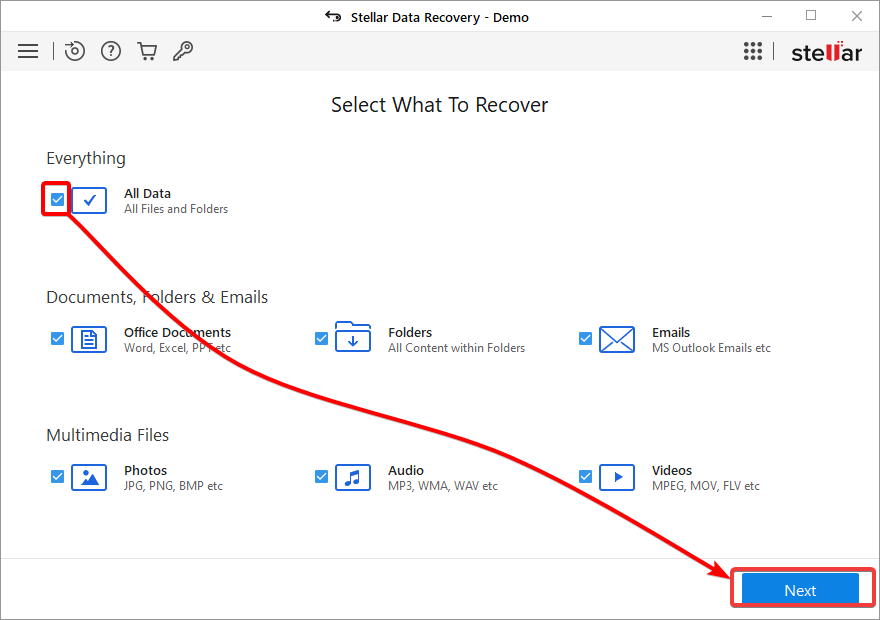
When you first launch Stellar Phoenix Linux Data Recovery, you’ll get the screen below. The main interface is well-organized into different intuitive sections, where you can select the type of recovery you want to perform. This design is helpful when you’re looking for specific types of files, such as photos, videos, or documents.
1. Tick the checkbox beside your desired option, and click Next. This tutorial’s choice is All Data since it’s the most comprehensive option.
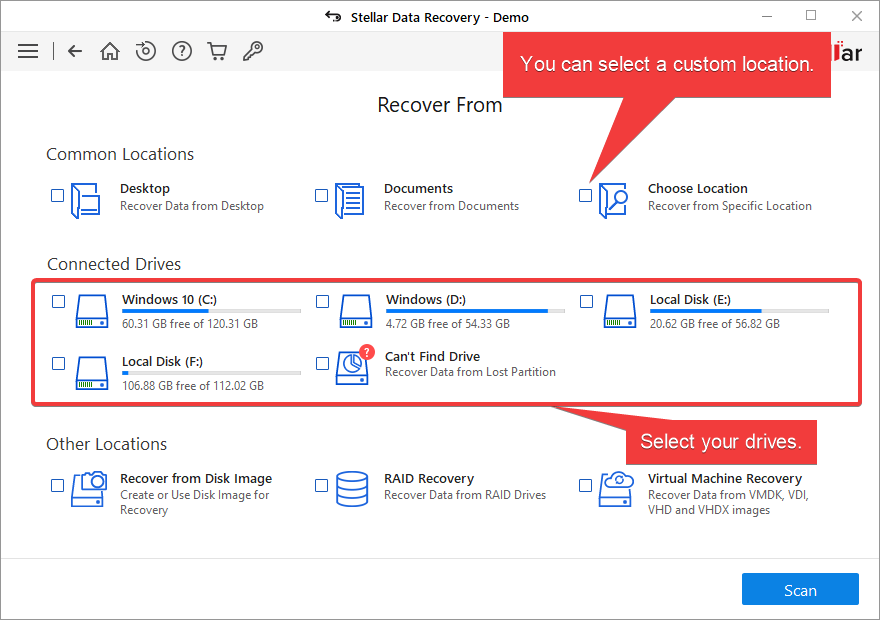
After selecting what to recover, you’ll see the page below where you can choose which drive/location you want to scan for lost or deleted files. You can see all your drives listed, including any external drives connected to your machine.
This feature can be helpful if you accidentally deleted a file from your USB drive or external hard drive. The list below explains the options you can select depending on your needs:
- Choose Location – A custom location. This option can be helpful if you know the exact location of the lost data.
- RAID Recovery – An advanced option for users with a RAID system. Most users won’t use this option.
- Virtual Machine Recovery – for users who have a virtual machine. Like with RAID Recovery, this option is advanced that most users won’t use.
- Recovery from Disk Image – An option for users who have a disk image. A disk image is a copy of your entire drive, including the lost or deleted data.
This option is useful if you created a disk image before you lost or deleted your data. But then again, most users won’t use this option.
If you get lost, click the back arrow (top-left) to go back to the previous screen or the home button to start over.

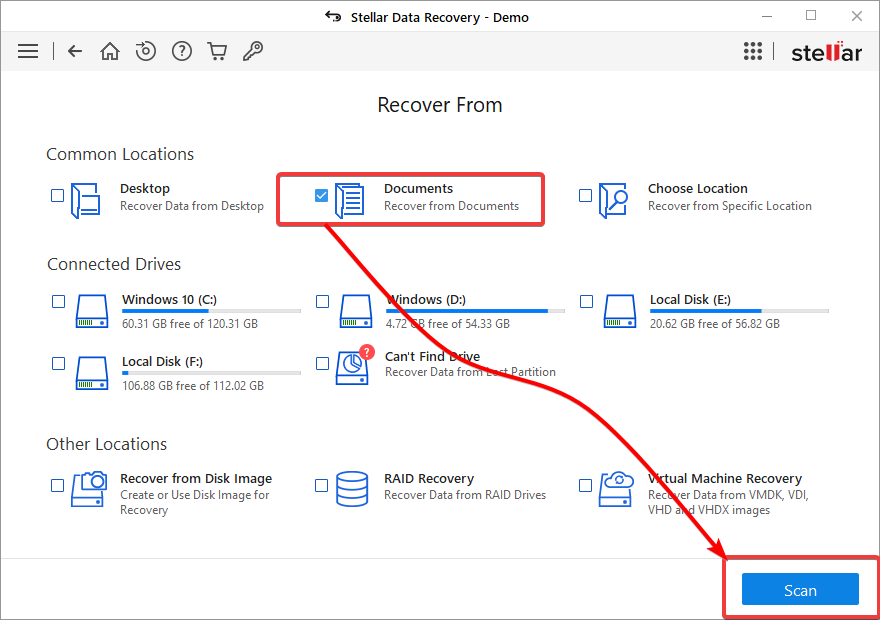
2. Next, tick the box beside the location(s) or drive(s) you want to scan and click on Scan. This tutorial selects the Documents location to scan for lost or deleted office files.
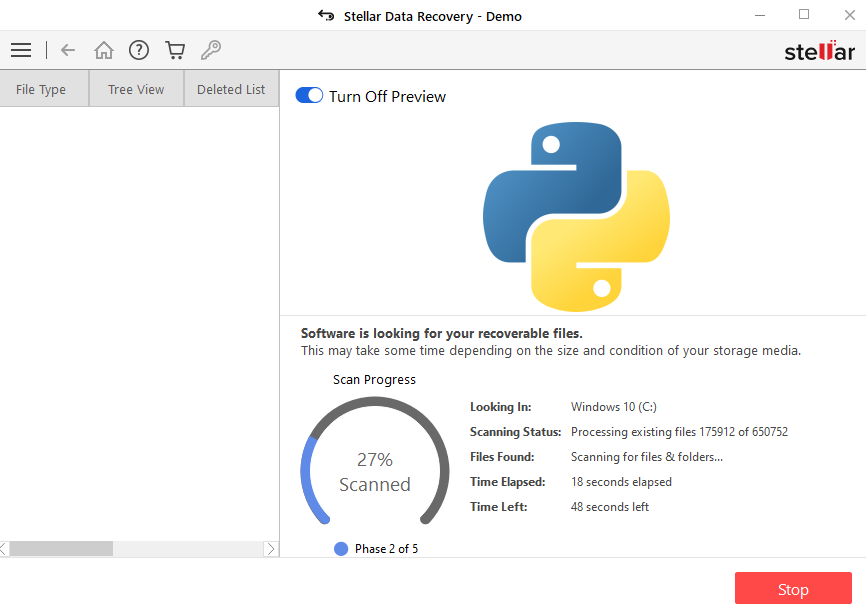
Stellar Phoenix Data Recovery starts scanning your drive for lost or deleted data. This process can take a few minutes up to a few hours, depending on the size of your drive and the number of files you have.
This tutorial tests a normal scan on an external SSD drive of 256 GB in size and has about 100,000 files. The scan took less than three minutes to complete, which is pretty fast compared to other recovery software.
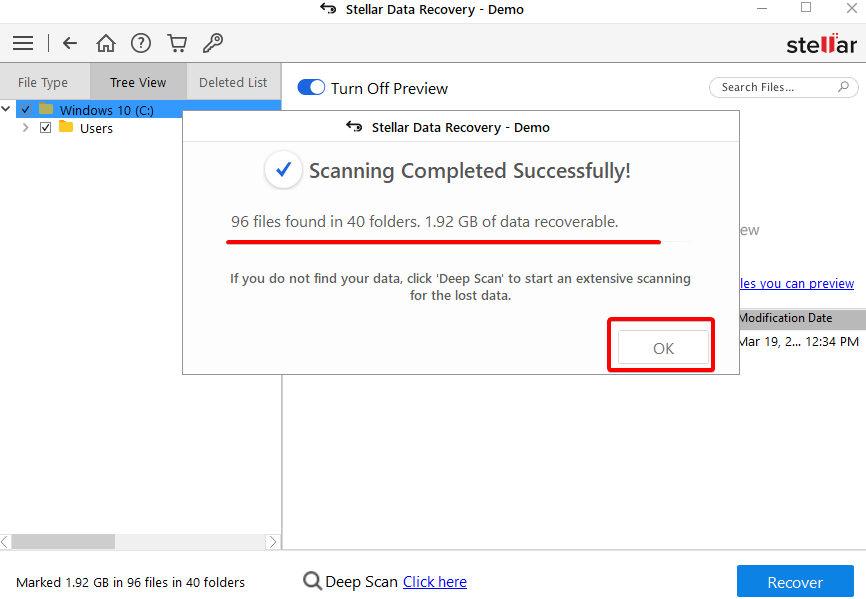
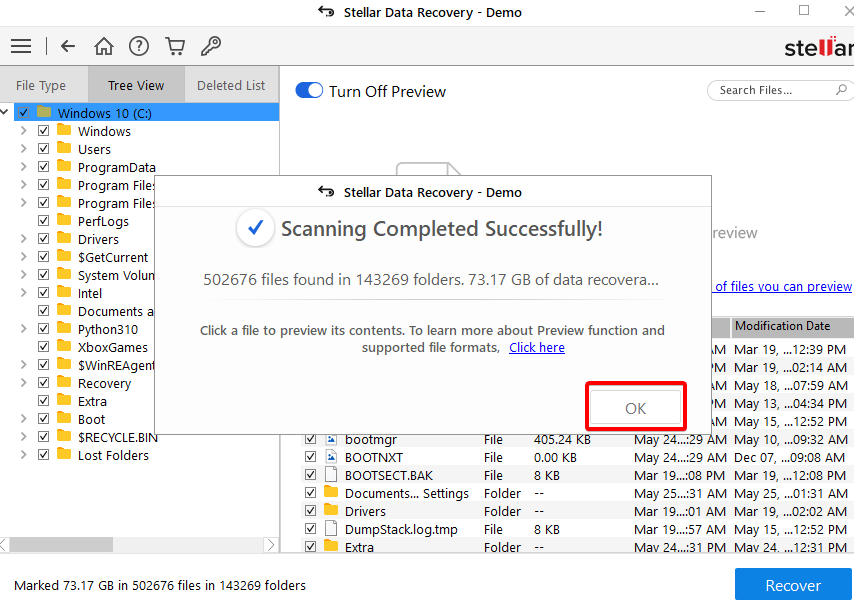
3. After scanning, click on OK to close the summary window once satisfied with the scan results.
You’ll see a summary of the scan, including the number of files found and the total size of the lost data, as shown below.
4. Now, click on the Click here hyperlink at the bottom of the window to perform a deep scan. Deep scanning helps you dig deeper into your disk if you’re not satisfied with the scan result or don’t see the file(s) you’re looking for.
A normal scan is enough for recently lost or deleted files. But deep scan is beneficial, especially if your disk has just undergone a hard drive format.
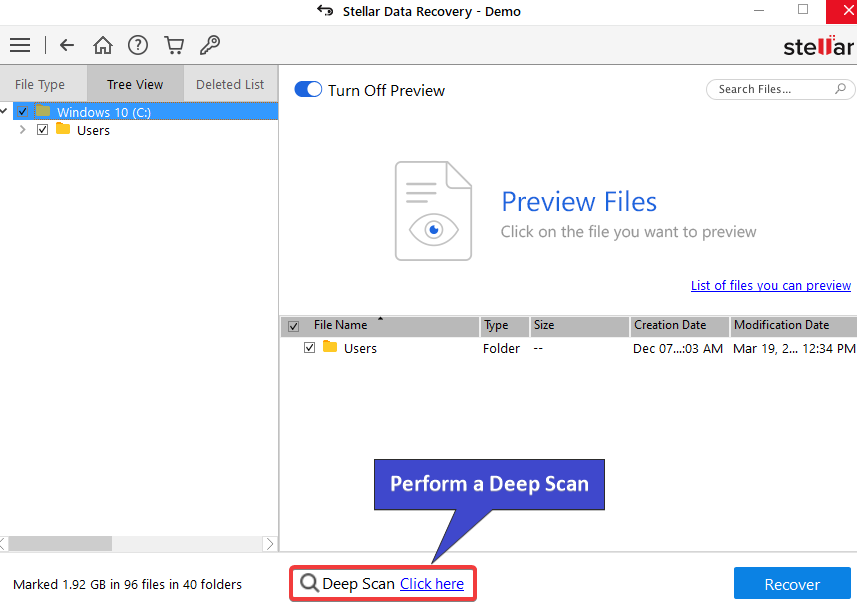
As the name suggests, the deep scan can take a while to complete than a normal scan.
This tutorial tests a deep scan on the same external SSD drive of 256 GB in size and has about 100,000 files. And the deep scan took about 15 minutes to complete.
You can see the deep scan process shown in the screenshot below. Once the deep scan completes, you’ll see a summary window pops up, just like the normal scan (step five).
5. After scanning, click on OK to close the summary window once satisfied with the scan results. You’ll see that this time there are more files deep scan found.
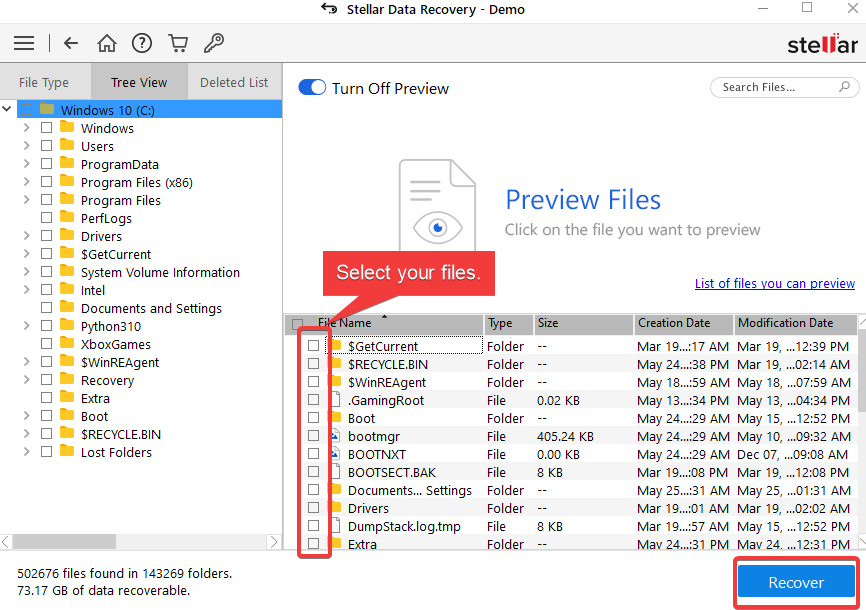
6. Finally, tick the box beside the file(s) or folder(s) you like to recover and click on Recover (bottom-right) to recover them.
The demo version lets you scan and preview the lost files for free. But you need to buy the software where you can actually recover the lost data. In the demo version, though, you get the main idea of how the software works and what to expect.
Advanced Options for Recovery
You’ve seen how to recover data after a normal or deep scan. But Stellar Phoenix Data Recovery also comes with some advanced options for data recovery.
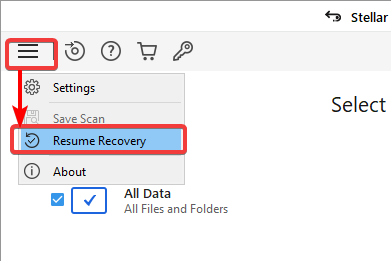
Suppose you’re recovering a large drive, but the recovery process was interrupted. Perhaps your computer ran out of battery, or there’s a power outage. If so, can you still resume the recovery later? Yes! If you saved the scan information beforehand, that is.
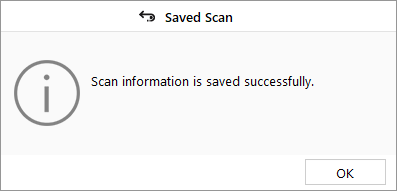
1. After scanning, click on the menu icon (top-left) —> Save Scan to save the scan information.
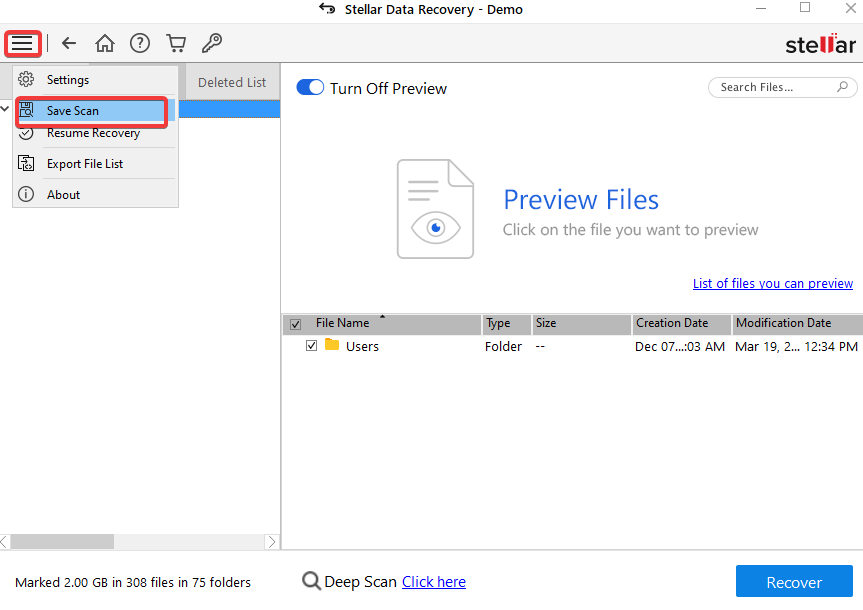
Note that you can only save the scan information in a different location than the drive where you’re trying to recover your data.
2. Open Stellar Phoenix Data Recovery after fixing what caused the interruption on recovery.
3. Click on the menu icon, and choose Resume Recovery to start resumption of the interrupted recovery.
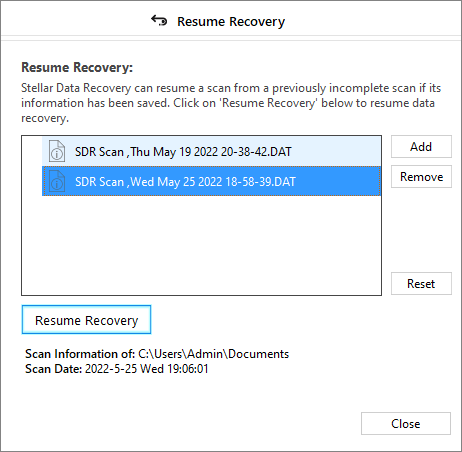
4. Lastly, select the scan information you saved in step one, and click Resume Recovery. The recovery process picks up from where it left off and resumes the recovery process.
Conclusion
Even just the thought of losing your data can be devastating. But in this tutorial, you’ve learned how to recover lost data, both recent and old ones. Data recovery can be a daunting task, but with Stellar Phoenix Linux Data Recovery by your side, you can rest assured that your data is in good hands.
At this point, you can confidently recover lost data and save the day with Stellar Phoenix Windows Data Recovery. But why not automate a regular backup for your data and save yourself the trouble of performing data recovery?


