

If you’re a VMware admin, losing your whole VMware environment can be fatal. So how do you backup your whole VMware environment? Don’t worry, this tutorial got you covered, and you’ll get to perform a VMware backup in no time!
In this tutorial, you will learn about how to never lose your VMware environment, including your vCenter server, virtual machines, and ESXi configuration.
Prerequisites
This tutorial will be a hands-on demonstration. If you’d like to follow along, be sure you have the following:
- A machine running VMware ESXi Hypervisor – This tutorial uses VMware ESXi 6.7 version.
- Any of the following protocols for performing vCenter server appliance backup: FTP, FTPS, HTTP, HTTPS, or SCP with enough disk space and access to the appliance.
Backing up vCenter Server Manually
First on this tutorial’s list of performing VMware backup is, backing up your vCenter server manually. You’ll access your Appliance Manager to fill up a form of your backup job’s configuration for backing up your vCenter server.
Application servers or database servers, continuously write data all the time. When creating a backup of such servers, you have to quiesce the VM so that the file and application data are brought to a steady-state.
1. Open your favorite browser, then navigate to the vCenter server’s IP address, as the one below, and log in. Doing so opens the management console for your VMware vCenter server.
Be sure to replace appliance-IP-address-or-FQDN with your vCenter server’s IP address. But for this example, the vCenter server’s IP address is 192.168.1.122.
https://appliance-IP-address-or-FQDN:5480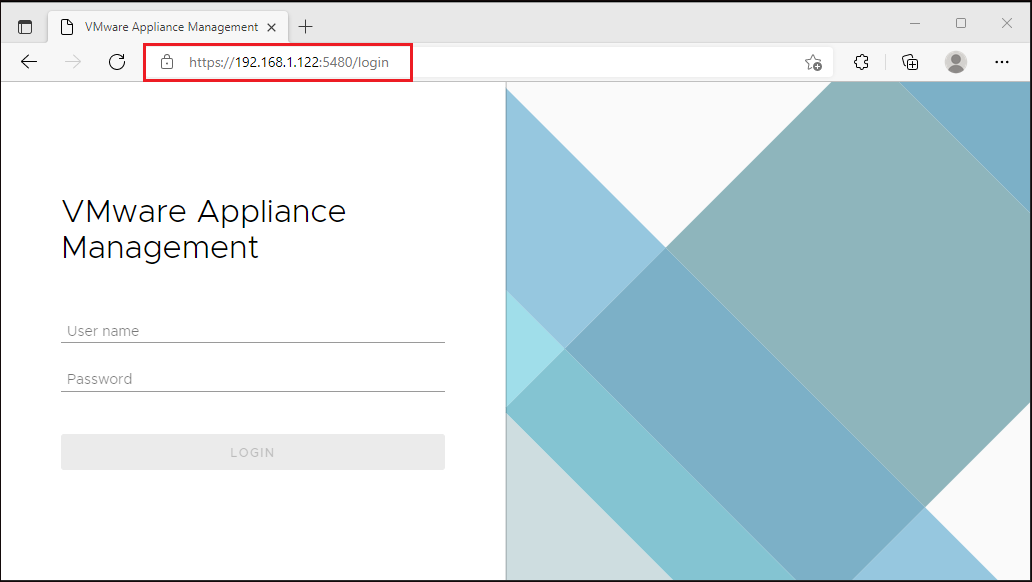
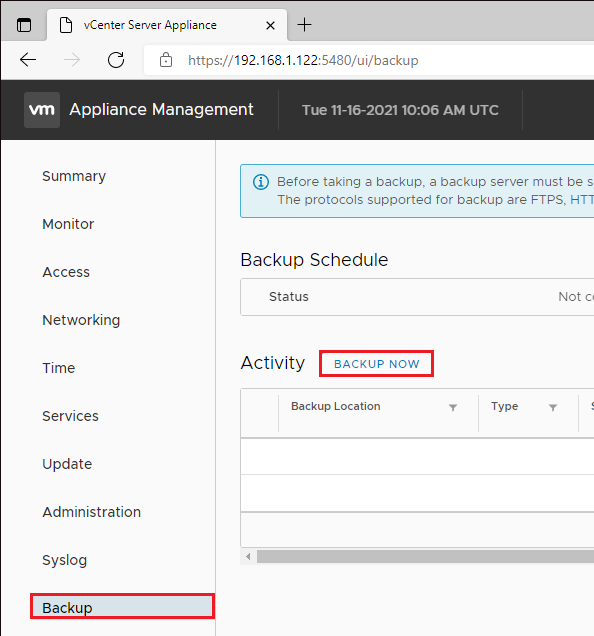
2. Once you log in, click on Backup at the left panel and click on BACKUP NOW in the Activity section, as shown below.
3. Configure the backup settings with the following:
- Enter the backup protocol (ftp) followed by location details and credentials to connect. In this example, the FTP server’s IP address is set to 192.168.1.34.
- Do not enter an encryption password to keep the backup as plain as possible. The password is needed while restoring an encrypted backup.
- Check the Stats, Events, and Tasks option to save the historical stats, events, and tasks data from the database to your backup location.
- Click the Start button to start the backup process.
Always remember that the hardware devices used for backup should have enough resources. Without enough resources, your backup operations, such as data deduplication, can not be completed quickly as expected.

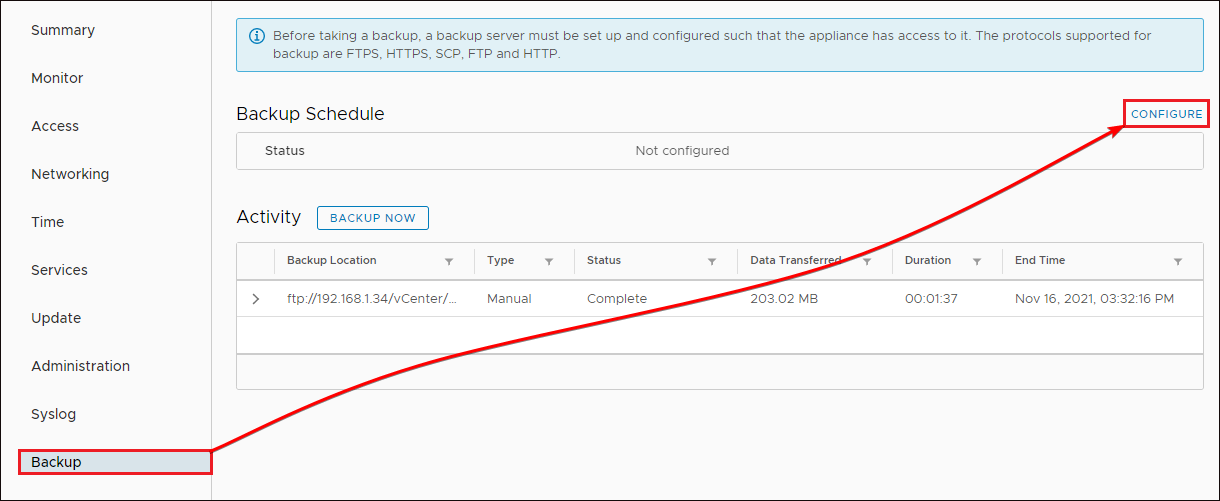
4. Once the backup is complete, you’ll see an item in the backup history on the Activity section like the one below.

Automating a VMware Backup Job for vCenter Servers
Instead of manually backing up your vCenter server, why not automate the process? How? By configuring a schedule to backup your vCenter server.
Configuring a backup schedule is similar to backing up your vCenter server manually. The only difference is that you set a schedule for when to run the backup process.
On Appliance Management’s home page, click on Backup, then click on CONFIGURE at the top-right of the Backup Schedule section. Doing so opens a page to configure the backup schedule.
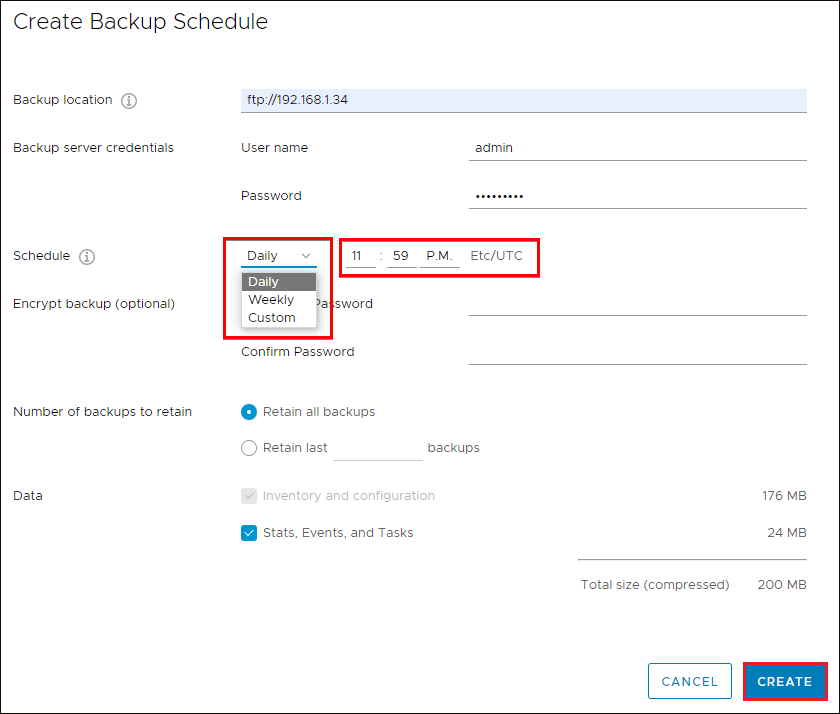
Now, configure the backup schedule details with the following:
- Fill in all the details on the Backup Schedule page as you did in the “Backing up vCenter Server Manually” section (step three).
- Click on the drop-down field to choose a repetition (Daily, Weekly, or Custom), and set the time when to run the backup job.
- Click Create to save the backup schedule, and your browser redirects back to the Backup page.
Never ignore the automated backup job you created. On your scheduled auto backups, try a file-level recovery for a VM and see if the automated backup job did its work correctly.
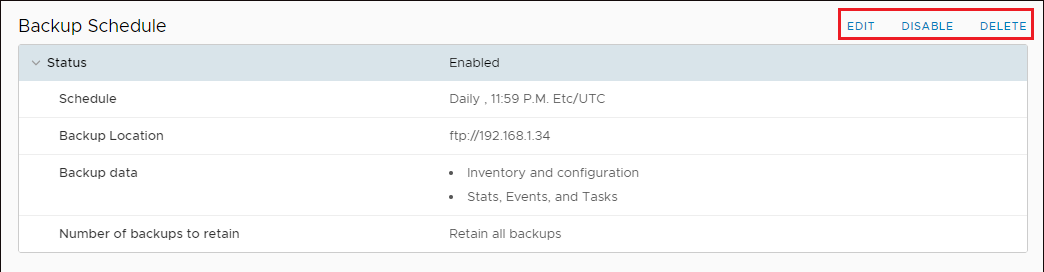
You can now see the Backup Schedule section with all the options you selected while creating the backup schedule, as shown below. You also have the option to Edit, Disable or Delete the backup schedule completely.
When you use a backup file to restore your vCenter server, all the configurations from the backup will be restored to a new appliance.
Scheduled backup jobs on your VM constantly consume memory, which degrades your VM’s performance. Alternatively, you can schedule your backup on off-hours, where there are no or fewer users using your servers.
But the better option is to use image-level backups from the virtualization layer, so the OS resource utilization will not be involved in the backup process.
Copying the VM Folder from VMware
You’ve previously learned how to backup your vCenter manually and by scheduling a backup job. Now, it’s time to look at different ways to backup VMs via the VMware Hypervisor. For a start, back up your virtual machine by copying your VM’s folder from VMware to a destination.
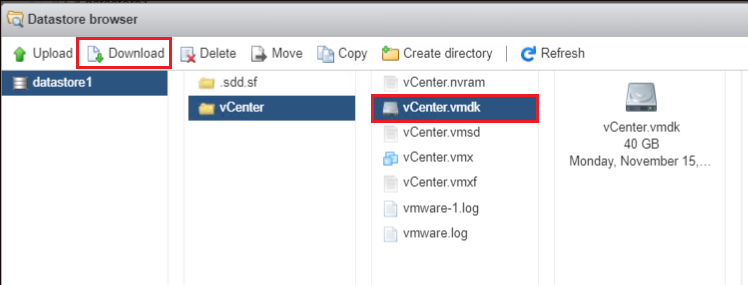
Power off your VM, then open VMware ESXi Datastore browser and navigate to your VM’s folder.
Now select your VM’s folder (vmdk), then click Download to select a destination folder outside your VMware hypervisor.
Exporting a Virtual Machine from vSphere
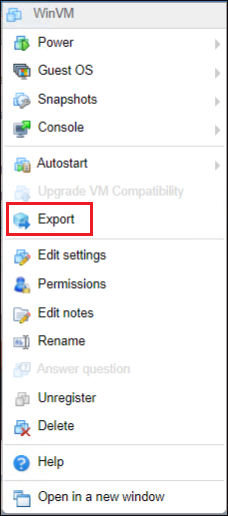
Similar to copying a VM folder, exporting from vSphere is another way to back up your VM. But exporting VMs is a bit different as the VM gets converted to an OVF file to support the exchange of virtual appliances across products and platforms.
Log in to your vSphere URL and navigate to your VM. Now, right-click on your VM and click Export to export your VM’s vmdk file to your preferred location and converts it to an OVF file.
Using a backup solution like VMware vSphere Storage APIs – Data Protection which doesn’t require any backup software to be installed on the VM or on the ESXi host is good practice.
Using vStorage APIs reduces the resource utilization for backup on both the VMs and the ESXi host. vStorage APIs for Data protection uses VMware vSphere’s snapshot capabilities to create a backup on the Storage Area Network (SAN) without requiring downtime on the VMs.
Exporting Virtual Machines via the PowerCLI Module
If running commands is your expertise, another way to create a backup is to export the VMs using the PowerCLI module in PowerShell. But first, you’ll install the module before you can backup any VMs.
1. Open PowerShell as administrator, then run the Install-Module command below to install the PowerCLI module (VMware.PowerCLI) on your machine.
Enter ‘A’ when you get the confirmation prompt to continue running the command.
Install-Module -Name VMware.PowerCLI
2. Next, run the command below to connect Connect-VIServer to your ESXi host. Change the 192.168.1.119 IP address to your ESXi host IP address.
Enter your credentials when prompted. Connect-VIServer 192.168.1.119
Connect-VIServer 192.168.1.119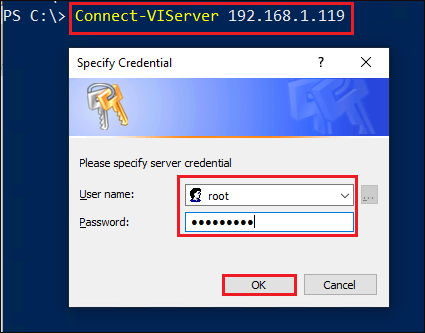
If you encounter an invalid server certificate error, run the below command to ignore certificate errors when connecting to your VMware host.
Set-PowerCLIConfiguration -InvalidCertificateAction Ignore
Run the Export-vApp command below to export your VM (vmdk file) as OVF format to a destination folder you specify (-Destination "C:\\VMBackup\\"). Replace WinVM with your VM’s name in the hypervisor.
Get-VM -Name WinVM | Export-VApp -Destination "C:\VMBackup\"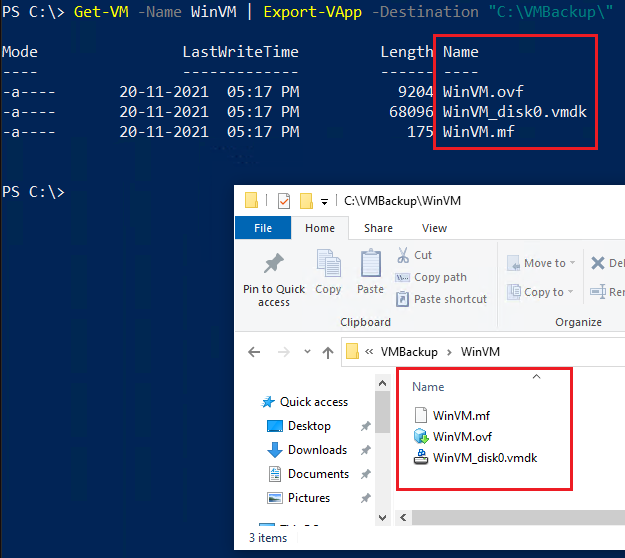
Backing up a VMware Host Configuration
You’ve seen how to back up VMs using third-party software and back up vCenter servers so far. But how about backing up a VMware host configuration?
1. Log in to your VMware host through SSH.
2. Run the below vim-cmd command on the shell to save the current configuration from the last autosave (hostsvc/firmware/sync_config). ESXi’s configuration is saved every hour automatically.
vim-cmd hostsvc/firmware/sync_config
Finally, run the below command to back up the configuration (hostsvc/firmware/backup_config) you saved in step two.
Note the URL from the output as you’ll need it to download the backup file in the next step.
vim-cmd hostsvc/firmware/backup_config
4. Open your browser and enter the URL you noted in step three. Replace * with the IP address of your ESXi host and the browser automatically downloads the backup folder.
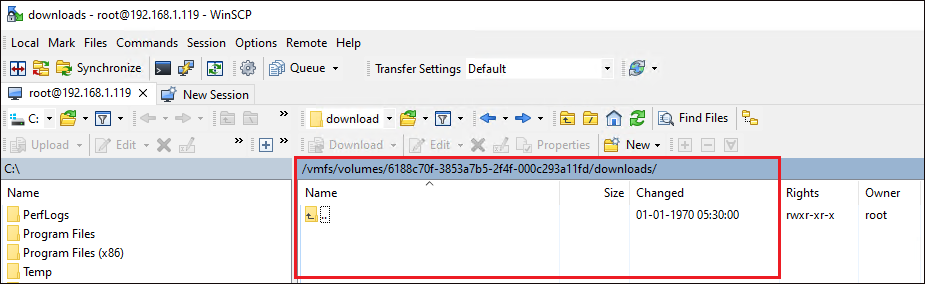
You can also view the same backup file from the /scratch/downloads folder and download it using software like WinSCP, as shown below.
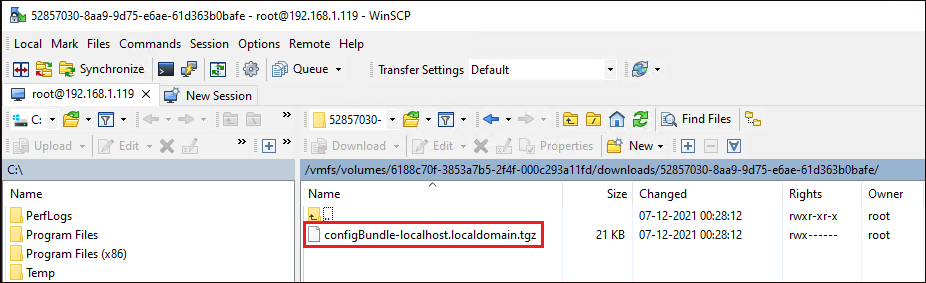
As you see below, the backup folder is deleted automatically in a few minutes, so you have to download it quickly.
When testing a quick software update, you can create a snapshot on the server, test, and remove the snapshot as soon as possible. Why? After a snapshot is created, all the disk writes for that VM are redirected to a new delta disk file.
Data written to the disk file in increments creates a lock on the storage Local Unit Number (LUN), which can cause performance issues.
Conclusion
This tutorial is aimed at providing you with knowledge on how to perform VMware environment backup. You’ve learned not just one, but many ways to secure a copy of your VMware environment and to up your ESXi host configuration.
Backing up your VMs is crucial, especially for business continuity purposes. There are tons of other backup software with data protection like Veeam Backup and Replication, Comvault, Dell EMC Networker, Cohesity Backup and Recovery, Veritas NetBackup, Altaro VM Backup, Nakivo Backup and Replication, and more.
With this newfound knowledge, which software would you use to backup your VMs? Would you turn to a manual or automated backup process?


