


SQLite is a versatile open-source relational database management system compatible with various applications. If you are new to SQLite and need to set it up quickly, this tutorial will walk you through SQLite install and usage basics.
Read on to get started!
Prerequisites
This tutorial will be a hands-on demonstration. If you’d like to follow along, you’ll need a Linux computer. This tutorial uses Ubuntu 20.04, but any modern Linux distribution will work.
Performing an SQLite Install
First things first, you need to install SQLite. The recommended installation method is through your Linux distro’s package manager, such as apt in Ubuntu or dnf on RHEL-based operating systems.
1. Launch your preferred terminal or SSH client and log in to your Linux computer.
2. After you log in, run the apt update command to update your computer’s package repository cache. This step ensures that you’ll install the latest packages.
sudo apt update -y3. Next, run the SQLite install by running the following command.
sudo apt install sqlite3 -y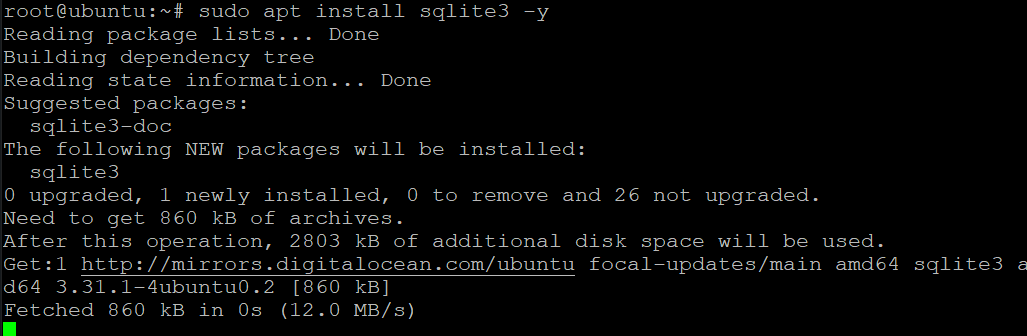
4. Finally, verify that the installation was successful by checking the version number. The below command returns the current SQLite3 version installed on your system.
sqlite3 --versionAs you can see below, the installed version is v3.3.1, which is the latest as of this writing.

Creating an SQLite Database
Now that you have installed SQLite, it is time to create your first database.
Unlike a full-blown database server, such as MySQL, creating an SQLite database does not require you to run the CREATE DATABASE statement. Instead, you’ll execute the sqlite3 tool.
For example, run the below command to create a new database named ata_db.db. If the database does not exist, the tool creates it automatically on the current working directory. If the database of the same name already exists, sqlite3 opens that database instead.
sqlite3 ata_db.db
Your prompt changes to sqlite> indicate that you have created the database successfully and entered the SQLite shell, as shown below.

Lastly, run the command below to list the current database.
.databases
To view the list of SQLite commands, type .help and press Enter
You will see an output similar to the below, which lists all databases in the current directory. You can see your newly created database, ata_db.db, on the list.

Press CTRL+D or type .quit and press Enter to exit the SQLite shell.
Creating a Table
Now that you have a database, it is time to create a table in the database for storing data.
SQLite tables are similar to folders in a file system that store information. An SQLite database can contain multiple tables. Tables are similar to what other databases call relations or collections.
SQLite has a CREATE TABLE statement for creating new tables in the database. The CREATE TABLE statement is flexible and allows you to specify all of the names, data types, and constraints.
The syntax for the CREATE TABLE statement is as follows:
CREATE TABLE [IF NOT EXISTS] [schema_name].table_name (
	column_1 data_type PRIMARY KEY,
  column_2 data_type NOT NULL,
	column_3 data_type DEFAULT 0,
	table_constraints
) [WITHOUT ROWID];
The below list breaks down the statement syntax for better understanding.
CREATE TABLEis the SQLite keyword for creating a new table.IF NOT EXISTSis an optional keyword. There will be no error if you include this keyword and the table already exists. Otherwise, if the table does not exist, it will be created. Attempting to create a table that already exists without this keyword will result in an error.schema_nameis the schema’s name (optional) in which to create the new table. This schema can be any of the attached databases. If you do not specify a schema, the statement will target themainschema by default.table_nameis the name of the table you are creating. You can choose any name for the table but not the same name as an existing table in the database.column_1,column_2,column_3, etc. are columns in the new table. You can choose any name for the columns, but they must be unique within the table.data_typeis the data type of the column. The SQLite data types arenull,integer,real,text, andblob.- Column constraints and
table_constraints:PRIMARY KEY– Specifies a column as a primary key. A table can have only one primary key. If you omit this keyword, the statement will create the column as a regular data column.FOREIGN KEY– The pointer to the PRIMARY KEY in another table.UNIQUE– Ensures that the column’s value does not have any duplicates.CHECK– Evaluates the value based on the condition before inserting data into the column.NOT NULL– Prevents inserting null values into the column. An error will occur if you try to enter a null value into a NOT NULL column.DEFAULTis an optional keyword to specify a default value for the column. If you omit this keyword, the default value will benull.
WITHOUT ROWIDis an optional keyword to specify that the table should not have arowidcolumn. The table must have aPRIMARY KEYif you specify theWITHOUT ROWIDoption.
In this example, run the statement below to create a table named atamember. This table has four columns and does not accept null values.
CREATE TABLE atamember(
    id integer NOT NULL,
    name text NOT NULL,
    membertype text NOT NULL,
    age integer NOT NULL
);
The CREATE TABLE statement returns no output unless there are errors. Run the below command to verify the new table now exists.
.tables
As you can see below, the command listed the new table called atamember, which confirms the successful table creation.

Inserting Records
At this point, you have a database and a table. A blank table is useless until you put some data (records) into it. Luckily, SQLite makes inserting records into the table convenient with the INSERT statement.
Below is the basic syntax for the INSERT statement.
INSERT INTO table (column1,column2 ,..) VALUES( value1, value2,...);
tableis the name of the table where to insert the data.column1,column2is the list of columns where the statement inserts the values. You do not need to list all columns in the table, but you must list at least one.VALUES(value1, value2, ...)are the values you want to insert into the columns. The number of values must match the number and order of columns you specified.
Run the below statements to insert three rows into the atamember table.
INSERT INTO atamember VALUES (1, "Adam", "Admin", 30);
INSERT INTO atamember VALUES (2, "Sagar", "Writer", 31);
INSERT INTO atamember VALUES (3, "Arman", "Editor", 32);
You must put the semicolon (;) at the end to terminate each statement.

Run the below command to insert a row of data with a missing value for the age column (last column).
INSERT INTO atamember VALUES (4, "June", "Editor");
You will get an error message saying “table atamember has 4 columns but 3 values were supplied,” as shown below.
Because the INSERT statement is trying to insert a row of data into four columns, but you only gave three values. Remember, the number of values must match the number of columns you specify with the NOT NULL constraint.

Reading Records
Once you have inserted some data into a table, you will want to read that data back out at some point. You can read all the data from a table using the SELECT statement with the * wildcard.
Below is the basic syntax for the SELECT statement. The * (wildcard) character indicates to retrieve all columns from the table name.
SELECT * FROM table;
Run the below command to return all data from the atamember table.
SELECT * FROM atamember;
As you can see below, the statement returns the three rows you inserted previously into the table.

To filter which rows to return, run the same SELECT statement and append the WHERE clause, as shown below. This statement will return only the row whose id is equal to 2.
SELECT * FROM atamember WHERE id=2;
As a result, you will see only one row in the output because only one row from the table met the condition in the WHERE clause.

Other comparison operators for the WHERE clause are:
<– Less than.>– Greater than.<=– Less than or equal to.>=– Greater than or equal to.
Updating Records
A common task in database management is updating records. Suppose you want to update Adam’s age from 30 to 31? You can do so by running the UPDATE statement.
1. First, confirm the current record you plan to update by running the below statement. This statement returns the record matching the name Adam.
SELECT * FROM atamember WHERE name='Adam';As you can see below, the record shows that Adam’s age is 30, and the record id is 1.

2. Now that you’ve confirmed the record and know that Adam’s record id=1, run the below command to change Adam’s age to 31 in the table.
UPDATE atamember SET age = 31 WHERE id=1;3. To verify that you’ve successfully updated the record, retrieve the record again by running the below statement.
SELECT * FROM atamember WHERE id=1;4. Confirm the record by retrieving it from the table again.

Altering the Table
What if you already created the table and filled it with records and forgot to add an important column? For example, you realized that the atamember table lacks an address column. Do you need to recreate the table? — No. This situation calls for the ALTER TABLE statement.
1. Run the below statement to add a new column named address to the atamember table.
ALTER TABLE atamember ADD COLUMN address text;2. By default, the new address column is empty. Apply the technique you learned in the previous section (Updating Records) to update each record’s address value.
Run the below command to update the address for your members in the atamember table.
UPDATE atamember SET address = 'US' WHERE id=1;
UPDATE atamember SET address = 'CA' WHERE id=2;
UPDATE atamember SET address = 'AUS' WHERE id=3;
3. Finally, verify that the records now have an address column and the column has values.
SELECT * FROM atamember;The below screenshot shows that each record now has an additional address column.

Deleting Records
Data may have validity periods, too. For example, members don’t stay forever, and at some point, you’ll need to perform database housekeeping by deleting old members’ records from a table.
Deleting records from a table requires you to run the DELETE statement. Suppose the member with id=1 no longer exists, and you must delete it from the table. To do so, run the below statement.
NOTE: Deleting a record is permanent. Make sure that you are deleting the correct record, always.
DELETE FROM atamember WHERE id=1;
Now, verify that you’ve successfully deleted the row containing the id=1 record.
SELECT * FROM atamember;
As you can see below, the record with id=1 no longer exists in the table.

Conclusion
In this guide, you’ve learned the basics of working with SQLite databases. You’ve created a new database and a table. You’ve inserted data, updated records, and deleted data from the table. These operations are the typical operations you’ll need to perform on an SQLite database.
At this point, you should have a good understanding of how to perform an SQLite install and work with SQLite databases. You can now move to more advanced topics, such as learning how to query data from multiple tables.


