


Monitoring is crucial for multi-tier microservices and applications in a data center or cloud infrastructure. But before scouring the internet for a monitoring tool, give Splunk Forwarder Agent a try.
Not a reader? Watch this related video tutorial!Splunk is one of the most widely-used log monitoring tools, which retrieves logs, events, and metrics from hosts and applications with the Splunk Universal forwarder agent. And in this tutorial, you’ll learn how to install the Splunk Universal forwarder agent on Ubuntu and monitor the host from your Splunk account online.
Read on and start using this badly needed monitoring tool!
Prerequisites
This post will be a step-by-step tutorial. To follow along, be sure you have an Ubuntu 14.04.4 LTS or greater – This tutorial uses Ubuntu 20.04.4 LTS.
Splunk agent installation is supported on all Windows, Linux, and macOS operating systems.
Registering for a Splunk Account
Before taking advantage of the Splunk Forwarder Agent, you should run through a few prerequisite tasks to ensure the installation goes smoothly. And first on the list is registering for a Splunk account.
1. Open your favorite web browser and navigate to the Splunk website.
2. Next, on the Splunk website, click on Free Trial (top-right) to register in Splunk and create an account.

3. Fill up your Splunk account information on the right pop-up window.
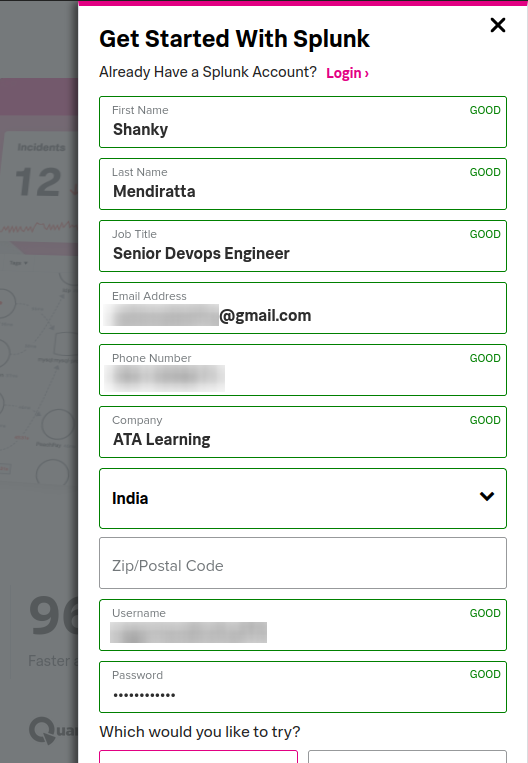
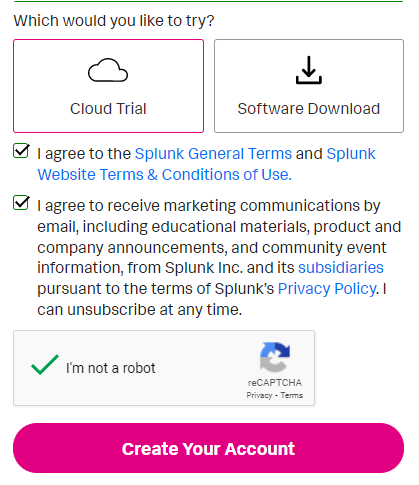
4. Lastly, scroll down, and select Cloud Trial to save your data to the cloud.
Tick all the checkboxes to agree to Splunk terms and conditions, and click on the Create Your Account button to finalize creating your account.
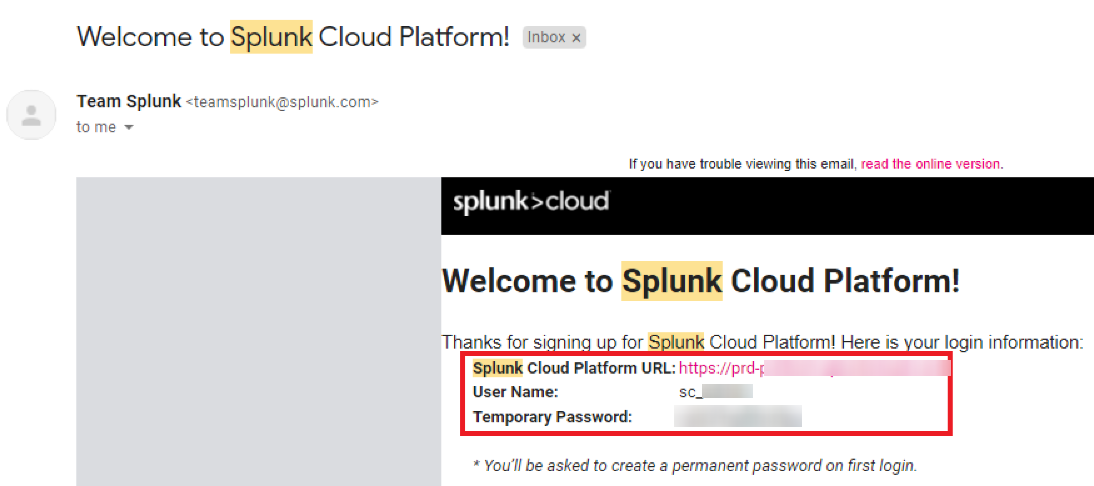
After creating your account, you’ll automatically log in to Splunk (step seven).
You’ll also receive an email with your login information, like the one below. You’ll need this information to login into the Splunk Cloud Platform later.
Generating wget Command for Downloading Splunk Forwarder
Another vital component you need is the Splunk forwarder that you’ll install. There are various ways of installing the Splunk forwarder. But for this tutorial, you’ll use the wget command to install/download the forwarder.
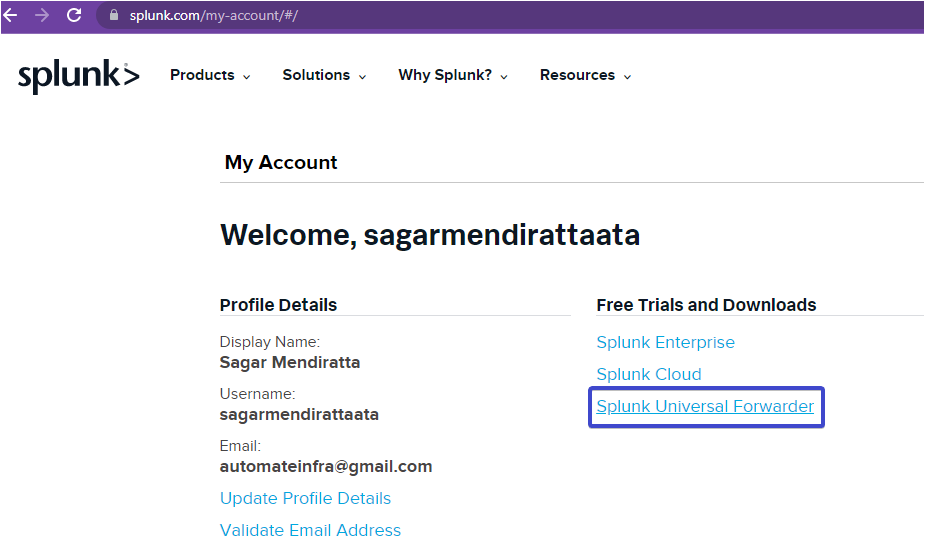
1. On Splunk’s home page, click on your profile icon (top-right) and click on My Dashboard. Doing so redirects your browser to your Splunk dashboard (step eight), where you’ll see everything related to your profile and download options.

2. On your Splunk dashboard, click on the Splunk universal forwarder from Free Trials and Download section to choose the Splunk Forwarder package to download.
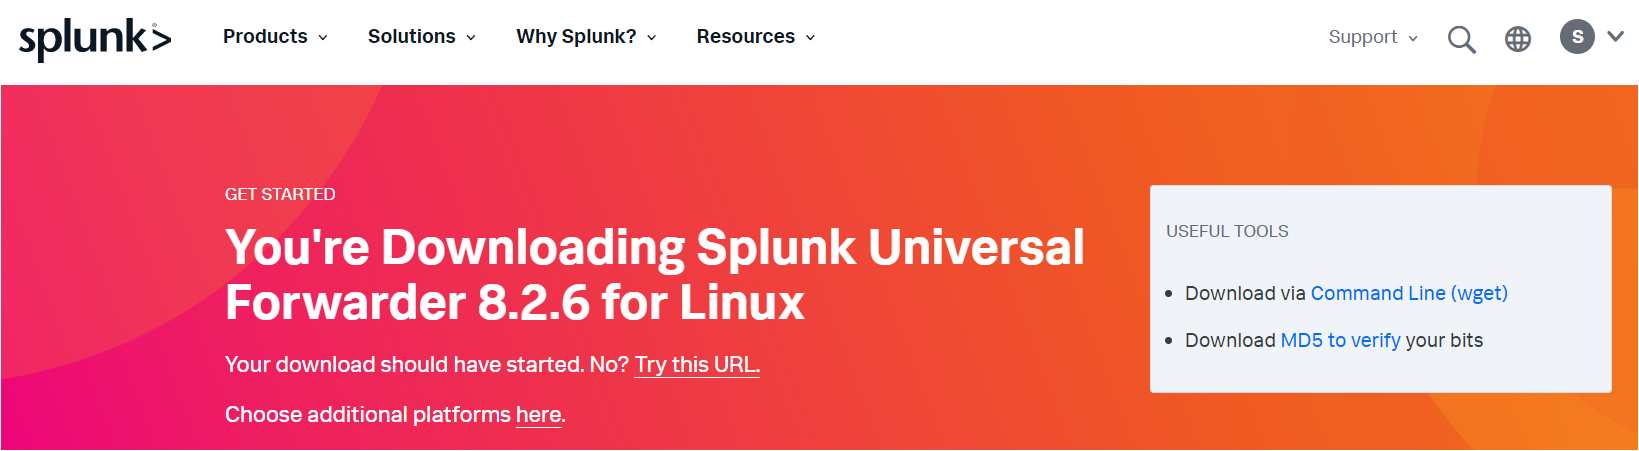
3. Now, choose your operating system, and click on the Download Now button beside the package of your choice. Doing so sets the installation package to download for Splunk Universal Forwarder.

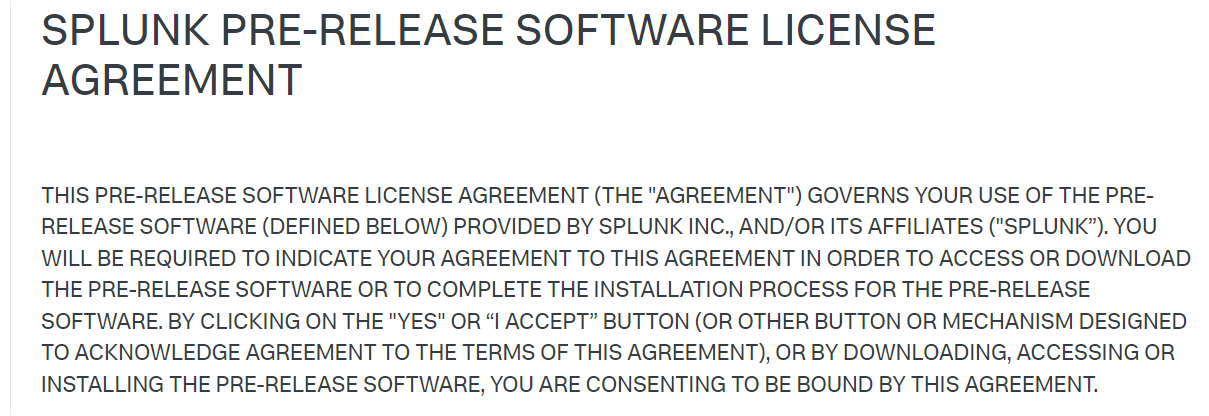
4. Tick the checkbox to accept the Splunk pre-release software license agreement, and click on the Access program.
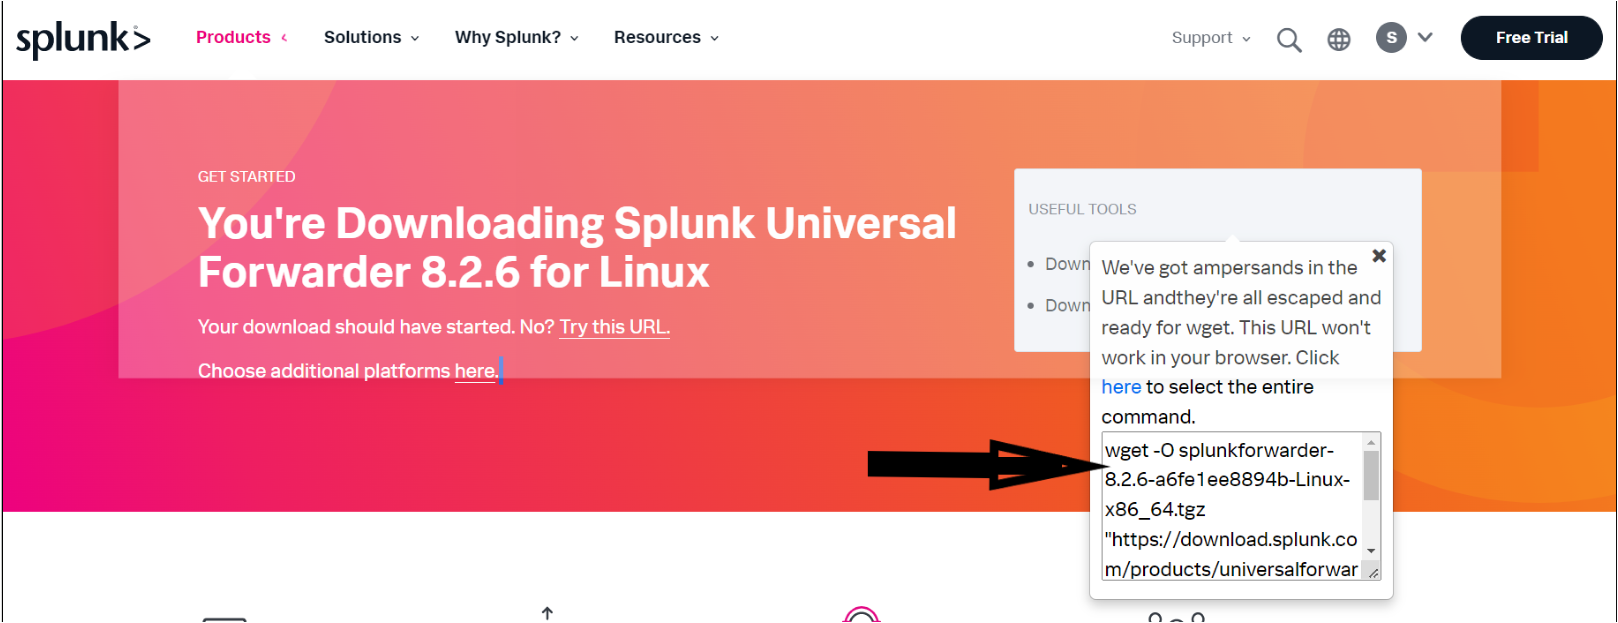
5. Click on the Download via Command Line (wget), and you’ll see a command appearing on the same screen (step 12).
6. Finally, copy the command, as shown below. In the following section, you’ll run this command to install and configure Splunk Forwarder on your machine.
Downloading and Installing the Splunk Forwarder
After generating the wget command, it’s time to download and install the Splunk Forwarder on your machine. But first, be sure to update your system package index.
You’ll extract Splunk’s installation package and start the Splunk server on your remote Ubuntu machine, so get your SSH client ready.
1. Open your favorite SSH client, and connect to your Ubuntu machine.
2. Next, run the following command to update your Ubuntu package repository list.
sudo apt update -y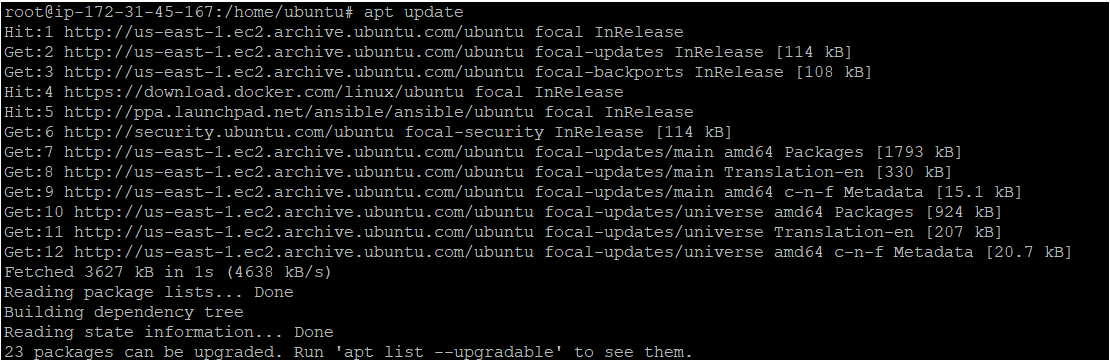
3. After the update, run the following commands to create a directory named /opt/splunk and switch to that directory. This directory is where you’ll store resources for your Splunk Forwarder installation.
# Create the /opt/splunk directory
mkdir /opt/splunk
# Change the working directory
cd /opt/splunk
4. Run the below wget command to download the Splunk Universal Forwarder agent package.
wget -O splunkforwarder-8.2.6-a6fe1ee8894b-Linux-x86_64.tgz "https://download.splunk.com/products/universalforwarder/releases/8.2.6/linux/splunkforwarder-8.2.6-a6fe1ee8894b-Linux-x86_64.tgz"
5. Now, run the tar command below to extract the contents of the Splunk Forwarder Datadog .tar file.
tar xvzf splunkforwarder-8.2.6-a6fe1ee8894b-Linux-x86_64.tgz
6. Run the following commands to change the directory to the splunkforwarder/bin directory and start the Splunk server daemon (./splunk start).
# Changing the directory to the Splunk forwarder bin folder
cd splunkforwarder/bin
# Running the Splunk Forwarder agent
./splunk start --accept-license
Note that you can install the Splunk Forwarder Agent on a Windows operating system.
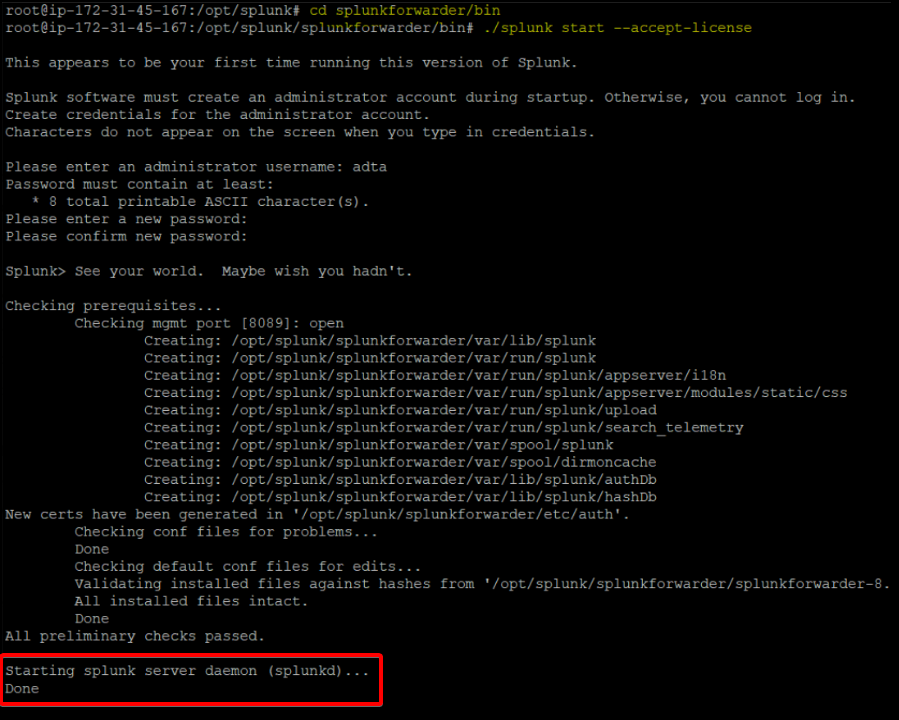
7. Lastly, run the below command to check the status of the Splunk server daemon.
./splunk status
Configuring the Splunk Forwarder
The Splunk server is now running, but you need to authenticate your connection with the Splunk cloud platform. How? You’ll need a credentials file that you’ll download from Splunk.
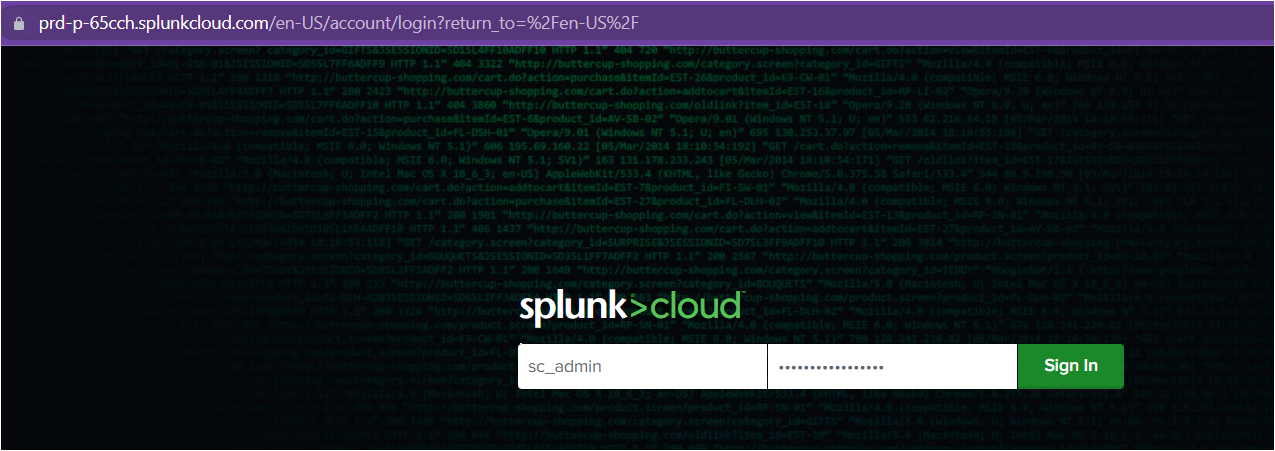
1. Navigate to the Splunk Cloud Platform URL from the Splunk’s welcome email you received, and log in with the credentials from the same email.
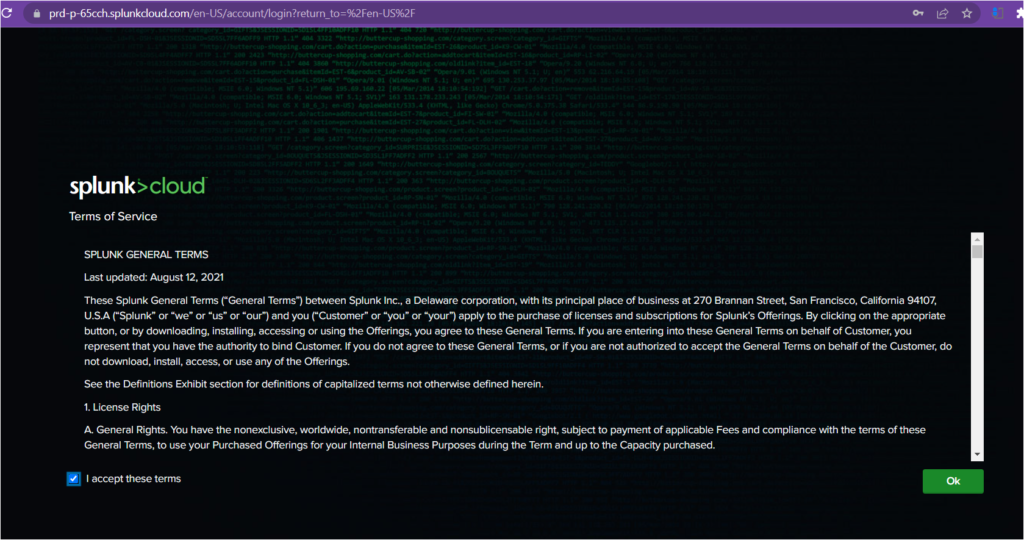
2. Tick the I accept these terms option and click OK to accept the terms of service.
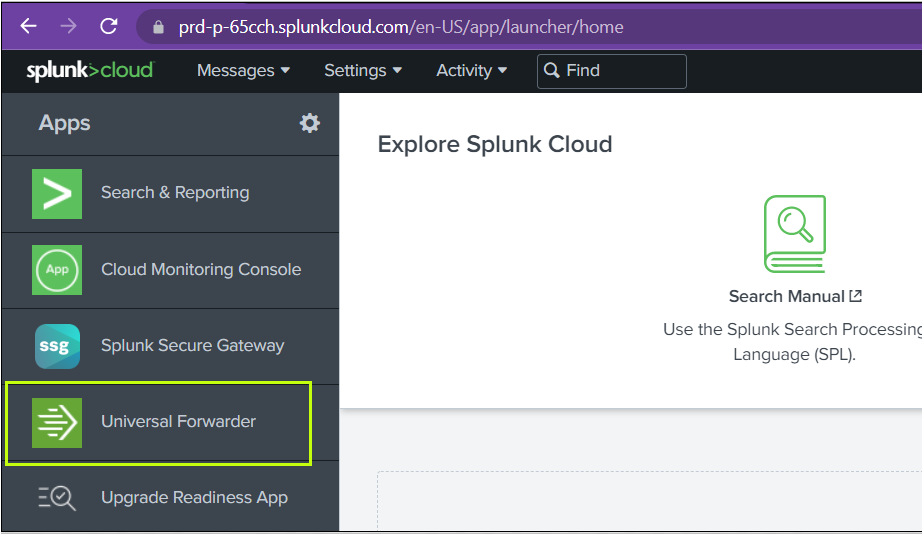
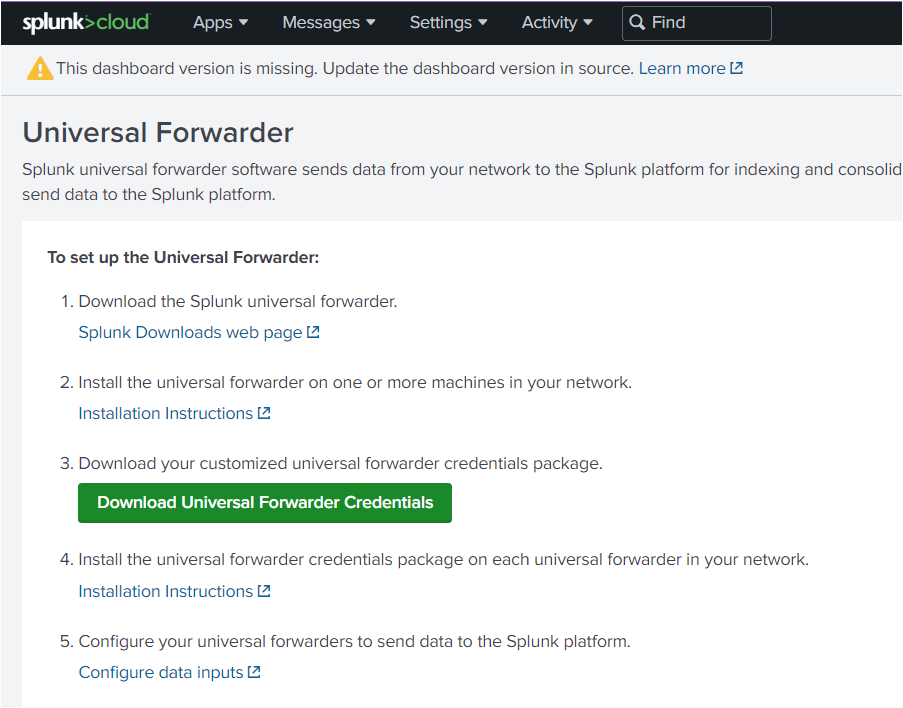
3. Next, click Universal Forwarder on the Splunk Cloud Platform’s home page. Your browser redirects to the page where you’ll see the steps on setting up the Splunk universal Forwarder (step four).
4. Now, click on Download Universal Forwarder Credentials to download the credentials file (splunkclouduf.spl) on your local machine (Windows).
5. Copy the credentials file (splunkclouduf.spl) from your local machine to your remote Ubuntu machine’s tmp directory. You can use the scp command for Unix-based OS or the WinSCP tool for local Windows machines.
6. Next, run the below command to allow your Ubuntu machine to authenticate with Splunk Cloud Platform using the credentials file (splunkclouduf.spl). Be sure to change admin:password with your Splunk Cloud Platform username and password.
./splunk install app /tmp/splunkclouduf.spl -auth admin:password
Downloading and Installing Splunk Add-on
Another critical component you need to install with Splunk forwarder is the Splunk Add-on for Unix and Linux. The Splunk add-ons support and extend the functionality of the Splunk platform and the apps that run on it by providing inputs for a specific technology. So, without any further delay, let’s install Splunk Add-on.
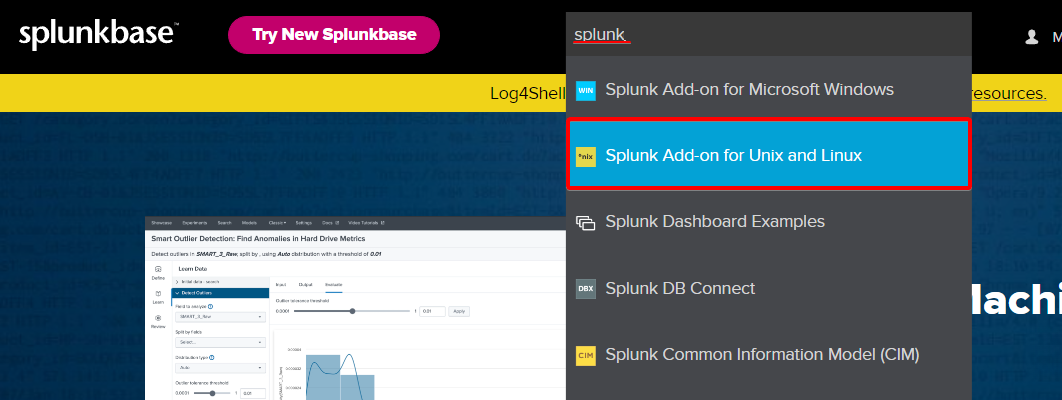
1. Navigate to the splunkbase website on your local machine’s browser, search for splunk, and choose the Splunk Add-on for Unix and Linux item, as shown below.
If you’re on Windows, choose the Splunk Add-on for Microsoft Windows instead.
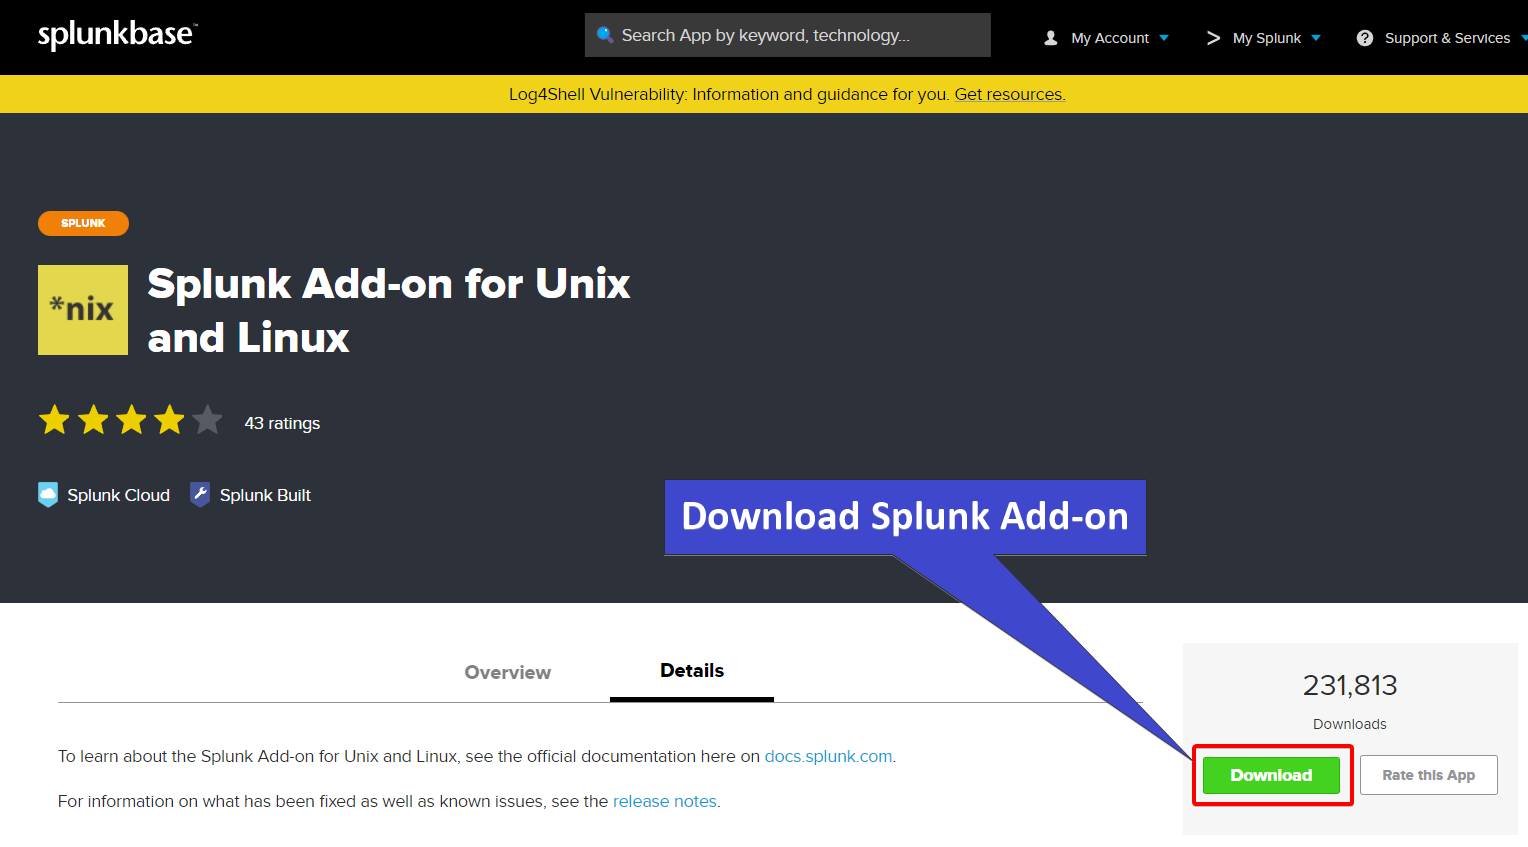
2. Next, click the Download button (green) to download the Splunk Add-on for Unix and Linux, which is in a .tgz file.
3. Once downloaded, copy the .tgz file from your local machine to your remote Ubuntu machine’s tmp directory as you did in step five of the “Configuring the Splunk Forwarder” section.
4. Now, run the below commands on your remote Ubuntu machine’s terminal to extract the Splunk Add-on (splunk-add-on-for-unix-and-linux_850.tgz). Your .tgz file’s name may be different depending on the release.
cd /tmp
tar xfvz splunk-add-on-for-unix-and-linux_850.tgz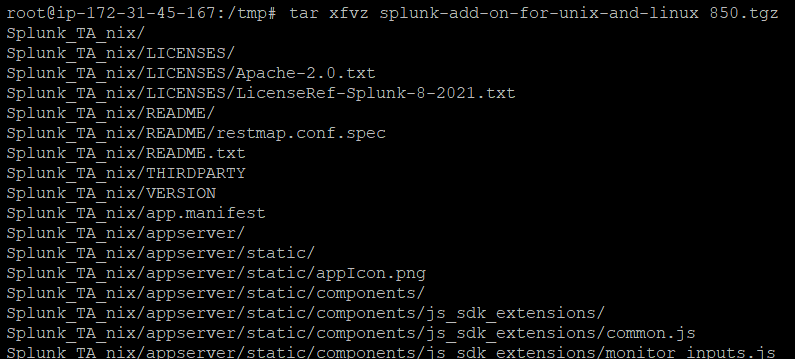
5. Run the following commands, which don’t provide output, but moves the Splunk_TA_nix directory to the apps directory (/opt/splunk/splunkforwarder/etc/apps/).
# Move Splunk_TA_nix directory to /opt/splunk/splunkforwarder/etc/apps/ directory
mv Splunk_TA_nix/ /opt/splunk/splunkforwarder/etc/apps/
# Change working directory
cd /opt/splunk/splunkforwarder/etc/apps/Splunk_TA_nix/
6. Now, run each command below, which doesn’t provide output, but copies the default/inputs.conf to a directory called local.
# Create a directory called local inside your working directory.
mkdir local
# Copy the default/inputs.conf directory to your local directory.
cp default/inputs.conf local
# Change the working directory to your local directory.
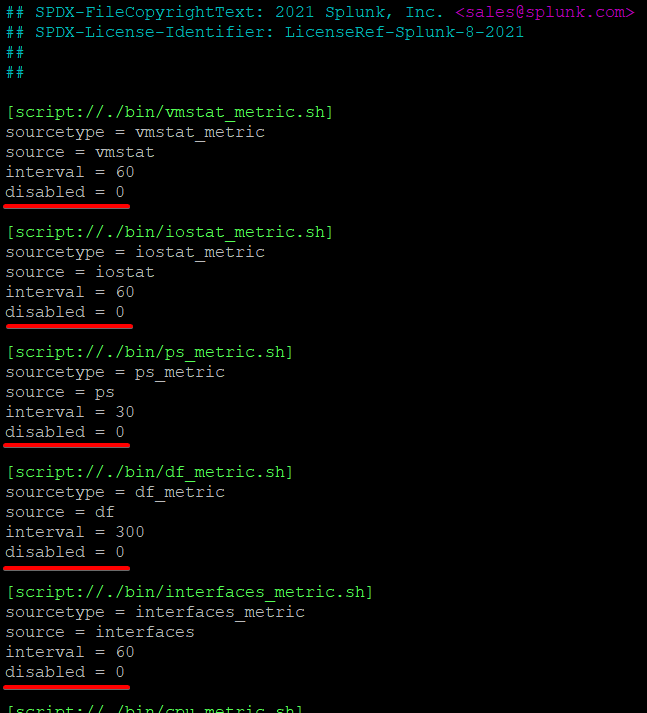
cd local7. Open the inputs.conf file in your preferred text editor, scroll through, and update all disabled values from 1 to 0, as shown below, to enable all inputs.
The inputs.conf file is the metrics Splunk Forwarder will push to Splunk Cloud Platform.
8. Lastly, run the following commands to restart the Splunk agent so that credentials changes will take effect.
cd /opt/splunk/splunkforwarder/bin
./splunk restart --accept-license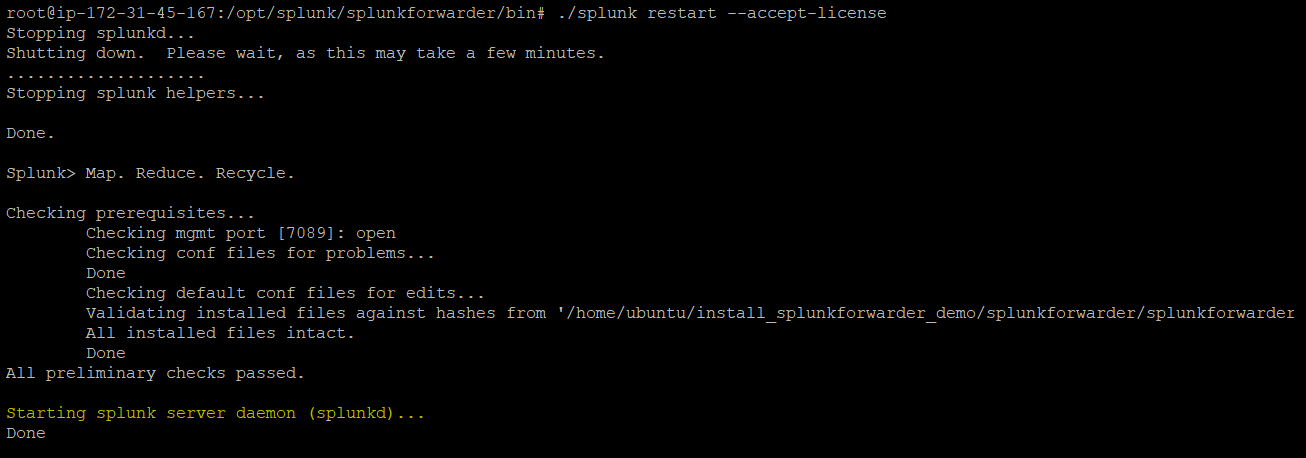
Accessing and Verifying the Splunk Forwarder in Splunk Cloud
You’ve successfully configured Splunk Forwarder on your machine, but how do you actually collect data with the Splunk Forwarder? By using a Splunk indexer. The Splunk indexer will serve as the data collector with two primary functions, indexing incoming data and searching indexed data.
To see how the Splunk indexer works, you’ll configure Splunk Forwarder to send data from Splunk Forwarder and collect with the Splunk Indexer (the Splunk Instance you configured in the Registering for a Splunk Account section.
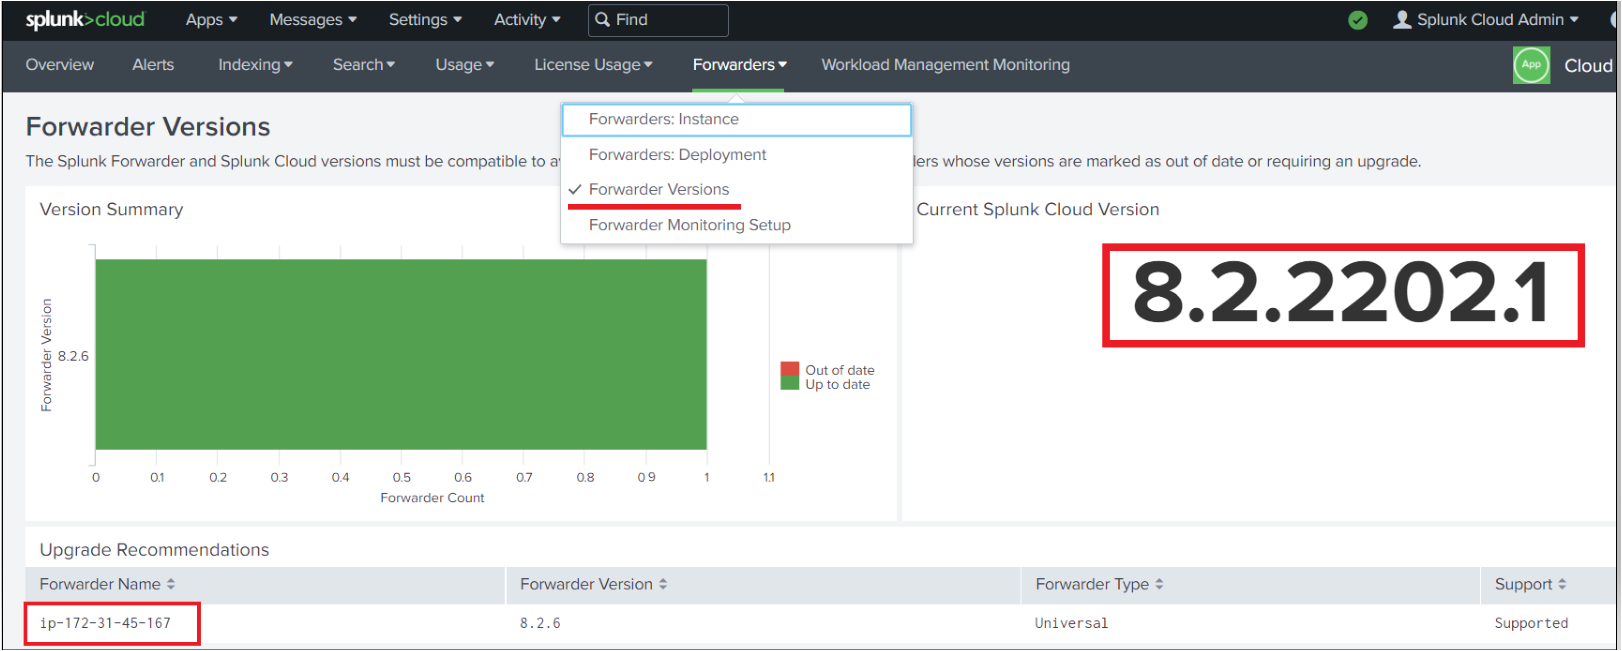
1. Navigate to your Splunk Cloud Platform home page, and click on Cloud Monitoring Console (left panel) to access your Splunk cloud monitoring overview.

2. Next, click on the Forwarders dropdown menu —> Forwarder Versions, and you’ll see the Forwarder version and the host details.
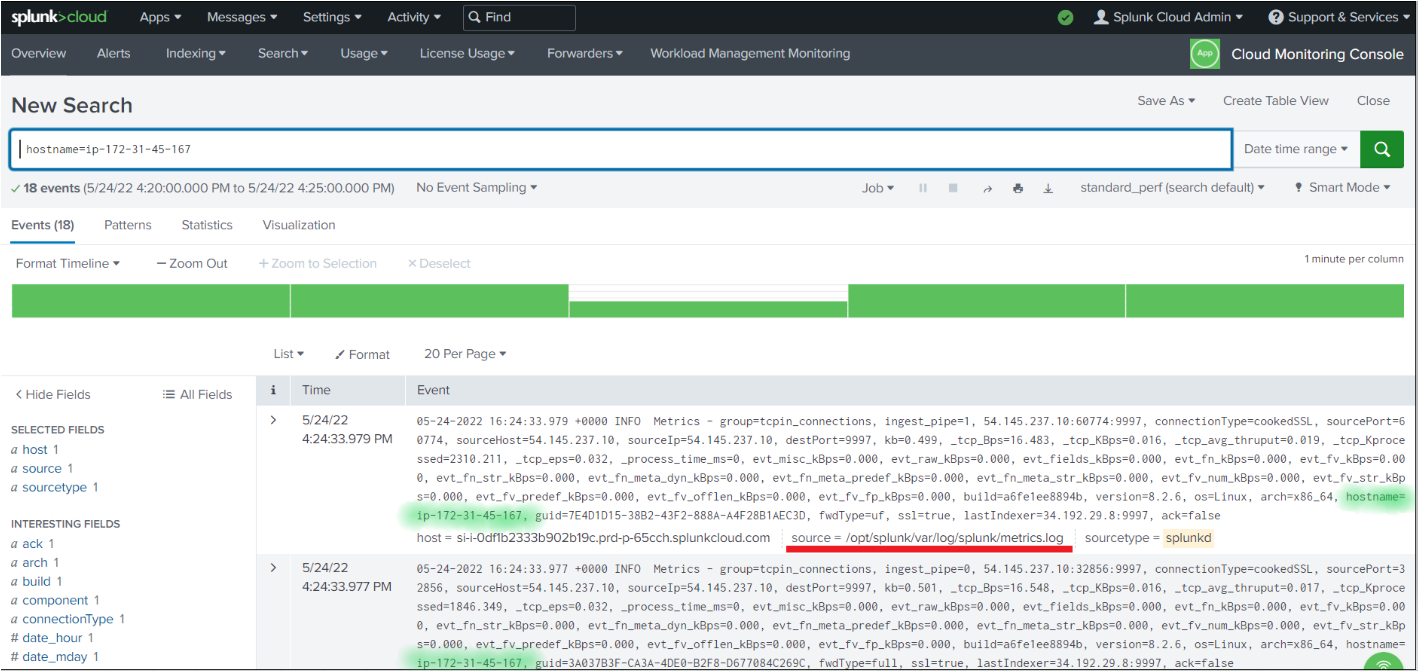
3. Finally, enter the hostname on the search box at the top, and click on Open <hostname> in search to view events on your host.
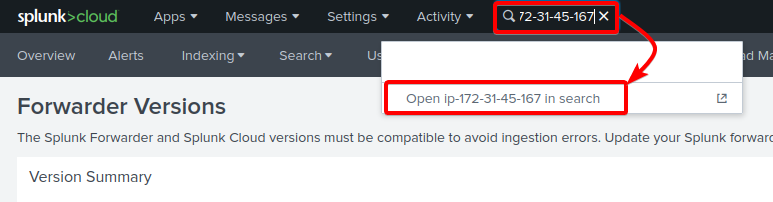
Below, you can verify that your Splunk Forwarder forwards the logs.
Conclusion
In this tutorial, you’ve learned how to set up a Splunk Universal forwarder agent and monitor data stored in the Splunk Forwarder agent host. You also learned to check various sources within the Splunk Dashboard from where data gets pulled.
At this point, you already have a fully functional Splunk Dashboard and agent installed on your machine.
So go wild and test out everything you can with the Splunk agent. After all, you only have 15 days to use Splunk for free. Perhaps by then, you can decide whether upgrading to a paid Splunk Enterprise account is worth the investment. Good luck!


