


Objects stored within your AWS Simple Storage Service (S3) buckets are expected to be secure. But how can they truly be secured when everyone with access to your AWS console can read and modify them? Fortunately, panic is unnecessary, as you can manage permissions with an AWS S3 bucket policy.
An S3 bucket policy enables AWS console administrators to control access to buckets alongside their objects. And in this tutorial, you will learn how to create bucket policies and associate them with a dedicated user.
Dive into S3 bucket policies and administer the right permissions, no more, no less!
Prerequisites
This tutorial comprises hands-on demonstrations. To follow along, be sure you have the following:
- An AWS account. – A free tier will suffice.
- AWS CLI installed and configured on your computer – This tutorial uses AWS CLI version 2.11.25.
Creating an S3 Bucket with Restricted Access
With the requisites out of the way, your first move is to create an S3 bucket with restricted access. An S3 bucket is an entity for storing blob data, referred to as objects.
In this example, you will manage user access to the buckets within your AWS account using bucket policies.
To create an S3 bucket with restricted access:
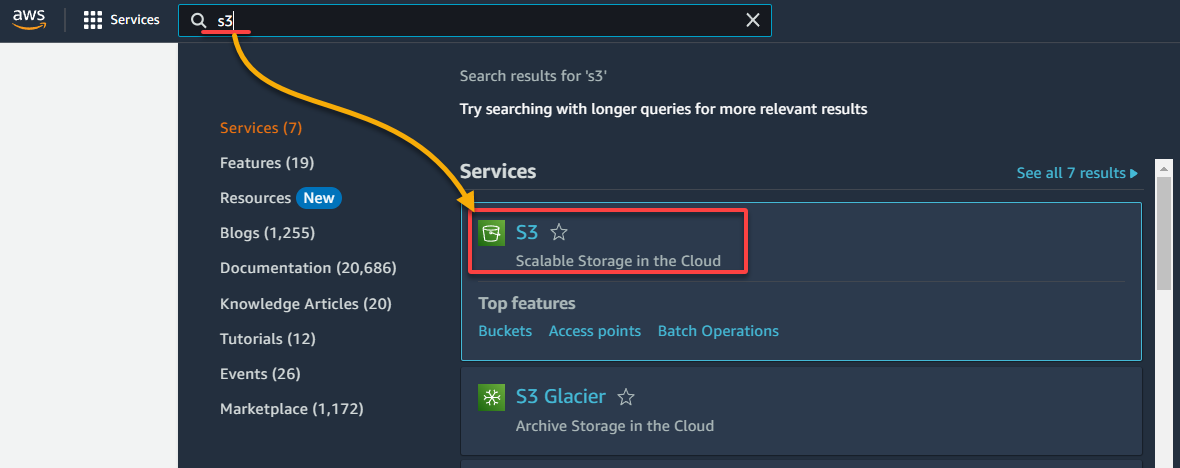
1. Open your favorite web browser, log into the AWS Management Console, and navigate to the S3 service.
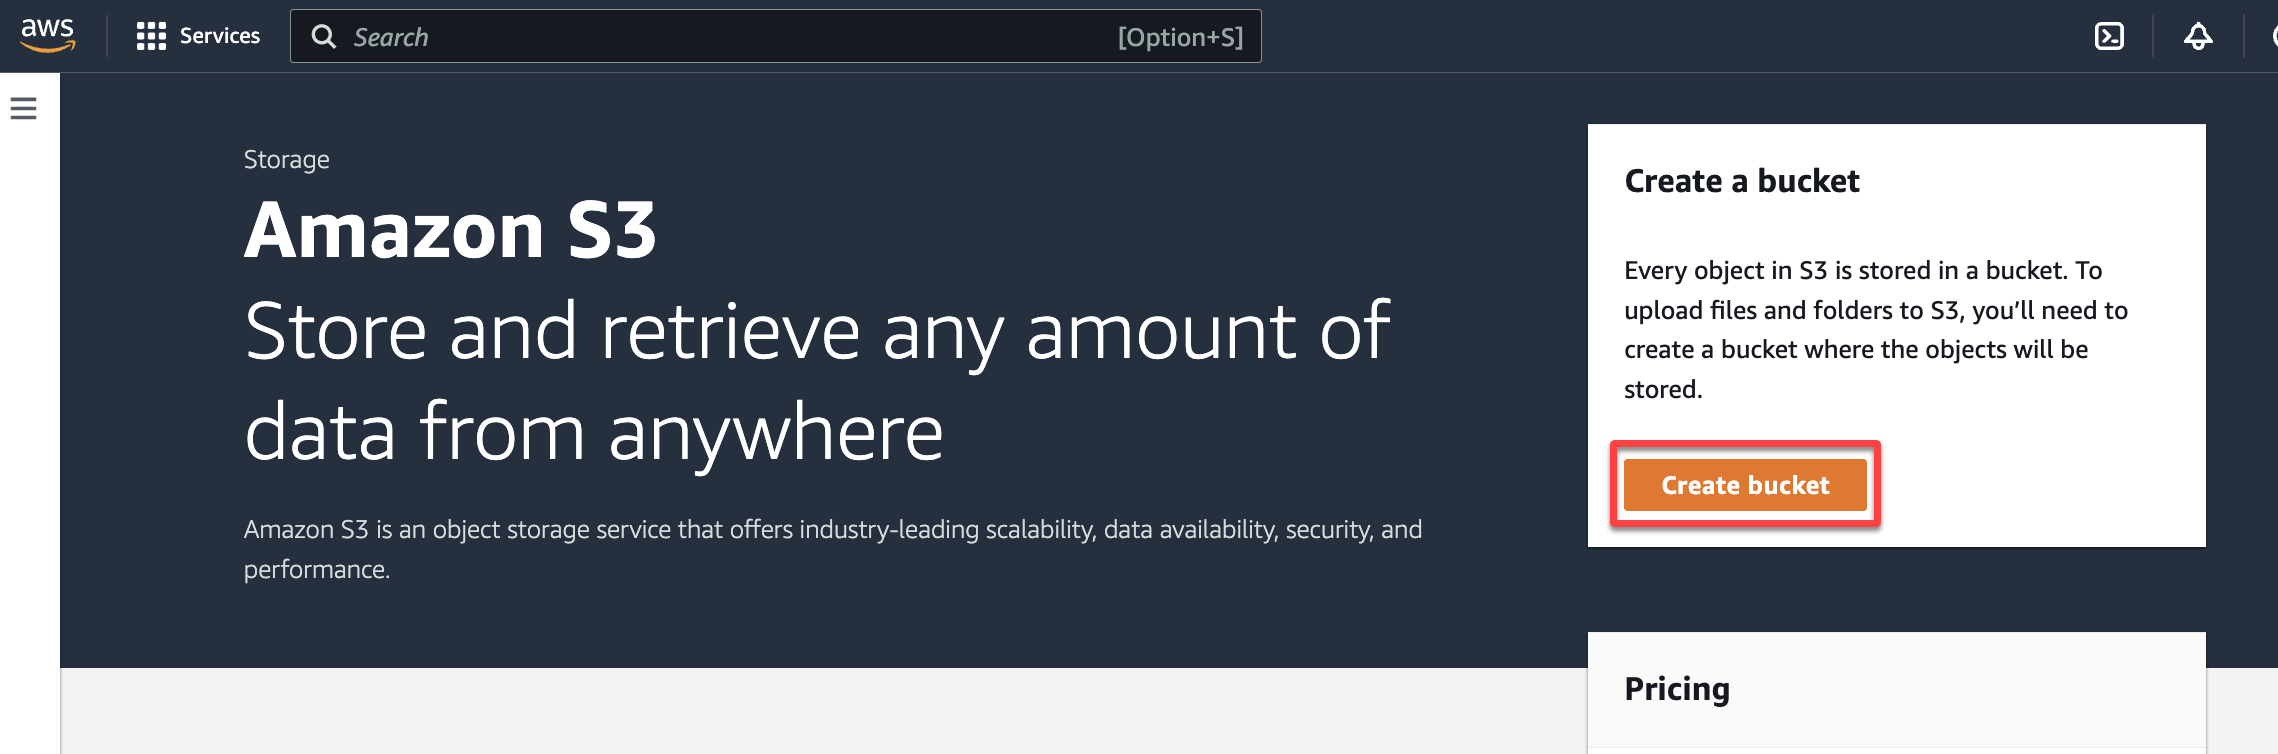
2. Next, click Create bucket to begin the process of creating a bucket.
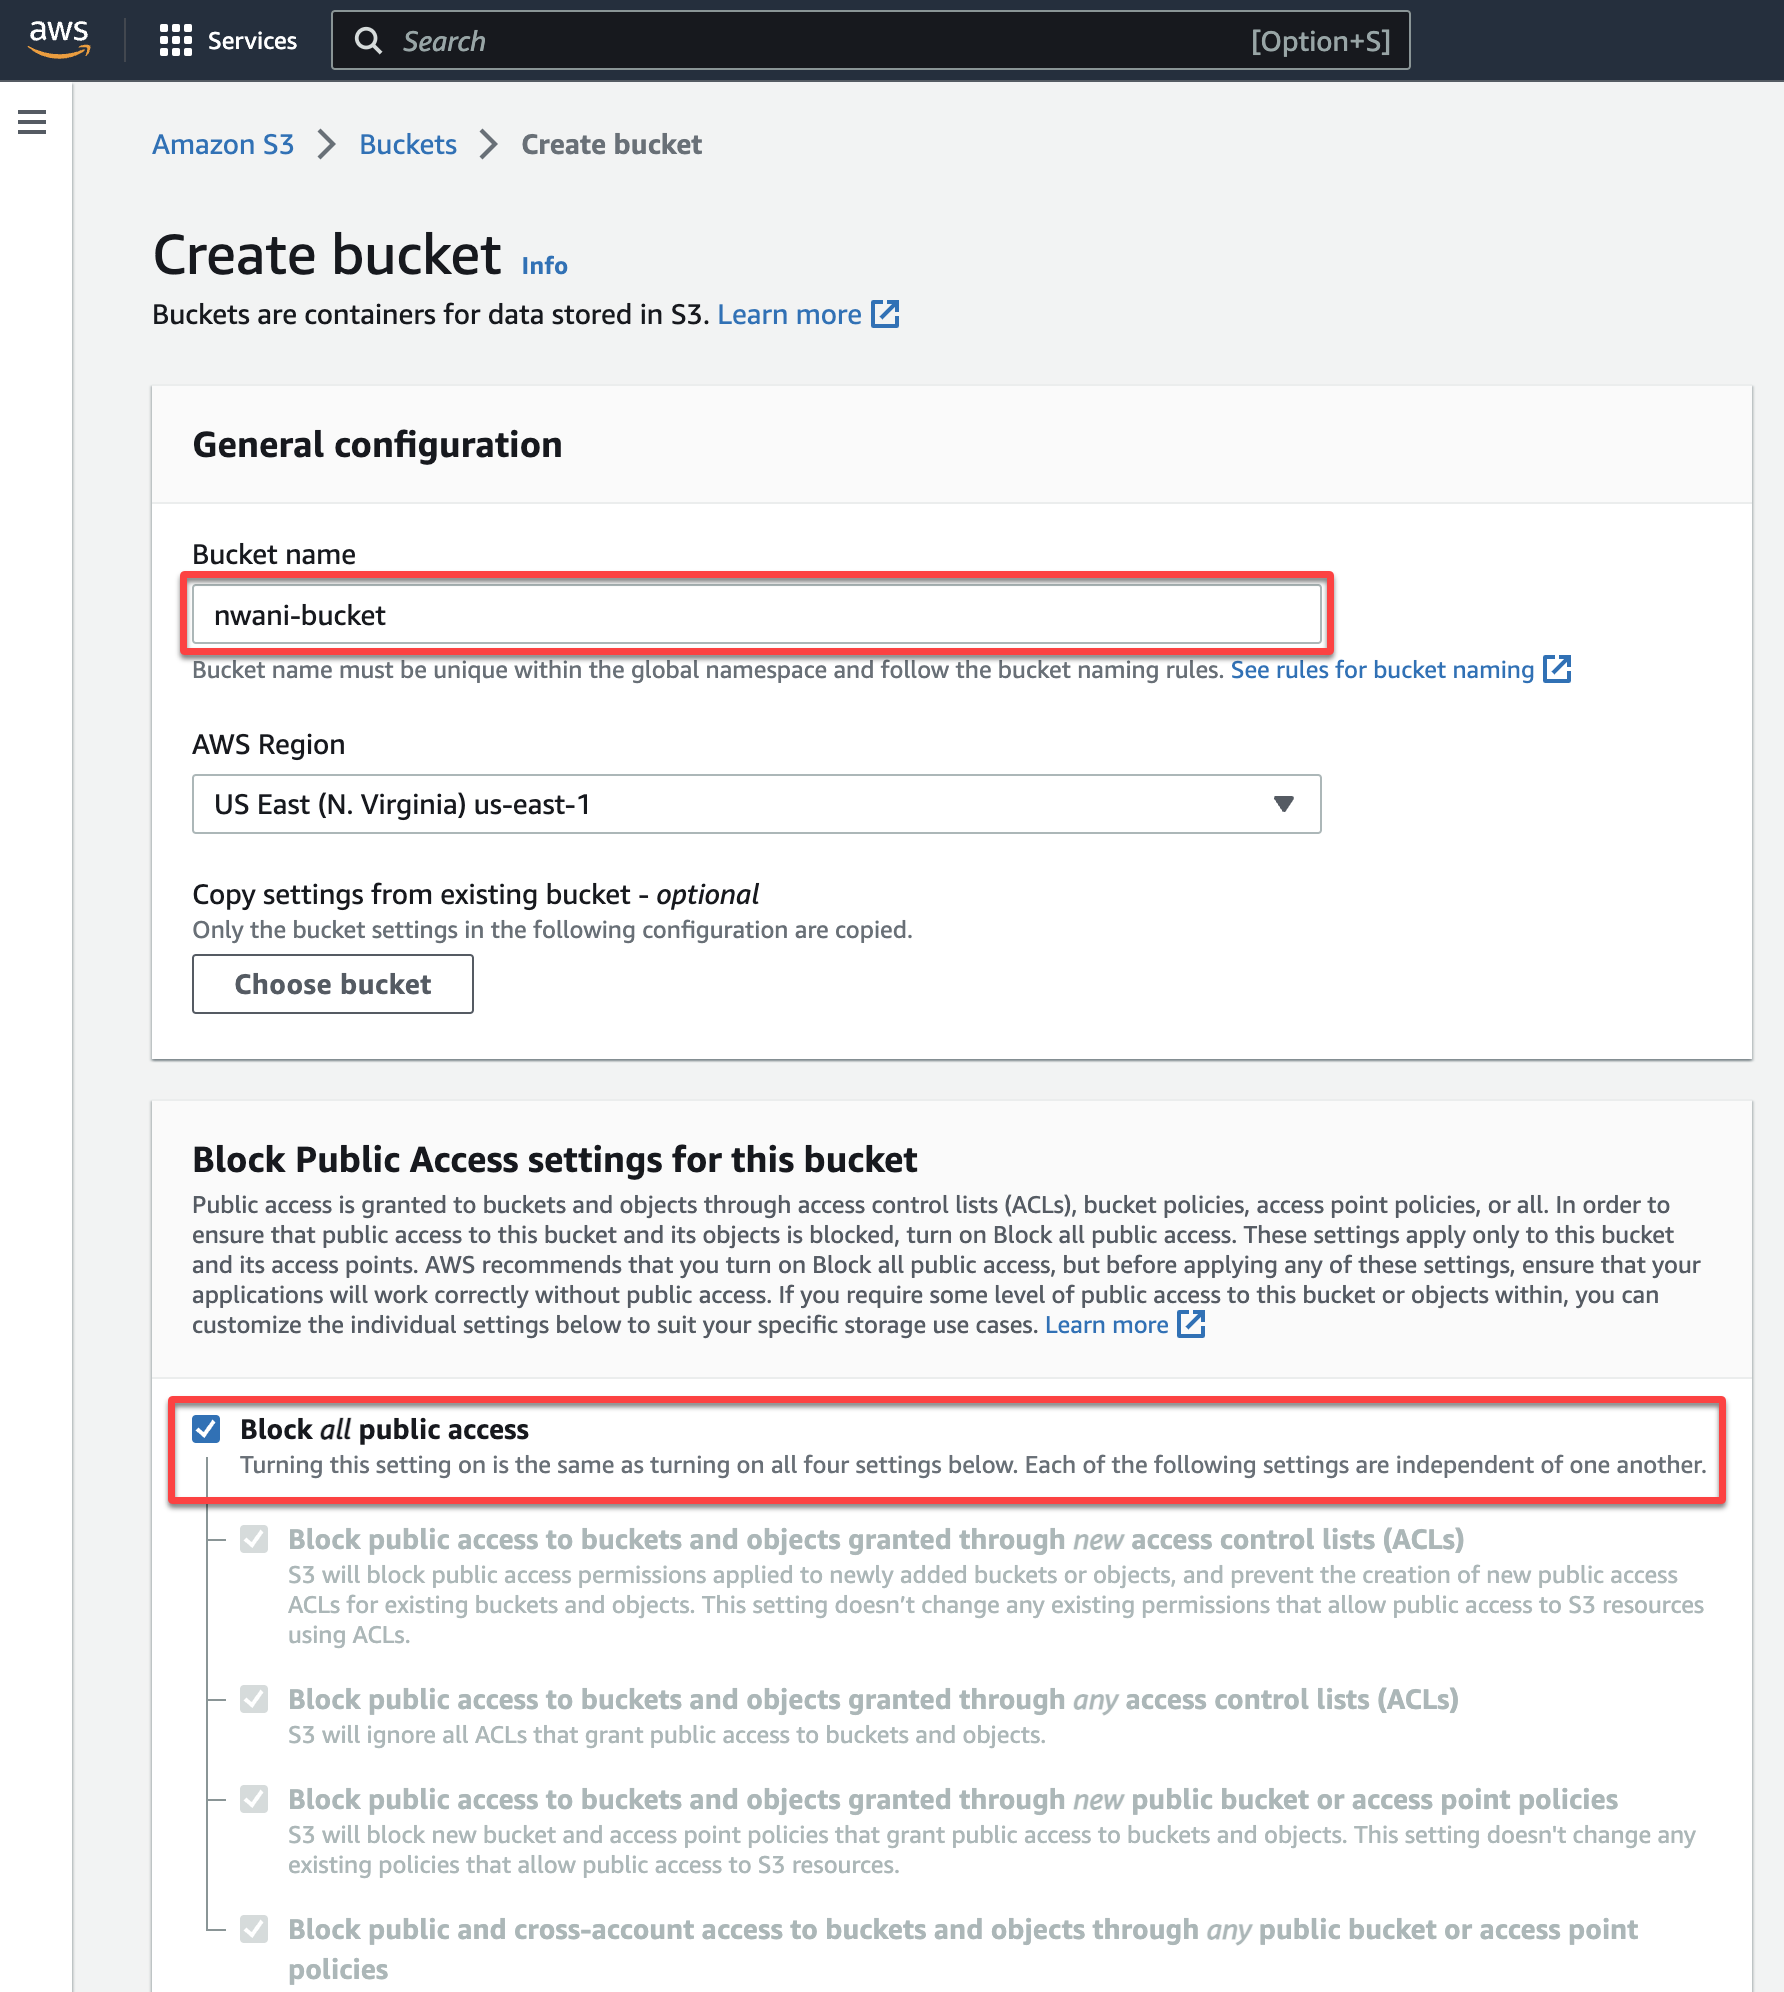
3. Provide a unique Bucket name and ensure the Block all public access checkbox is marked to restrict all public access to the bucket and its objects.
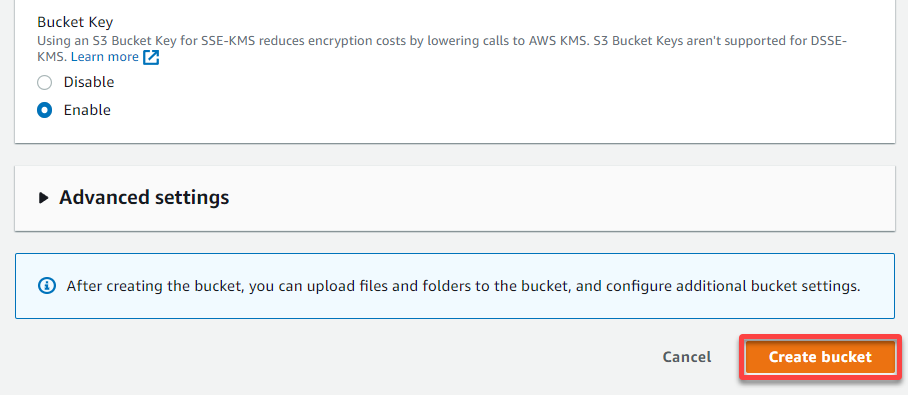
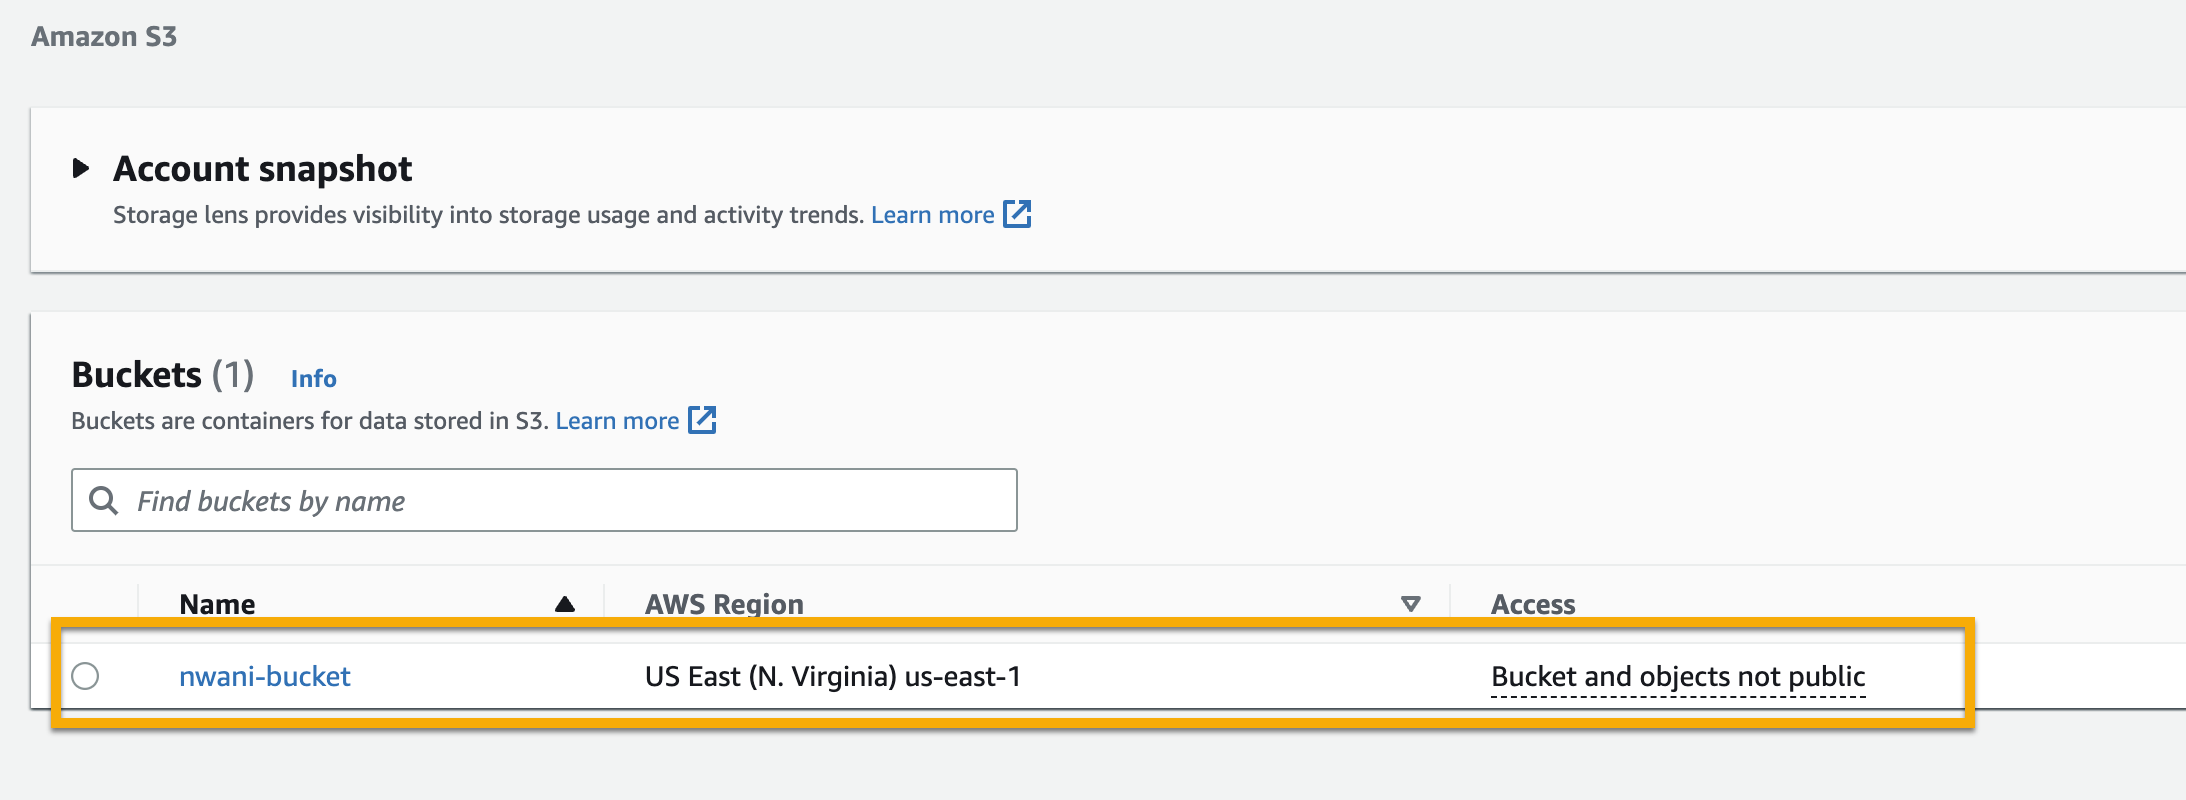
4. Lastly, leave all default settings as is, scroll to the bottom, and click Create Bucket to save the private S3 bucket.
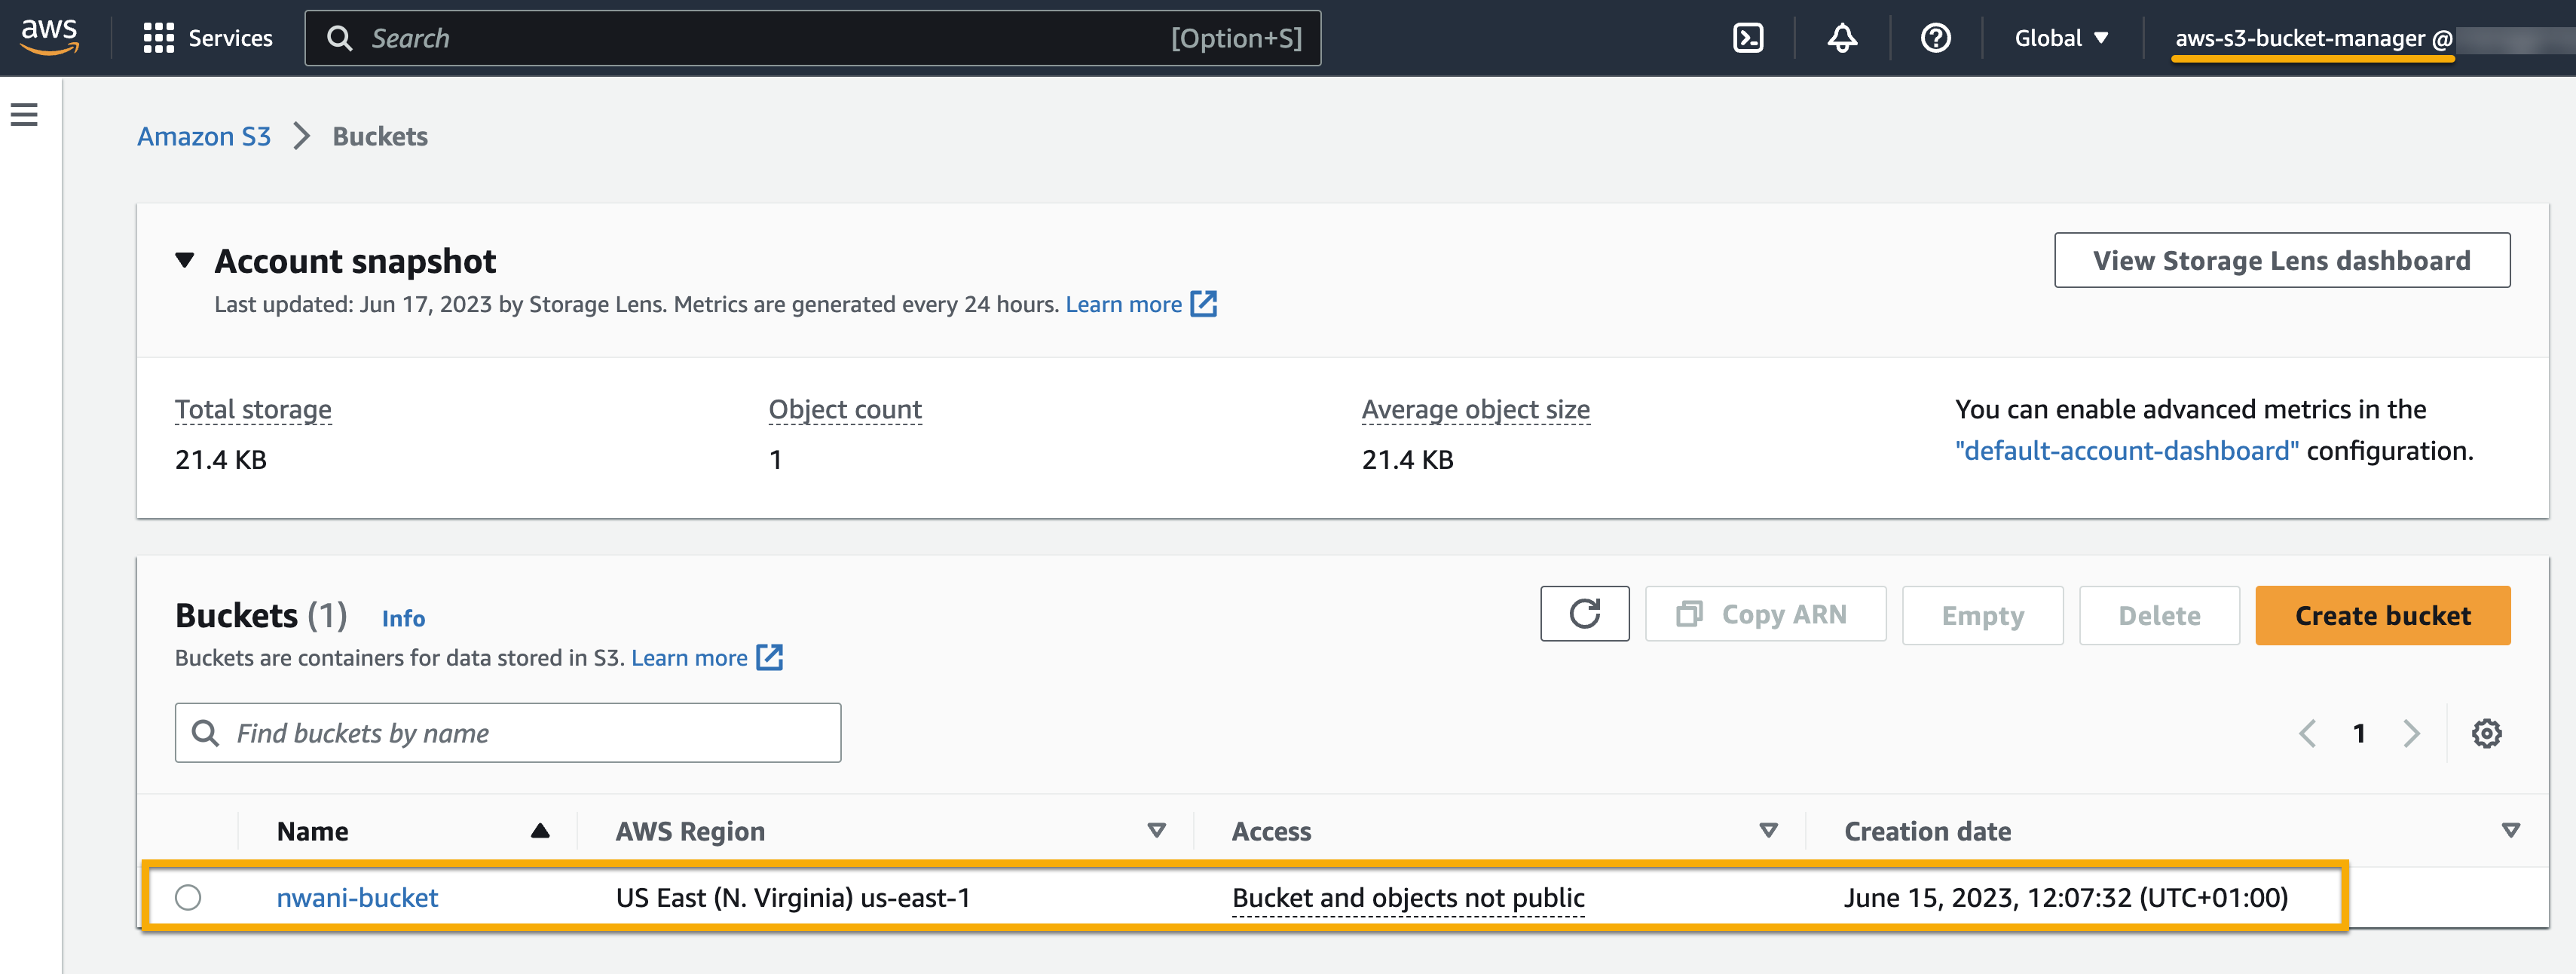
Once created, you will see your private S3 bucket in the Buckets list within the S3 dashboard, as shown below.
Creating an IAM User with Zero Permissions
After creating a private S3 bucket, how will you manage permissions to that bucket? You must create a dedicated AWS Identity Access Management (IAM) user. An AWS IAM user is an entity with human or programmatic access to your AWS Management Console to perform certain operations.
In this example, you will create a user with access to the AWS Management Console without permission or access to the S3 service.
To create an IAM user without assigned permissions:
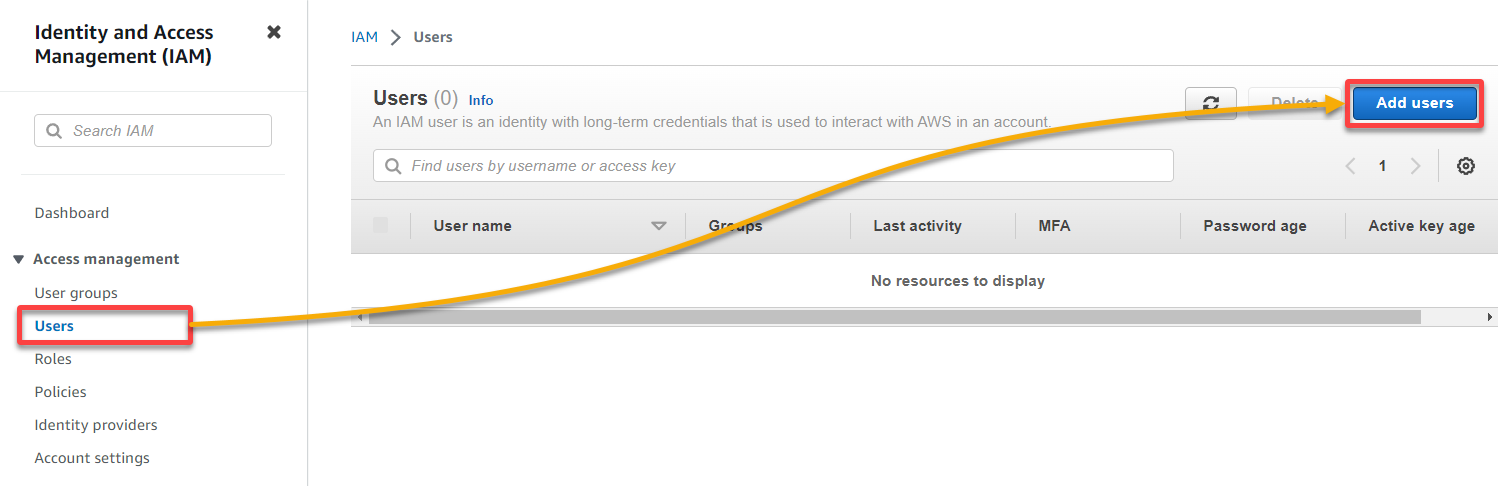
1. In the IAM service page, navigate to Users (left pane) and click Add Users to initiate creating an IAM user.
2. Next, configure the user details as follows:
- Provide a User name (i.e., aws-s3-bucket-manager).
- Enable user access to the AWS Management Console.
- Choose to create an IAM user.
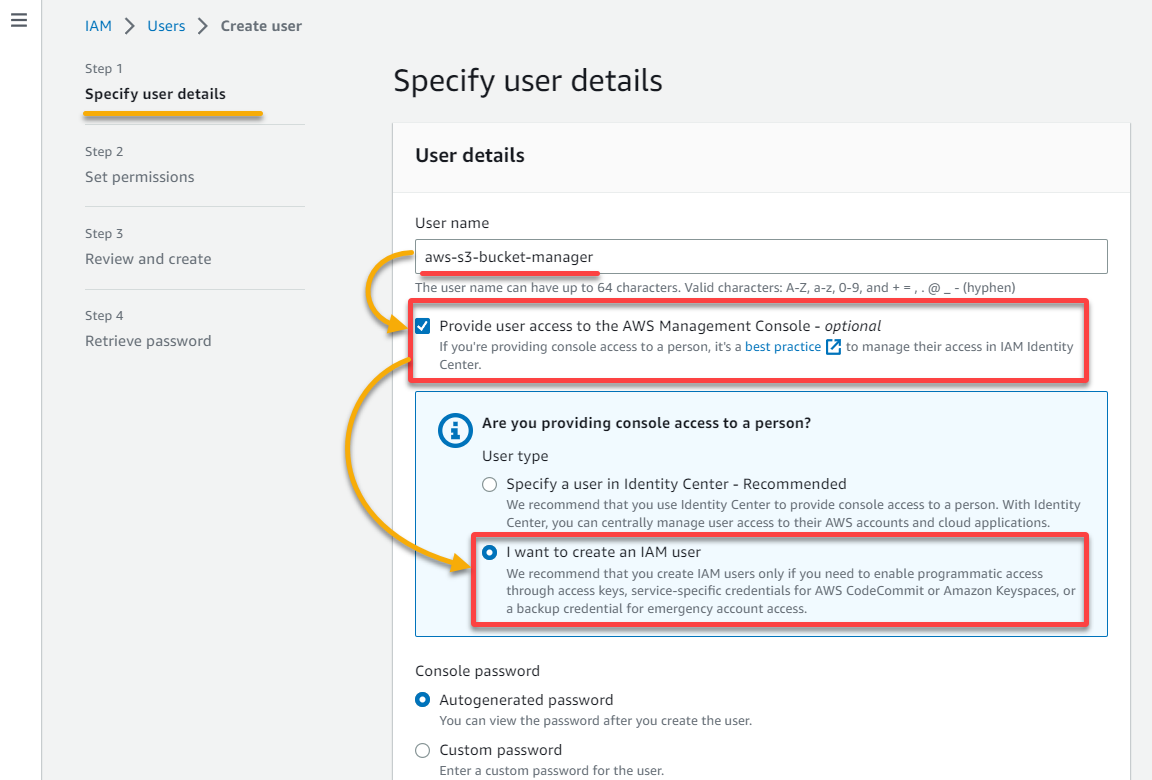
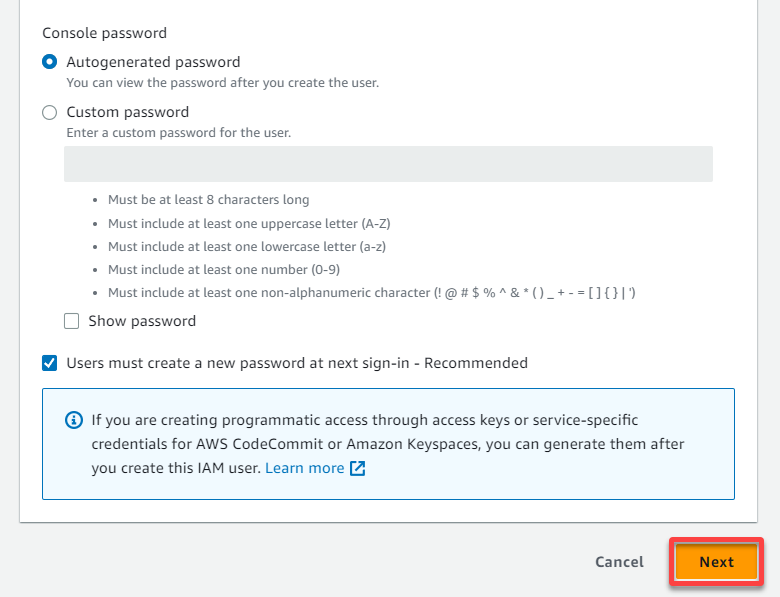
- Scroll down, leave other settings as default for the console password, and click Next to continue.
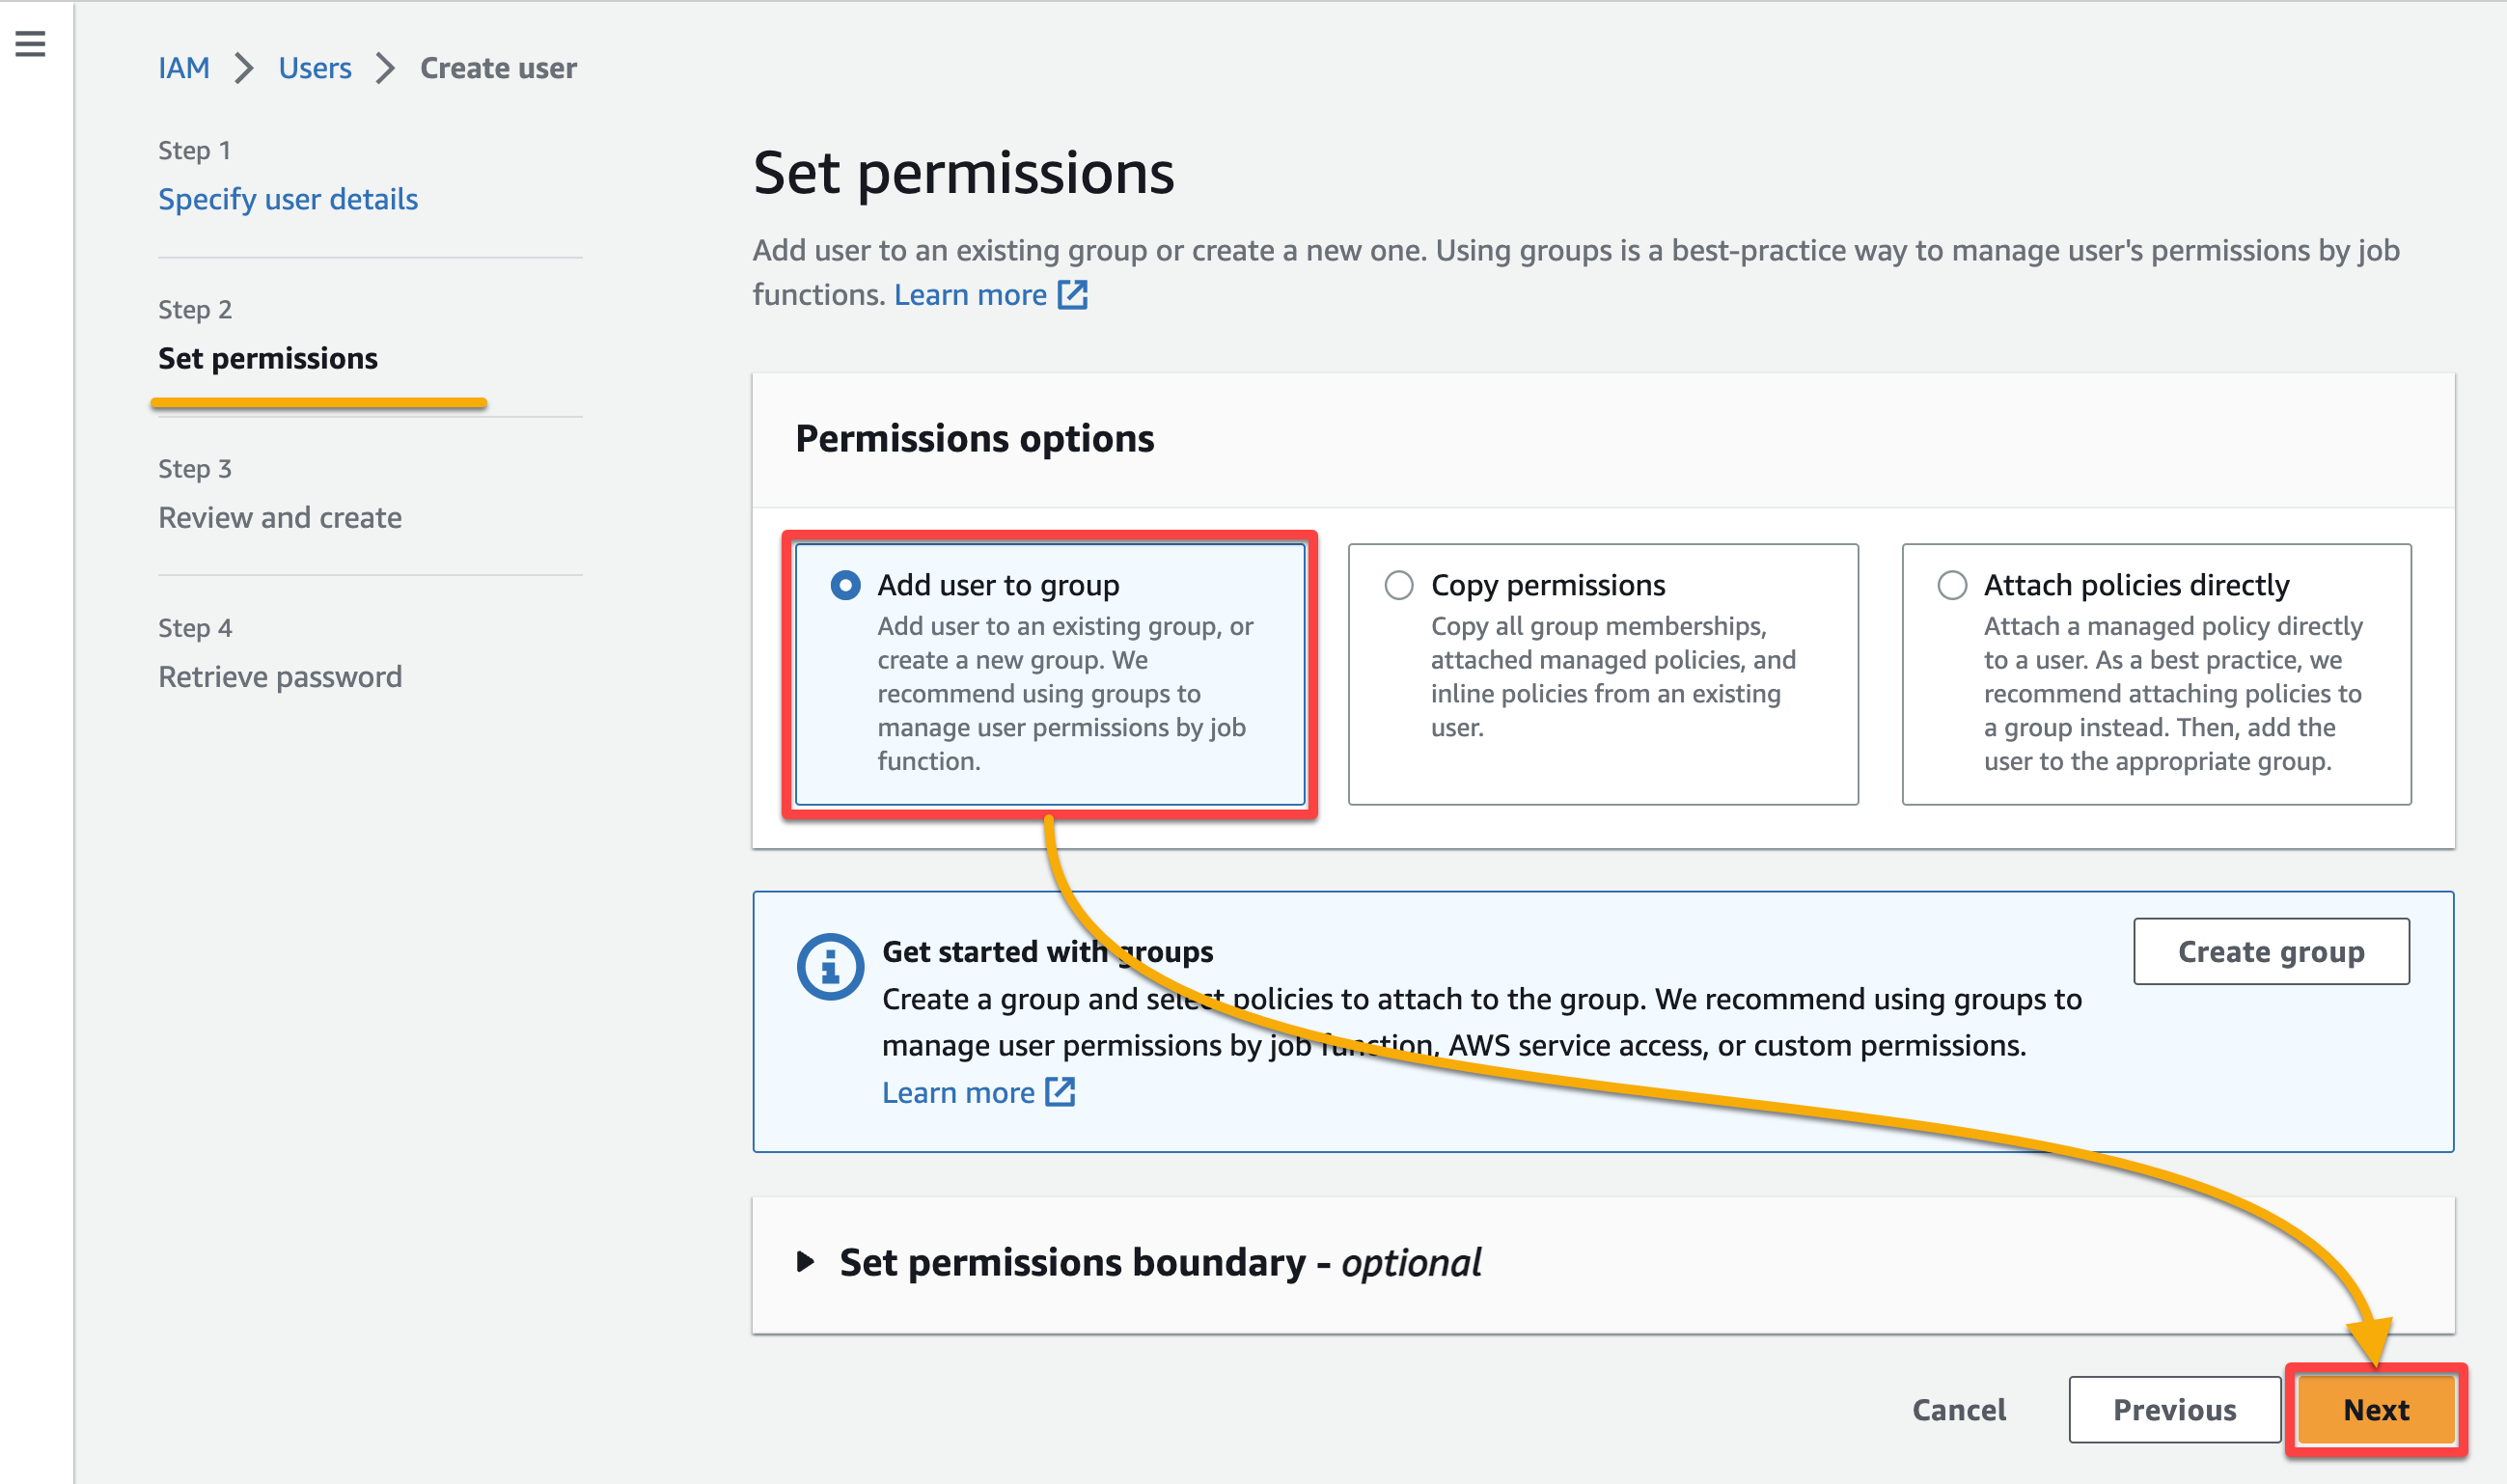
3. Keep the selected default permissions option, and click Next to continue.
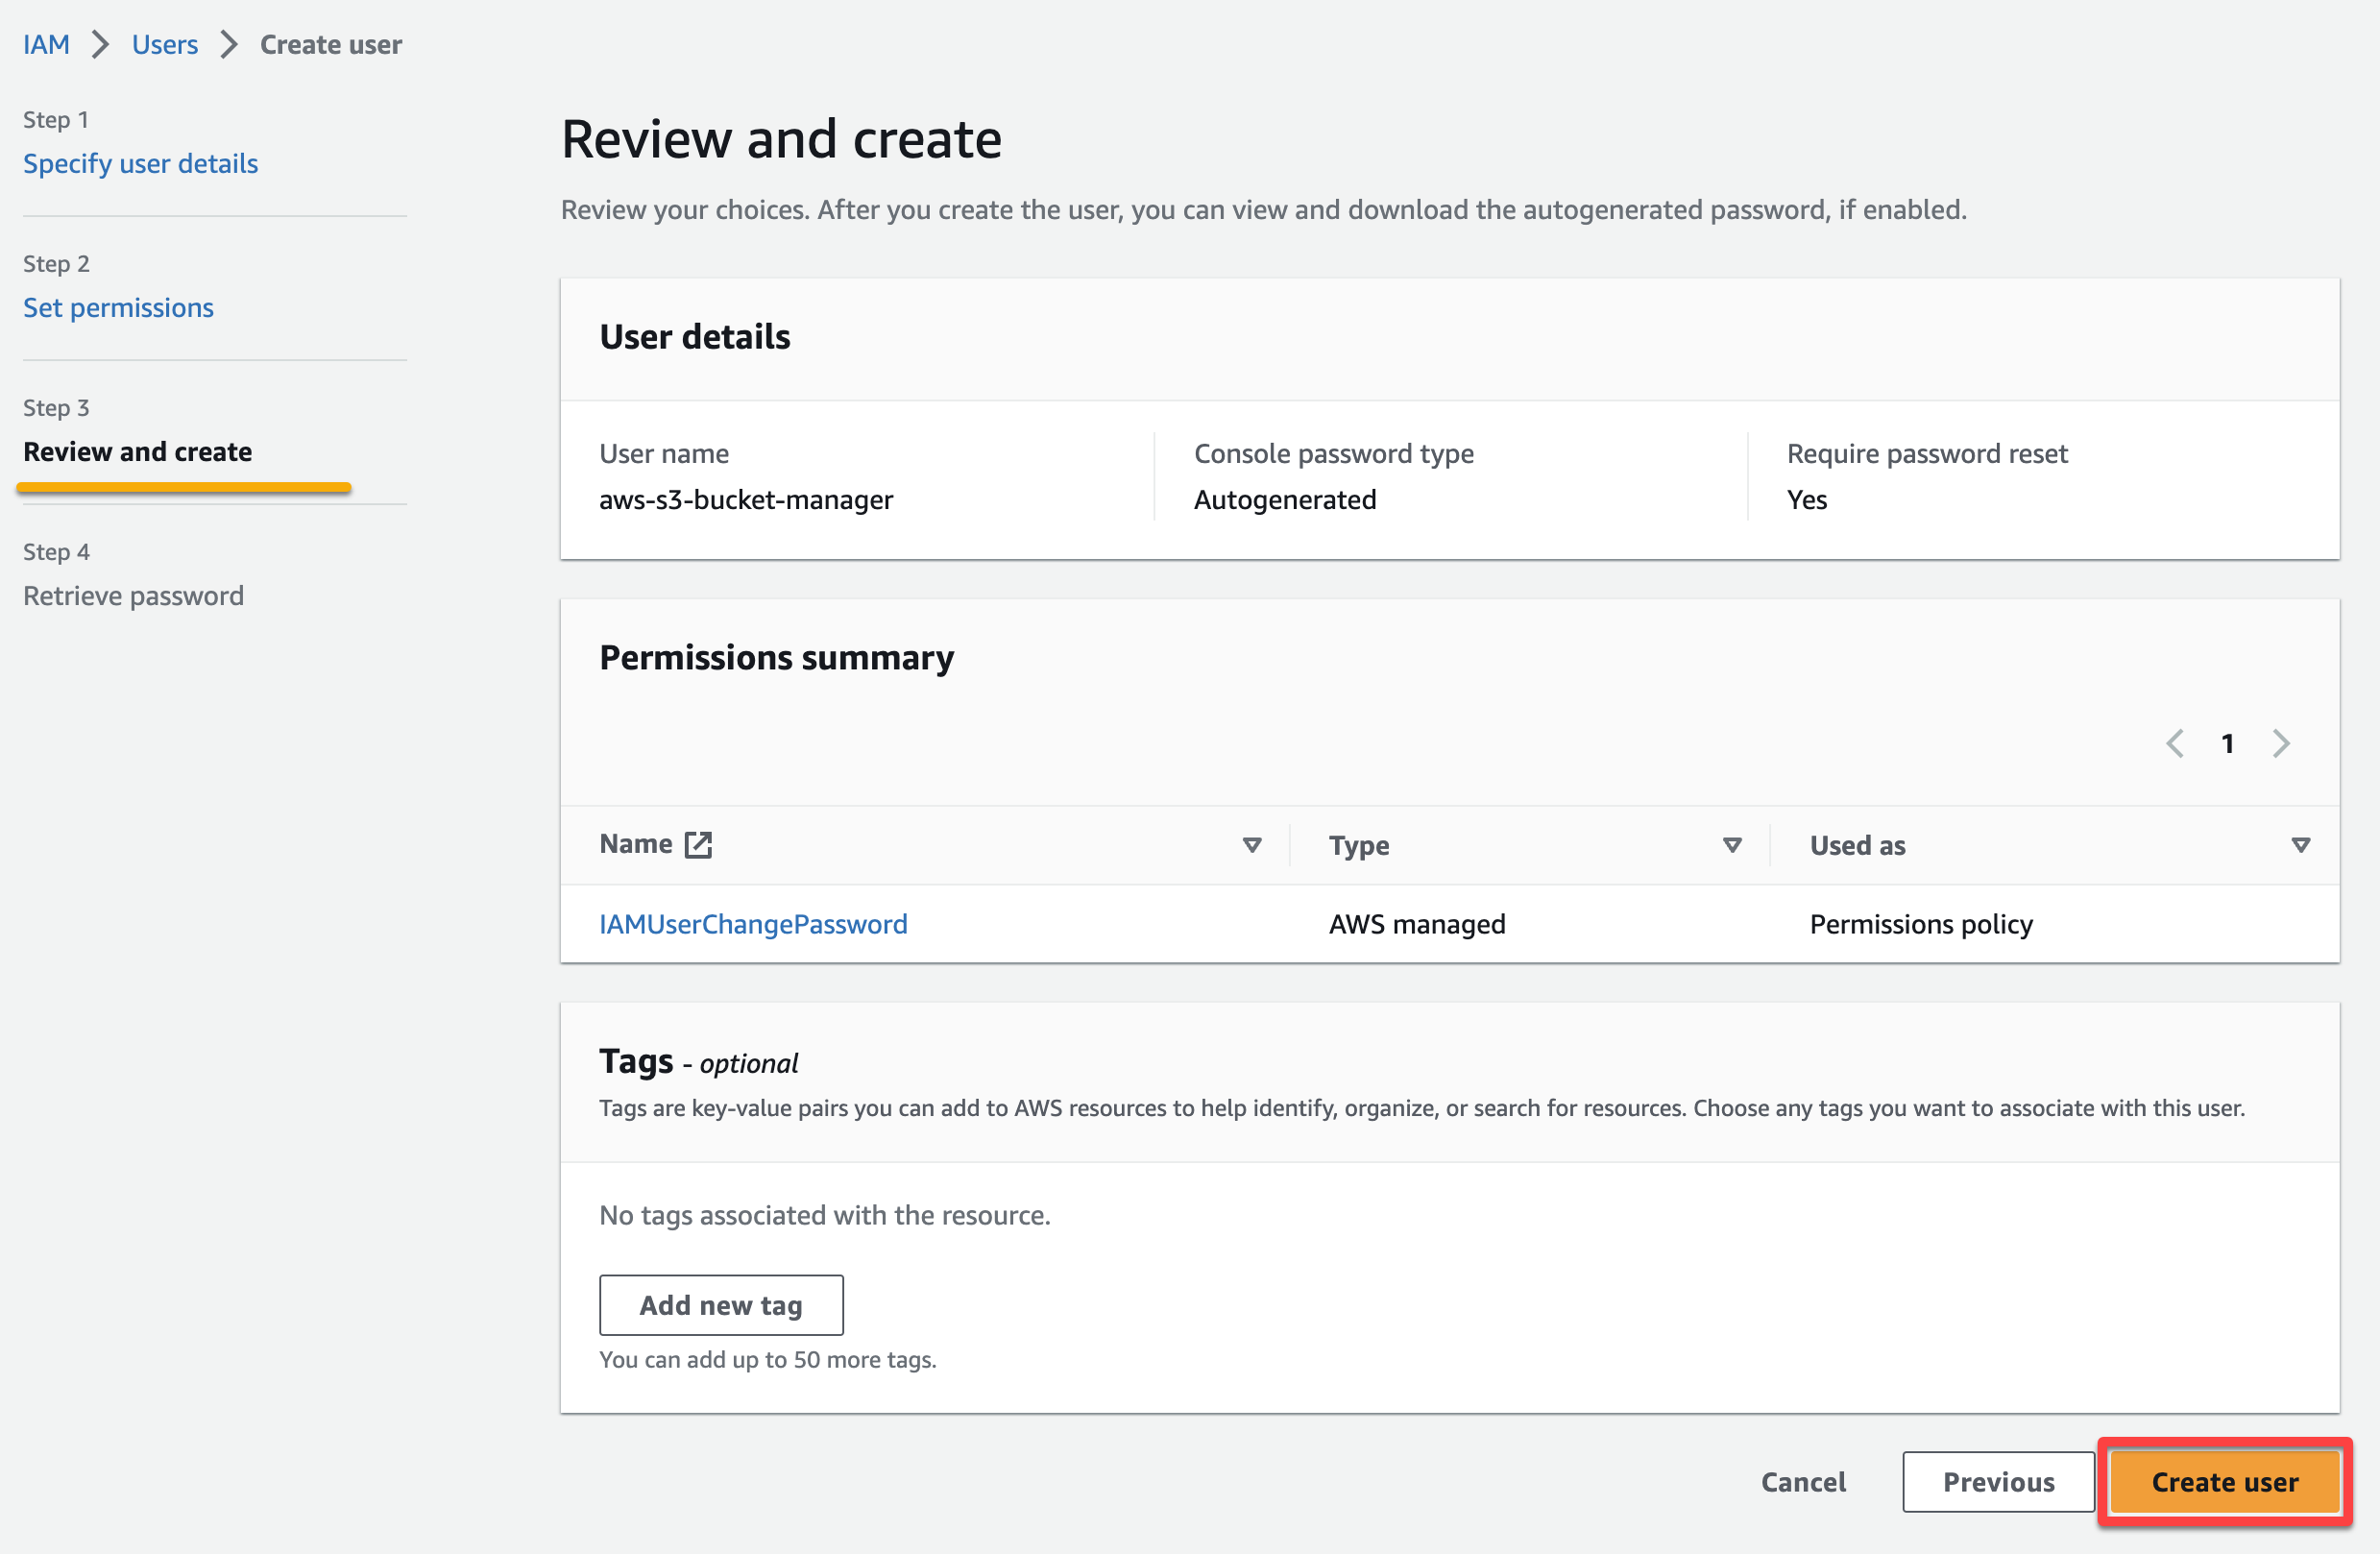
4. Now, review the configuration, and click Create user to complete creating the new IAM user.
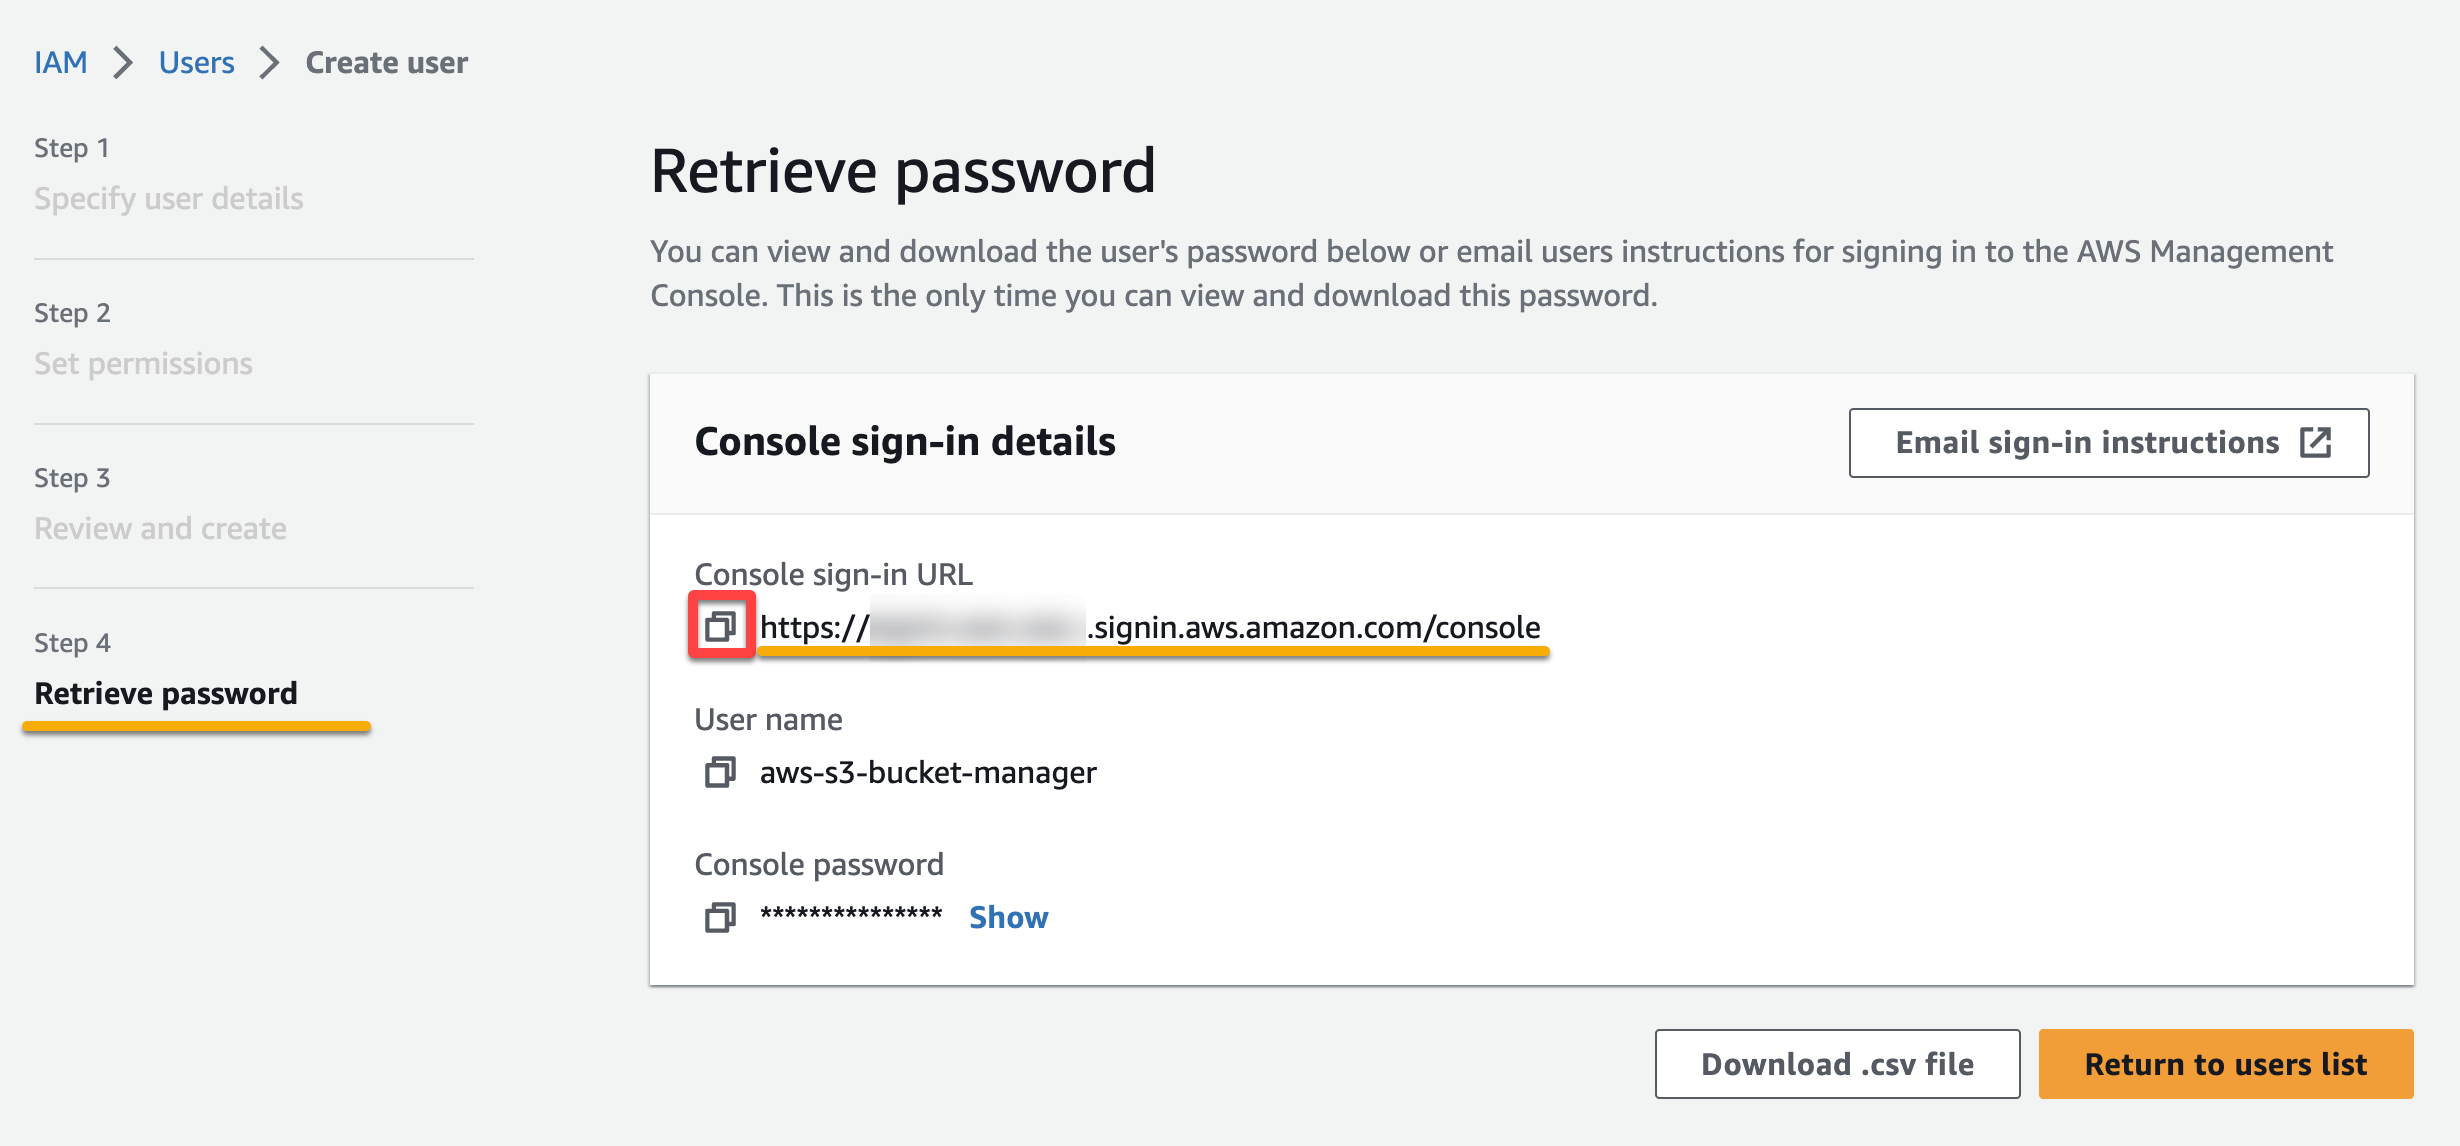
5. Take note of the generated Console sign-in URL, which you will use to log in as an IAM user.
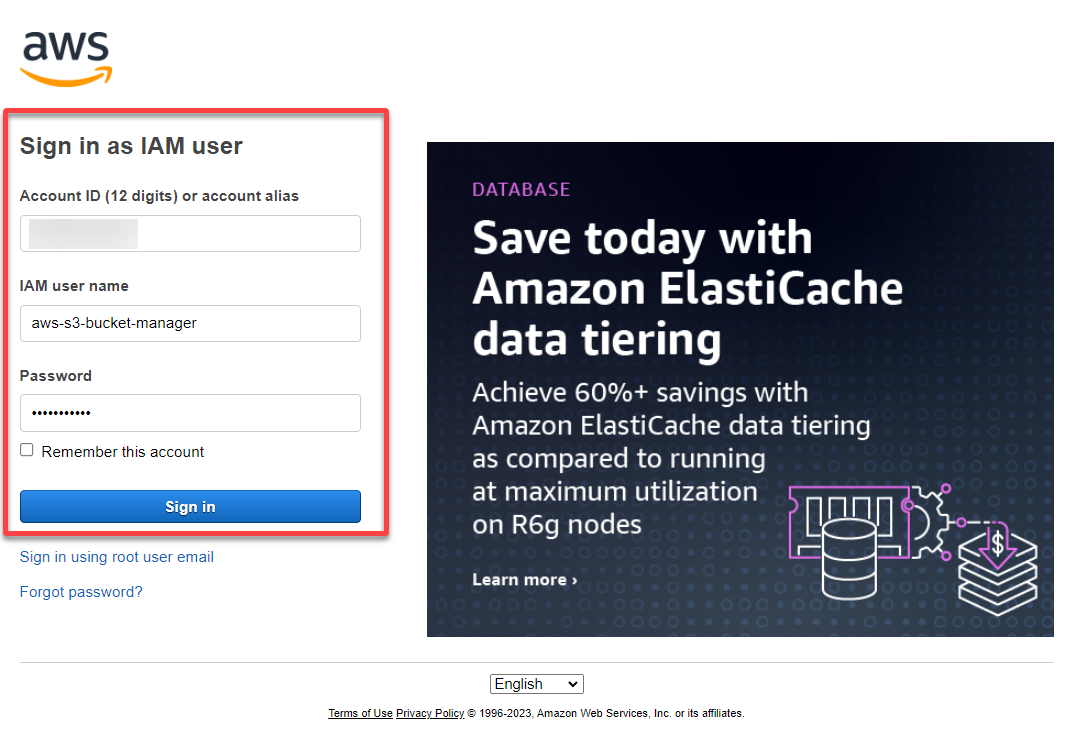
6. Launch an incognito browser window, navigate to the console sign-in URL you noted in step five, and log in with the IAM user’s credentials.
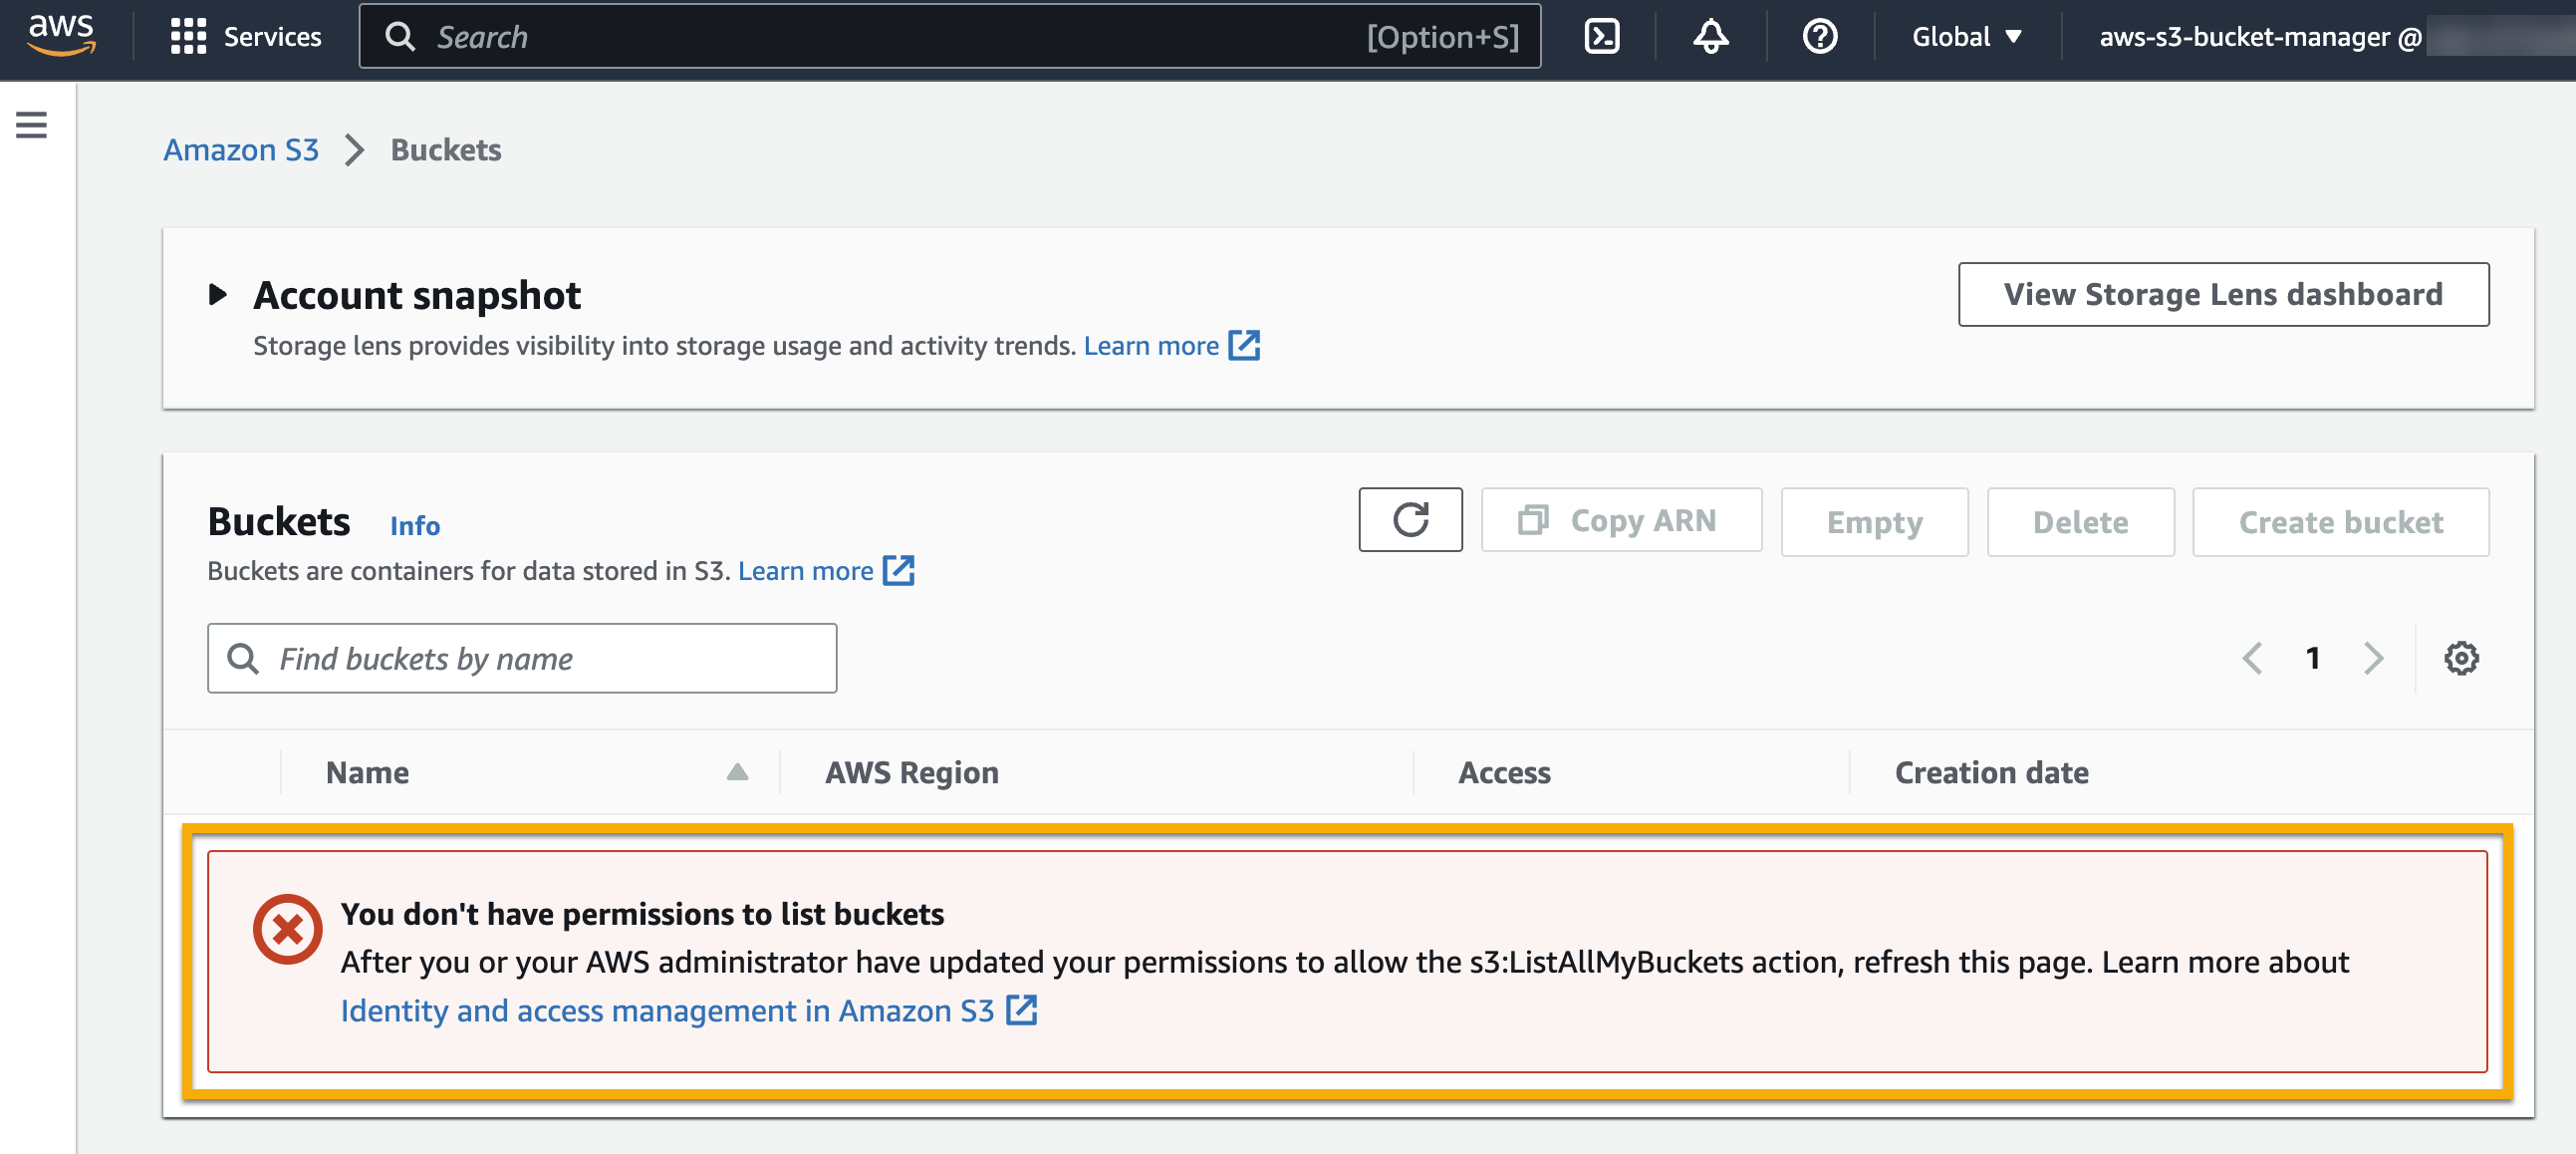
7. Once logged in, navigate to the S3 service dashboard to view the bucket you created previously through the AWS root account.
As you can see below, a message says you do not have the permissions required to create or view the existing buckets. What a downer. But no worries! You will fix the permissions in the following sections.
Controlling User Access to Buckets with an S3 Bucket Policy
When faced with an error while accessing the buckets, just stay calm. With a dedicated IAM user created to manage your buckets, you are ready to control access to buckets via bucket policies. Controlling a user’s access to S3 buckets is possible by modifying that user’s IAM permissions.
There are two methods you can modify IAM permissions, either by attaching a policy document directly to an IAM user group that has the required S3 permissions or to a user account. But in this example, you will use the former method first.
💡 AWS recommends managing permissions through IAM user groups, as managing various permissions attached to multiple users could quickly become difficult to track.
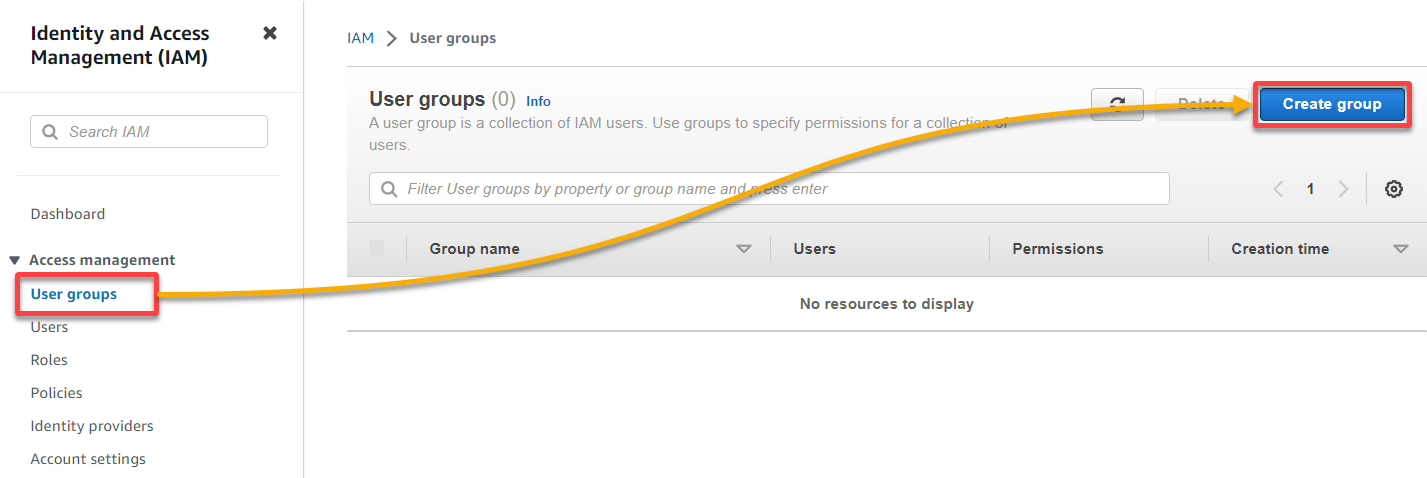
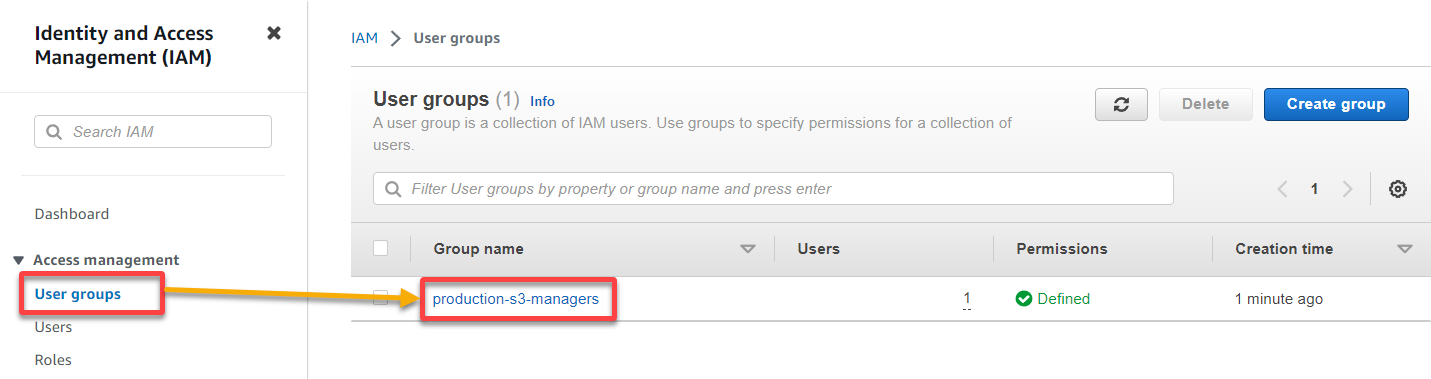
1. On your root account, navigate to the User groups page within the IAM console, and click the Create group to initiate creating a new user group.
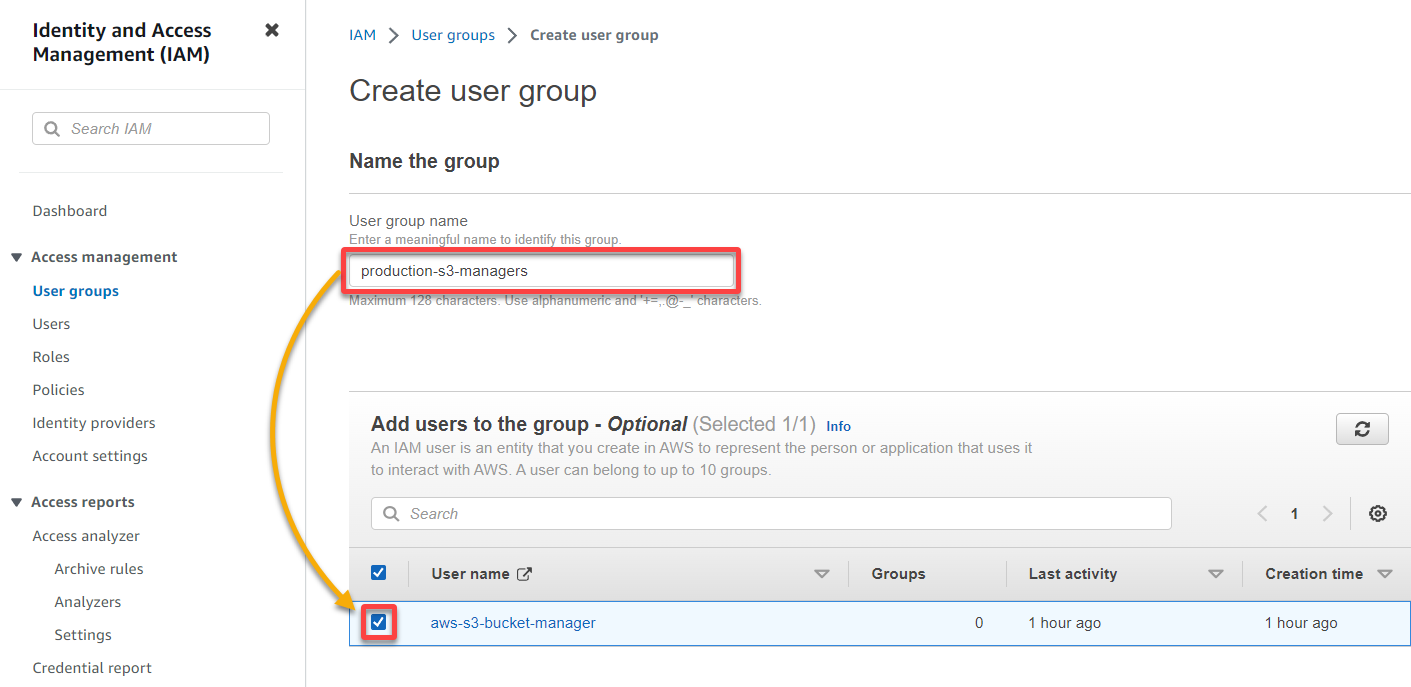
2. Next, provide a User group name (i.e., production-s3-managers), and select your IAM user to add to the group.
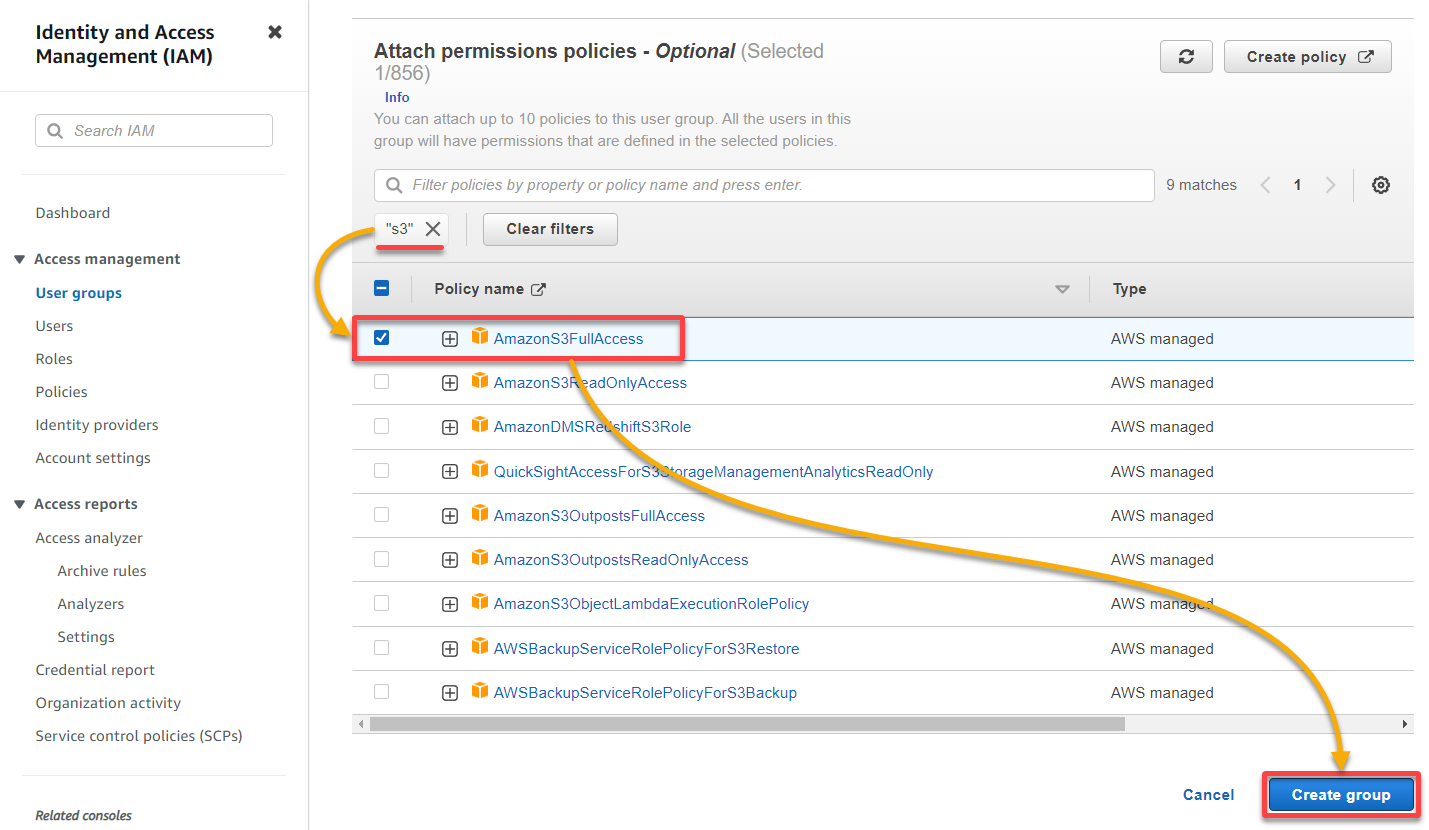
3. Scroll down, search for s3, select the AmazonS3FullAccess policy, and click Create group to create the new user group. The AmazonS3FullAcess grants users within the group administrator privileges over the S3 service.
4. Now, switch to your incognito browser where your IAM user is signed in, and try viewing the bucket again within the S3 service to confirm the elevated permission.
As shown below, your IAM user can now view the S3 bucket alongside its objects.
Streamlining S3 Bucket Access for IAM Users
Users within your newly-created user group currently have permission to perform operations over all resources within your S3 service. But does it not sound scary? Why not streamline S3 bucket access for IAM users?
When setting permissions for IAM users, you must choose either of the following policies.
| Policy | Details |
|---|---|
| AWS managed policies | These policies are standalone, fully managed by AWS, and which has their own Amazon Resource Name (ARN) that includes the policy name. |
| Customer managed policies | For specific use cases, you can create customer managed policies in your AWS account and attach them to principal entities, like users, groups, and roles. You can also change and update these policies as much as necessary. |
| Inline policies | Created for a single IAM identity, whether a user, group, or role, these policies maintain an exclusive relationship between a policy and an identity. |
In this example, you will narrow user access through custom inline policies. But first, you must remove the broad policy you attached to the newly-created IAM user group.
Removing an Existing Attached S3 Bucket Policy
Since you will add a custom inline policy to your user group, you must first remove the existing AWS managed policy (AmazonS2FullAccess).
To remove an existing attached policy:
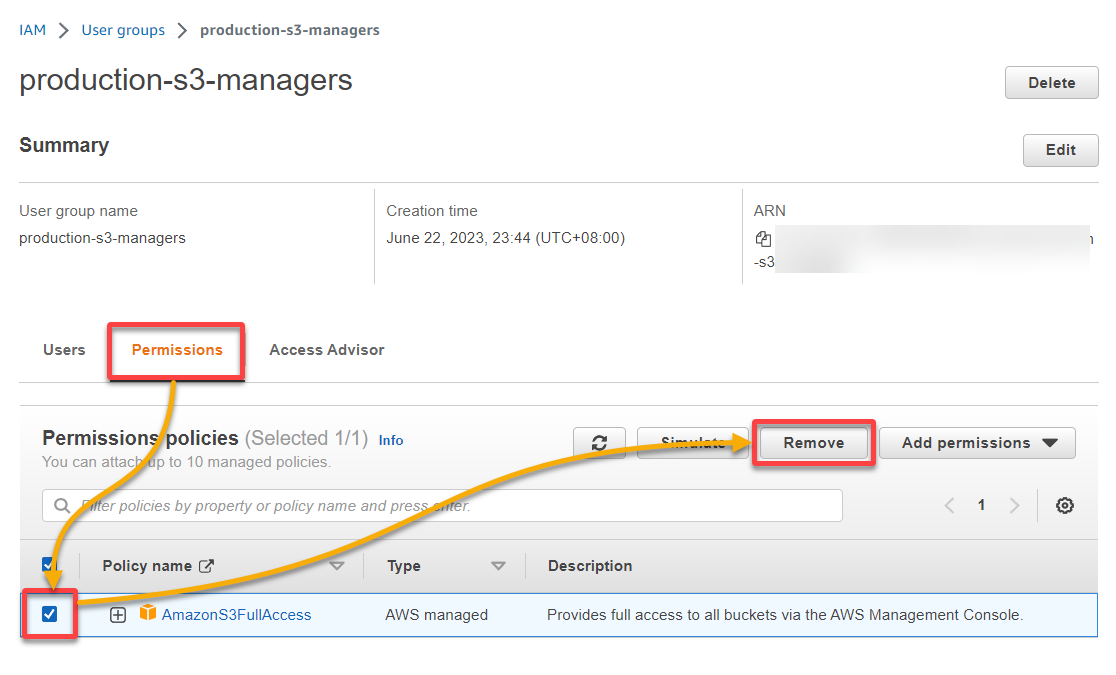
1. In your root account, navigate to the IAM User groups page, and click your user group to access its summary page.
2. Next, navigate to the Permissions tab, select the existing policy (AmazonS3FullAccess), and click Remove to remove the policy from the user group.
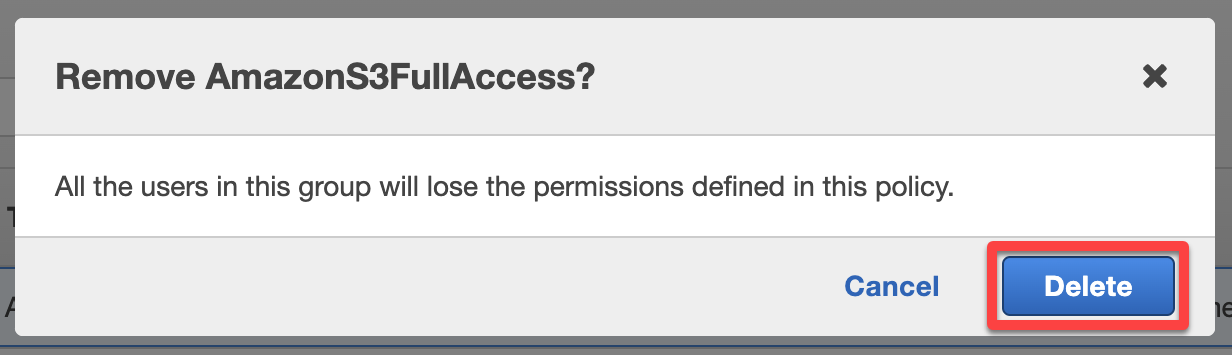
3. When prompted, as shown below, click Delete to confirm the policy removal.
Granting Read S3 Access to Specific Buckets
With the AmazonS3FullAccess policy removed, you are ready to create an inline policy allowing your IAM user to view the content of a specific bucket. You will create an inline policy in the same user group’s summary page where you removed the AmazonS3FullAccess policy.
To create an inline policy granting read S3 access within your user groups:
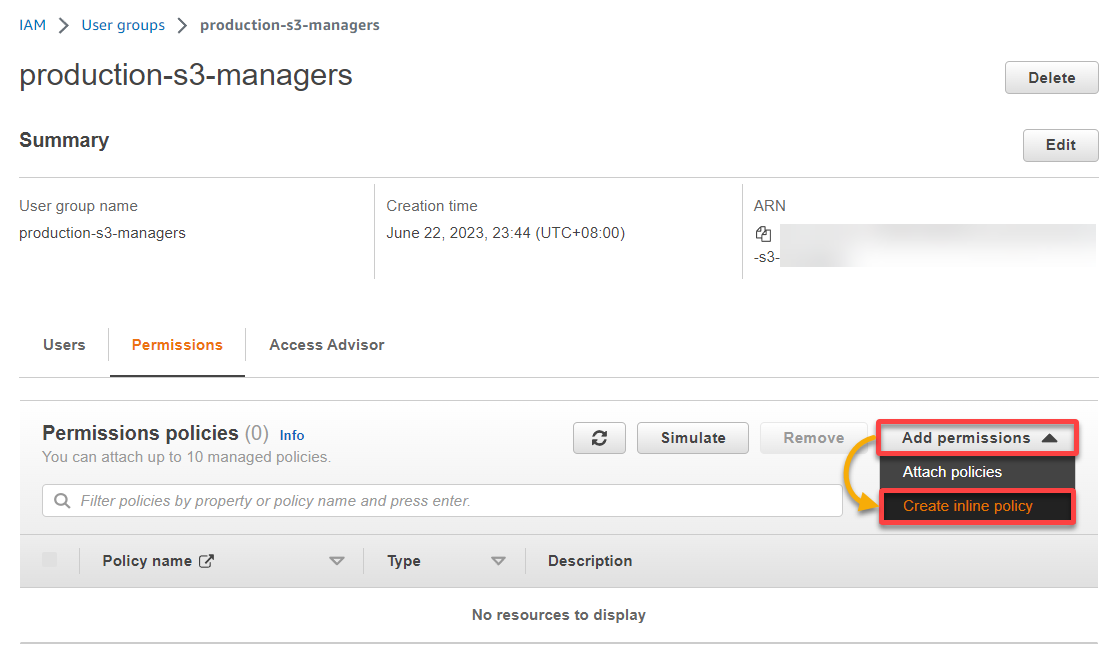
1. Within the Permissions tab, click Add permissions, and choose Create inline Policy from the drop-down, redirecting your browser to the Visual Policy Editor.
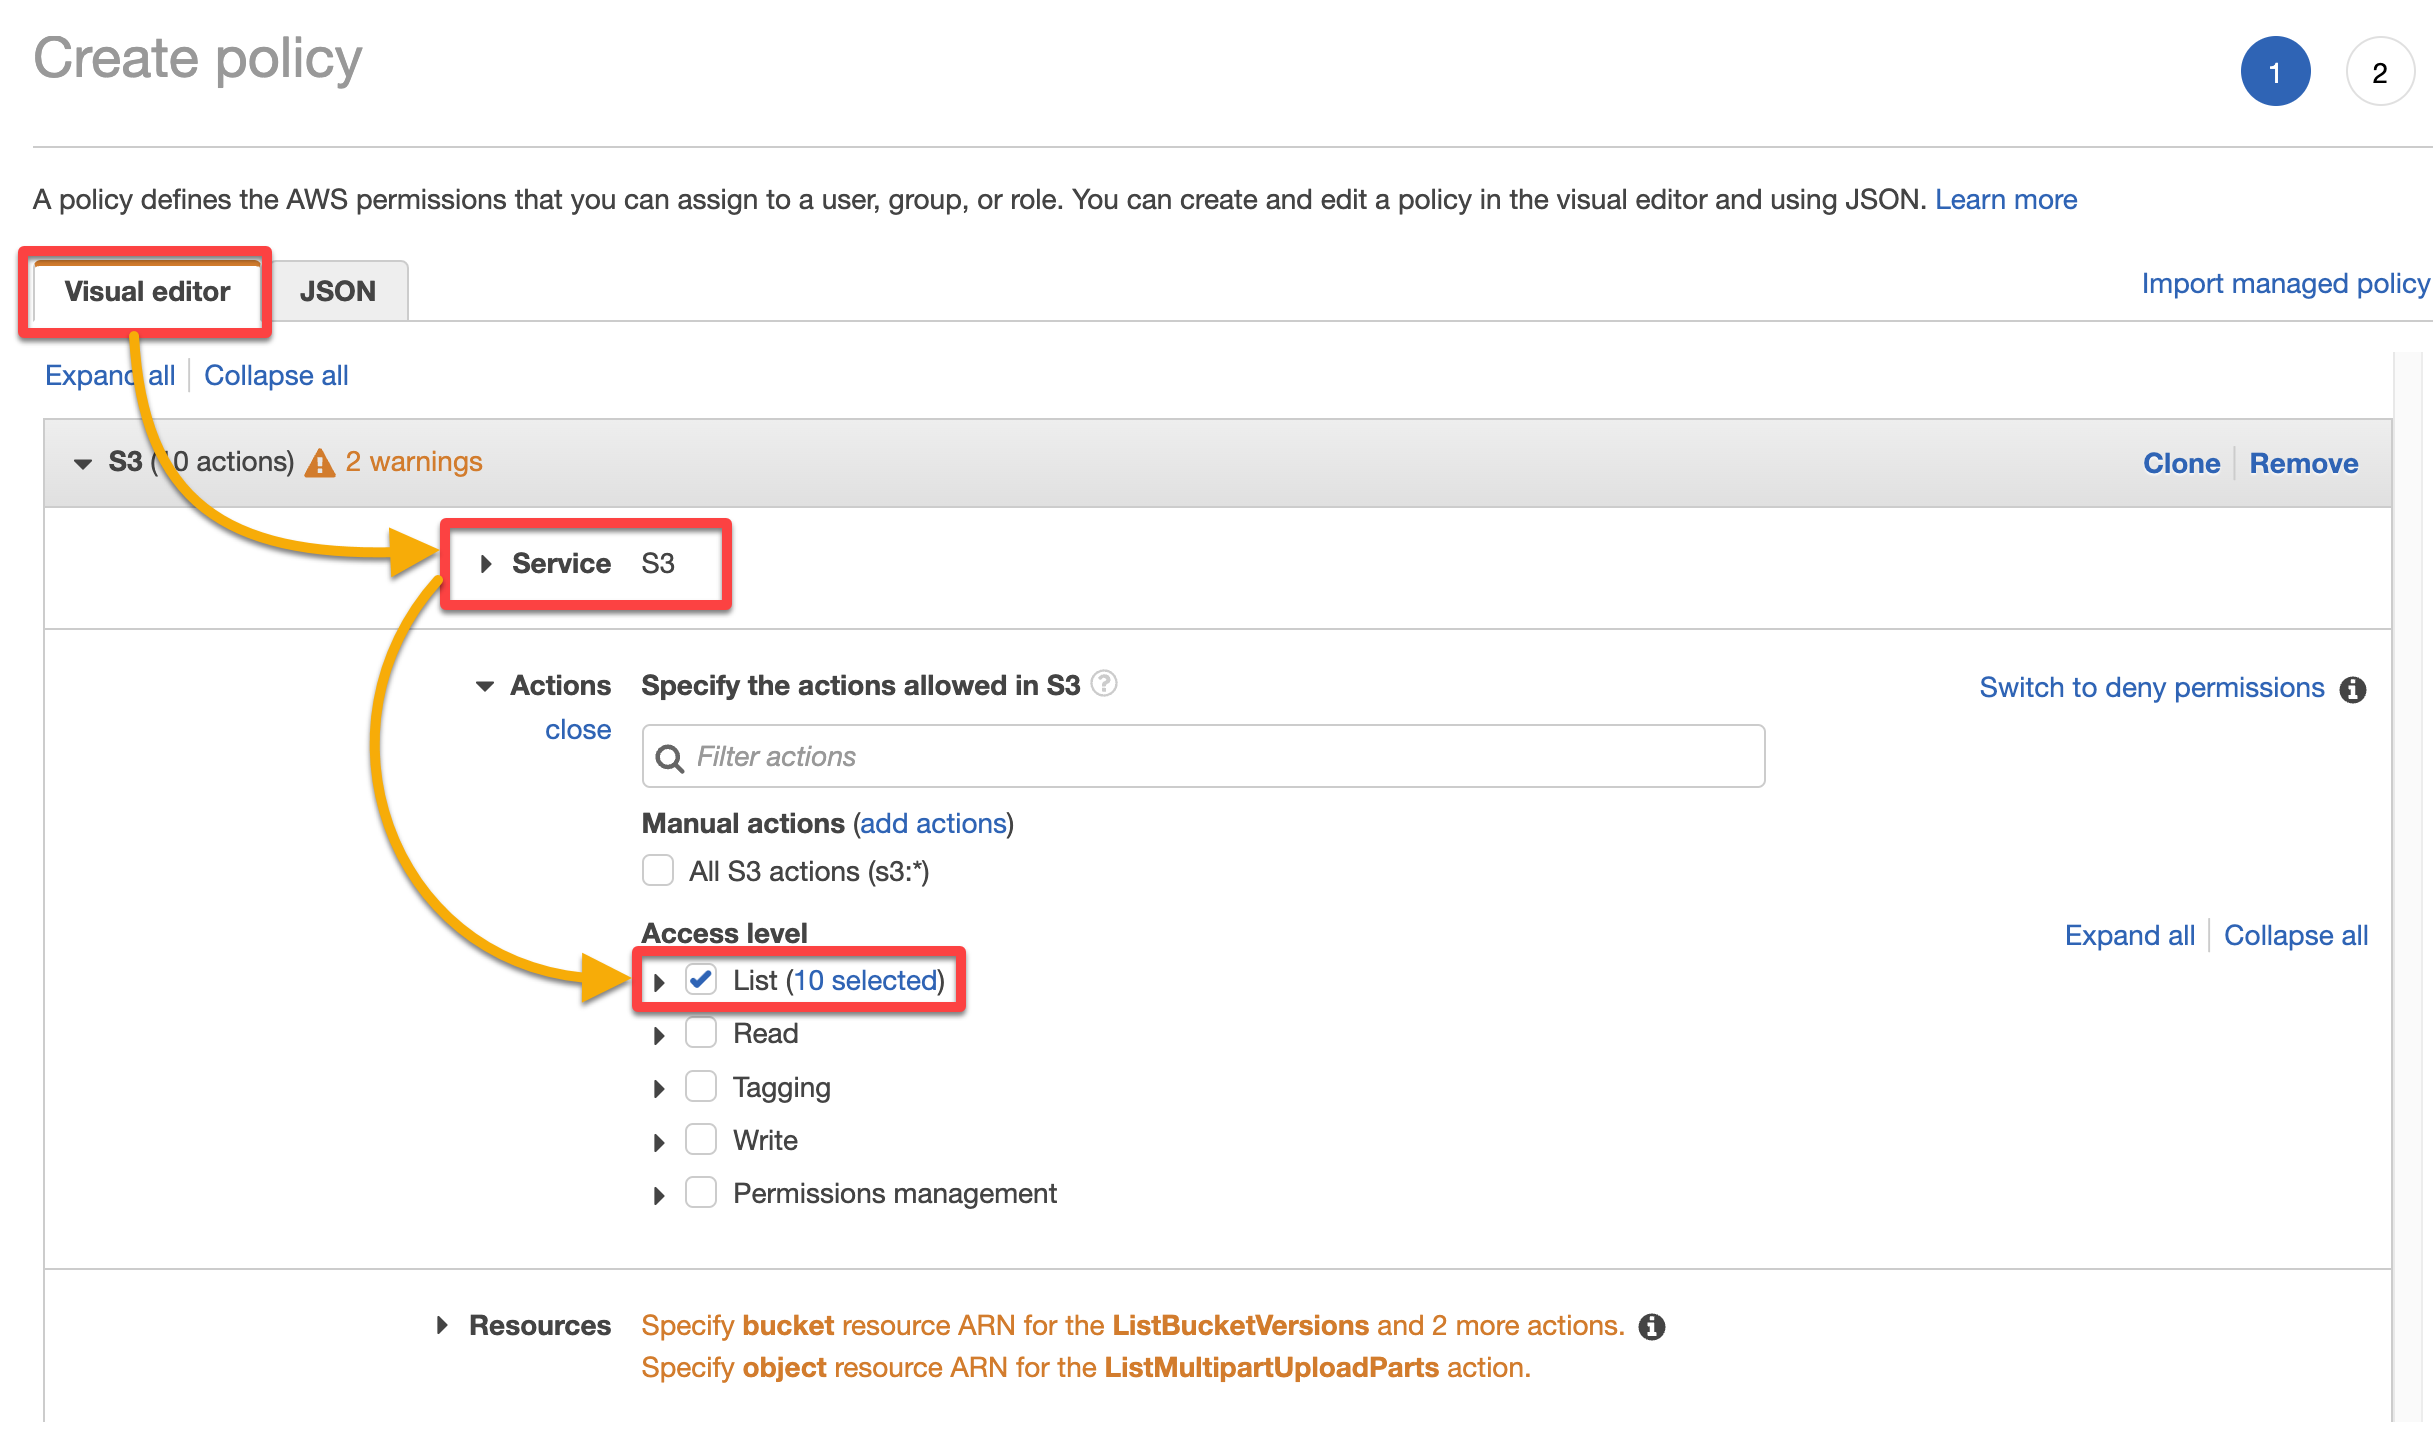
2. Next, configure the following under the Visual editor tab:
- Select S3 as the Service to apply the conditions within the policy to only the S3 service.
- Tick the List Access level options for the S3 service. Enabling this option allows users within the group to view a specific bucket only and its contents.
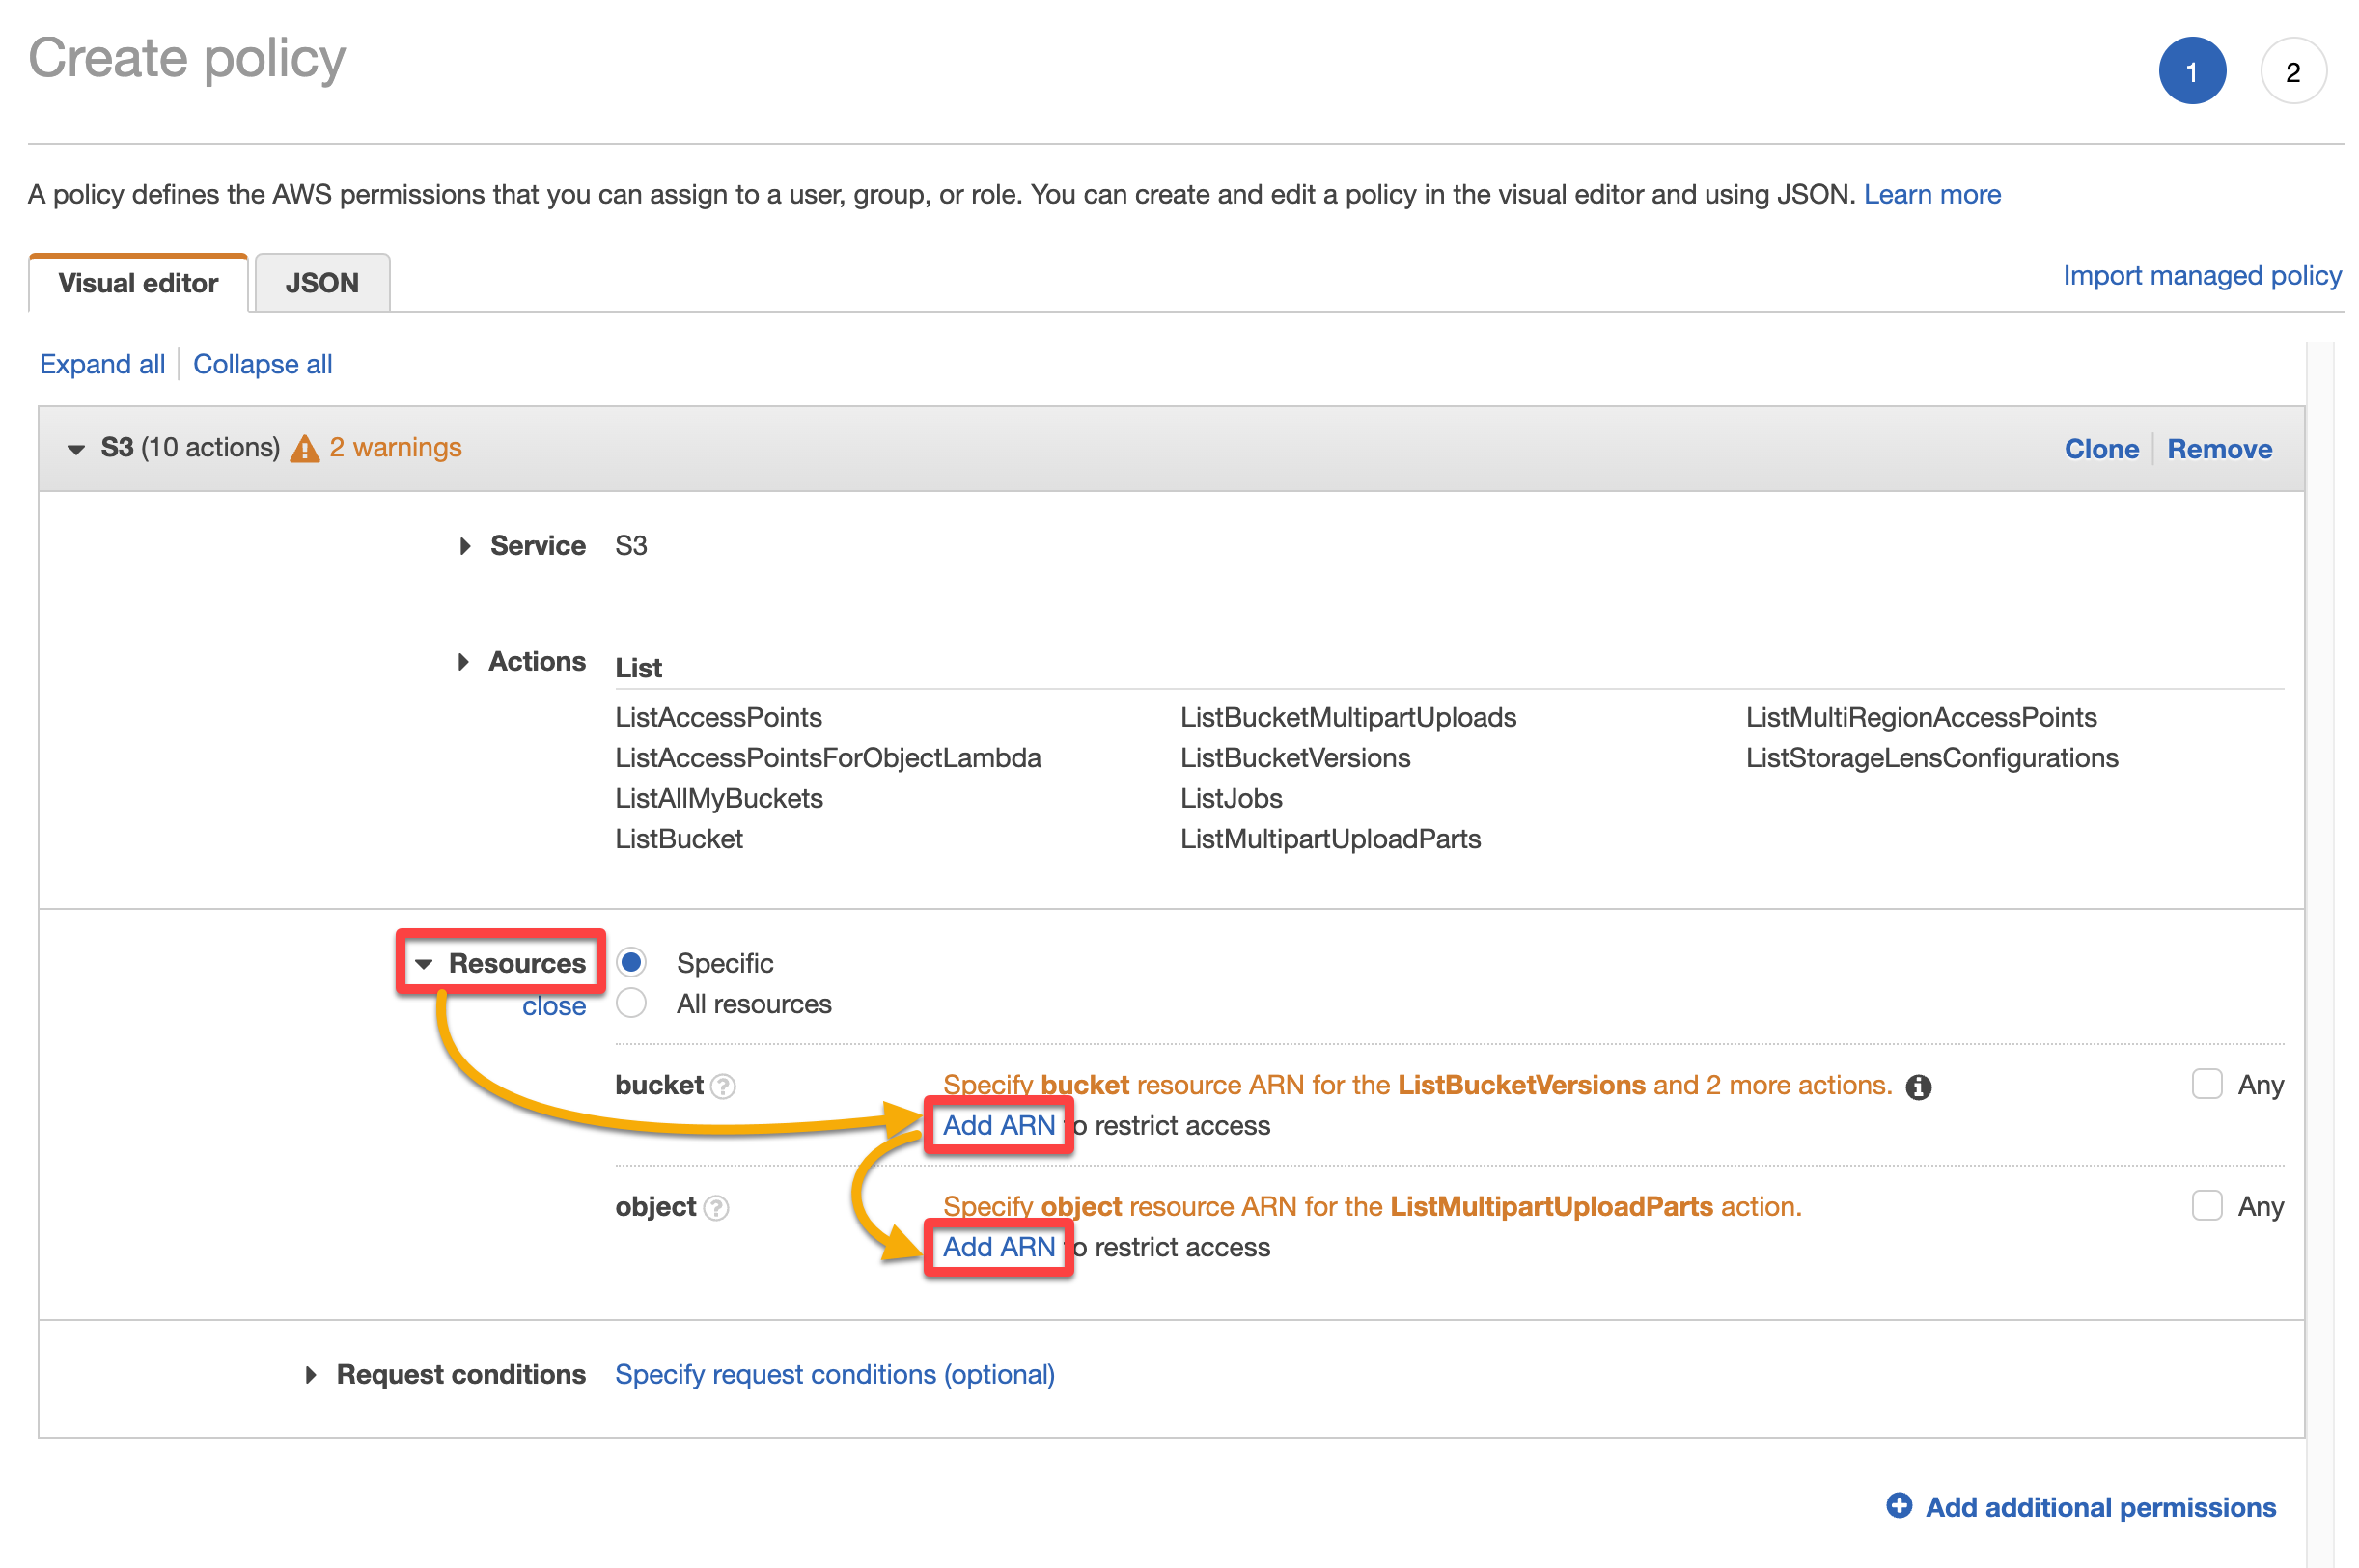
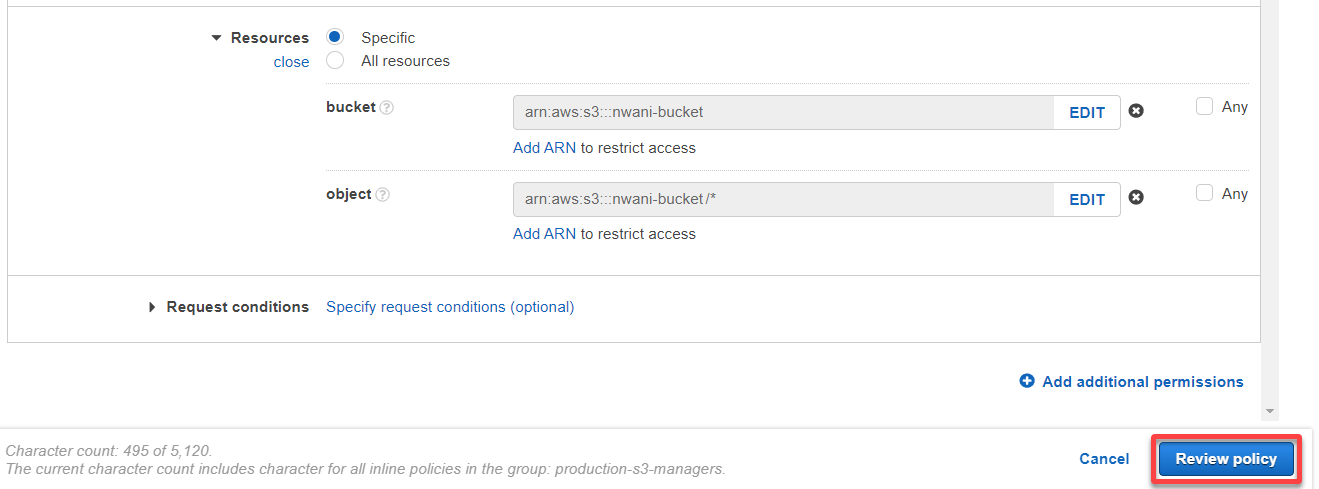
3. Scroll down, expand Resources, and click the Add ARN texts to specify the ARN’s bucket and object name values. Doing so allows the user to list only the specified bucket and view its objects.
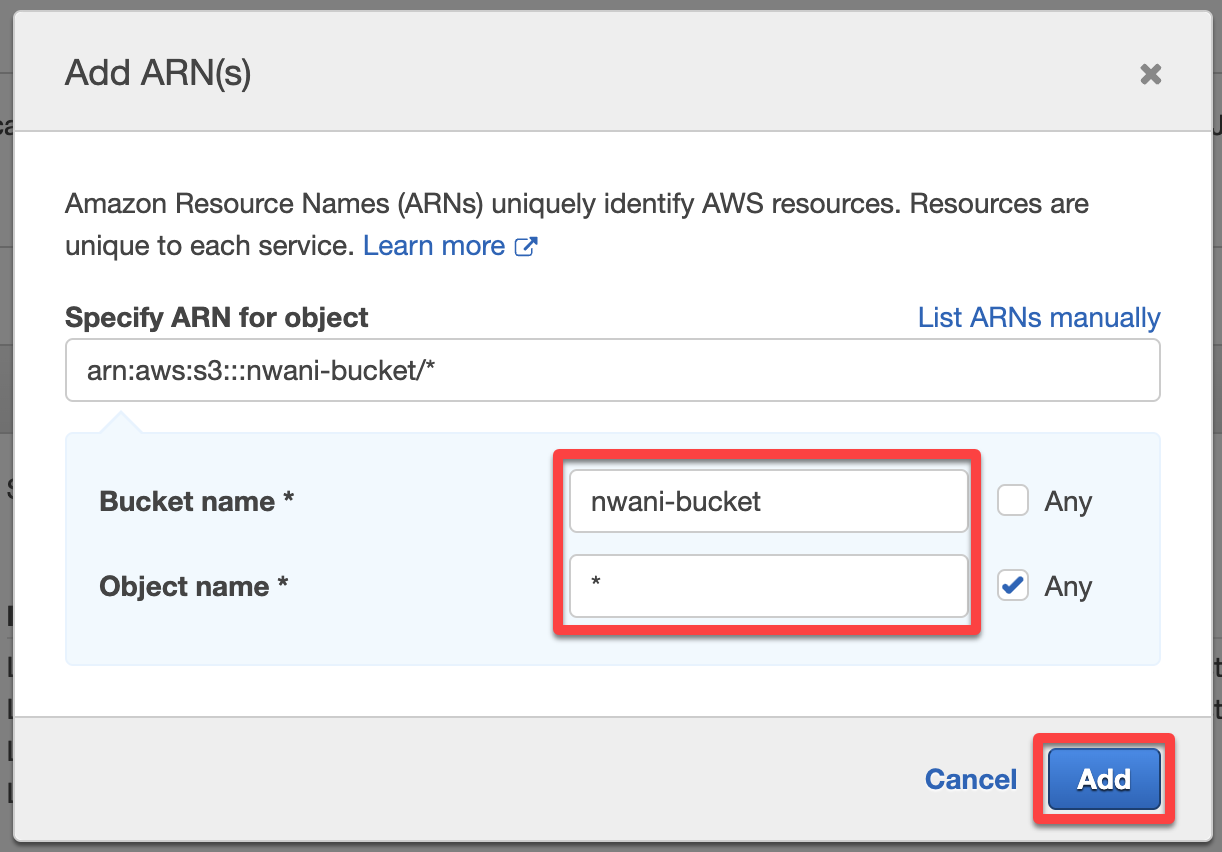
For the object ARN, specify the following:
- Bucket name – Specify your bucket’s exact name.
- Object name – Add a wildcard (*) character to allow users to view all objects within your specified bucket.
Once specified, click Add to confirm the changes.
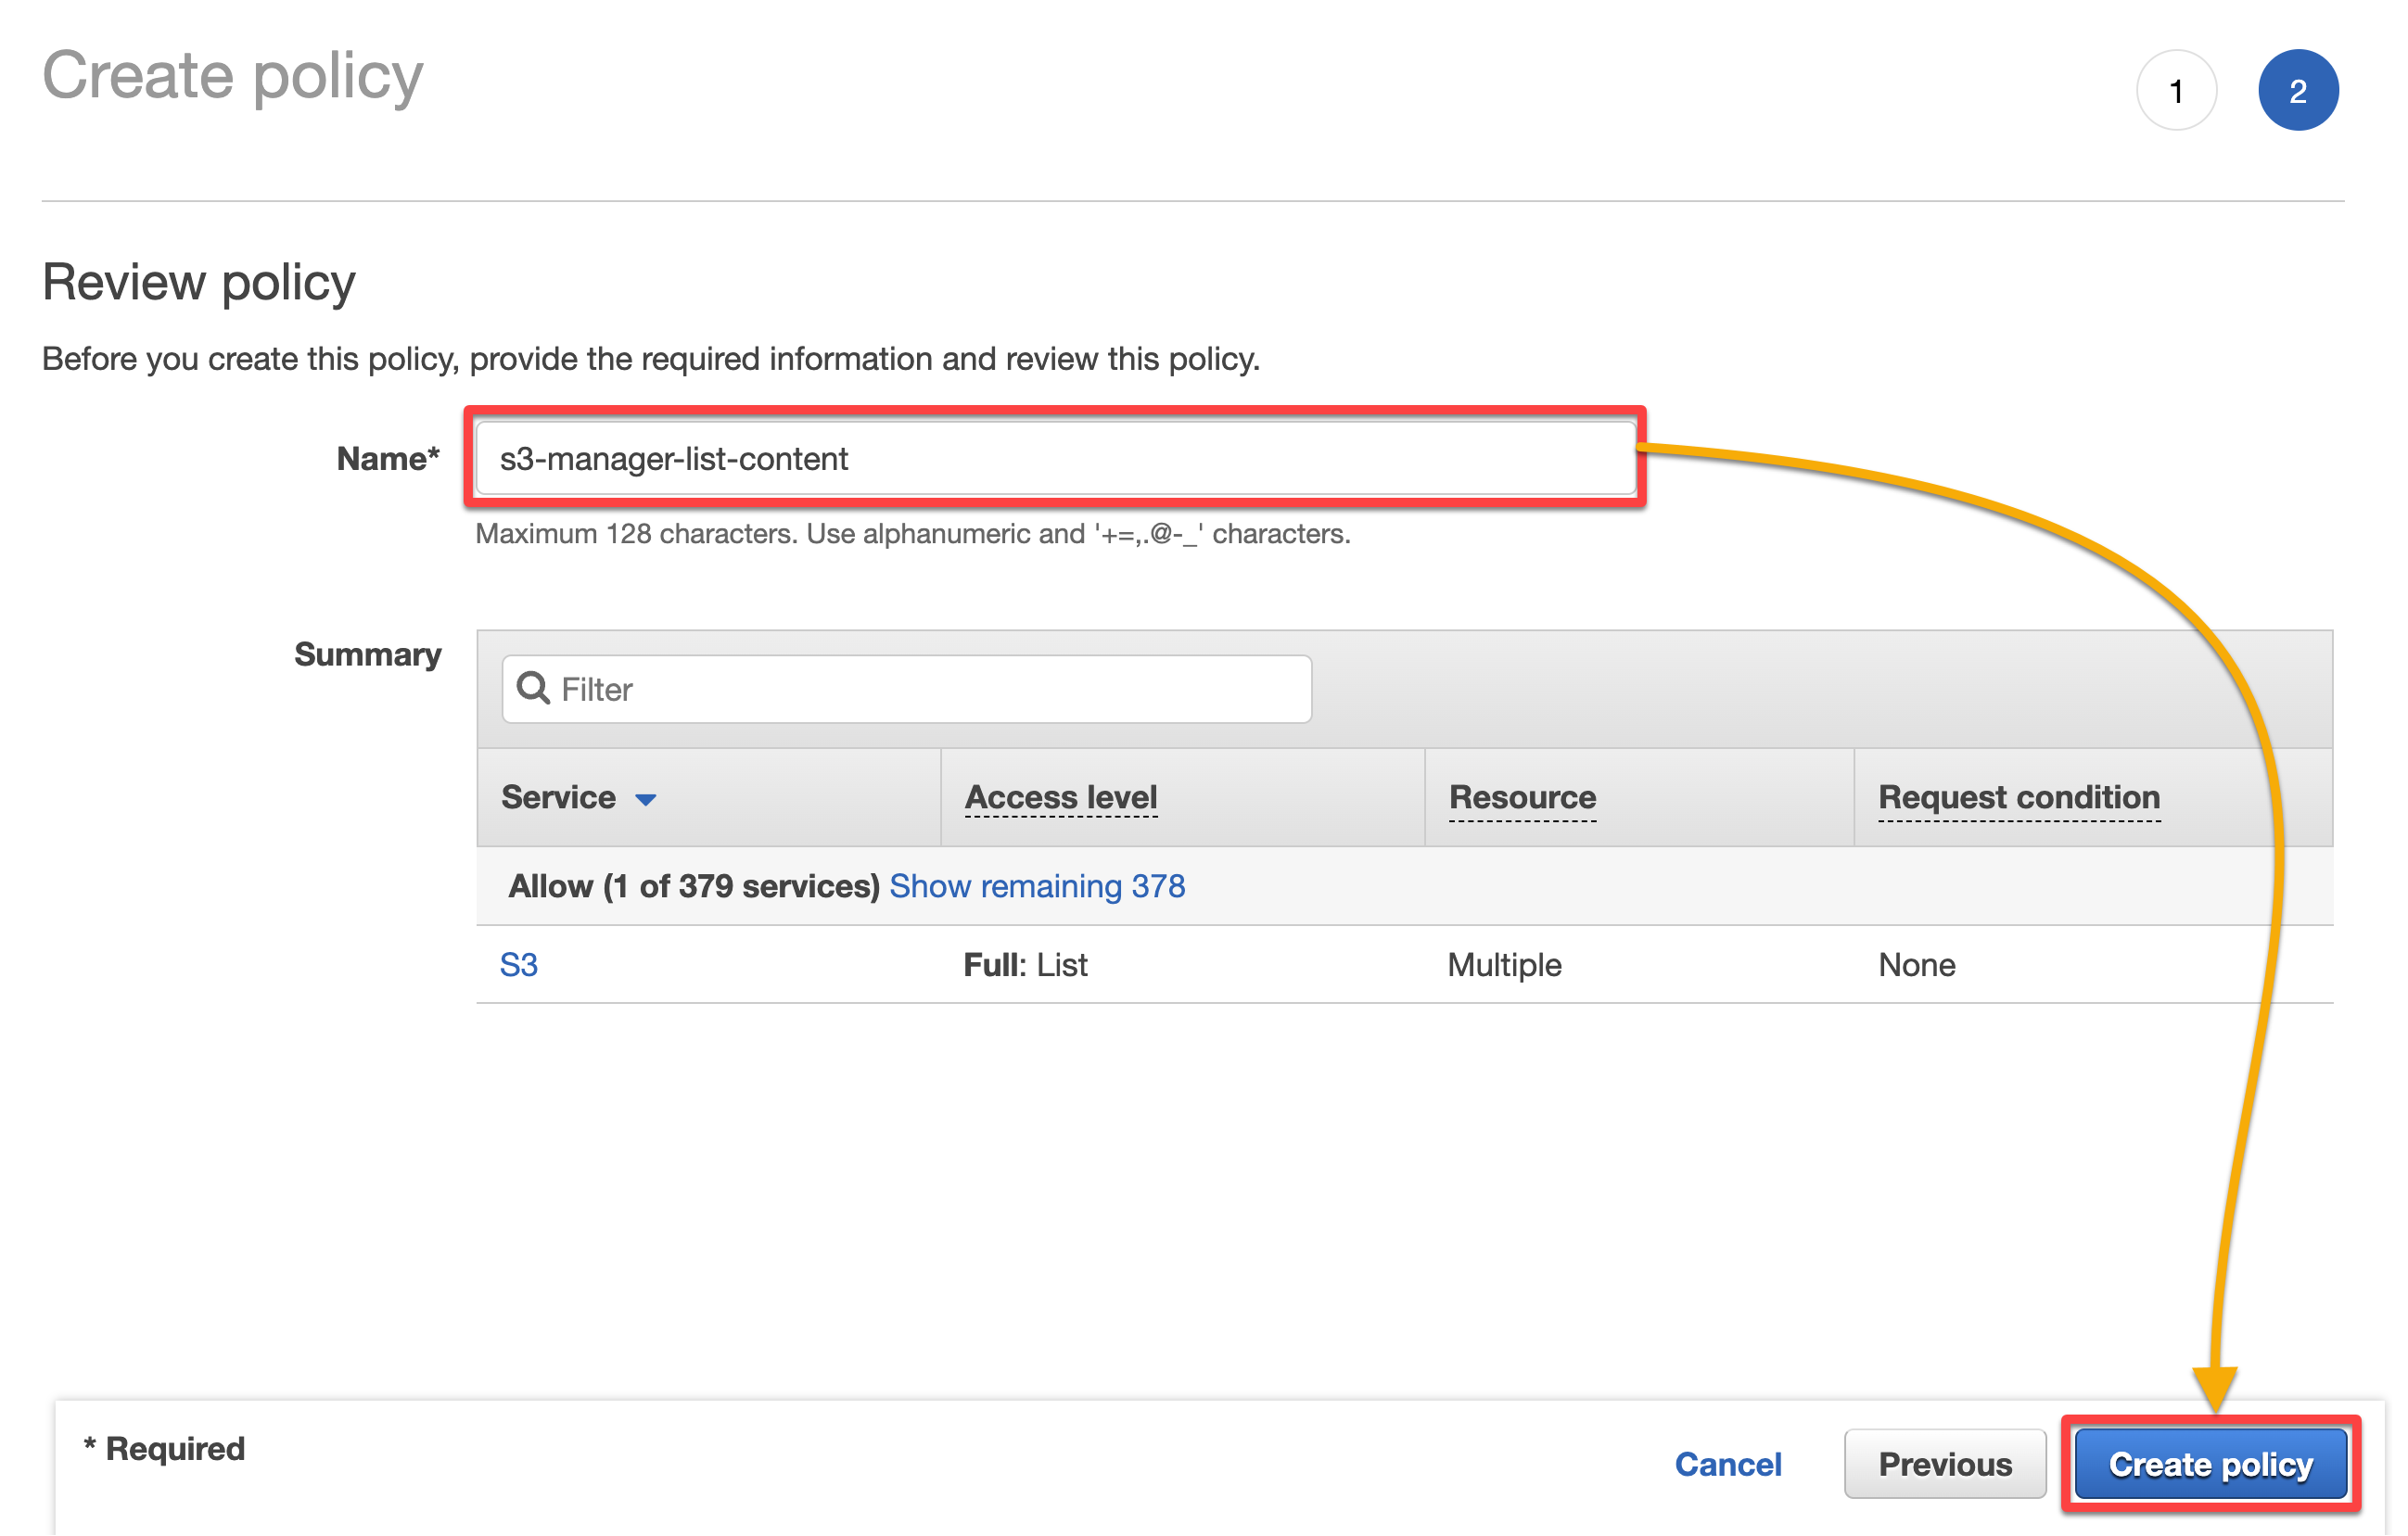
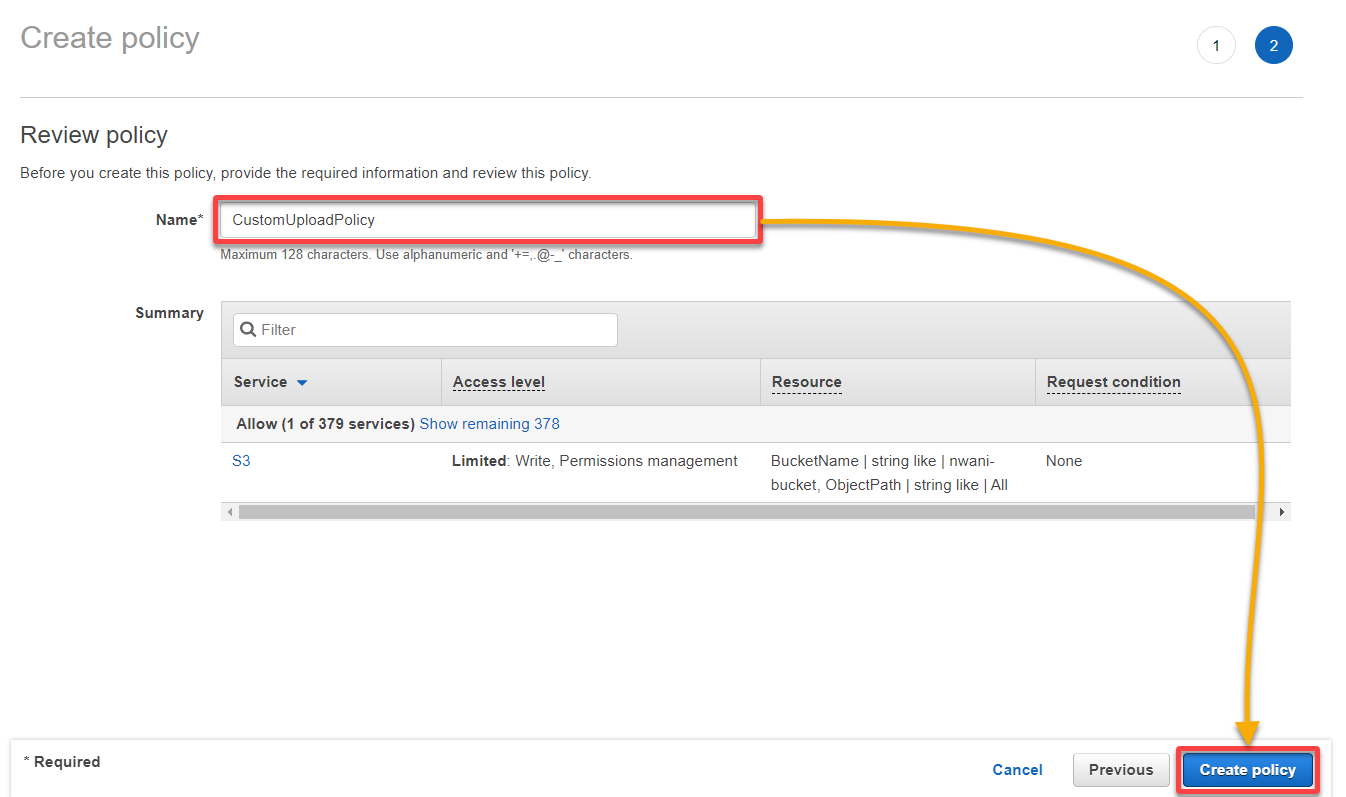
4. Now, click Review policy (bottom-right) to review the conditions you set for the custom inline policy.
5. Provide a Name for the policy (i.e., s3-manager-list-content), and click Create policy to save the policy.
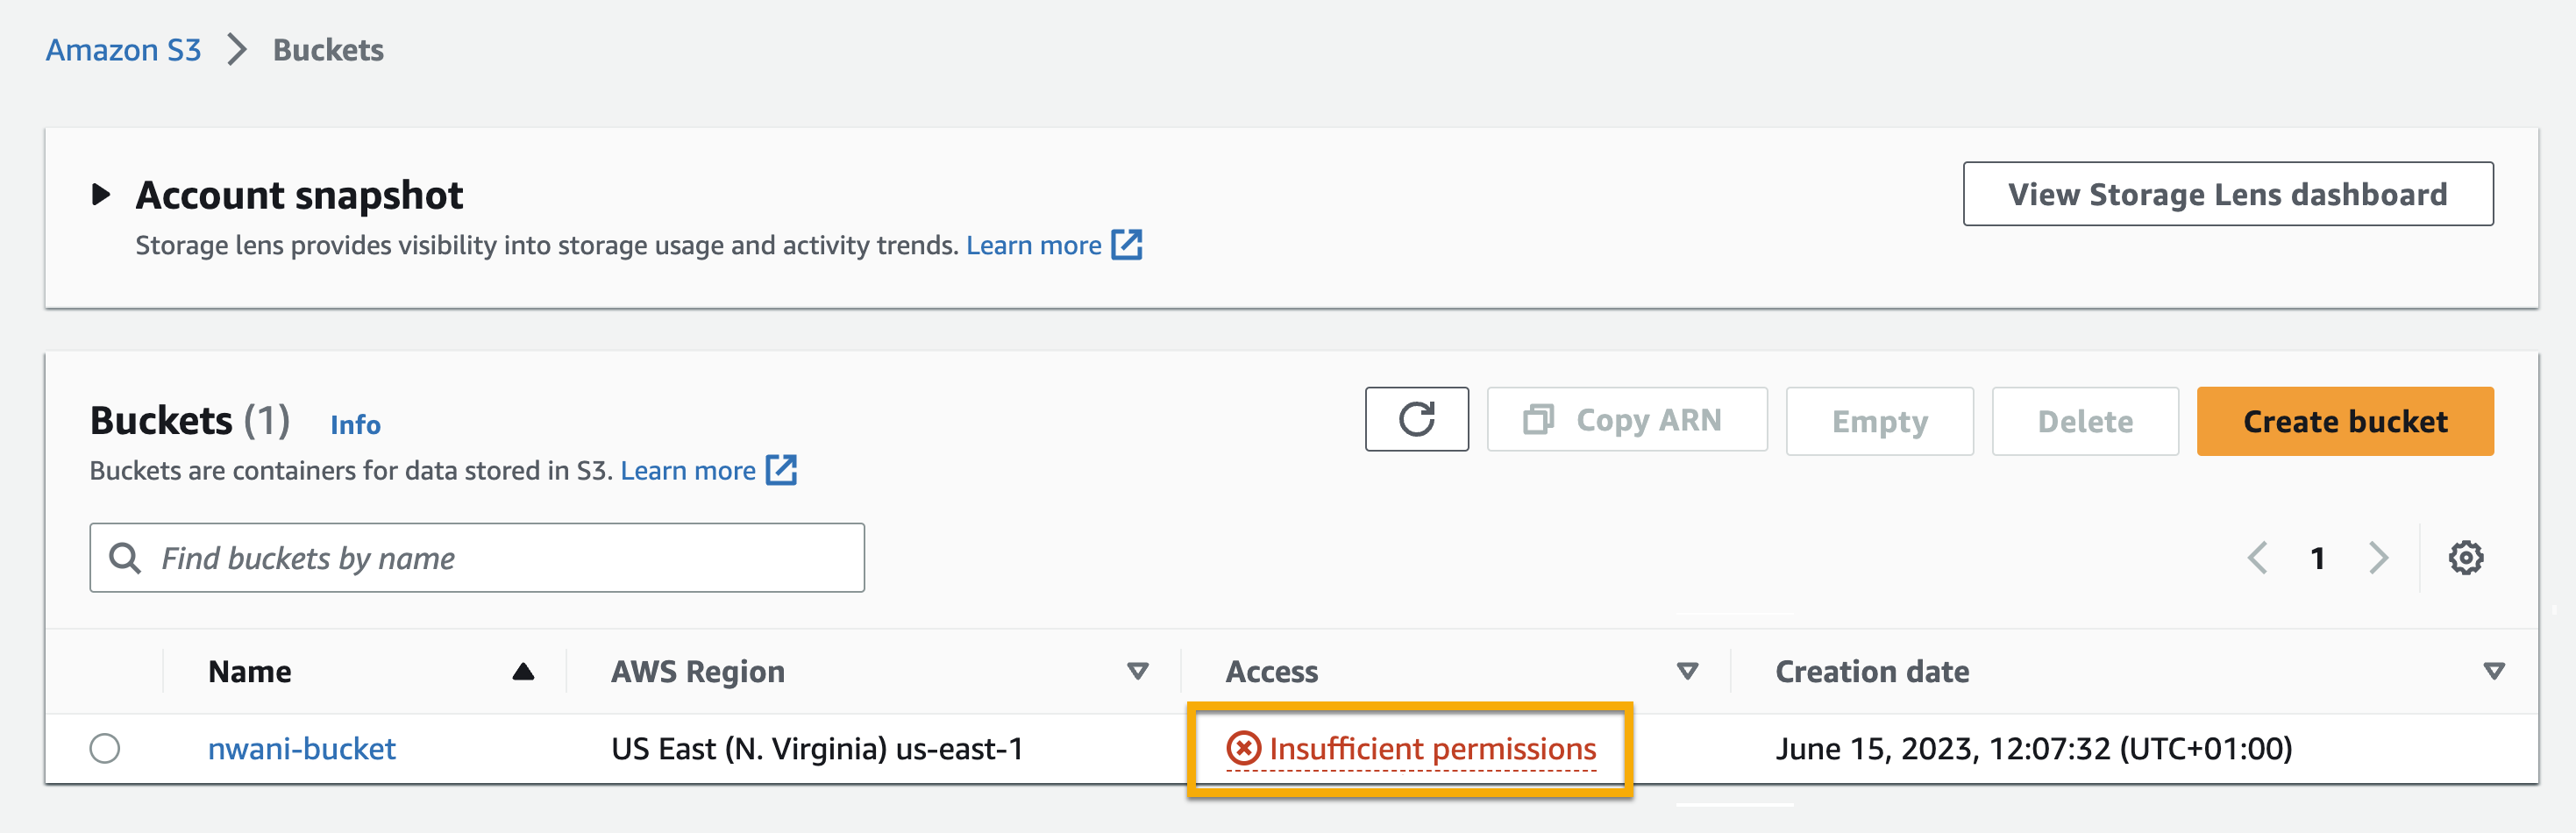
6. Once saved, switch to your IAM user, navigate to the S3 service dashboard, and you will see your Access status that says Insufficient permissions, as shown below.
With your IAM user’s current permission, you can only view the bucket as specified in the custom inline policy. You cannot perform other actions, such as viewing the bucket access permissions or deleting objects from the bucket.
Granting Write S3 Access to Specific Buckets
Granting only read access excessively limits your IAM user from performing other crucial operations. Why not grant write S3 access as well?
To grant write S3 access to specific buckets, you will attach a new inline policy:
1. In your root account, navigate to your user group’s summary page, and initiate creating a new inline policy.

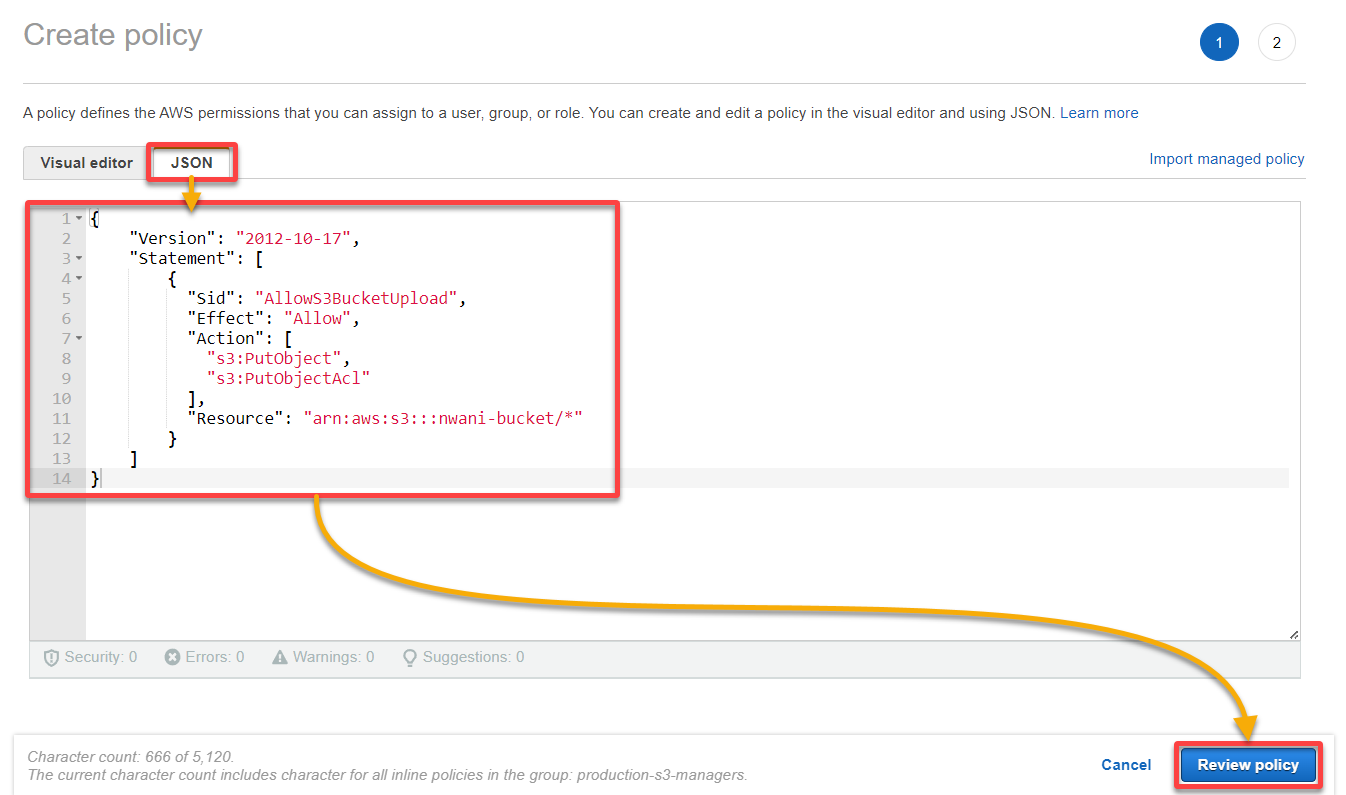
2. Next, navigate to the JSON tab, populate the following code to the policy editor, and click Review policy to save the policy. Ensure you replace BUCKET_NAME with your bucket name.
The code below uses the Allow Effect to provide an associated user with the features to upload an object into a bucket whose ARN matches the Resource property value.
{
    "Version": "2012-10-17",
    "Statement": [
        {
          "Sid": "AllowS3BucketUpload",
          "Effect": "Allow",
          "Action": [
            "s3:PutObject",
            "s3:PutObjectAcl"
          ],
          "Resource": "arn:aws:s3:::BUCKET_NAME/*"
        }
    ]
}
💡 Note that the IAM Policy Simulator lets you test and debug IAM Policies against your environment to simulate permission boundaries before they are applied.
3. Now, provide a Name for the new policy, and click Create policy to confirm and create the policy.
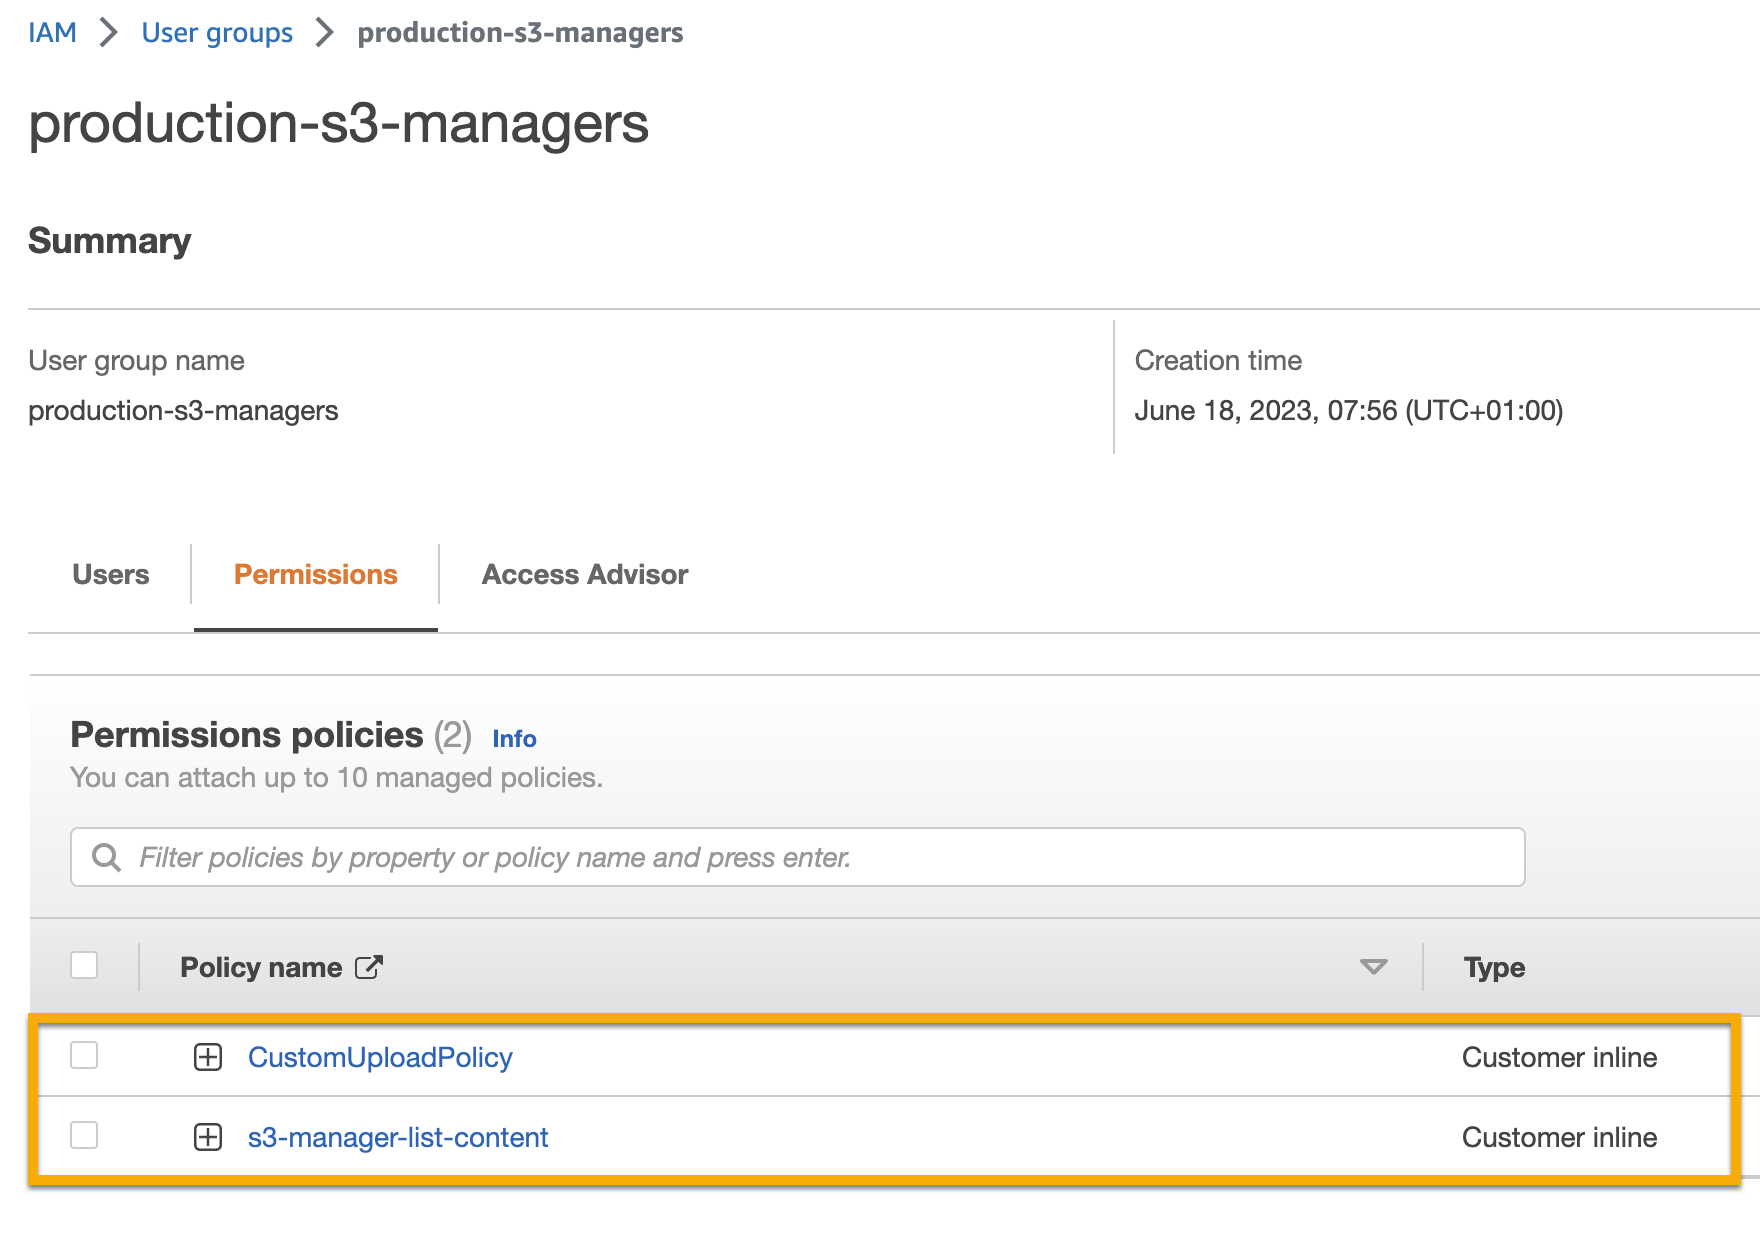
Your IAM user group now has two associated custom inline policies for a specific bucket, as shown below. One is to read the bucket’s objects, and the other is to upload objects into the bucket.
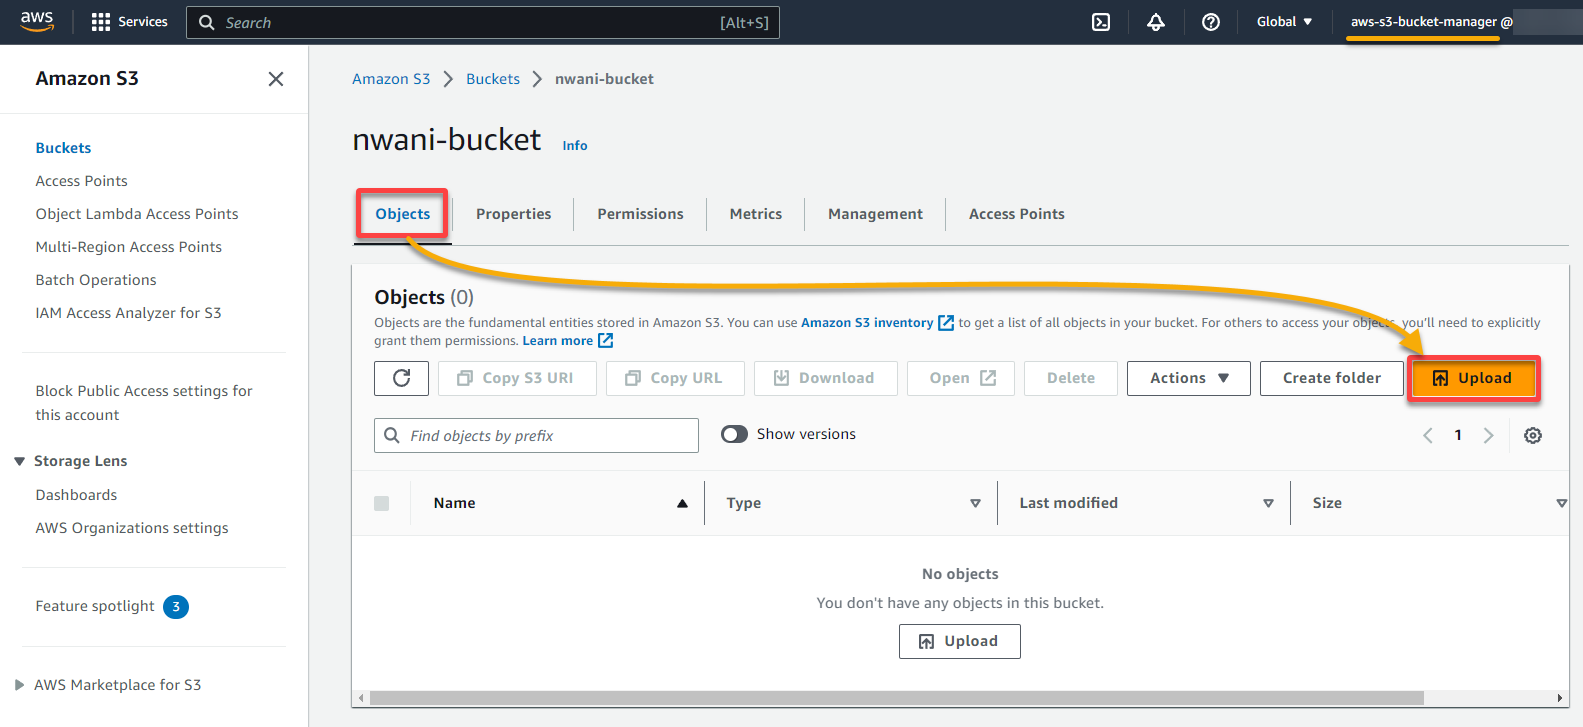
4. Finally, switch to your IAM user, navigate to the Buckets page, and upload an object to the bucket to confirm the user’s elevated permission.
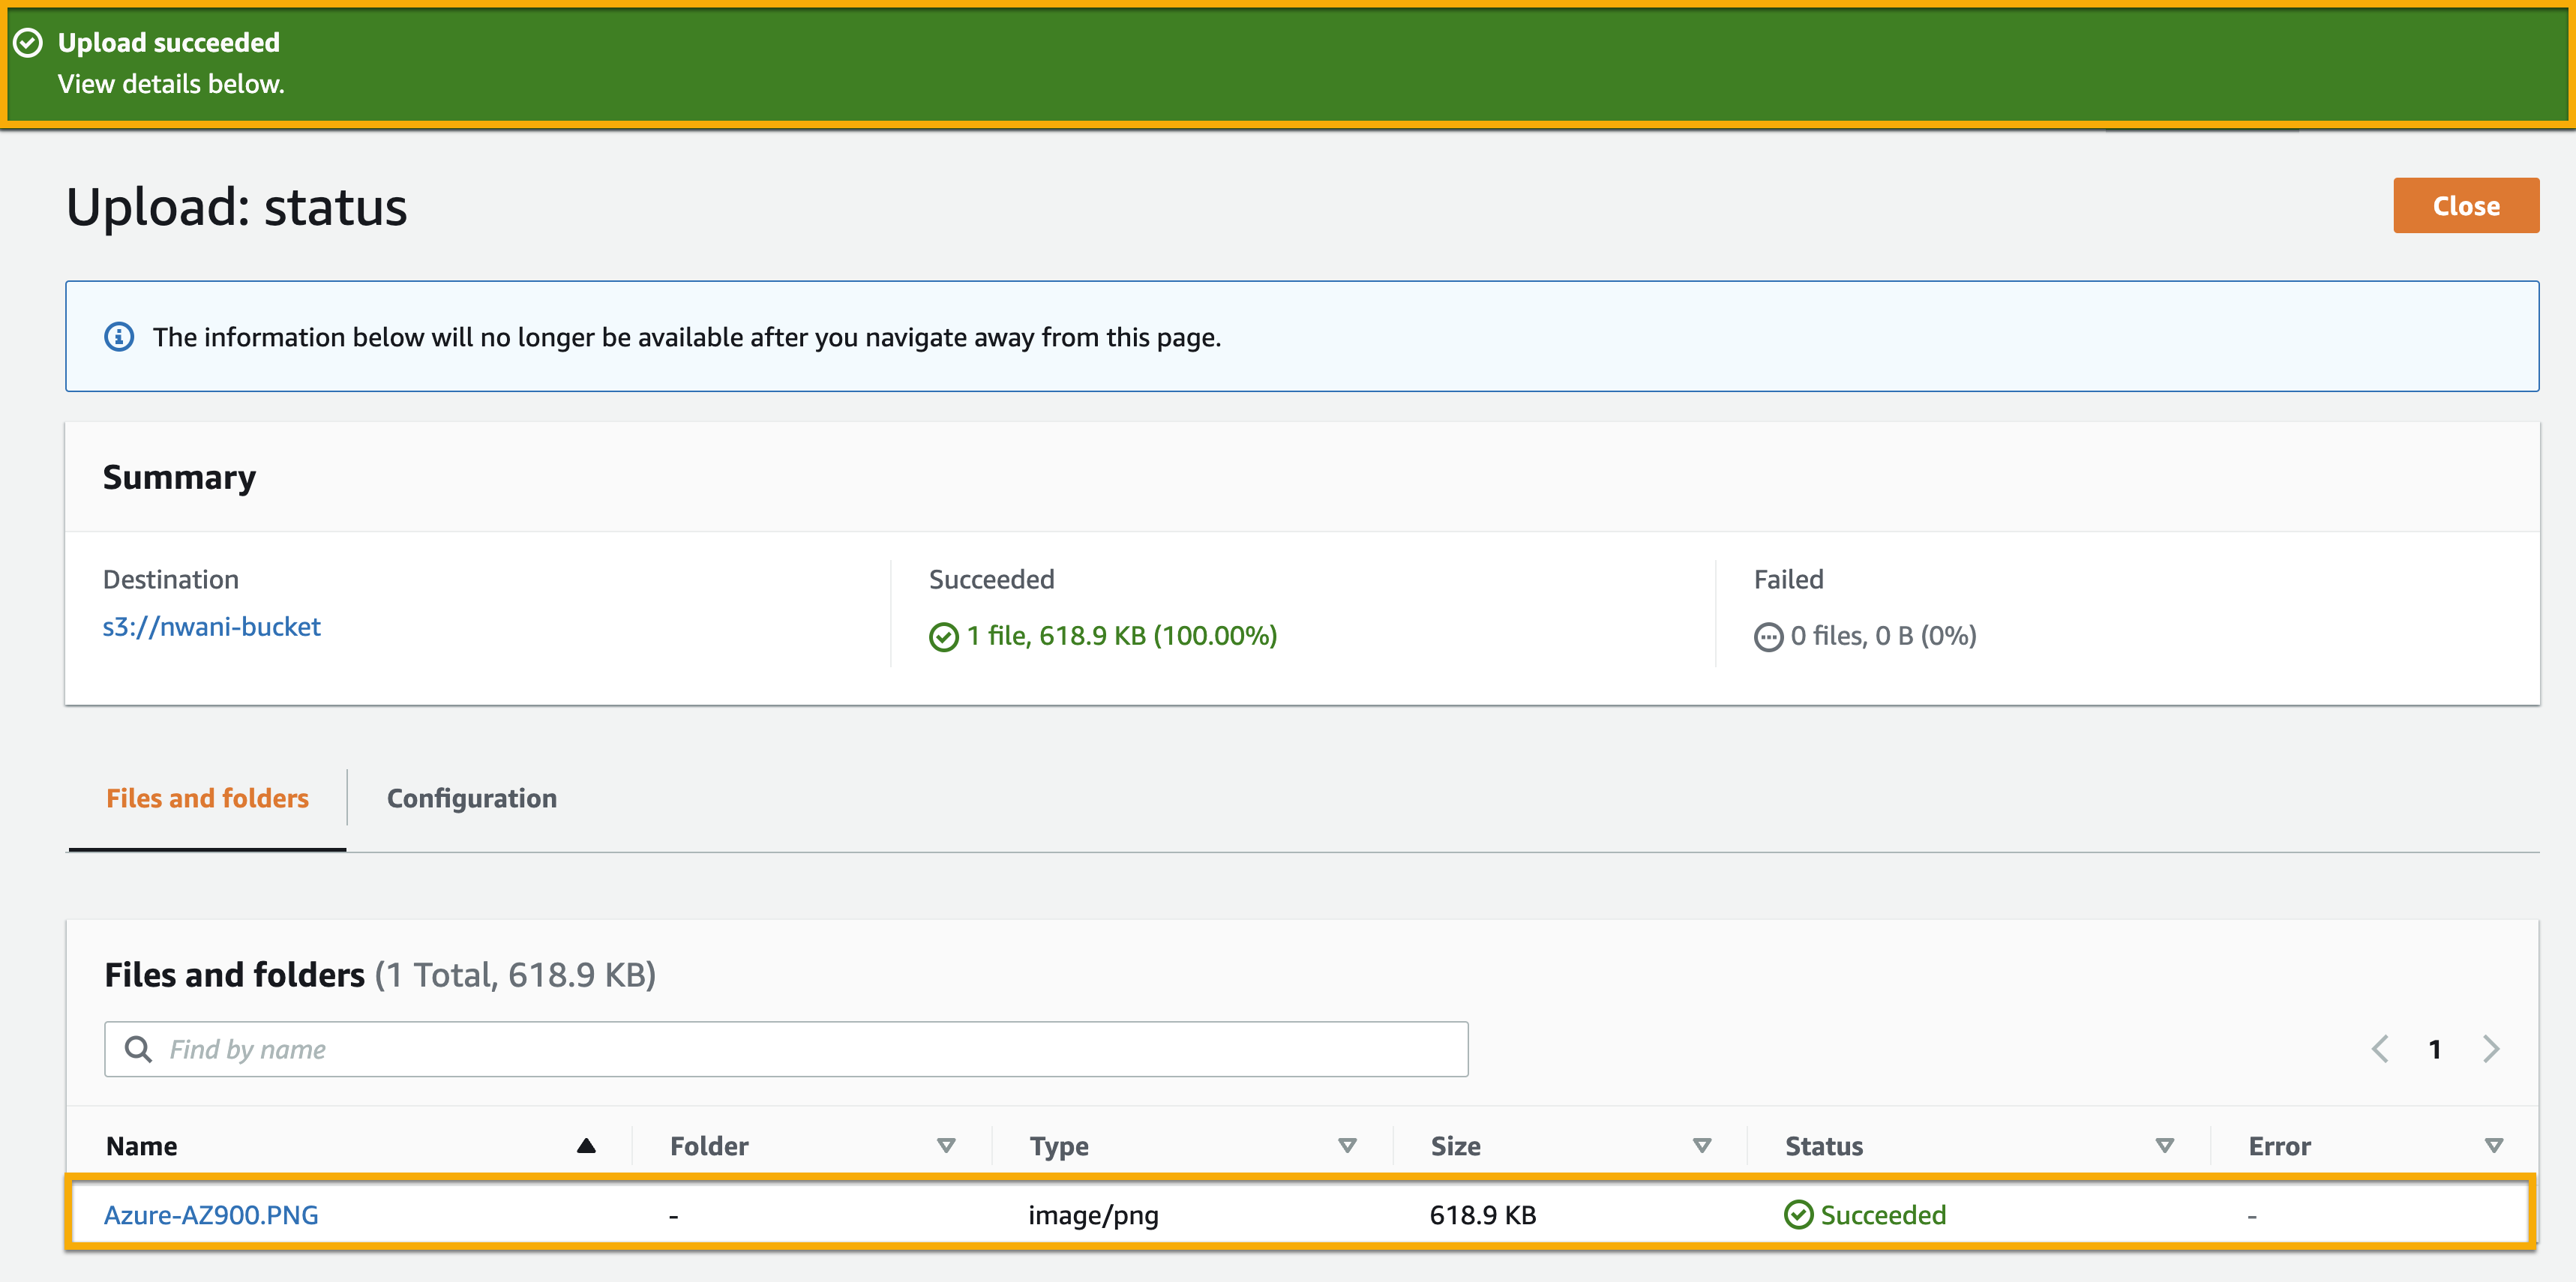
If successful, you will see a notification, and the uploaded object will be listed, as shown below.
Conclusion
Conclusively, you should now know how to manage user access to your S3 service via an S3 bucket policy. In addition, you have learned about the User Groups feature of the IAM service and how they improve the process of managing user permissions at a large scale.
Now, you can confidently streamline S3 bucket access to your IAM users with inline policies via the Visual Editor or the JSON Policy Editor.
As a next step, why not optimize files within your S3 buckets and reduce storage costs using proper storage classes?


