


Database servers have been one of the most critical infrastructures in modern technology. But how do you keep the database running despite problems like system failure or a service crash? Well, you can set up a Galera Cluster and ProxySQL. When one server is down, another server still keeps your data accessible.
In this tutorial, you’ll learn to set up high availability database system with MariaDB Galera Cluster and ProxySQL using Ubuntu servers.
Ready? Read on and start securing your data!
Prerequisite
This tutorial will be a hands-on demonstration. To follow along, be sure you have the following:
- Three or more Linux servers – This tutorial uses three Ubuntu Servers 20.04 (as MariaDB servers) for the MariaDB (mariabdb1, mariabdb2, and mariabdb3). And one for Galera Cluster and ProxySQL (proxysql).
- A non-root user with root privileges or root/administrator user.
Installing and Configuring MariaDB Server
MariaDB server is one of the most popular database servers created by original MySQL developers. The MariaDB provides more storage engines than MySQL, such as MyRocks, Aria, and ColumnStore.
MariaDB also provides speed improvements to original MySQL, such as parallel replication, faster and safer replication, and adjustable size for MyISAM and Aria storage engines. And in this tutorial, you’ll install the MariaDB server from the official MariaDB repository, which provides an up-to-date and latest version of MariaDB server packages.
1. Open your terminal, log in to your MariaDB servers (mariadb1, mariadb2, and mariadb3) one at a time and perform the following steps.
2. Run the apt install command below to install some basic packages for managing repositories.
apt install software-properties-common apt-transport-https -y
3. Once installed, run the following commands to add the GPG key and repository of MariaDB packages.
# Add the GPG key
apt-key adv --recv-keys --keyserver hkp://keyserver.ubuntu.com:80 0xF1656F24C74CD1D8
# Add offical MariaDB repository
add-apt-repository 'deb [arch=amd64,arm64,ppc64el] http://sfo1.mirrors.digitalocean.com/mariadb/repo/10.8/ubuntu focal main'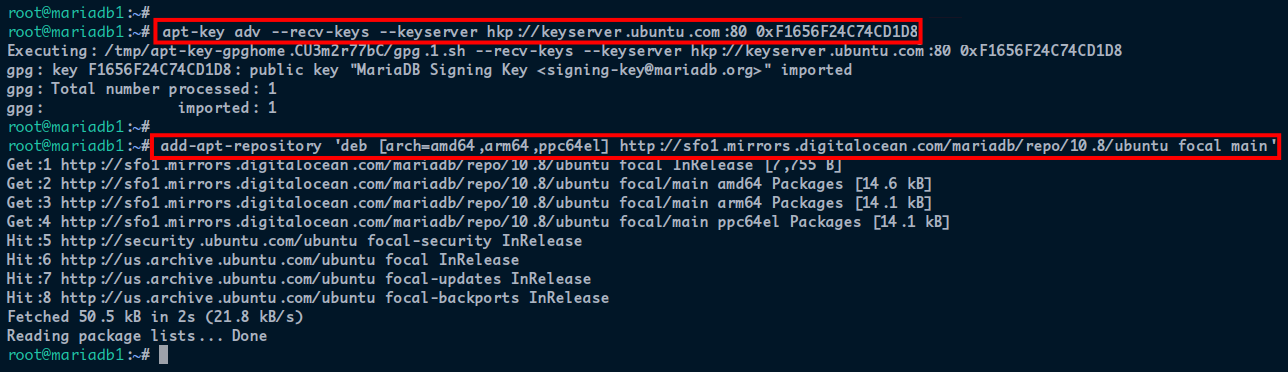
4. Now, run the apt commands below to update and refresh the repository package index and install MariaDB packages.
# Update and refresh repository packages
apt update -y
# Install MariaDB
apt install mariadb-server mariadb-client -y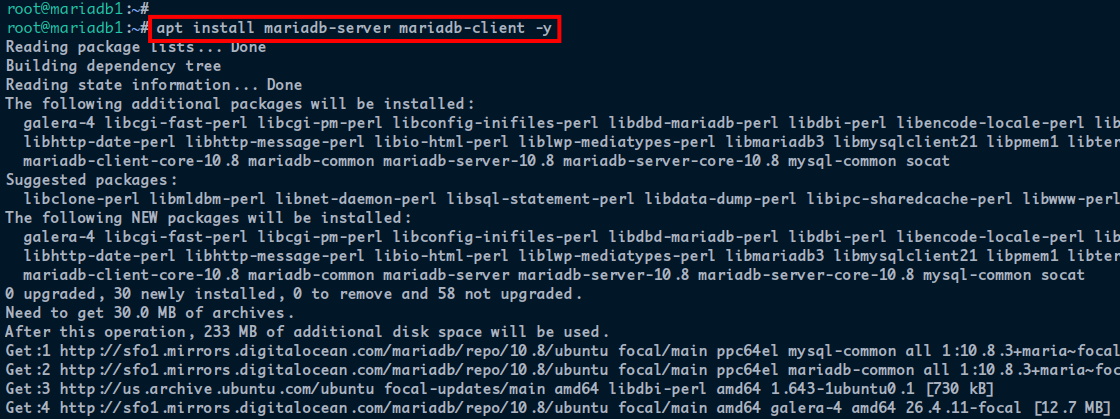
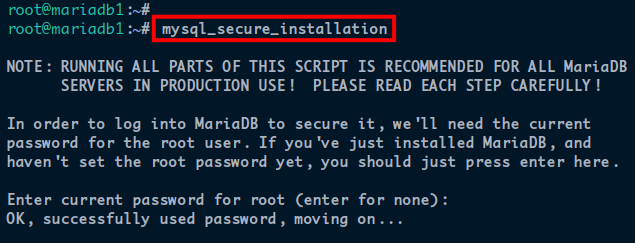
5. Once the MariaDB server is installed, run the mysql_secure_installation command below to start configuring the MariaDB server.
mysql_secure_installationYou’ll be asked for the MariaDB configurations below:
The default MariaDB installation comes without a root password, so press Enter to continue.
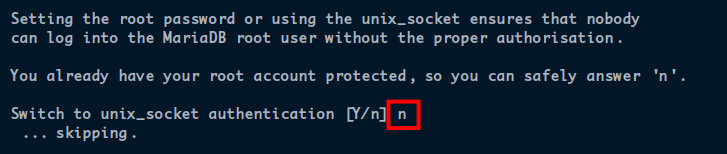
6. Next, input n to skip the unix_socket authentication configuration. In the MariaDB cluster, MariaDB users should not use the unix_socket_authentication.
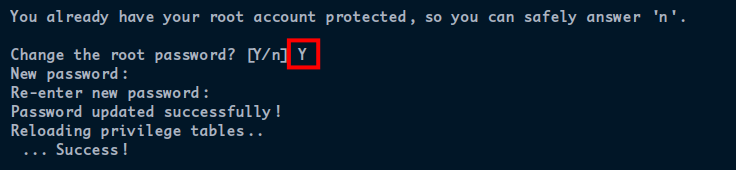
7. Input Y to accept the root change password prompt and input a strong password for configuring the MariaDB. Be sure to use the same password for all your MariaDB servers.
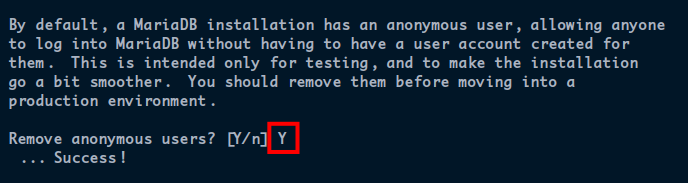
8. After setting the root password, input Y again to remove the default anonymous user from the MariaDB server.
9. Input n to skip setting the remote login MariaDB root user. In the MariaDB cluster, the root user should be allowed to connect from any node.

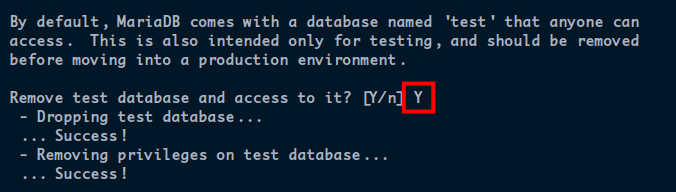
10. Now, input Y to remove the default database test from the MariaDB server.
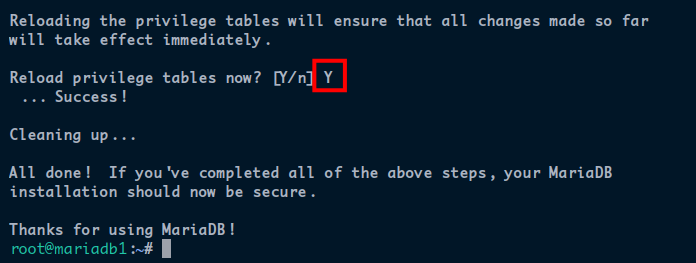
11. Lastly, input Y again to reload all privilege tables and apply new changes on the MariaDB server.
Deploying a MariaDB Galera Cluster
After installing the MariaDB server, you’re ready to set up the MariaDB Galera Cluster on all your MariaDB servers. The MariaDB Galera Cluster provides high availability with multiple MariaDB servers. This provision allows you to read and write on any cluster node and provides automatic node joining and parallel replication.
To set up the MariaDB Galera Cluster to your MariaDB servers:
1. Run the systemctl command below, which doesn’t provide output, but stops the MariaDB service before configuring the MariaDB Galera Cluster.
systemctl stop mariadb2. Next, edit the /etc/mysql/mariadb.conf.d/60-galera.cnf configuration file on each MariaDB server with your preferred editor. Replace the content of the file with the below code.
Copy and paste the following configuration for each MariaDB server. The wsrep_node_address and wsrep_node_name options below refer to the MariaDB server’s IP address and hostname. Replace these options’ values depending on which MariaDB server you’re on.
[galera]
binlog_format=ROW
default-storage-engine=innodb
innodb_autoinc_lock_mode=2
bind-address=0.0.0.0

# Galera Provider Configuration
wsrep_on=ON
wsrep_provider=/usr/lib/galera/libgalera_smm.so

# Galera Cluster Configuration
# Cluster Name
wsrep_cluster_name="mariadb_test_cluster"
# IP addresses of MariaDB servers to include in the cluster
wsrep_cluster_address="gcomm://172.16.5.11,172.16.5.12,172.16.5.13"

# Galera Synchronization Configuration
wsrep_sst_method=rsync

# Galera Node Configuration
wsrep_node_address="172.16.5.11"
wsrep_node_name="mariadb1"
3. Next, move to the mariadb1 server, and run the following command to initialize the MariaDB Galera Cluster. This command doesn’t have an output, but you can check the Galera cluster status in the next step.
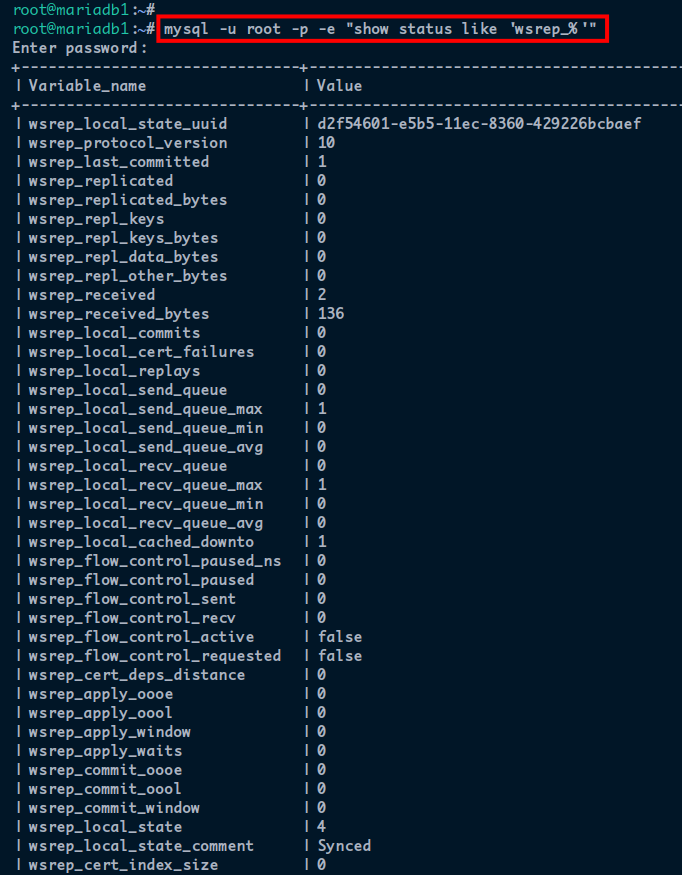
galera_new_cluster4. Now run the mysql commands below to check and verify the MariaDB Galera cluster status.
# Checking detailed Galera Cluster
mysql -u root -p -e "show status like 'wsrep_%'"

# Checking the cluster size
mysql -u root -p -e "show status like 'wsrep_cluster_size'"
In the following screenshot, you can see detailed MariaDB Galera Cluster status.
5. Next, move to the mariadb2 and mariadb3 servers and run the following command to start the MariaDB service.
This command doesn’t provide output but automatically joins the mariadb2 and mariadb3 servers to the MariaDB Galera Cluster on the mariadb1.
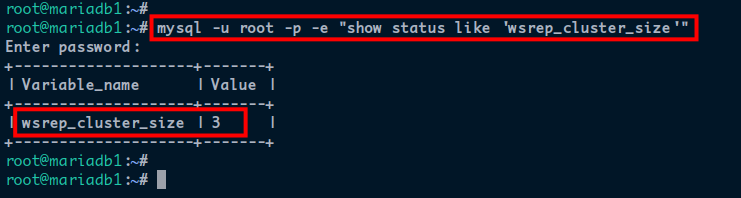
systemctl start mariadb6. Lastly, move back to the mariadb1 server, and run the mysql command below to check and verify the cluster size.
mysql -u root -p -e "show status like 'wsrep_cluster_size'"The output below shows that the MariaDB Cluster size now has three nodes/servers (mariadb1, mariadb2, and mariadb3).
Installing ProxySQL on Ubuntu Server
After configuring your MariaDB Galera Cluster, it’s time to provide zero downtime for your MariaDB/MySQL deployment with advanced query rules with ProxySQL. These rules allow you to route and distribute database traffic. ProxySQL delivers high availability and automatic failover MariaDB servers.
But first, you’ll have to install ProxySQL on your proxysql server as a load-balancer for your MariaDB Galera Cluster.
1. Log in to your proxysql server, and run the following commands to perform the following:
- Download (wget) the pre-built binary package for the ProxySQL. The URL (/v2.4.1/proxysql_2.4.1-ubuntu20_amd64.deb) may change depending on the recent release.
- Install the ProxySQL using the dpkg command.
# Download ProxySQL
wget https://github.com/sysown/proxysql/releases/download/v2.4.1/proxysql_2.4.1-ubuntu20_amd64.deb

# Install ProxySQL
dpkg -i proxysql_2.4.1-ubuntu20_amd64.deb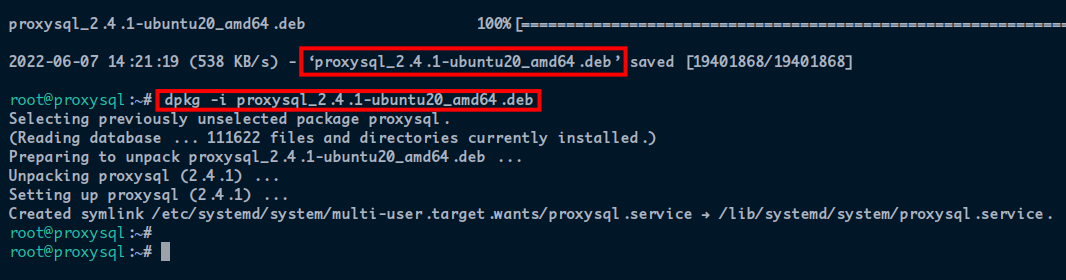
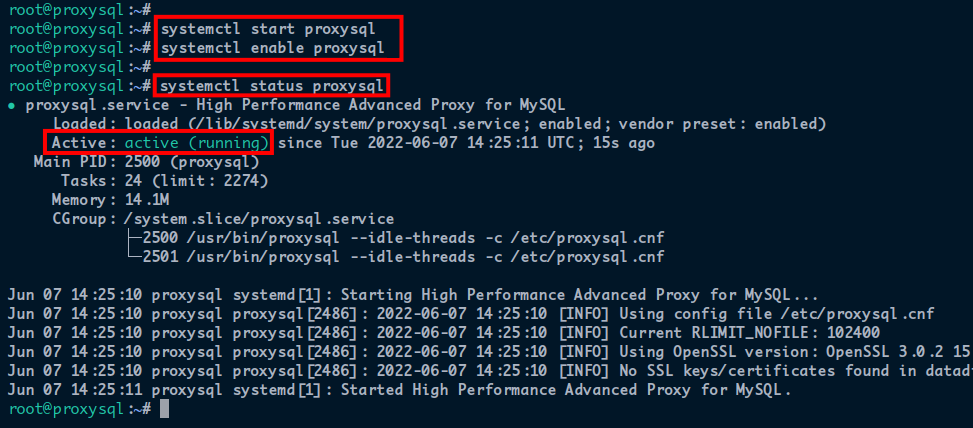
2. Next, run the systemctl commands below to perform the following:
start and enable the ProxySQL service. This command automatically starts the ProxySQL service at system boot/startup.
- Check and verify the ProxySQL service status.
systemctl start proxysql
systemctl enable proxysql
systemctl status proxysql
The output below shows that the ProxySQL service is active (running) with the default configuration (/etc/proxysql.cnf).
3. Next, run the apt install command below to install the mariadb-client package. This package is needed for configuring the ProxySQL.
apt install mariadb-client -y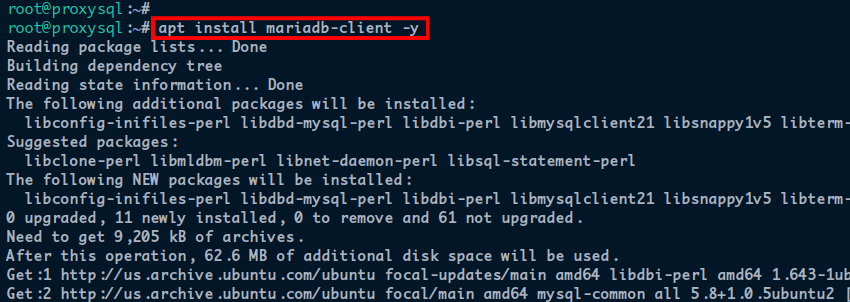
4. Once installed, run the mysql command below to connect to the ProxySQL and start configuring the ProxySQL. You’ll be prompted for the password of ProxySQL. Input the default ProxySQL password admin.
mysql -u admin -p -h 127.0.0.1 -P 6032 --prompt='ProxySQLAdmin> '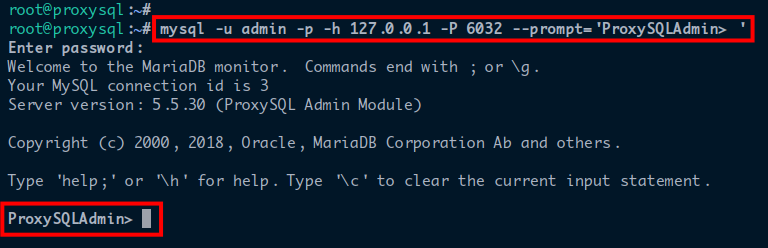
5. Run the following query to change the default ProxySQL password.
This tutorial uses the password AdminStrongPassword as the admin password for ProxySQL. But be sure to use a strong and unique password for increased ProxySQL security.
UPDATE global_variables SET variable_value='admin:AdminStrongPassword' WHERE variable_name='admin-admin_credentials';
6. Lastly, run the below query to save the changes on your ProxySQL server.
In ProxySQL, changes are applied after the LOAD MYSQL … RUNTIME; query. But to make the changes persistent, you also execute the LOAD MYSQL … TO DISK; query.
# Apply new changes
LOAD ADMIN VARIABLES TO RUNTIME;

# Making new changes persistent
SAVE ADMIN VARIABLES TO DISK;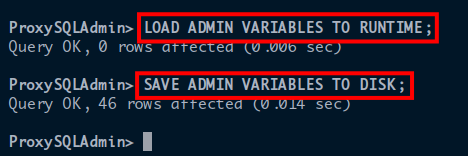
Setting Up a User for Monitoring MySQL/MariaDB Servers
Your MySQL/MariaDB servers are up, but you must monitor their health status. This monitoring includes ping logs, connection logs, and replication, and you’ll need a dedicated user for these tasks.
1. Switch back to the mariadb1 server and run the mysql command below to log in to the MariaDB/MySQL shell. Input the root password when prompted.
mysql -u root -p2. Next, run the following query to create a new MySQL user called monitor with the password as MonitoringPassword. Your proxysql server will use this MySQL user to monitor all MariaDB clusters.
CREATE USER 'monitor'@'%' IDENTIFIED BY 'MonitoringPassword';
FLUSH PRIVILEGES;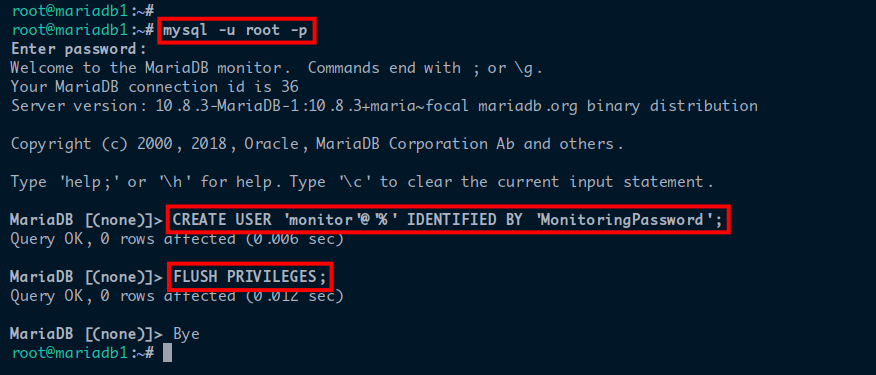
3. Move back to the proxysql server, and run the following query to add and define the user monitor with the same password MonitoringPassword.
# Define a user for monitoring the ProxySQL server
UPDATE global_variables SET variable_value='monitor' WHERE variable_name='mysql-monitor_username';
# Define the user's password
UPDATE global_variables SET variable_value='MonitoringPassword' WHERE variable_name='mysql-monitor_password';
4. Now, run the following query to define the various monitoring interval of the ProxySQL against the MariaDB cluster.
UPDATE global_variables SET variable_value='2000' WHERE variable_name IN ('mysql-monitor_connect_interval','mysql-monitor_ping_interval','mysql-monitor_read_only_interval');5. Run the following queries to save and persistent the changes on the ProxySQL server.
LOAD MYSQL VARIABLES TO RUNTIME;
SAVE MYSQL VARIABLES TO DISK;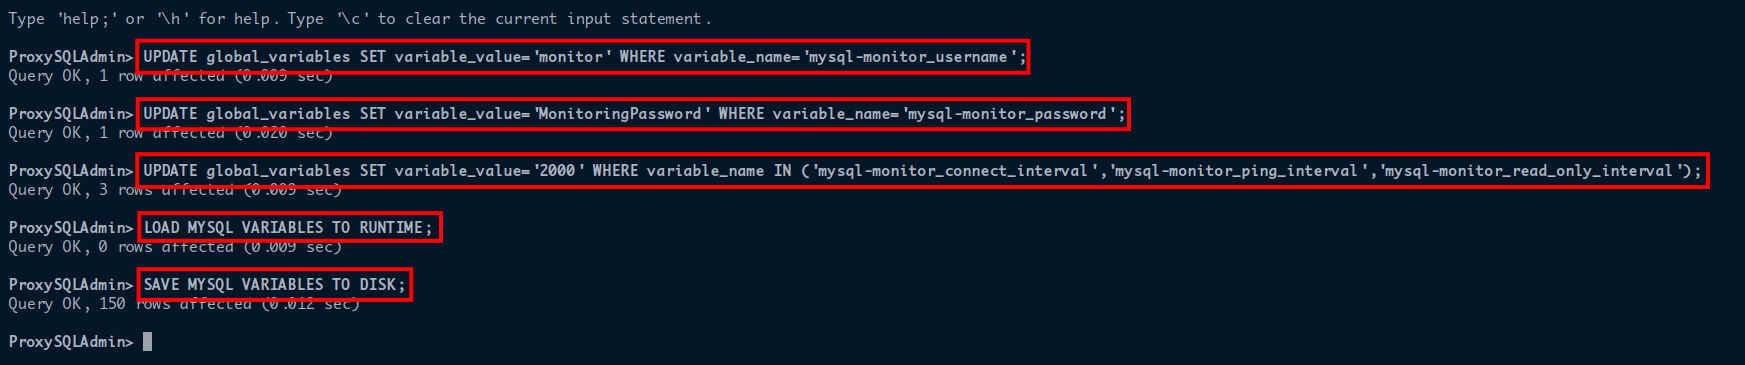
6. Lastly, run the query below to check and verify the details of the ProxySQL monitoring configurations.
SELECT * FROM global_variables WHERE variable_name LIKE 'mysql-monitor_%';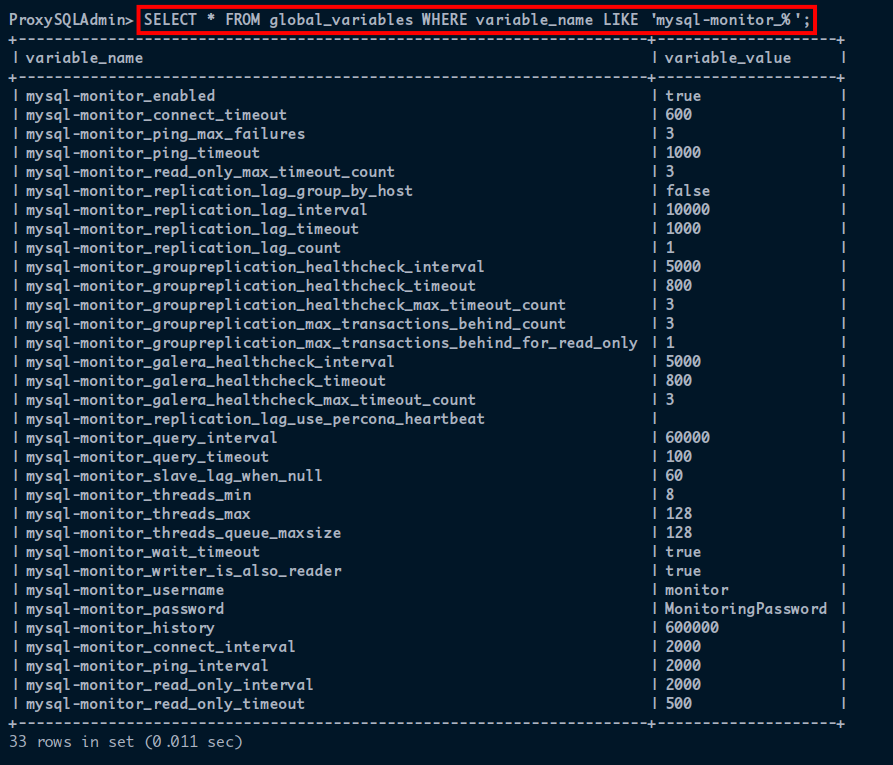
Adding the MySQL/MariaDB Servers as Backend
At this point, you’ve entirely configured your ProxySQL server, and now it’s time to add the MariaDB Galera Cluster as the backend to the ProxySQL server. Why? This backend is where you’ll store your data, and the ProxySQL server is where your application will be connected to.
1. On the proxysql server, run the query below to check the table mysql_replication_hostgroups. You can use this table to decide which MariaDB server acts as writer and reader.
SHOW CREATE TABLE mysql_replication_hostgroups\G2. Next, run the following query to define the host groups (writer_hostgroup as 1 and reader_hostgroup as 2).
This query allows the MariaDB servers in the writer_hostgroup to accept any queries that can change/write data. But, the MariaDB servers on the reader_hostgroup can only accept queries for reading data.
INSERT INTO mysql_replication_hostgroups (writer_hostgroup,reader_hostgroup,comment) VALUES (1,2,'cluster1');
3. Run the below queries to add all MariaDB servers to the ProxySQL server. In this tutorial, all MariaDB servers are on the hostgroup_id number 1. With this setup, servers are on writer_hostgroup and can accept queries for changing data.
INSERT INTO main.mysql_servers(hostgroup_id,hostname,port) VALUES (1,'172.16.5.11',3306);
INSERT INTO main.mysql_servers(hostgroup_id,hostname,port) VALUES (1,'172.16.5.12',3306);
INSERT INTO main.mysql_servers(hostgroup_id,hostname,port) VALUES (1,'172.16.5.13',3306);
4. Now run the following queries to save and persist changes to the ProxySQL server.
LOAD MYSQL SERVERS TO RUNTIME;
SAVE MYSQL SERVERS TO DISK;
SAVE MYSQL VARIABLES TO DISK;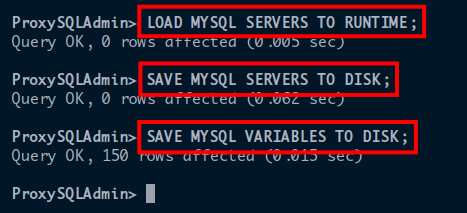
5. After saving the changes, run the following queries to verify the list of available MariaDB servers on the ProxySQL and verify the monitoring status.
# Checking the list MariaDB servers
SELECT * FROM mysql_servers;
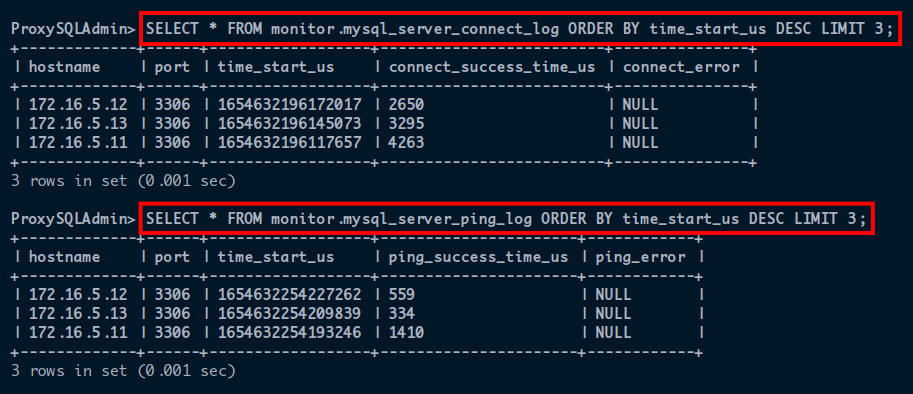
# MariaDB servers monitoring
SELECT * FROM monitor.mysql_server_connect_log ORDER BY time_start_us DESC LIMIT 3;
SELECT * FROM monitor.mysql_server_ping_log ORDER BY time_start_us DESC LIMIT 3;In the following output, all MariaDB servers are added to the ProxySQL server, all with the ONLINE status. All MariaDB servers are on the hostgroup_id number 1, indicating all servers are on the writer_hostgroup.

For MariaDB servers monitoring below, you can see the value of the connect_success_time_us and ping_success_time_us sections. These values indicate all MariaDB servers have been monitored correctly.
If there’s a problem with one of the MariaDB servers (e.g., MariaDB service down), you’ll get an error message on the connect_error and ping_error sections. Also, the connect_success_time_us and ping_success_time_us will have 0 value.
Creating a New MySQL/MariaDB User
You now have a high-available MariaDB database deployment with MariaDB Galera Cluster and ProxySQL. But apart from the root user, you’ll also need a database and user for your applications.
You’ll create a new MariaDB user and database for your application. You’ll define the new user on your ProxySQL server so that the new user can connect to the MariaDB server through the ProxySQL.
1. Switch back to your mariadb1 server, and run the following command to log in to the MariaDB shell.
mysql -u root -p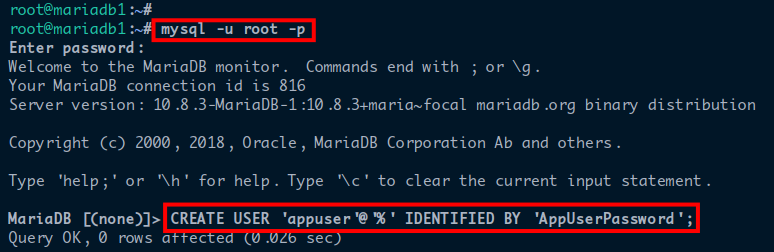
2. Next, run the following queries to add a new MariaDB user appuser with the password AppUserPassword and the new database appdb.
CREATE USER 'appuser'@'%' IDENTIFIED BY 'AppUserPassword';
CREATE DATABASE appdb;
GRANT ALL PRIVILEGES ON appdb.* to appuser@'%' WITH GRANT OPTION;
FLUSH PRIVILEGES;
3. Back to your ProxySQL server, run the following query to define the new MariaDB user to your ProxySQL server.
INSERT INTO mysql_users(username,password,default_hostgroup) VALUES ('appuser','AppUserPassword',1);
4. Now, run each query below to save all the changes.
LOAD MYSQL USERS TO RUNTIME;
SAVE MYSQL USERS TO DISK;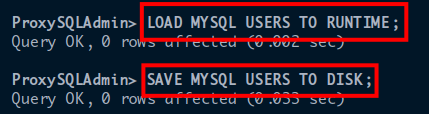
5. Run the query below to check and verify the list of users on the ProxySQL server.
SELECT * FROM mysql_users;You will see the new user appuser is added to the ProxySQL server with active status.

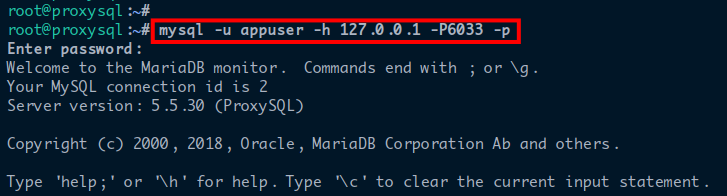
6. Next, run the below command to log in as the new user appuser through the ProxySQL server. Be sure to change the IP address 127.0.0.1 with the external IP address of your ProxySQL server.
mysql -u appuser -h 127.0.0.1 -P6033 -pEnter the new user’s (appuser) password when prompted, as shown below.
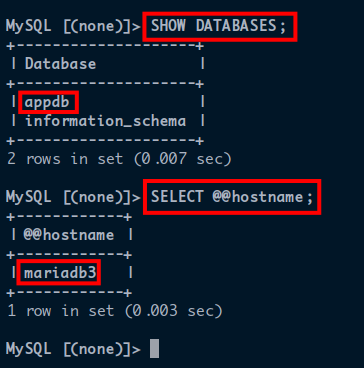
7. Finally, run the below queries to check the list of available databases and which MariaDB you’re currently connected to.
SHOW DATABASES;
SELECT @@hostname;
The output below shows that the database appdb is available, and the session is currently connected to the MariaDB server mariadb3. You’ll be connected to a different MariaDB server each time you connect.
Conclusion
In this tutorial, you’ve learned how to configure the MariaDB Galera Cluster on multiple Ubuntu servers. You’ve also set up ProxySQL as the load balancer for your MariaDB Galera Cluster deployment. With this deployment, you now have a high-available MariaDB deployment with automatic failover through the ProxySQL server.
At this point, with a dedicated user and database for your application, you’ve ensured your data is stored and automatically replicated on multiple servers in the MariaDB Galera Cluster.
To build on this newfound knowledge, why not set up Read/Write split on the ProxySQL server and define new query rules to enable ProxySQL Sharding?


