


Does the SharePoint admin center bore you, find it lacking, and want to switch to the command line? Yes, it is possible with the PowerShell SharePoint Online Management module.
Not a reader? Watch this related video tutorial!This module allows you to accomplish the same tasks that you typically do in the SharePoint admin center in PowerShell. What’s more, you can automate your SharePoint Online tasks!
This tutorial teaches the PowerShell SharePoint Online Management basics. You’ll learn to install the module, perform common administrative tasks, and automate repetitive actions. Don’t go anywhere and dive right in!
Prerequisites
This tutorial will be a hands-on demonstration. If you’d like to follow along, be sure you have the following:
- You must have a SharePoint Administrator role or higher in a Microsoft 365 tenant.
- You must know your SharePoint Online admin URL and portal URL. Refer to this link to know how to get the SharePoint Online admin URL in your tenant.
This tutorial will be using the portal URL HTTPS://lzex.sharepoint.com and the admin URL HTTPS://lzex-admin.sharepoint.com.
- Windows PowerShell 5.1 or the latest PowerShell 7 on Windows. This tutorial uses Windows PowerShell 5.1 on Windows 10.
Installing the PowerShell SharePoint Online Module
To manage SharePoint Online with PowerShell, you must first install the PowerShell SharePoint Online Management module. This module provides the cmdlets that allow you to connect and manage your SharePoint online organization and resources.
The quickest and most convenient way to install the PowerShell SharePoint Online module is from the PowerShell gallery using the Install-Module cmdlet. To do so, follow the below steps.
1. Open PowerShell as an administrator.
2. Run the command below next. This command installs Microsoft.Online.SharePoint.PowerShell module.
Install-Module -Name Microsoft.Online.SharePoint.PowerShell3. To confirm that the module installation is successful, run the below command to get the module information.
Get-Module -Name Microsoft.Online.SharePoint.PowerShell -ListAvailable | Select-Object Name,VersionThe command returns the module’s name and version. As you can see below, there’s one version of Microsoft.Online.SharePoint.PowerShell module on this computer. The latest version as of this writing is 16.0.22615.12000.

4. Lastly, import the PowerShell SharePoint module by running the below command in PowerShell.
Note: While the PowerShell SharePoint Online module works with PowerShell 7, you must explicitly import the module with the -UseWindowsPowerShell switch.
# On Windows PowerShell 5.1
Import-Module Microsoft.Online.SharePoint.PowerShell

# On PowerShell 7x
Import-Module Microsoft.Online.SharePoint.PowerShell -UseWindowsPowerShell
Ignore the warning about unapproved verbs. This warning warns you about cmdlets that do not start with approved verbs in the Get-Verb list but do not affect the module’s functionality.
To avoid this warning, append the -DisableNameChecking switch to the Import-Module cmdlet.

Connecting to PowerShell SharePoint Online
You’re now ready to connect to the PowerShell SharePoint Online session. But before you do, understand that the syntax and method would vary depending your your admin account’s multifactor authentication status.
Administrator Account without MFA
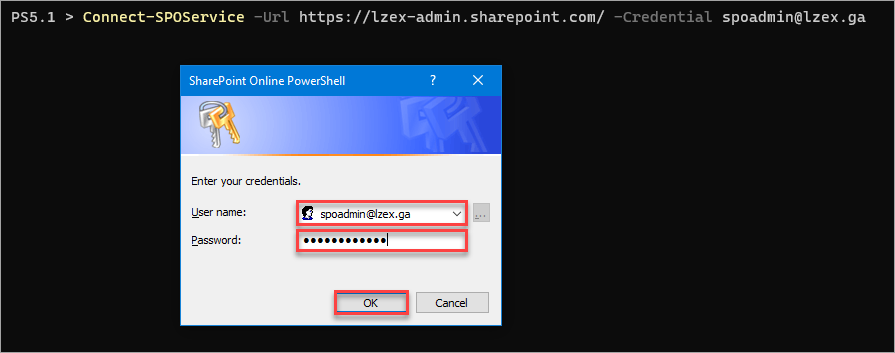
If your admin account is not MFA-enabled, run the below command Connect-SPOService. Specify your admin URL after the -Url parameter and your user principal name (UPN) after the -Credential parameter.
Connect-SPOService -Url <https://tenant-admin.sharepoint.com/> -Credential [email protected]
Type your password on the next prompt and press Enter.

The -Credential parameter also accepts a PSCredential object, which you can create with the Get-Credential cmdlet.
Administrator Account with MFA
For an MFA admin account, follow the steps below to connect to the PowerShell SharePoint Online session.
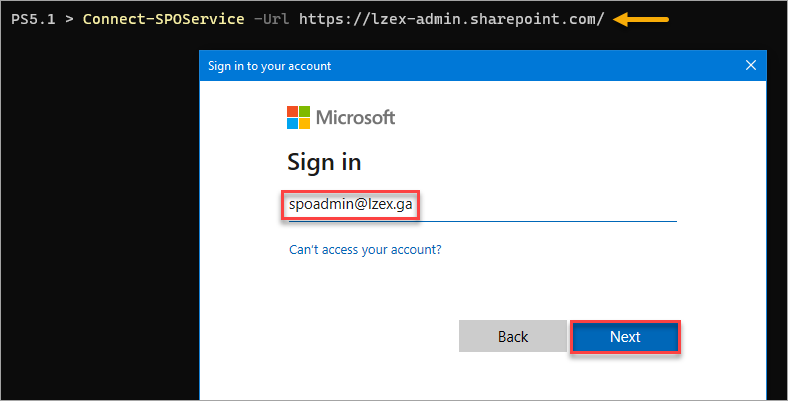
1. Run the below command in PowerShell. Ensure to specify the correct SharePoint admin URL.
Connect-SPOService -Url https://tenant-admin.sharepoint.com/2. On the Sign in window that pops up, type your admin username and click Next.
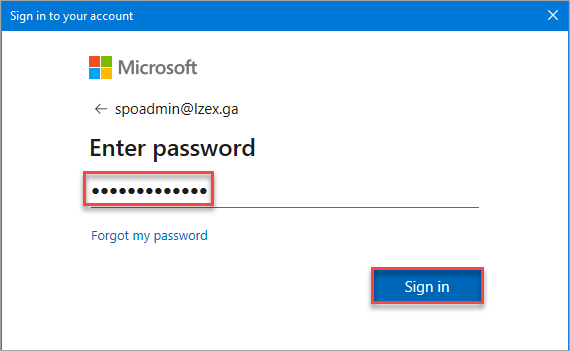
3. Next, type the password for the admin account and click Sign in.
4. Finally, complete your MFA challenge. Depending on how you configured MFA for your account, the MFA method may differ from the screenshot below.
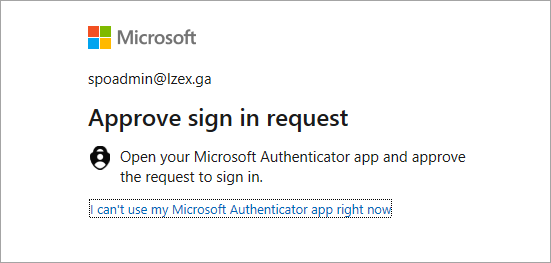
Once you’ve completed these steps, your PowerShell SharePoint online connection should now be active.
Managing Sites, Users, and Groups using the PowerShell SharePoint Module
Through PowerShell, you can perform some functionalities that SharePoint provides to SharePoint Online and various resources. In this section, you will be performing the typical SharePoint Online tasks, such as creating sites, creating groups, adding users, removing users from groups, and generating user reports.
Creating a New SharePoint Site
Leveraging the New-SPOSite command, you can create a new SharePoint Online site. Suppose you’re creating a new modern Team Site site called My First Team Site, execute the following steps.
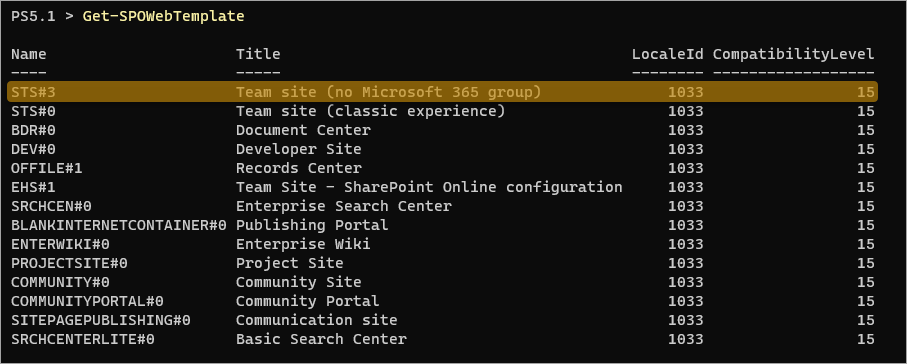
1. First, get the name of the Team Site template.
Get-SPOWebTemplateLook for the template you wish to apply to the new site. In this example, copy the Name value of the Team site (no Microsoft 365 group) template, STS#3.
2. Now, run the below command to create the modern Team Site. Make sure that the following parameters are complete.
Url - Specifies the new site's URL. This URL structure follows this convention - HTTPS://<tenant>.sharepoint.com/sites/<site-slug>.
Ensure the URL is unique. The site creation will fail if a site exists with the same URL, even if the site is in the recycle bin.
Title– Sets the title for your new site.
Owner - Assigns the site owner’s user principal name.
Note: SPO automatically sets the Company Administrator group as the site owner if the owner you specify has an administrator role.
Template– Indicates the web template you’re applying to the new site.
StorageQuota - Configures the site’s storage quota value in MB.
Note: The StorageQuota value takes effect only if the Site Storage Limit in your SharePoint Online organization is set to Manual. If the setting is Automatic, the tenant’s total storage quota takes precedence.
New-SPOSite `
    -Url 'https://lzex.sharepoint.com/sites/MyFirstTeamSite' `
    -Title 'My First Team Site' `
    -Owner '[email protected]' `
    -Template 'STS#3' `
    -StorageQuota 1000
If the site creation is successful, you will get no response or message in PowerShell.
3. Confirm that the new site exists by running the Get-SPOSite cmdlet.
Get-SPOSite -Identity 'https://lzex.sharepoint.com/sites/MyFirstTeamSite'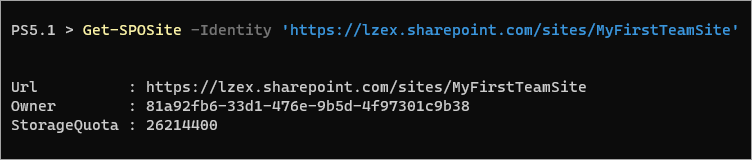
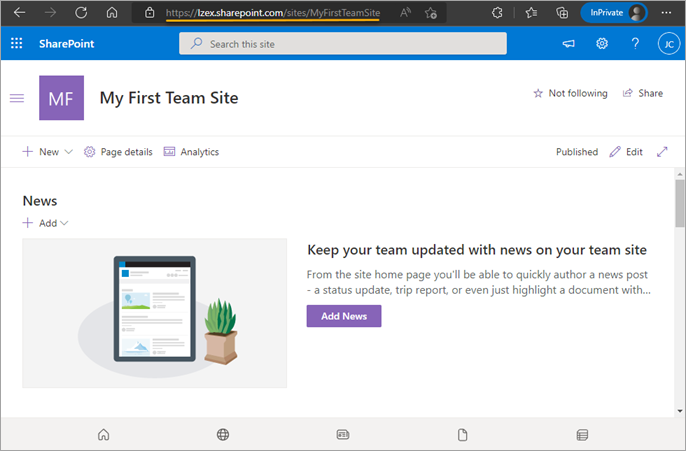
4. Lastly, open the SharePoint site URL in your web browser to confirm the site works.
Creating Site Groups and Adding Users
After creating a new SPO site, you can start creating groups and adding users with specific permission levels. In this section, you will be learning how to create groups and add users to such groups.
First, create the groups that follow the specifications in the table below.
To get a list of permission levels, visit the User permissions and permission levels in SharePoint Server documentation.
| Site | Group | PemissionLevels |
| https://tenant.sharepoint.com/sites/MyFirstTeamSite | Editing Team | Edit |
| https://tenant.sharepoint.com.sites/MyFirstSite | Design Team | Design |
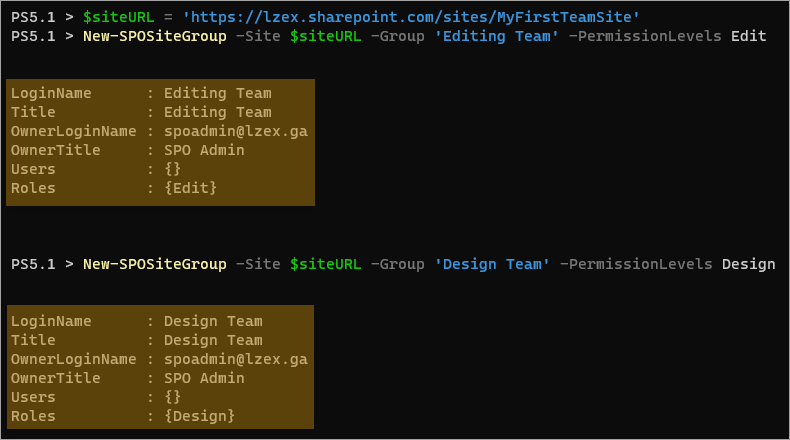
To create groups, the New-SPOSiteGroup cmdlet is the one to execute. Run the below commands to create the groups.
# Define the Site URL.
$siteURL = '<https://lzex.sharepoint.com/sites/MyFirstTeamSite>'
# Create the 'Editing Team' group with 'Edit' permission on the site.
New-SPOSiteGroup -Site $siteURL -Group 'Editing Team' -PermissionLevels Edit
# Create the 'Design Team' group with 'Design' permission on the site.
New-SPOSiteGroup -Site $siteURL -Group 'Design Team' -PermissionLevels Design
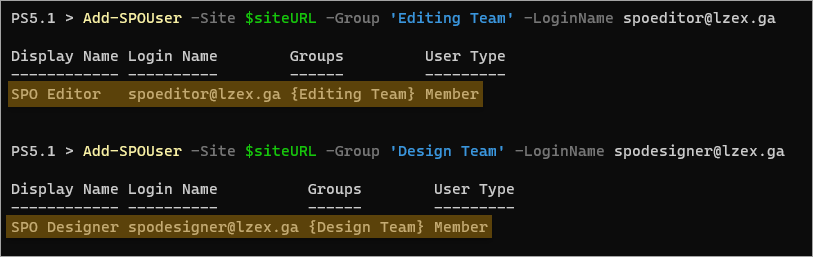
Next, add the users you want to be members of the groups. To do so, run the Add-SPOUser commands below.
# Add a user to the 'Editing Team' site group
Add-SPOUser -Site $siteURL -Group 'Editing Team' –LoginName [email protected]
# Add a user to the 'Design Team' site group
Add-SPOUser -Site $siteURL -Group 'Design Team' –LoginName [email protected]
After each command execution, you will receive results similar to the screenshot below.
Generating a Site Users List
Leveraging the Get-SPOUser command, you can generate which users can access the site.
Run the command below to generate the list of users on the My First Team Site.
Get-SPOUser -Site <https://lzex.sharepoint.com/sites/MyFirstTeamSite> | Format-Table -Wrap -AutoSize | Out-File <path-to-savereport> -Force -Width 360 -Append
The result would look similar to the below screenshot. As you can see, the output shows you the list of users and their group memberships.
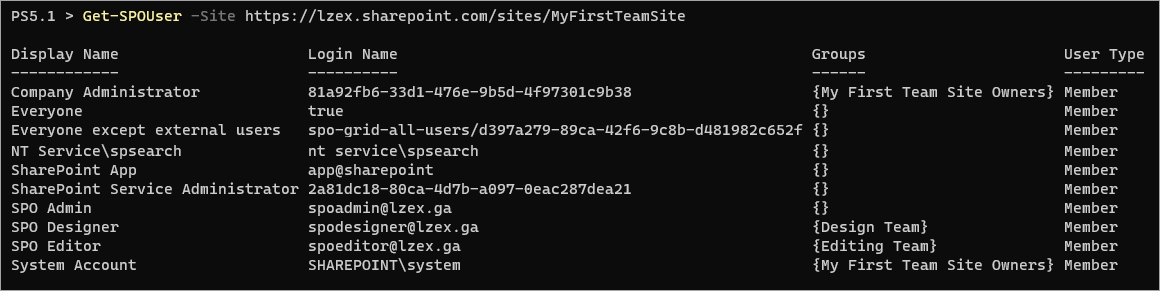
You can also output the results to different file types, including CSV, XML, JSON, YAML, HTML, and plain-text.
Remove Users from Site Groups
You may need to remove a user probably because you added the user to the wrong group or the user is no longer with the team. The Remove-SPOUser cmdlet is the right tool for this task.
For example, run the command below to remove the user [email protected] from the Design Teow.
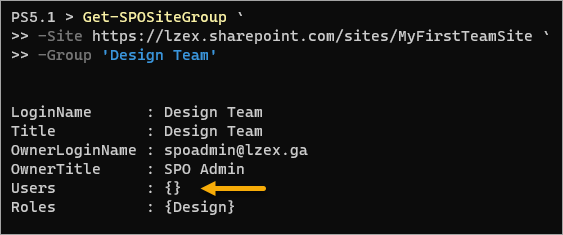
Remove-SPOUser `
    -LoginName [email protected] `
    -Site <https://lzex.sharepoint.com/sites/MyFirstTeamSite> `
    -Group 'Design Team'
As you can see, the Users list in the Design Team is now empty after removing its only member.
Using the PowerShell SharePoint Online for Automation
Since you’re working with PowerShell, you can leverage its power for automation. For example, scripting would be a more practical approach when creating multiple sites.
You can combine the PowerShell SharePoint Online New-SPOSite command with built-in commands like Import-Csv and ForEach-Object. The following steps give you an example of creating multiple sites with different properties.
1. Run the below command to create a new CSV file called sites.csv.
New-Item -Type File -Path .\sites.csv2. Next, open the CSV file in a text editor. This example uses notepad.exe.
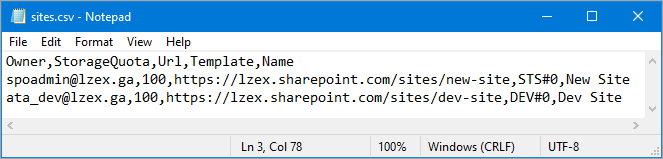
notepad.exe .\sites.csv3. Copy the below text into your CSV file and save it. Make sure to replace the Owner and Url values to match your organization.
Owner,StorageQuota,Url,Template,Name
[email protected],100,https://lzex.sharepoint.com/sites/new-site,STS#0,New Site
[email protected],100,https://lzex.sharepoint.com/sites/dev-site,DEV#0,Dev Site
Your CSV file would look like the screenshot below.
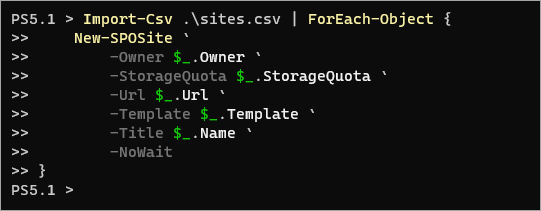
4. Run the following script in PowerShell.
Import-Csv .\sites.csv | ForEach-Object {
    New-SPOSite `
        -Owner $_.Owner `
        -StorageQuota $_.StorageQuota `
        -Url $_.Url `
        -Template $_.Template `
        -Title $_.Name `
        -NoWait
}
If there are no errors, you will not get any additional results on the screen.
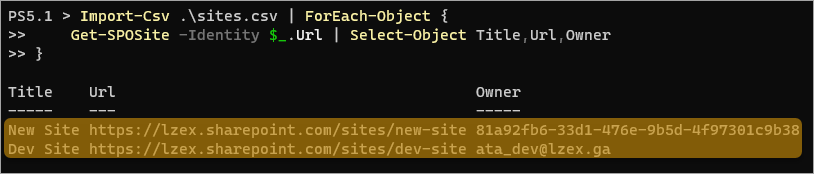
5. Finally, execute the following command to confirm the new sites exist.
Import-Csv .\sites.csv | ForEach-Object {
    Get-SPOSite -Identity $_.Url | Select-Object Title,Url,Owner
}
You can apply the same technique you just performed to automate bulk tasks like site group creations and site group membership updates.
Conclusion
The PowerShell SharePoint Online module allows you to improve how you manage your SharePoint Online organization. This module is not meant to replace the SharePoint admin center but as a tool to augment your SharePoint Online skills.
Apart from the PowerShell SharePoint Online module, did you know another module lets you manage SharePoint Online in PowerShell? Yes, that module is the PnP PowerShell module. Why don’t you also explore that module and compare which works best for you?


