


Database management can feel limited on your Windows system at some point. If you’re considering a switch from MySQL or just looking to expand your database expertise, it’s your lucky day. PostgreSQL on Windows offers a promising alternative!
This tutorial ushers you into the world of PostgreSQL and guides you through installation steps, fundamental operations, and essential commands.
Master PostgreSQL on Windows as your ticket to database stardom!
Prerequisites
Get ready for a hands-on experience in this tutorial. To join in, make sure you’ve got the following in place:
- A machine running Windows 7 or higher – This tutorial uses a Windows 10 64-bit machine.
- PowerShell 5+ or later installed on your machine – This tutorial uses PowerShell v7.
Installing PostgreSQL on Windows
Before you embark on your PostgreSQL journey and delve into the nitty-gritty of PostgreSQL, you’ll first install PostgreSQL on your Windows system. PostgreSQL is a celebrated open-source relational database management system (RDBMS) that stands out.
PostgreSQL’s stability, reliability, and advanced features distinguish itself from alternatives like MySQL. This RDBMS supports complex data types, offers the capacity to define custom functions, and enables the use of stored procedures.
To get started with PostgreSQL, you first need to install it on your Windows system as follows:
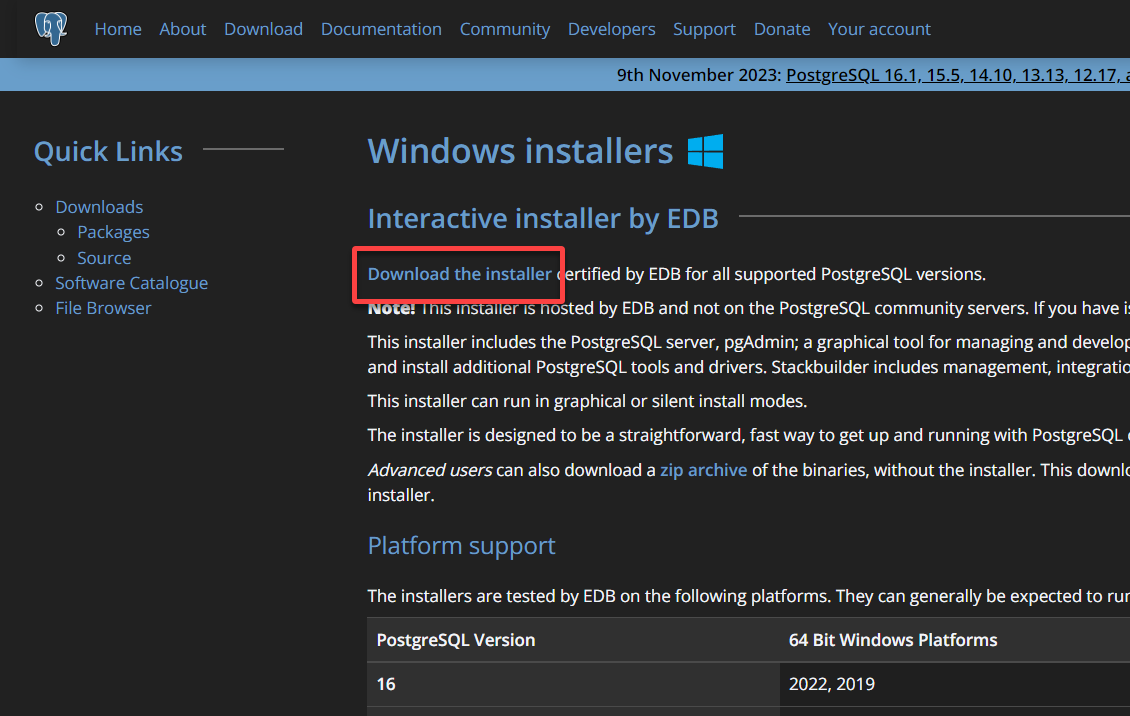
1. Open your preferred web browser, visit the official PostgreSQL website, and download the Windows installer. This tutorial uses PostgreSQL version 16.2, the latest as of the time of this writing.
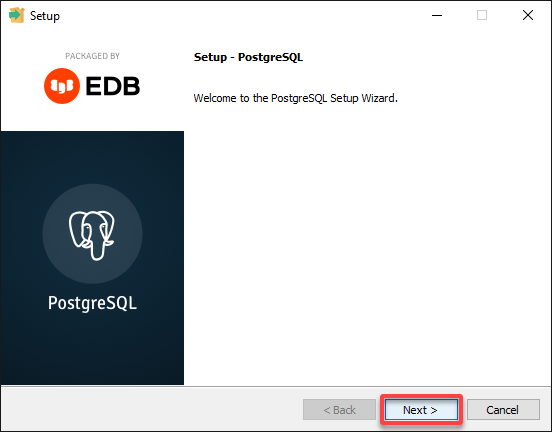
2. Next, open the downloaded installer to launch the installation wizard.
3. On the setup wizard, click Next to continue with the installation.
4. Now, choose a destination folder for the PostgreSQL installation (or retain the default setting), then click Next to proceed.

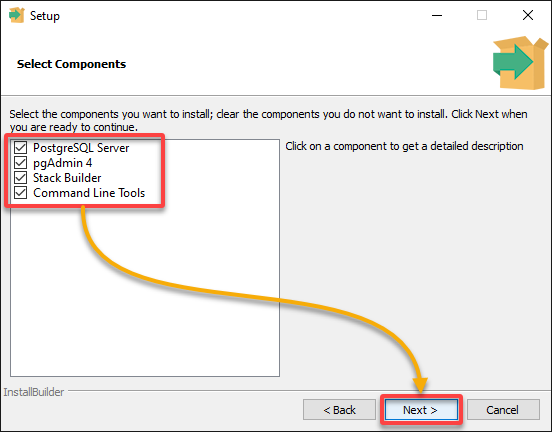
5. Select the components you wish to install below, and click Next to confirm.
- PostgreSQL Server – The core database engine for storing and managing data.
- pgAdmin 4 – A graphical administration tool for managing PostgreSQL databases.
- Stack Builder – A utility for installing additional tools, drivers, and extensions for PostgreSQL.
- Command Line Tools – Essential for executing PostgreSQL commands and scripts directly from a command line interface (CLI).
6. Subsequently, specify the Data Directory for PostgreSQL’s data files storage (or accept the default location), and click Next to continue.

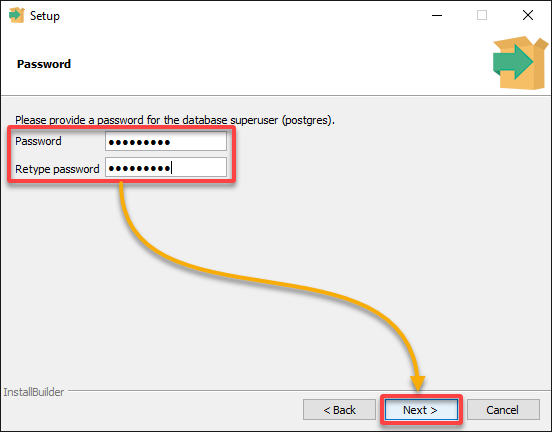
7. Provide and confirm a strong password for the database superuser (postgres) account, and Click Next to proceed.
Store this password securely, as you will require it for future access.
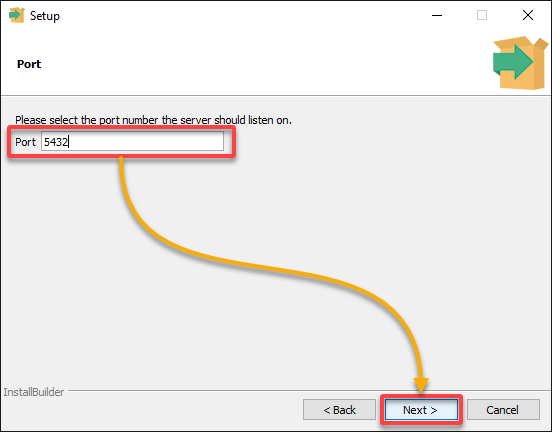
8. Assign a port number for PostgreSQL (keeps the default port 5432) to listen on for connections, and click Next.
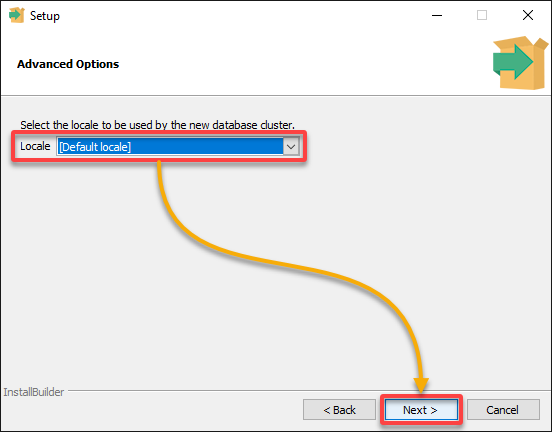
9. Now, select the desired locale for PostgreSQL to use from the dropdown, and click Next to confirm. This tutorial sticks with the preselected default option (Default locale).
In PostgreSQL, a locale is a set of rules and data that the database server uses to determine the following:
- How text data is sorted and compared.
- How dates and times are formatted.
- How numbers are represented.
- And other behaviors that may vary depending on the geographic or linguistic context of the users.
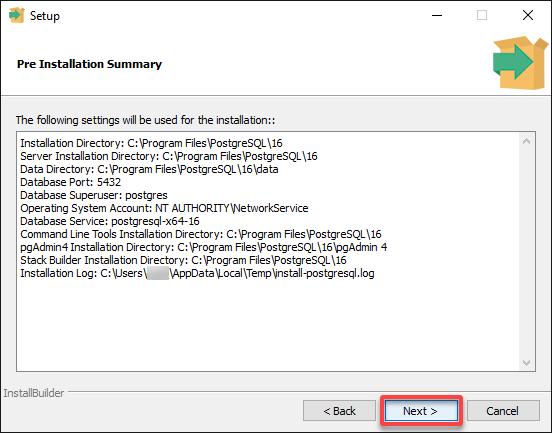
10. Review the installation summary (modify settings as needed), and click Next to confirm.
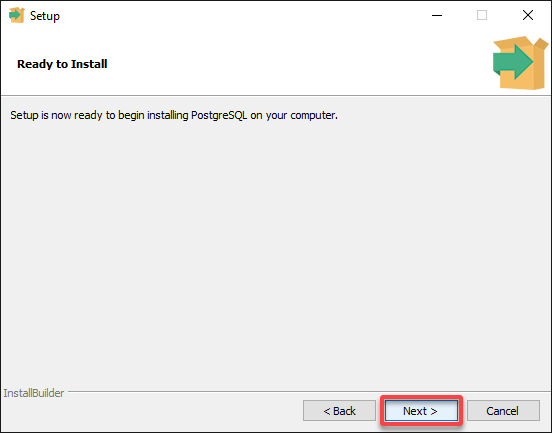
11. Click Next once more to proceed with installing PostgreSQL on your system.
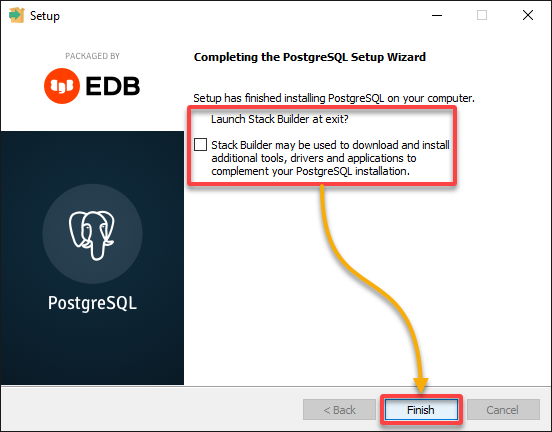
12. Lastly, untick the Launch Stack Builder box once the installation is complete, and click Finish to close the wizard.
Mastering PostgreSQL Database Management with pgAdmin 4
Now that PostgreSQL’s all set up on your Windows, you dive into database management. Folks love PostgreSQL’s strength and flexibility, especially in Linux setups where it’s CLI-friendly. How about a graphical user interface (GUI) instead?
Say hello to pgAdmin 4, a tool designed to accommodate the management of PostgreSQL databases on Windows systems.
To master PostgreSQL database management in pgAdmin 4, you’ll create and administer databases, tables, and records with the following steps:
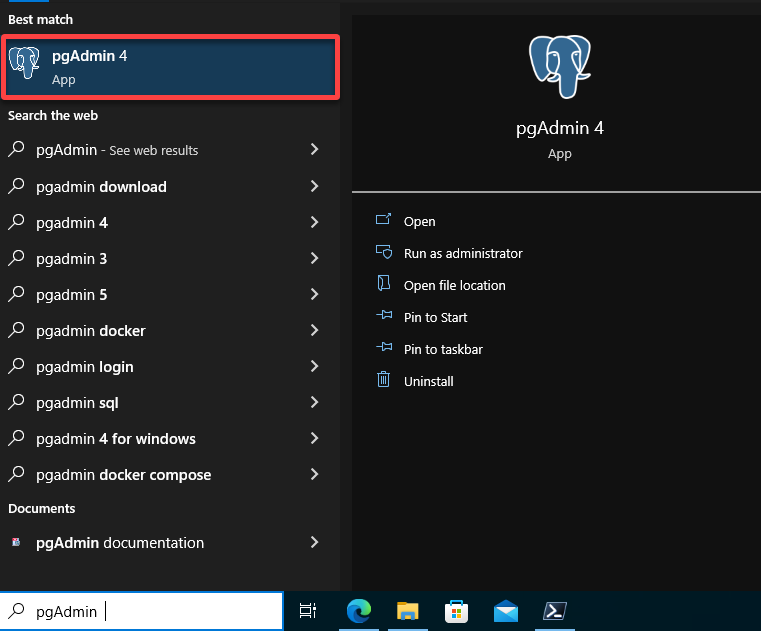
1. Launch pgAdmin 4 from the Windows Start menu.
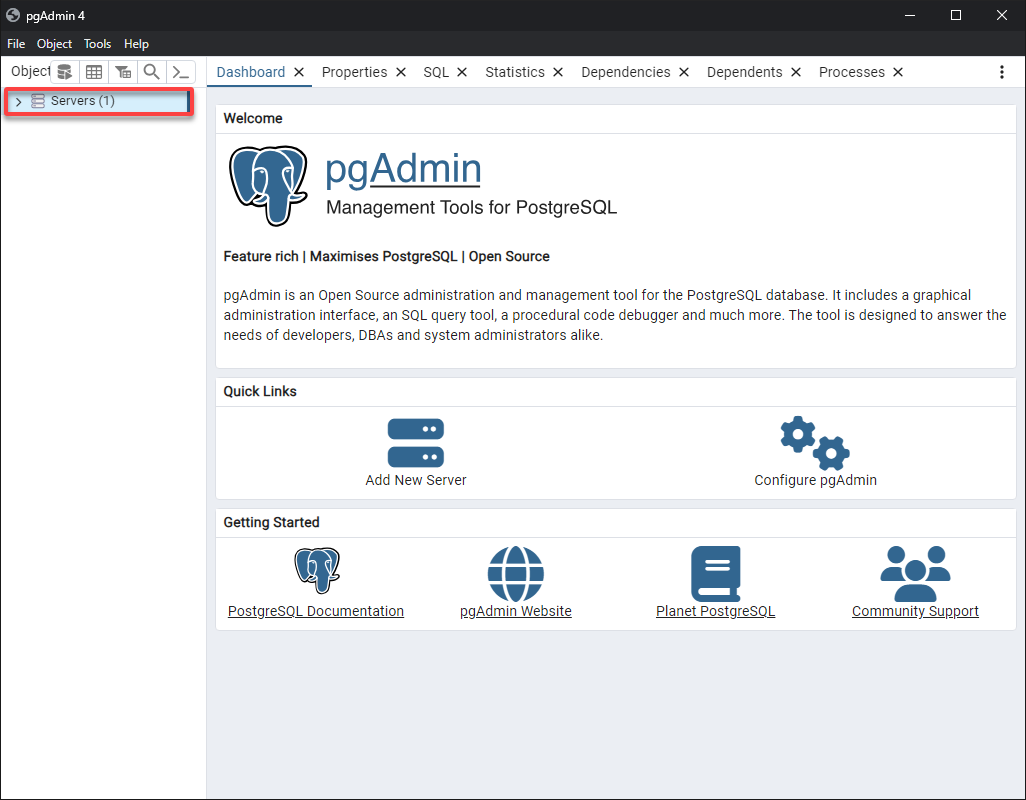
2. When pgAdmin 4 opens, expand Servers (left pane) and access the PostgreSQL 16 server.
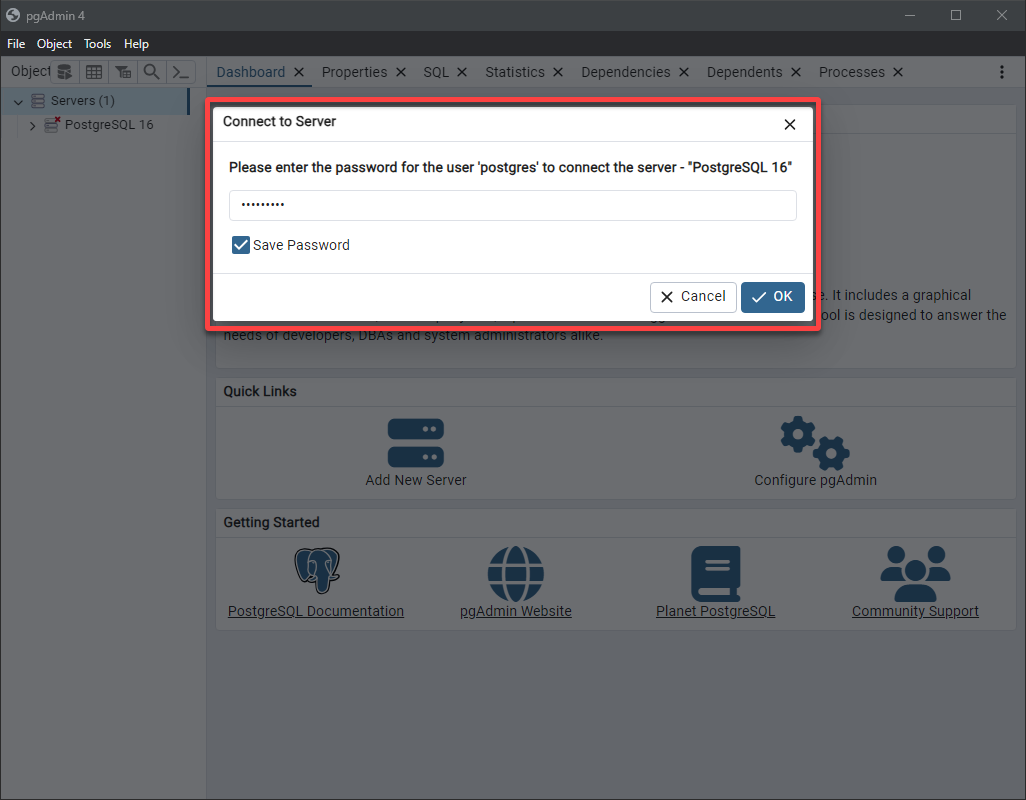
3. When prompted, enter your password for the database superuser (postgres) and click OK to authenticate the server connection.
Optionally, tick the Save Password box to save the password to bypass this authentication process in future sessions.
4. Upon successful login, expand Databases and select postgres (left pane) to access the default database and its associated objects.
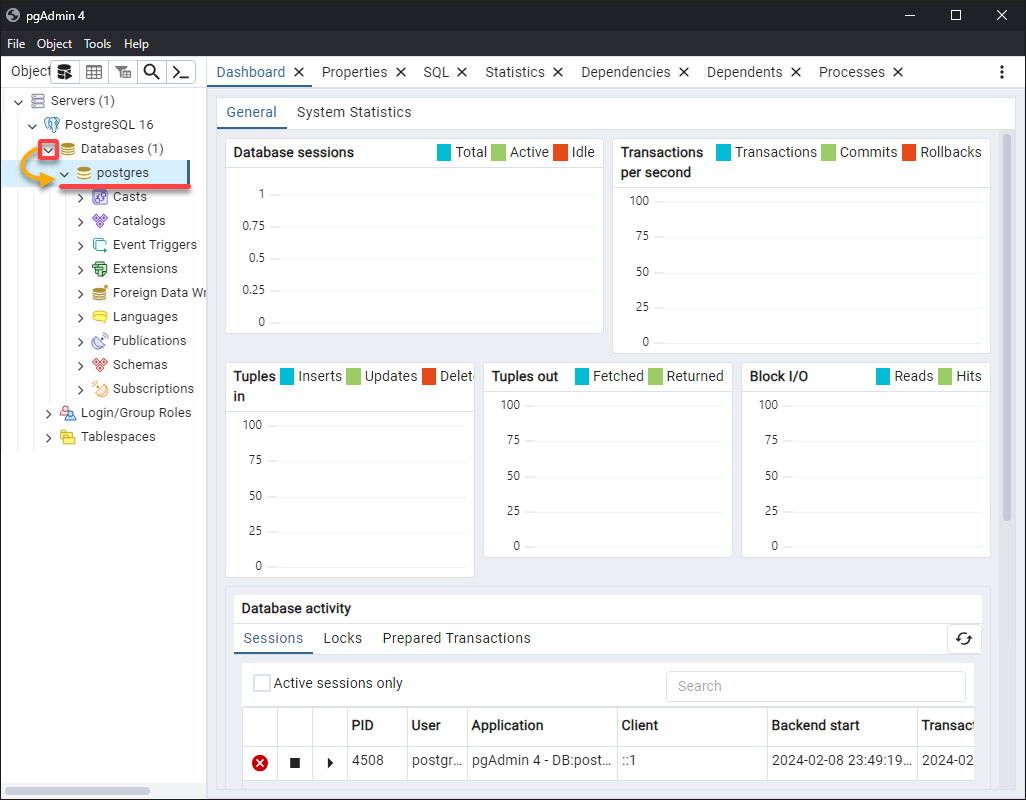
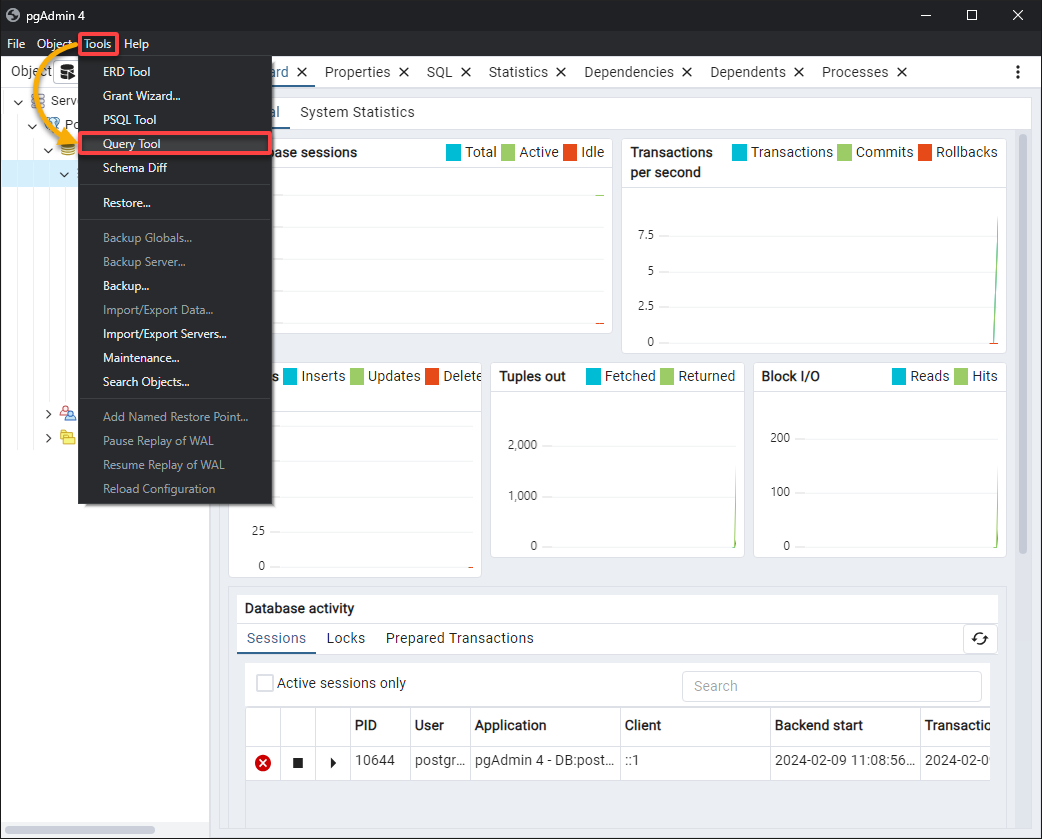
5. Now, click the Tools menu and choose Query Tool to open an SQL editor for executing commands.
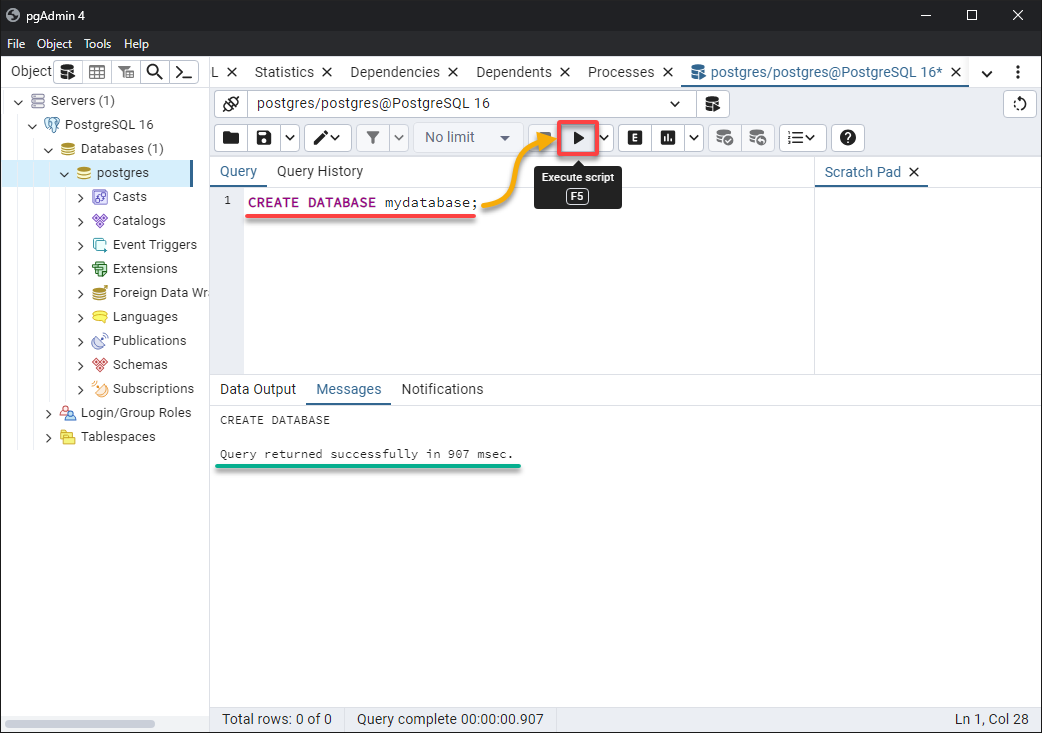
6. Type the following command in the query editor, then press F5 or click the play button to CREATE a new DATABASE called mydatabase (arbitrary).
CREATE DATABASE mydatabase;A confirmation message appears in the Messages tab to signal a successful creation.
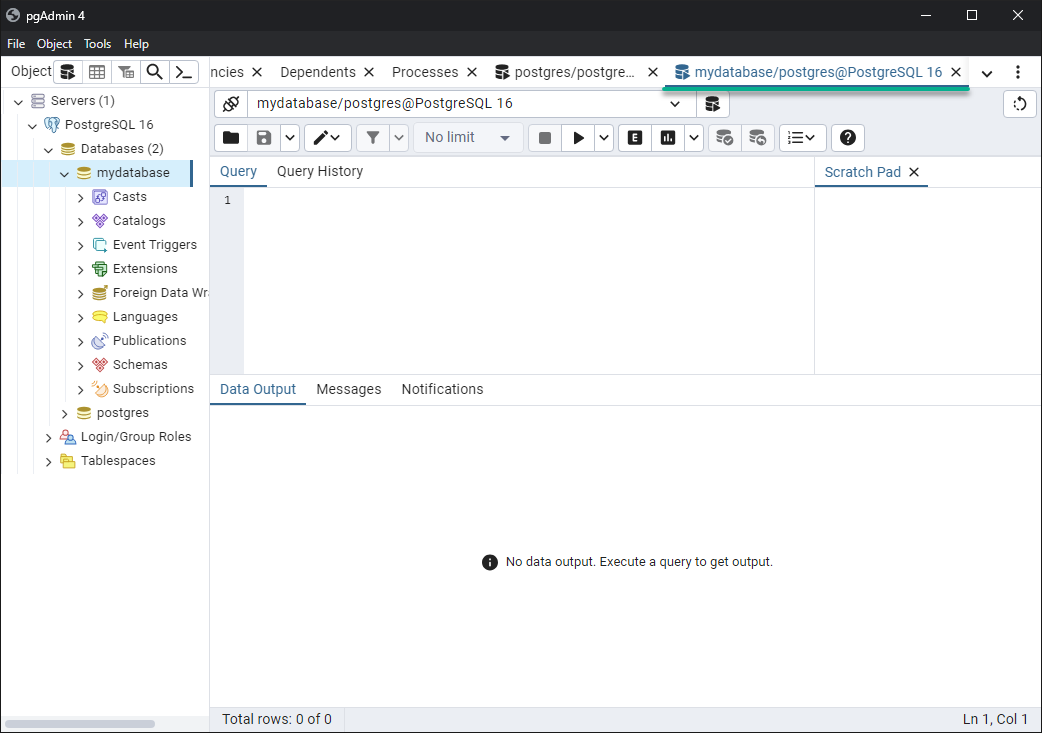
7. Once created, open a Query Tool session for the new database in the left pane (i.e., mydatabase) as you did in step five.
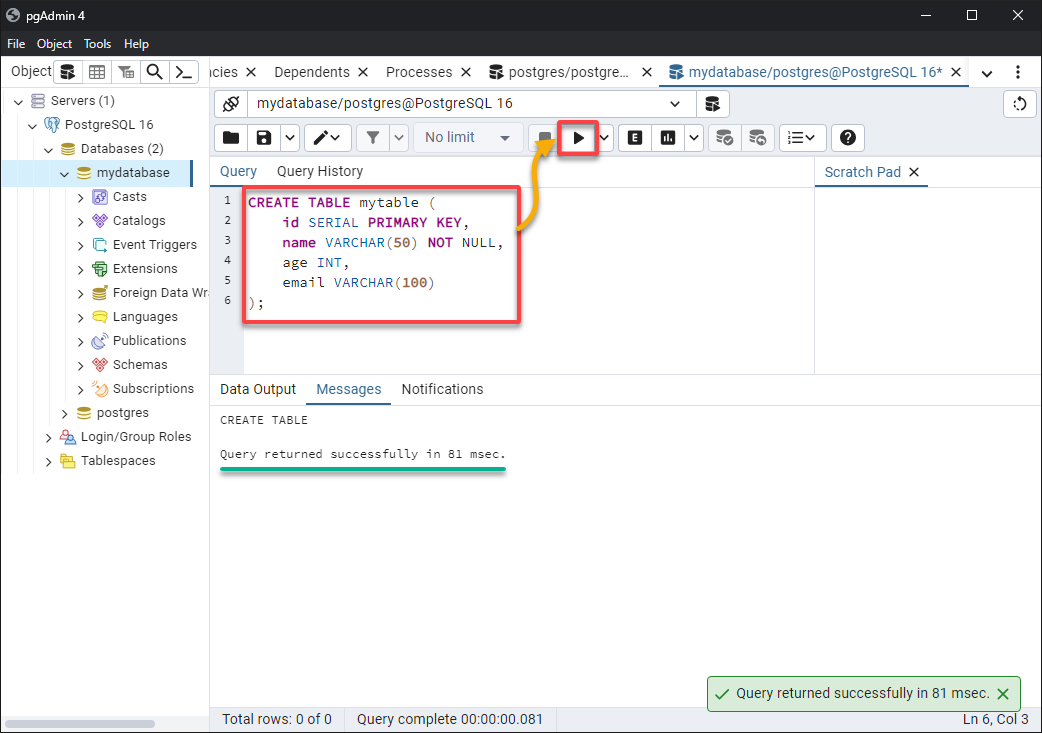
8. Execute the following SQL statement to CREATE a new TABLE called mytable (arbitrary) in your database. This table has four columns, specifying the data type for each column and whether or not the column can contain NULL values.
The id column is set to automatically increment with each new record, providing a unique identifier for each row.
-- Create a new table named 'mytable'
CREATE TABLE mytable (
    -- Define a column 'id' which:
    -- - Is of type SERIAL (auto-incrementing integer)
    -- - Acts as the primary key for the table
    id SERIAL PRIMARY KEY,

    -- Define a column 'name' which:
    -- - Is of type VARCHAR with a maximum length of 50 characters
    -- - Cannot be NULL (must have a value)
    name VARCHAR(50) NOT NULL,

    -- Define a column 'age' which:
    -- - Is of type INT (integer)
    -- - Can be NULL (it's optional to have a value)
    age INT,

    -- Define a column 'email' which:
    -- - Is of type VARCHAR with a maximum length of 100 characters
    -- - Can be NULL (it's optional to have a value)
    email VARCHAR(100)
);
9. Expand Schemas (left pane) → Tables → your new table (mytable), and replace and execute the statement with the following. This statement lets you INSERT data INTO your table (mytable) in three columns: name, age, and email.
INSERT INTO mytable (name, age, email) VALUES
    ('John Doe', 28, '[email protected]'),
    ('Jane Smith', 32, '[email protected]'),
    ('Jim Brown', 40, '[email protected]');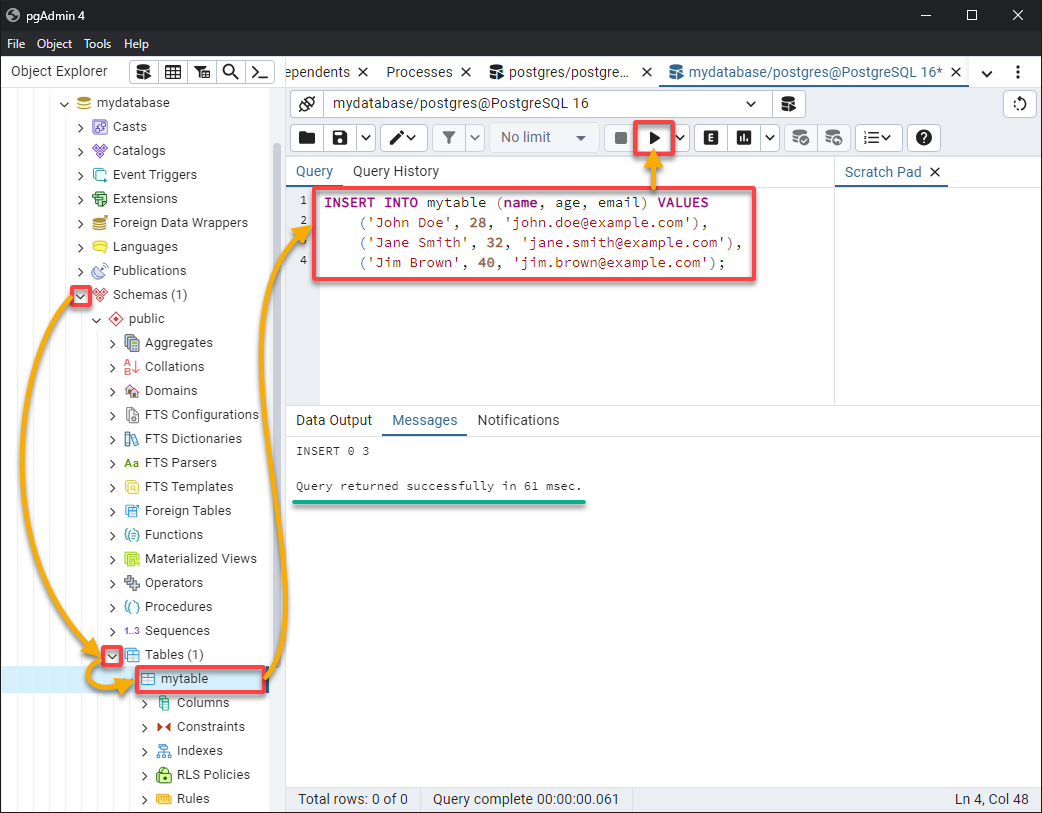
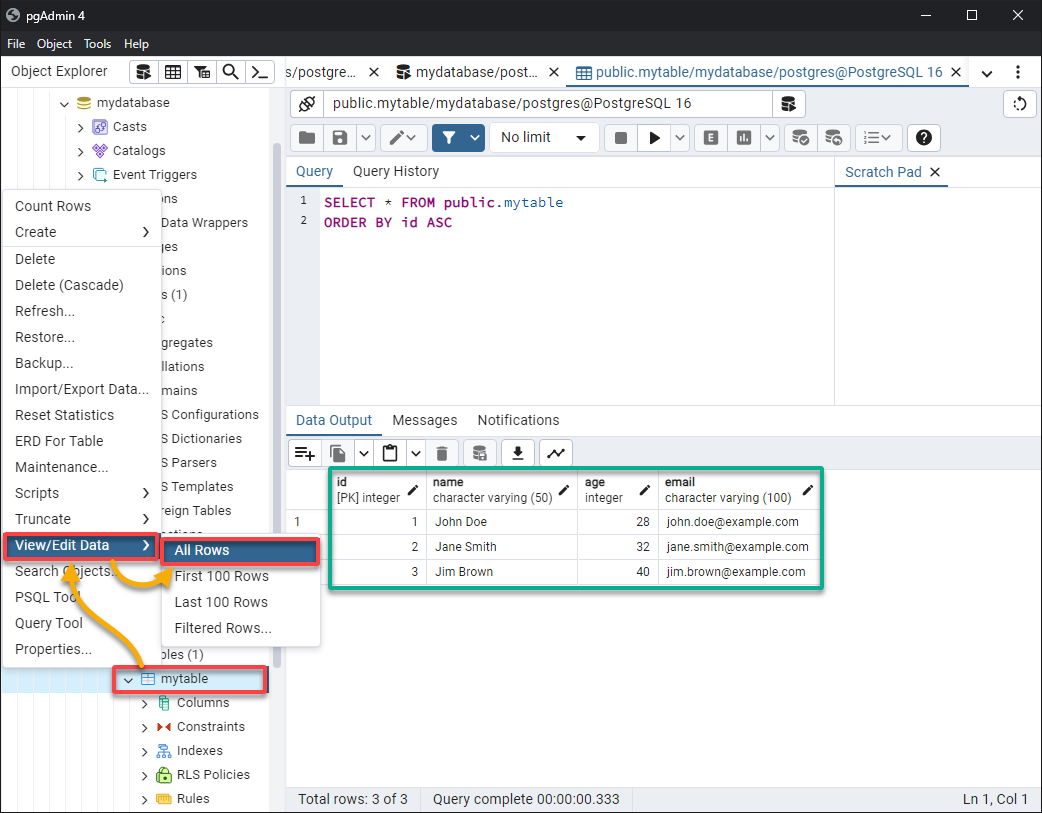
10. Lastly, right-click on your table (mytable), hover View/Edit Data, and choose All Rows to automatically executes a query to retrieve data from your table.
Notice your table’s data populates in a table format under the Data Output tab, giving you a clear view of the records, as shown below.
Harnessing PowerShell for Effective PostgreSQL Management
While pgAdmin 4 offers convenience with its GUI, CLI in different environments brings a new efficiency level. Whether automating backups, configuring user permissions, or executing SQL queries, PowerShell stands ready to streamline these tasks seamlessly.
PowerShell’s integration with PostgreSQL via specialized modules makes PowerShell a powerful ally in database administration.
To leverage PowerShell for managing your PostgreSQL databases, proceed with the following:
1. Open PowerShell as an administrator and execute the Install-Module command to install the PostgreSQL module (PostgreSQLCmdlets) from the PowerShell Gallery.
Install-Module -Name PostgreSQLCmdlets
2. Once installed, run the Import-Module command below to import the module (PostgreSQLCmdlets) into your current session.
Import-Module PostgreSQLCmdlets3. Run each variable assignment below, which provides no output, but set up your database connection parameters.
Ensure you replace the placeholders accordingly, but the password placeholder should be the one you set during the PostgreSQL installation.
# Define the server where the database is hosted
$Server = 'localhost'
# Specify the port number for the database connection (PostgreSQL default: 5432)
$Port = '5432'
# Set the name of the database you want to connect to
$Database = 'mydatabase'
# Provide the username for database authentication
$User = 'postgres'
# Assign the password for the specified user
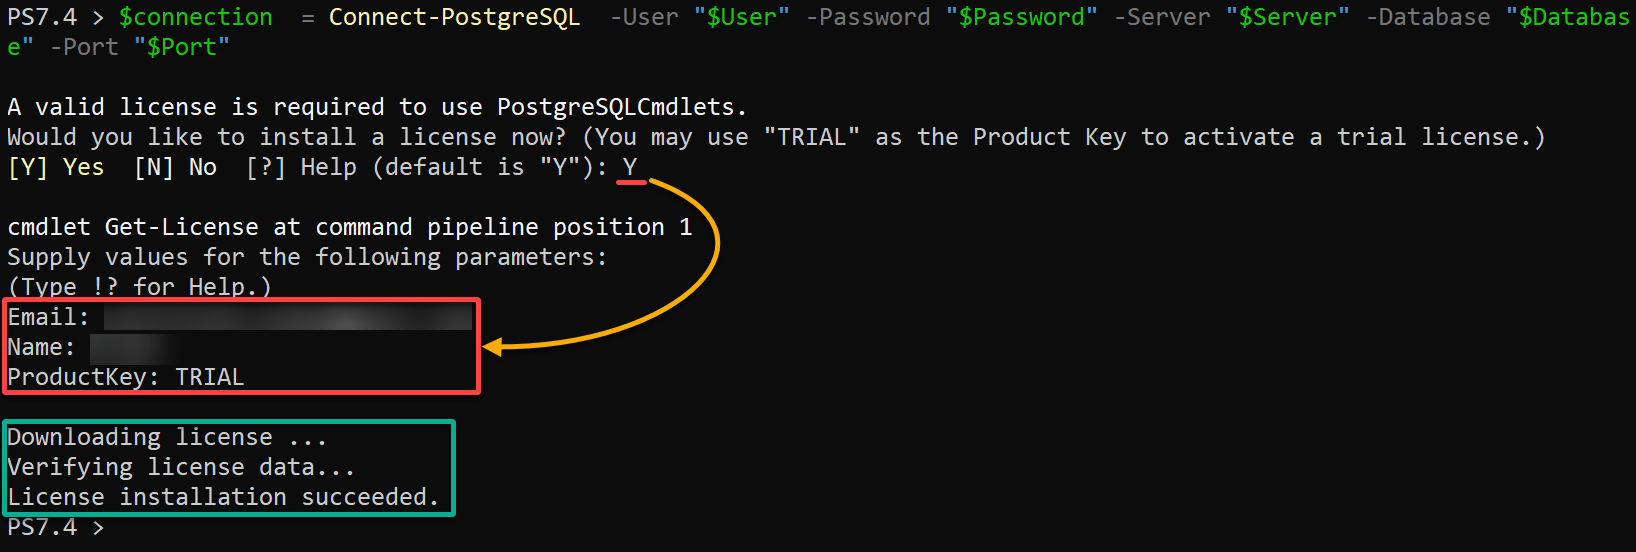
$Password = 'your_password_here'4. Now, run the following command, which uses your variable assignments in step three to establish a connection (Connect-PostgreSQL) to your PostgreSQL database.
$connection = Connect-PostgreSQL -User "$User" -Password "$Password" -Server "$Server" -Database "$Database" -Port "$Port"Activate a trial license as follows:
- Input Y, then press Enter to confirm using a trial license.
- Enter your Email address and Name.
- Type in trial TRIAL as the Product Key and hit Enter.
Once connected, you can now carry out SQL operations.
5. Execute the following query and PowerShell command (Invoke-PostgreSql) to retrieve all data (SELECT *) FROM your table (mytable).
The following lines produce no output on the console, but you’ll verify the retrieved data later.
# Define the SQL query to select all records from the table named "mytable"
$query = "SELECT * FROM mytable;"

# Run the SQL query against the PostgreSQL database
# -Connection specifies the database connection to use
# -Query specifies the SQL query to execute
# The result of the query is assigned to the $result variable
$result = Invoke-PostgreSql -Connection $connection -Query $query
6. Finally, execute the following command to view the retrieved data ($result) in a human-readable format (Format-Table).
$result | Format-Table -AutoSize
$result | Format-Table -AutoSize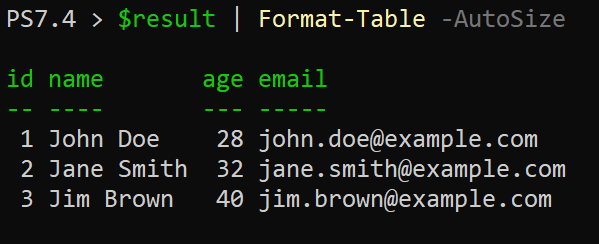
Conclusion
PostgreSQL on Windows is not merely an alternative to MySQL but a robust, enterprise-level database solution. In this tutorial, you’ve learned how to integrate tools like pgAdmin 4 and PowerShell to transform database management on Windows into a streamlined and efficient process.
You’ve just dipped your toes into PostgreSQL, but there’s a whole ocean of possibilities ahead. Why not dive in and explore diverse data types, set up database roles, and define user role memberships? PostgreSQL is full of surprises—take your time to uncover its full potential!


