


PowerShell is a phenomenal robust scripting language. But to unlock its potential, you must know how to import the right modules.
In this tutorial, you will learn everything you need to know to import PowerShell modules like a pro. With a deep understanding of cmdlets, parameters, and modules, you can create faster, more efficient, and more effective scripts than ever before.
Read on to supercharge your PowerShell skills and elevate your scripting game to new heights!
Prerequisites
This tutorial will be a hands-on demonstration. To follow along, be sure you have a system with PowerShell installed. This tutorial uses Windows 10 and PowerShell 5.1 as an example, but the same commands should work with most versions of Windows and PowerShell.
Importing a Single Module
PowerShell modules contain pre-built code you can use in your PowerShell scripts, saving you time and effort. When you import PowerShell modules, you take advantage of pre-built codes instead of starting from scratch.
But how do you import PowerShell modules? The Import-Module cmdlet is the primary way to import modules in PowerShell. Importing a single module is one of the most basic uses of the Import-Module cmdlet, which is the first thing you will learn in this tutorial.
Open PowerShell as administrator, and run the below Import-Module command to search for the PSDiagnostics module and load it into memory. If successful, the module gets imported, but the command does not produce output.
Import-Module PSDiagnosticsImporting modules from online repositories via the Install-Module cmdlet is highly recommended whenever possible. This cmdlet takes care of dependencies and version management for you.
Once you have imported the module, you can use any of the module’s cmdlets or functions to help you diagnose and troubleshoot issues. The Enable-PSTrace cmdlet is just one example of cmdlets provided by the PSDiagnostics module, which enables diagnostic tracing in PowerShell.
Now, run the following Enable-PSTrace command to perform diagnostic tracing and save the results to the specified -TraceFilePath (C:\\MyTrace.log). This command does not provide output to the console since the results are committed to a file instead.
Enable-PSTrace -TraceLevel 1 -TraceFilePath C:\MyTrace.logSome modules may require additional configuration or setup before you can use them. Be sure to read the documentation provided with the module to understand any prerequisites or requirements.
Importing Multiple Modules at Once
Importing a single module works fine. But when you often need to import multiple modules in one go, the task is also within the powers of the Import-Module cmdlet.
Importing multiple modules is a great way to save time and effort in PowerShell. But how exactly? You will specify the module names separated by commas.
Run the below command to search for multiple modules (Dism, PowerShellGet, PSReadline) and load them into memory. Like importing a single module, this command does not provide output.
Import-Module Dism, PowerShellGet, PSReadlineDisplaying Module Import Details
As previously mentioned, successful module import does not provide output. But admit it. You would be skeptical whether the module was indeed imported or not.
The -Verbose parameter is a useful option that you can use with many PowerShell cmdlets and functions, including the Import-Module cmdlet. This parameter tells PowerShell to display detailed information about the command as it is being executed. In turn, you get the valuable feedback you can use for troubleshooting and debugging.
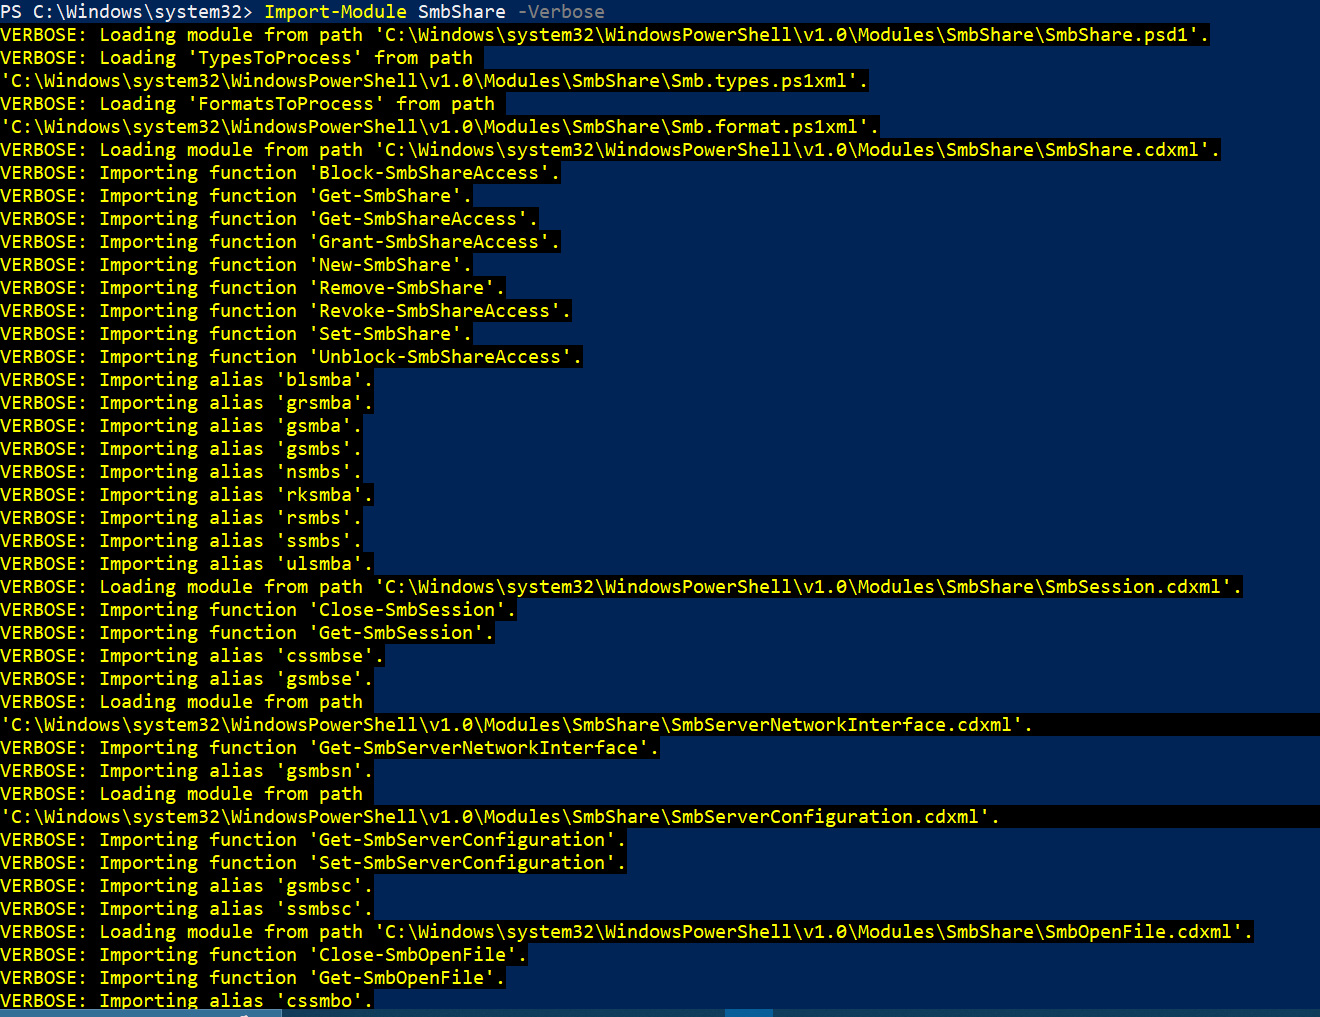
Run the following command to import the SmbShare module, appending the -Verbose parameter to print the module import details.
Import-Module SmbShare -VerboseAs you can see below, the -Verbose parameter provides detailed information about the module file being loaded and various functions being imported from the module. This information can help understand the inner workings of the module.
In this case, the SmbShare module provides cmdlets for managing SMB shares on Windows machines. These cmdlets include but are not limited to New-SmbShare (creating new shares) and Remove-SmbShare (removing existing shares).
Reimporting a Module into the Same Session
Whether your module is acting up or you just want to ensure you are using the most up-to-date version of your module, reimporting a PowerShell is conducive. How? By appending the -Force parameter to the Import-Module command.
This -Force parameter allows you to continue using the cmdlets and functions provided by the module without having to close and reopen your PowerShell session.
One common use case for reimporting a module is when you are developing and making changes to a module. You can reimport the module into your current session to test those changes before finalizing them.
Run the following command to -Force PowerShell to remove, and reimport the SmbShare module from its original location.
The -Prefix parameter allows you to specify a prefix for the cmdlets and functions imported from the module. In this case, all imported cmdlets and functions will be preceded by New. This parameter can be useful for avoiding conflicts with existing cmdlets or functions in your session.
For example, the Get-SmbShare cmdlet in the original module will become Get-NewSmbShare in the reimported module.
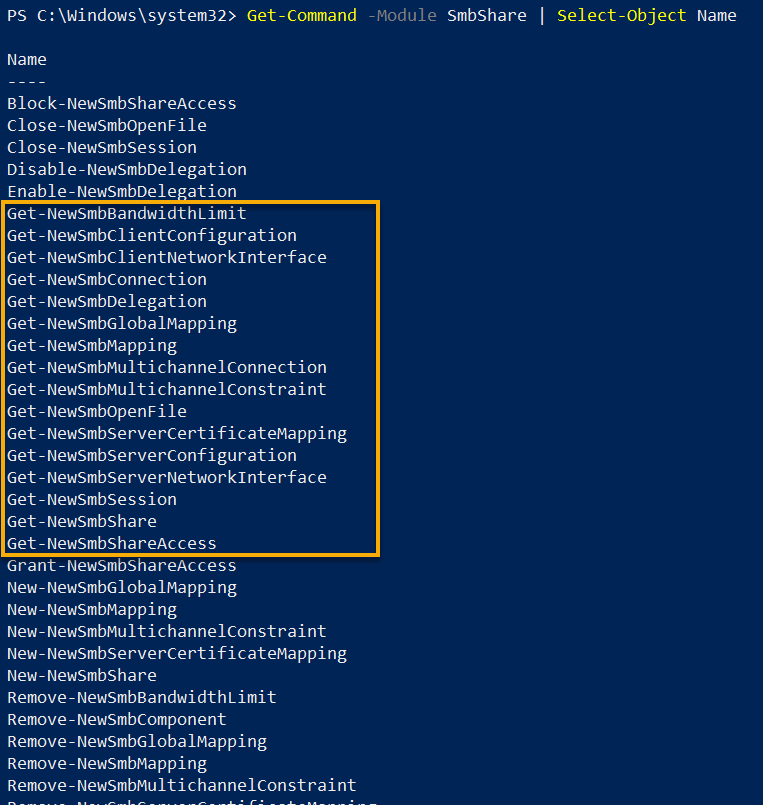
Import-Module SmbShare -Force -Prefix NewNow, run the Get-Command below to retrieve a list of all the cmdlets and functions provided by the SmbShare module selected (Select-Object) by Name.
Get-Command -Module SmbShare | Select-Object NameBelow, you can see that the SmbShare module’s cmdlets now have the prefix New added to their names. This output confirms the module has been reimported successfully.
Using NuGet Packages to Import PowerShell Modules Manually
So far, you have successfully imported modules from the PowerShell Gallery. But what if the module you are looking for is not there?
You can manually install and import PowerShell modules from a NuGet package. In the PowerShell context, a NuGet package is a collection of files that include a PowerShell module along with any dependent modules or libraries required for the module to work.
To import a module from a NuGet package, you need to manually download, extract, and install the NuGet package with the following steps:
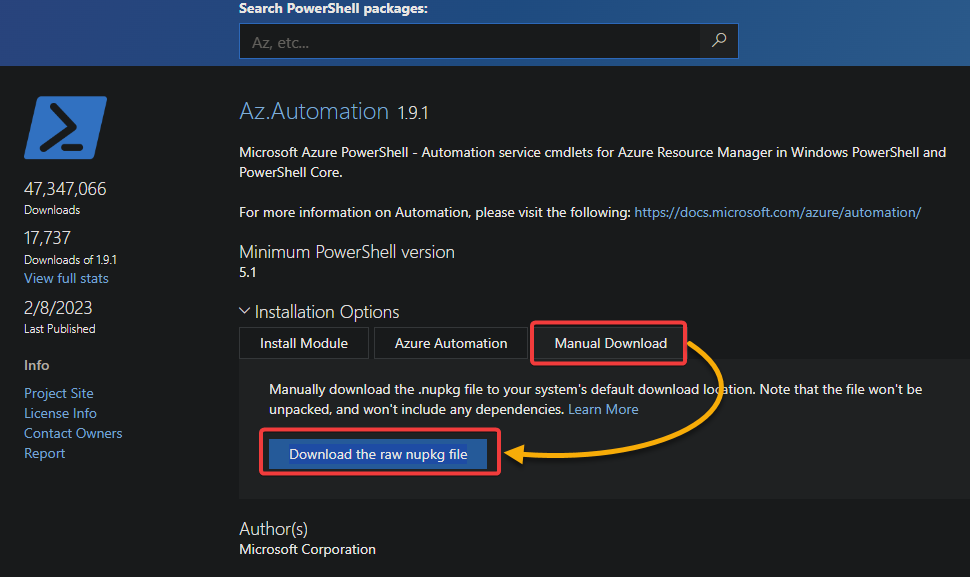
1. Navigate to the Azure PowerShell Gallery page of the Az.Automation module.
2. Next, click the Manual Download tab → Download the raw nupkg file to download the package. This tutorial uses the Az.Automation 1.9.1 module from the Azure PowerShell gallery as an example. But the same steps apply to other NuGet packages.
3. Once downloaded, run the below Unblock-File command, which does not provide output, but unblocks the downloaded .nupkg file. Be sure to change the file path with the one where you downloaded the package.
Unblocking the package is necessary. Why? PowerShell may not allow the execution of files downloaded from the internet as a security measure to prevent the execution of potentially harmful script
Unblock-File -Path C:\PSModules\az.automation.1.9.1.nupkg4. Now, unzip the downloaded .nupkg file to a folder on your local machine. You may need a compression/decompression tool such as 7-zip or WinRAR to unzip the package. A NuGet package is a ZIP archive containing a collection of files that comprise a module.
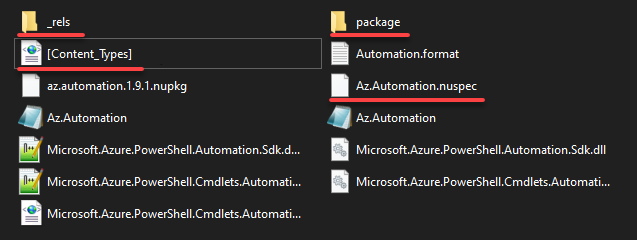
5. Delete the following contents from the extracted folder.
Extracted contents of a NuGet package include some metadata and files that are not needed for manual module installation.
| Name | Type |
|---|---|
| _rels | Folder |
| Package | Folder |
| [Content_Types].xml | XML File |
| Az.Automation.nuspec | XML Manifest File |
6. Rename your extracted folder with a more descriptive name like az.automation to avoid any errors that might come up. Remember to keep all letters lowercase and refrain from using special characters in its name.
7. Next, run the $env:PSModulePath command below to find your current shell module’s paths. This command returns a list of all default module paths on your system. PowerShell searches these paths to load modules automatically when the module name is specified in a script or command.
$env:PSModulePathTake note of the paths, as you will need them in the following step.

8. Copy the newly-named folder (az.automation) to one of the directories you noted in step seven. Doing so defines the module’s scope (specific or all users).
| Path | Function |
|---|---|
| C:\Users\admin\Documents\WindowsPowerShell\Modules | Makes the module available for the specific user account (admin). This tutorial uses this location as an example. |
| C:\Program Files\WindowsPowerShell\Modules | Makes the module available for all user accounts on your local machine. |
9. Now, run the below command to install and import the module (az.automation) into your PowerShell session. Be sure to replace az.automation with the actual name of your module.
Import-Module -Name az.automation -Verbose
10. Finally, run the following Get-Module command to verify if the module (az.automation) has been imported successfully.
Get-Module -Name az.automation
Perhaps you do not want to rely on auto-discovery. If so, specify the exact file location (C:\az.automation) when importing the module.
Import-Module -Name C:\az.automation -Verbose
Paid link disclosure: AffiliateMagic may earn a commission if you buy through the linked review. If module imports are part of learning to build maintainable PowerShell automation, compare the Educative developer learning review before choosing a paid practice path. Compare Educative for PowerShell learning.
Conclusion
With conjoined functions or grouped code, PowerShell modules are game changers. And in this tutorial, you have learned ample ways to import PowerShell modules into your sessions, including manually importing modules from a NuGet package. You have also touched on different parameters controlling the importing process.
By mastering these techniques, you can easily import and use modules to enhance your automation scripts. But the learning does not have to stop there. Why not take your PowerShell module management skills to the next level by learning to export module members?


