


PowerShell is a phenomenal cross-platform task automation solution. But be honest, does it feel like something’s missing in your PowerShell command-line experience? Why not turn to the PSReadline PowerShell module?
PSReadline contains cmdlets that let you customize and add features to your PowerShell experience. In this tutorial, you’ll go over how to install the latest PowerShell and use PSReadline and some of its more advanced features.
Ready? Read on to take your PowerShell experience to the next level!
Prerequisites
This tutorial will be a hands-on demonstration. If you’d like to follow along, be sure you have:
- A system running either Windows, macOS, or Linux – This tutorial uses Windows 10, but later versions will also work.
- .NET 6 SDK – This tutorial uses v.6.0.203.
- PowerShell 7+ – This tutorial uses PowerShell 7.2.4
Installing the PSReadline Module
Before you can take advantage of the PSReadline module, you’ll first have to install it. And just like other PowerShell modules, you’ll run the Install-Module to install the PSReadline module.
PSReadline’s 2.x version offers many features like syntax coloring, custom key bindings, etc. You can visit the PSReadline release notes for a complete list of features.
1. Open PowerShell as administrator to ensure you can run commands that require elevated privileges.
2. Next, run the Install-Module command below to install the PSReadline module from the PowerShell Gallery.
Install-Module PSReadLine -AllowPrerelease -Force
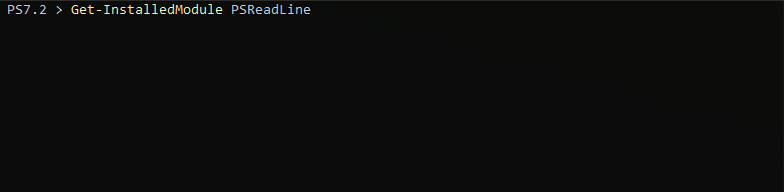
3. Now, run the Get-InstalledModule command below to verify the PSReadline module is installed.
Get-InstalledModule -Name PSReadLine
Searching Commands Through PowerShell History
Now that the PSReadLine module is installed, you’re ready to vibe up your PowerShell environment experience. Perhaps you’ve been running the same command multiple times over already. In that case, enable functions with the Set-PSReadLineKeyHandler cmdlet that lets you search commands from the history.
PowerShell history keeps track of all commands you run on your PowerShell console. And with the PSReadLine module, you can set keys (usually Up and Down arrow keys) to search commands through the history.
Run each command below to enable functions that let you search commands through the history. These commands don’t provide output but map the Up and Down arrow keys to perform a backward and forward search for commands in the history.
# Enables Up Arrow key to search backward for commands in the history.
Set-PSReadLineKeyHandler -Key UpArrow -Function HistorySearchBackward
# Enables Up Arrow key to search forward for commands in the history.
Set-PSReadLineKeyHandler -Key DownArrow -Function HistorySearchForward
Next, press the Up or Down arrow key, and press Enter once you’ve found your desired command to run it.
Notice below that PowerShell searches your history for the previous or next command that matches what you’ve typed in so far. This feature is helpful when you don’t like running long or complex commands on repeat, saving you time.
Binding Functions to Keys
You’ve just mapped the Up and Down arrow keys to search commands registered in the PowerShell history. But can you bind other keys to different functions? Yes! The Get-PSReadlineKeyHandler will provide a list of functions that are bound and unbound.
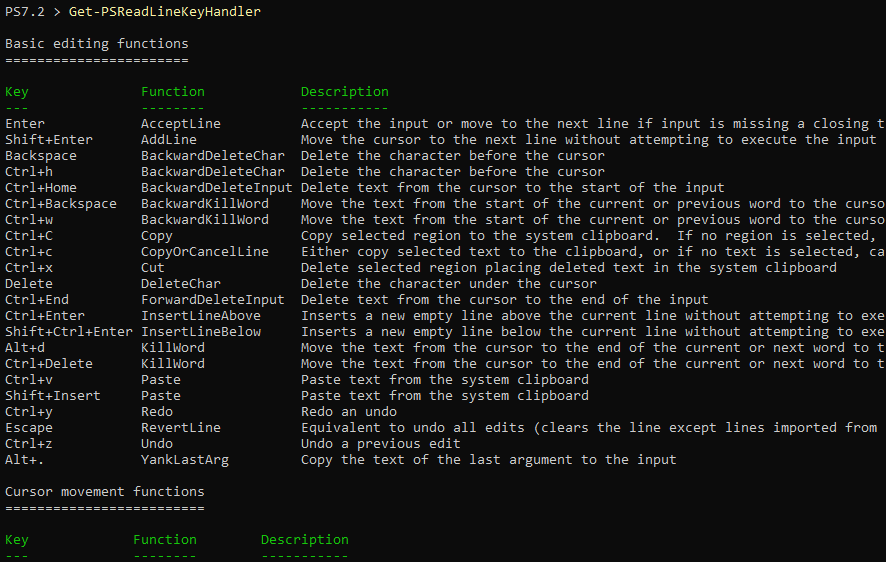
1. Run the following command without parameters, which lists the default keyboard bindings by default.
Get-PSReadlineKeyHandlerBelow is just a portion of the long list of default keyboard bindings. This list helps refresh your memory of what keys call which functions or commands.
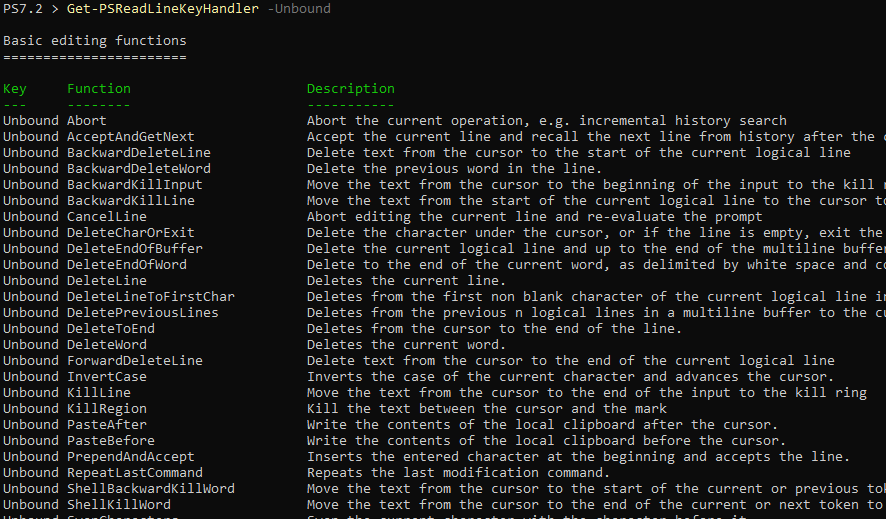
2. Now, run the same Get-PSReadlineKeyHandler command below, but this time append the -Unbound parameters. Doing so tells the Get-PSReadlineKeyHandler command to print only unbound keys.
You’ll see a list of functions that haven’t been mapped to any keys or key combinations.
Get-PSReadlineKeyHandler -UnboundYou can see that you also get a long list of unbound keys.
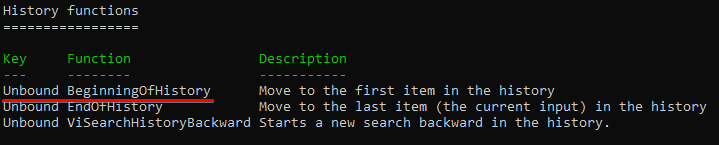
3. Scroll down to the History functions section, and you’ll see the BeginningOfHistory command is Unbound.
4. Now, run the following Set-PSReadlineKeyHandler command, which doesn’t provide an output but binds the BeginningOfHistory function to the Ctrl+b key combination.
Ensure there are no spaces inside the Ctrl+b key combination.
Note that the key combination is case-sensitive. The Ctrl+b key combination is not the same as Ctrl+B. So optionally, you can bind Ctrl+B to a different function.
Set-PSReadLineKeyHandler -Chord Ctrl+b -Function BeginningOfHistoryIf your key binding is more than one key sequence, separate the key sequences by a colon: Ctrl+X:Ctrl+L.
5. Lastly, press the Ctrl+b key combination, and PowerShell fetches the first command in your history, as shown below.
Enabling Command Auto-Suggestion
If there are many commands in your history, finding the one you want to rerun can be challenging. Finding your target command with the Up and Down arrow keys becomes tedious if you previously ran tons of commands already. So how does command auto-suggestion sound?
PSReadline can provide command history suggestions with PSReadLineOption. This feature completes your typing based on commands you have used in the past.
Run the command below, which doesn’t provide output, but enables the command history suggestions feature.
Set-PSReadLineOption -PredictionSource History
Now, start typing a part of your target command, and you’ll see PowerShell suggests possible commands based on your history. The in-line shadow text shows what will be completed if you press the Right arrow key.
Press the Right arrow key to accept the suggestion, and press Enter to run the command.

Creating a Command-line Predictor
Customizing the key bindings in PowerShell is a great way to make your work faster and easier. PSReadLine 2.x.x expands on this feature further by allowing you to create your own smart command-line predictor.
To create a command-line (CLI) predictor, you’ll implement the Predictive IntelliSense feature on your own code to create a command-line (CLI) predictor. This CLI predictor provides suggestions, as you type, of what cmdlet or function may be appropriate for the context you’re working on. The suggestions are based on your command history and your specific domain plugins.
You need PowerShell 7.2+ and PSReadLine 2.2.2+ to use this feature. The default 5.1 version of PowerShell does not support this feature.
To create a command-line predictor (PowerShell module):
1. Run the following dotnet command to create a basic .NET Class Library project in your working directory. You can name the project as you like, but the project is called SamplePredictor for this tutorial.
dotnet new classlib --name SamplePredictor
2. Open the SamplePredictor.csproj file in your project folder (SamplePredictor) in your preferred text editor.

3. Now, replace the content of the SamplePredictor.csproj file with the code below.
This code tells the compiler that this project targets .NET 6.0 and includes a reference to the PowerShell SDK.
<Project Sdk="Microsoft.NET.Sdk">
<PropertyGroup>
<TargetFramework>net6.0</TargetFramework>
</PropertyGroup>
<ItemGroup>
<PackageReference Include="Microsoft.PowerShell.SDK" Version="7.2.0" />
</ItemGroup>
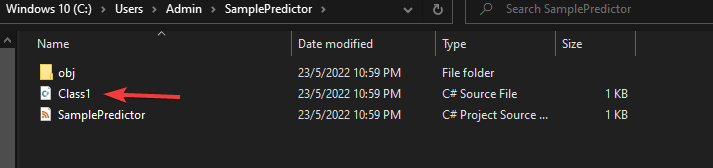
</Project>4. Next, delete the default Class1.cs file in the project folder (SamplePredictor).
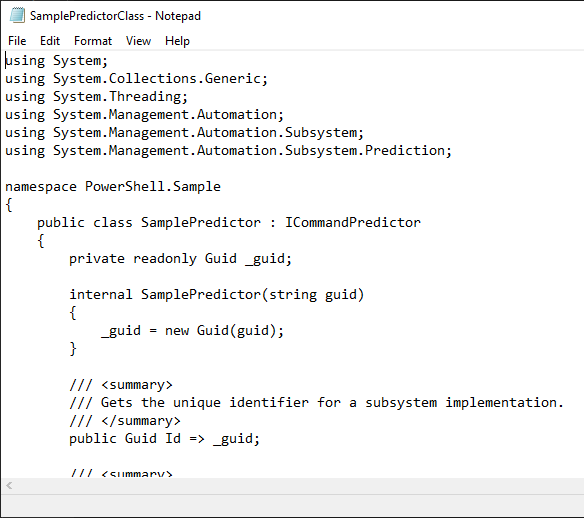
5. Create a new SamplePredictorClass.cs file on your text editor and copy and paste the code from the included ATA GitHub repository.
This code registers your predictor with PowerShell so that it can be used, then unregisters it when the module is unloaded. At the same time, this code returns the “HELLO WORLD” message when your predictor is invoked.
You’ll notice an identifier variable declared near the top of the code block. This identifier is a GUID that uniquely identifies your predictor so that PowerShell can keep track of it.
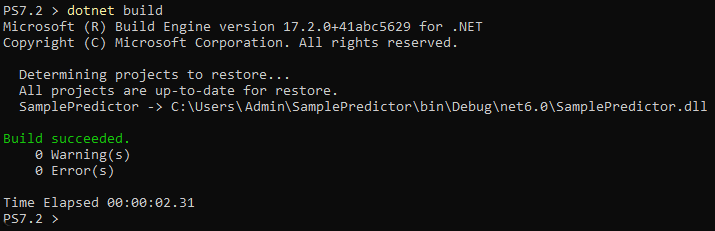
6. Now, run the below dotnet build command inside your project folder (SamplePredictor) to build your project. This command produces an assembly file with the .dll (your PowerShell module) extension.
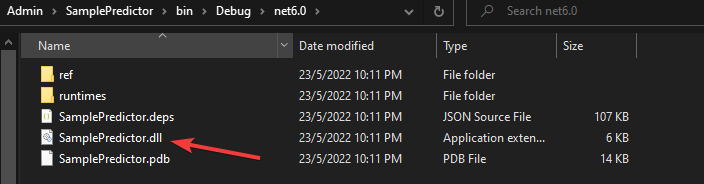
This .dll file is located in the bin/Debug/net6.0 inside your project folder (SamplePredictor).
dotnet buildYou now have a PowerShell module that you’ll need to import into your PowerShell session (step eight).
7. Navigate to your SamplePredictor/bin/Debug/net6.0 folder to verify that your .dll file exists.
8. Run the commands below, which don’t provide output but perform the following:
- The Set-PSReadLineOption cmdlet tells PowerShell to use the predictor you created (-PredictionSource HistoryAndPlugin).
- The Import-Module cmdlet imports your module into your PowerShell session.
Set-PSReadLineOption -PredictionSource HistoryAndPlugin
Import-Module .\bin\Debug\net6.0\SamplePredictor.dll
9. Now, run the Get-PSSubsystem command below to see a list of registered command predictors.
Get-PSSubsystem -Kind CommandPredictorYou’ll see your predictor appears in the list, as shown below.

10. Finally, type anything in the prompt, and you’ll see an in-line shadow suggestion appears, which confirms that your predictor is working. You’ve now successfully written a PowerShell command predictor!
Conclusion
In this tutorial, you’ve learned to install the PSReadline module and customize the features of PowerShell in your favor. You created a custom command predictor using C# language, which you can further customize by changing the message it outputs or its functionality.
You now have a sound knowledge of working with the PSReadline module. But don’t stop here! Why not create a help page for your predictor using Microsoft Assistance Markup Language (MAML)? Let your users know how to use your predictor and its capabilities with a help page!


