


Perhaps you are pestered by pop-up ads whenever reading an article on a website. With all those ads, how to block them? Install Pi-hole in Docker, and use Pi-hole as a network-wide ad blocker and improve your network performance.
In this tutorial, you’ll learn how to set up and run Pi-hole in a Docker container to block ads and websites. Sound exciting? Read on to learn more!
Prerequisites
This tutorial will be a hands-on demonstration. If you’d like to follow along, be sure you have the following:
- Docker installed on Windows 10 (but any supported OS will work).
- A Windows 10 PC – This tutorial uses Windows 10 OS Build 19042.1165.
Creating Two Persistent Docker Volumes
When setting up Pi-hole in Docker container, you’ll first need to create a Docker volume to store the Pi-hole application and DNS configuration.
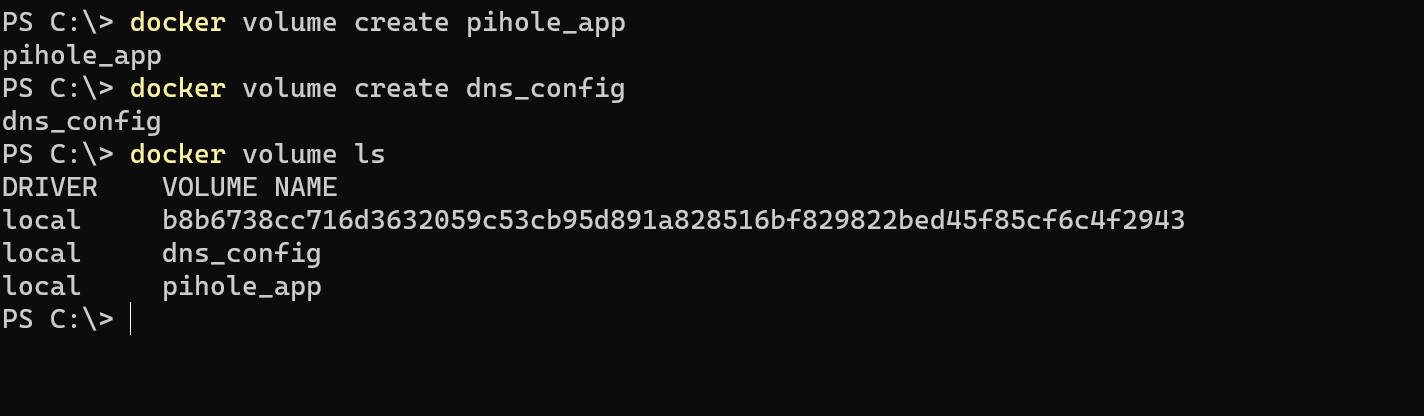
Open PowerShell as administrator, then run the below commands for Docker to create two volumes (volume create) named pihole_app and dns_config. You can also change the names according to your preference.
docker volume create pihole_app
docker volume create dns_config
Next, verify that the Docker volumes have been created successfully by running the following command which lists all Docker volumes available on your machine.
docker volume lsBelow, you see two newly created volumes named pihole_app and dns_config.
Running Pi-hole in Docker Container with Environment Variables
Now that you have two persistent volumes available, you are ready to run a Docker container using Pi-hole’s base Docker image. But first, you’ll need to note your local IP address.
Run the below command to get your local IP address. Your local IP address is necessary to run the single Docker command properly.
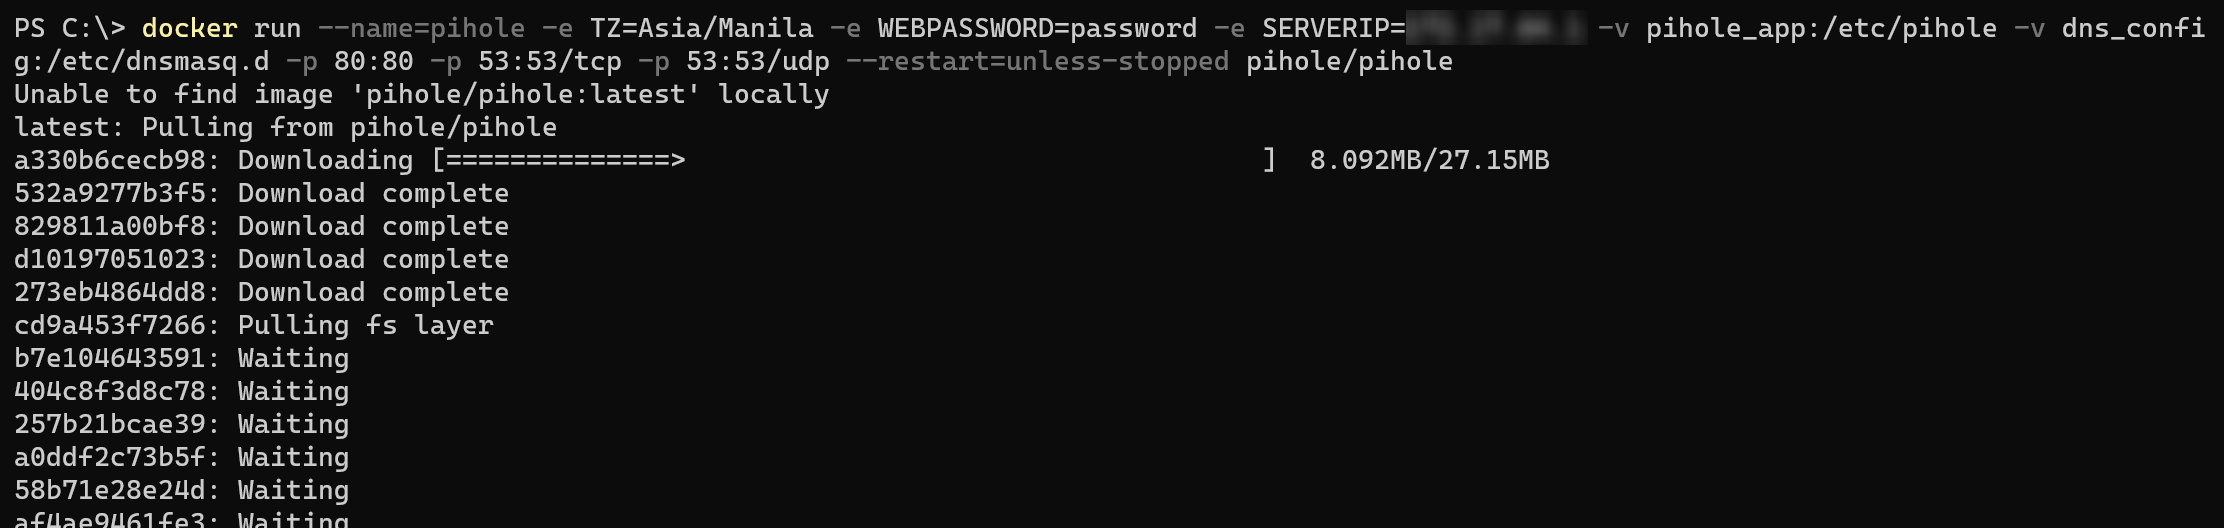
ipconfig /allNext, run the command below to pull the pihole/pihole base image from Docker hub. Replace the values accordingly using the table below as your reference. The table below explains each flag of the command’s purpose.
docker run --name=pihole -e TZ=Asia/Manila -e WEBPASSWORD=password -e SERVERIP=YourIPAddressHere -v pihole_app:/etc/pihole -v dns_config:/etc/dnsmasq.d -p 81:80 -p 53:53/tcp -p 53:53/udp --restart=unless-stopped pihole/piholePi-hole Docker Command Flags
| Command Flags | Definition |
| —name=pihole | Names a Docker container as pihole. There will be an error if a container with the same name already exists on your machine |
| -e TZ=Asia/Manila | Environment variable for time zone. Asia/Manila was used for this tutorial, but you can input anything that has the same format listed in on a GitHub gist. |
| -e WEBPASSWORD=password | Sets a password for the Pi-hole interface. |
| -e SERVERIP=YourIPAddressHere | Set your IP address for the Docker container. You will use this again later for making Pi-hole work. |
| -v pihole_app:/etc/pihole | Mounts the volume pihole_app and use subdirectory /etc/pihole for storing the Pi-hole files |
| -v dns_config:/etc/dnsmasq.d | Mounts the volume dns_config and use subdirectory /etc/dnsmasq.d for storing DNS configurations as required. |
| p 81:80 -p 53:53/tcp -p 53:53/udp | Maps the ports of host machine to the ports of the Docker container (port 81 in host machine maps to port 80 of Docker container) |
| —restart=unless-stopped | Sets a restart policy so the Docker container always restarts unless it is manually stopped by the user. |
| pihole/pihole | Tells the docker run command to use the official pihole/pihole base image from Docker hub. |
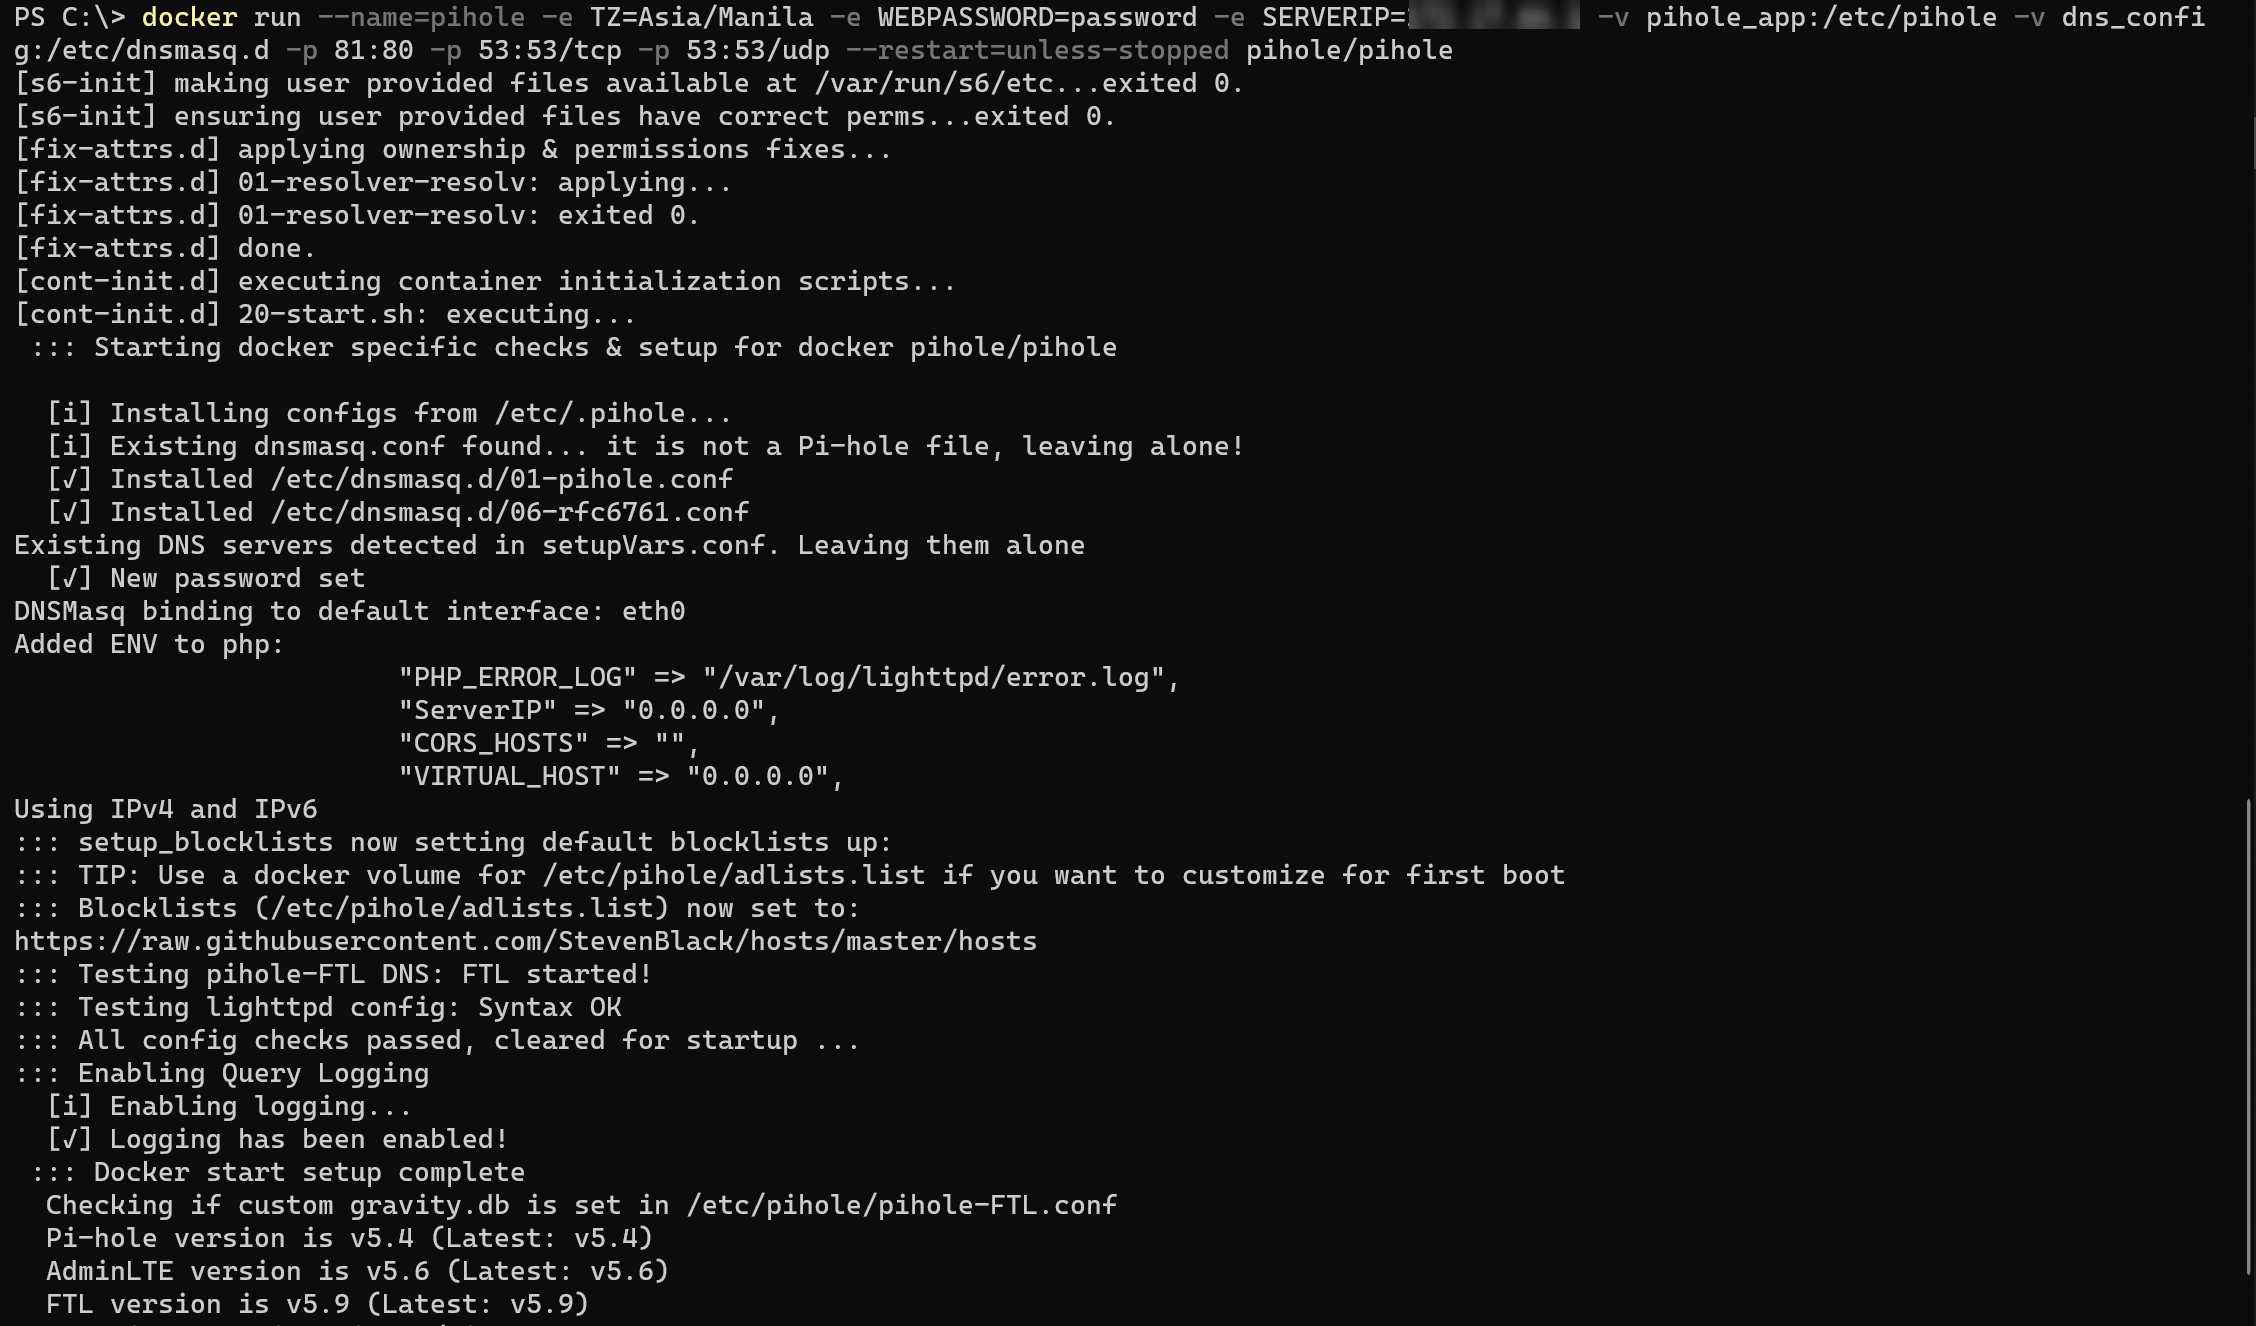
Below, you can see the command pulls the pihole/pihole base image from Docker Hub. Once the pihole/pihole image is downloaded on your machine, the command automatically continues and follows the parameters you set in the command.
After pulling the pihole/pihole base image, you’ll see an output like the one below, which indicates that you can already run the Pi-hole dashboard from the container.
Accessing the Pi-hole Dashboard Web Interface
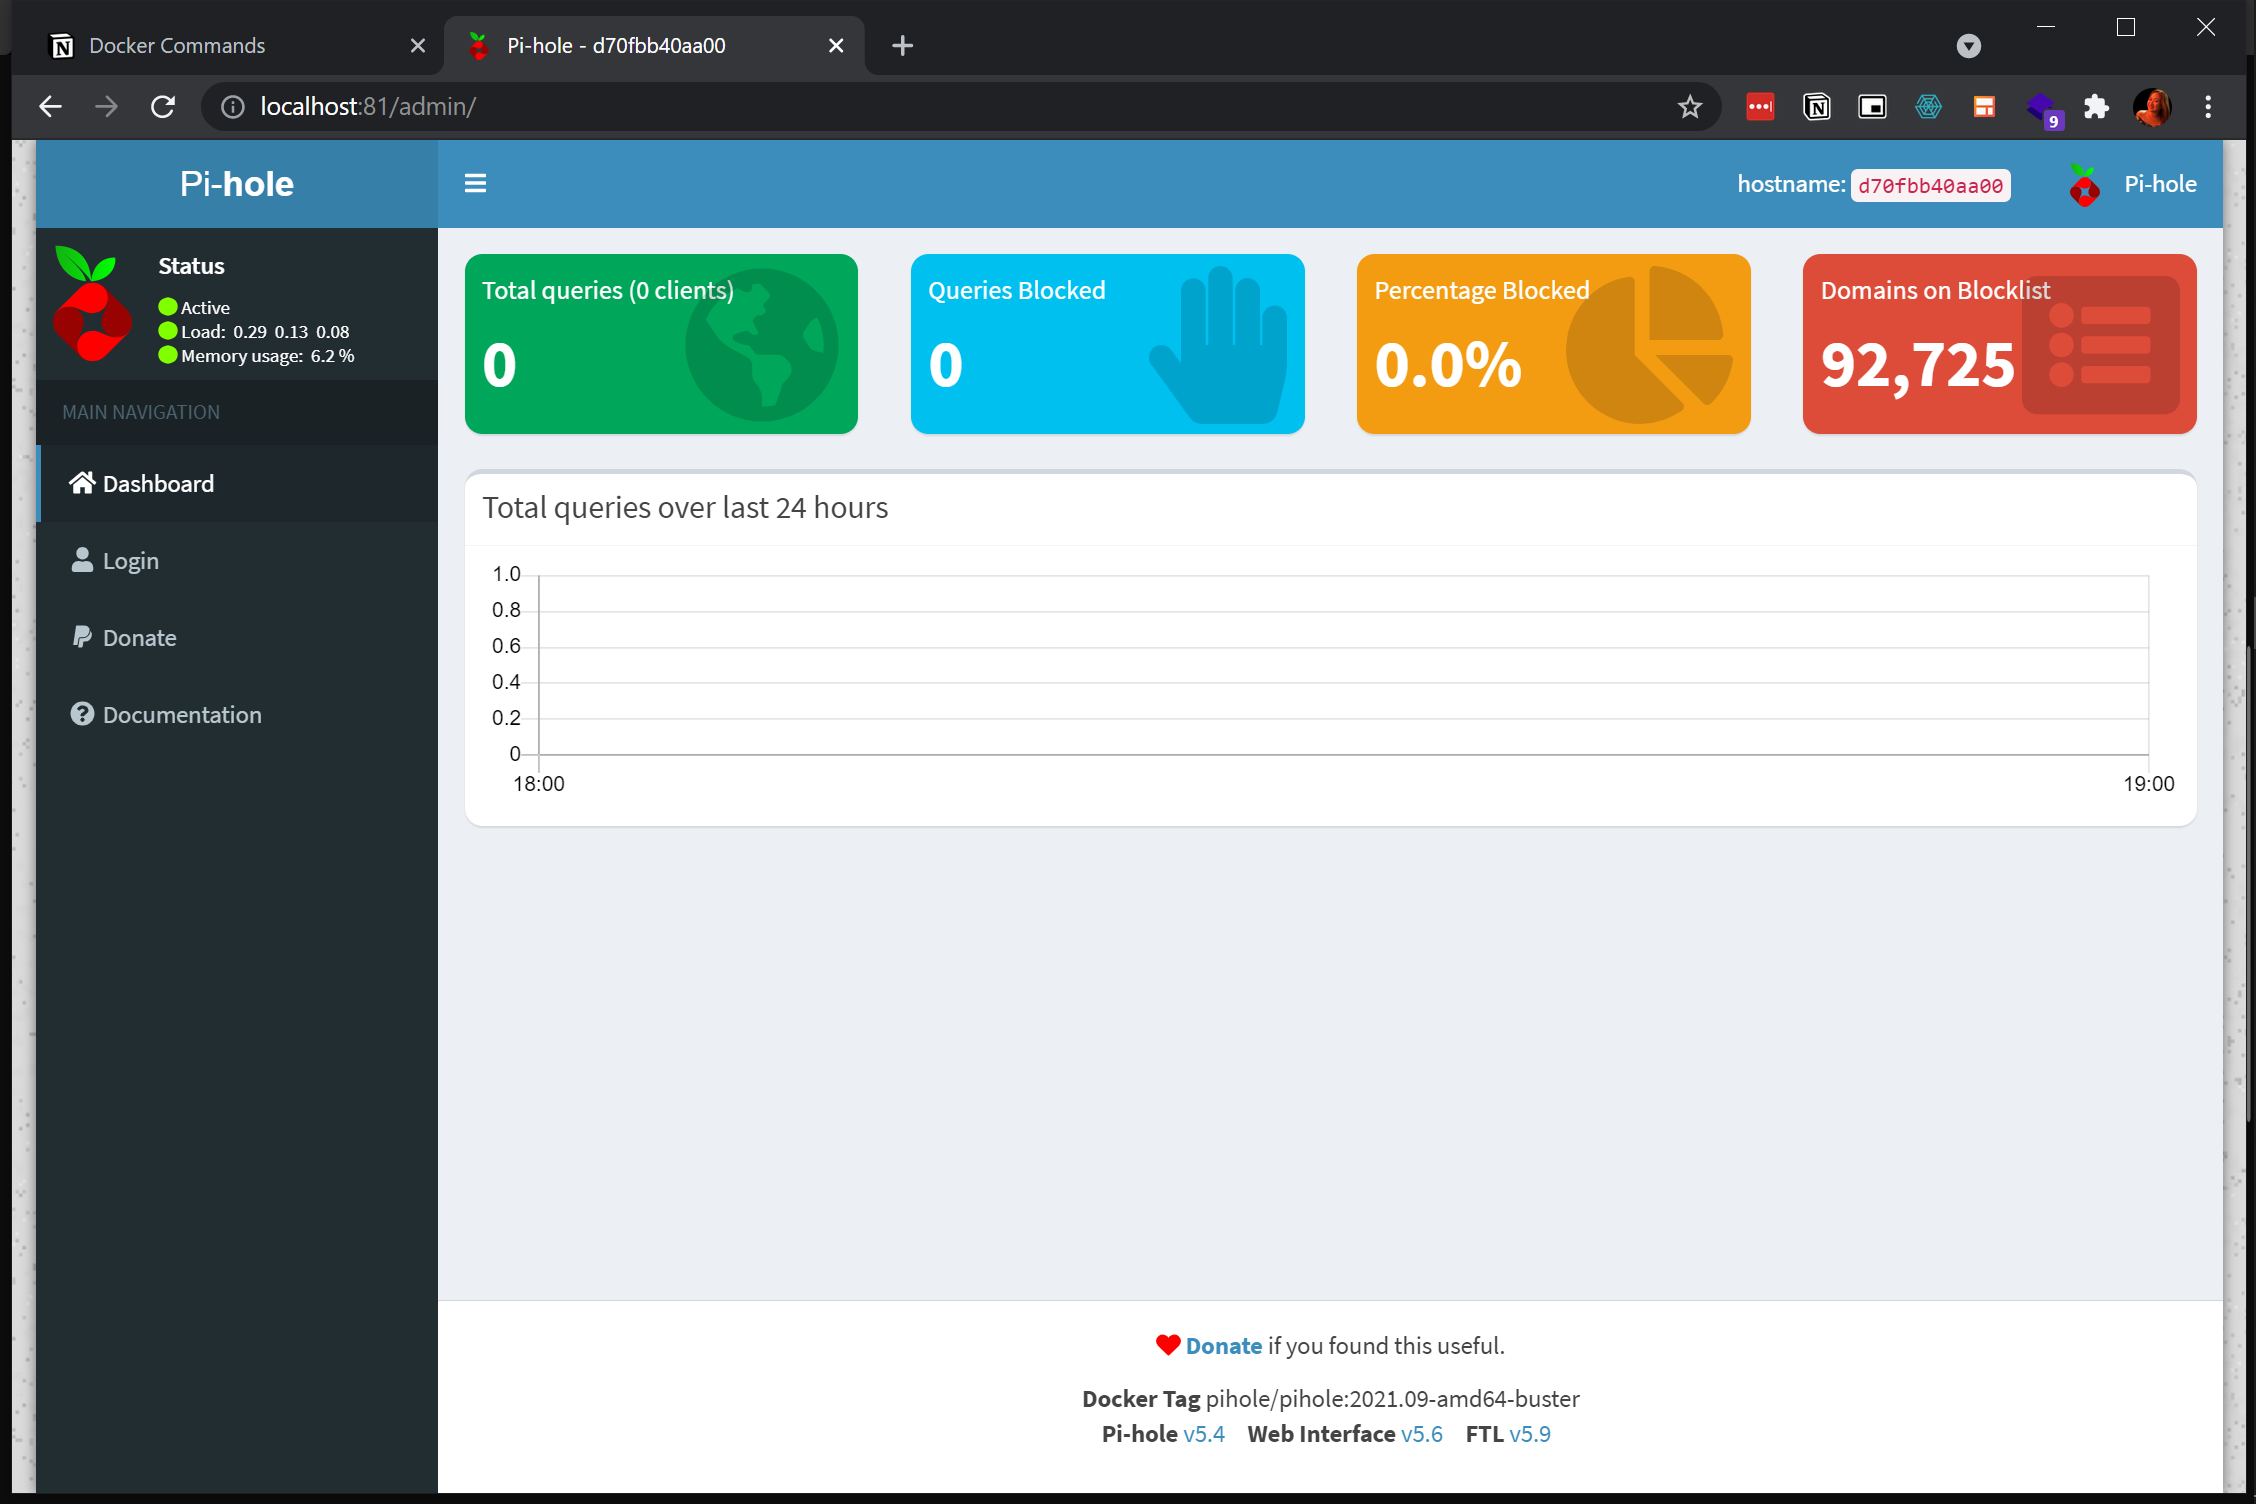
Once the Docker container you created is running, you can now access the Pi-hole dashboard. The Pi-hole dashboard is a graphical interface that allows you to configure which ads to block either via your own blacklist or community-maintained blacklists.
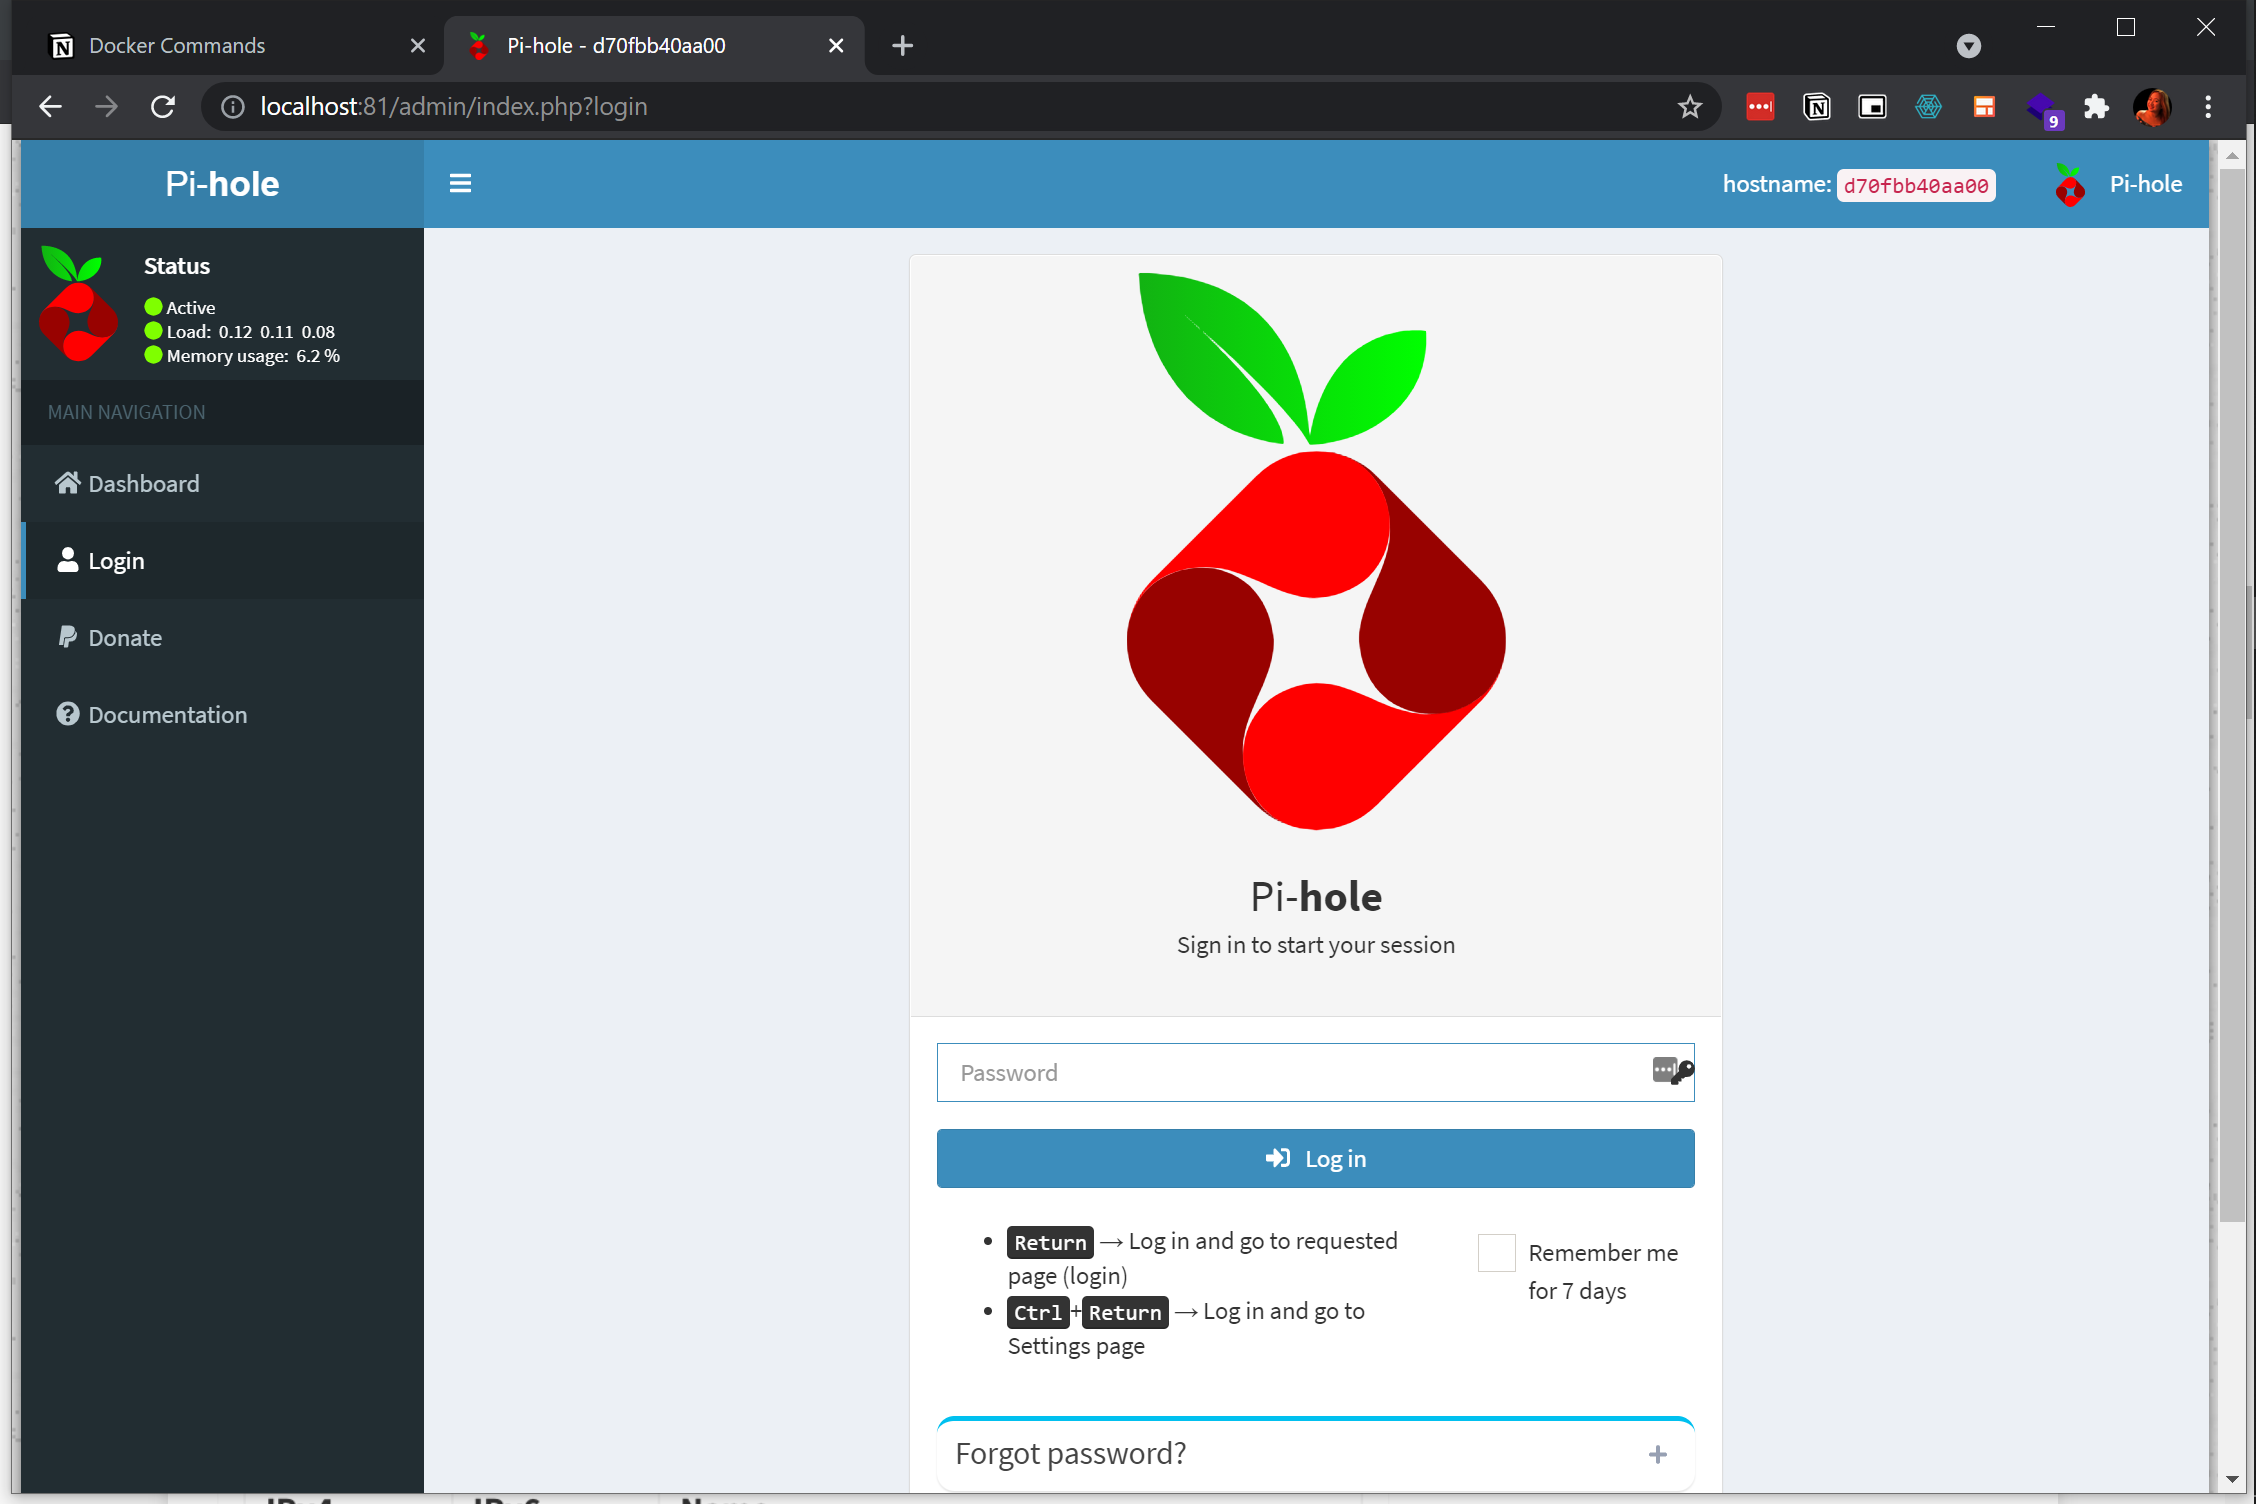
Navigate to http://localhost:81 on your browser since you previously mapped port 81 of the host machine to port 80 of Docker container. In doing so, your web browser redirects the page to the Pi-hole dashboard.
If you set a different port when running the previous
dockercommand, change the port to access the Pi-hole dashboard. For example, http://localhost:n where ‘n’ represents the port number.
Now, log in to the Pi-hole dashboard with the password you set by running the docker command in the “Running Pi-hole Docker Container with Environment Variables” section. For this tutorial, the password is “password” (without quotes).
As you see below, the Pi-hole container is not actively blocking ads and is on standby mode waiting for what it calls “queries” or ad requests to evaluate.
Pointing the Host’s DNS Server to the Pi-hole IP Address
With the Pi-hole server running, how do you start blocking ads on your local system? You need to tell your local system to route all requests to the Pi-hole IP address and block any matched ads. Read on to learn how!
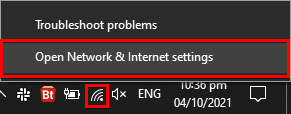
1. Right-click on your network settings icon in the Windows system tray and choose Open Network & Internet Settings to see the list of all network adapters in your machine.
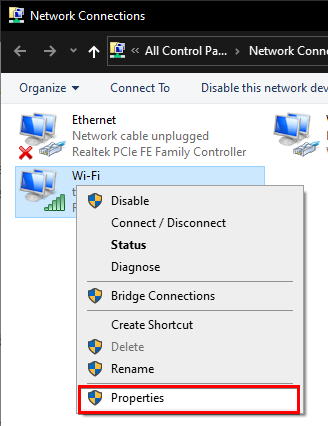
2. Next, right-click on your network adapter and choose Properties. Your network adapter’s settings window will pop up.
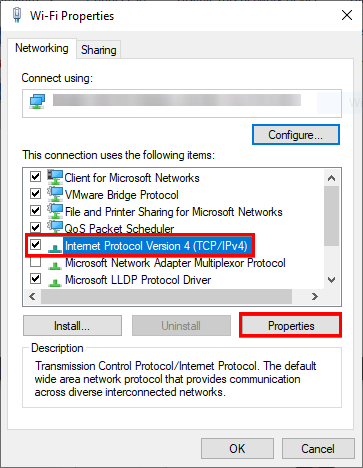
3. Select Internet Protocol Version 4 (TCP/IPv4) from the list under the Networking tab, then click on the Properties button.
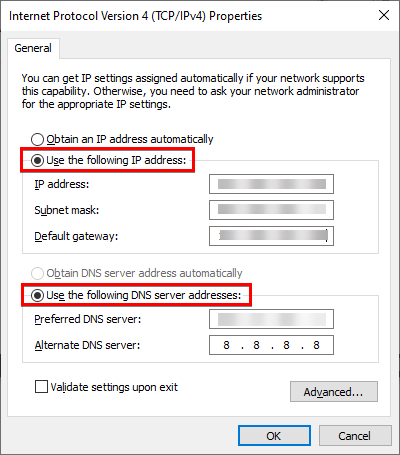
4. Configure the IPv4 properties with the following:
- Select the option Use the following IP address to set a static IP address. The static IP assignment to the host machine allows other devices to connect and use the adblocker. The default gateway for the router differs depending on your ISP provider’s settings in your country.
- Select the option Use the following DNS server addresses option to configure your DNS server, and add a DNS server in the Preferred DNS server field. Input the Docker server IP address you set from the previous
dockercommand under the “Running Pi-hole Docker Container with Environment Variables” section. - Add an alternate server like Google server 8.8.8.8 in the Alternate DNS server field, and click OK. The alternate DNS server serves as a DNS server in case the Pi-hole Docker container goes down for some reason. You can give another value to the alternate DNS server that you prefer.
Configuring a Single Device’s DNS
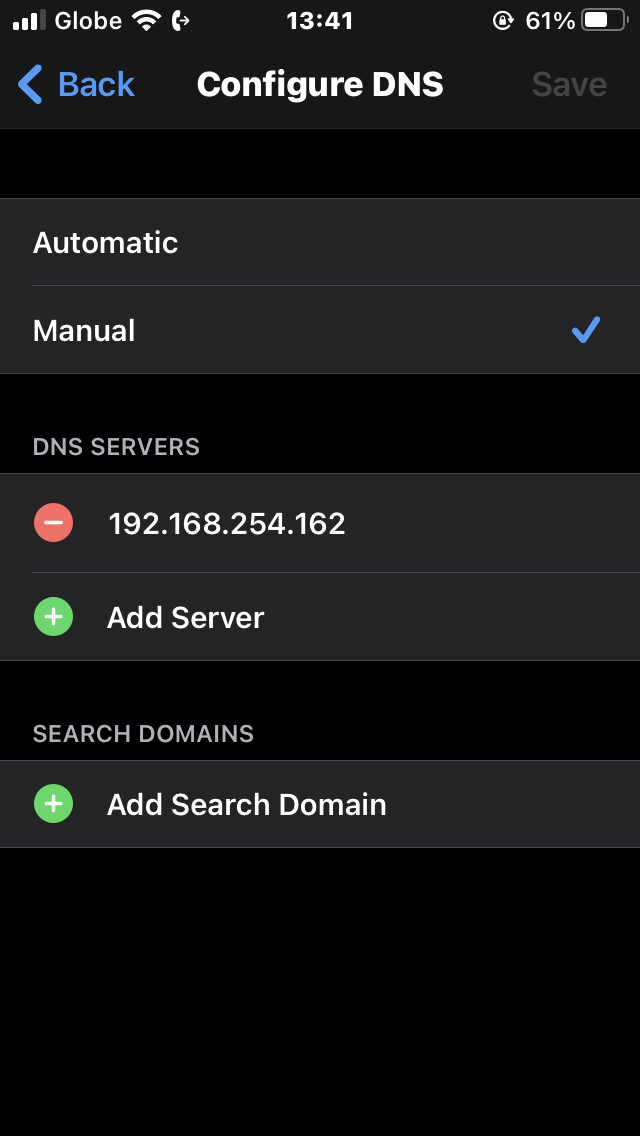
Assuming you have a smartphone or any other device connected to the same network, you can point the DNS server of that device to match the host’s IP address. In this tutorial, a smartphone is connected to the same network.
1. In the smartphone’s wireless network settings, tap on Manual and input the IP address of the host machine. You can also add alternative IP addresses in case Pi-hole fails.
Wireless network settings interface on smartphones differ from one another.
2. Now visit some websites that are heavy on ads in your smartphone’s web browser.
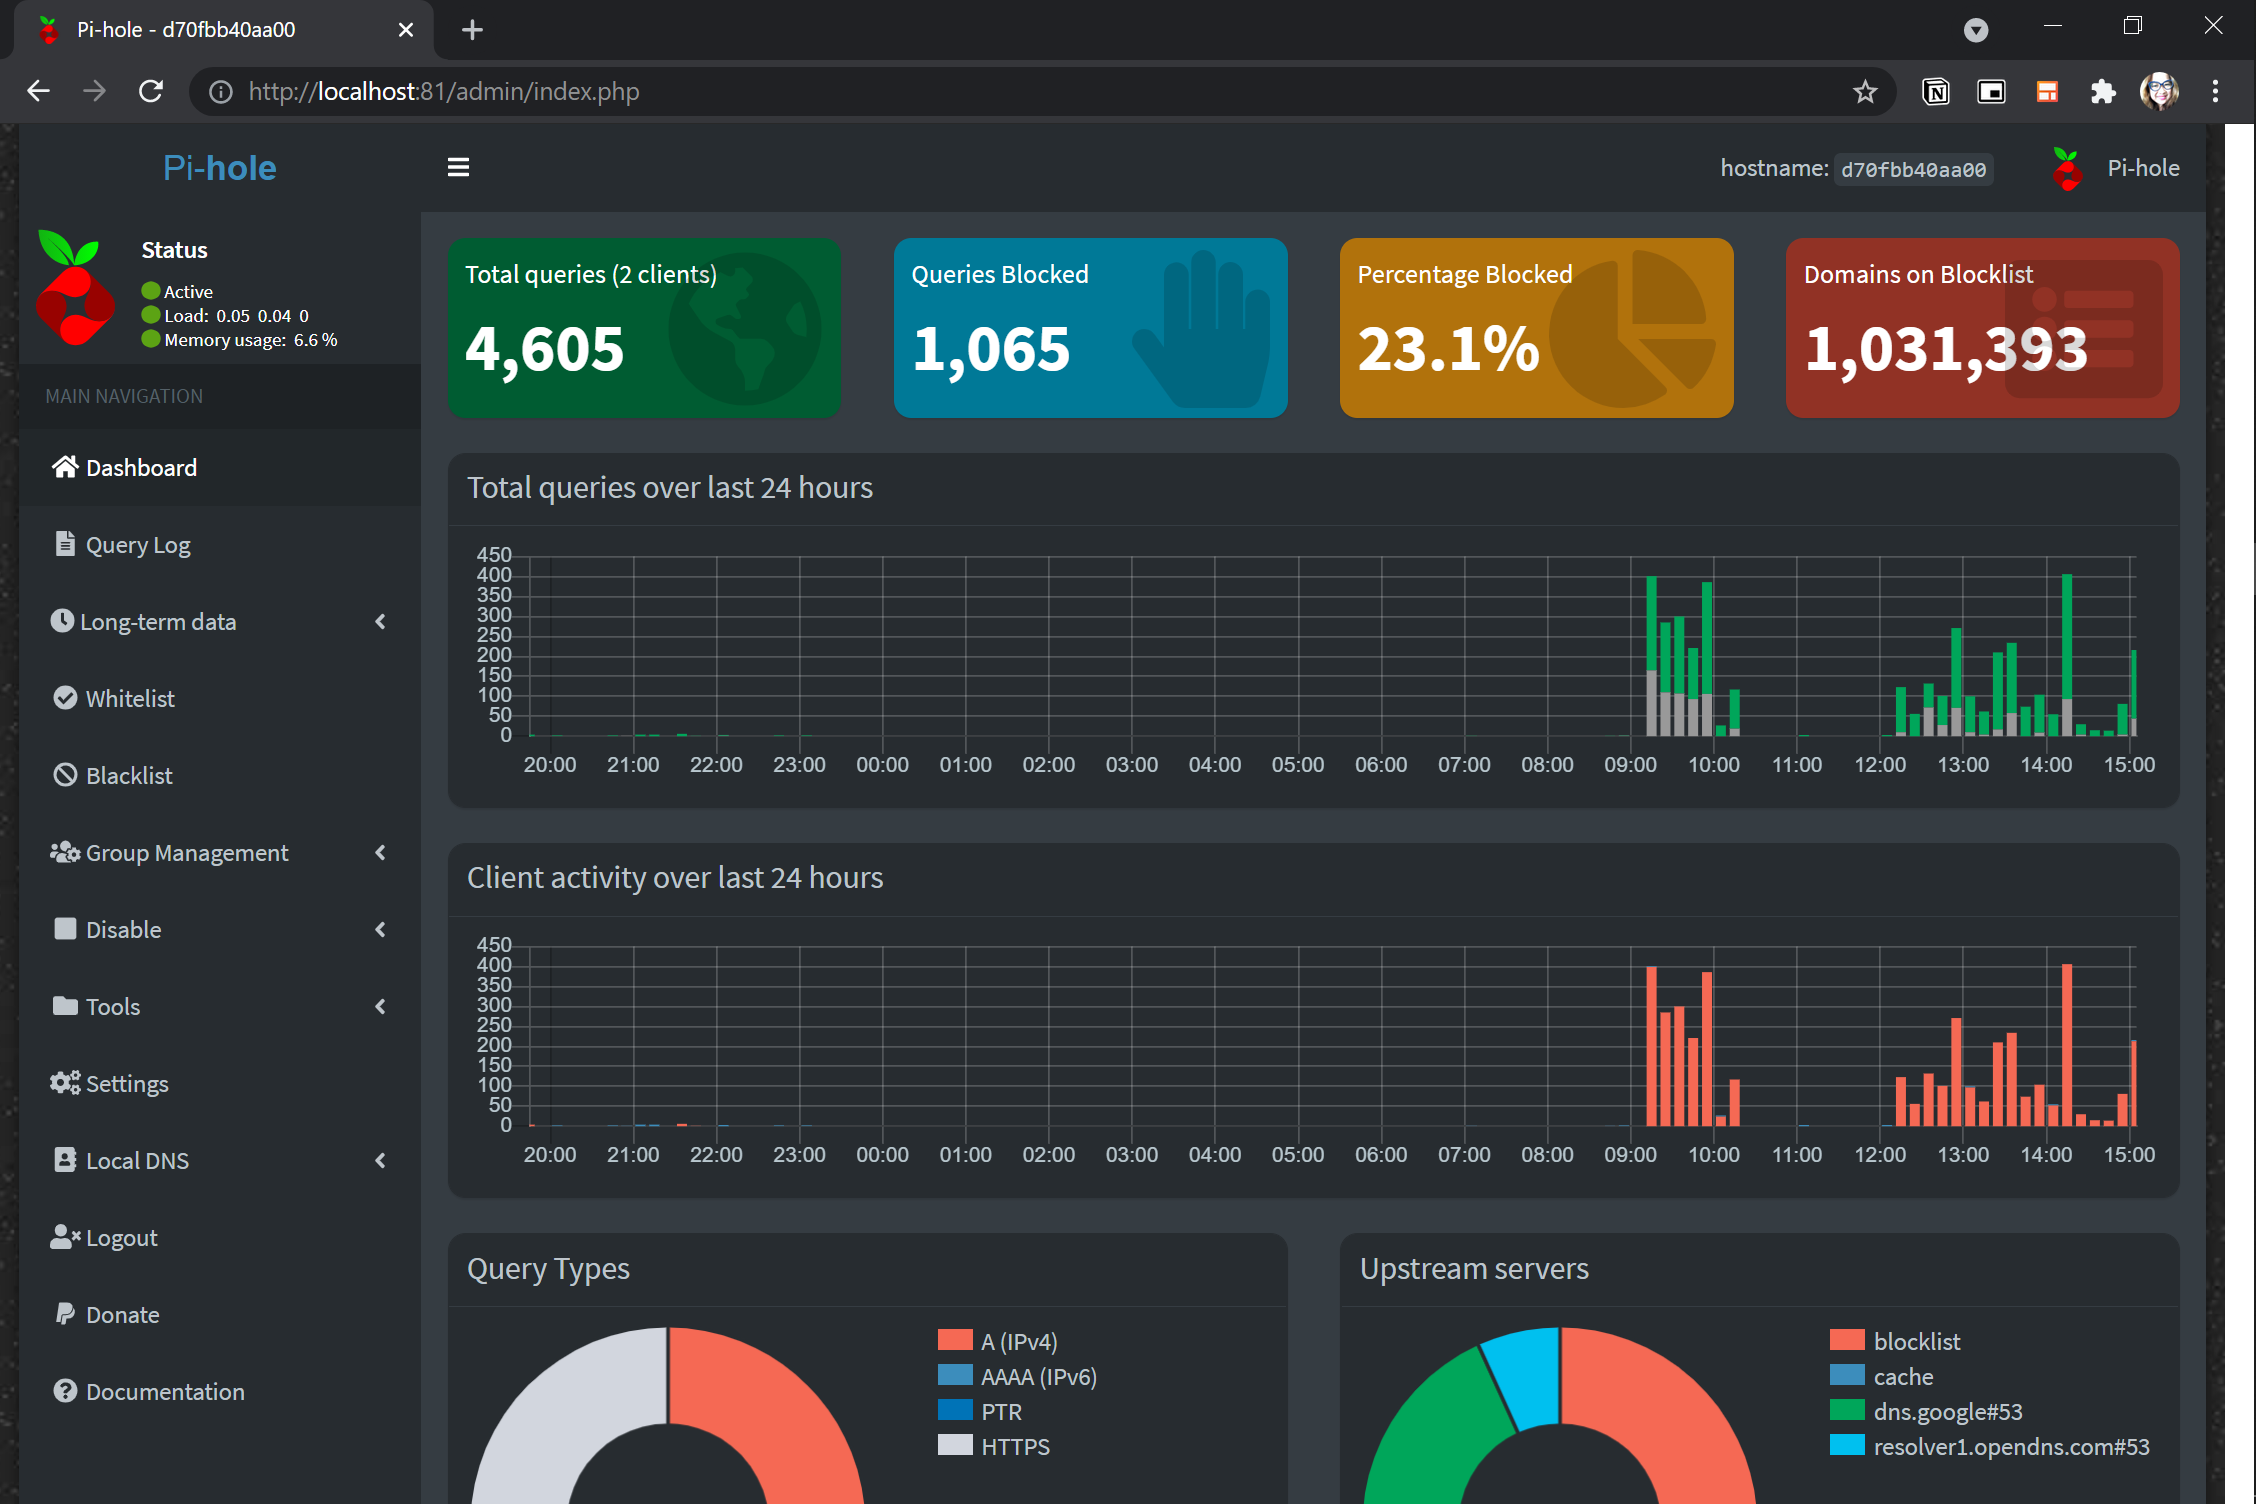
For this example, the websites of Daily Mail and the New York Times were visited repeatedly for 5-10 minutes. The live browser admin on the Pi-hole dashboard shows the number of blocked ads from the device, as shown below.
The bar charts are a recent addition to Pi-hole’s latest version at the time of this writing. Some older versions have line charts instead.
Enabling Home Network-Wide Blocking via Router Settings
Rather than configuring a DNS server on a single device, try configuring DNS servers for all devices in your router settings. Depending on your router, there may or may not be a provision for using the IP address.
For this demo, the router did not allow access to changing DNS servers and DHCP. So home networking was not explored in full detail in this tutorial due to router constraints.
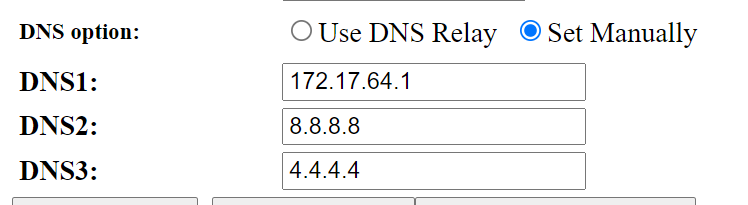
In a sample admin view, you may be able to encode the DNS server IP in the same way as it was done in a single device. This demo uses a Prolink PRS1841U-v2 router locked to ISP.
The DNS configuration interface differs from router to router, but the settings look like the one below.
You can also disable the DHCP server in the router and then enable the DHCP server in Pi-hole instead. A sample discussion in the Pi-hole community shows this in more detail.
Blocking Websites via Pi-hole Dashboard
The default installation of Pi-hole blocks around 92,725 websites by default, but you can also add more websites via blacklists from the Pi-hole maker and other lists shared by Pi-hole fans.
1. Save the websites to block in a text file with your preferred name. For this example, the file is named blocklist.txt.
2. Run the docker command below to copy the blocklist.txt file (cp blocklist.txt) to the Docker container’s volume in a file named blacklist.txt. Keep the blacklist.txt file on the Docker volume so that Pi-hole will detect it automatically.
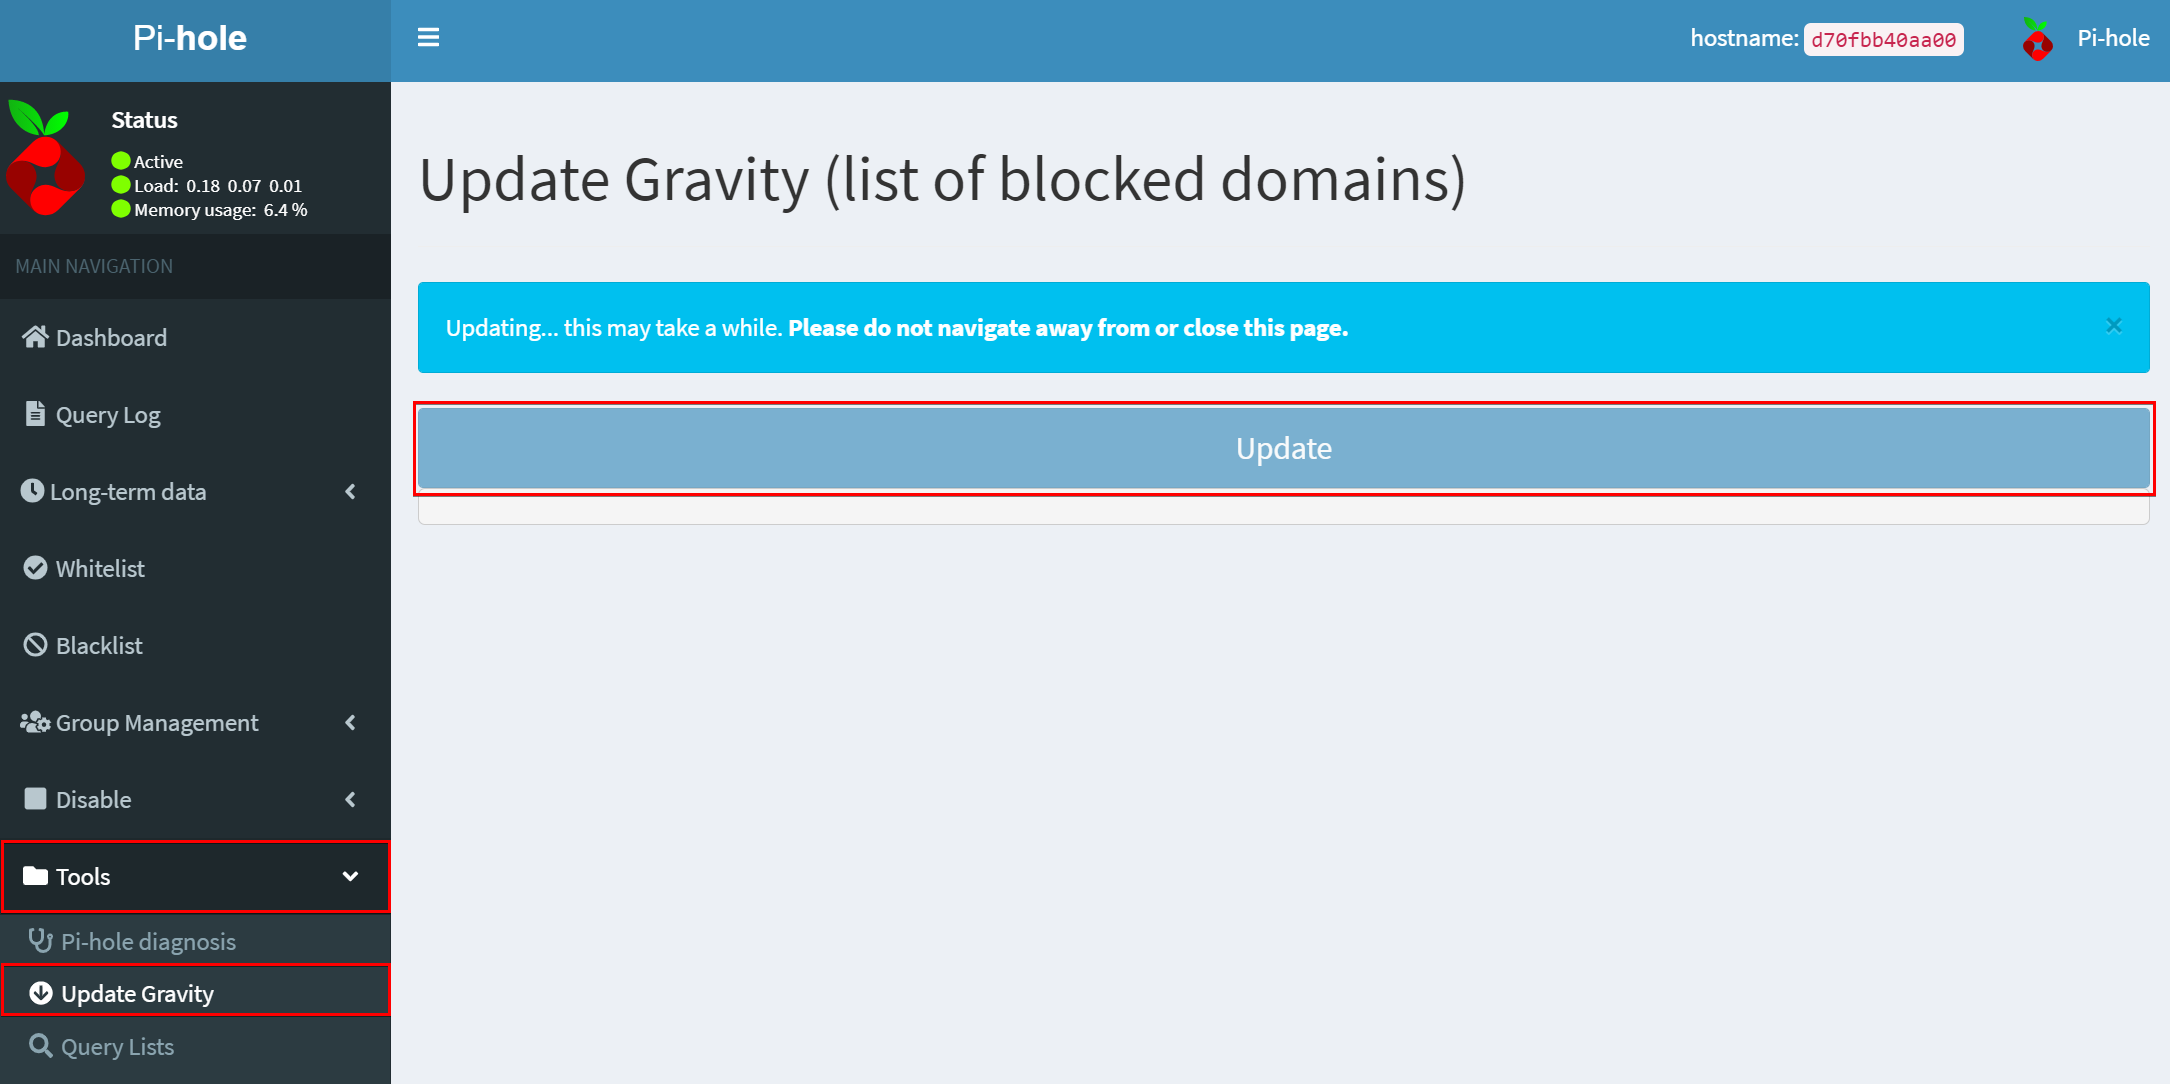
docker cp blocklist.txt d70:/etc/pihole/blacklist.txt3. Finally, navigate to the Pi-hole admin dashboard again. Click the Tools menu in the left panel and then the Update Gravity link. Finally, click Update to retrieve an updated list of URLs for Pi-hole to block.
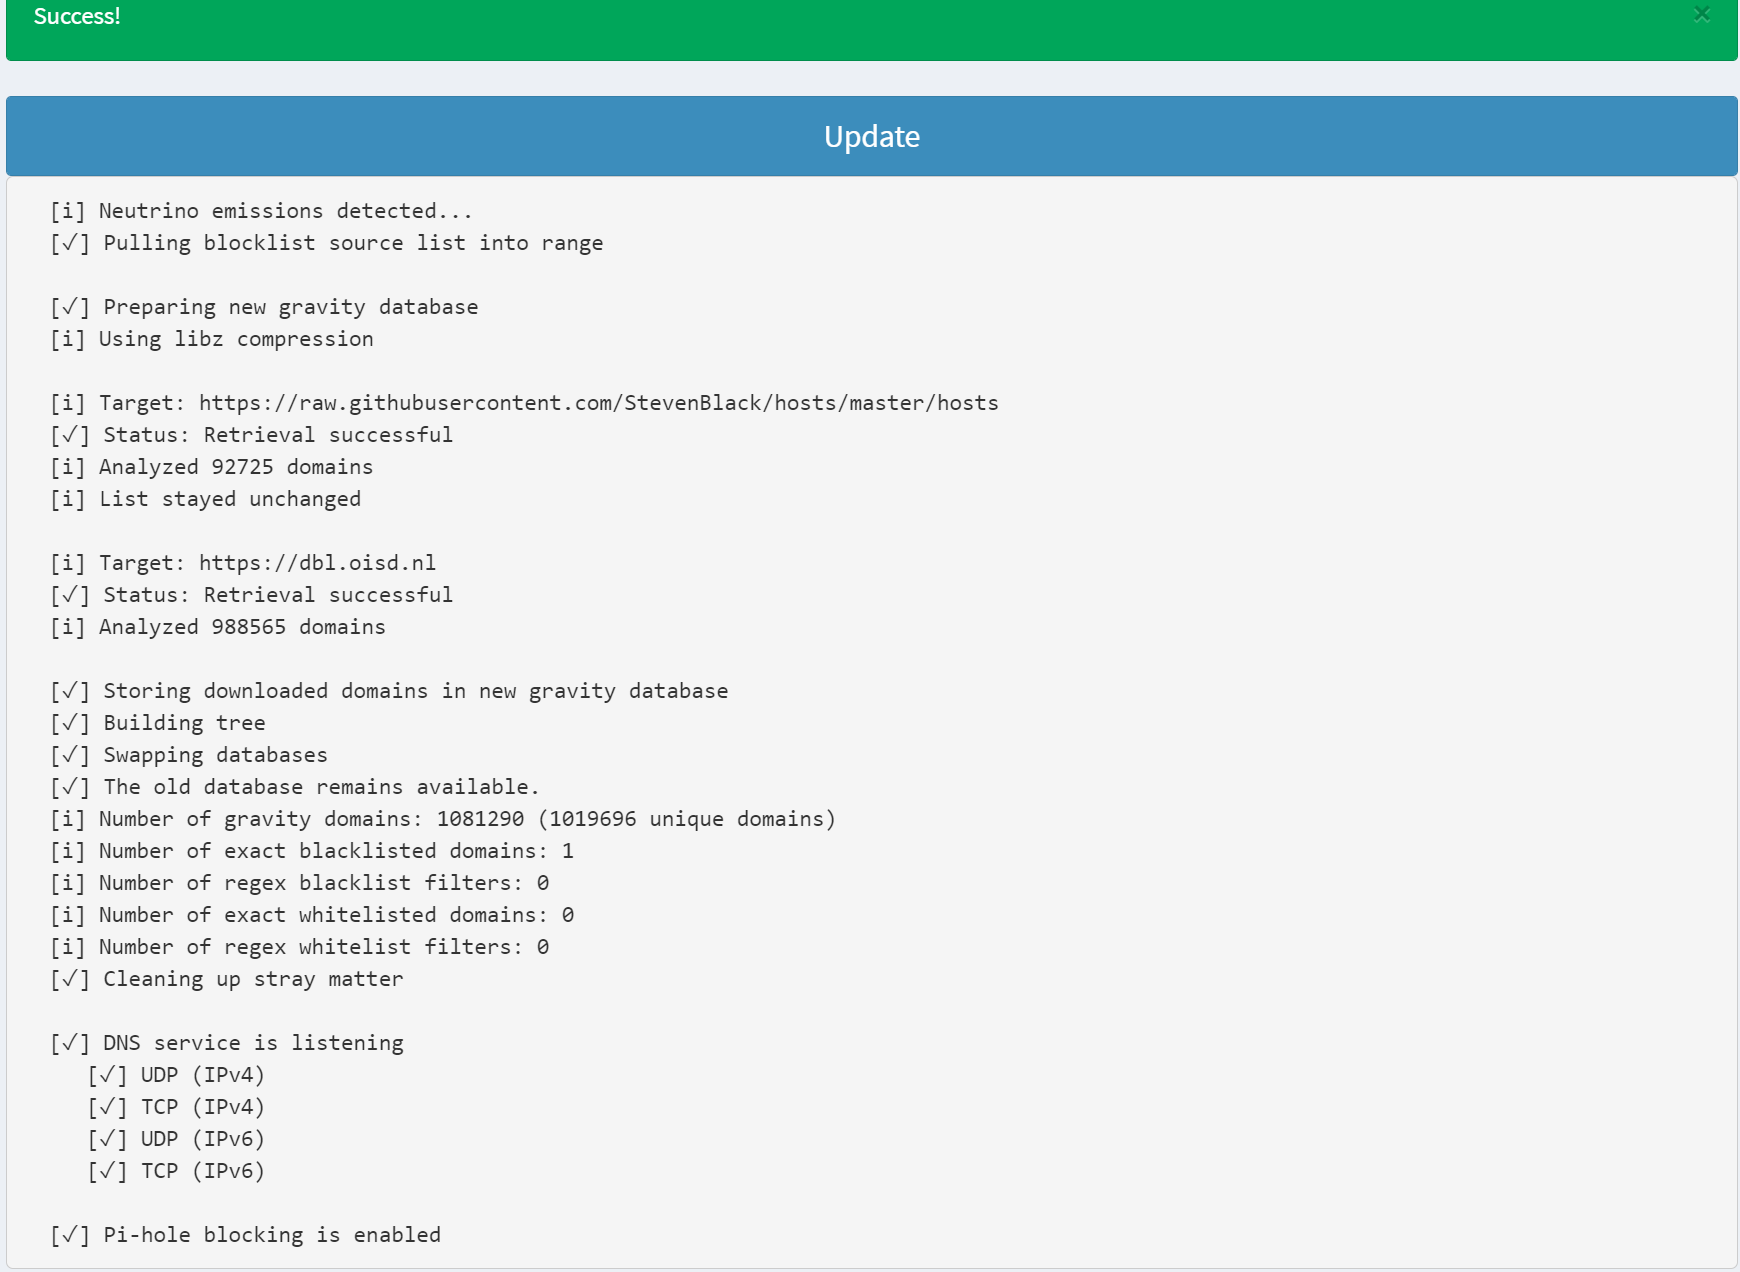
A successful update will look like the one below.
Updating the Blocklist of Websites via Console
Perhaps you prefer to run console commands rather than navigating the Pi-hole dashboard. If so, you can run a docker command in PowerShell to block websites. Run the docker exec command below to create an interactive terminal session to the pihole_app Docker container, which allows the running of commands.
docker exec -it pihole_app /bin/bashOnce the terminal session is open run the command below to update Pi-hole’s blacklist of URLs.
pihole -gRe-run
pihole -gfrom time to time so that your ad blocker will stay updated.
Blocking Websites via Community-Maintained Blacklists of URLs
Some URLs are dedicated to being updated regularly by their contributors, and some are not, so uploading a blacklist from an old list may not reflect the latest changes.
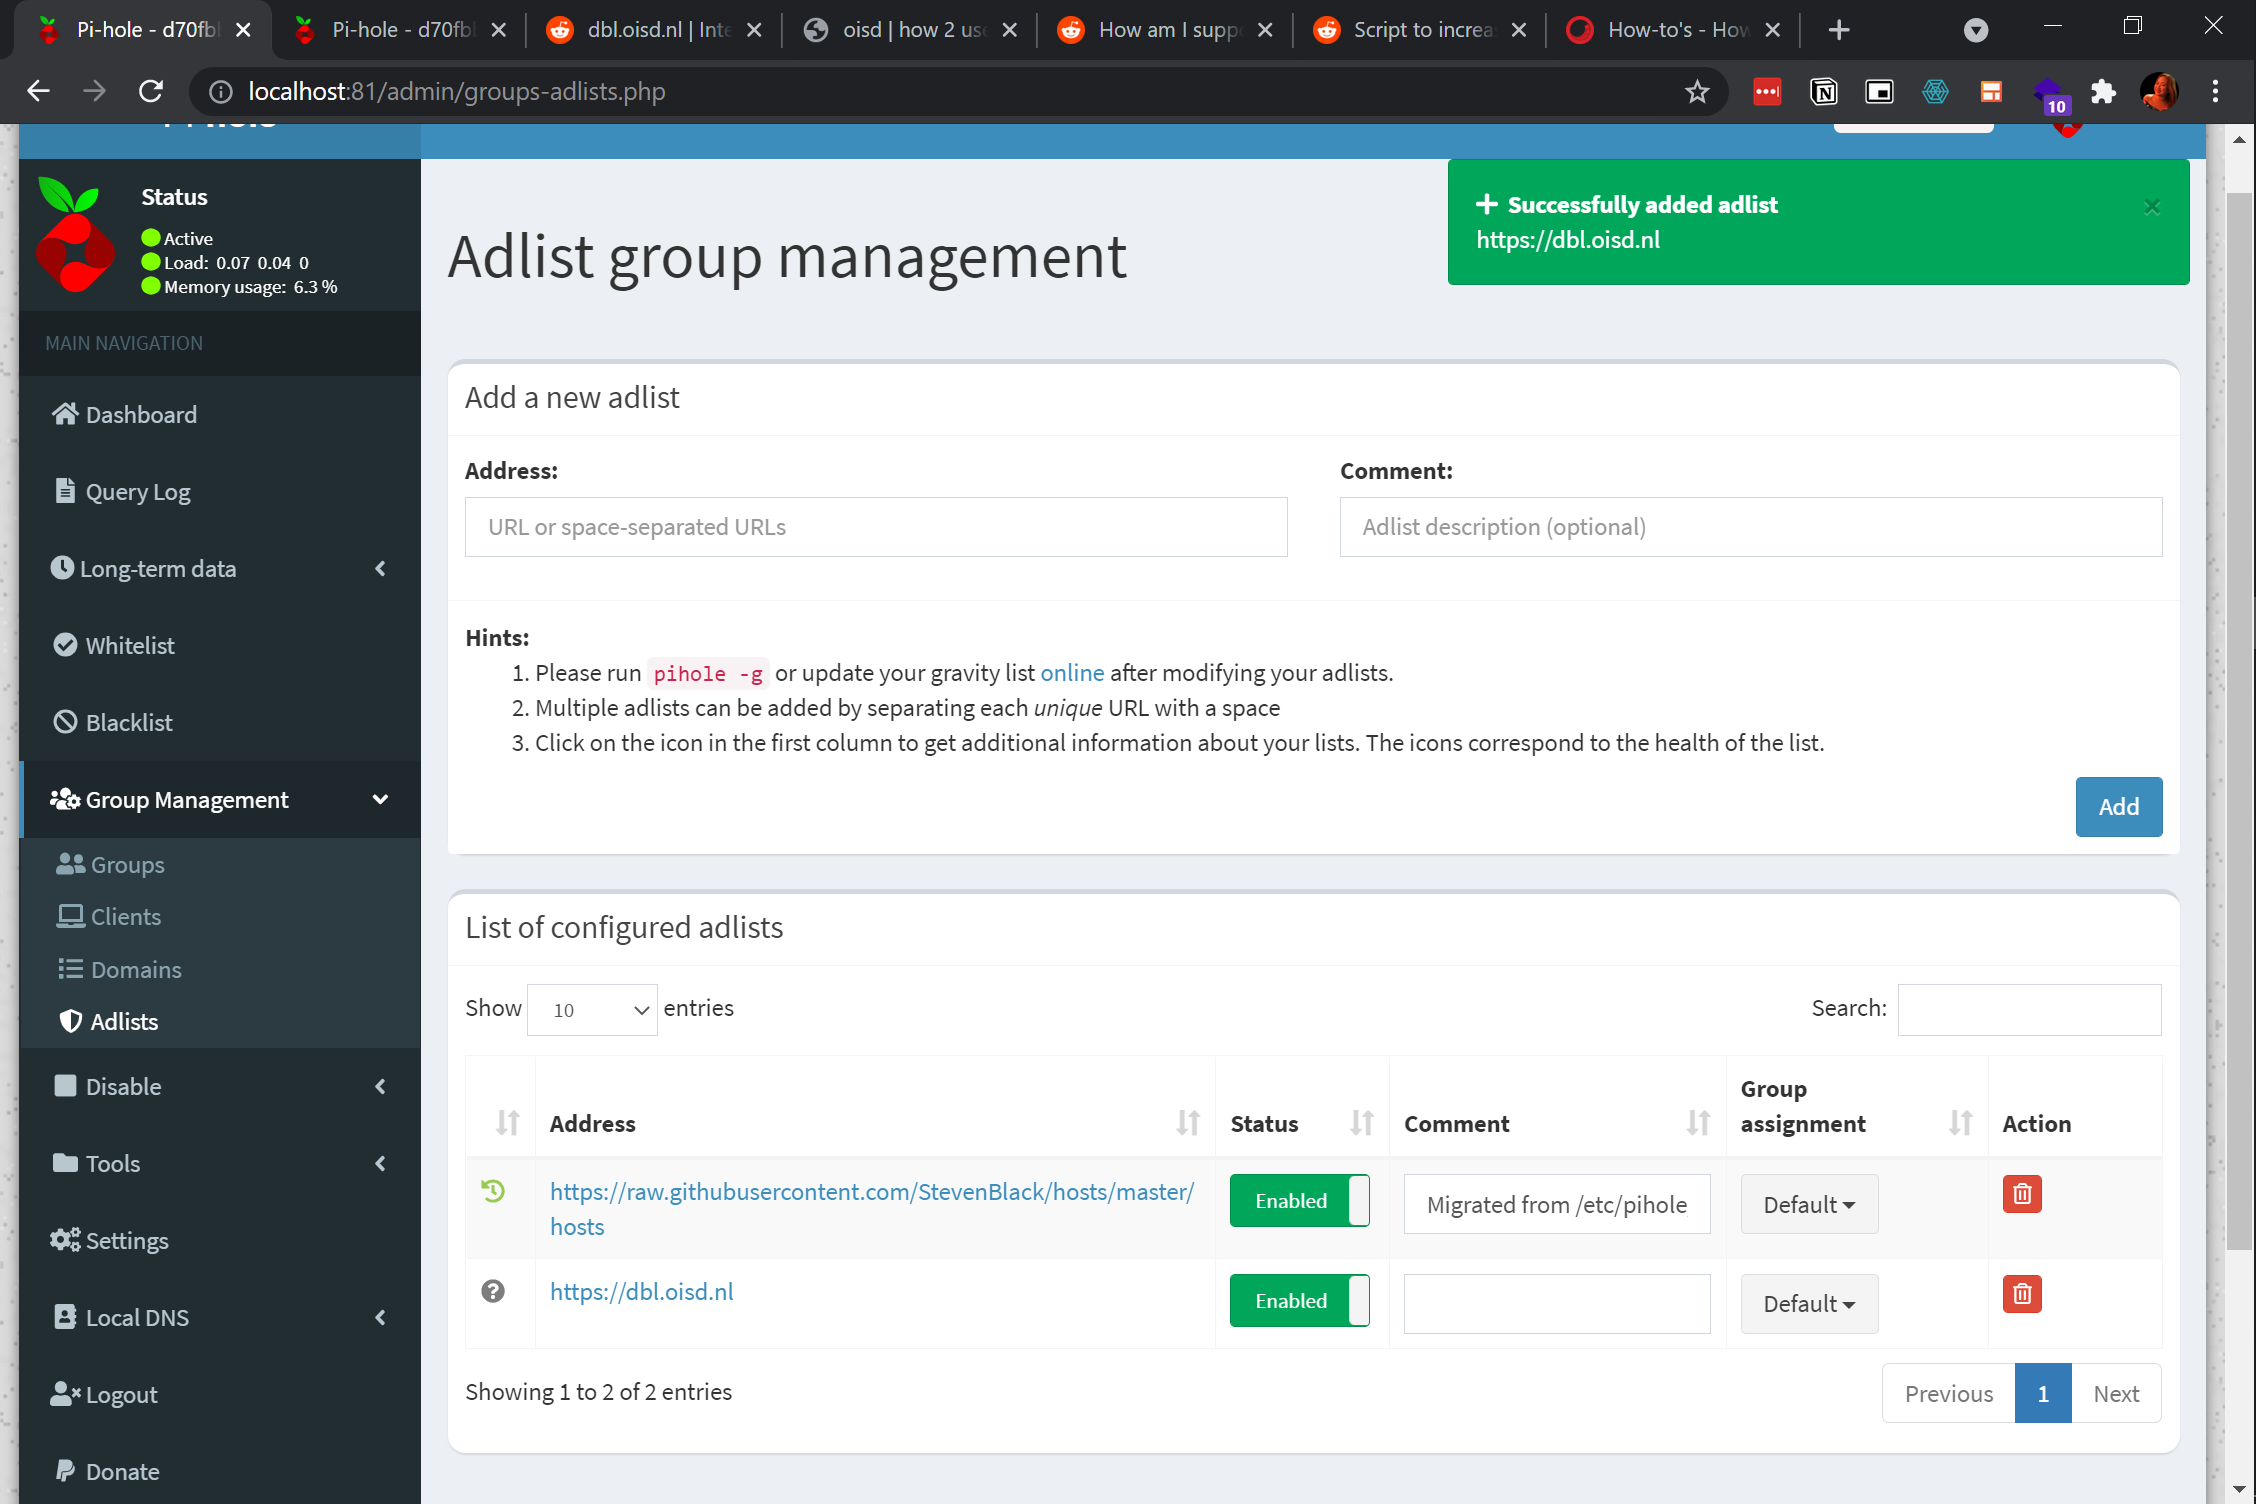
Leverage the Adlist block list group management feature of Pi-hole. On the Pi-hole dashboard, click on the Group Management → Adlists menu at the left panel, then click on Add to choose the list of URLs you want to add in Pi-hole.
Conclusion
In this tutorial, you learned how to download a Pi-Hole Docker image, test out an active listening Pi-hole web interface, test an external device to connect to Pi-hole. You’ve also learned how to block ads and websites, that you’ve seen the Pi-hole dashboard in action as it blocks them.
With this knowledge, why not use any host machine to block ads to other connected devices in the same network?


