


Does your web server feel like it is dragging its feet, especially when your traffic picks up? Well, you have come to the right place! The PageSpeed Module for Apache is the key to revving your web server.
By the end of this tutorial, you will have a powerful tool that will supercharge your server and have those pages loading faster than you can say “swiftly.”
Read on and turn your website into a speed demon!
Prerequisites
Before you dive into the nitty-gritty of optimization, ensure you are all set up for this speed-boosting adventure:
- A Linux server running Ubuntu 20.04/22.04 – This tutorial uses Ubuntu 22.04.
- A user with sudo privileges.
- The Apache web server is installed on your Ubuntu server.
Installing the PageSpeed Module
Picture this: your Apache web server, tirelessly churning out content to the world (a workhorse), but over time, your server can get bogged down. In such cases, this module is your server’s secret weapon against sluggish load times and unimpressed visitors.
The module you are about to install is an open-source web server module for optimizing and reducing the load times of your websites.
To install the module, carry out these steps:
1. Open a terminal and run the below command to perform the following:
- Provides information about the architecture of your system, displaying detailed CPU information (
lscpu). - The output is then piped (
|) togrep Architecture, which searches for lines containing the wordArchitecture.
- Extracts and prints the second field (which contains the actual architecture value) from the filtered output (awk {‘print $2’}).
lscpu | grep Architecture | awk {'print $2'}The result below displays if you have a 64-bit system architecture.
Note the result, as it will be your basis for downloading the package.

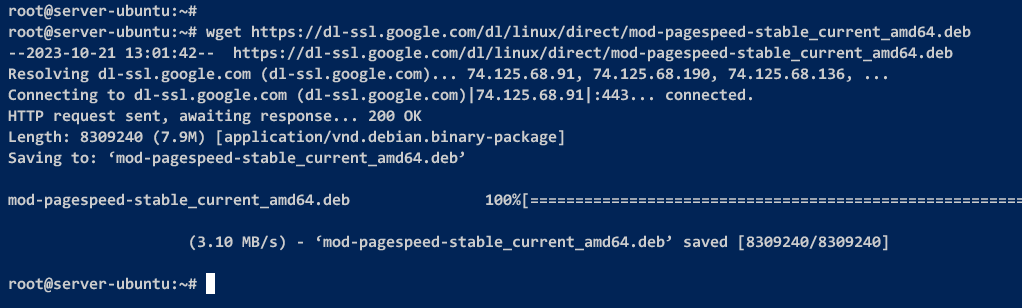
2. Next, run either wget command below to download it for Debian-based distribution.
# PageSpeed module for 64-bit architecture
wget https://dl-ssl.google.com/dl/linux/direct/mod-pagespeed-stable_current_amd64.deb

# PageSpeed module for 32-bit architecture
wget https://dl-ssl.google.com/dl/linux/direct/mod-pagespeed-stable_current_i386.debIf successful, the mod-pagespeed-stable_current_amd64.deb file becomes available on your system.
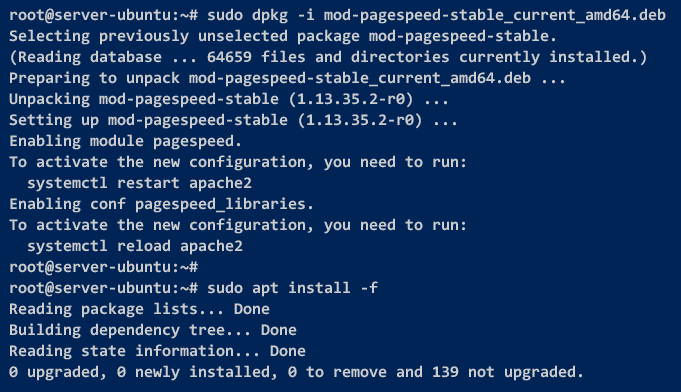
3. Once downloaded, run the dpkg command below to install the PageSpeed module package (mod-pagespeed-stable_current_amd64.deb) and its dependencies.
# Install the PageSpeed module package
sudo dpkg -i mod-pagespeed-stable_current_amd64.deb

# Resolve any dependencies or missing packages
sudo apt install -f
This supports Apache2 and NGINX web servers and 32-bit and 64-bit architectures. Thus, this module is a must-have for anyone serious about web performance.
4. With the module installed, run the following commands to enable (a2enmod) it to restart the apache2 service, and apply the changes.
# Enable the PageSpeed module for Apache
sudo a2enmod pagespeed

# Restart the Apache web server to apply the changes
sudo systemctl restart apache2
💡 You can also disable the module when necessary with the following command:
sudo a2dismod pagespeed
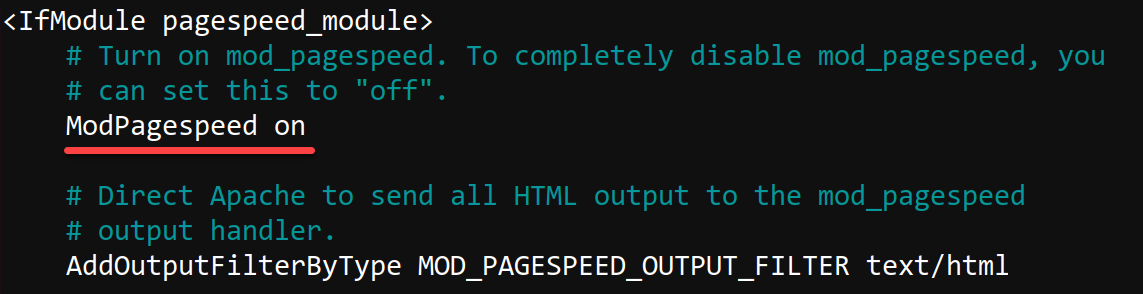
💡 Additionally, you can enable and disable it manually by modifying the configuration (/etc/apache2/mods-enabled/pagespeed.conf). You can enable the it with ModPagespeed on or disable it using ModPagespeed off.
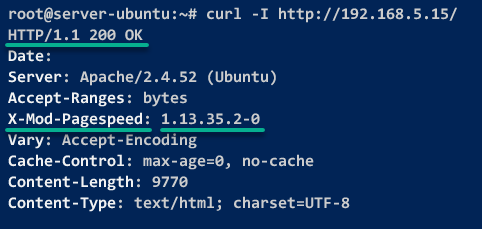
5. Lastly, run the curl command below to send a HEAD request (-I) to the specified URL. A HEAD request retrieves only the headers of the HTTP response without the actual content.
Ensure you replace SERVER-IP with your server’s IP address.
curl -I http://SERVER-IP/The HTTP header X-Mod-Pagespeed: 1.13.35.2-0 indicates that the PageSpeed installation is successful with the following breakdown:
- The X-Mod-Pagespeed header is a custom HTTP header introduced by the module. When present, this header signifies that the module is active and functioning.
- The version number 1.13.35.2-0 after X-Mod-Pagespeed verifies the installed PageSpeed module.
- The HTTP status code of 200 OK alongside the X-Mod-Pagespeed header indicates the request was successful, and the server responds with the requested content.
Configuring the PageSpeed Admin Page
Kudos on getting the PageSpeed Module running. But still, you must ensure your Apache server is optimized for peak performance.
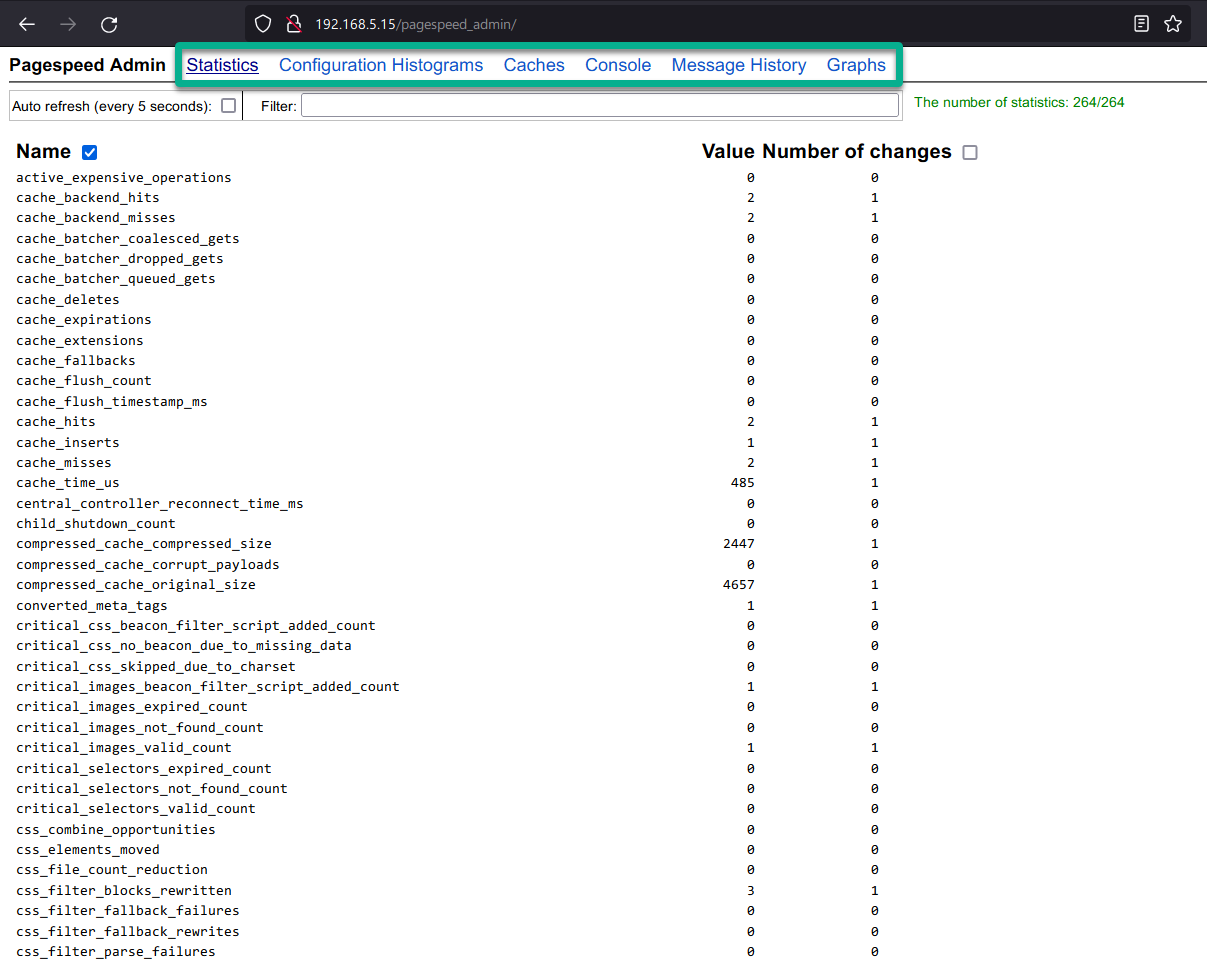
You will elevate control by configuring the PageSpeed admin page. PageSpeed provides an admin dashboard for monitoring the performance and logs and can also show PageSpeed configurations.
To configure the PageSpeed admin page, proceed with the following steps:
1. Open PageSpeed’s configuration file (/etc/apache2/mods-enabled/pagespeed.conf) using your preferred text editor.
2. Next, add the option Allow from all to both <Location /pagespeed_admin>…</Location> and <Location /pagespeed_global_admin>…</Location> sections, as shown below.
Once added, save the changes and close the editor. This configuration makes the PageSpeed admin page accessible from anywhere.

💡 Alternatively, you can make the PageSpeed admin page accessible from a specific IP address. How? By changing the option
Allow from alltoAllow from <IPADDRESS>, replacing<IPADDRESS>with your preferred IP address.
3. Now, run the systemctl command below to restart the apache2 service and apply the changes.
sudo systemctl restart apache24. Lastly, launch your web browser visit one of the following, replacing *SERVER-IP* with your server’s IP address:
| PageSpeed admin page | http://SERVER-IP/pagespeed_admin |
|---|---|
| PageSpeed global admin page | http://SERVER-IP/pagespeed_global_admin |
| Menu | Function |
|---|---|
| Statistics | Shows server statistics such as optimized resources, latency, and PageSpeed cache. |
| Configuration | Shows details of PageSpeed configuration, including enabled filters, additional options, and cache flush timestamp. |
| Histograms | Shows detailed information on load time pages, rewriting, caches, and HTTP fetching. |
| Caches | Displays details of cache configurations. |
| Console | Displays console graph of PageSpeed optimization over time. |
| Message History | Displays recent logs from PageSpeed. |
| Graphs | Allows you to view graphical representations of various performance metrics and statistics related to the PageSpeed module’s operation. |
Configuring PageSpeed Rewriting Levels and Filters
With the PageSpeed admin page configured, enhancing your website’s speed and reducing latency is crucial. If you have ever wondered why some websites load faster than others, it is not magic but a result of advanced server-side optimizations.
You can dramatically boost your Apache server’s performance by configuring PageSpeed rewriting levels and filters. PageSpeed filters are like magic tricks for web pages; they work behind the scenes to make your website load snappier and smoother for visitors.
To configure, enable/disable PageSpeed filters to optimize your websites, follow these steps:
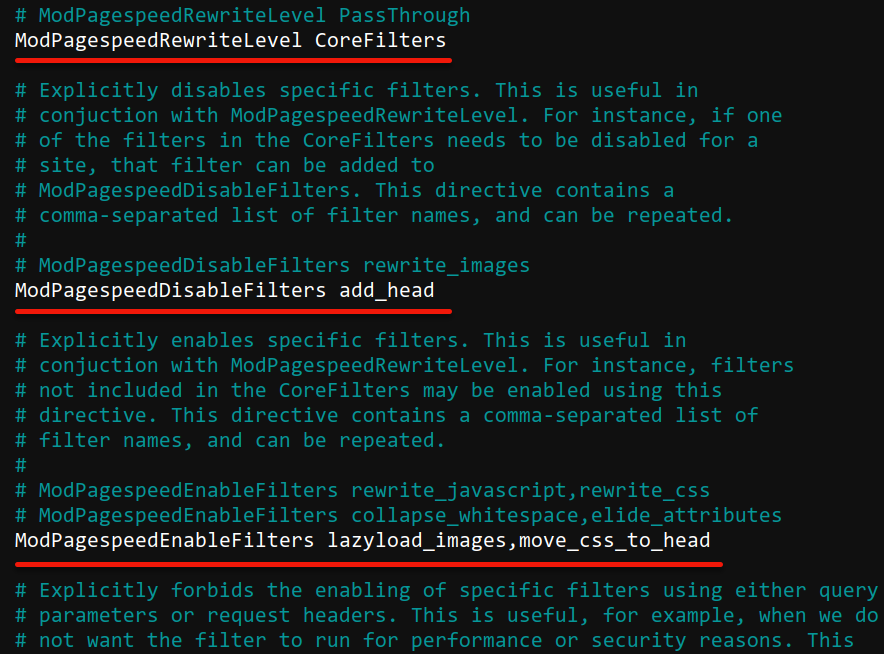
1. Open the PageSpeed configuration (/etc/apache2/mods-enabled/pagespeed.conf), and add the following options. These options let you set up Rewrite Level via CoreFilters and disable and enable specific filters, as follows, that are safe for most websites:
add_head– Lets PageSpeed add necessary CSS and JavaScript code directly into the<head>section of your HTML. This filter helps speed up the initial loading of your page because the critical stuff gets priority access.
The decision to disable theadd_headfilter should be based on the specific requirements and circumstances of the website in question.lazyload_images– This filter tells PageSpeed to load the images only when they are about to appear on the “stage” (to be seen by the user). This behavior saves bandwidth and makes your page load faster.move_css_to_head– Instructs PageSpeed to take any CSS in the middle of your HTML and move it up to the<head>section. This way, the styles are ready before the page starts rendering, which helps display content more quickly and smoothly.
# Set up Rewrite Level using CoreFilters
ModPagespeedRewriteLevel CoreFilters

# Disable the add_head filter
ModPagespeedDisableFilters add_head

# Enable specific filters
ModPagespeedEnableFilters lazyload_images,move_css_to_head
Once added, save the file and exit the editor.
2. Now, run the below systemctl command to restart the apache2 service and apply the changes.
This command does not provide output, but you will verify the changes in the following step.
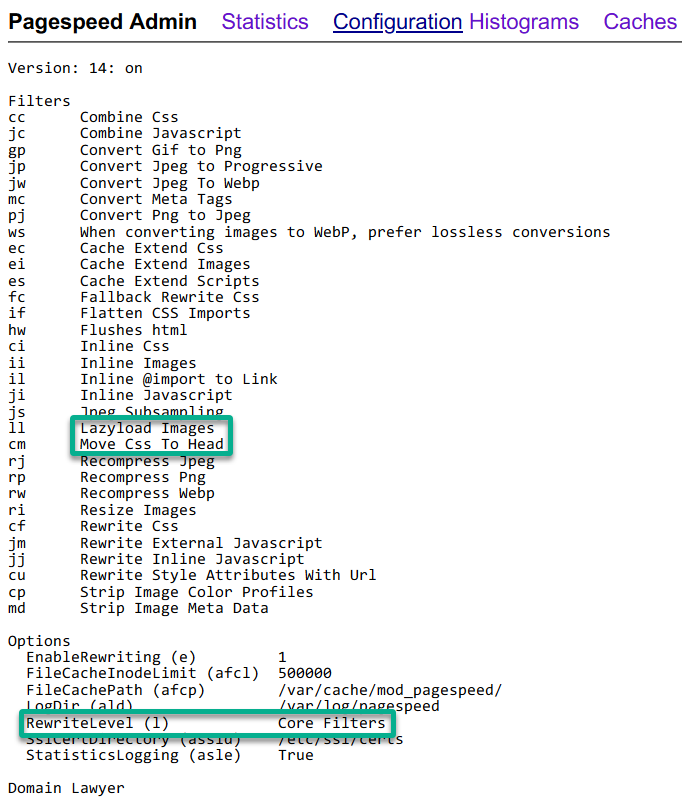
sudo systemctl restart apache23. Lastly, switch back to the PageSpeed admin page and click the Configuration menu.
If the configuration is successful, you will see the list of enabled PageSpeed filters, including Lazyload Images and Move Css To Head. Plus, the default RewriteLevel is configured to Core Filters.
Integrating PageSpeed with External Cache via Memcached
Having fine-tuned PageSpeed with rewriting levels and filters is excellent, but why not take the configurations up a notch? You need a powerful strategy for enhancing your website’s performance, scalability, and user experience — integrating PageSpeed with Memcached external cache.
You must configure the server-side caching for PageSpeed to get most of the PageSpeed module. The default cache method enabled by PageSpeed is file cache, but it also supports other caching methods, such as in-memory LRU cache and external cache via Memcached and Redis.
To integrate PageSpeed with external cache via Memcached, complete the steps below:
1. Run the below apt command to install memcached to your Ubuntu system.
sudo apt install memcached -y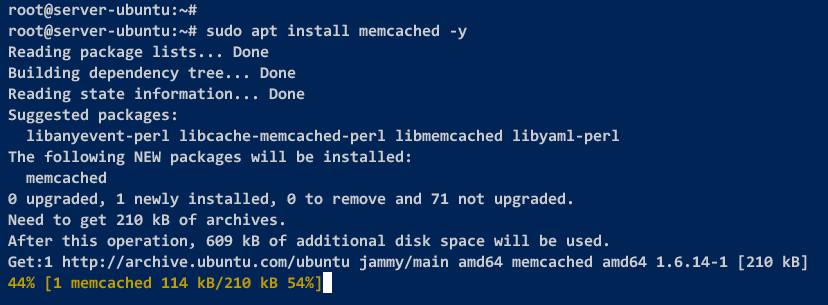
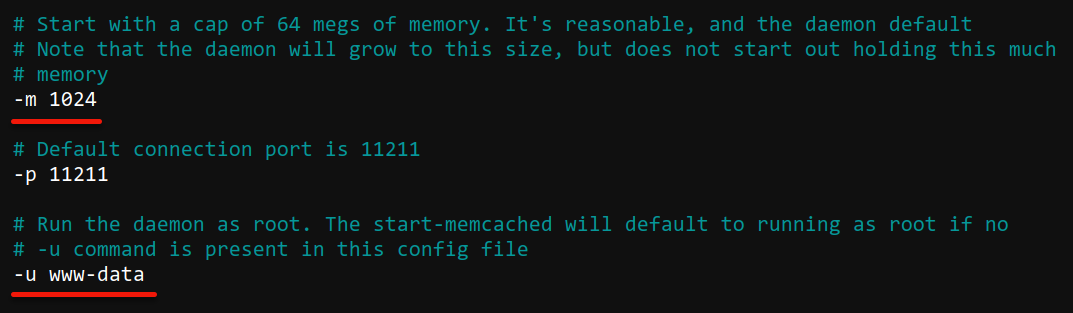
2. Once installed, open the Memcached configuration (/etc/memcached.conf), increase the default memory option (-m) to 1024 MB, and change the default user (-u) to www-data.
After the changes, save the file and exit the editor.
3. Next, run the systemctl command below to restart the memcached service.
This command does not produce output, but you will later see the result in the following steps.
sudo systemctl restart memcached4. Next, open the PageSpeed configuration (/etc/apache2/mods-enabled/pagespeed.conf) and modify the Memcached servers as follows:
- Look for and uncomment the ModPagespeedMemcachedServers option by deleting the hash sign (#).
- Change the localhost value to 127.0.0.1 to ensure consistent and reliable connections to the Memcached server.
This option enables Memcached integration and inputs the server IP address and port.

5. Now, run the below systemctl command to restart the apache2 service.
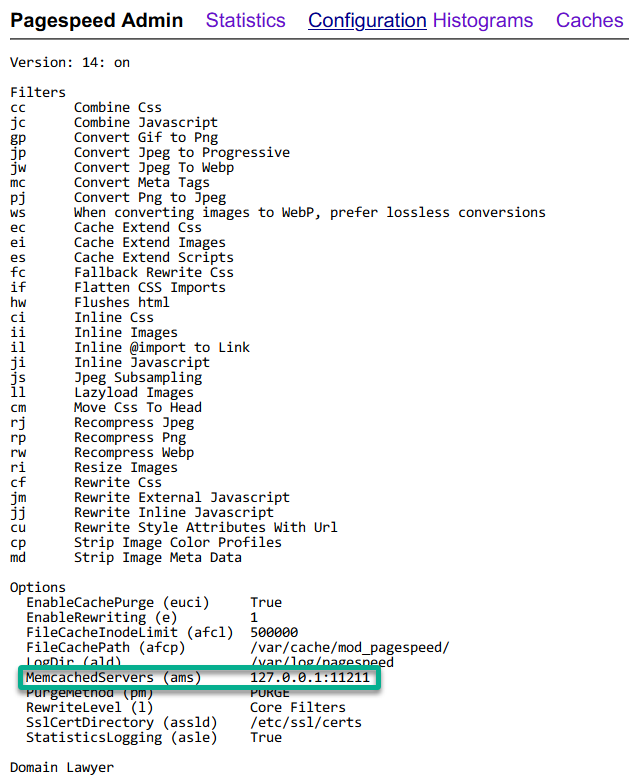
sudo systemctl restart apache26. Refresh the Configuration page within the PageSpeed admin page.
In the MemcachedServers section, you will see the memcached host 127.0.0.1 and port 11211. This information is crucial for ensuring that PageSpeed is correctly configured to use Memcached as an external cache.
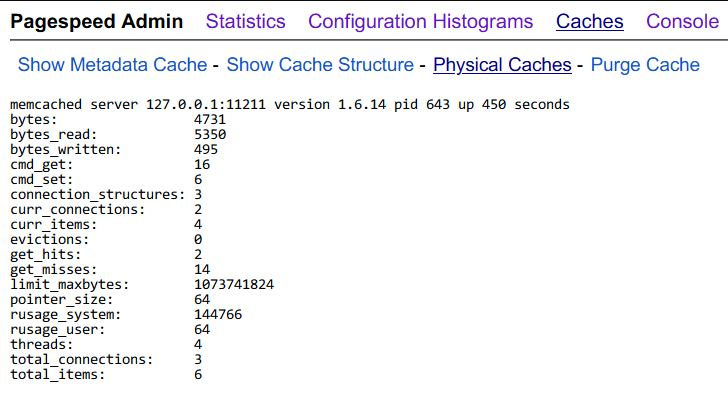
7. Lastly, navigate to the Caches menu and click the Physical Caches sub-menu to view real-time insights into how Memcached is actively caching and serving content.
This information offers several benefits:
- Monitoring Performance – Allows you to monitor how Memcached performs in real-time. You can see metrics like cache hits, misses, and evictions. This information helps in understanding how efficiently Memcached is improving website performance.
- Troubleshooting – This view can provide valuable diagnostic information if there are any issues with Memcached. For example, a high rate of cache misses might indicate that certain resources are ineffective.
- Optimization – Observing server activity lets you identify patterns and optimize caching strategies. For instance, you might discover opportunities to cache additional resources or adjust cache expiration times.
- Capacity Planning – Understanding the activity in Memcached helps with capacity planning. If the cache is frequently reaching its limit, this behavior might indicate you need to allocate more resources or adjust cache configurations.
- Validation of Configuration – Provides a visual confirmation that Memcached is actively working with the configurations you have set up. This view helps ensure that your caching setup is effectively integrated into your website’s performance strategy.
Conclusion
Throughout this tutorial, you have embarked on a journey that transforms your Apache web server’s performance. You have armed your web server with a potent tool for rapid web experiences. This action includes installing the PageSpeed Module, configuring various settings like filters, and integrating PageSpeed seamlessly with an external cache via Memcached.
Now, why not consider diving deeper into Apache’s configuration options? Perhaps explore optimizing bandwidth usage with rewrite level OptimizeForBandwidth on PageSpeed? Or add new filters and implement PageSpeed on Apache virtual host configurations?
Keep fine-tuning, experimenting, and pushing the boundaries of what your Apache web server can achieve!


