


Your SSH keys are your server access credentials, and keeping them secure is crucial. But how? Consider using the Pageant PuTTY agent to hold your SSH keys in memory, which is more secure than storing them on your hard drive.
In this tutorial, you’ll learn how to use Pageant to manage your SSH keys and securely log in to your servers.
Read on to never worry about your SSH keys again!
Prerequisites
This tutorial will be a hands-on demonstration. If you’d like to follow along, be sure you have the following.
- A local computer – This tutorial uses Windows 10, but other versions of Windows will work.
- A server you’ll connect to via SSH – This tutorial uses Ubuntu 20.04 server, but any Linux server will work. But you can use any server, including a virtual private server (VPS) or even a Raspberry Pi at home.
- An account on your server that accepts SSH key-based authentication – This tutorial uses a root account.
- PuTTY installed on your local computer.
- An SSH key pair to use with Pageant.
Configuring PuTTY and Opening a Session
Before using your SSH key on Pageant, you must first configure your PuTTY session and ensure your server is accessible via SSH. PuTTY is a free and open-source terminal emulator, serial console, and network file transfer application.
PuTTY supports several network protocols, including SCP, SSH, Telnet, rlogin, and raw socket connections. On the other hand, Pageant is a companion application to Putty that allows you to hold your SSH keys in memory securely.
To configure a PuTTY session:
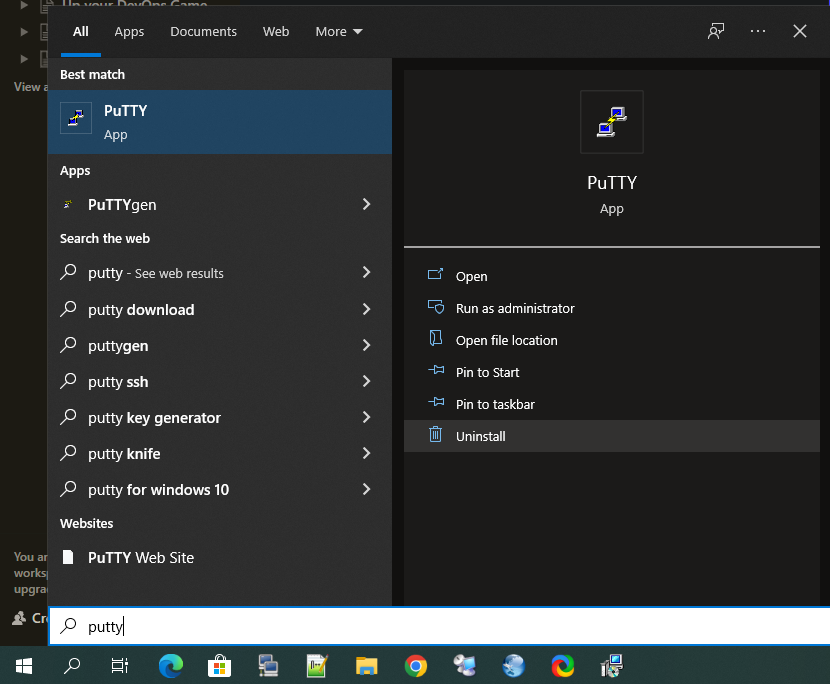
1. Launch PuTTY from the Start menu.
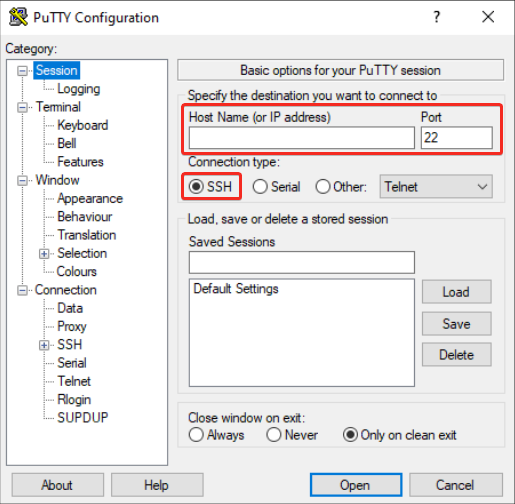
2. Now, configure your PuTTY Session settings in the main PuTTY window with the following:
- Enter your server’s IP address or hostname in the Host Name field.
- Set the port to the default SSH port (22).
- Select the SSH option under the Connection type.
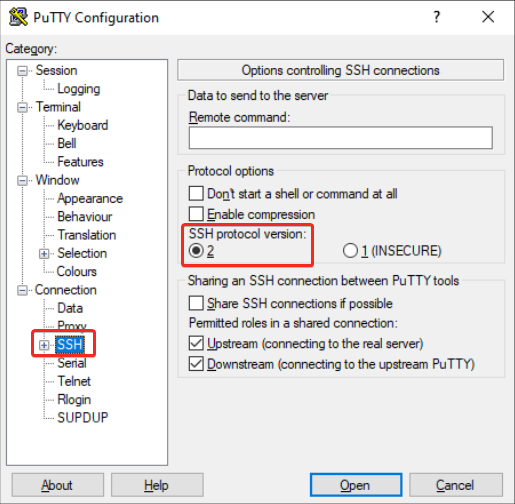
3. Select SSH under Connection in the left panel and select 2 as the SSH protocol version.
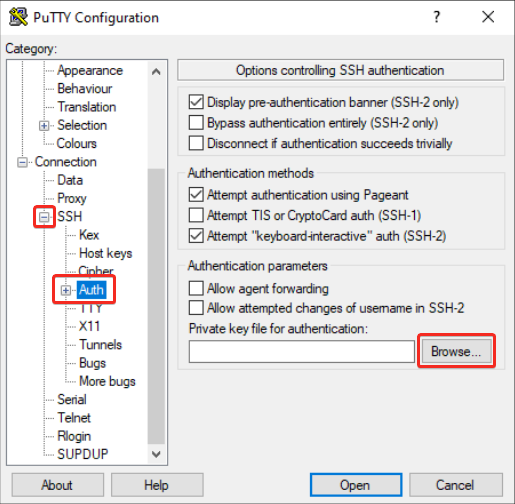
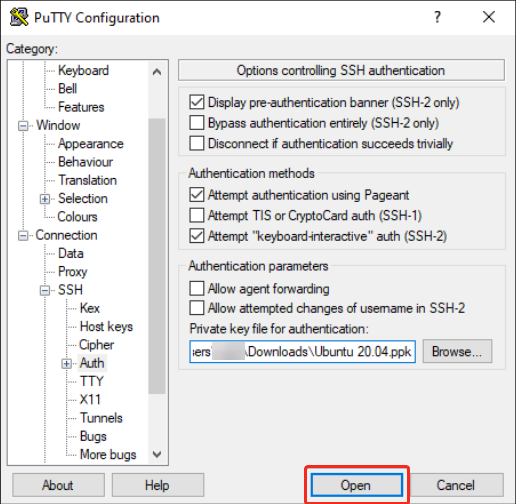
4. Next, expand SSH in the left panel, as shown below, and select Auth.
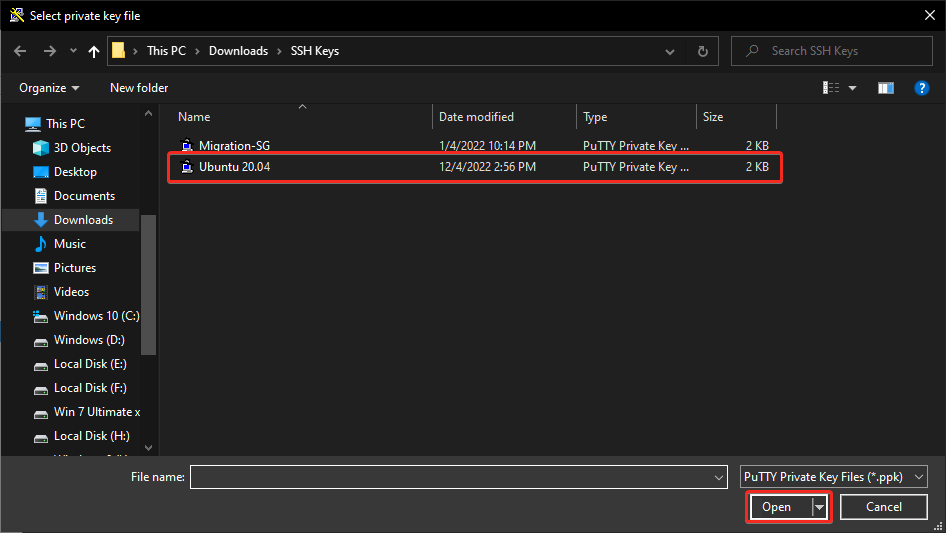
Click the Browse button next to the Private key for authentication field. A file explorer dialog box will open.
5. Locate and select your private key file.
6. Now, click Open in the PuTTY window to start a PuTTY session.
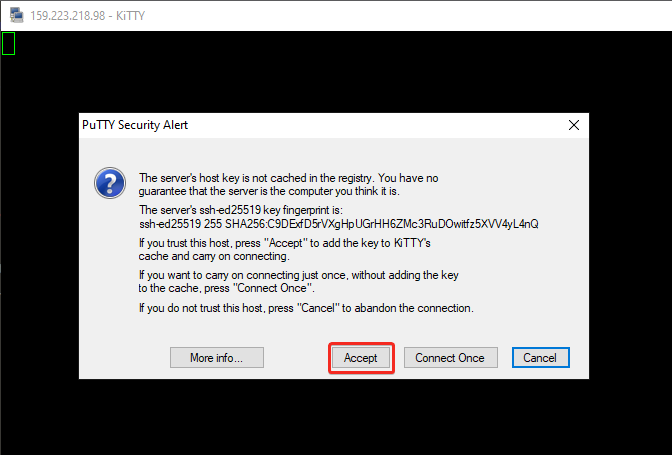
7. In your PuTTY session, click on Accept when you get the message prompt below. Doing so stores the key to PuTTY’s cache and will recognize the server in the future.
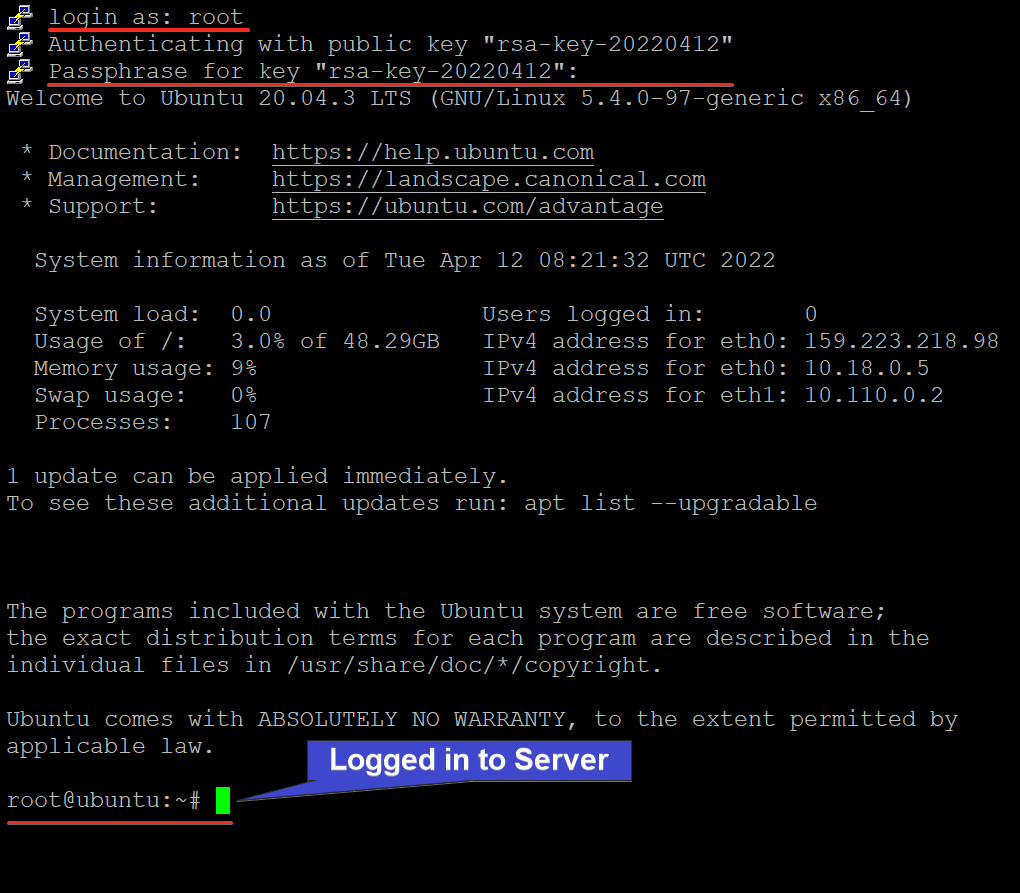
8. Lastly, provide your user name and passphrase for your private key, and hit Enter.
You should be logged in to your server via SSH if everything goes well, as shown below. If not, double-check that you entered the correct hostname or IP address and that your server is accessible via UFW from your network.
Adding Keys to Pageant PuTTY
Now you’ve confirmed PuTTY is working correctly, it’s time to add your SSH keys to Pageant. Adding your SSH keys to Pageant lets you use them for authentication in future sessions.
1. Launch the Pageant application from the Start menu.
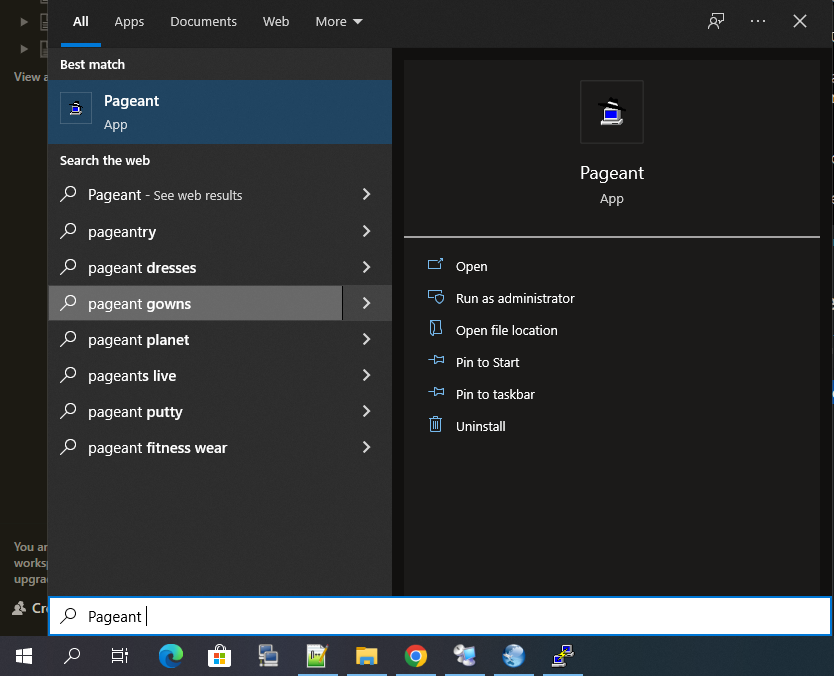
When Pageant starts, you’ll see a blue computer icon appear in your system tray.

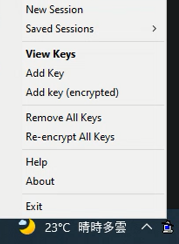
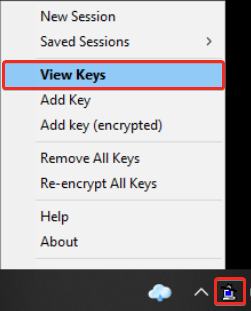
2. Right click on the Pageant icon, and select the Add Key option. A file explorer will open where you can locate and select your SSH key to add to Pageant (step three).
The other most-used options are listed below:
- New Session – Allows you to open a new terminal session with a key. This option is helpful when using a different key for each session.
- Saved Session – Allows you to open a new terminal session with a key that has been saved in the registry. This option is useful when you want to quickly open a session with a key that you have used before.
- View Keys – Allows you to view information about the currently loaded keys.
- Remove All Keys – Removes all keys from Pageant. What if you only want to remove a specific key? You will have the option to remove a particular key after adding it in the following section.
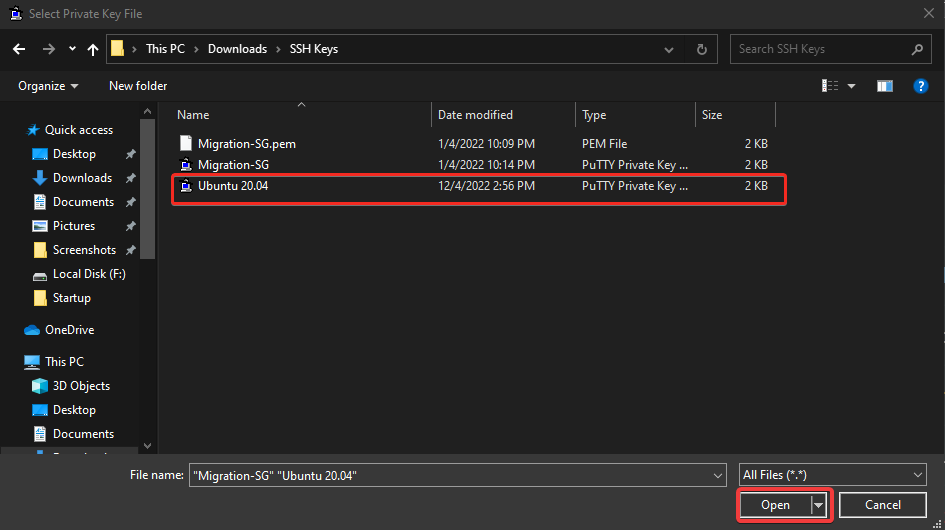
3. Navigate to your private key, select it, and click Open. You can choose one or multiple files, and you should select the file in .ppk format.
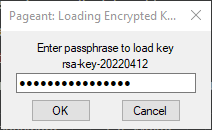
4. Lastly, enter the passphrase for your private key, and click OK.
Pageant uses this information to decrypt the key and make it available. Note that you’ll enter the passphrase only once when you first add the key. In the future, you can use it without entering the passphrase again.
Connecting to the Server via SSH
At this point, Pageant loaded your key(s), and you can use them for authentication when connecting to your server.
Right click on the Pageant icon and select View Keys, as shown below. Doing so opens the Pageant Key List.
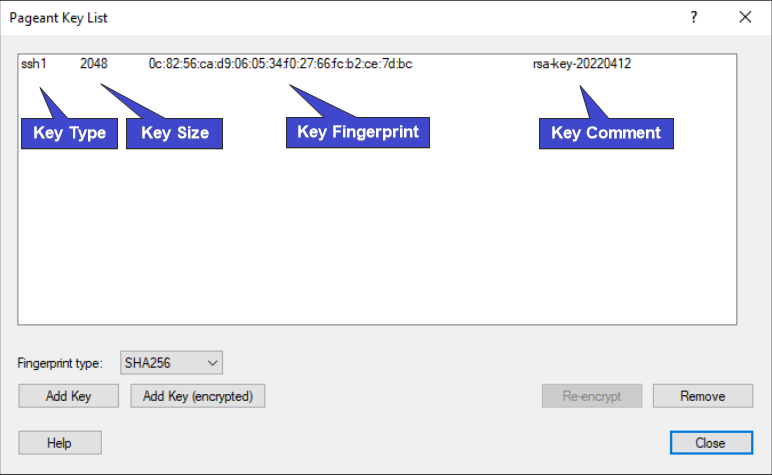
In the Pageant Key List Window below, you can see the key you added. Now that you have your key(s) loaded, you can use them for authentication.
You can also select a key and click the Remove button to remove a key from the list.
Now, relaunch PuTTY. But this time, just enter your server’s hostname or IP address in the Host Name field and click the Open button.
Your key, together with the passphrase, is already loaded in Pageant. As a result, you only need to provide the hostname or IP address when connecting to your server. This behavior is a big-time saver if you have multiple keys and need to connect to various servers.
Loading Keys Automatically on Startup
Pageant will not automatically load your keys by default when you exit Pageant. Or when you shut down and restart your computer. You will have to load your keys each time you start Pageant manually, which can be tedious if you’re connecting to different servers simultaneously.
The good news is that you can automatically set Pageant to load your keys when you log in to your machine.
1. Exit your current Pageant session and relaunch Pageant.
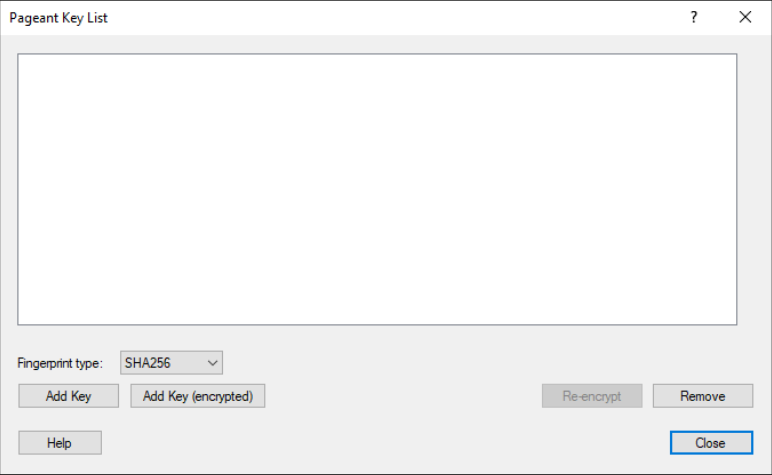
2. Next, right-click on the Pageant icon, and select the View Keys option.
You can see below that all keys are gone since you restarted Pageant.
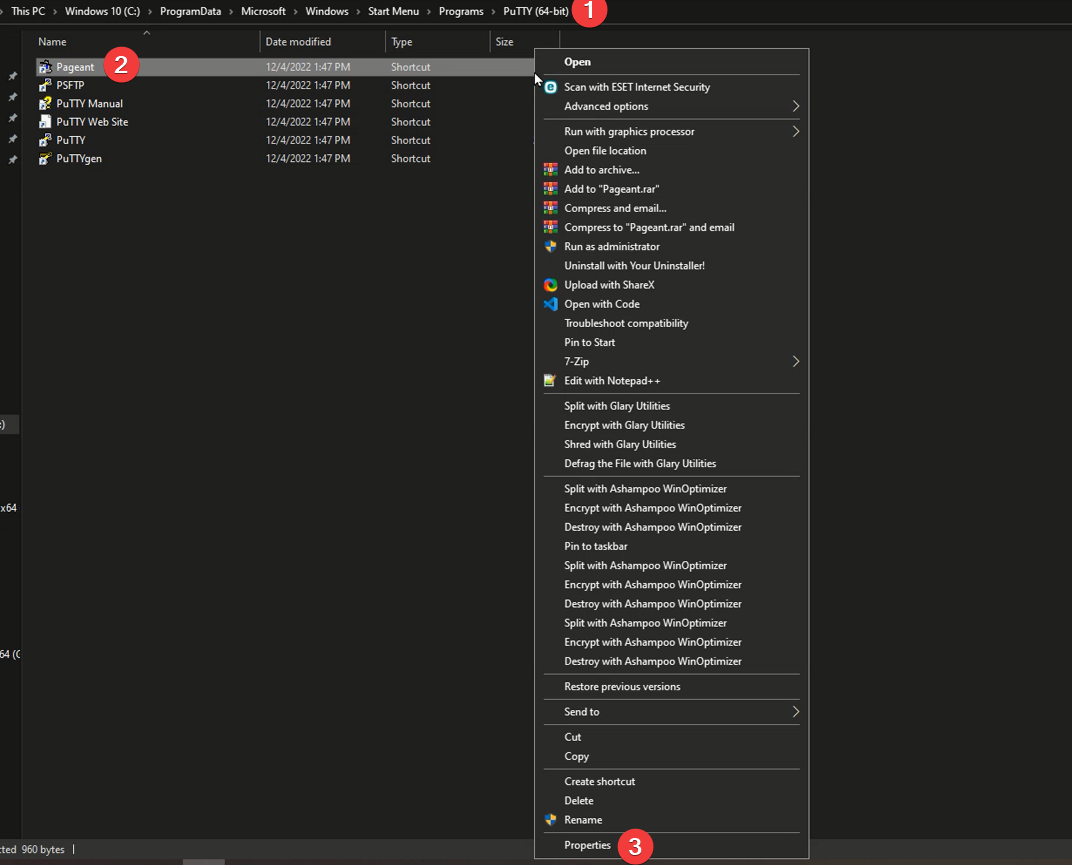
3. Open file explorer and navigate to the C:\ProgramData\Microsoft\Windows\Start Menu\Programs\PuTTY (64-bit) folder.
Right click on the Pageant shortcut icon, and select Properties on the context menu, as shown below.
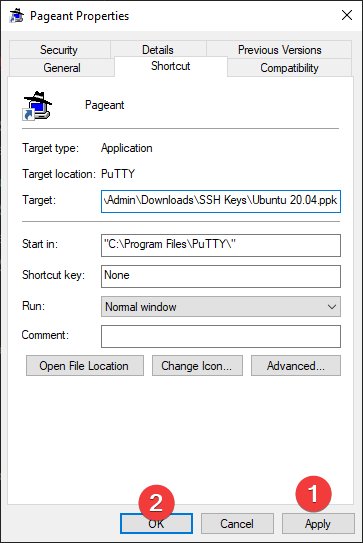
4. In the Pageant Properties window, set Pageant to load your keys automatically with the following:
- Click on the Shortcut tab if not already selected. The Shortcut tab is where you’ll configure Pageant to load your keys automatically.
- Keep the Pageant app’s path in double-quotes in the Target field, but replace key-path with your private key’s file path. As a result, Pageant will load your keys automatically each time you start up your machine.
You can add multiple keys by adding the path to each key, separated by a single space. Also, when there are spaces in the key path, be sure to enclose the key path in double quotes.
"C:\Program Files\PuTTY\pageant.exe" key-path- Click on Apply —> OK to save your changes and exit the Pageant Properties window.
Perhaps you prefer to automatically launch PuTTY after entering your passphrase when you launch Pageant. If so, append the -c option followed by PuTTY’s full path (in double quotes), as shown below. “C:\Program Files\PuTTY\pageant.exe” “key-path” -c “putty-path”
5. Finally, restart the Pageant app, and Pageant will automatically load your key, as shown below. When prompted, provide the passphrase for your keys, and you’re all set.
You can also use this approach to launch multiple instances of Pageant to connect to servers with different key requirements.
Open the Pageant Key List window to verify your key was loaded successfully.

Conclusion
Throughout this tutorial, you’ve learned how to use the Pageant PuTTY agent to manage and use your SSH keys. You’ve also configured Pageant to load your keys on startup automatically. This automation lets you skip manually loading your keys, especially if you’re managing multiple servers simultaneously.
With this newfound knowledge, why not try to securely connect to your Amazon EC2 Linux instances using PuTTY and Pageant?


