

PowerShell is a handy scripting language that can do just about anything. Couple that with Netwrix Auditor and you have a deadly combination on your hands. In this article, you’re going to learn a common use case, how to find who deleted a file.
You’ll learn how to fix track down those file-deleting monsters with PowerShell and afterward, you’ll see how you can do the same in Netwrix Auditor.
Related: Using PowerShell to Delete Files [All the Ways]
PowerShell
There are a few prerequisites to working with auditing using PowerShell. To get started, we’ll need to change a few settings on the file server that we want to monitor. This is a three-step process that will begin by setting the local security auditing policy on the file server, configuring the auditing, and then analyzing the event logs to read the data.
Step 1
To set the local security audit policy with PowerShell, we’ll use the secedit command on our file server (which isn’t strictly PowerShell, but we can still utilize it from our terminal). Once we export our policy to a “.cfg” file, we will then replace one line, enabling AuditObjectAccess for both successes and failures, and then we’ll use the secedit command again to apply the newly configured security policy.
PS>secedit /export /cfg C:\Temp\securitypolicy.cfg
The task has completed successfully.See log
%windir%\security\logs\scesrv.log for detail info.

PS> (Get-Content C:\Temp\securitypolicy.cfg).replace("AuditObjectAccess = 0", "AuditObjectAccess = 3") | Out-File C:\Temp\securitypolicy.cfg

PS> secedit /configure /db C:\Windows\Security\local.sdb /cfg C:\Temp\securitypolicy.cfg /areas SECURITYPOLICY

The task has completed successfully.
See log %windir%\security\logs\scesrv.log for detail info.
Step 2
Now that the Local Security Audit Policy has been applied on our File Server, we need to configure auditing on the specific folders that we want. When we do this configuration, it will store the event in the Windows Event Logs. Since we’re doing this with PowerShell, we will again be using the Administrative PowerShell terminal on the file server to configure auditing.
## This is the path to the file share you want to configure
$path = "C:\Share"

## This stores your current settings in case you want to revert
Get-ACL $path -Audit | Format-List Path, AuditToString | Out-File -FilePath 'audit.txt'

## This section creates and sets the audit rule on the Folder
$acl = Get-ACL $path
$AuditRule = New-Object System.Security.AccessControl.FileSystemAuditRule("Everyone", "CreateFiles", "none", "none", "Success")
$acl.AddAuditRule($AuditRule)
$acl | Set-ACL $path

## This stores your new settings so you can compare to the previous file
Get-ACL $path -Audit | Format-List Path, AuditToString | Out-File -FilePath 'after_audit.txt'
Once this is set, it’s time to check out the Windows events that are generated!
Step 3
The last thing that we need to do to monitor who deleted what is to start checking out the Windows event logs on our file server. The team at Microsoft have given us a few handy Windows event IDs to monitor these deletion events, so we can create a simple hashtable to be able to analyze the results.
We’ll start by creating a start date for our query. Since I only want to analyze the last day’s worth of results, I can use the Get-Date cmdlet with the AddDays() method to set a start date of yesterday. We’ll then create our filter to look in the Security log while filtering for the IDs related to file access and deletion, finally adding our start date in our filter. Once that’s done, we’ll run the Get-WinEvent cmdlet to return our Windows events.
PS>$date = (Get-Date).AddDays(-1)

PS>$filter =
@{LogName='Security';ID='4656','4659','4660','4663';StartDate=$date}

PS> Get-WinEvent -FilterHashTable $filter
As you can see, there are a significant number of events returned. Based on what you’re looking for (specific files or folders deleted, or specific users doing the deleting you can filter this down even further using the Where-Object and Select-Object cmdlets and the pipeline.
Netwrix Auditor
Now that we know how to do this natively within PowerShell let’s check out what we can do with Netwrix Auditor. The fine folks at Netwrix have given us a shortcut on how to enable this auditing without using PowerShell.
Once downloaded, double click to install, and a short wizard will walk you through any steps necessary for your first installation in your environment. The installer deploys in a client/server model, so you’ll start by deploying the “server” portion to your file server, and then you can manage it there or install the “client” on your personal workstation for easy remote management.
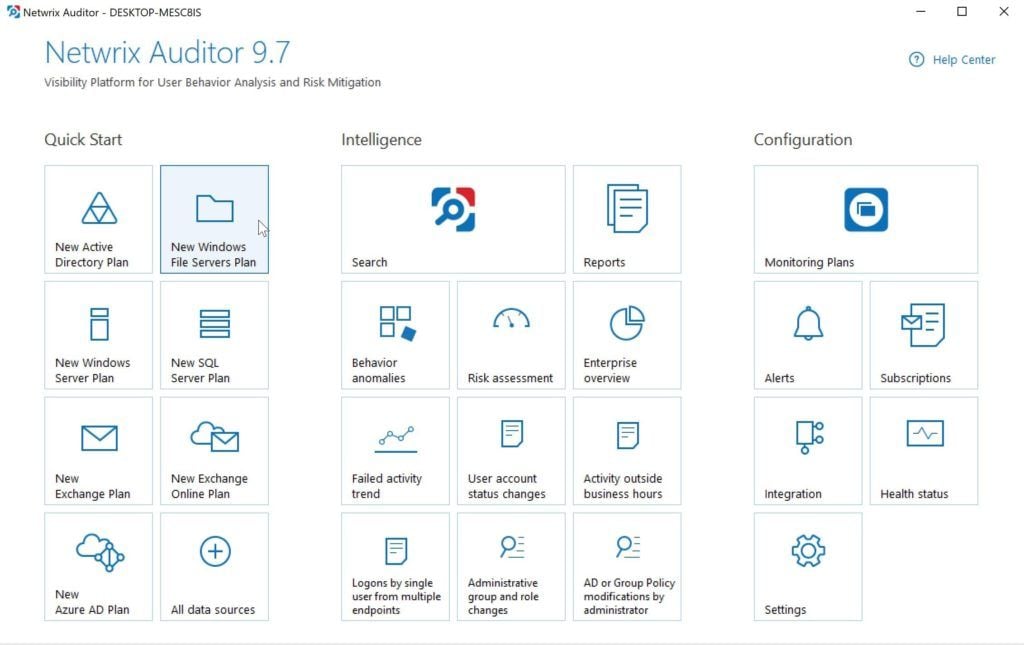
Main Menu for Netwrix Auditor
From the Main Menu, we can select the “Quick Start” guide for a “New Windows File Servers Plan” which will perform the monitoring for us. Notice how you can do a lot more than file monitoring with this software as well.
Once selected, we’ll run through another short wizard, configuring a service account on your domain with the appropriate permissions for this type of file server monitoring connecting a database to store all of the audit details, and finally choosing where to monitor. When complete, you’ll be brought to a new screen which will look something like this:
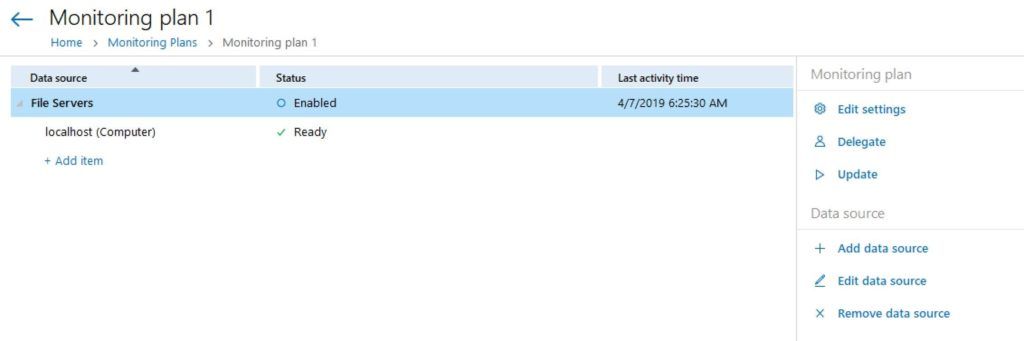
Post-install screen
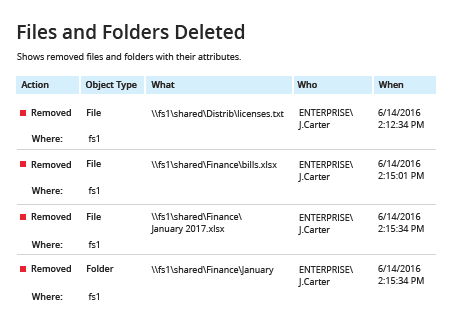
Now you can start watching the logs pour in! If you go to the “reporting” tab in Netwrix Auditor, you’ll be able to see all the different kinds of reports you can run on the auditor.
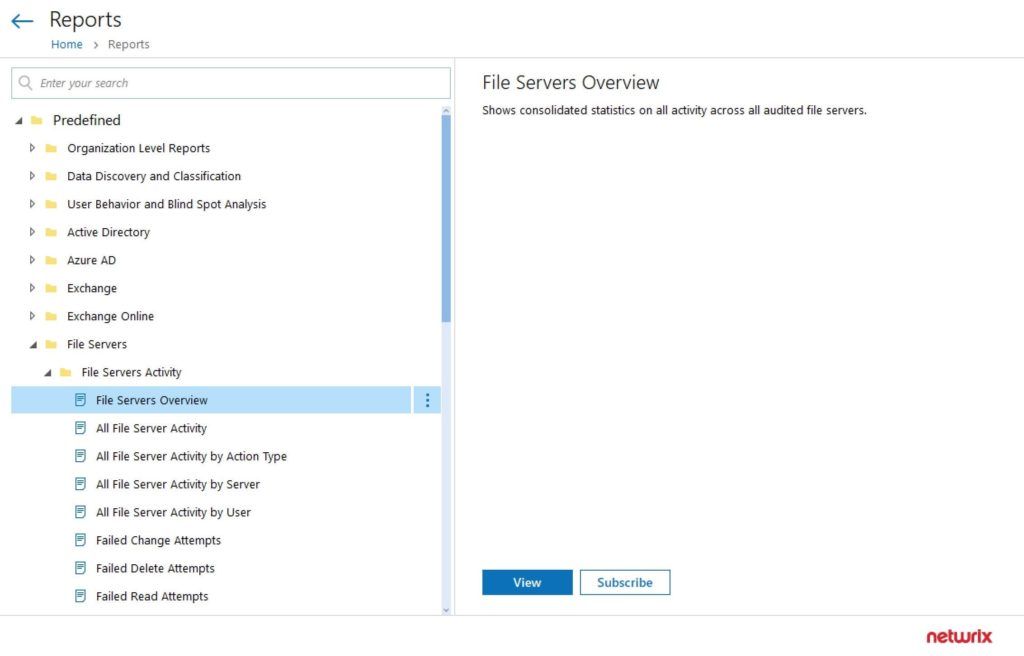
View Reports
Things like files accessed, files and folders deleted, and permissions changes are all included as pre-defined reports for you. All you have to do is click and run!
Comparison
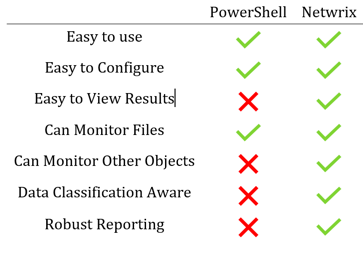
Since we’ve seen them both in action, I thought it would be good for us to take a step back and look at both options. For a quick side-by-side comparison, I’ve made this table which shows how far the Netwrix Auditor goes beyond “figuring out who deleted what.” In the table, you can see that native PowerShell can perform the primary task, but Netwrix Auditor includes several quality-of-life features which will make the job significantly easier.
Conclusion
Overall, though you may be able to perform some of the same functionality with native PowerShell, the number of features you get with the Netwrix Auditor merely is astounding. If you don’t currently do any monitoring in your environment, I’d strongly encourage you to deploy the PowerShell method so you can start attaining these kinds of logs today. You never know when they’ll come in handy. As you can probably see after a short while, the solution doesn’t scale incredibly well into a large environment. That’s where Netwrix Auditor comes in.
Learn more about Netwrix Auditor for Windows File Servers!


