


Are you looking for a way to secure your IT infrastructure and keep it in good shape? You are in luck! Learn how to use Microsoft Defender for Cloud to secure your infrastructure in the best possible way so that no threat will ever harm your business.
In this tutorial, you will learn what exactly Microsoft Defender for Cloud is and how to set it up to assess, secure, and defend your resources.
Stay tuned and safeguard your infrastructure!
Requirements
This tutorial comprises hands-on demonstrations. To complete this tutorial, you will need the following:
- An Azure account with an active subscription.
- A few resources in Azure to leverage the value of the service – This tutorial uses Azure Arc-enabled servers, among other resources.
What is Microsoft Defender for Cloud?
Microsoft Defender for Cloud (formerly Azure Security Center) is a Cloud Security Posture Management (CSPM) and Cloud Workload Protection Platform (CWPP) solution. These solutions apply to all enterprise resources, regardless of location.
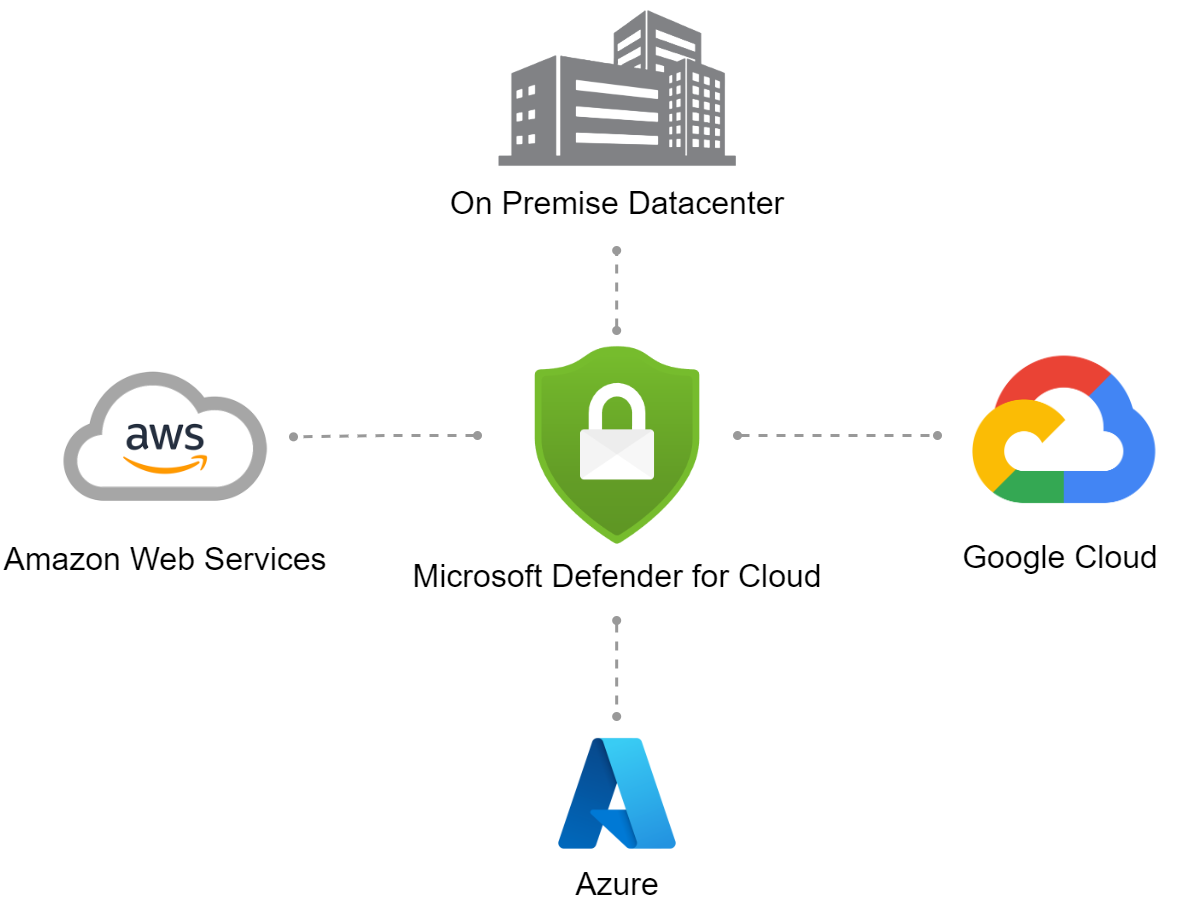
At the time of this writing, four different sites can be connected and observed: the On-Premise Datacenter, Amazon Web Service (AWS), Google Cloud, and Azure.
This architecture below covers almost all relevant landscapes where most cloud-aware companies can be found.
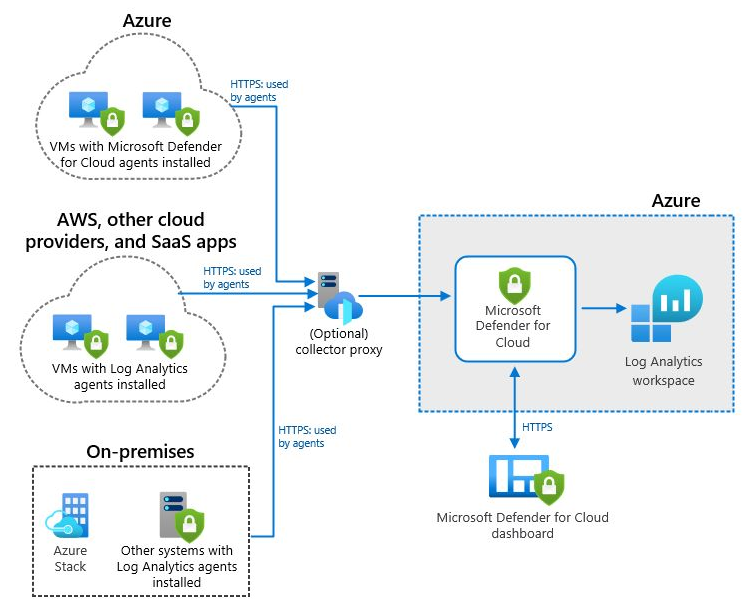
Microsoft Defender for Cloud, along with natively available connectivity options, is mainly an agent-based solution, especially in monitoring non-Azure resources, as shown below. A separate agent is available depending on which environment has to be connected.
Below are the following available agents:
- Log Analytics Agents, also called Microsoft Monitoring Agent (MMA).
ℹ️ The Azure Monitoring Agent (AMA) will replace the MMA Agent in the future.
- Microsoft Defender for Cloud Agent.
Onboarding Azure Subscription to Microsoft Defender for Cloud
A brief explanation of the Microsoft Defender for Cloud architecture will not be enough to grasp how it works, but it is a good start. The best way to experience Microsoft Defender for Cloud is to first work on onboarding your Azure Subscriptions.
Onboarding your Azure subscription creates a new authorization system in Permissions Management. The Permissions Management service is where you can monitor and manage your subscriptions.
To onboard your Azure subscriptions, follow these steps:
1. Open your favorite web browser, and log in to your Azure Portal.
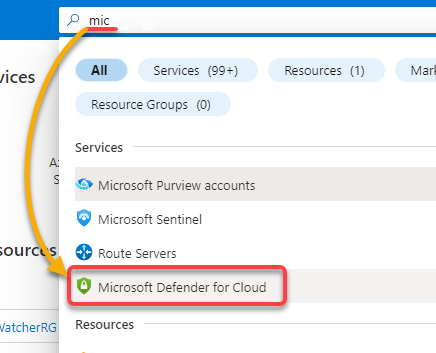
2. Next, search for mic, and select Microsoft Defender for Cloud from the search result list to access the Microsoft Defender for Cloud service.
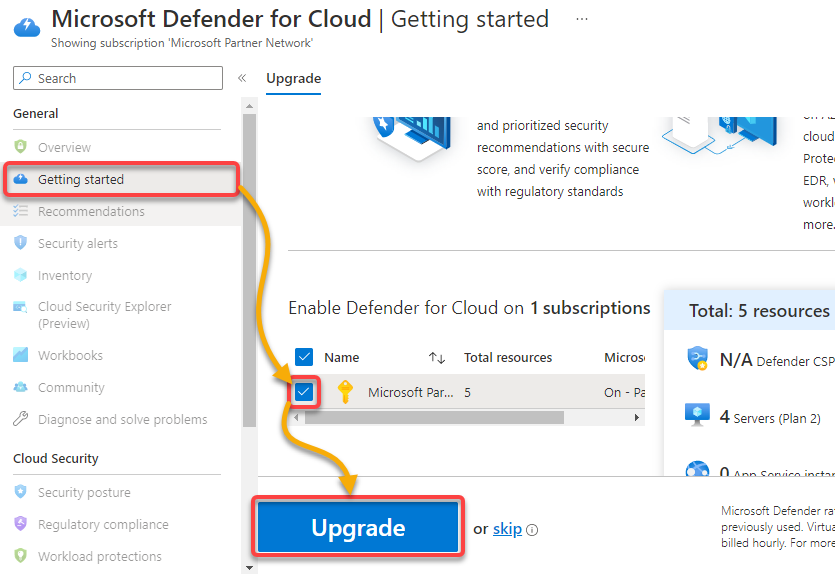
3. Click Getting started (left pane), select all your preferred subscriptions, and click Upgrade to activate the service.
4. Now, on the next page, click on Continue without installing agents (right-most) to decide which resources should be equipped with an agent.
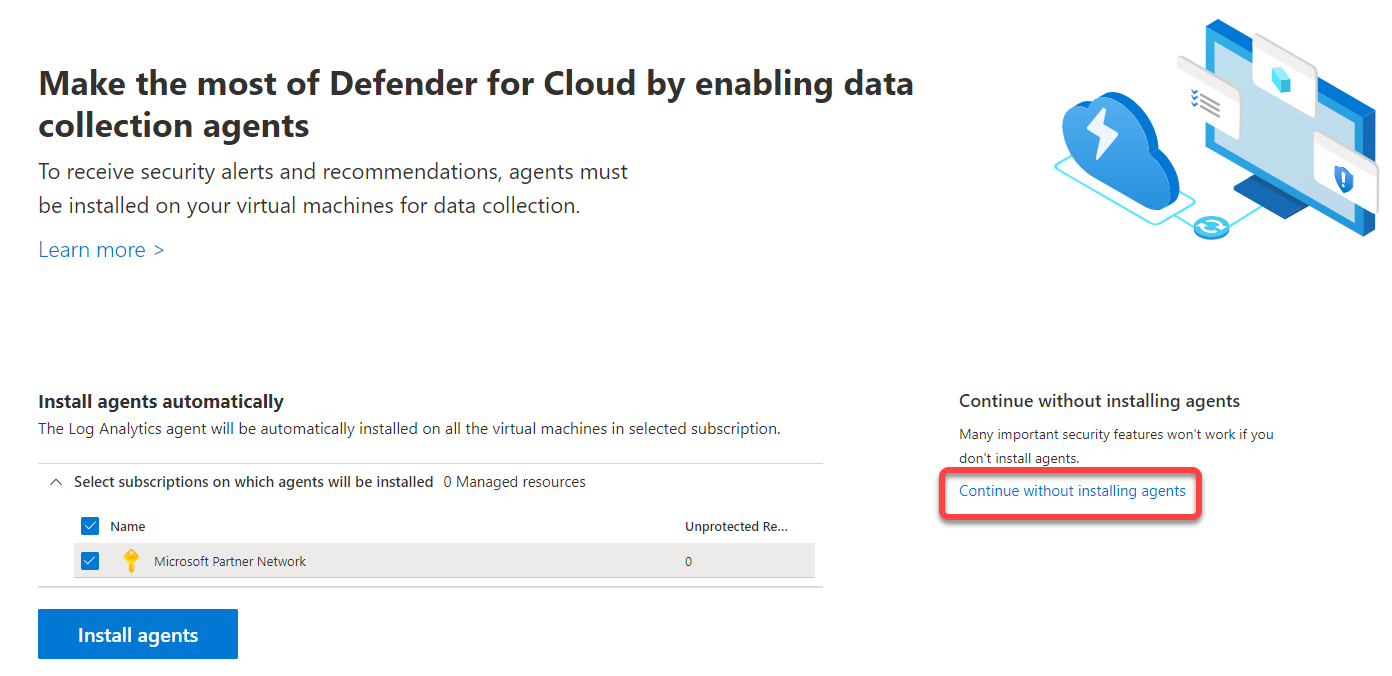
As a result, you will see a message (top-right) saying that a free trial (of 30 days) has been successfully activated.

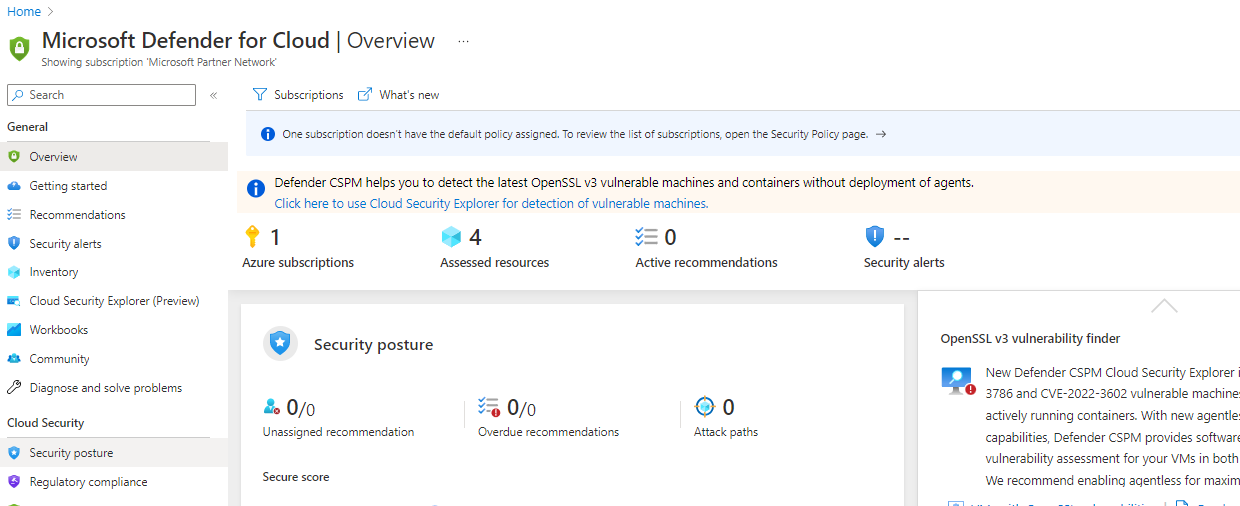
Your browser automatically redirects to an Overview page of the service, as shown below.
Currently, you can only see limited information: four (4) Assessed resources, zero (0) Active recommendations, and no Security alerts. But as you assign an initiative to the respective subscriptions in the following section, you will get more information presented.
Assigning an Initiative (Policy) to your Subscriptions
You have enabled Microsoft Defender for Cloud for specific subscriptions, but you still need to define the rule set that should be applied. The number of choices is quite large. These choices are based on the standards and regulations available to the industry, such as the ISO27001 standard.
For a non-specific use case, you can use the default initiative developed by Microsoft called Azure Security Benchmark (ASB). This initiative provides a solid security foundation and starting point. Meeting the requirements of this standard makes fulfilling other sets of rules easier.
To assign an initiative to your subscriptions, follow these steps:
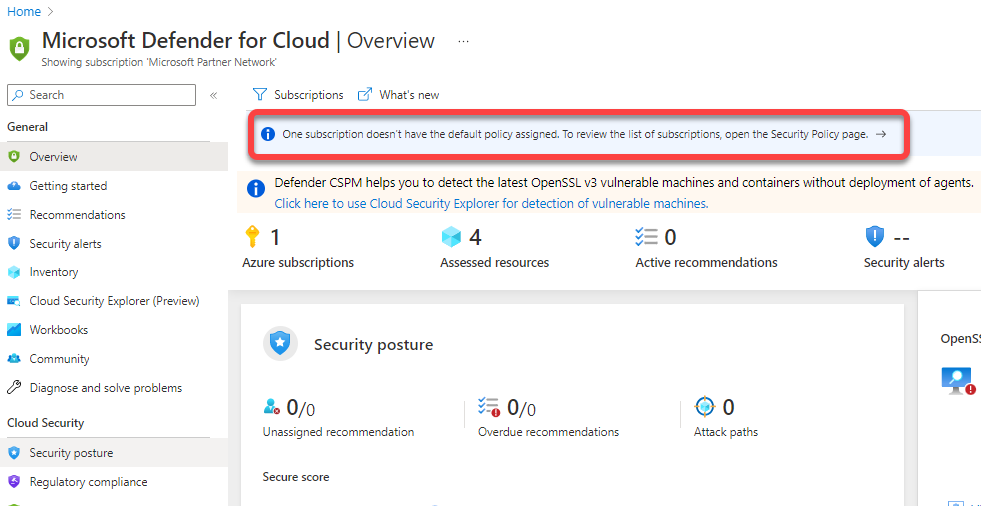
1. On the Overview page, click the blue-highlighted information to access the Microsoft Defender for Cloud Environment settings page (step two).
2. Next, click the subscription to which you want to assign an initiative.

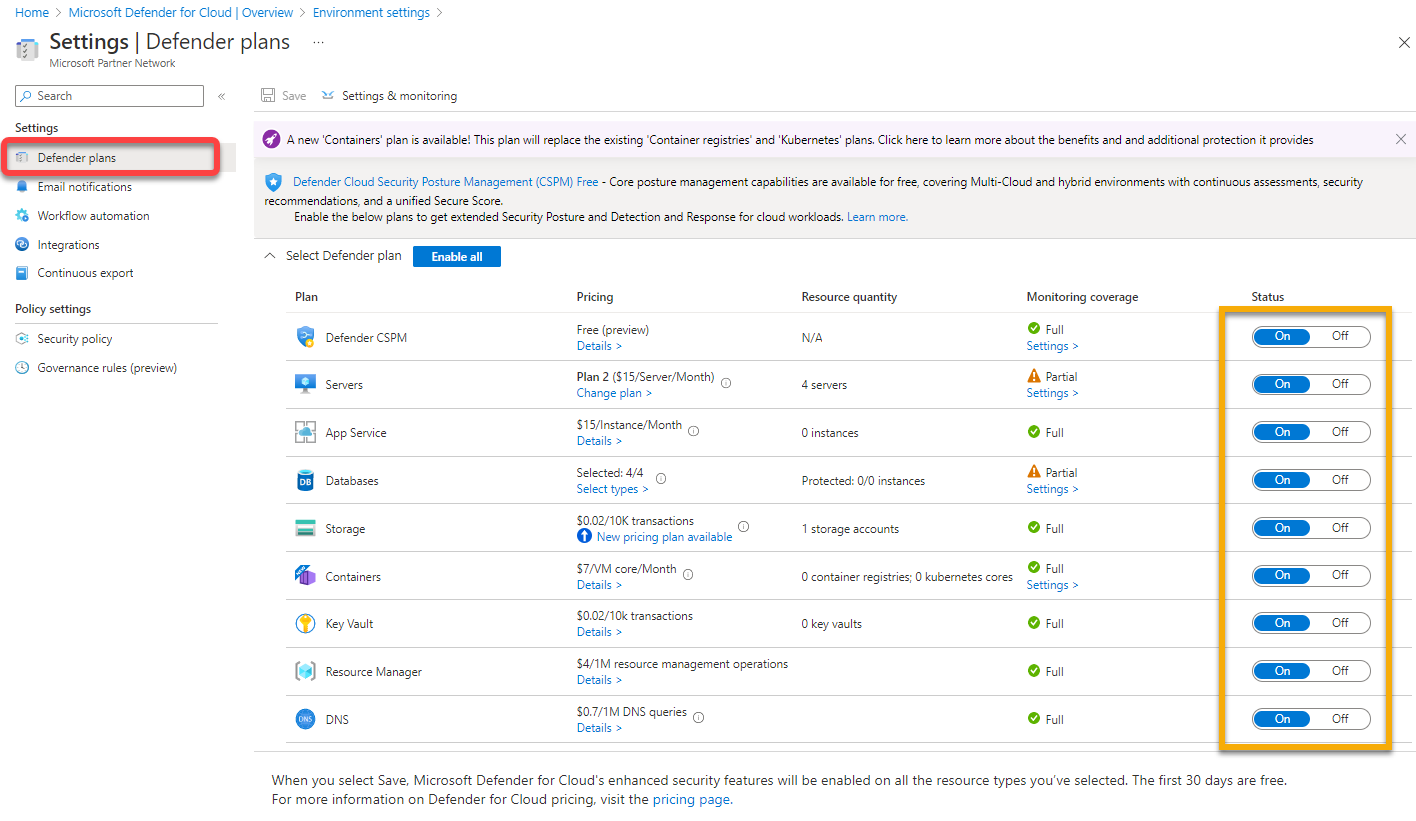
3. Navigate to Defender plans (left pane), and look at the activated Microsoft Defender for Cloud services.
Below, you can see that all plans are turned on. These are the chargeable CWPP parts of the service. If you only want to use the CSPM features, this page is where you can deactivate all plans before the 30-day trial period expires.
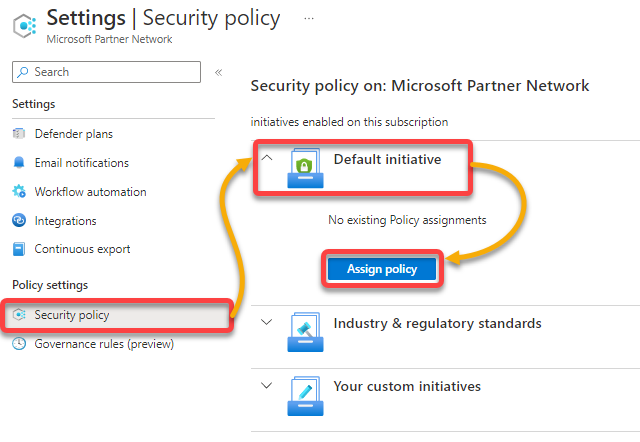
4. Now, navigate to Security policy under Policy settings (left pane), expand Default initiative, and click Assign policy to assign the initiative.
The Settings page opens, where you can configure the initiative (step five).
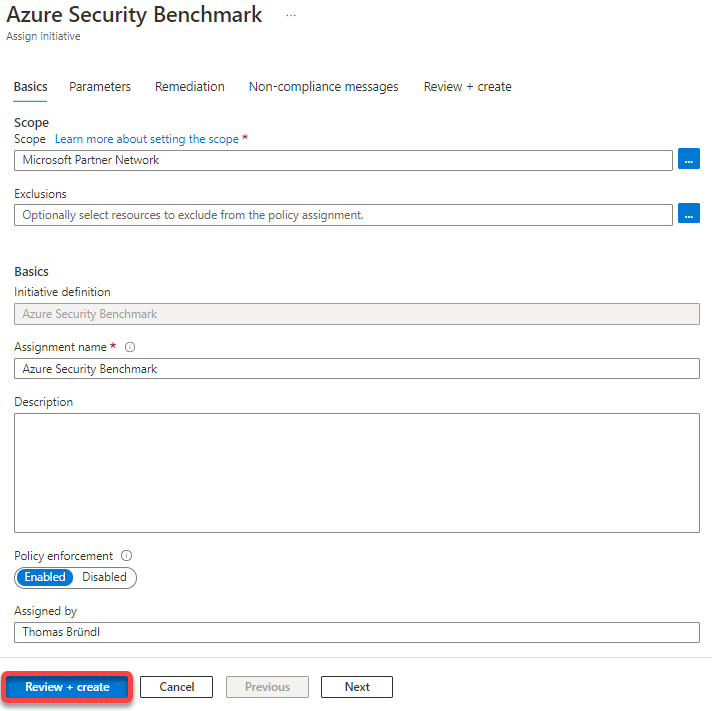
5. Leave all settings in the ASB initiative, and click Review + Create (bottom-left) to continue.
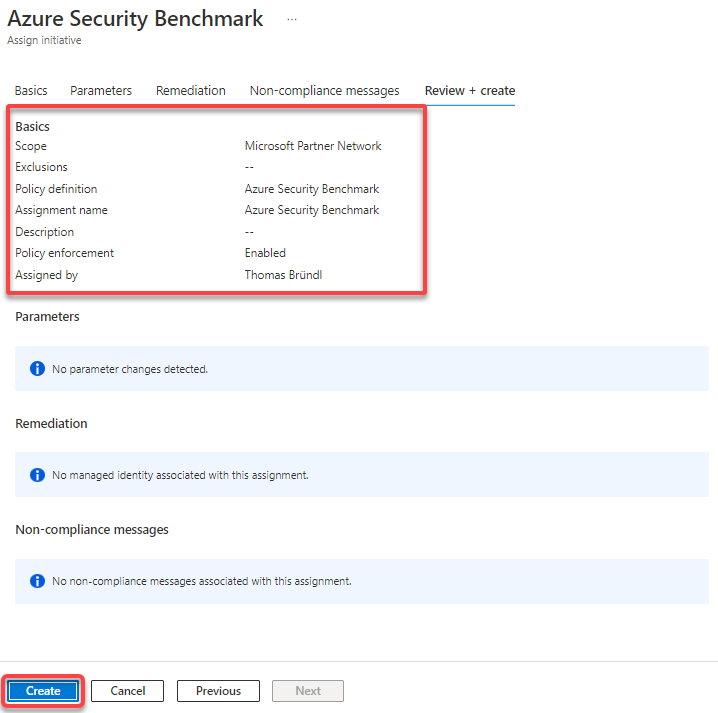
6. Lastly, review the summary of your selected settings, and click Create (bottom-left) to finalize assigning the ASB initiative.
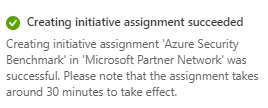
If successful, you will see a notification regarding the initiative assignment like the one below. But note that the process takes at least 30 minutes until the first assignment results become visible.
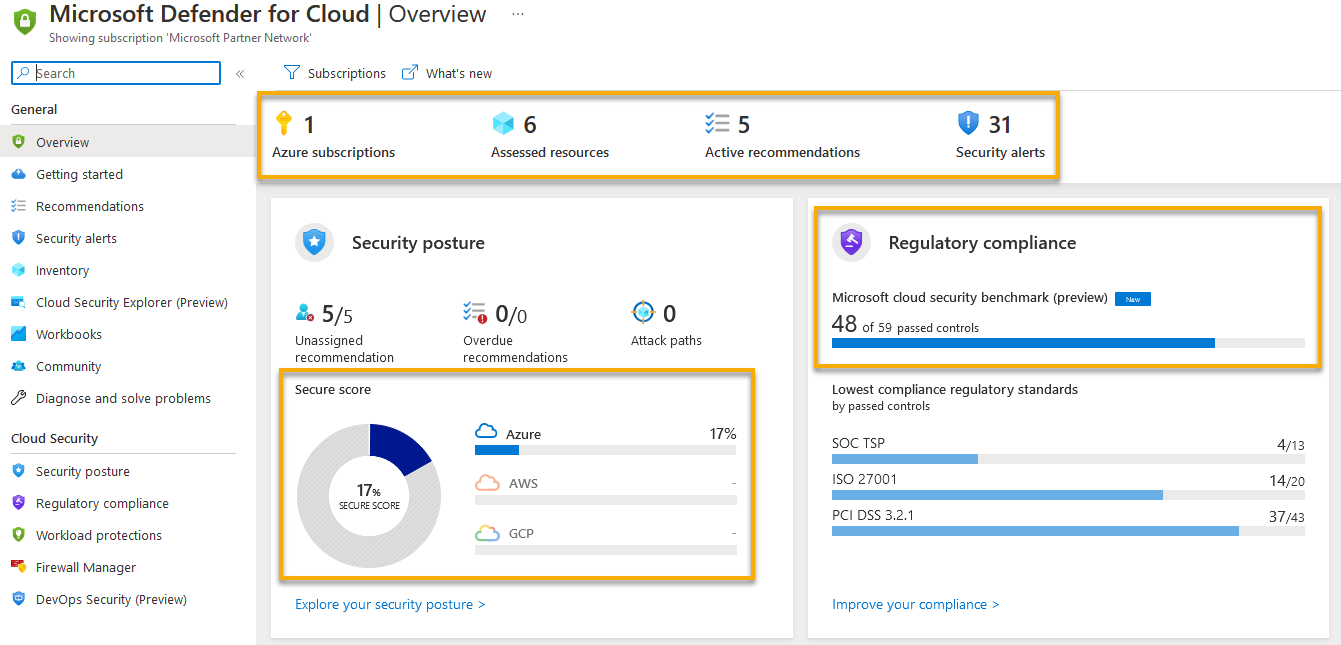
As a result of the initiative assignment, you will see the below populated Overview page.
Depending on the initiative (set of policies) applied, assessment runs are conducted regularly, and the environment’s health status is analyzed.
Note that a Secure Score value is now available with six (6) Assessed resources, five (5) Active recommendations, and 31 Security alerts triggered. The Secure Score is your organization’s measurement for security posture bundled into controls.
In addition, the assigned initiative’s level of fulfillment is also displayed.
Implementing Recommendations Manually
After assigning an initiative, take a closer look at the basic features and functions of the Microsoft Defender for Cloud service — there are tons. But in this tutorial, the focus is on the most important ones.
Based on the performed assessment, manual and automatic measures can be initiated to harden the monitored environment.
There are two management principles you will explore (CSPM and CWPP). But the first feature you will explore is Recommendations, which are part of the CSPM portfolio.
To see how to work with Recommendations, follow these steps:
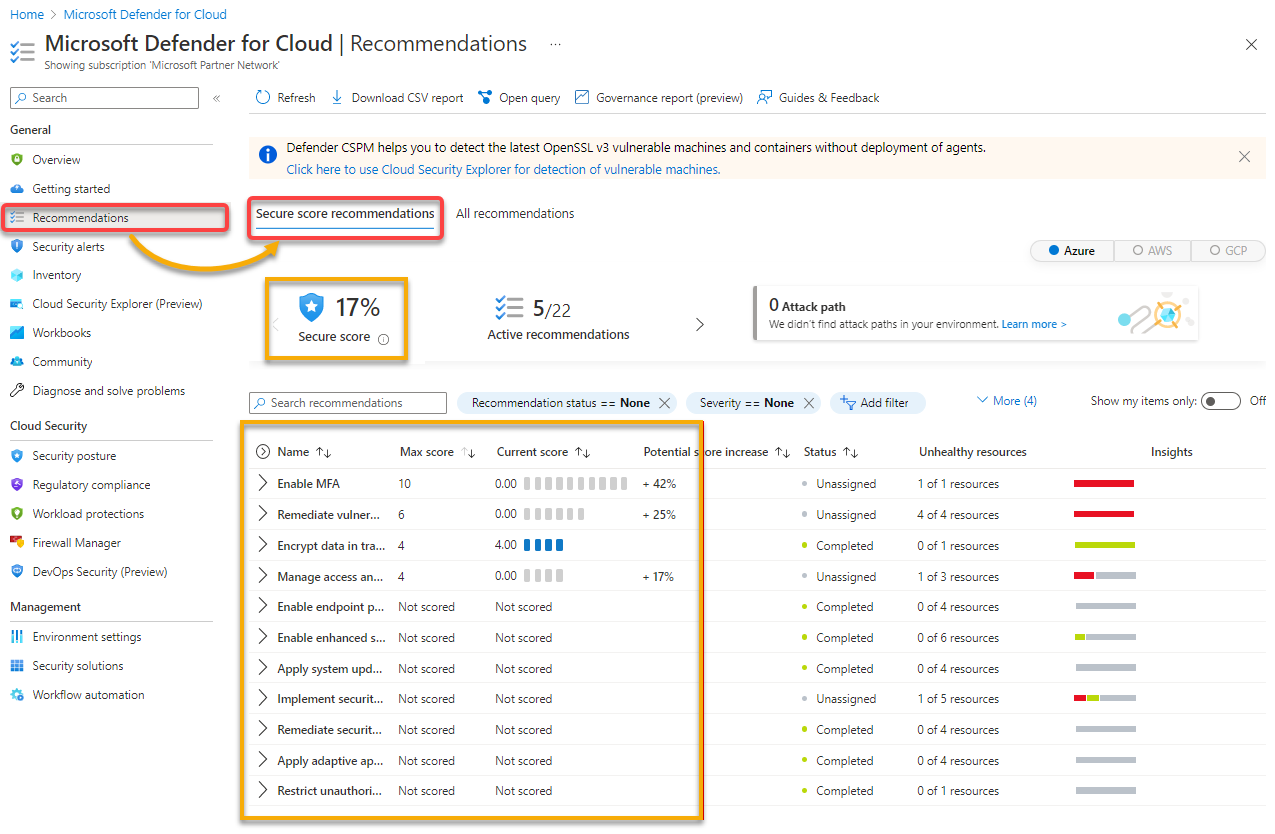
1. Navigate to Recommendations (left pane) → Secure score recommendations tab, as shown below, to access an overview of all Secure Score relevant recommendations.
Essentially, the Secure Score is taken from the ASB initiative you previously assigned to your subscription. Other initiatives can be activated (e.g., ISO, CIS…) depending on which standards you must comply with.
If these recommendations cannot be sorted into the existing controls, they can be found under the All Recommendations tab. But there is an overlap between the initiatives. You have already achieved a lot if you implemented the ASB initiative.
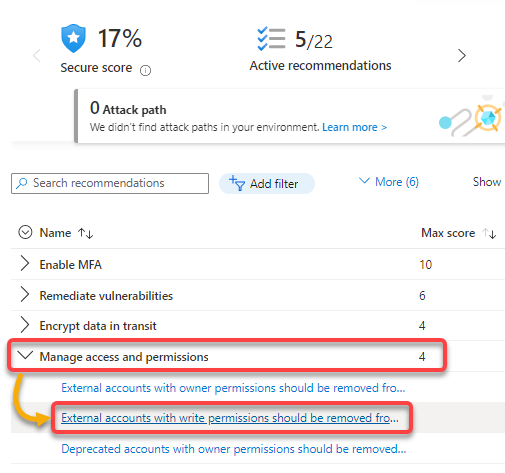
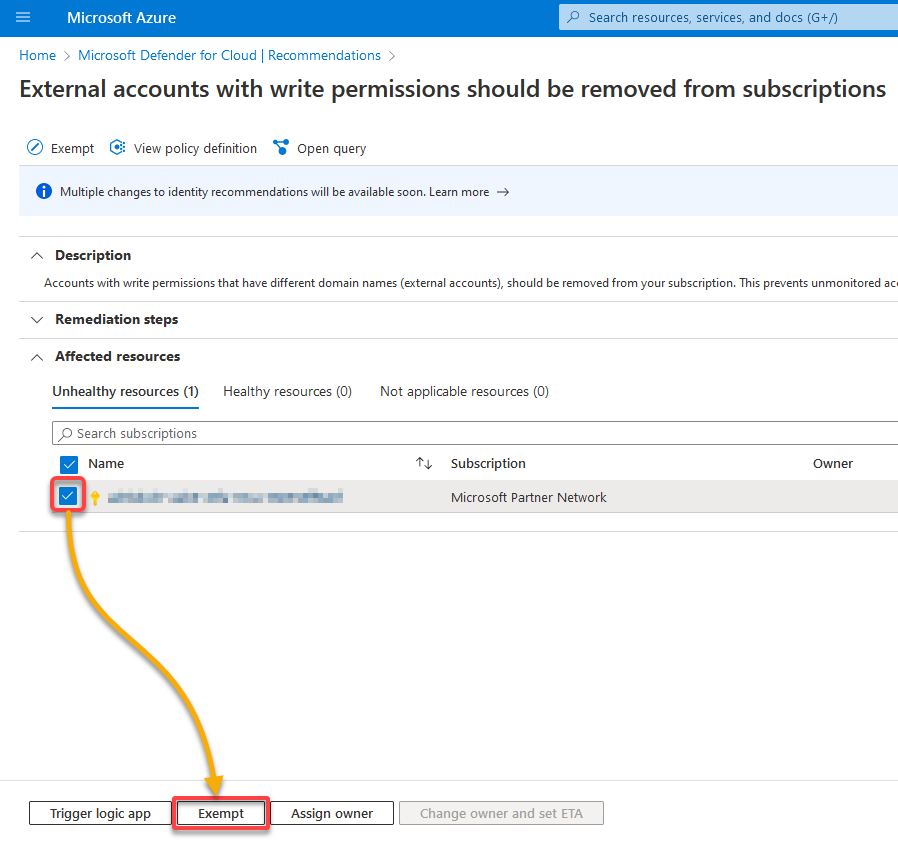
2. Next, expand the Manage access and permissions control bundle, and click the recommendation in the screenshot below. Doing so lets you find out more about the recommendation and remediations.
Recommendations vary depending on the configuration of the particular environment. You may not find the same recommendations in your tenant as in this tutorial.
3. Read the Description, and comply with the Remediation steps.
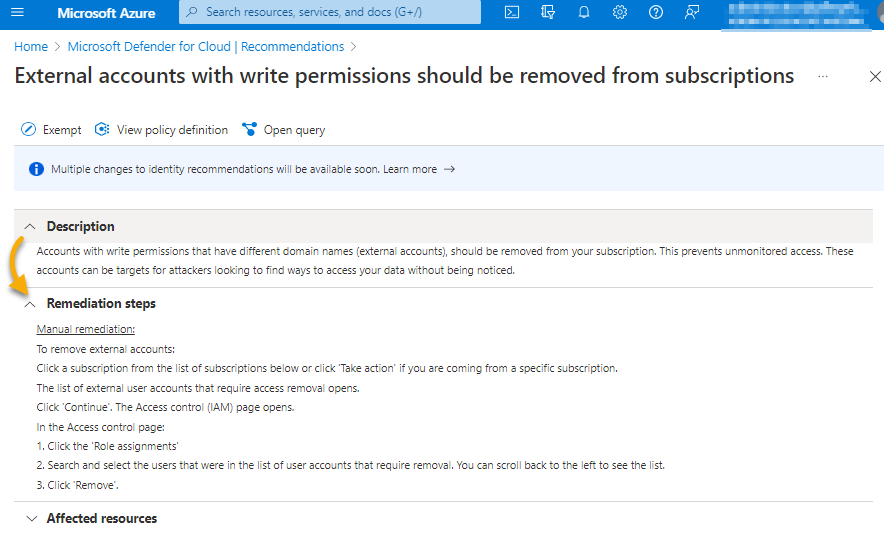
Now, take action to process the recommendation to ensure that it is not reported again. Below are the options (page bottom) available for dealing with the recommendation:
| Option | Description |
| Trigger logic app | If you are working on a recurring topic, with this option, you can automate the remediation process by using a logic app. |
| Exempt | Solving the recommendation outside of Azure or accepting the risk of not implementing the recommendation is good news. Doing so makes deactivating the recommendation temporarily or permanently without penalty points on the Secure Score possible. |
| Assign owner | With this option, a person required to implement the recommendation can be assigned. In addition, you can define a completion date by which the implementation must be completed. |
| Change owner and set ETA | Based on the Assign owner option, the owner and ETA can be adjusted, regardless even if it has already been assigned before. |
But since you do not have a logic app that implements the recommendation (which you do not want in this case anyway), click Exempt to define an exception.
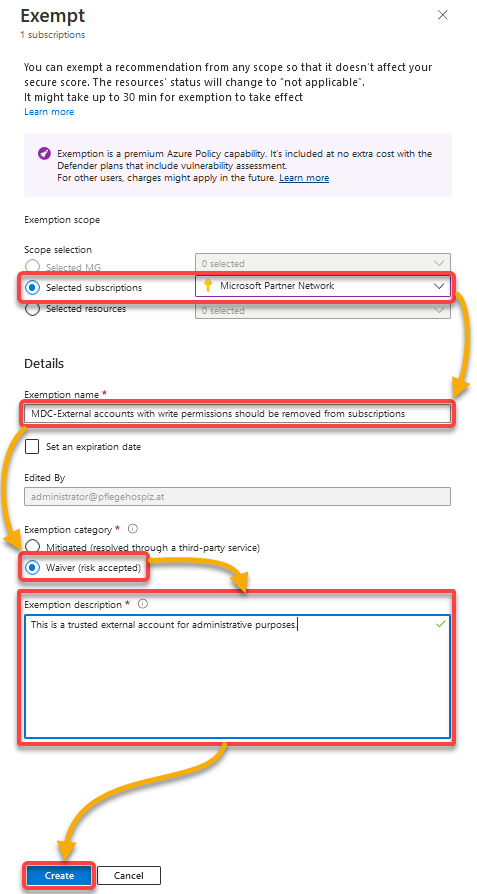
A child window opens where the scope of the exception has to be defined (step four).
Configure the exemption as follows:
- Choose the Selected subscriptions option under Scope selection, and select Microsoft Partner Network from the dropdown field, as shown below. Doing so applies the exemption at the subscription level.Provide a descriptive Exemption name to help easily distinguish exemptions from one another.Choose the Waiver as the Exemption category to confirm you accept the resulting risk.Provide a description for creating an exemption.
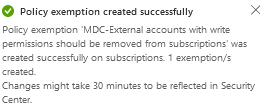
You will get a message like the one below stating that the exception was successfully created. Congratulations! You have just processed your first Recommendation.
Remediating Resources Automatically
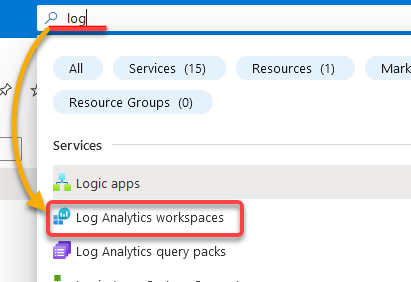
Manual remediations work fine and all. But there are also recommendations that you can implement automatically. But first, you need your Workspace ID handy before you automate fixing resources.
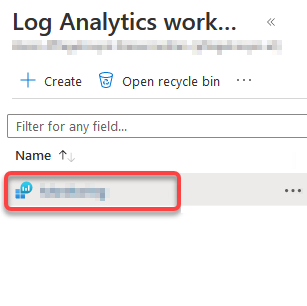
1. Open the Azure Portal in a new browser tab, search for log, and select Log Analytics workspace to view your available workspaces.
2. Next, select your desired Log Analytic Workspace, which opens the workspace’s blade (step three).
3. In the Overview page, copy the Workspace ID, as shown below.

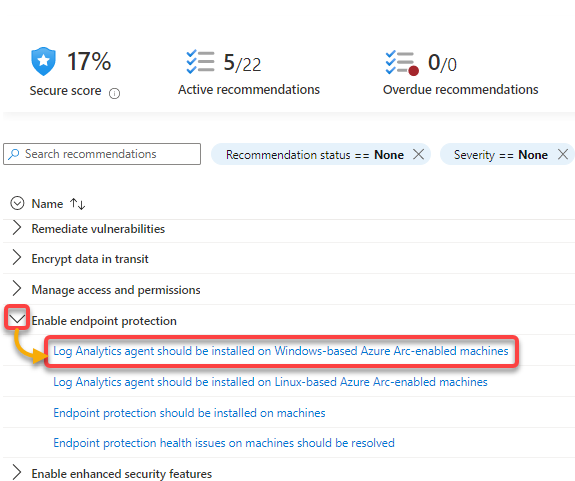
4. Now, switch back to the Recommendations page, expand the Enable endpoint protection control, and click the recommendation, as shown below.
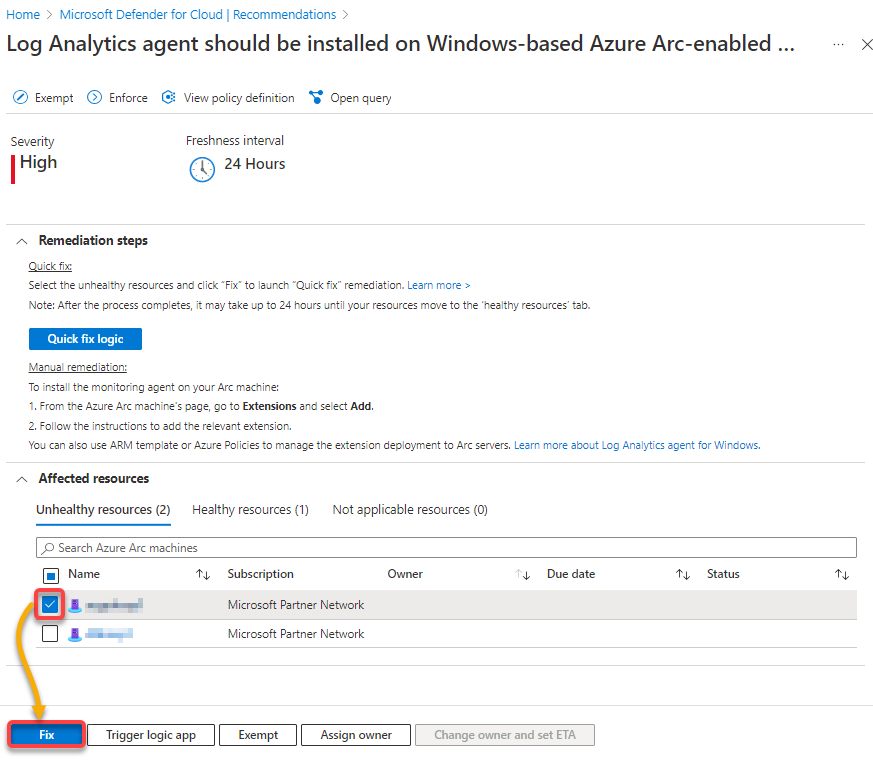
5. Tick the box beside the unhealthy resource under Affected resources, and click Fix to implement the recommendation. This solution is prepared by Microsoft, which applies the recommendation automatically.
After fixing your resources, moving them to the ‘healthy resources’ tab may take up to 24 hours, as mentioned in the Remediation steps.
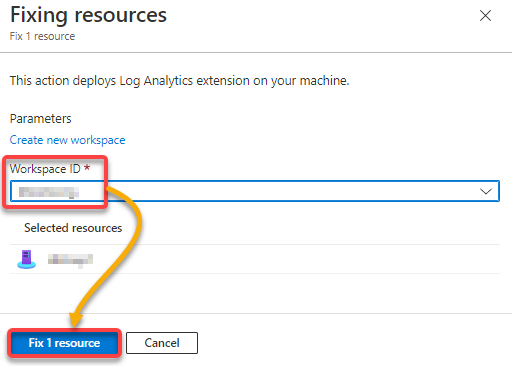
6. Return to the Fixing resources page, input the Workspace ID you copied in step three, and click Fix (x) resource.
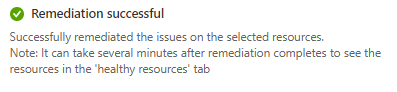
If the remediation succeeds, you will get the message below.
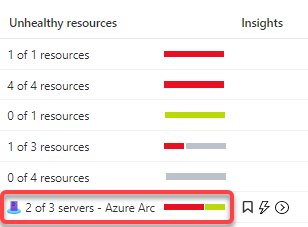
You will also see another assessment run. The health status on the Recommendations overview should adjust (visible on the partially changed bar color — from red to green).
Azure Policy evaluates resource compliance automatically every 24 hours for already assigned policies or initiatives.
Remediating Resources via the Security Alerts
Besides Remediations, another defender element should not be left out, as the most important one is the paid CWPP offering — Security Alerts. This feature allows you to not only exclude threats at the configuration level but also to detect threats in real-time directly on the provisioned resource.
Defender for Cloud collects, analyzes, and integrates log data from your Azure resources, depending on which advanced feature has been activated, and uses this log data to detect threats.
To see how Security Alerts work behind the scenes, follow these steps:
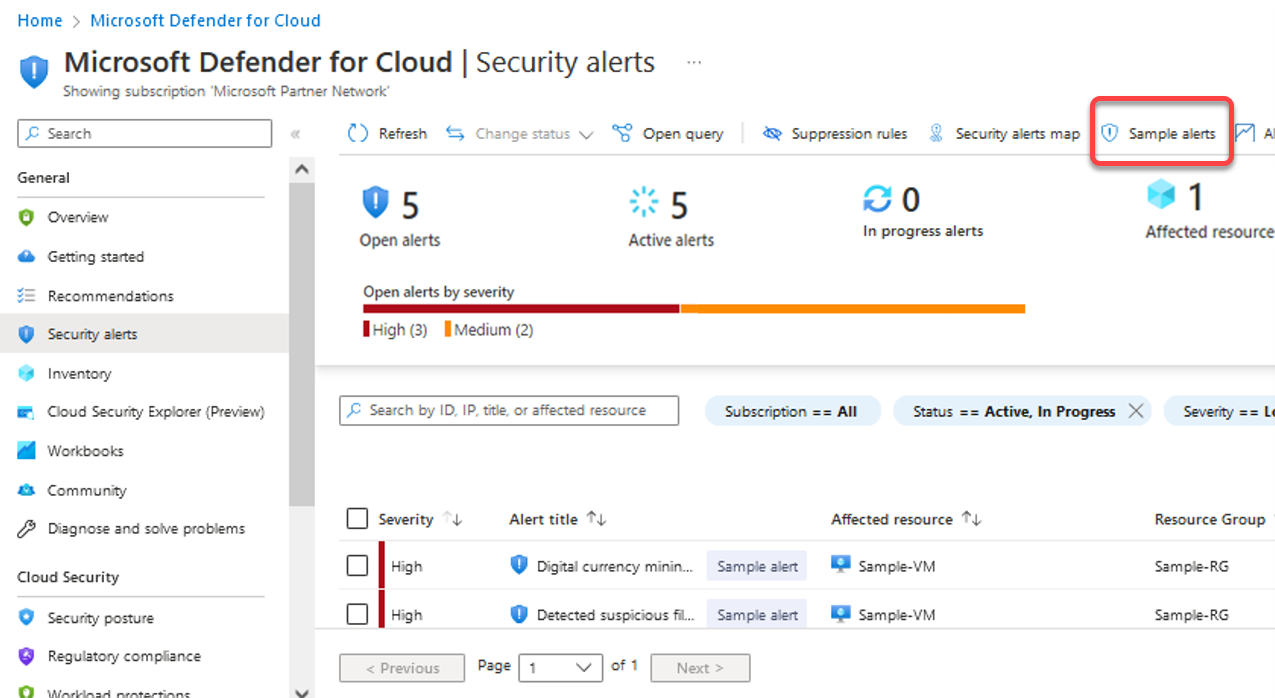
1. Click Sample alerts, and a pop-up window appears where you can configure your sample alerts (step two).
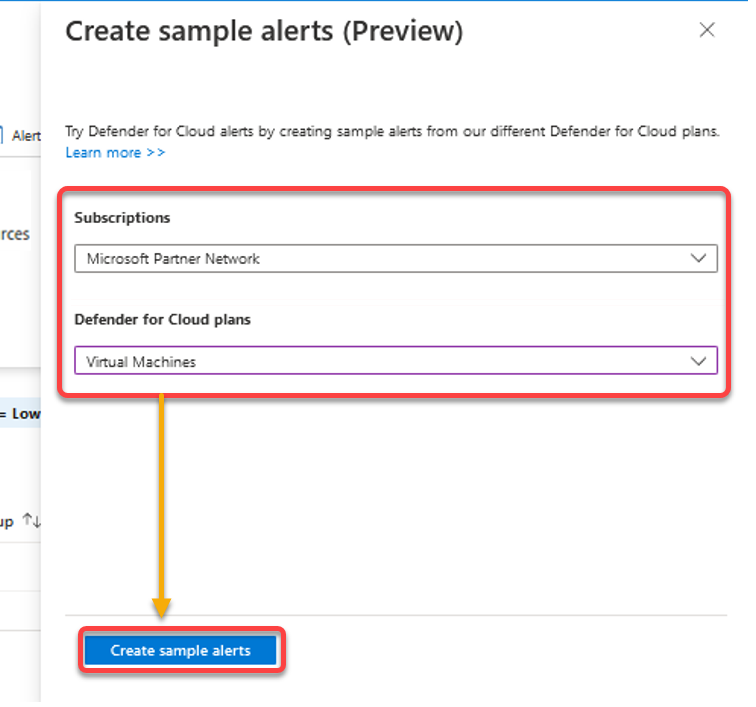
Next, configure the sample alerts with the following:
- On the pop-up window, select the Subscription where the alarms should be delivered and set an alarm type.Choose the type Virtual Machines, and click Create sample alerts to finalize creating the alerts.
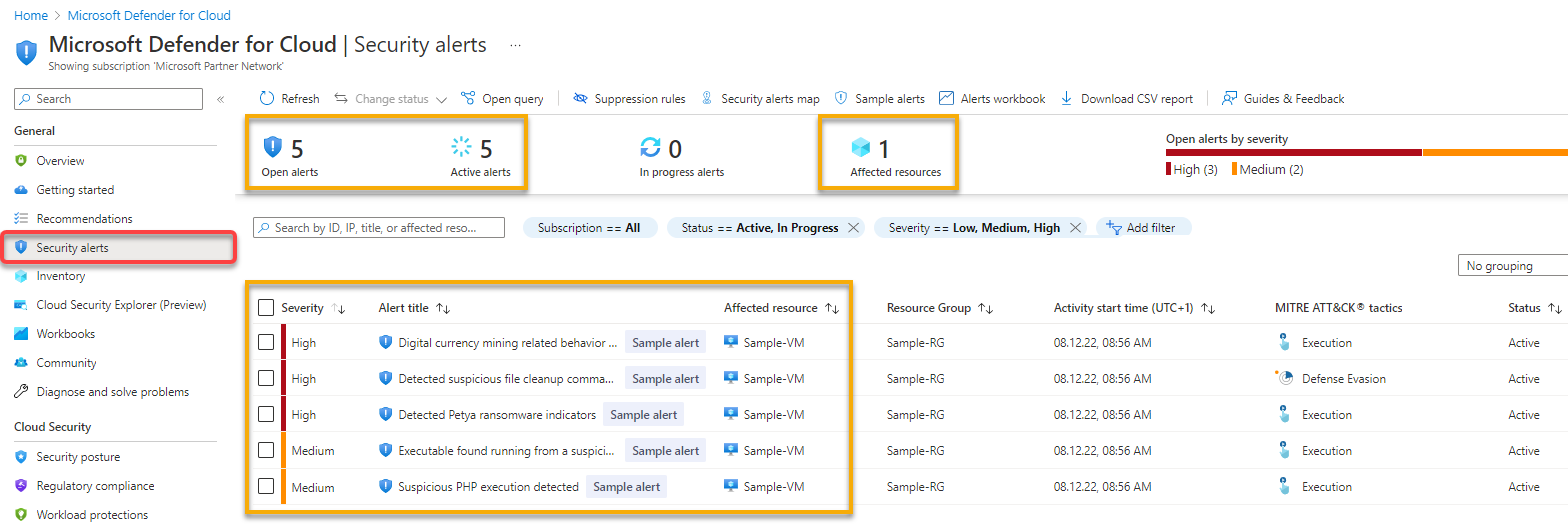
3. Navigate to Security Alerts (left pane) to see all security alert details as follows:
- Five (5) Open and Active alerts with one (1) Affected resource.Detailed view of prioritized security alerts, the information needed to investigate, and the steps to fix it.
Similar to the Recommendations, the alerts you will see in your environment will differ from those shown in this tutorial.
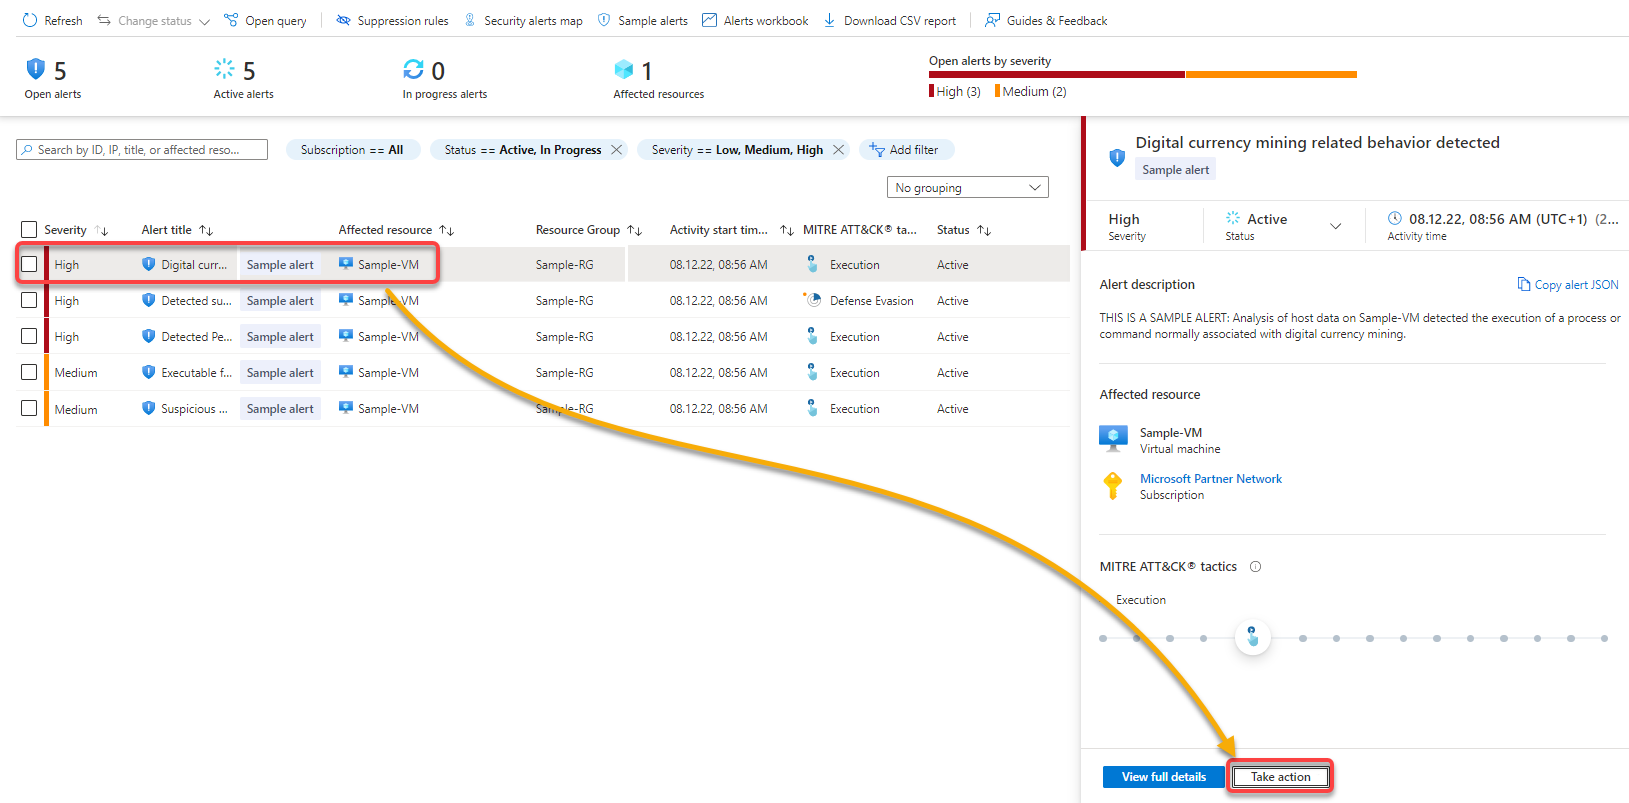
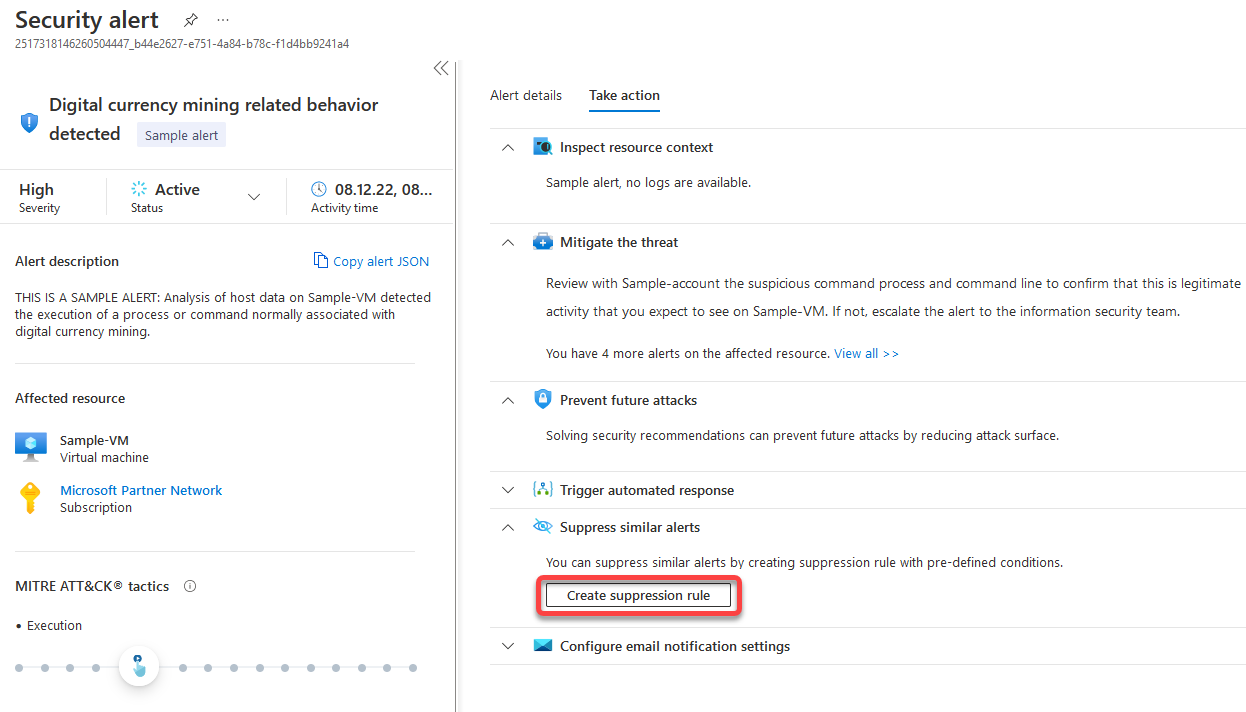
4. Next, click on the alarm with the highest priority in the list, and click Take action in the pop-up window, as shown below, to explore the suggested actions in another window.
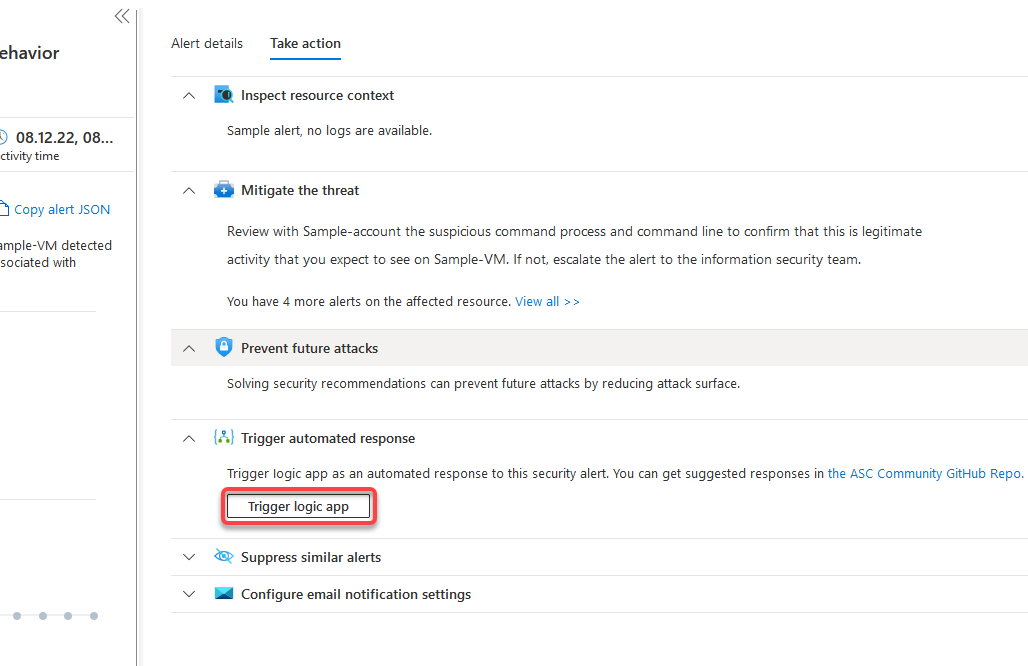
5. Click on either of the following:
- ASC Community GitHub Repo link – to read the possibilities of resolving the alert and avoiding its future occurrence.Trigger logic app – to trigger an automated response in the form of a logic app.
Another of the main tasks and functions of Microsoft Defender for Cloud is to “Defend.” If threats occur on resources explicitly selected for monitoring, action can be taken automatically, and notifications can be sent out.
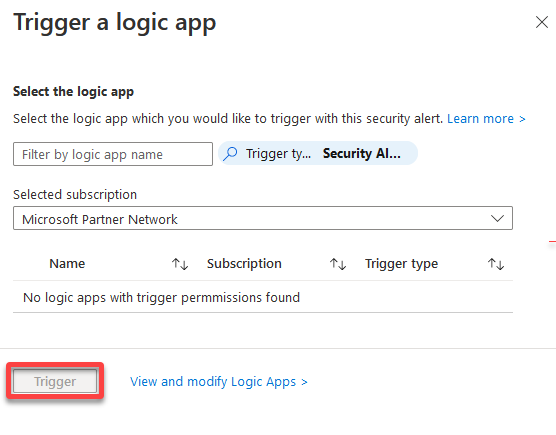
6. Next, click Trigger if you choose to assign and trigger a prepared logic app.
But in this case, no logic app is prepared, and therefore none can be selected and initiated. So jump to the following step for the second option available.
7. Return to the Take action sub-window, and click Create suppression rule under Suppress similar alerts to inspect this option in more detail.
A new sub-window pops up, where you will define a rule to suppress any further alerting on this specific event.
Note that only alarms that have occurred at least once can be suppressed. Furthermore, the suppression can also be limited to certain entities (such as a User account, File, Host, Process, or Azure resource).
8. Configure the new suppression rule with the following:
- Choose which Subscription and Alert the rule should be applied to.Provide a descriptive Rule name, set the rule’s State as Enabled, and specify the Reason for activating the rule.
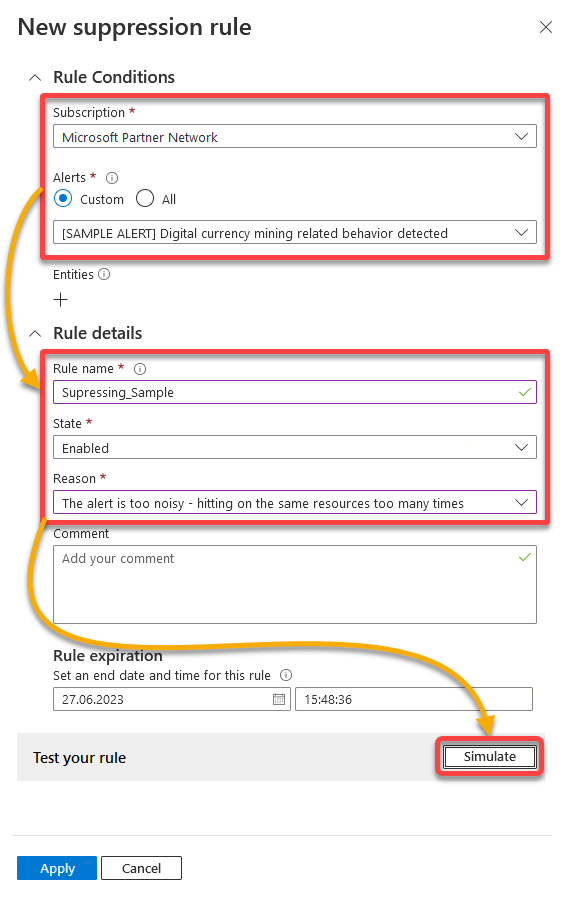
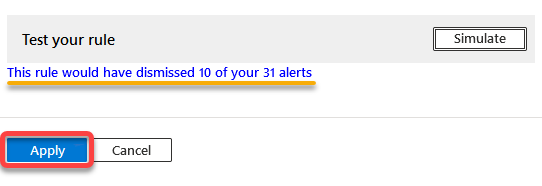
Below, the rule is simulated, which performs a dry run of the rule.

9. Once the test completes, review the notification of how many alerts this rule would have affected, and click Apply (bottom-left) to implement the new rule.
After a successful rule application, you will see the following message.

10. Return to the Take action sub-window, expand Configure email notification settings, and click Configure settings to see all available notifications possibilities.
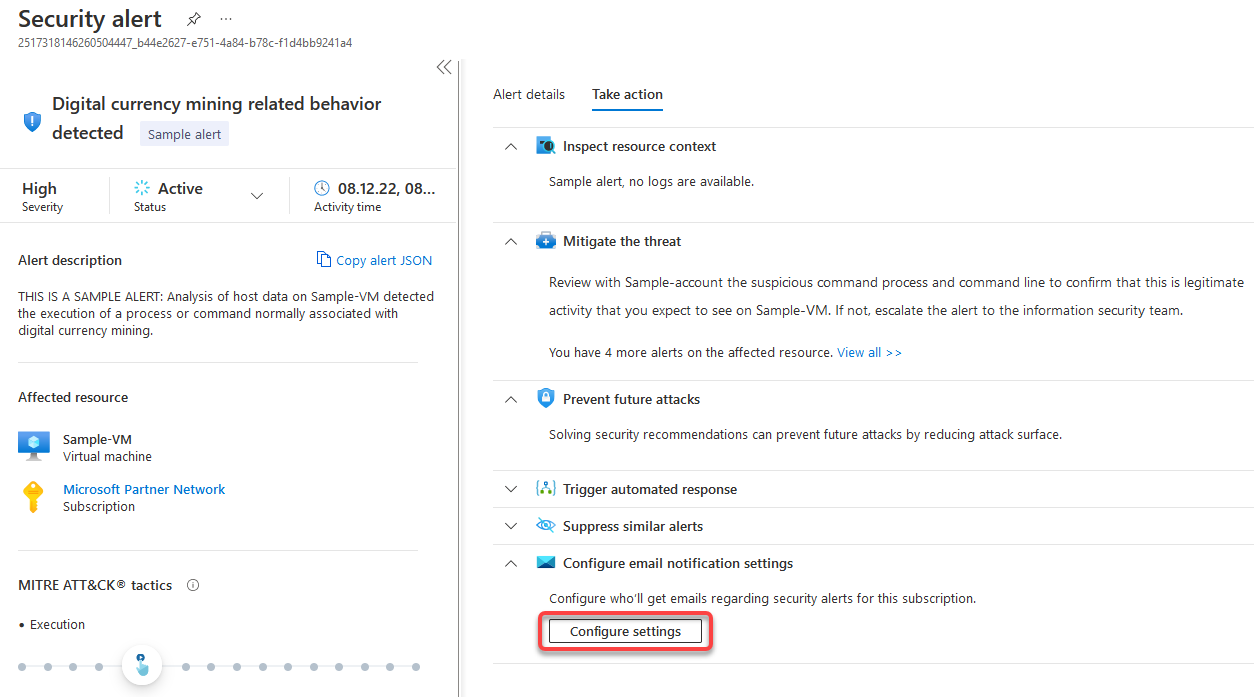
Configure the email notification settings. as follows:
- Choose a specific role (Owner), and set Additional email addresses to send email notifications.
- Tick the box under Notification types to enable setting a trigger for the notification.
- Choose the severity (High) of alerts to trigger a message.

The message below confirms you have successfully saved the email notification setting changes.
At this point, each time there is a security alert with High severity, the email recipients you specified in the notification settings will get an email regarding the alert.
Conclusion
A secure and well-maintained IT infrastructure is an indispensable part of modern companies. Keeping track of what needs to be done and prioritizing the necessary steps is often tricky. But the good news is that you have learned how to solve this problem with Microsoft Defender for Cloud in this tutorial.
Microsoft Defender for Cloud is only a tiny part of the Defender family. So why not explore other family members, like Microsoft Defender for Identity or Microsoft Defender for Endpoint? Nothing more is left that prevents a holistic security solution from being implemented!


