


As you start working with Azure, you’ll find that the Azure Portal is a great way to manage your resources. And if you’re wondering which resources and how you can manage Azure Portal, there are tons of them!
Azure Portal provides an intuitive browser-based user interface you can use to provision and manage Azure resources. And in this tutorial, you’ll learn how to use and manage your resources in the Azure Portal.
Read on and discover how the Azure Portal can make your life a breeze!
Prerequisites
This tutorial will be a hands-on demonstration. If you’d like to follow along, be sure you have an Azure account with an active subscription. You can create a free Azure account if you don’t have one already.
How to Manage Azure Portal and Create a Custom Dashboard
By default, Azure provides you with a set of default dashboards you can choose from to manage your resources. But would you really prefer a default dashboard? Why not create your own custom dashboard, and tailor it to your specific needs?
Luckily, Azure Portal also lets you create a custom dashboard you can call your own. Suppose you want a focused and clean view of your subscription’s virtual machine (VM) and runbook resources. With Azure Portal on your side, you can create this type of dashboard.
To create a new custom dashboard with an assigned name:
1. Open your favorite web browser, and log in to the default Azure Portal.
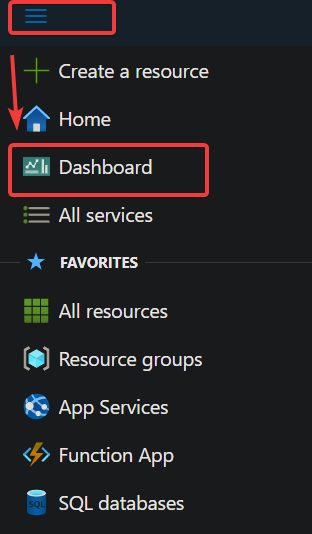
2. On the Azure Portal, click on the top-left menu icon (three horizontal lines), and choose Dashboard to initiate creating a new dashboard.
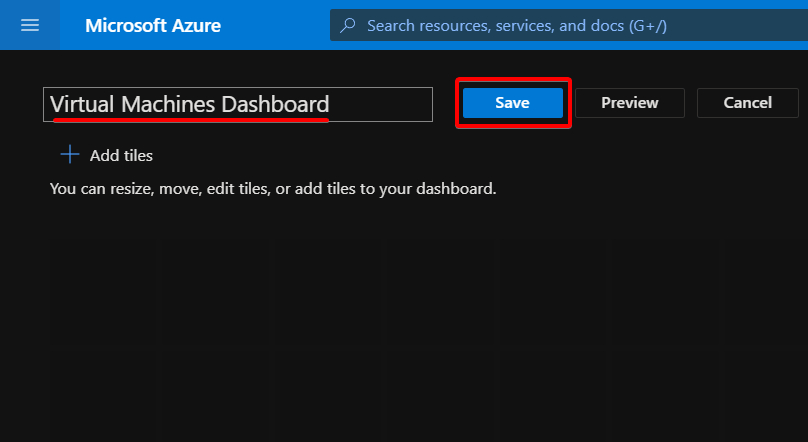
3. Next, click the New dashboard dropdown button, and select Blank dashboard. This action opens a new dashboard blade with an empty grid (step four).

4. Now, provide a descriptive name for your new dashboard, and click Save. This tutorial’s choice for the dashboard name is Virtual Machines Dashboard.
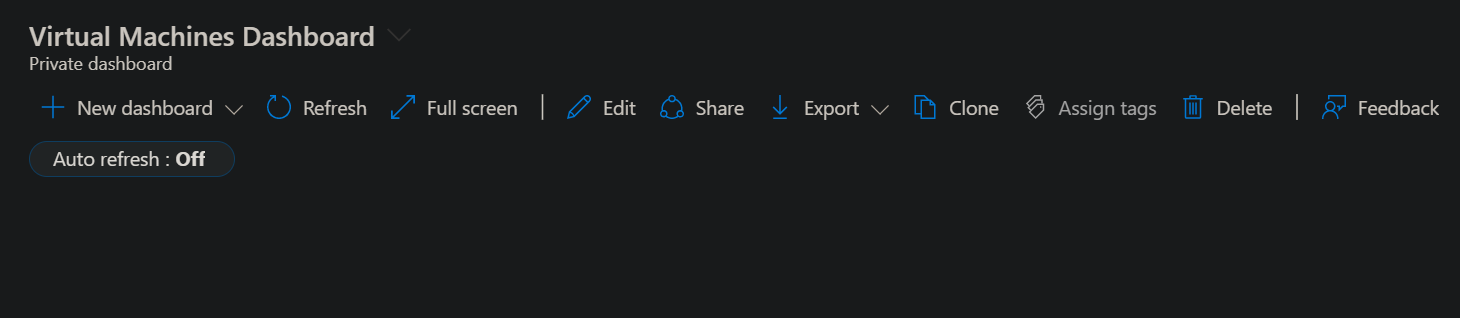
After saving the dashboard, your browser opens a blade like the one below, showing the newly-created dashboard once provisioned.
Customizing Azure Dashboards
You’ve created your first custom dashboard in Azure Portal. But right now, it’s empty. So why not add some content to the dashboard? For instance, add a tile to the dashboard showing all your resources.
To edit your custom dashboard:
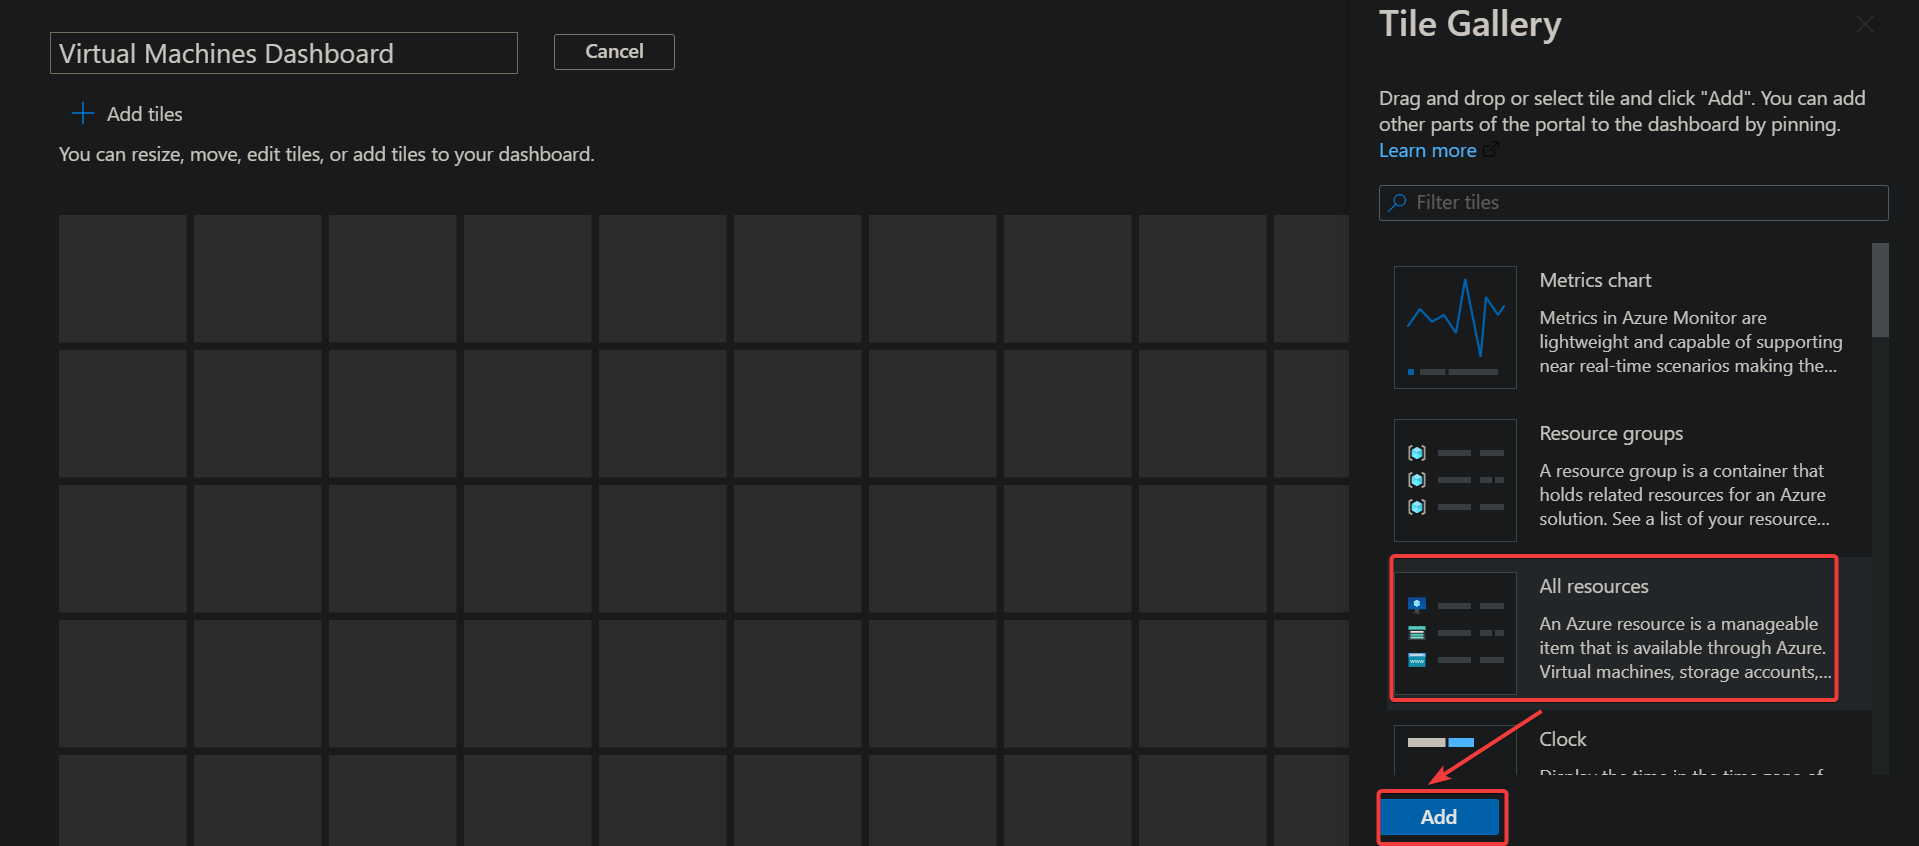
1. Click Edit on your dashboard page to enter edit mode.

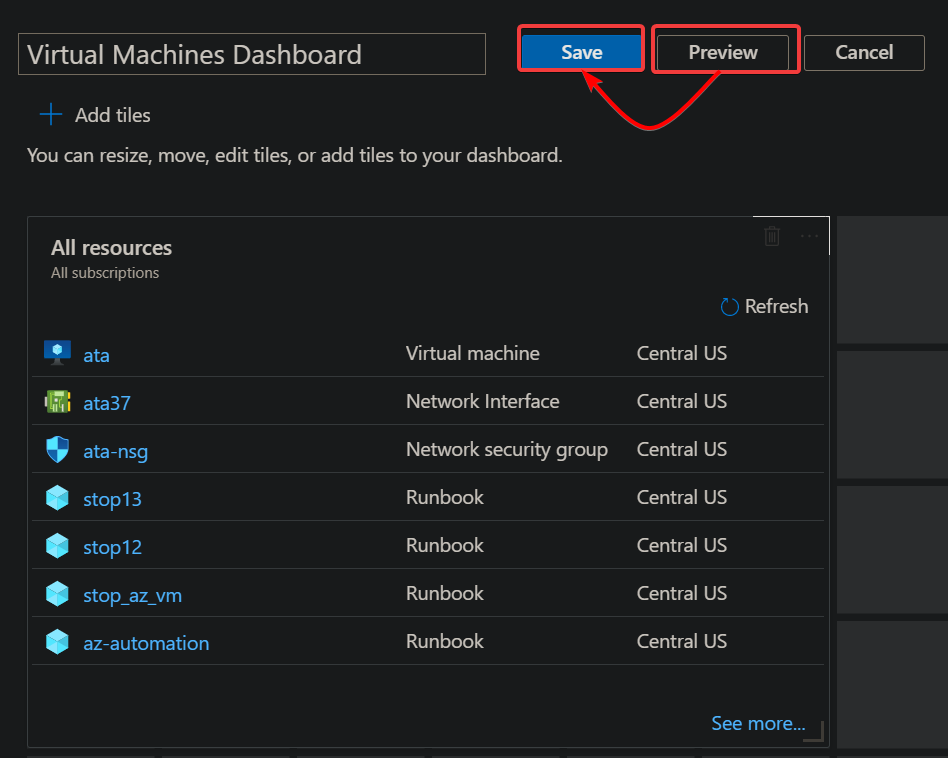
2. Next, browse the Tile Gallery (right-panel), select the type of tile you like, and click the Add button to add the selected tile to your dashboard. This tutorial’s choice is the All resources tile, which shows all available resources for your account.
Like most people (when they feel a bit lazy), you can also drag and drop the tile on the empty grid.
3. After adding a tile, click Preview to see how the new tile will look on your dashboard. If you’re happy with how the dashboard looks, click the Save button to save your changes.
Perhaps you want to add multiple tiles to your dashboard. If so, repeat steps one to three for each tile you want to add.
Resizing and Rearranging Tiles on the Custom Dashboard
Your dashboard now looks a bit lively with added tiles. But you may want to resize or rearrange the tiles to suit your taste better on how your dashboard should look.
1. Click on Edit again to enter edit mode.

2. Resize your tile from the dashboard with the following:
- Hover your mouse to the tile you want to resize or rearrange, and click the three dots that appear (top-right) on the tile. A context menu appears where you can select actions or sizes you want the selected tile to take.
- Select the 2×1 size from the context menu, which takes up two columns and one row on the dashboard grid. As soon as you select a size, the tile resizes automatically.
- After resizing, click on Save to save the changes.
There are other sizes you can choose for the tile, which make the tile take a certain number of columns and rows on the dashboard grid. The list of sizes goes on, but you get the idea of how these tile sizes work.
3. Lastly, drag and drop tiles to your desired location to rearrange the tiles on the dashboard, and click Save to save the changes.
There you have it. Your dashboard now looks more clutter-free!
Creating an Azure Resource Group to Manage in Azure Portal
When you have unorganized resources in Azure Portal, chances are you’ll get lost about which is which. Yikes! Sounds like trouble. How do you sort this problem out?
Grouping related resources together (like Azure VM resources) is an excellent solution. Luckily, resource groups keep your resources organized and neat.
You can create a resource group using the Azure Cloud Shell, PowerShell, or Azure CLI. But in this tutorial, you’ll use the Azure Portal to create a resource group.
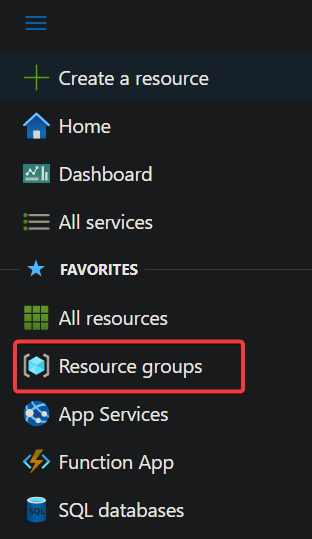
1. Click on the menu icon again —> Resource groups to access the resource groups blade (step two).
2. Next, click Create in the Resource groups blade to initialize creating a new resource group.

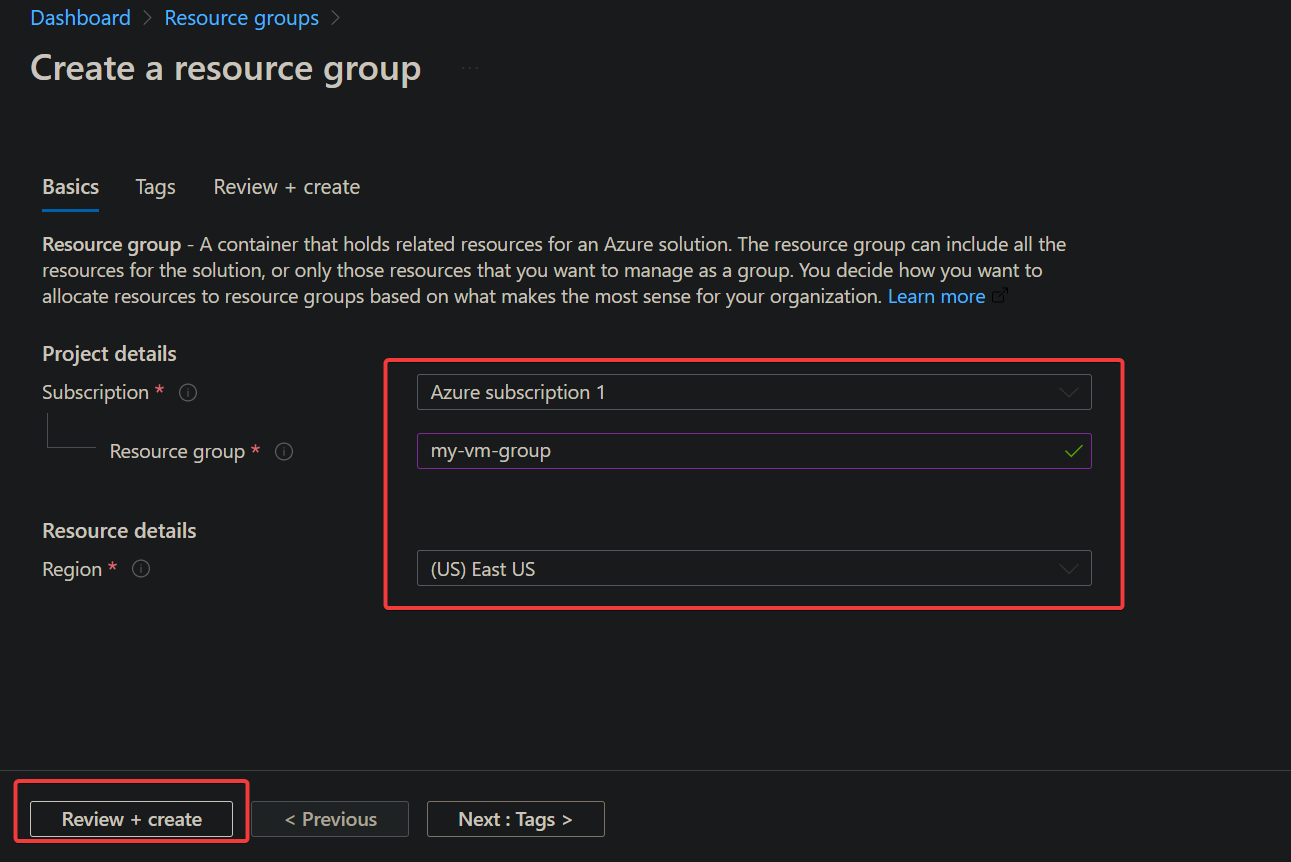
3. Provide the following information for the resource group, and click Review + create to review the details you set for the resource group.
- Subscription – Select your Azure subscription from the drop-down field.
- Resource group – Provide a descriptive name for your resource group. But this tutorial’s choice is my-vm-group.
- Region – Select the location to use for your resource group from the location drop-down field. A region nearest to you or your resources is usually the best option to minimize network latency.
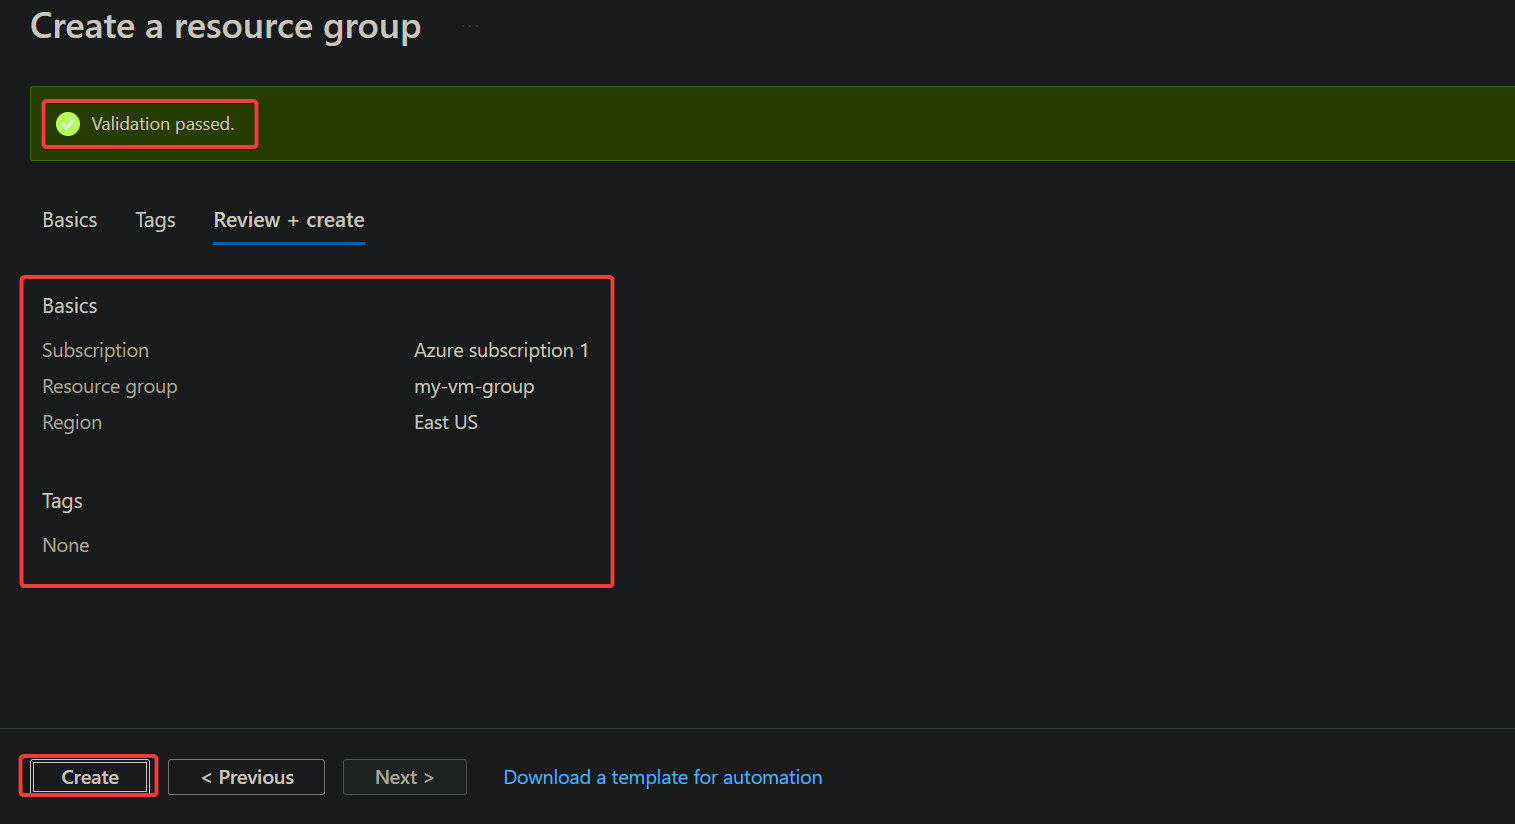
4. Now, review the resource group details, and wait until you see the Validation passed message shown below.
Once validated, click Create to finalize creating the new resource group, which may take a few minutes to complete.
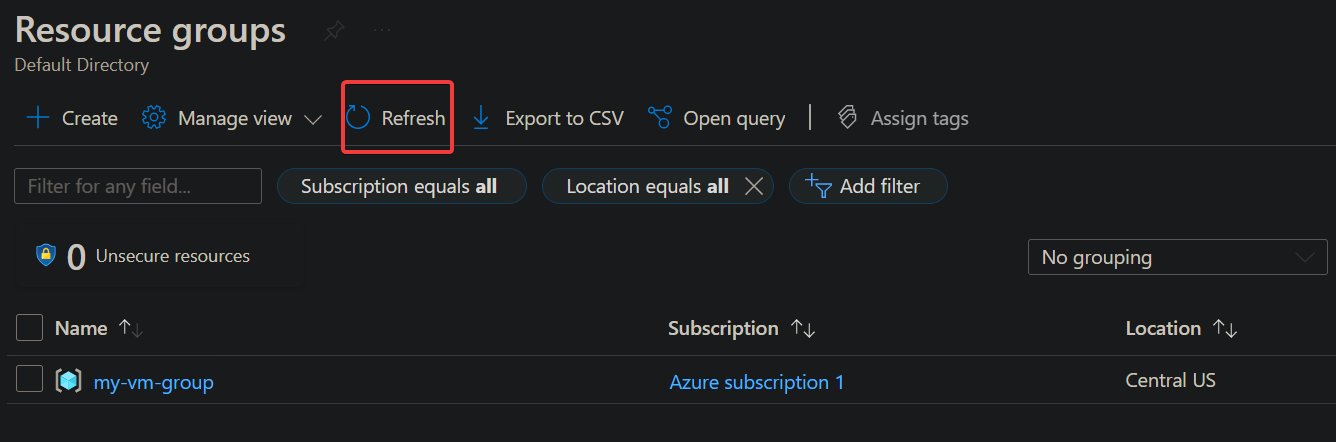
5. Click the Refresh button to refresh the list of resource groups if you don’t see the newly-created one right away.
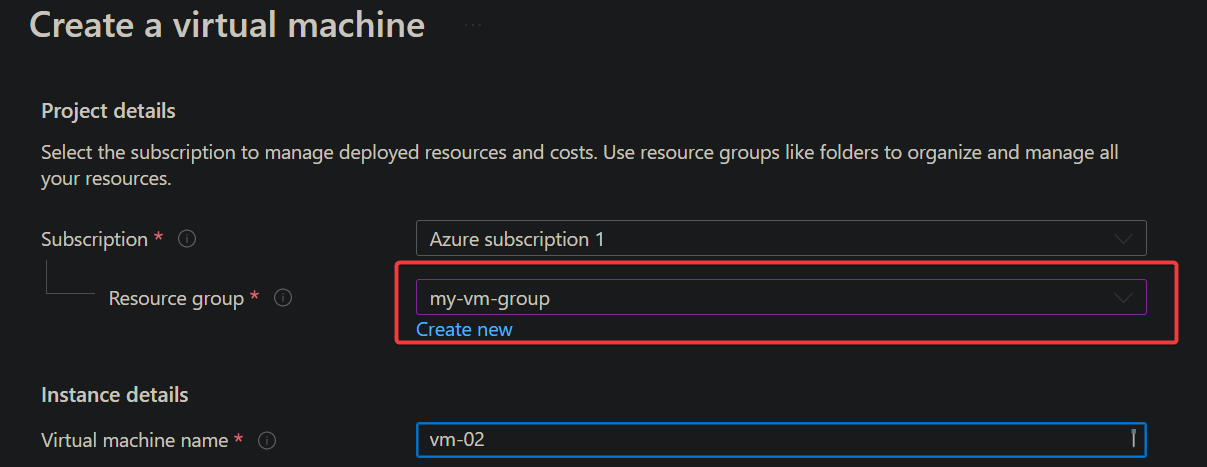
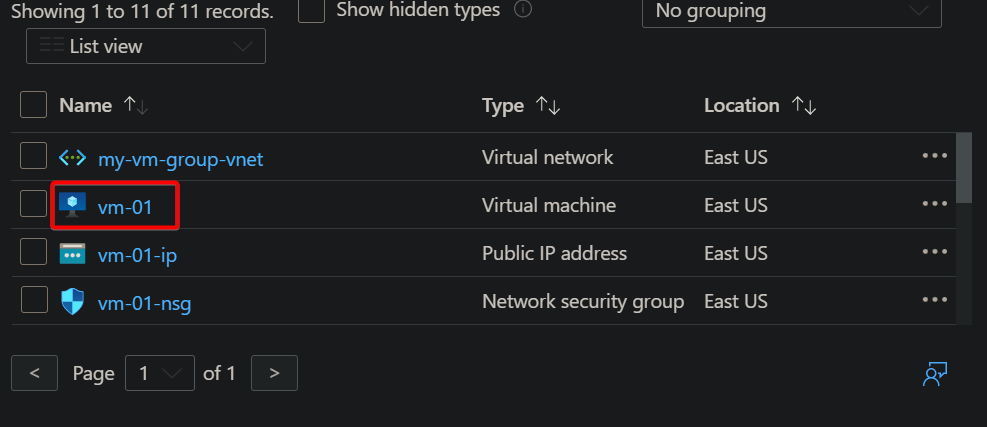
6. Finally, create two VMs, named vm-01 and vm-02. Ensure both VMs are under the resource group you created (my-vm-group), as shown below.

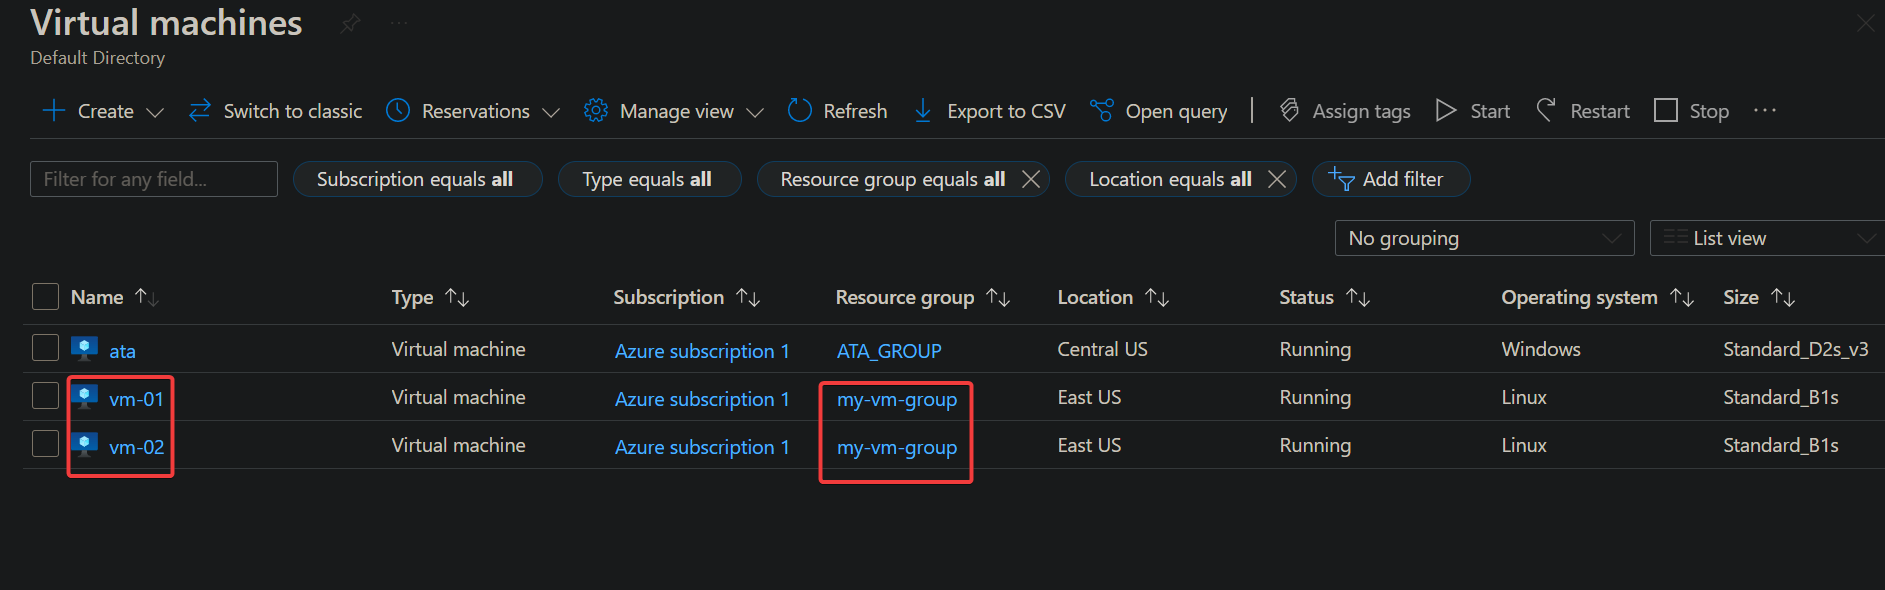
After creating the VMs, you’ll see them listed in the Virtual machines blade, as shown below. Below, you can confirm that both VMs are under the same resource group (my-vm-group).
Managing Azure Resources (VMs)
You’ve just created an Azure resource group to organize your resources (VMs). But how do you actually manage your Azure resources in Azure Portal? So long as you have your resources under the same resource group, Azure Portal lets you quickly manage your resources all in one place.
You’ll manage your VMs in this tutorial, but the same concepts apply to any resource group like Storage account, Azure SQL Database server, and so on.
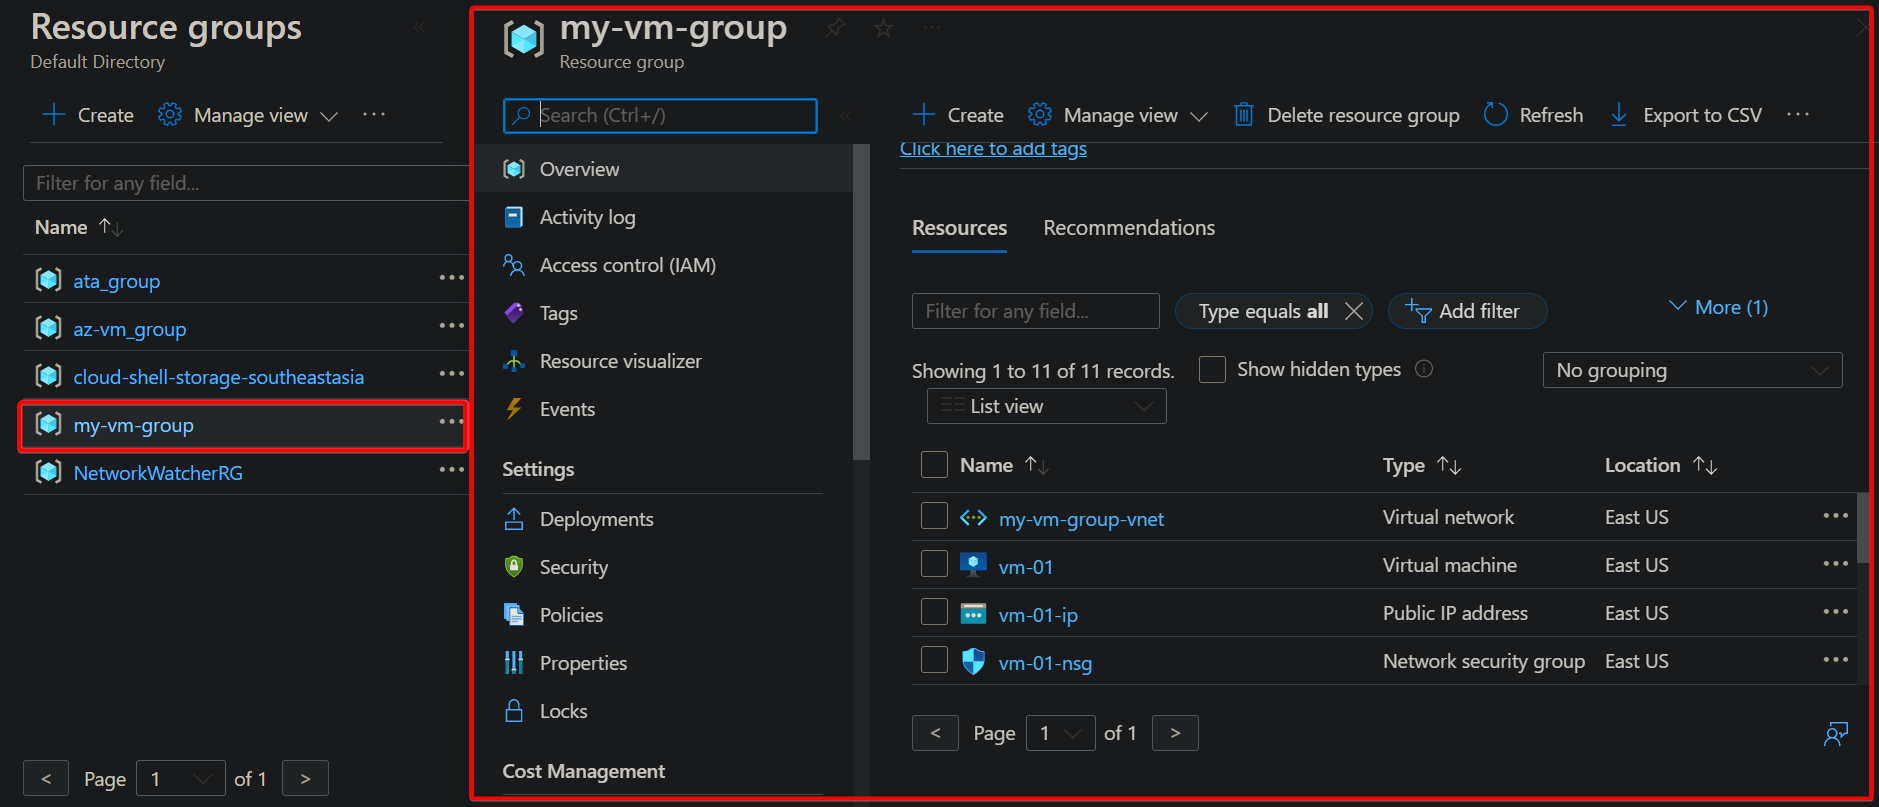
1. On the Resource groups blade, click on the resource group (my-vm-group) you want to manage from the list. Doing so opens a blade for the selected resource group.
Below, you can see that the blade lists all resources in your resource group (my-vm-group).
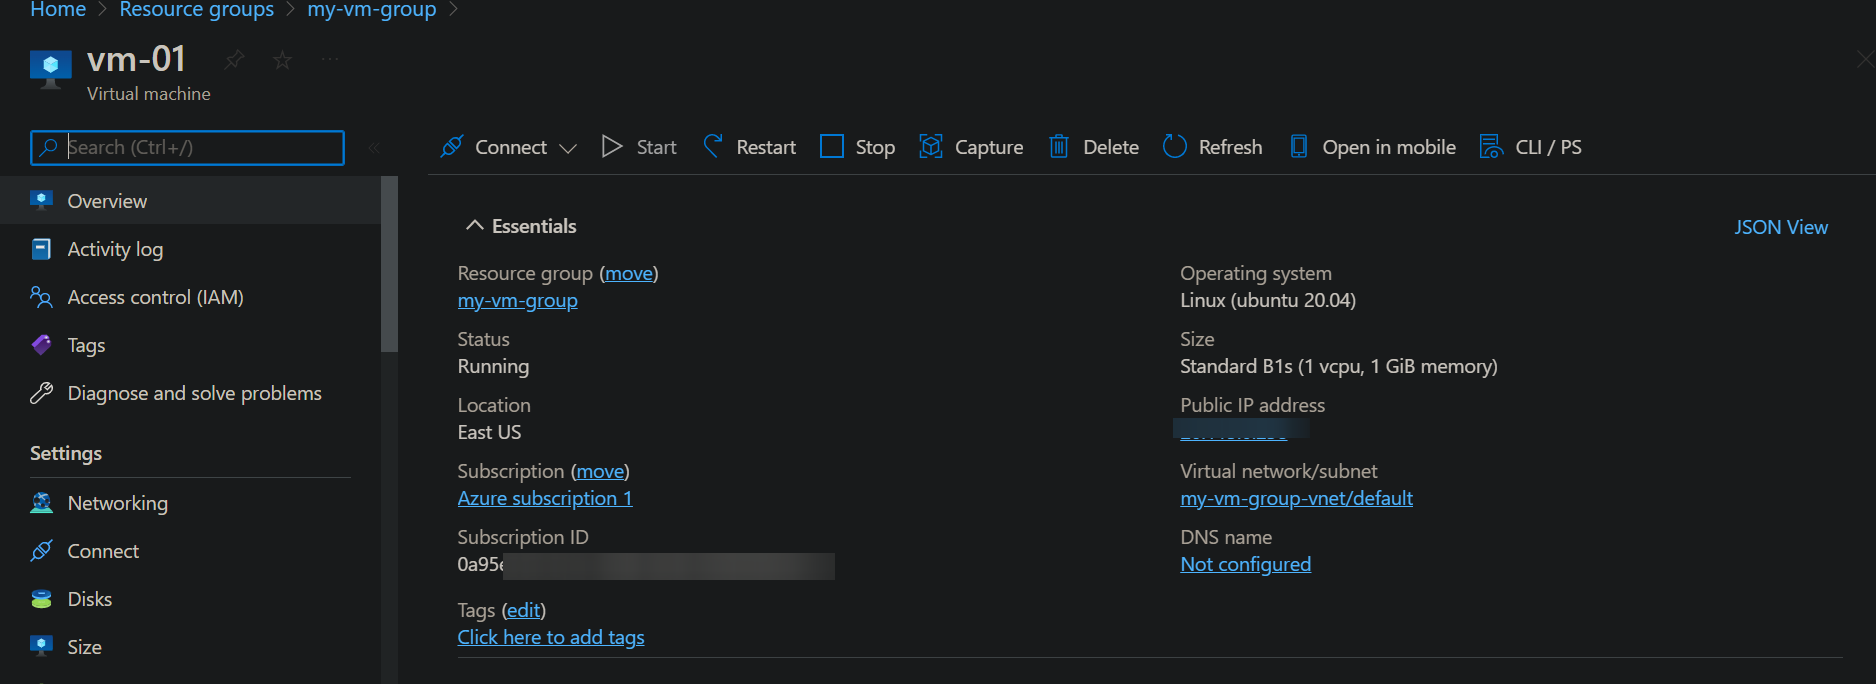
2. Next, click on your VM (vm-01) from the list of resources. A blade for your selected resource opens, showing all information and settings for the selected resource.
You can see below all details about your VM. But apart from the resource details, you can also see several actions you can take to manage your VM. For instance, you can start, stop the VMs, connect to them, and so on.
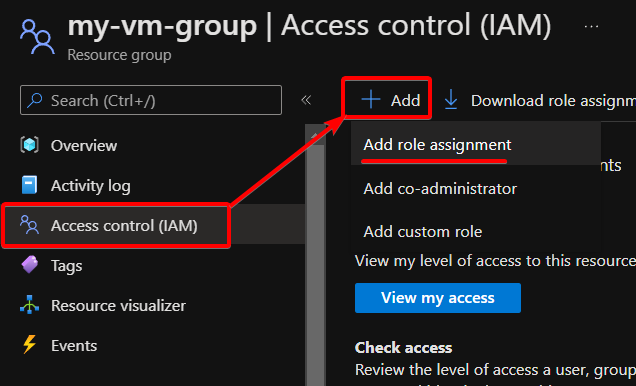
3. Switch back to your resource group’s (my-vm-group) blade, and click on Access control (IAM) on the left panel. An Access control (IAM) blade opens, where you can manage access control for the selected resource group.
On the Access control (IAM) blade, click Add —> Add role assignment to initiate adding a new role assignment.
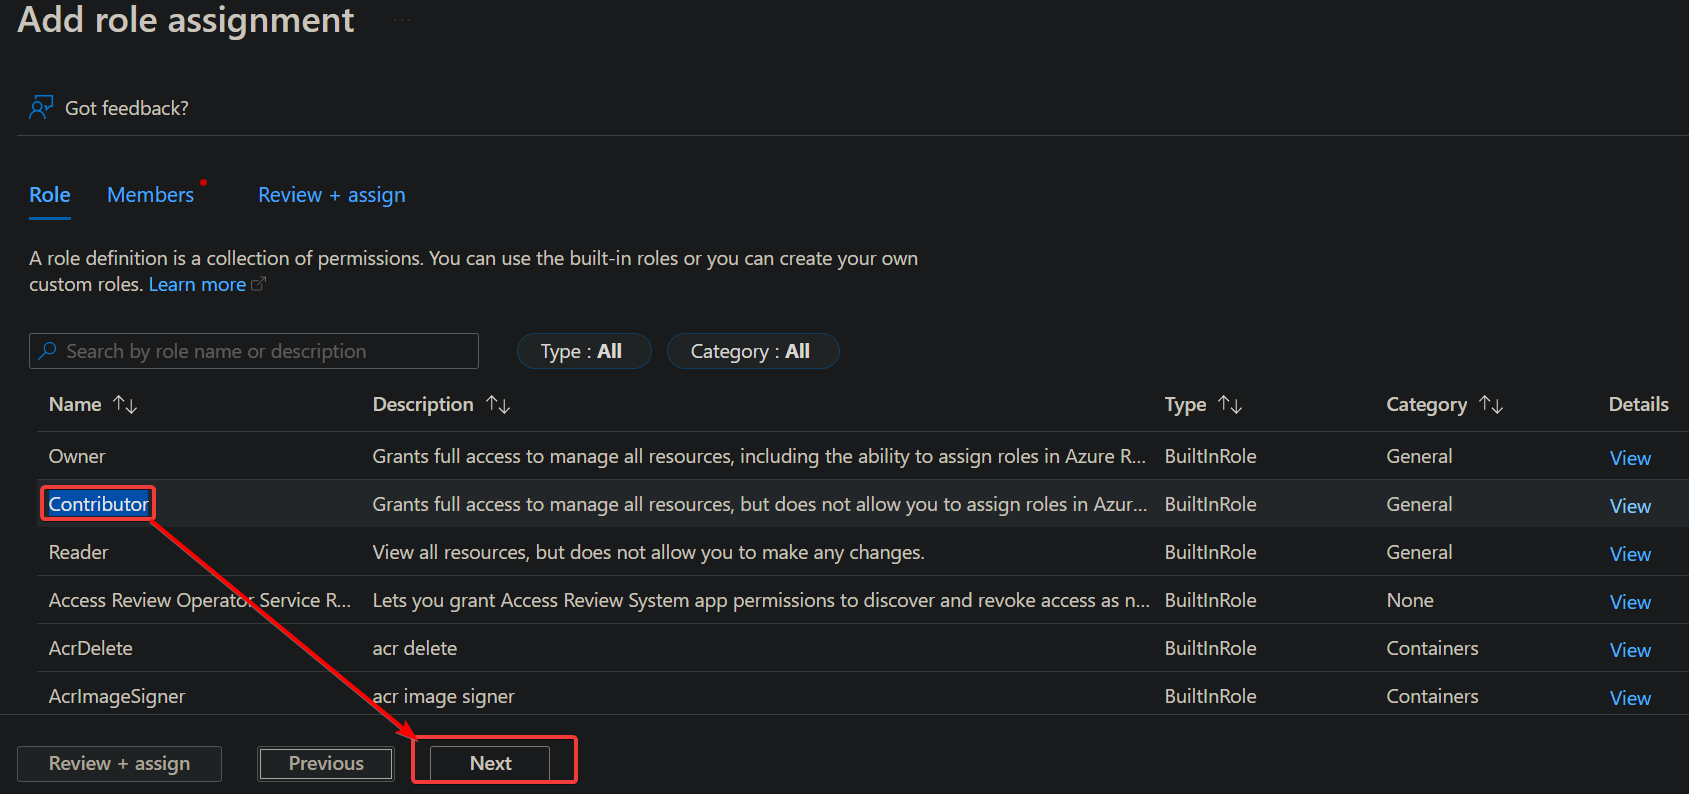
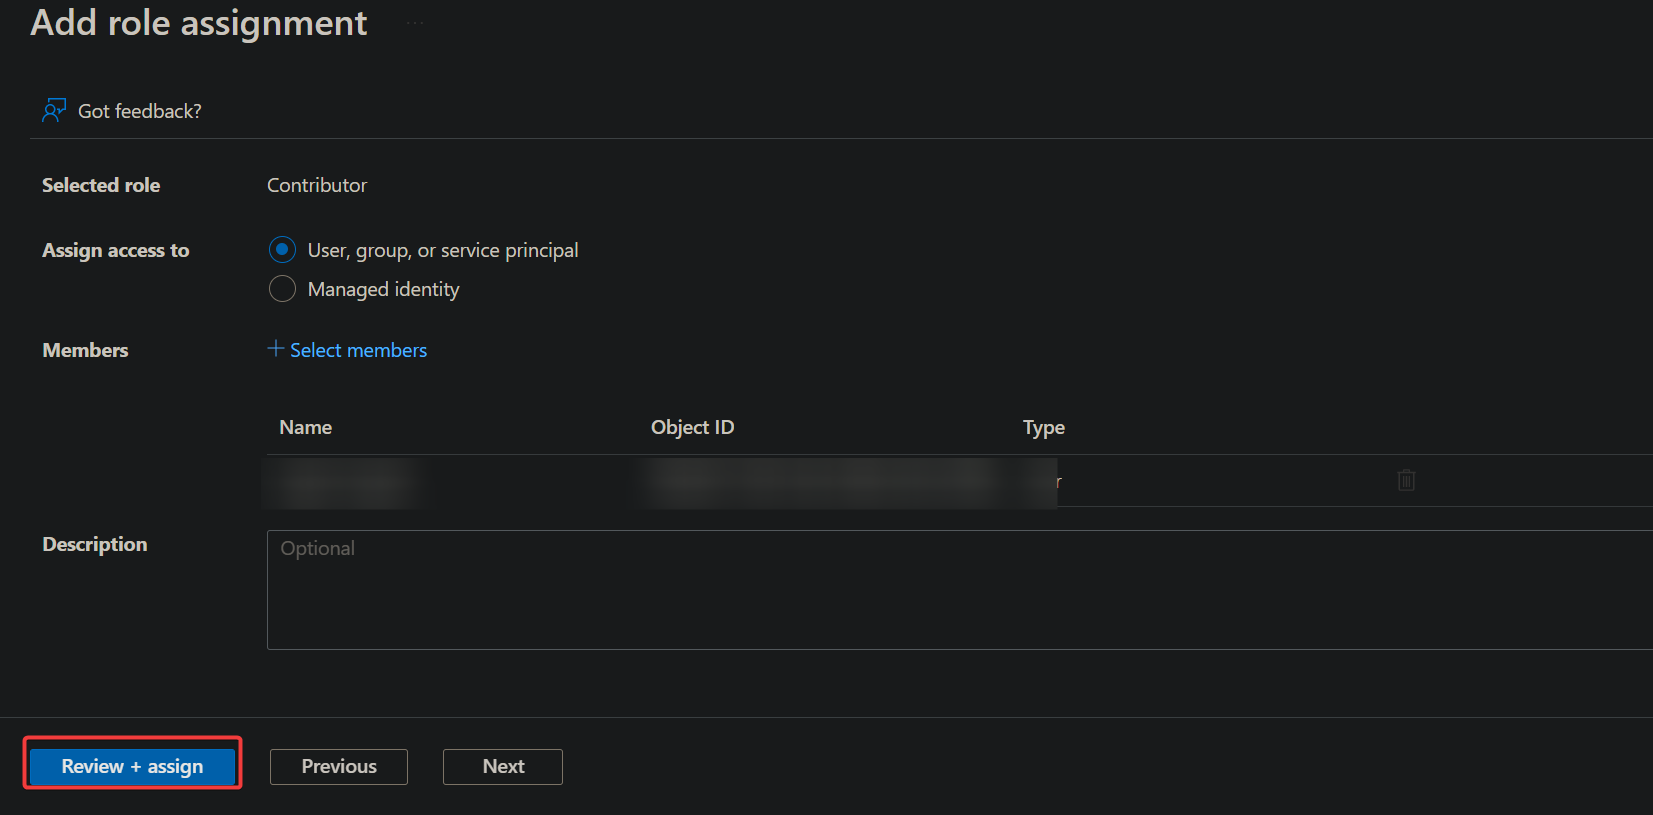
4. On the Add role assignment, select the role (Contributor) you want to assign under the Role tab and click Next.
5. Click the Select member hyperlink, look for and click the user to give access to your resources, and click Select.
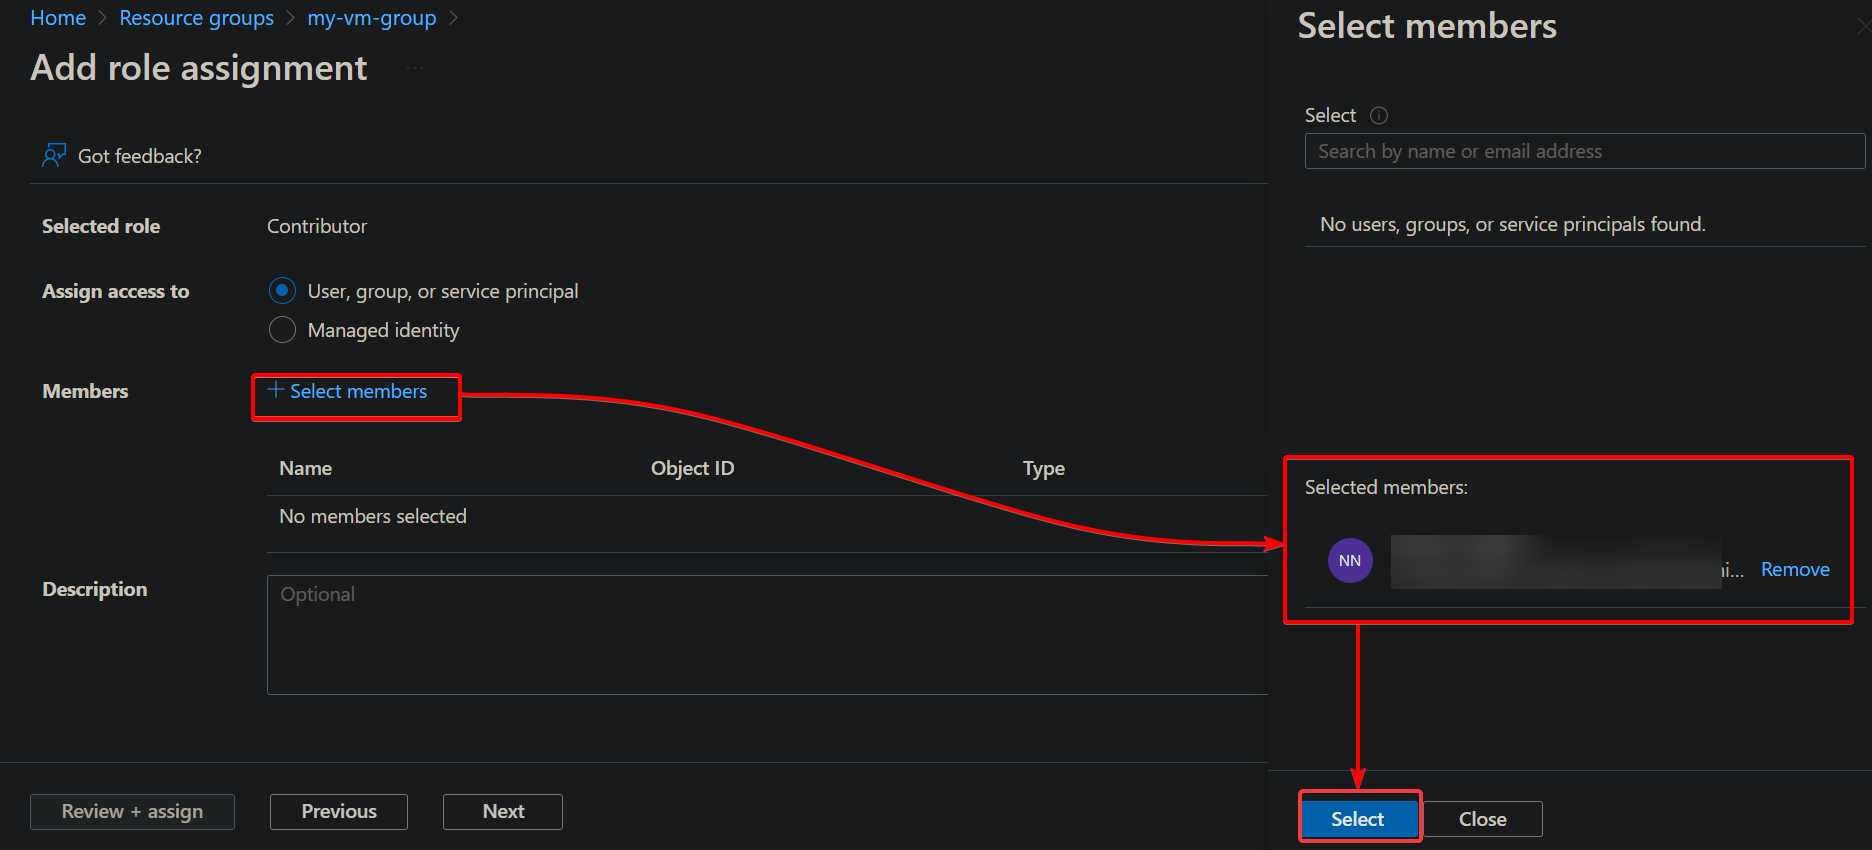
6. Now, review the role details, the members added to the role, and click Review + assign twice to finalize adding role assignment to the selected member.
Note that you can add multiple users to a single resource group and assign different roles to each one.
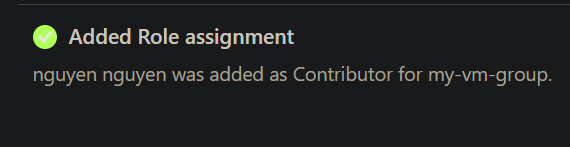
You’ll see an Added Role assignment message (top-right) when the role assignment is successful, as shown below.
At this point, the selected users will now have the access rights assigned so they can access your resources in the Azure Portal and via the Azure CLI or Azure PowerShell.
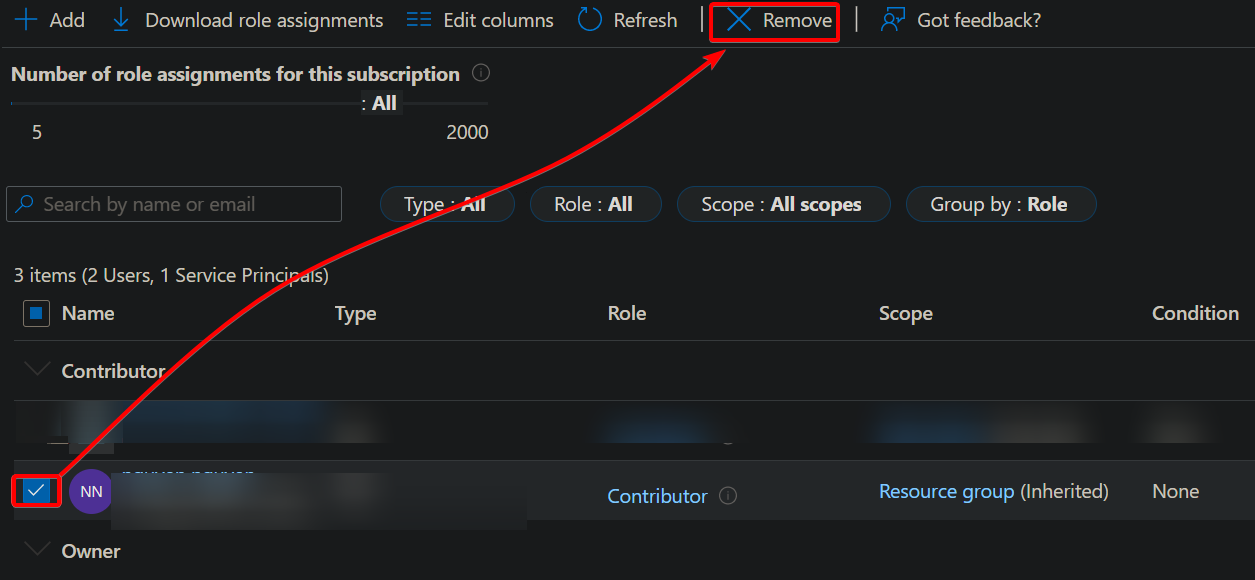
If you ever need to remove a user’s access, tick on the checkbox in front of the user’s name and click the Remove button, as shown below.
Conclusion
Managing resources can be tedious but nothing you can handle. And in this tutorial, you’ve learned how to use and manage the Azure Portal and Azure resources. You’ve also controlled access to your resources using the Azure role-based access control (RBAC).
What other resources do you plan to manage in Azure Portal? Why not set up Azure Availability Sets to organize your virtual machines (VMs) into logical groupings?


