
Are you looking for lightweight, fast, and highly-available Kubernetes? Microk8s might be what you need. High availability is in MicroK8s DNA. Once you install it, you rarely have to make modifications because everything just works out of the box.
If you’re still on the fence, read on! Because in this tutorial, you will learn step-by-step how to install Microk8s locally on Ubuntu so you can quickly get started with your first deployment!
Prerequisites
This article will be a step-by-step tutorial. To follow the examples, you will need to have a Ubuntu 20.04 LTS computer, which already comes with the Snap package manager pre-installed.
Feel free to use other Linux distros, but note that you may need to install the Snap package manager separately.
Installing Microk8s
Now that you have the prerequisites, your environment should be ready for the Microk8s installation. Luckily, Canonical has made the installation quick and convenient as a Snap package.
A Snap is a self-contained package that works universally on any Linux distribution with the Snap package manager.
To install on Ubuntu, follow these steps.
1. Open a terminal session on your Ubuntu machine, whether locally or via SSH.
2. Run the following command on the terminal to install it.
# Installing the latest Microk8s version via snap
sudo snap install microk8s --classic
The image below shows the confirmation message after a successful installation. As you can see, the latest stable version as of this writing is v1.22.4.

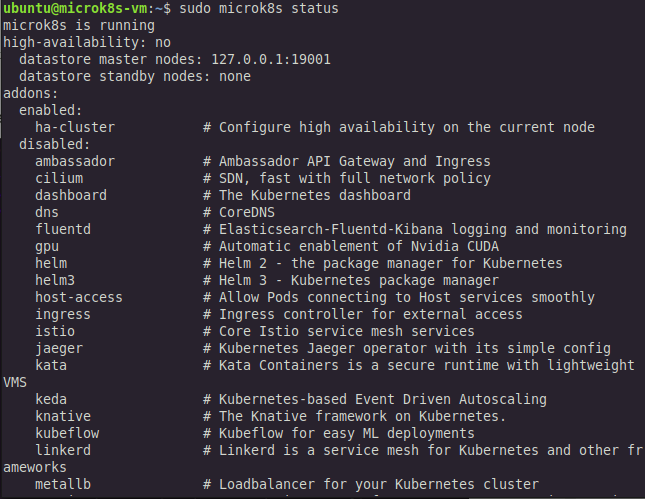
3. Lastly, to confirm the service status, run the following command.
# Checking Microk8s status
sudo microk8s status
The screenshot below confirms that the microk8s service is running. Additionally, you can see that the ha-cluster add-on is enabled by default, which provides high availability configuration on the current node.
Adding Your User Account to the MicroK8s Group
Running the commands requires superuser privileges, which means you have to issue every command with sudo. To avoid this annoyance, the installation creates a group aptly named microk8s, where members will have superuser rights to run its commands.
1. To add your user account, run the following command in the terminal.
# Adding the current user to Microk8s group
sudo usermod -aG microk8s $USER
2. Adding your account does not automatically apply the new privileges on your current terminal session. To refresh your terminal session and the new privileges to take effect, run the below commands next.
# Re-entering user session for group update to take effect
su - $USER
# Reload the mircok8s group users
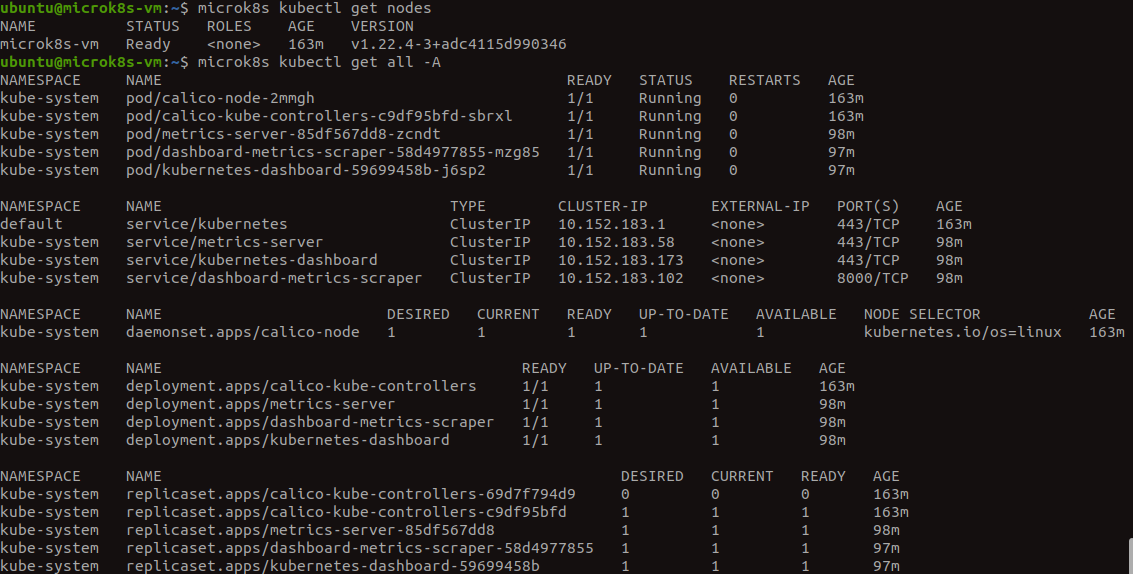
newgrp microk8s3. From this point, when you run microk8s commands, you no longer have to prefix the sudo command. To test, run the microk8s kubectl commands in the terminal.
# Getting available nodes
microk8s kubectl get nodes
# Displaying all contents in all the namespaces
microk8s kubectl get all -A
The commands should execute without requiring the sudo command, as you can see below.
The
kubectlsubcommand controls the Kubernetes cluster manager. If you prefer to drop themicrok8sprefix and just use*kubectlto issue commands to Kubernetes, create an alias by running the command:alias kubectl='microk8s kubectl'.
Enabling and Accessing the Kubernetes Dashboard
It supports a wide range of add-ons. One of which is the dashboard add-on that enables the Kubernetes web-based dashboard. The dashboard allows viewing and interacting with the resources using a GUI. What’s even better, enabling this add-on only takes a one-liner.
1. Run the command below to enable the Kubernetes web dashboard.
# Enabling Kubernetes web dashboard
microk8s enable dashboard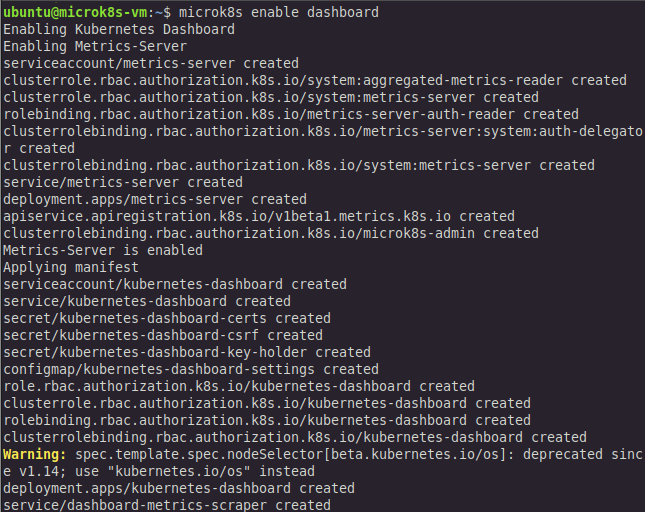
2. Next, get the IP address of the kubernetes-dashboard service, which is the dashboard IP address.
# Displaying services running in the kube-system namespace
microk8s kubectl get services --namespace kube-system
After running the command, take note of the IP address and the port number from the result.

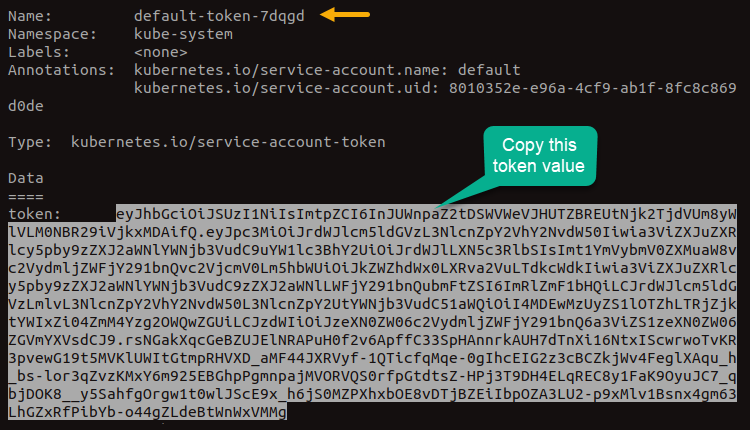
3. Accessing the dashboard requires authorization using the default token. To retrieve the default token, run the commands below.
# Get the default token name
token=$(microk8s kubectl -n kube-system get secret | grep default-token | cut -d " " -f1)
# Display the token value
microk8s kubectl -n kube-system describe secret $token
As you can see below, the default token name is default-token-7dqgd. The default token name is unique on every installation.
Make sure to copy the token value. You’ll authenticate to the dashboard using this token in the succeeding steps.
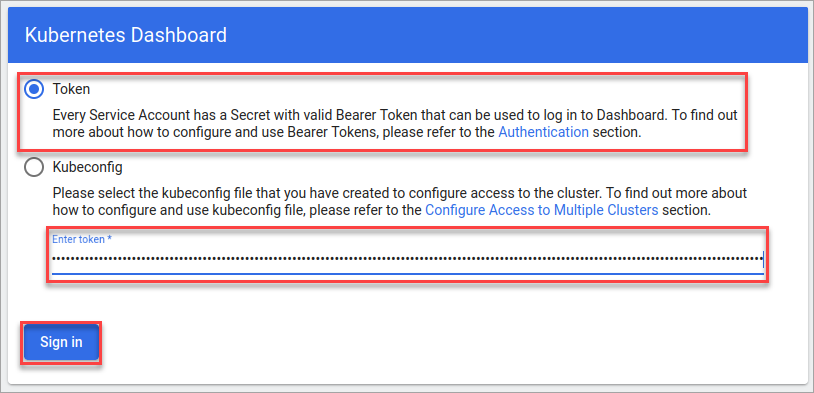
4. Open a new browser window and navigate to the dashboard’s IP address you copied in step #2.
5. On the Kubernetes Dashboard sign-in page, paste the token value you copied in step #3 into the Enter token field and click Sign in.
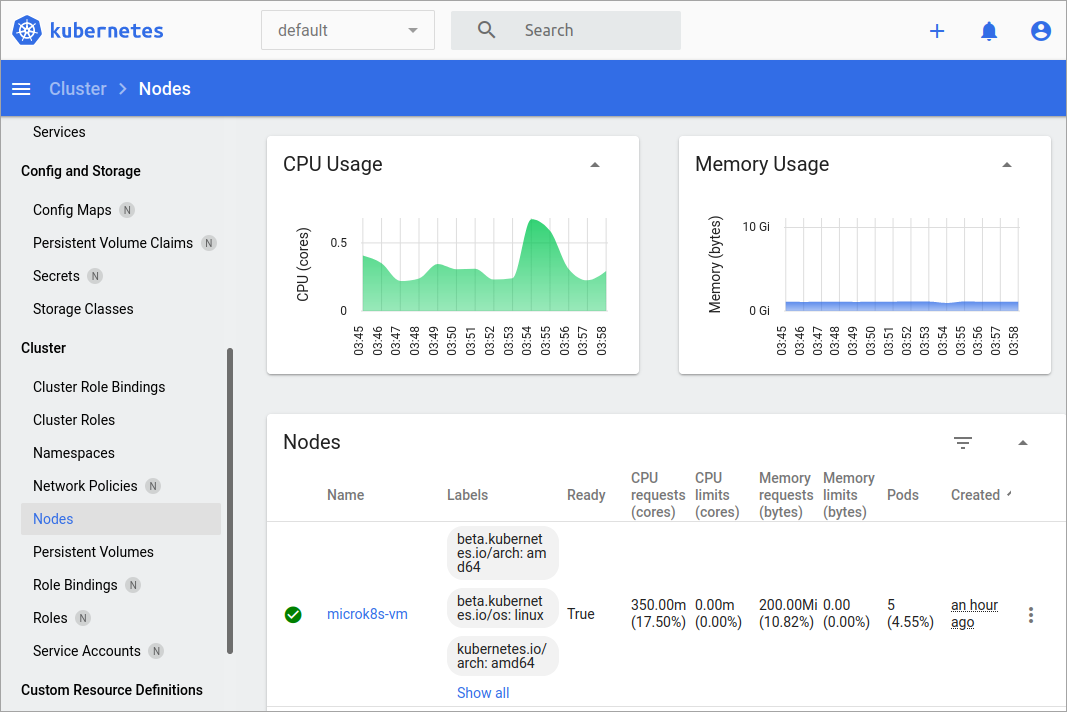
And you now have a graphical view of the Kubernetes resources.
To get a comprehensive list of add-ons, you can check out the Official Documentation.
Deploying a Sample Application Microk8s
As long as you’ve followed the previous sections properly, you should now have a proper Kubernetes setup. This tutorial isn’t complete without you deploying a sample application for testing.
For this section, you will be deploying a base NGINX application running in a Docker container.
A Kubernetes deployment is a way for Kubernetes to create, modify, and manage pods. Deployments are responsible for managing the desired state of pods.
1. Run the command below to create a deployment called nginx. This command pulls an NGINX image from Docker Hub, creates a pod, and runs an NGINX container inside the pod.
# Creating deployment for nginx
microk8s kubectl create deployment nginx --image=nginx
The results below confirm that you’ve created the deployment successfully.

2. Next, run the command below to confirm if the pod for NGINX is running.
# Displaying available pods
microk8s kubectl get pods
As you can see below, you now have one pod running.

3. While the pod running NGINX is currently active and healthy, the NGINX container inside the pod is not accessible from the host machine. To expose the application to the network, run the command below to bind the container’s port 80 to the host machine’s port 80.
# Creating service for nginx deployment and assigning nodeport
microk8s kubectl create service nodeport nginx --tcp=80:80
As you can see below, the result indicates that the command has created a service for the NGINX deployment. A Kubernetes service allows network communication between pods or between pods and the host machine.

4. Before you can access the NGINX container using your browser, you first need to find its port number. To do so, run the command below to get the nginx pod port number.
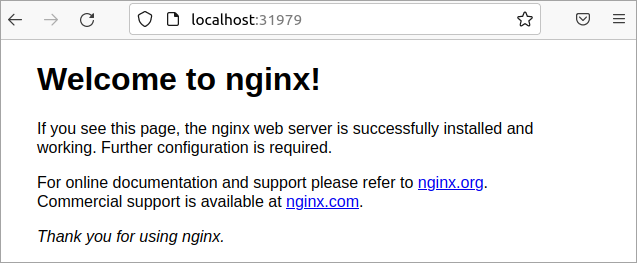
microk8s kubectl get svc nginxIn this example, the node port Kubernetes mapped on the machine for the nginx container is 31979.

Now, open a browser window and navigate to http://<host-ip>:<port>. If you’re accessing the container from the host, the URL would be http://localhost:31979.
Stopping, Starting, and Removing MicroK8s
Running Kubernetes in the background consumes system resources. If you’re not using the service, consider stopping the service to free up resources and save power. Whether you’re starting, stopping, or uninstalling, you’ll only need to execute one-liners — isn’t that convenient?
To stop, run the below command.
# Stopping Microk8s
microk8s stop
Execute the command below when you need to start Microk8s and its services again for further testing.
# Starting Microk8s
microk8s start
But if you no longer need and wish to uninstall it from your computer, run the removal command below.
# Uninstalling microk8s
sudo snap remove microk8s
Conclusion
Finally, you have come to the end of this tutorial. With the above walk-through, you have successfully installed Microk8s locally, started a single node, deployed a sample application into a cluster, and successfully stopped the cluster.
Now, what will you do next? How about adding another Microk8s node to your cluster? But it’s entirely up to you! Go crazy with it!


