


Have you ever accidentally deleted important files from your computer? Well, you’re not the only one. Mistakes, such as accidentally deleting files, can be costly. But the good news is there are plenty of ways in Linux to recover deleted files.
In this tutorial, you will learn how to recover even permanently deleted files in a Linux system.
Let’s get started!
Prerequisites
This tutorial will be a hands-on demonstration. If you’d like to follow along, be sure you have the following:
- A Linux Machine – This tutorial uses Ubuntu 20.04, but any Linux distributions will work.
- User with sudo privileges.
Recovering Deleted File from Trash
Accidentally deleting a file can be nerve-wracking, especially if it’s a project file. But if you’re lucky enough that your deleted file ended up in the Trash, you can still recover your file in a few clicks.
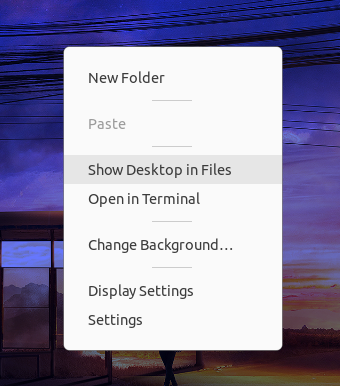
- Right-click on a space on your Desktop, and select Show Desktop in Files from the context menu to open your file manager.
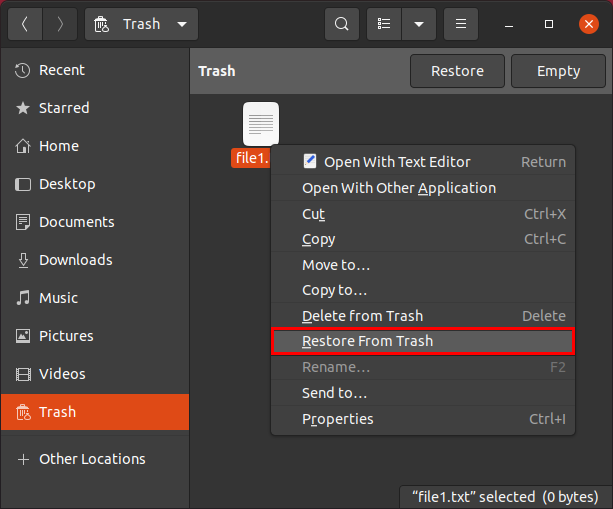
2. Select Trash from the left sidebar to access the Trash. Right-click on the file, choose Restore from Trash to recover the file and move the file back to its original location.
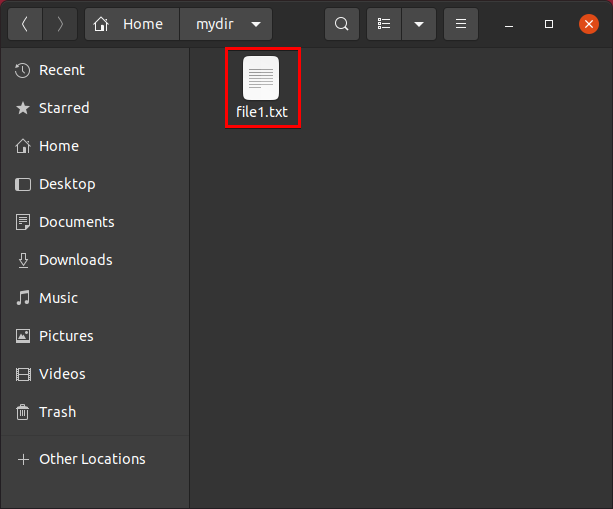
3. Finally, navigate to your deleted file’s original location to see the successfully restored the file.
Using TestDisk Linux to Recover Deleted Files
Couldn’t find your file anywhere? Chances are, you may have deleted your file permanently either by pressing the Shift + Delete keys or by running the rm command. There are tons of file recovery tools, but for this tutorial, you’ll be working with TestDisk. TestDisk is a Linux utility that checks and recovers lost partitions, files, and more via a command-line terminal.
Each file on a Linux system occupies a series of disk clusters, which themselves are composed of disk sectors and are the actual bits stored on the disk. When you delete a file, Linux releases all the clusters associated with that file to store other files. TestDisk can only recover the deleted files if these clusters have not been overwritten.
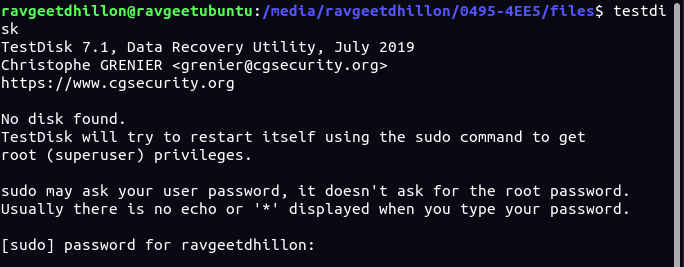
- Launch your terminal and run the command below to check whether TestDisk (
testdisk) is installed on your system or not.
which testdiskBelow, you can see the output shows the executable path of TestDisk, which indicates TestDisk is already installed.

If you don’t see any output, run the commands below to install TestDisk via the apt utility and check if you’ve installed TestDisk completely.
sudo apt install testdisk
which testdisk
2. Next, run the command below to access TestDisk.
testdiskIf you have not run testdisk preceded by sudo, you need to enter your sudo password before proceeding, as shown below. Linux will then restart the TestDisk utility in your terminal under a privileged user.
3. On the TestDisk’s initial page, choose Create with the arrows keys and press Enter to create a log file. The log file houses all actions you perform in TestDisk.
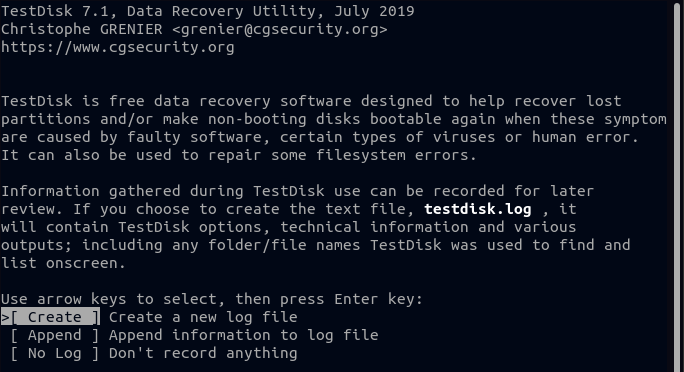
The TestDisk GUI may look sparse at first, but it is not. The interface is user-friendly and will automatically highlight the best option you need to use to restore your deleted files.
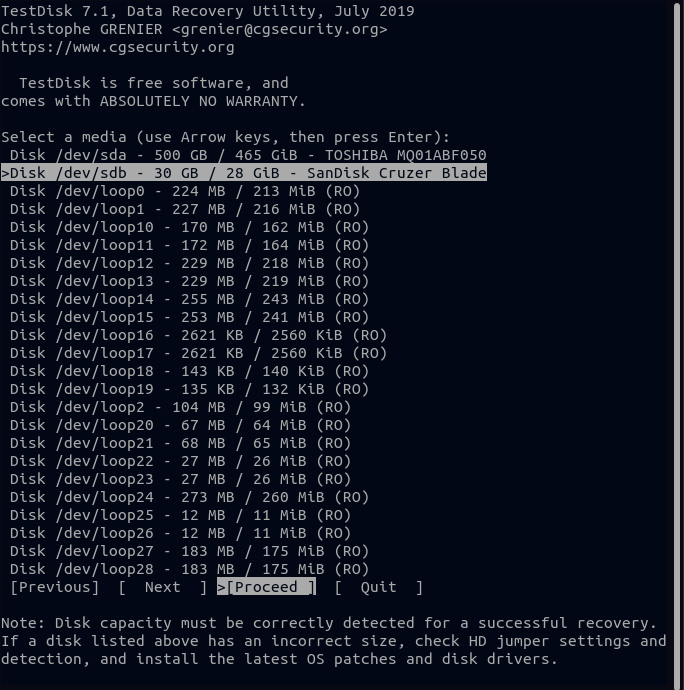
4. Next, navigate through the list with the Up and Down arrow keys, and select the disk from which you want to recover your deleted files. Once you highlight the disk, press the Right arrow key to highlight the Proceed option and hit Enter to select the disk.
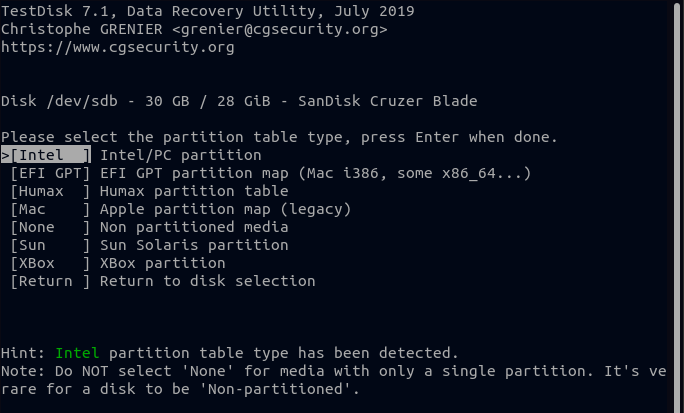
5. Select your disk’s partition type and press Enter. Identifying the correct partition table type can be tricky, but don’t worry as TestDisk automatically predicts and highlight the right partition.
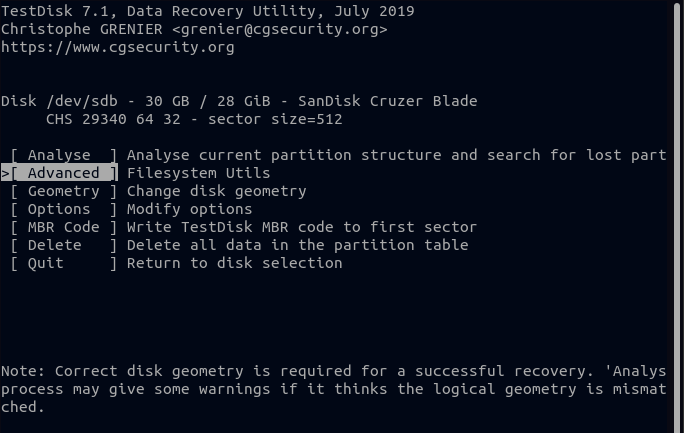
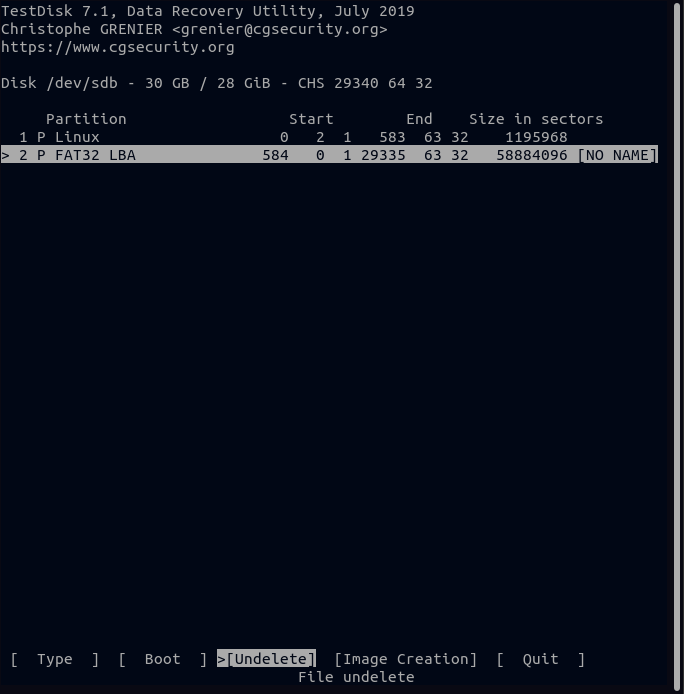
6. On the next screen, select the Advanced option since you’re recovering a deleted file, and press Enter.
TestDisk is used not only for recovering files but also to fix broken disks.
7. Highlight your disk’s partition, press the Right arrow key, select the Undelete option, and press Enter. This tutorial is based on recovering files from an external storage device like a USB drive with a FAT32 type partition.
At this point, TestDisk scans files related to your partition and shows a list of deleted files shown in the next step.
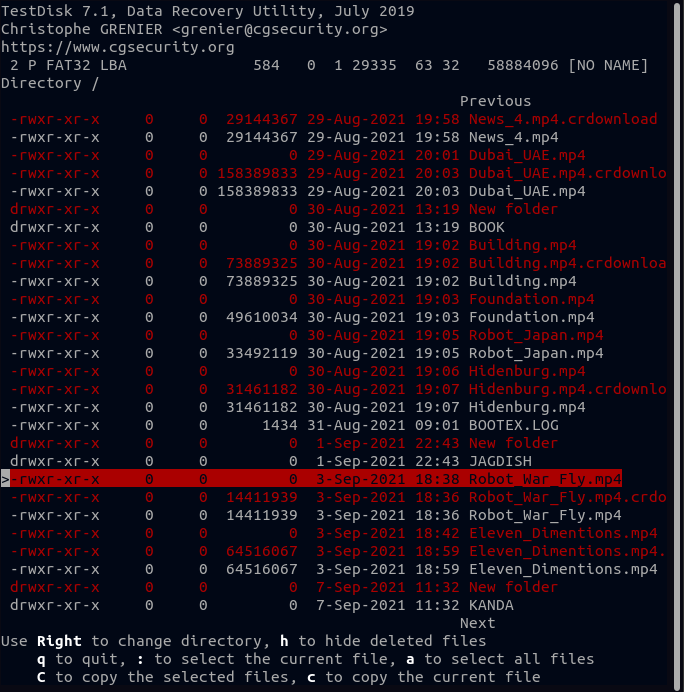
8. Now, select the file you want to restore from the list of files as shown in the image below.
If you have to select multiple files, navigate to each file, and press the colon (:) key to select the file for restoration. Once you have selected all the files to restore, press C to copy your files in memory.
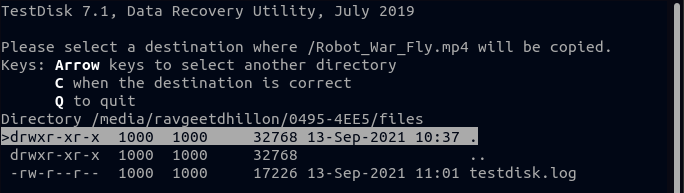
9. Select a destination where you want to save the recovered file and press Enter.
Navigating directory paths in TestDisk can be tricky, so it’s usually best practice to save the files to the path from where you launched your TestDisk utility. After saving, copy/paste the files at your desired location via a GUI file manager.
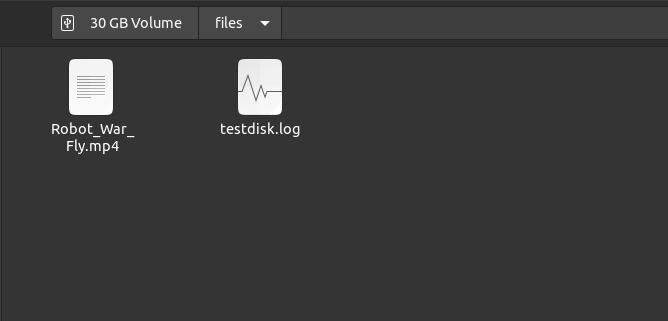
TestDisk has successfully recovered the deleted file (green text), as you can see in the image below.
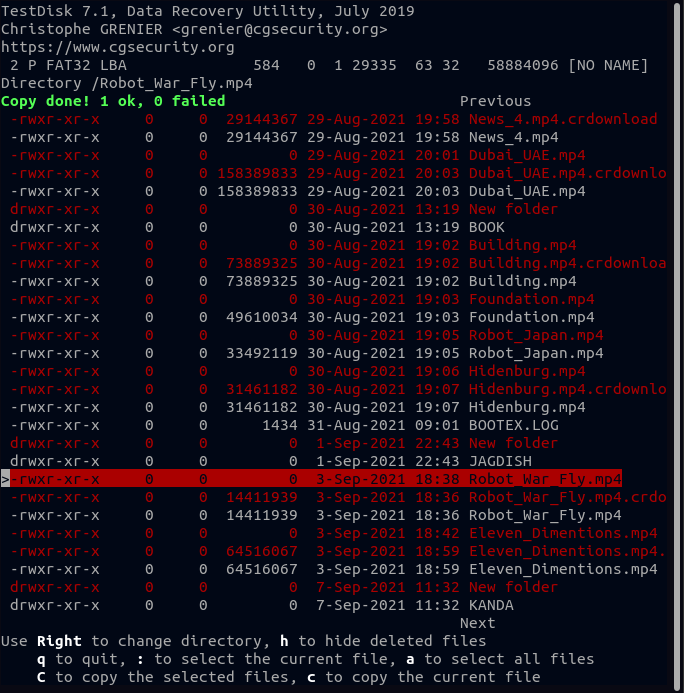
10. Finally, open the path where you copied the file, and verify that you have restored your deleted file successfully.
Conclusion
In this tutorial, you learned how to restore files from Trash with File Manager and even permanently deleted files via TestDisk. Although the built-in File Manager and TestDisk work great in recovering your files, there are other file recovery tools that you can try.
Now would you turn to TestDisk on Linux to recover deleted files? Or perhaps you prefer to automatically backup your Ubuntu system?


