

Backing up and restoring home directories or entire file systems in Ubuntu Linux is something every first-time Linux user or experienced professional needs to know. No one wants to lose files or have to rebuild an entire computer from scratch. It’s important to know How to restore and backup Your Ubuntu.
While there are many choices to backup Ubuntu, this guide will tackle using two prominent Ubuntu tools available to backup and restore Ubuntu Linux systems; Déjà Dup Backups and Timeshift.
Ready to learn about backing up your files or making a system image in Linux? Let’s get started!
Prerequisites
This tutorial is comprised of step-by-step instructions. To follow along, you will need the following:
- An Ubuntu Linux Desktop 20.04 LTS machine or your choice of Linux desktop OS.
- Ensure you have snapd installed on your machine.
BackUp your Ubuntu and Restoring Files with Déjà Dup
Let’s start this Ubuntu backup tutorial by covering the popular backup tool, Déjà Dup. Déjà Dup is a file backup and restoration tool available for Ubuntu Linux and other distributions, including Fedora, Red Hat Enterprise Linux, Manjaro, and OpenSUSE.
For a free and open-source software (FOSS) backup tool, Déjà Dup makes backing up and restoring files in Linux a breeze!
Installing Déjà Dup
Before you get to back up files, you first need to install Déjà Dup. To do so requires a single step.
In Ubuntu, open a terminal and run the command below. This command uses the snap package manager to install the deja-dup package.
sudo snap install deja-dup --classicChoosing Files to Backup
Once you have the tool installed, it’s time to choose what you’d like to back up. To do so:
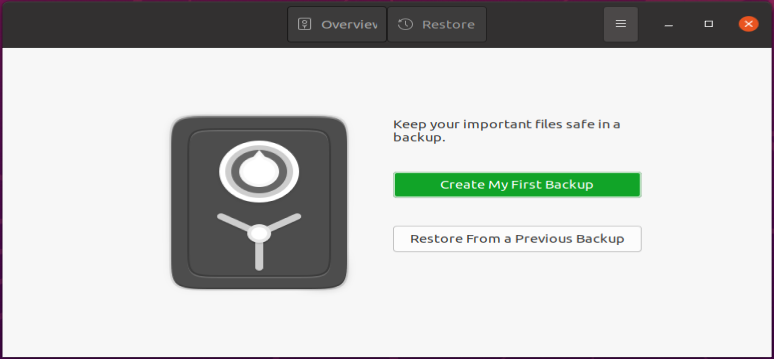
1. First, open Déjà Dup by pressing the super-key (Windows key), type Deja into the search bar, and click on the Backup icon, as shown below.
Once Déjà Dup opens, you are presented with only two options. Click on Create My First Backup:
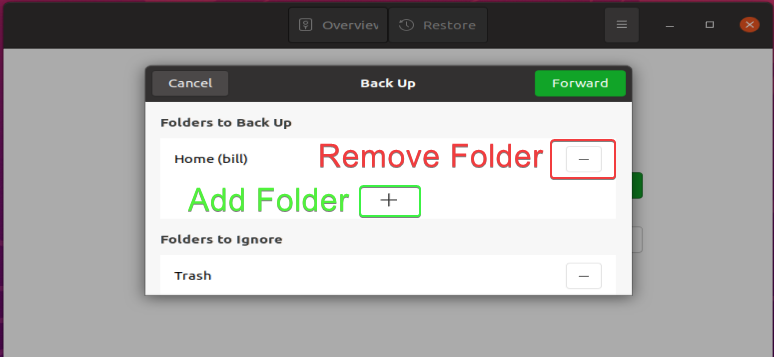
2. Next, choose one or more folders you’d like to backup by clicking on the plus sign (+) or remove any folders by clicking on the minus sign (–). Once you’ve chosen the folders to backup, click on the Forward button to continue the process.
By default, Déjà Dup will backup the current user’s home folder, ignoring the Trash folder.
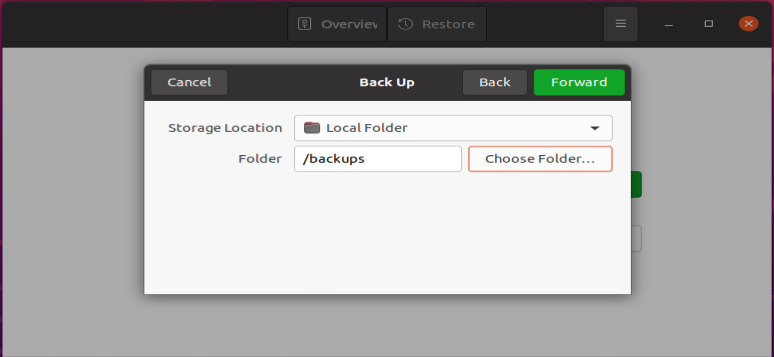
3. Now, choose where to store the backed-up files in the folders you selected by selecting the Storage Location and Folder and click on Forward.
You’ll see you have three options by clicking on the Storage Location dropdown (Local Folder, Network Folder, or Google Drive).
Once you’ve selected a Storage Location, choose the Folder you’d like to store all of the files in via the Folder field. To browse available folders on the Storage Location chosen, click on the Choose Folder button.
This tutorial will use a Local Folder for the storage location and the /backups folder as the backup folder.
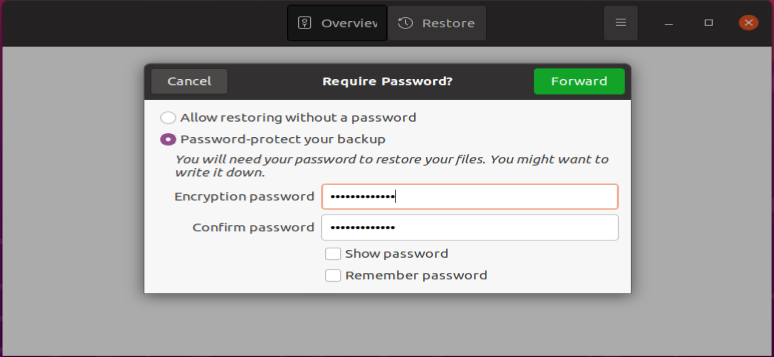
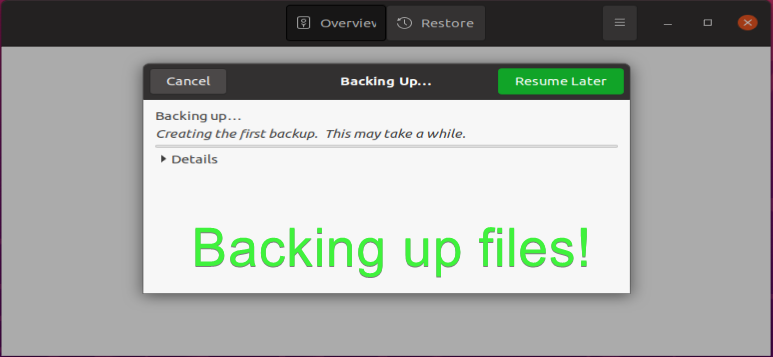
4. Optionally encrypt the backup by providing a password. This tutorial will choose Password-protect your backup and provide a secure password. Once you provide the Encryption password, click the green Forward button to begin backing up your files.
Scheduling Backups
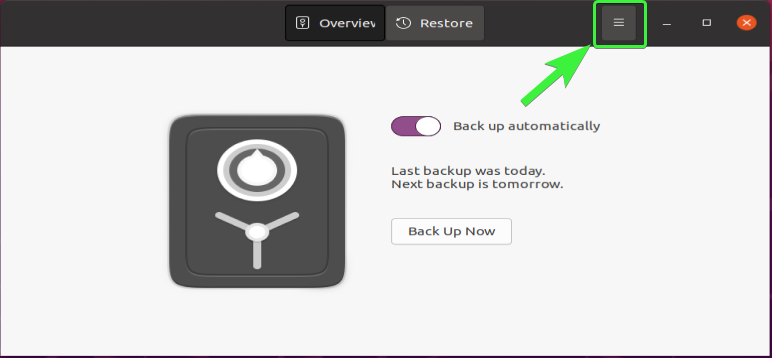
Once the first backup is complete, Deja Dup will take you back to the main menu, as shown below. You’ll now see that the tool displays when it took the last backup. Here you can also click on Back up automatically to schedule a daily backup using the same settings you provided earlier.

If you’d like to adjust the backup frequency, click the drop-down menu icon in the title bar, as shown below.
Click on Preferences to access available backup options such as storage location and schedule.
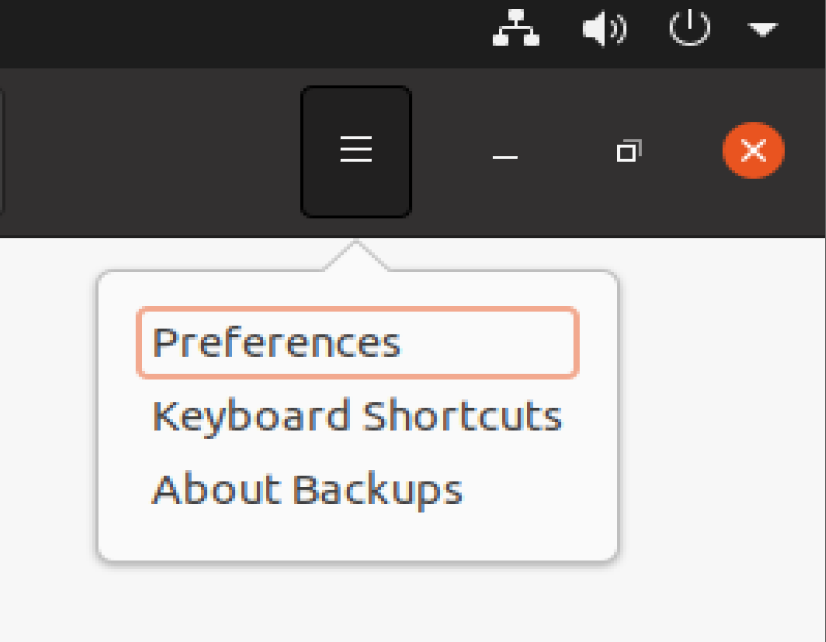
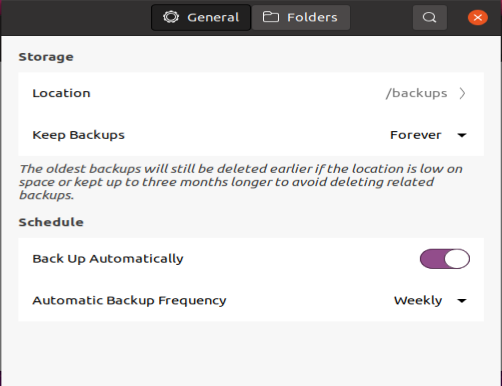
The Preferences window allows you to change the Location, how long backups are stored for (Keep Backups), and more.
Déjà Dup can perform either a weekly or daily automatic backup and rotate backups in a three, six, or twelve-month backup set. If you are a data hoarder with a lot of disk space, the default option is forever!
Restoring Files with Déjà Dup
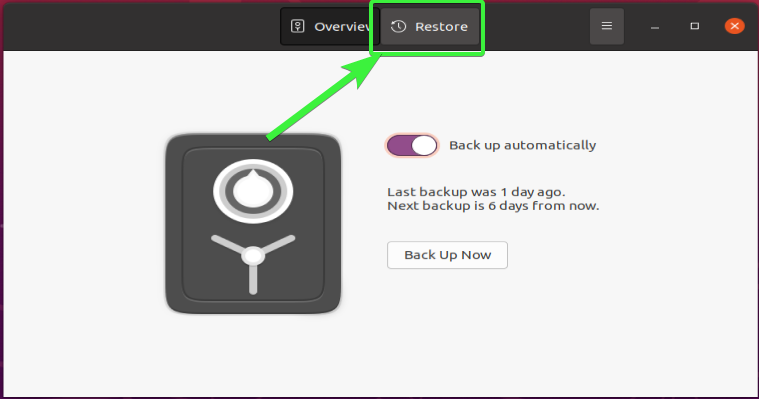
A backup is no good unless you can restore it! Let’s now get into how to restore that backup.
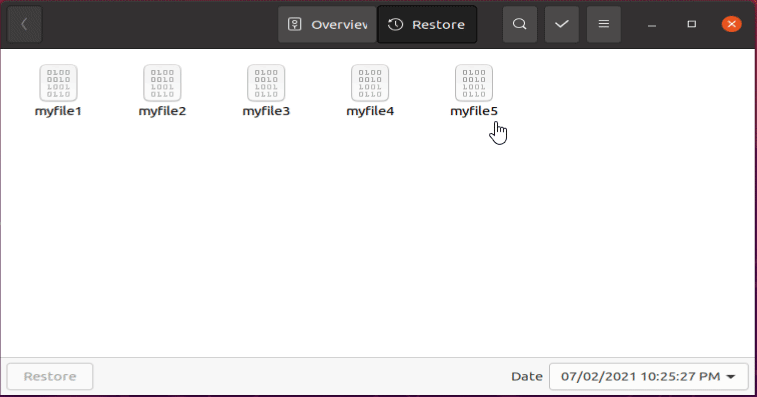
1. With Déjà Dup open, click on Restore.
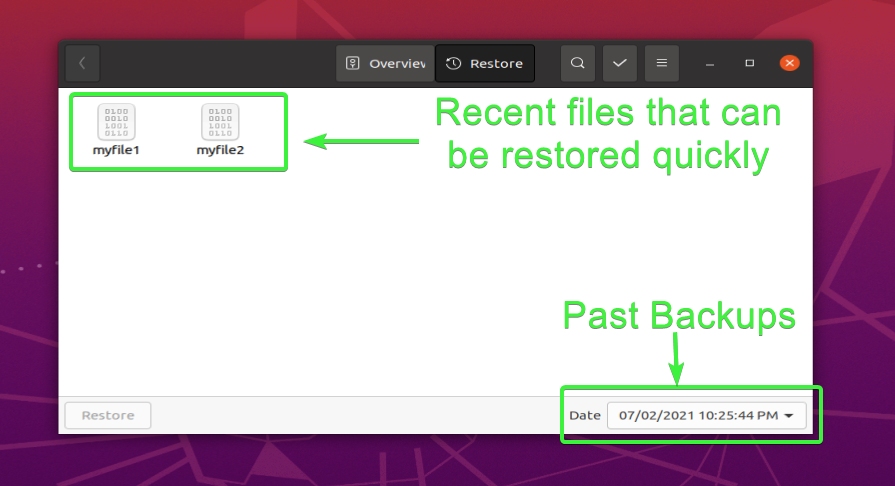
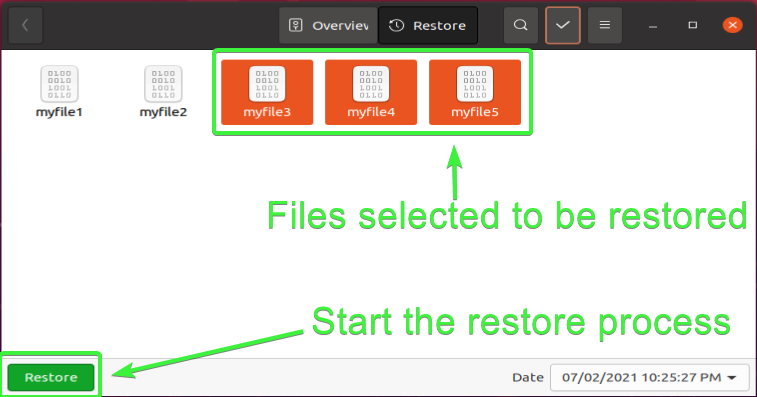
2. Select the files you’d like to restore. Here you can choose, by default, from the most recent backup or select the Date dropdown to choose older backups.
Click on the checkmark button in the title bar if you’d like to select multiple files.
3. Once you’ve selected all files, you’d like to restore, click the green Restore button, as shown below.
4. Now, provide the location where you’d like to restore the files. In the Restore to Where? screen, you have the option to restore to the original location or a new location. Once you’ve selected the destination location, your files will begin restoring.
Below you can see an example of the entire restoration process.
Backing Up and Restoring Filesystems with Timeshift
Even though Deja Dup is great for backing up and restoring files, what happens when you need to back up your entire hard drive? One of the best ways to back up an entire drive is via a backup snapshot. And the free and open-source Timeshift tool can do just that.
Timeshift harnesses snapshot technology to create file system images. Like the Windows System Restore feature, Timeshift uses either rsync or BTRFS (commonly pronounced as “Butter FS”) to create incremental file system snapshots used to restore a system from scratch.
Before starting the demo below, be sure you have an additional storage medium to save a backup.
Installing Timeshift
Let’s first start by installing Timeshift and see what it can do! To do so, open a terminal and run the following commands.
## Add the repository to apt-get to make it available to download
sudo add-apt-repository ppa:teejee2008/ppa

## Download all available packages
sudo apt update

## Download and install the Timeshift package
sudo apt install timeshift
Setting up a Backup Snapshot with Timeshift
Now that you have Timeshift installed, it’s time to see what it can do.
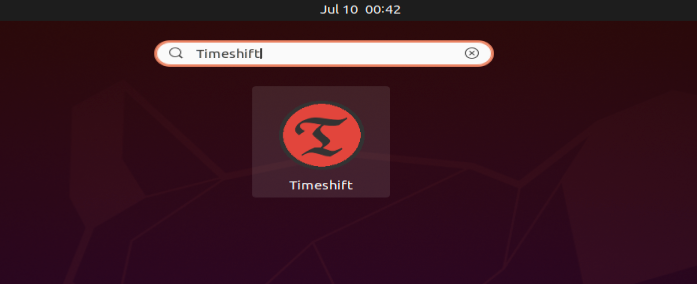
1. Open Timeshift by pressing the Super or Windows key and typing Timeshift in the search bar.
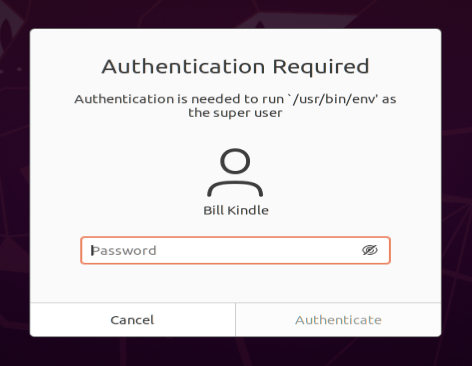
Timeshift needs to run as a superuser. Depending on the account you are using, you may be prompted for a sudo password, as shown below.
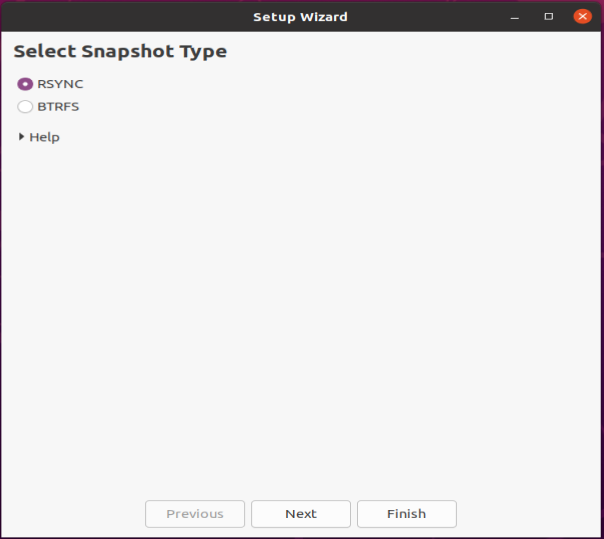
2. Next, select the time of snapshot you’d like to create (RSYNC or BTRFS) and click Next. You’ll see below that RSYNC is the default snapshot type and will be the snapshot technology you want to choose for most applications.
RSYNC – The file system is copied to the destination location via rsync and hard links. Every snapshot is a full system backup that you can open and browse with a file manager such as GNOME Files. This mode saves disk space by using common files shared between snapshots. This tutorial will create an RSYNC snapshot.
BTRFS – Creates read-only snapshots using copy-on-write (CoW) principles, which means creating snapshots is fast. These snapshots will only work on a Ubuntu-type sub-volume layout.
BTRFS might be more attractive as a backup option if you must ensure that backups are never modified for any reason.
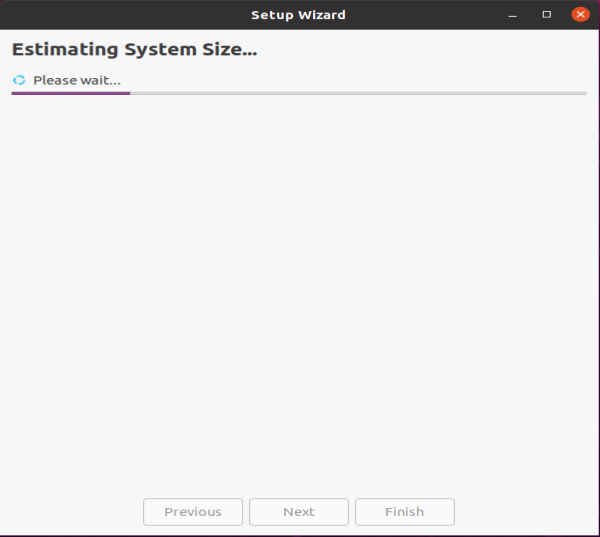
Once you click Next, Timeshift will begin estimating the system, size as shown below.
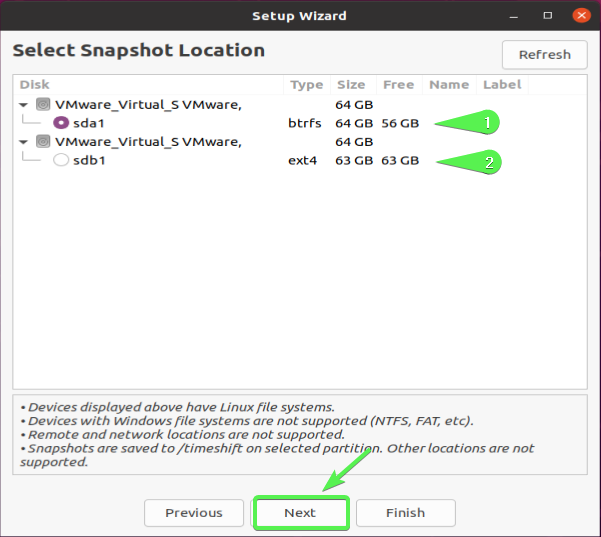
3. Now, choose a Snapshot Location to store the snapshot in and click Next.
The screenshot below shows the primary drive (sda1) and a backup drive (sda2). For purposes of this tutorial, assume that sda1 contains the Linux system files that will be backed up using snapshots.
Notice that remote and network locations are not supported.
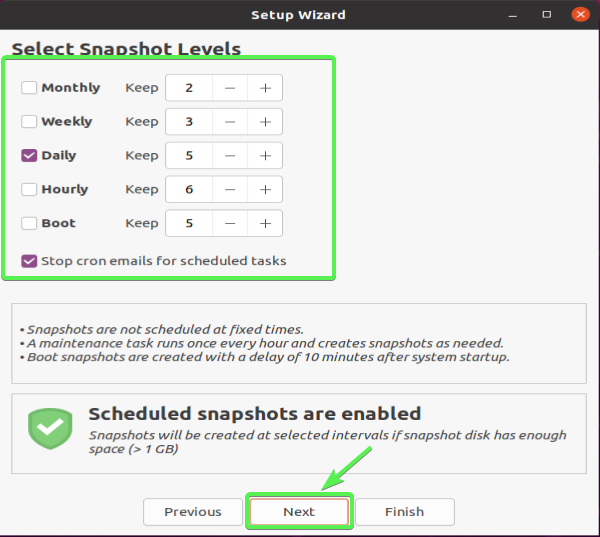
4. Next, create a snapshot schedule by selecting the snapshot frequency and the number of snapshots to keep and click Next.
Snapshots are taken using a cron job that runs every hour, but there’s no fixed time. Boot snapshots are taken 10 minutes after startup.
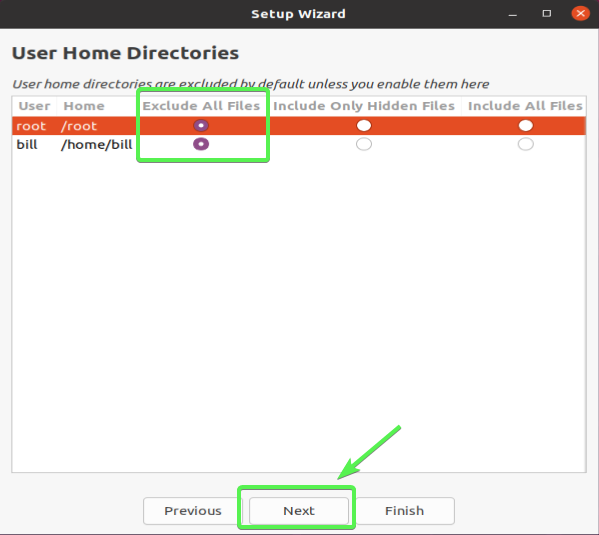
5. Next, leave the Exclude All Files options selected to tell Timeshift you do not want to include User Home Directories and click Next and Finish.
Even you have the option to include home directories in the snapshot; it is not recommended. When you restore a snapshot, you are restoring entire volumes to that point in time. Restoring to a specific point in time means if you made important changes to a document or even created a new document, those changes are gone after the restore because they were not part of the snapshot.
After you complete the setup wizard, Timeshift will send you back to the main window.
Creating a Backup Snapshot
Now that you’ve set up a snapshot, you can now create one. To do so:
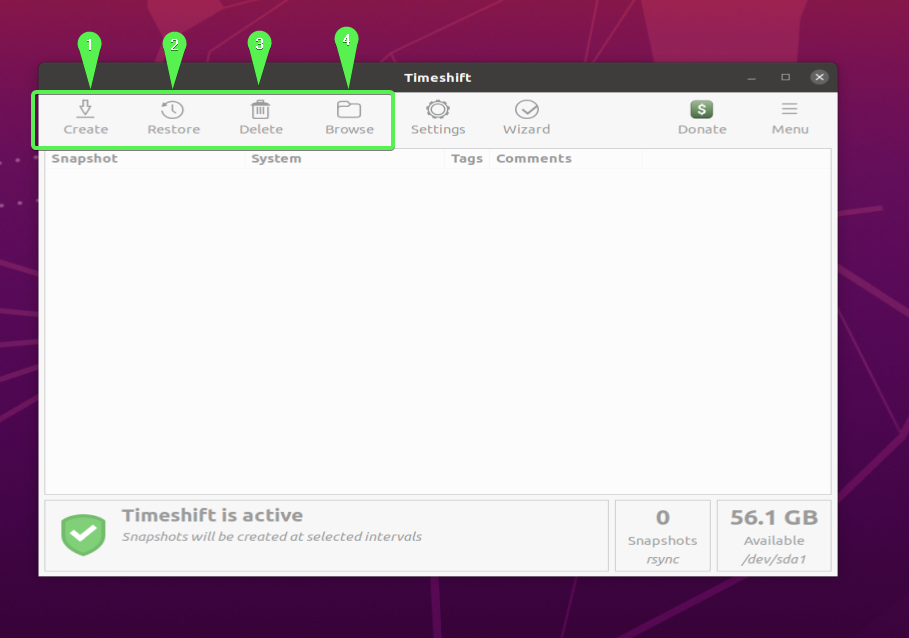
1. Click the Create button on the main window.
You’ll also see where you can Restore, Delete and Browse existing snapshots in this main window.
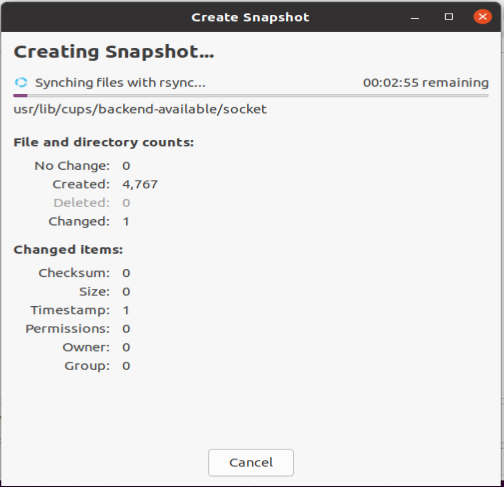
Once you click Create, Timeshift begins creating the snapshot, as shown below.
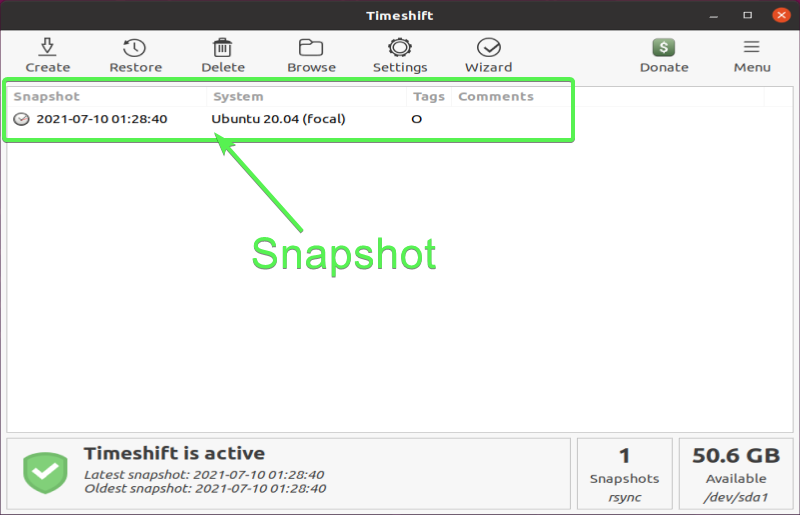
When the snapshot completes, you’ll now see the snapshot show up in the window.
Inspecting the Snapshot
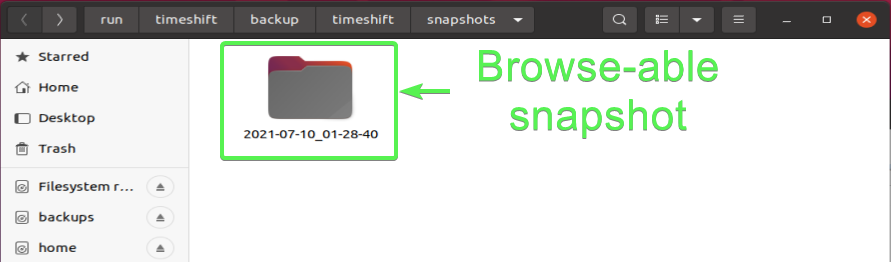
Once you’ve created the snapshot, you can then inspect it to see what file contents it backed up. To do that, right-click on the snapshot or click on Browse and choose the snapshot.
Snapshots are stored in folders by snapshot name in the /timeshift/backup/timeshift/snapshots/ directory.
Restoring Snapshots with Timeshift
Now that you’ve created a backup snapshot with Timeshift, it’s time to see how to restore it. Timeshift supports two different methods to restore a snapshot; via the GUI or the command-line.
Timeshift Snapshot Restoration via GUI
With Timeshift open:
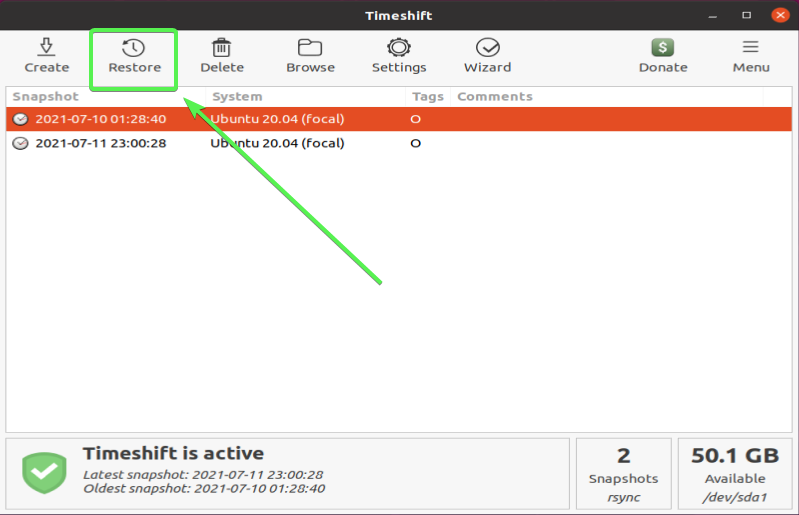
1. Click on the snapshot you’d like to restore and click on the Restore button, as shown below.
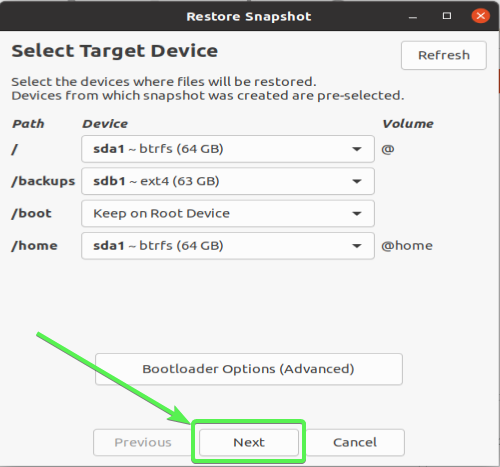
2. Select a Target Device where you’d like to restore the snapshot and click Next. You can restore snapshots to the original or restore to another device or volume.
You can modify bootloader options when restoring snapshots, which allows you to do things like reinstall the GRUB2, update the Grub menu, etc.
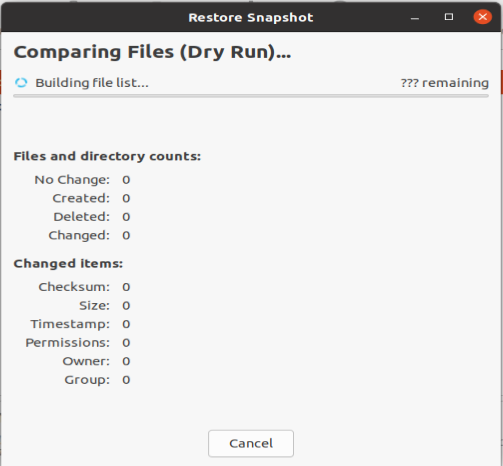
Once you click on Next, Timeshift will perform a ‘Dry Run’ to test the snapshot and build a list of actions taken on all files included in the last snapshot, as shown below.
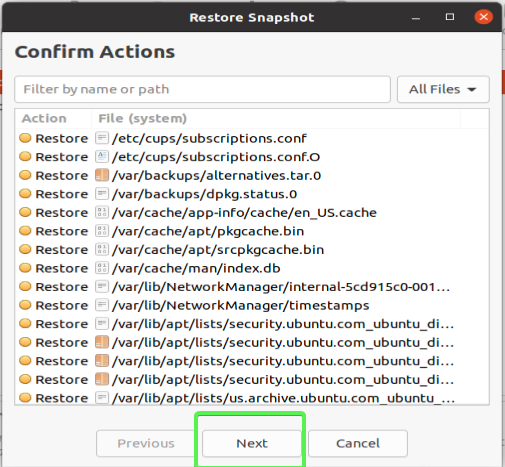
3. Next, verify all of the files Timeshift will restore and click Next.
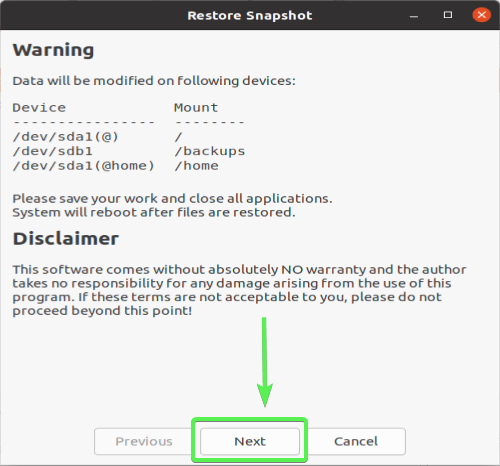
4. Finally, agree to the disclaimer and click Next to begin restoring the snapshot.
Remember that restoring from a snapshot will overwrite all files that changed with the last snapshot. This could potentially cause problems, which is precisely why you should not use snapshots for files in your home directory.
When the restoration starts, your desktop will disappear, and you will see a terminal-like message, as shown below.
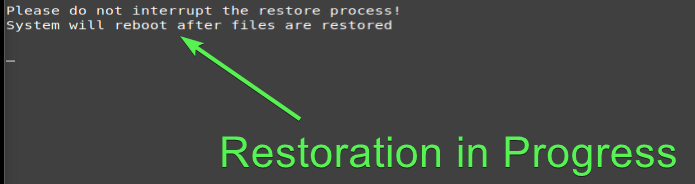
When the process is done, your system will reboot, and the snapshot will have been restored.
Timeshift Snapshot Restoration via Command-Line
As an alternative to using the GUI, you can also restore a Timeshift snapshot via the command line. To do so only requires a few commands!
# Restore selecting options interactively
timeshift --restore

## Discover all available snapshots
timeshift --list

# Restore a specific snapshot
timeshift --restore --snapshot '2021-07-10_01-28-48'
Timeshift has other command line parameters that may be useful. Check out the Timeshift online manual page for more information.
Timeshift also allows you to use a live Linux CD/DVD if, for example, you don’t have a running Linux installation to run from. Any recent Ubuntu Live CD/DVD image can temporarily install Timeshift to read and restore snapshots.
Conclusion
You should now have the skills to perform an Ubuntu backup using a couple of useful, free tools. Déjà Dup is a great option for those quick and reliable home directory backups that are set and forget. Be sure to look at Timeshift for more advanced full system backups with snapshots.
Which tool do you prefer?


