

Focusing on meeting business requirements while ensuring code quality and software security can be challenging. Well, not unless you have Continuous Integration and Continuous Delivery (CI/CD). Why not turn to JetBrains TeamCity?
TeamCity is a powerful CI tool that lets developers deliver code changes reliably and more frequently. In this tutorial, you’ll learn how to build a Node application Docker image and push it to a Docker Hub registry using TeamCity.
Dive in and discover untapped CI/CD potential using TeamCity!
Prerequisites
This tutorial will be a hands-on demonstration. If you’d like to follow along, be sure you have the following:
- A GitHub account with a personal access token and a public GitHub repository..
- A Docker Hub account and Docker Registry.
- An Ubuntu server – This tutorial uses an Ubuntu 20.04 LTS.
- Docker installed on the Ubuntu server.
- NodeJs installed.
- A code editor – This tutorial uses Visual Studio Code (VS Code).
Installing JetBrains TeamCity Server on Ubuntu
TeamCity is a powerful tool that provides automated responses to code changes. But before discovering TeamCity’s untapped potential with CI/CD, you first have to set up the TeamCity server on your local machine or virtual machine (VM).
There are three different options in setting up the TeamCity server; as a package on local machine, as a docker container, and using the TeamCity cloud. But in this tutorial, you’ll set up the TeamCity server as a Docker container.
1. Execute the docker run command below to install the TeamCity server with two volumes (teamcity-data-directory and teamcity-log-directory) — names are arbitrary.
# - < WHAT DOES THIS COMMAND DO? >
# Install and run a TeamCity server instance in detached mode.
# The instance also comes with two volumes to persist data and logs.
# Bind port 8111 to the host’s port 8111.

docker run --name teamcity-server-instance \
-v teamcity-data-directory:/data/teamcity_server/datadir \
-v teamcity-log-directory:/opt/teamcity/logs \
-p 8111:8111 \
-d jetbrains/teamcity-server
Once installed, you’ll see the following output.

2. Next, run the docker ps command below to see the lists of containers running.
docker psThe TeamCity server Docker container is running below and available on port 8111.

3. On your browser, navigate to your VM’s IP address followed by port 8111 (i.e., 192.53.166.13:8111).
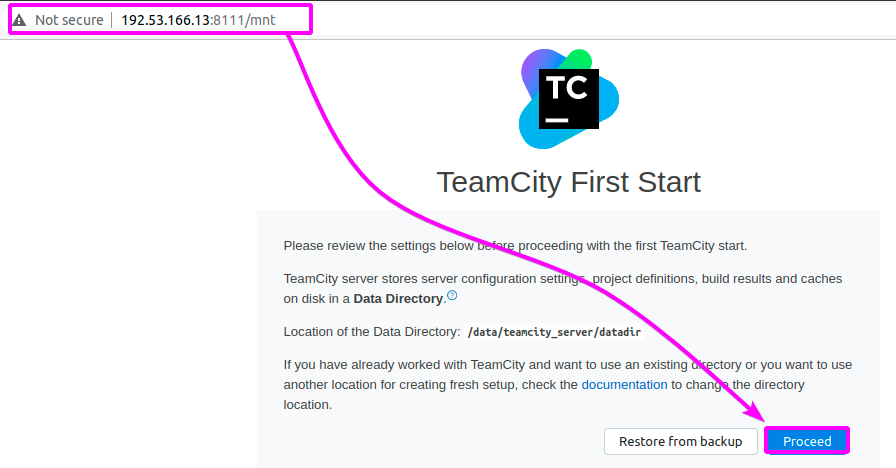
4. Now, wait for TeamCity to start, and click on Proceed to continue with the default database type to persist data.
You can use MySQL, PostgreSQL, or other supported databases that TeamCity provides.

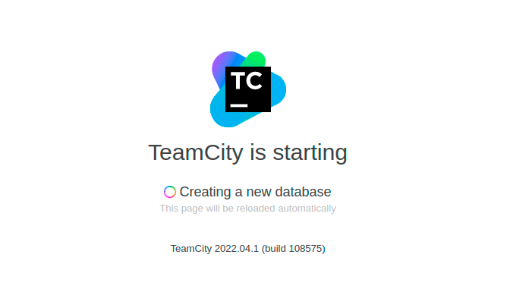
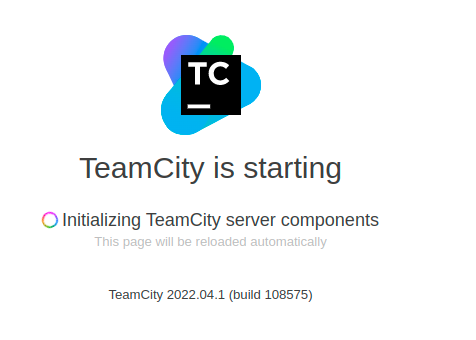
Wait for TeamCity to create your database and initialize your TeamCity components.
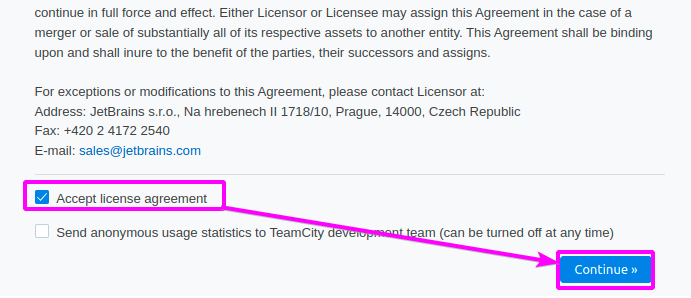
Once finished, your browser redirects to a page where you’ll accept the license agreement for JetBrains TeamCity (step five).
5. Tick the Accept license agreement box, click Continue to accept JetBrains’ license agreement, and proceed to create an administrator account (step six).
6. Lastly, fill in the fields with your credentials, and click Create Account to create your administrator account.

After creating an administrator account, your browser redirects to your TeamCity dashboard, as shown below.

Scaffolding a Node-based Project
You now have access to your TeamCity dashboard and are almost ready to create a project on TeamCity. But first, you’ll create a Node project from the ground up and then push that project up to GitHub.
1. Run the following commands, which don’t provide output but create a project directory (teamcity-node-project) and switch to that directory.
mkdir teamcity-node-project
cd teamcity-node-project
2. Open your working directory with your default code editor, in this case, VS Code.
code .3. Run the npm init command below to initialize a package.json file to keep track of essential metadata and dependencies.
npm init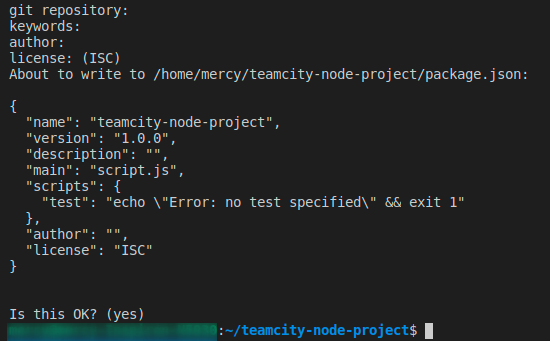
4. Now, run the following commands to install (i) express and cors.
Express is a Node.js library for building web applications, while CORS is a mechanism that permits restricted web page resources to be requested from a domain.
npm i --save-dev express
npm i cors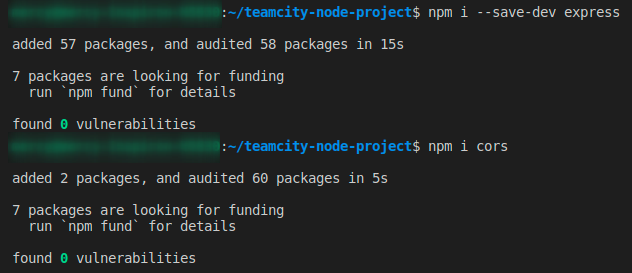
5. Create a file called script.js, and add the code below to the file.
The code below spins up a web server that prints the Hello world from TeamCity message and listens for requests on port 4000.
const express = require('express') //importing express
const cors = require('cors') //importing cors

const app = express() //initializing and express app

app.use(cors())

app.get('/', (req, res) => {
 res.send('Hello world from TeamCity')
})

app.listen(4000, () => {
    console.log('listening for request on port 4000')
})
6. Next, create a Dockerfile, and add the following configurations.
TeamCity will use this configuration to build and push your Docker image to Docker Hub.
FROM node:16-alpine

WORKDIR /app

COPY package.json .

RUN npm install

EXPOSE 4000

CMD ["node", "script.js"]
7. Create a .gitignore and a .dockerignore file, and the node_modules folder in them, as shown below.
Having the node_modules folder on a Git repository and a registry in DockerHub is not good practice.


8. Finally, push your project directory to GitHub.
Configuring a TeamCity CI/CD Pipeline
Now that your Node-based project is created and hosted on a GitHub repository, you’re ready to create a CI/CD pipeline in TeamCity.
When configuring a CI/CD pipeline in TeamCity, you’ll first create a project and connect your Git repository to that project.
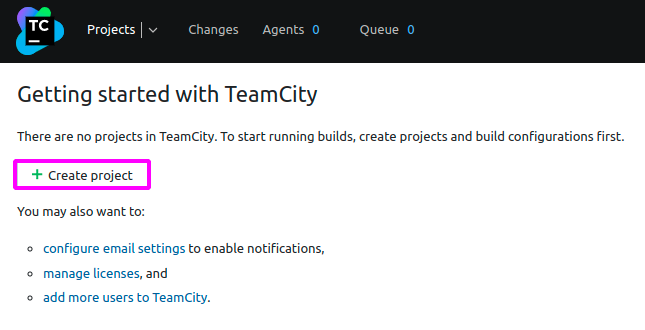
1. On your TeamCity dashboard, click on Create project to initialize creating a project.
Your browser redirects to a page where you’ll configure your project settings via a GitHub repository.
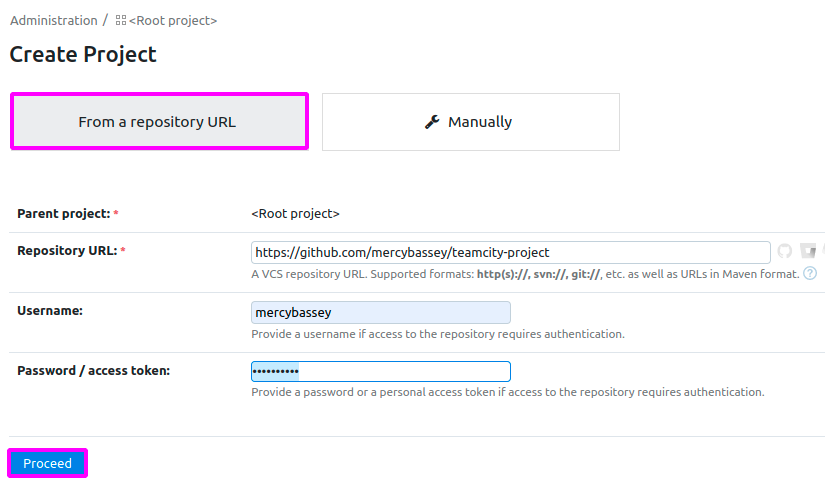
2. Next, configure your project settings with the following:
- Select the From a repository URL option since you’ll use your GitHub repository to create your project.
- Repository URL – Fill in the URL of your repository.
- Username and Password/access token – Input your GitHub username and password.
TeamCity may ask you to replace your GitHub password with the personal access token you previously generated as a prerequisite.
- Click on Proceed to verify the connection to your GitHub repository. Once verified, your browser redirects to a page where you’ll set your project name and other default configurations. (step three).
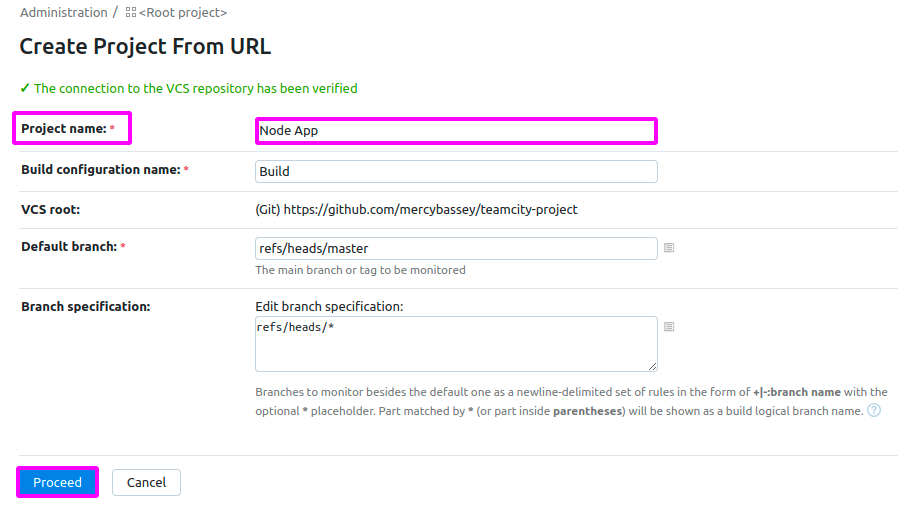
3. Input a project name (Node App), leave the default options on the other fields, and click Proceed to connect your GitHub repository to your TeamCity project.
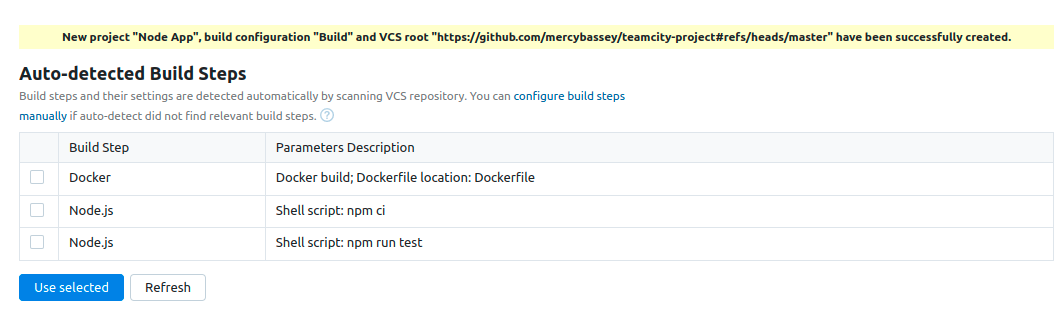
The output below indicates you’ve successfully created your project. TeamCity automatically detected the build steps you might want to configure for your project.
But in most cases, TeamCity can’t auto-detect some relevant build steps to your project. So in this tutorial, you’ll configure your build steps manually.
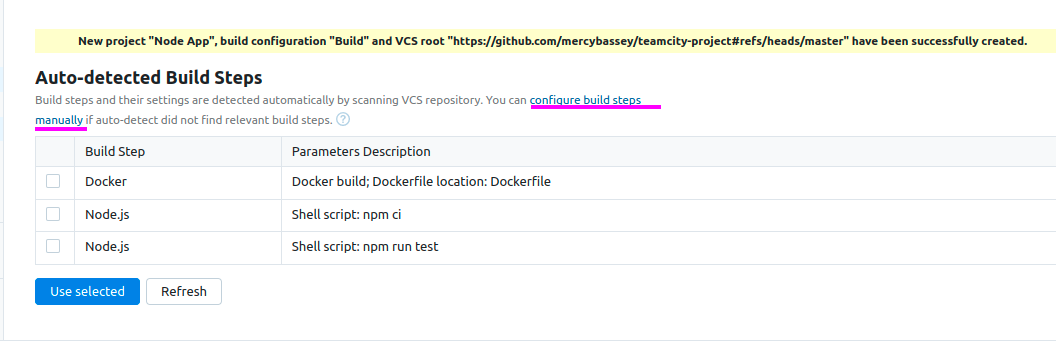
4. Now, click on the configure build steps manually link shown below to configure a build step manually. Your browser redirects to a page where you’ll choose the build type for your project.
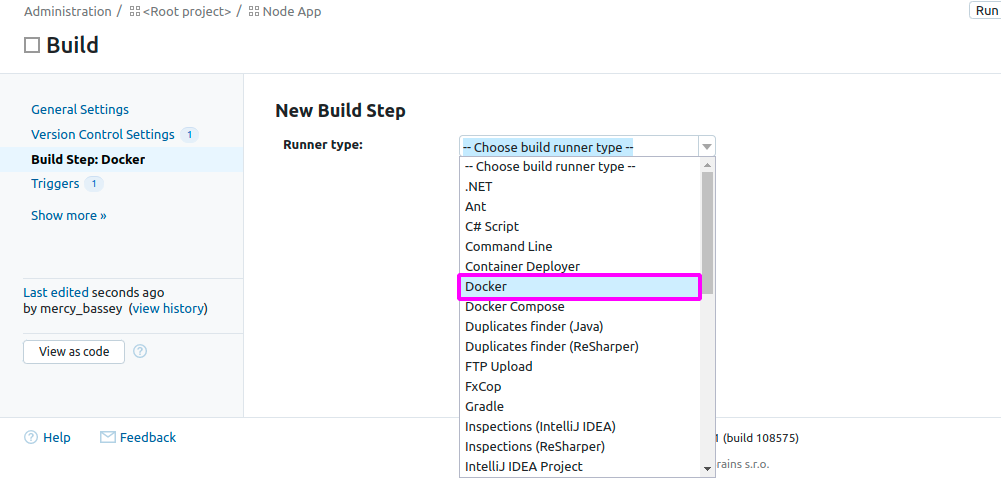
5. On the New Build Step page, select Docker on the Runner type dropdown field, as shown below. Your browser directs you to a page where you’ll specify configuration options for your runner type.
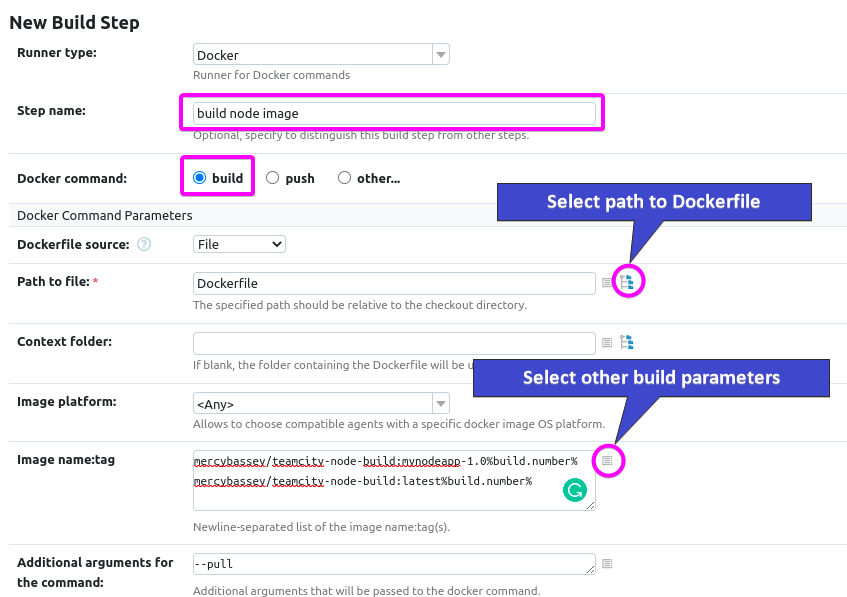
6. Now, specify the following configurations for your runner type:
- Step name – Provide a step name (build node image).
- Docker command – Choose the build option since you’re adding a build step.
- Path to file – Select the path to your Dockerfile.
- Image name:tag – Set the Image name:tag in the following format to build two images with different tags. Be sure to replace DOCKER_REPO_NAME with your registry name.
DOCKER_REPO_NAME:mynodeapp-1.0-%build.number%
DOCKER_REPO_NAME:latest-%build.number%
Adding a build parameter is crucial in configuring a build step in TeamCity. Otherwise, the build configuration fails.
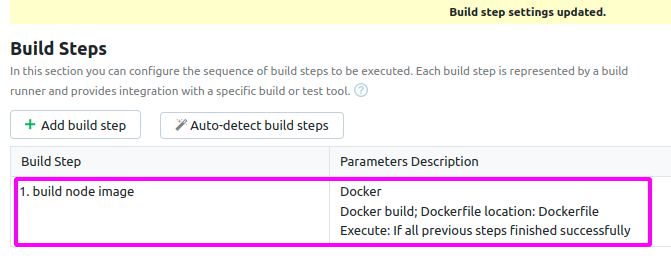
- Leave other options as defaults, and click on Save (page bottom) to create the build step.
If successful, you’ll see the newly-created build step on the Build Steps list like the one below.
Creating a Docker Push Build
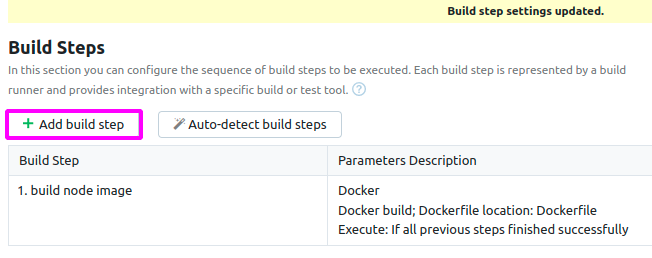
Now that you have successfully created a Docker Build build step, you’ll need to create a Docker Push build step. Why? So that when TeamCity builds your Node project’s Docker image, the Docker push build pushes that image to your Docker registry.
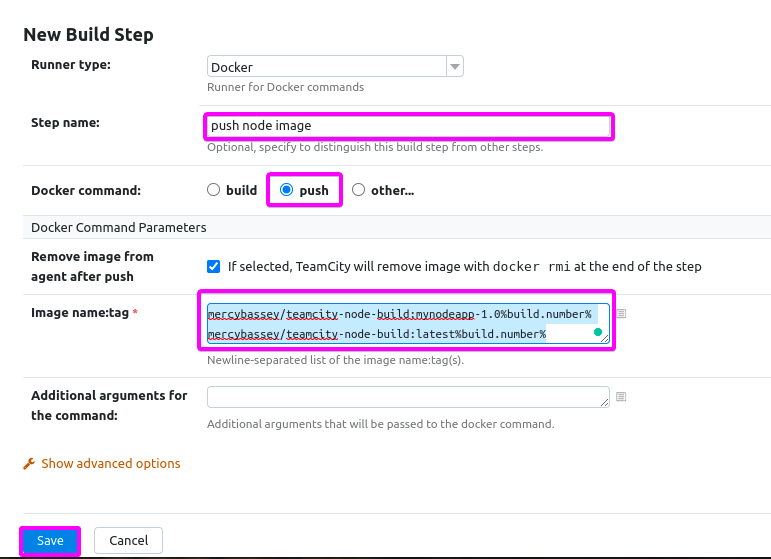
1. On the Build Steps page, click on Add build step to initialize creating another build step and select Docker as the runner type.
2. Set the push build configuration as you did in the last step of the “Configuring a TeamCity CI/CD Pipeline” section. But this time, with a different Step name (push node image) and a Docker command to push instead.
Once satisfied with the configuration, click on Save to create the push build.
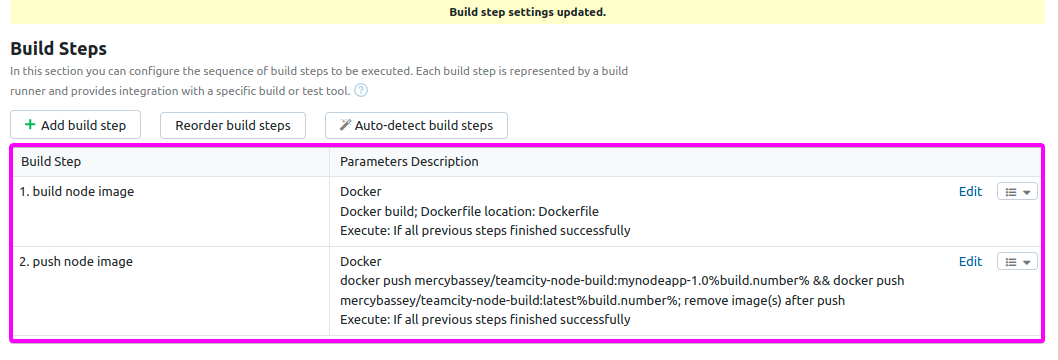
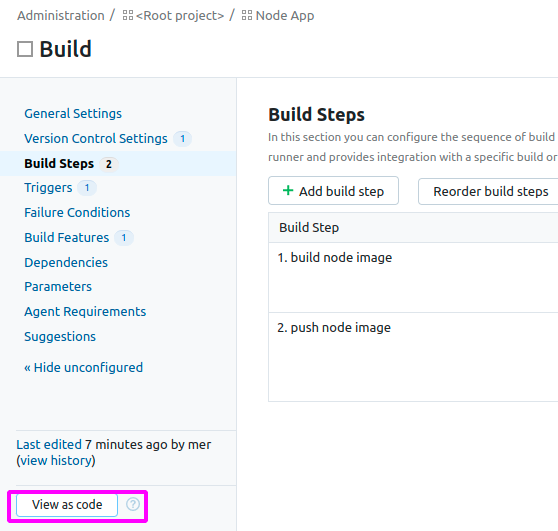
As shown below, you now have two build steps for your project.
Connecting to a Docker Hub Registry
You’ve created build steps for your Node project to your Docker Hub registry. But TeamCity doesn’t know about this registry on Docker Hub and needs a way to connect to that registry. How?
You’ll configure connections on your TeamCity project, allowing TeamCity to:
- Build your image.
- Log in to your Docker Hub account.
- And push the Docker image to your Docker registry.
To configure connections on your project:
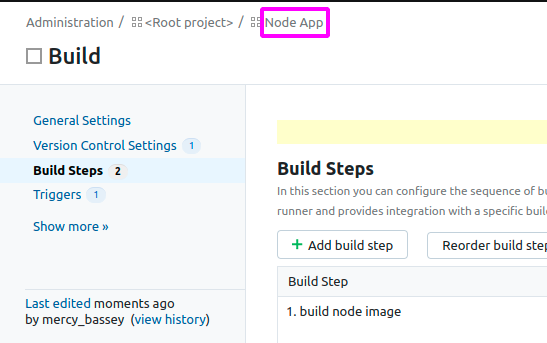
1. On the Build Steps page, click on your project’s name tab shown below to access your project details page.
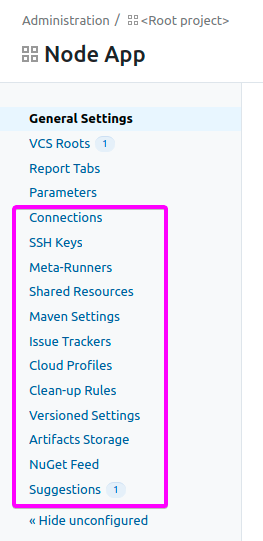
2. On your project page, click on Show more (left panel) to see more settings.
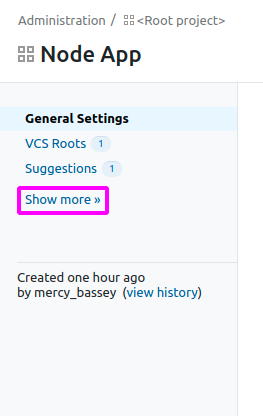
Below, you can see more settings appears.
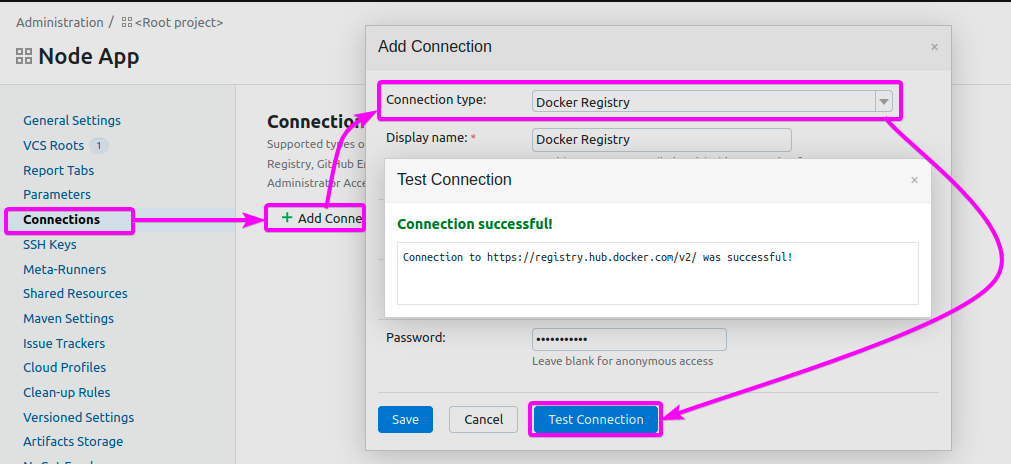
3. Navigate to the Connections tab, click on Add connection, and select Docker Registry as the Connection type.
Fill in your Docker Hub credentials (username and password), and click on Test Connection to test the connection.
If successful, close the pop-up window and click on Save to save the new connection.
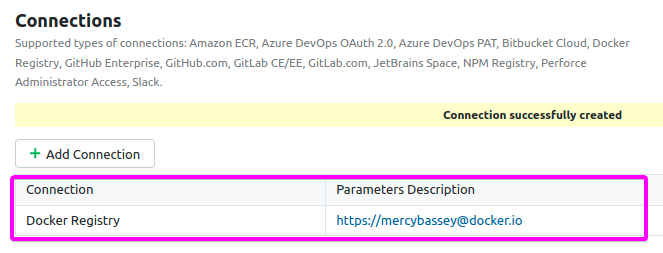
You’ll see the newly-added connection in the connections list, as shown below.
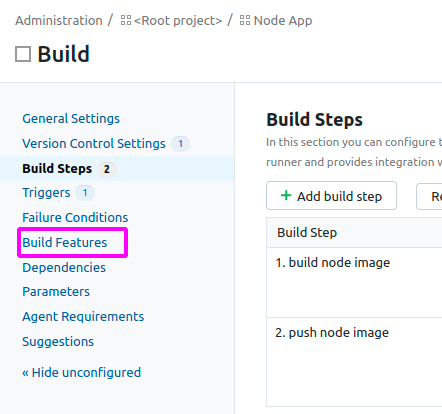
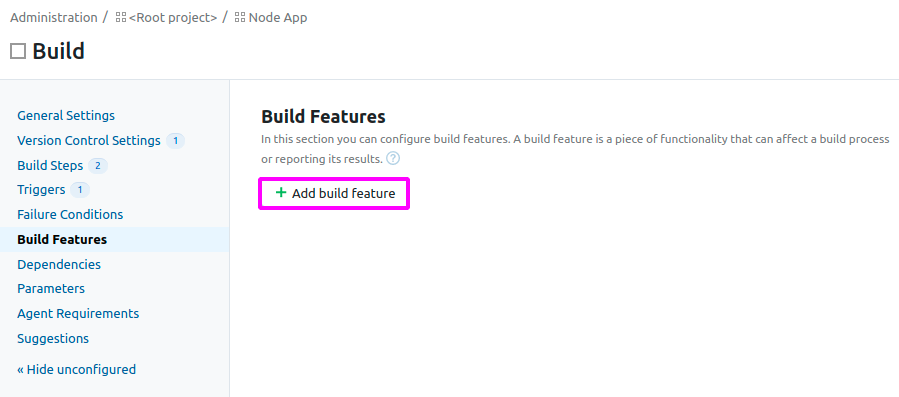
4. Navigate to the Build Steps page, and click on Build Features (right panel).
5. Click on Add build feature, and the Add Build Feature pop-up window appears.
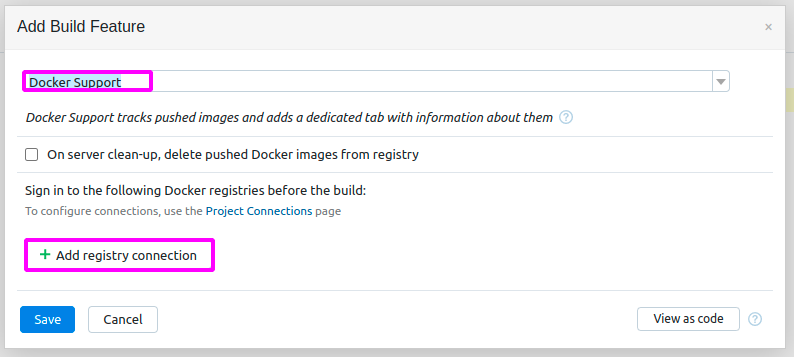
6. Select Docker Support from the dropdown field on the pop-up window, and click Add registry connection. Another pop-up window appears, where you’ll select a repository (step seven).
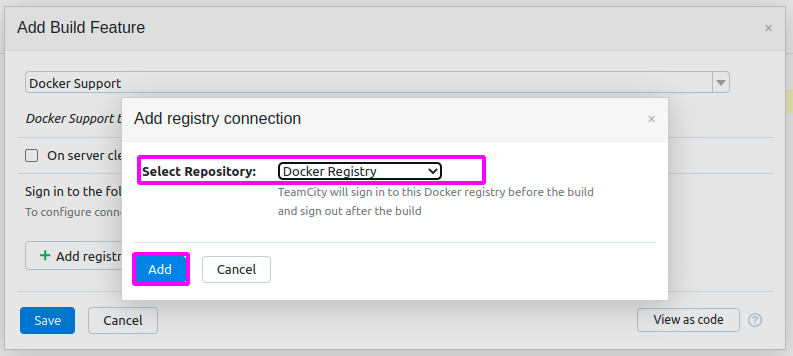
7. Now, select a Docker Registry for the repository you want to connect, and click Add
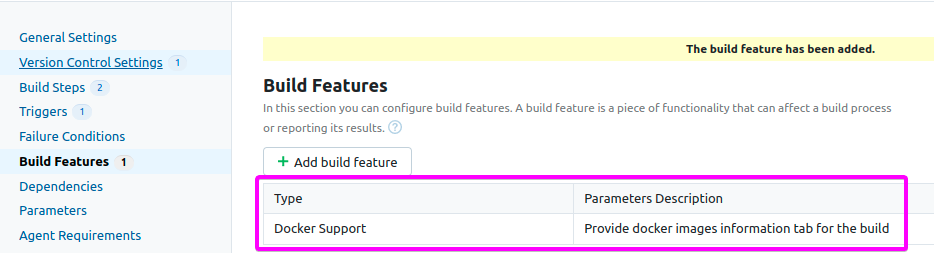
8. Lastly, click Save on the Add Build Feature pop-up window to save the build feature.
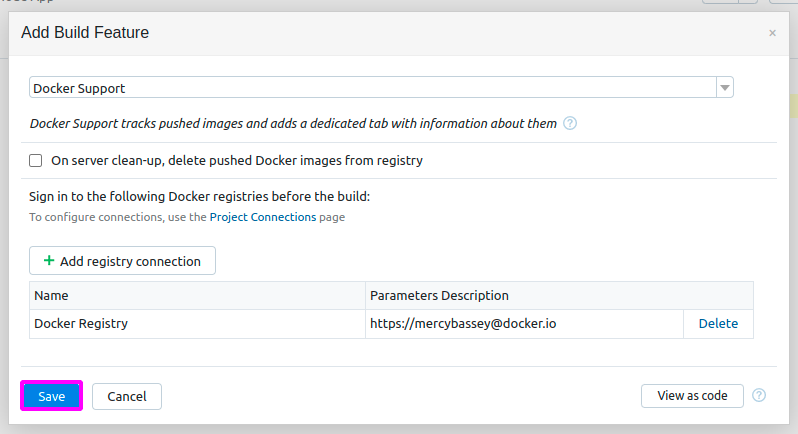
If successful, you’ll see the newly-created build feature on the list, as shown below. This output indicates you’ve successfully connected to your Docker Hub registry.
Deploying and Setting Up Build Agents
By now, you already have a completely-configured build. But to test if the build works, you’ll have to run the build.
To run the build, you’ll deploy a build agent that is authorized and compatible with running your builds. You currently have no build agents for your project, so you’ll deploy one as a Docker container.
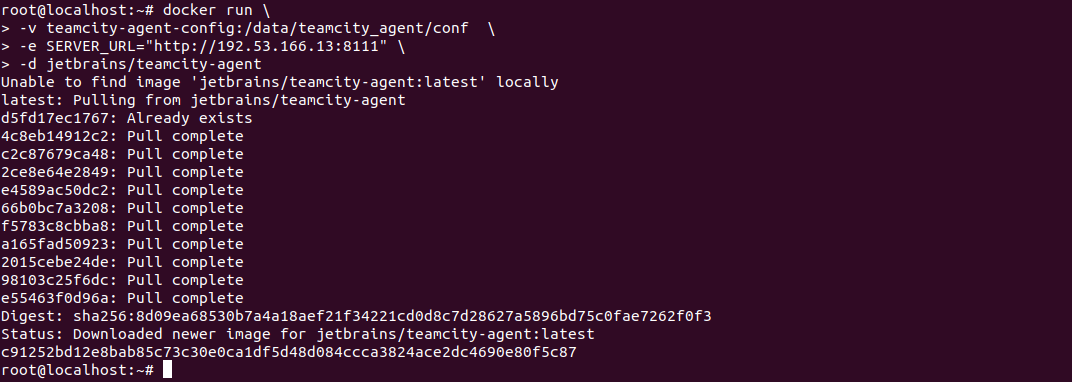
1. Run the command below to deploy a build agent, but replace the vm-ip-address with your VM’s IP address.
docker run \
-v teamcity-agent-config:/data/teamcity_agent/conf  \
-e SERVER_URL="vm-ipaddress:8111" \
-d jetbrains/teamcity-agent
Once the TeamCity agent is created, you’ll see the following output.
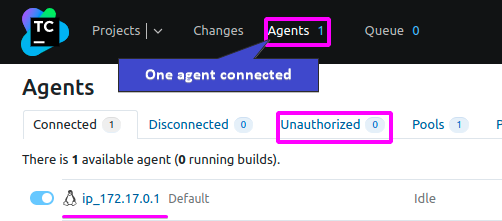
2. Next, click on Agents on your TeamCity dashboard, and click on the Unauthorized tab to view your newly-deployed agent. By default, any newly deployed build agent is unauthorized.
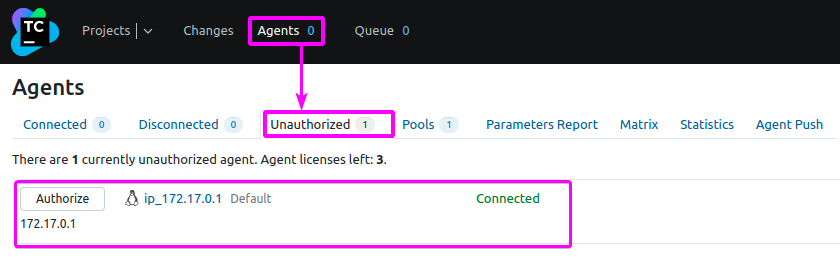
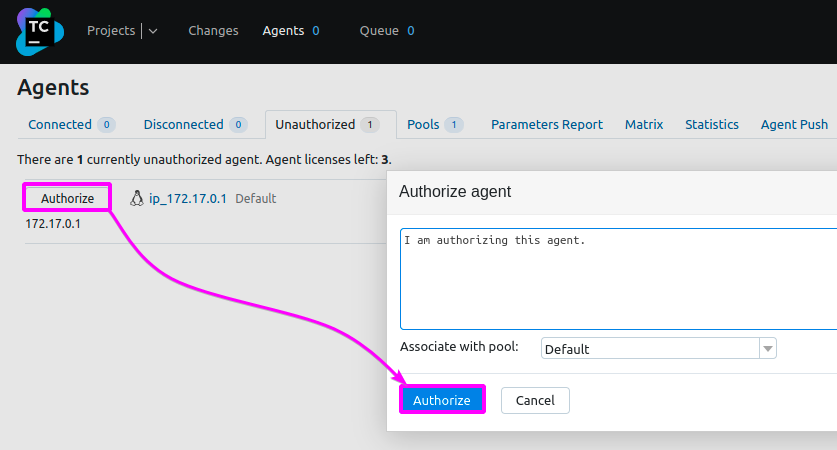
3. Click on Authorize to authorize the available agent.
Once authorized, you’ll see zero (0) unauthorized agents and one Connected agent on your TeamCity project dashboard.
Deploying Compatible Build Agents
You’ve authorized an agent in your TeamCity project, but you must make the agent compatible to run your build. Compatibility in this context actually asks, “Does your agent have the tool needed to run your build?”
To make an authorized agent compatible to run your build:
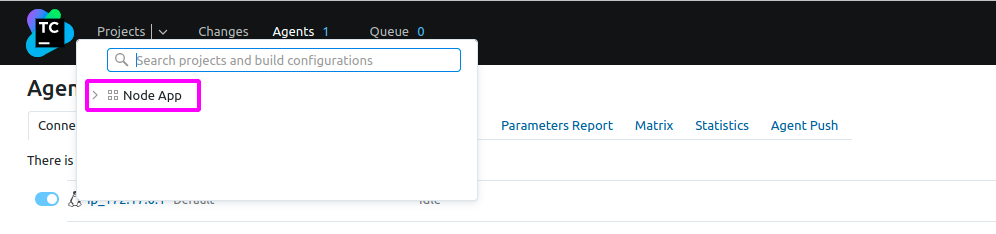
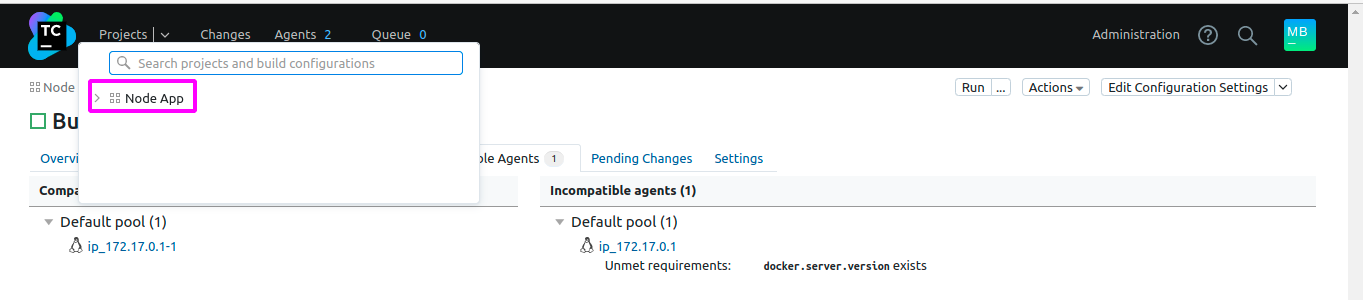
1. On your TeamCity server, navigate to the Projects dropdown menu, and select your TeamCity project (Node App).
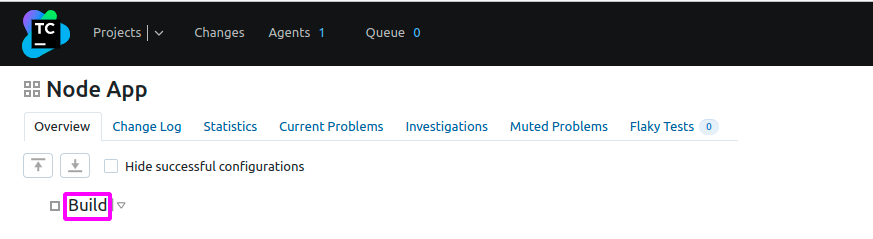
2. Next, select the Build option to access all available build agents.
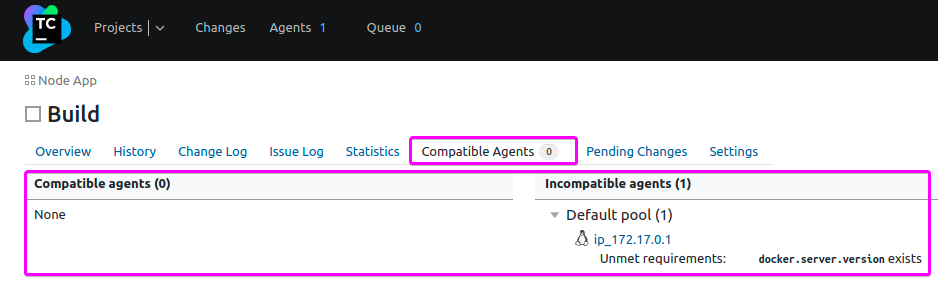
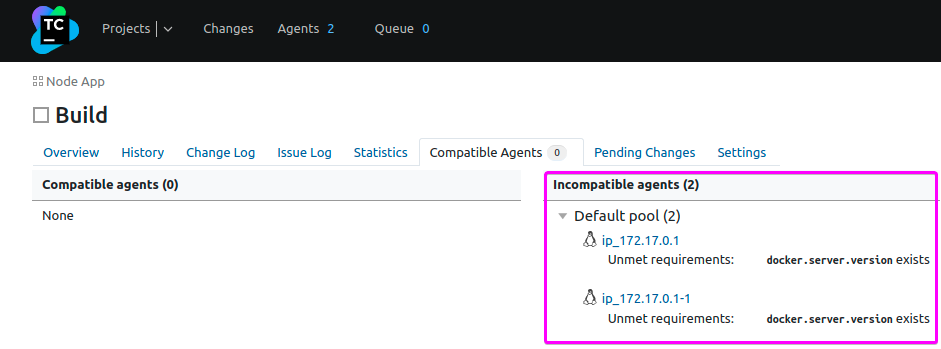
3. Select the Compatible Agents tab to view all compatible agents. And as you can see below, there are no compatible agents, but one incompatible.
TeamCity detected that docker.server.version is not present in the build agent, which is required to run your build, making the build incompatible.
4. Now, run the command below to install a build agent with Docker inside it.
# - < WHAT DOES THIS COMMAND DO? >
# Connect to the TeamCity server using the SERVER_URL variable
# Configure the volume for configuration data
# Connect to the Docker daemon from within the container.
# Start up the teamcity-agent container in detached mode

docker run \
-e SERVER_URL="http://192.53.166.13:8111" \
-v teamcity-agent-config-docker-container:/data/teamcity_agent/conf \
-v /var/run/docker.sock:/var/run/docker.sock \
-d jetbrains/teamcity-agent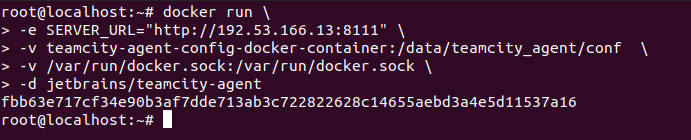
5. Once installed, run the following chmod command to enable the container to connect to Docker daemon.
chmod 666 /var/run/docker.sock6. Authorize the new build agent as you did in steps two to three of the “Deploying and Setting Up Build Agents” section.
7. Repeat steps one to three, and you’ll see two incompatible agents, as shown below.
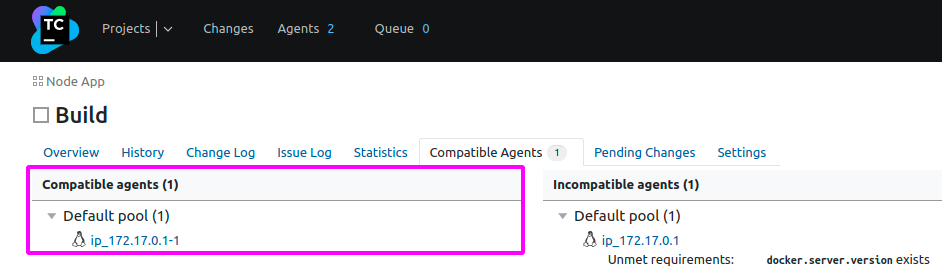
8. Now, wait a while, and one of the build agents turns compatible.
Refresh the page, and you’ll see the output below, indicating TeamCity has detected a build agent capable of running your builds.
Running the CI Build
Now that you have a compatible build agent, you’re in a good position to execute your build. After execution, you’ll later confirm if your image was created and pushed to your Docker registry.
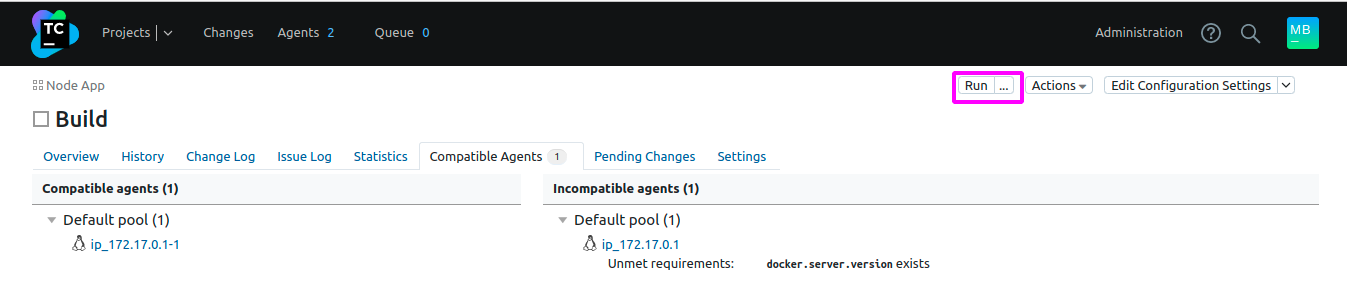
1. On the Build overview page, click Run (top left corner) to run your build.
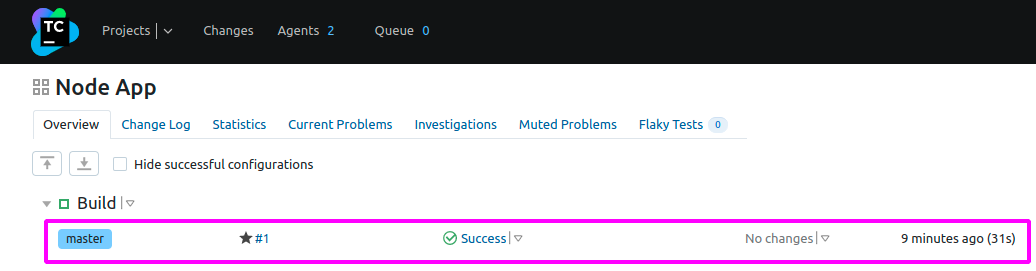
2. Next, navigate to your project to view the status of your build.
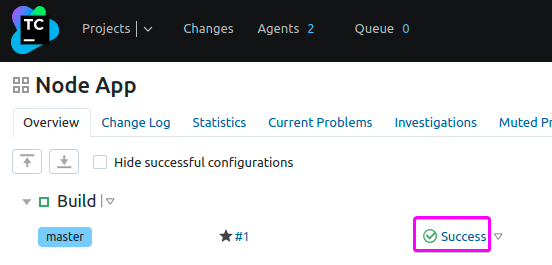
You’ll see an output similar below if your build run is successful.
3. Click on Success to access your build overview.
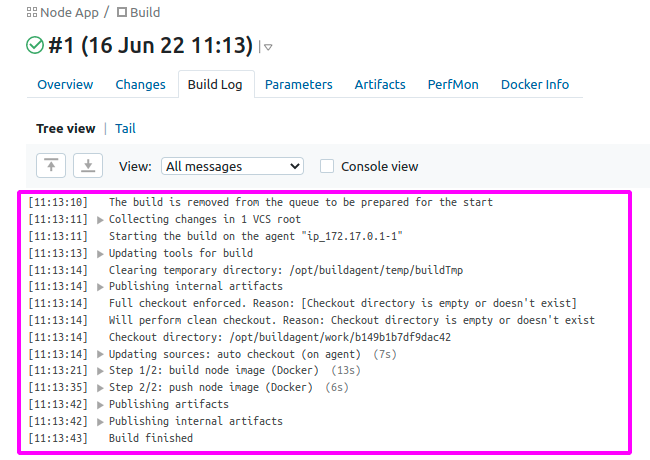
4. Now, click on the Build Log tab to view your build logs.
You’ll see all the steps completed to build and push your Node application image to your Docker Hub registry.
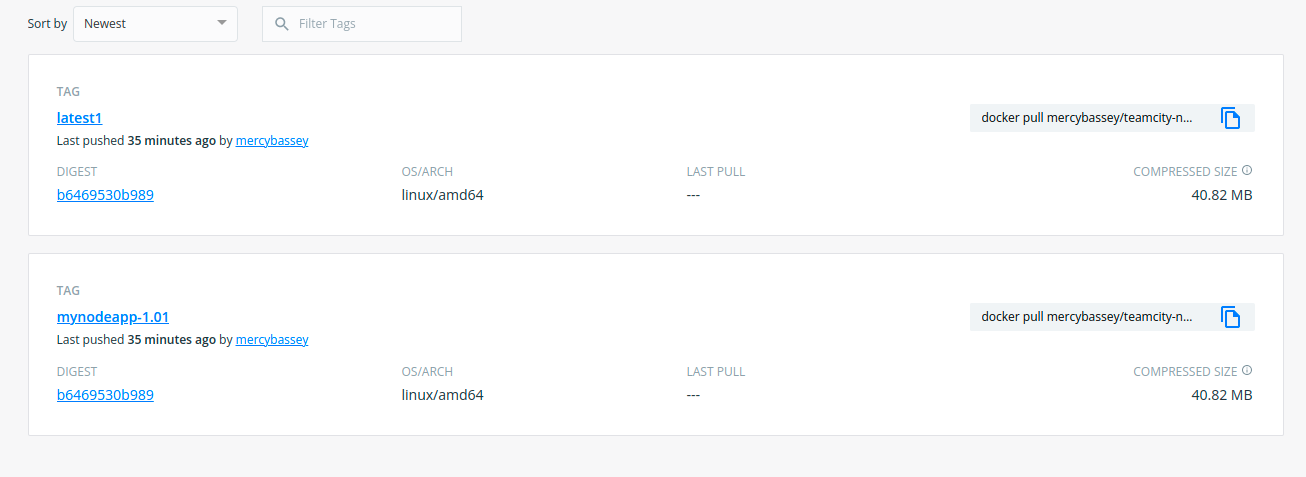
5. Navigate to your registry on Docker Hub to confirm if your image was created and pushed to your Docker registry successfully.
If successful, you’ll see your Node project pushed to your Docker registry, as shown below.

You’ll also see the built and pushed tags.
6. Navigate to the URL below, replacing VM-IP with your VM’s IP address. Doing so initializes viewing the configuration as code for the TeamCity CI/CD pipeline you’ve configured.
This URL redirects your browser to the Build page, where you configured build steps for your project.
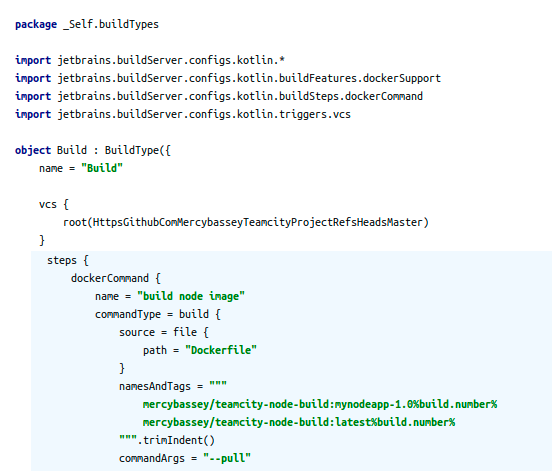
http://VM-IP:8111/admin/editBuildRunners.html?id=buildType:NodeApp_Build7. Finally, click View as code (bottom-left) on the Build page, and your browser redirects to a page where you’ll see your configuration as code.
Below, you can see your project configuration as code.
Conclusion
In this tutorial, you’ve learned how to configure a CI/CD pipeline in TeamCity by adding a Git repository. You’ve connected to a Docker registry and deployed authorized and compatible build agents to run your builds.
Now, what else will you configure on your Node Project? Perhaps an automatic build triggering on every code push from GitHub that rebuilds Docker images and pushes to your Docker Hub registry?


