


Wondering why the default Electronic Software Download (ESD) format seems to limit your customization options? Well, why not opt for (install.wim) Windows Imaging (WIM) format instead? If you’re pondering the need for a more flexible and controllable approach to deploying Windows, convert your ESD to WIM format!
Throughout this tutorial, you’ll learn ample ways to convert your ESD to WIM format and gain the upper hand in shaping your Windows setup. Whether you’re an IT pro seeking deployment mastery or a tech enthusiast, performing this conversion is crucial.
Stay tuned so you can aim for the ultimate personalized Windows setup!
Prerequisites
Before starting the conversion process, ensure you have the following prerequisites in place:
- A Windows ISO file – This tutorial uses a Windows 10 x64 ISO file.
- A Windows machine where you have administrative privileges – This tutorial uses Windows 10 Pro 22H2.
- NTLite installed – This tutorial uses NTLite version 2023.12.9552.
- DISM++ downloaded – This tutorial uses DISM++ x64 10.1.1002.1.
- An optical disc authoring software – This tutorial uses PowerISO 8.7 to modify the Windows ISO file.
Grasping the Distinctions Between ESD and WIM Formats
Imagine ESD as the magician of compression, adept at reducing the size of Windows installation files. The ESD format employs a highly efficient compression algorithm, resulting in a more space-saving storage solution.
While the install.esd file format offers efficient compression; below are some potential disadvantages:
| Limited Tool Support | Compared to the widely supported install.wim format, some third-party tools may have limited support for it. This limit can impact users relying on various tools for Windows customization and deployment. |
|---|---|
| Compatibility with Older Systems | Older systems or tools that don’t support the ESD compression algorithm may face compatibility issues when dealing with install.esd files. This issue can be a concern for users working in diverse environments. |
| Reduced Readability | The compressed nature of the install.esd file makes it less human-readable compared to the plain XML format of install.wim. This aspect can make manual inspection and modification more challenging. |
Unlike ESD, WIM allows you to store multiple images within a single file, like having a digital gallery of Windows editions and architectures neatly organized within the same frame. WIM files are widely used in enterprise environments and offer granular control over the installation process.
By grasping the nuances of ESD and WIM, you’re not just decoding file formats; you’re gaining mastery over the tools that shape your Windows environment.
Extracting the install.esd File from a Windows ISO
Past the overview of ESD and WIM formats, you’re almost ready to perform conversions. But first, a crucial step precedes — obtaining an install.esd file. Wondering where to find it?
The install.esd file is typically present in recent Windows versions, and your key to initiating the conversion lies in extracting this file from your existing Windows ISO file.
To extract the install.esd file from your Windows ISO file, perform the following:
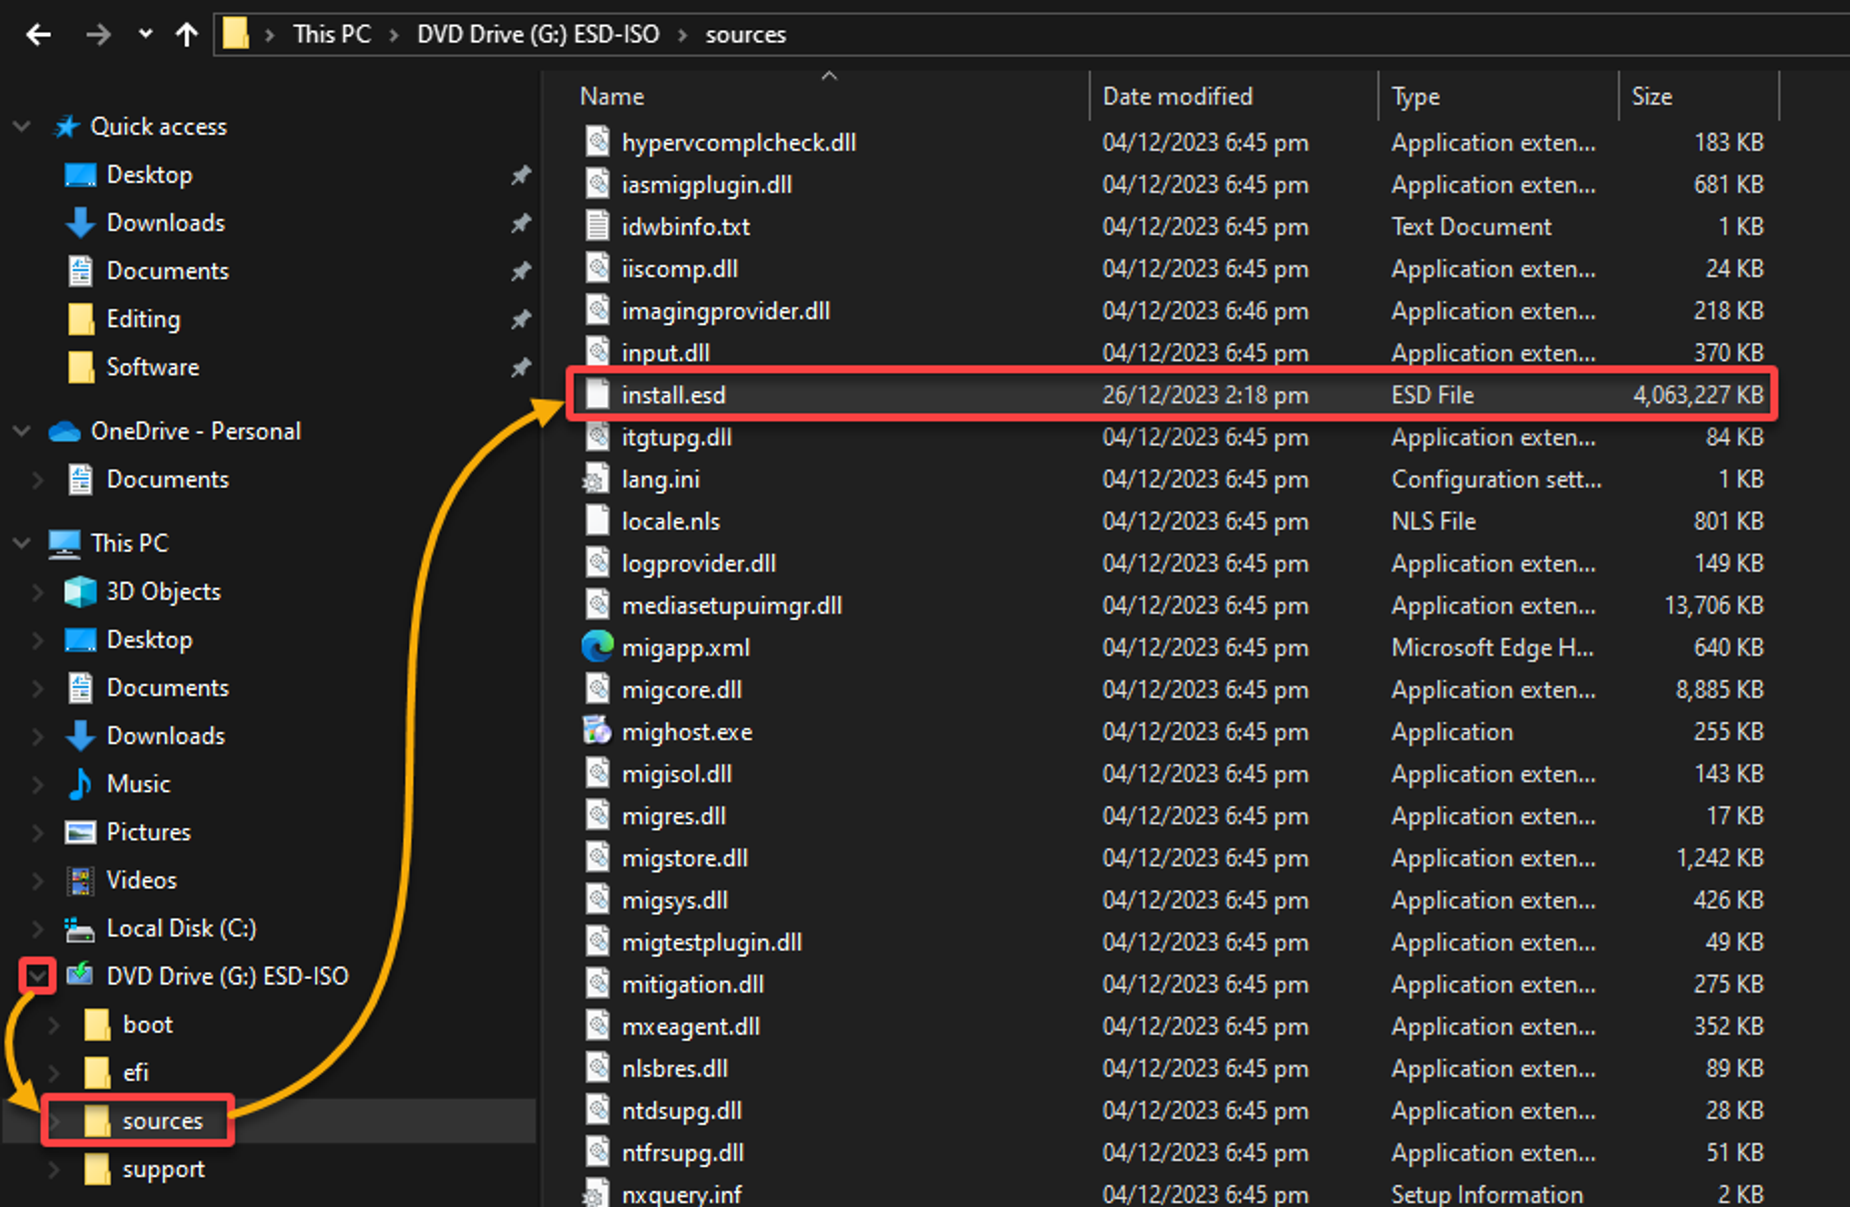
Mount the Windows ISO via File Explorer or third-party software.
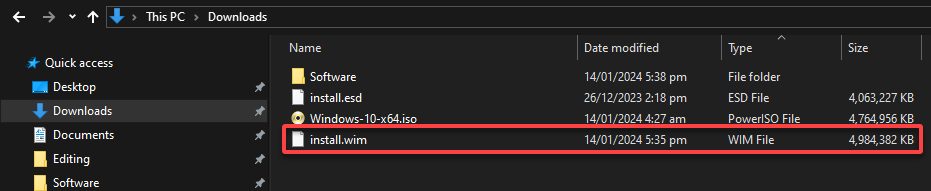
Now, navigate to the /sources folder (left pane) and copy the install.esd file to a different location on your system for further processing.
Converting install.esd to install.wim via NTLite
Having successfully extracted the install.esd file from your Windows ISO, you’re now standing at the threshold of a transformative process. Reshaping the essence of your Windows installation starts with converting the install.esd file to install.wim.
There are many ways to perform this conversion, but one good example is using the NTLite software. NTLite offers a friendly UI, keeping you focused on customizing various components of your Windows installation.
To convert your install.esd file to install.wim using NTLite, follow these steps:
1. Launch NTLite from your Start menu or desktop.
2. Once NTLite opens, click Add from the toolbar, choose Image (ISO, WIM, ESD, SWM), and locate your install.esd file.

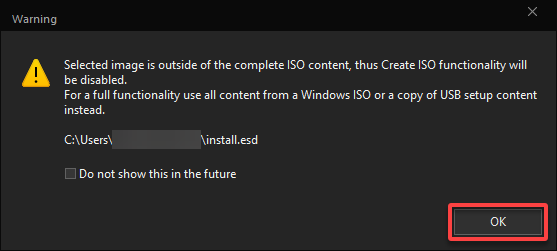
3. Click OK when prompted to confirm adding the install.esd file to NTLite.
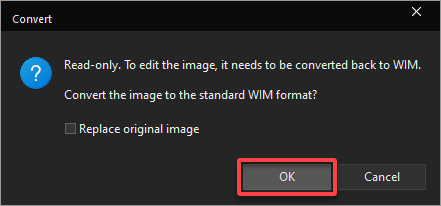
4. In the NTLite interface, right-click the install.esd file from the list, hover Convert and choose WIM (Standard, editable).
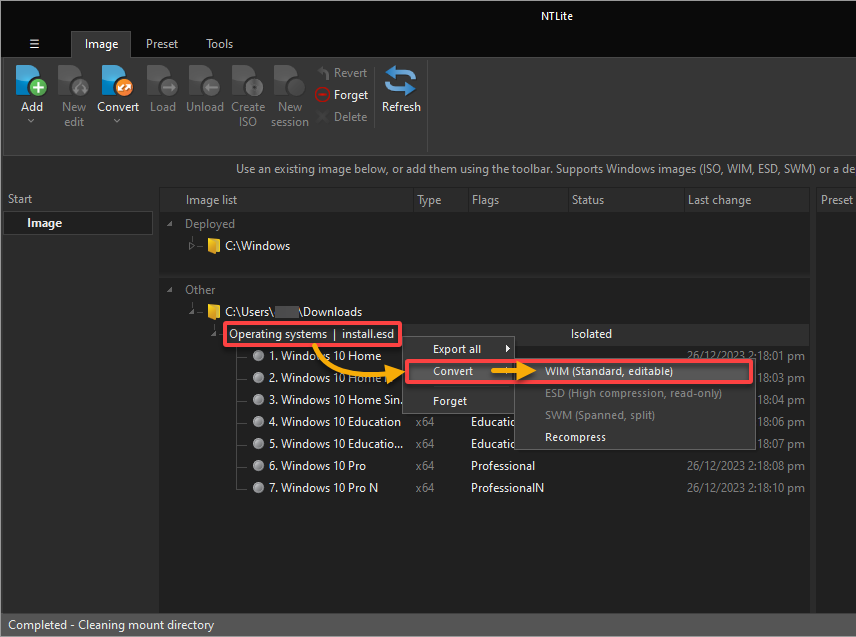
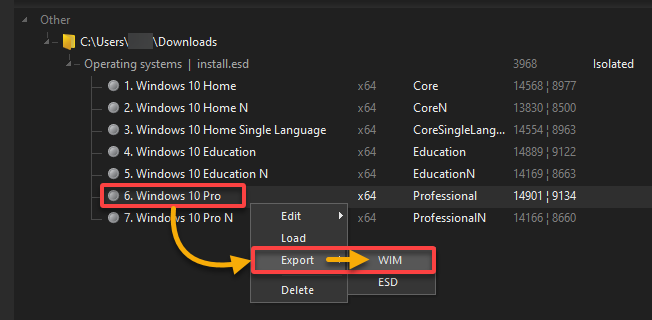
Optionally, right-click one image, hover Export, and choose WIM to export one image in WIM format, as shown below.
5. When prompted, click OK to confirm the reference image cache directory. This directory is crucial for efficient handling of the conversion operation.
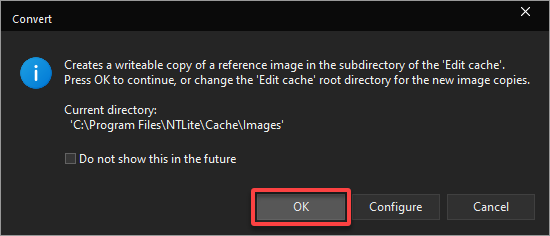
6. Now, click OK to continue with the conversion.
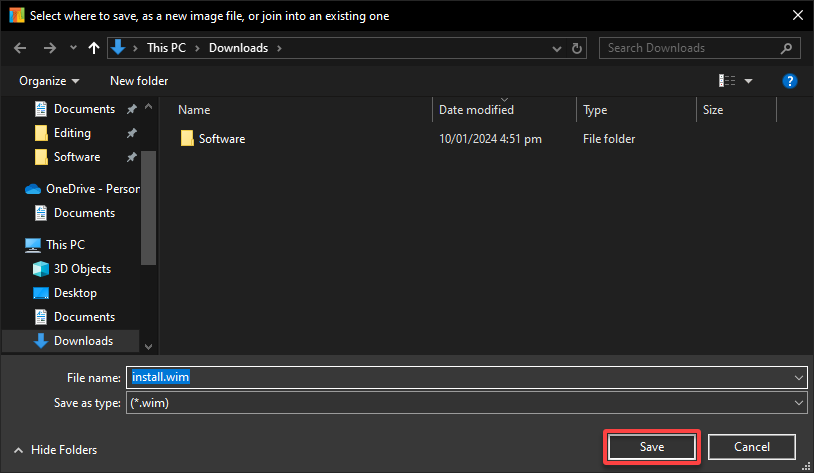
7. Choose a location to save the converted install.wim file, and click Save to confirm.
8. Monitor the progress, wait for the conversion to complete, and NTLite processes each image in the list individually.
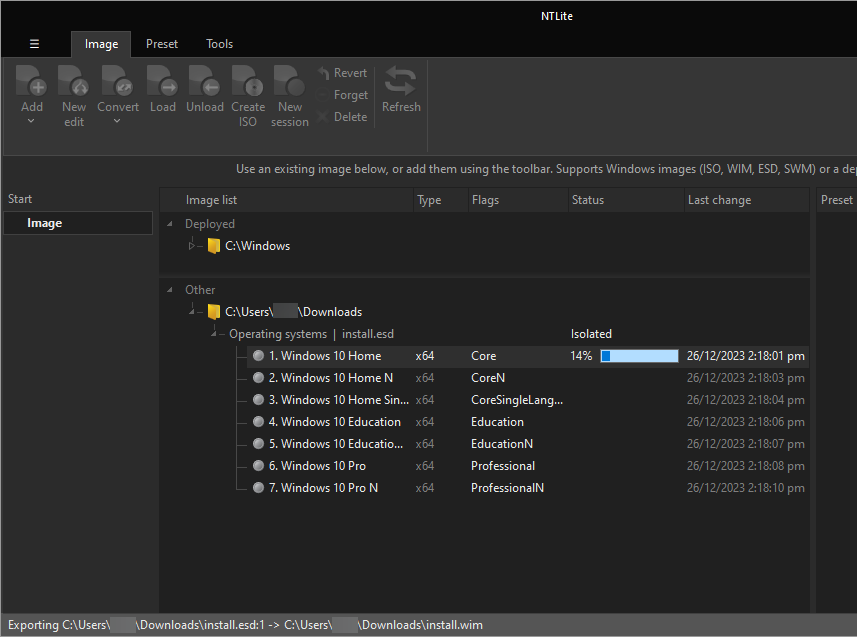
9. Once completed, verify the same images from install.esd are intact in install.wim, as shown below. This output confirms you’ve successfully converted install.esd to install.wim.
But why choose WIM over ESD? If your deployment requires a high level of customization with specific components or features, WIM is preferable due to its modular nature.

Employing DISM++ for ESD to WIM Conversion
Another robust tool you can use for ESD to WIM conversion is DISM++. This tool seamlessly marries the power of the command line with the elegance of a GUI.
DISM++ proves that magic doesn’t always require intricate spellcasting, especially when converting ESD to WIM.
To convert ESD to WIM with DISM++, carry out the following:
1. Open DISM++ compatible with your machine from its extracted location.
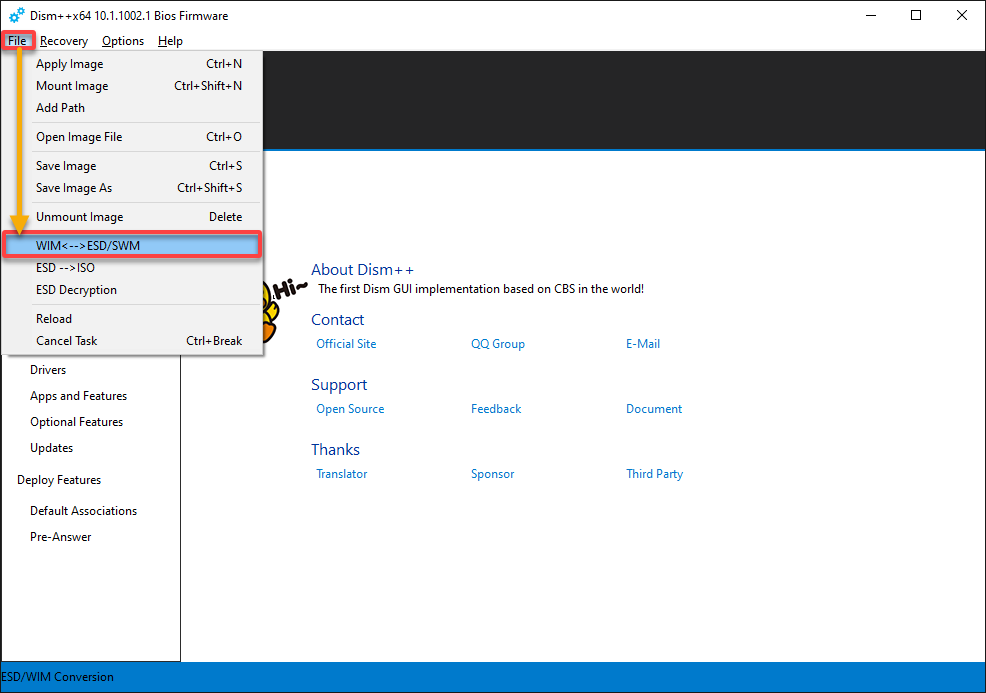
2. When DISM++ opens, click the File menu and choose WIM <–> ESD/SWM
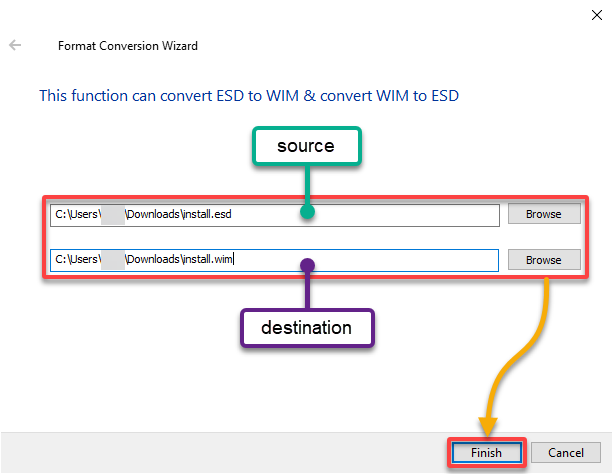
3. Choose the source ESD file, provide a destination for the WIM file, and click Finish.
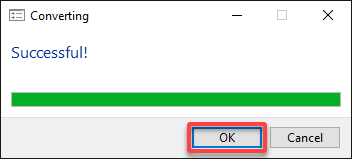
4. Wait for the conversion process to complete, and click OK.
5. Now, verify the converted install.wim exists in the target location.
Converting ESD to WIM Image Format via DISM Commands
Besides the graphical guides, consider an adventurous dive into the command-line seas, where every keystroke casts a transformation spell. You’ll run Deployment Image Service and Management Tool (DISM) commands to convert ESD to WMI format.
Why choose the command-line journey after exploring the comforts of DISM++’s GUI? Understanding the core commands that drive the conversion process offers unparalleled control and precision over your Windows deployment.
To convert ESD to WIM via DISM commands, complete the steps below:
1. Open Command Prompt as administrator, and navigate to where your install.esd file is located.
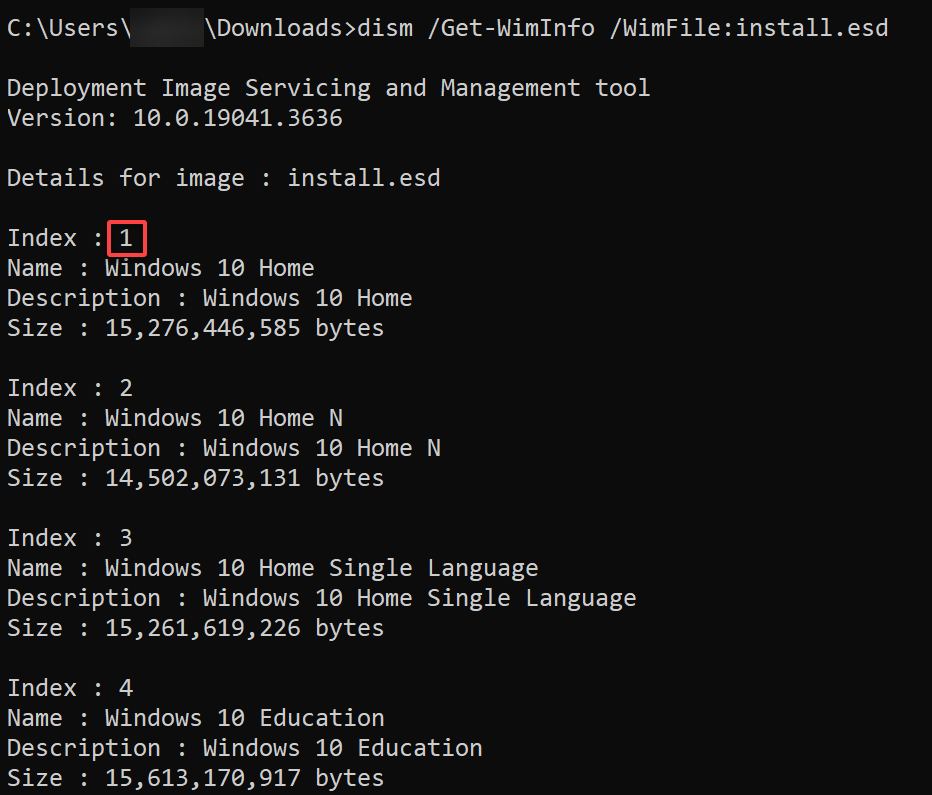
2. Next, execute the following dism command to list all images (Get-WimInfo) if you have multiple images within the install.esd file.
dism /Get-WimInfo /WimFile:install.esdPick one from the list of images and note its index (i.e., 1 for Windows 10 Home), as shown below.
2. Now, run the dism command below to convert (/export-image) ESD to WIM while keeping max compression.
Ensure you replace <img> with the index you noted in step two and <WIM> with the full path for the install.wim file.
dism /export-image /SourceImageFile:install.esd /SourceIndex:<img> /DestinationImageFile:<WIM> /Compress:max /CheckIntegrity
💡 Alternatively, omit the
/SourceIndexparameter from the command to include all images in the conversion as follows:dism /export-image /SourceImageFile:install.esd /DestinationImageFile:<WIM> /Compress:max /CheckIntegrity
Invoking the Export-WindowsImage PowerShell cmdlet
Coming from the hands-on experience of DISM commands, you’re now stepping into the realm of PowerShell. If you wish to explore another Windows conversion avenue that seamlessly blends power and simplicity, you can never go wrong with PowerShell cmdlets like Export-WindowsImage.
PowerShell provides a powerful and flexible environment for managing Windows configurations and deployments. The Export-WindowsImage cmdlet, in this context, allows for a more streamlined and scriptable approach to the conversion process.
To seamlessly convert ESD to WIM via PowerShell, proceed with these steps:
1. Open PowerShell with administrative privileges, and navigate to your install.esd file’s location.
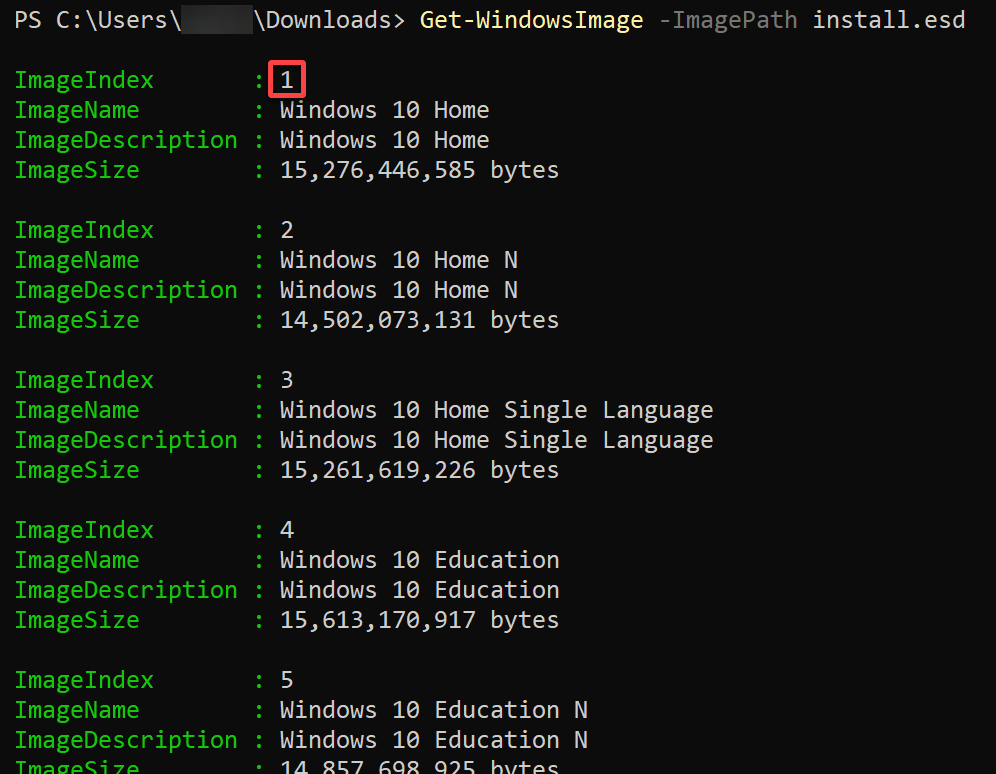
2. Next, execute the following Get-WindowsImage command
Get-WindowsImage -ImagePath install.esdNote one ImageIndex of an image (i.e., 1) you wish to include in your install.wim conversion.
3. Next, execute the Export-WindowsImage command to convert install.esd, with the file paths customized per your setup file to install.wim.
Ensure you customize the file paths per your setup and replace <img> with the image index you noted in step two.
As you may have noticed, the conversion process is similar to running DISM commands. So why opt for PowerShell instead? One example is that the Export-WindowsImage cmdlet can seamlessly integrate into broader automation workflows or larger deployment scripts.
Export-WindowsImage -SourceImagePath .\install.esd -SourceIndex <img> -DestinationImagePath <img> -CompressionType Max -CheckIntegrityWait until the conversion completes.

💡 Like with running DISM commands, you can omit the
-SourceIndexparameter to include all images within the install.esd to your converted install.wim.Export-WindowsImage -SourceImagePath .\install.esd -DestinationImagePath <img> -CompressionType Max -CheckIntegrity
Once complete, you’ll get the following output showing the DISM log path.

4. Finally, run the Test-Path or Get-ChildItem command below to verify the newly converted install.wim file exists.
# Test if the file exists
Test-Path .\install.wim
# List all files/folders in the working directory
Get-ChildItem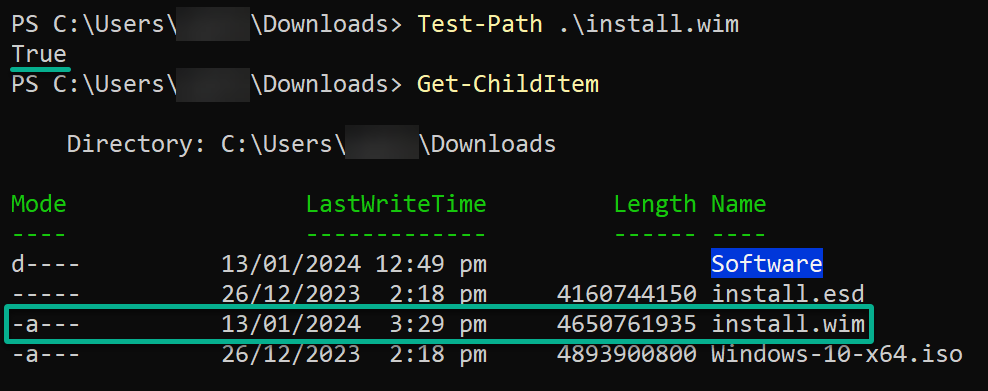
Modifying the Windows ISO File
No matter the route you took to acquire install.wim, the next step is to modify your Windows ISO file. You’ll be swapping out the existing install.esd file with the newly converted install.wim within your Windows ISO file.
While there are tools available that can accomplish this task, PowerISO is one of the best you can find. PowerISO comes with a trial version, but some essential features require a paid license, like modifying ISO files that are beyond 300 MB in size.
To modify your Windows ISO file, follow these steps:
1. Create a backup of your original Windows ISO file to ensure you have a copy if anything goes wrong.
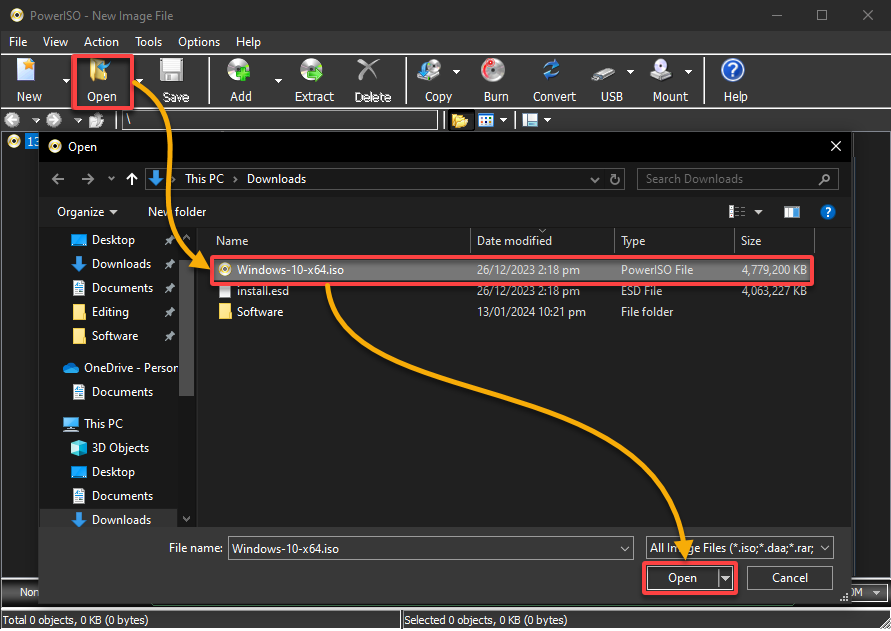
2. Next, launch PowerISO from the Start menu or desktop and open your original Windows ISO file, as shown below.
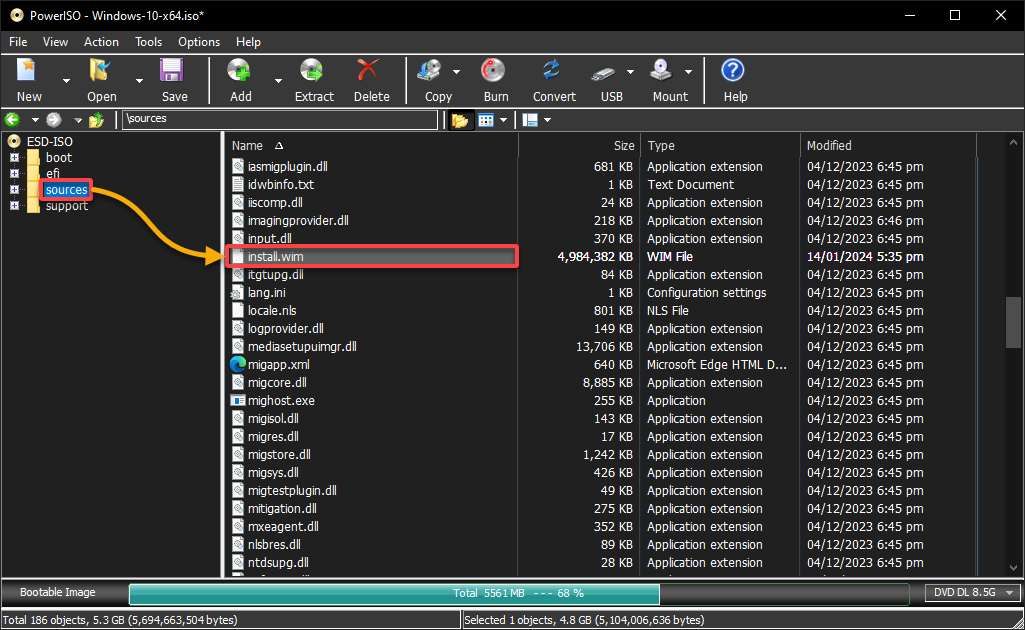
3. Once opened, navigate to the /sources folder, delete, and replace install.esd with the converted install.wim.
💡 Windows Setup relies on specific files and their locations during the installation process. Thus, be cautious to keep the overall folder structure and the layout of files within the ISO. The /sources folder is a crucial part of the ISO’s organization.
4. Now, click Save to save your changes, and confirm overwriting the ISO file.
💡 Overwriting the ISO file should be fine if you have already made a backup. But if you’re still skeptical, click No, then click on the File menu instead, and choose Save as.

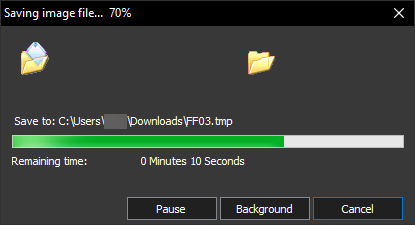
Wait for PowerISO to complete saving the changes.
5. Finally, deploy your Windows installation on a single or multiple clients to test the install.wim works.
Conclusion
Converting install.esd to install.wim expands your control over Windows deployment options. Whether using graphical tools or command-line utilities, you now know how to perform this conversion seamlessly. Just remember to choose the method that best fits your workflow and customization requirements.
As you reflect on your learning, why not explore advanced customization options? How about learning to manipulate unattended installation settings? Or use Sysprep to prepare a Windows installation, incorporate driver packages, and further tailor the user experience?


