

Are you looking for a UI that eases up performing your data science and AI tasks? If so, then install Jupyter Notebook on Ubuntu (now JupyterLab) and explore the features that make JupyterLab stand out.
In this tutorial, you’ll learn how to install Jupyter Notebook on Ubuntu 20.04 server with secure access via SSL/TLS encryption.
Ready? Read on and start interactive computing with JupyterLab!
Prerequisites
This tutorial will be a hands-on demonstration. If you’d like to follow along, be sure you have the following.
- An Ubuntu machine – This tutorial uses Ubuntu 20.04.
- A non-root user with sudo privileges.
- Python 3 installed on your machine.
- A registered domain name (your_domain.com) pointed at your server’s public IP address.
- JupyterLab requires a minimum of 4GB RAM to function properly.
Setting up Anaconda Environments for JupyterLab
Before you install Jupyter Notebook on Ubuntu, you need to install Anaconda and configure the environments for JupyterLab. Why? Anaconda is a Python distribution that makes it easy to install, run, and update multiple versions of Python and data science tools like JupyterLab.
With Anaconda, you can create separate environments for each project you work on. This setup keeps your projects organized and prevents one project from breaking another when you upgrade or change dependencies.
To install Jupyter Notebook on Ubuntu, we need to set up Anaconda environments for JupyterLab:
1. SSH to your server, open your terminal and run the following apt update and apt install command.
This command updates your server’s package index and installs the dependencies required to add new repositories over HTTPS.
sudo apt update -y && sudo apt install curl gnupg2 ca-certificates lsb-release -y
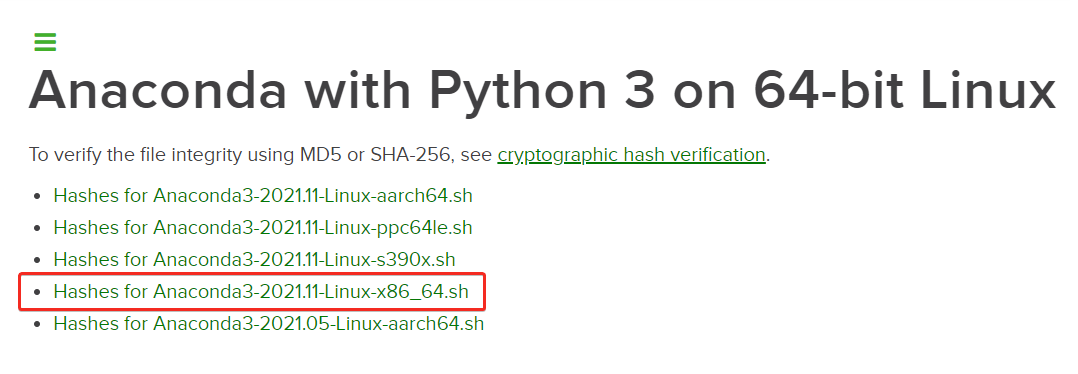
2. Open your web browser and navigate to the Anaconda downloads page. Scroll down to the bottom and choose the Linux installer for Python 3, as shown below.
Note down the installer’s name as you’ll need it in the following step, but don’t start the download. At this time, the latest Linux 64-bit installer is called Anaconda3-2021.11-Linux-x86_64.sh.
3. Now, run the below command to download the Anaconda installation Bash script and save it to the tmp directory. Be sure to replace the URL with the actual path to the latest version of Anaconda you noted in step three.
The Anaconda bootstrap script installer is the fastest way to get the latest Anaconda installer.
cd /tmp && curl https://repo.anaconda.com/archive/Anaconda3-2021.11-Linux-x86_64.sh --output anaconda.sh
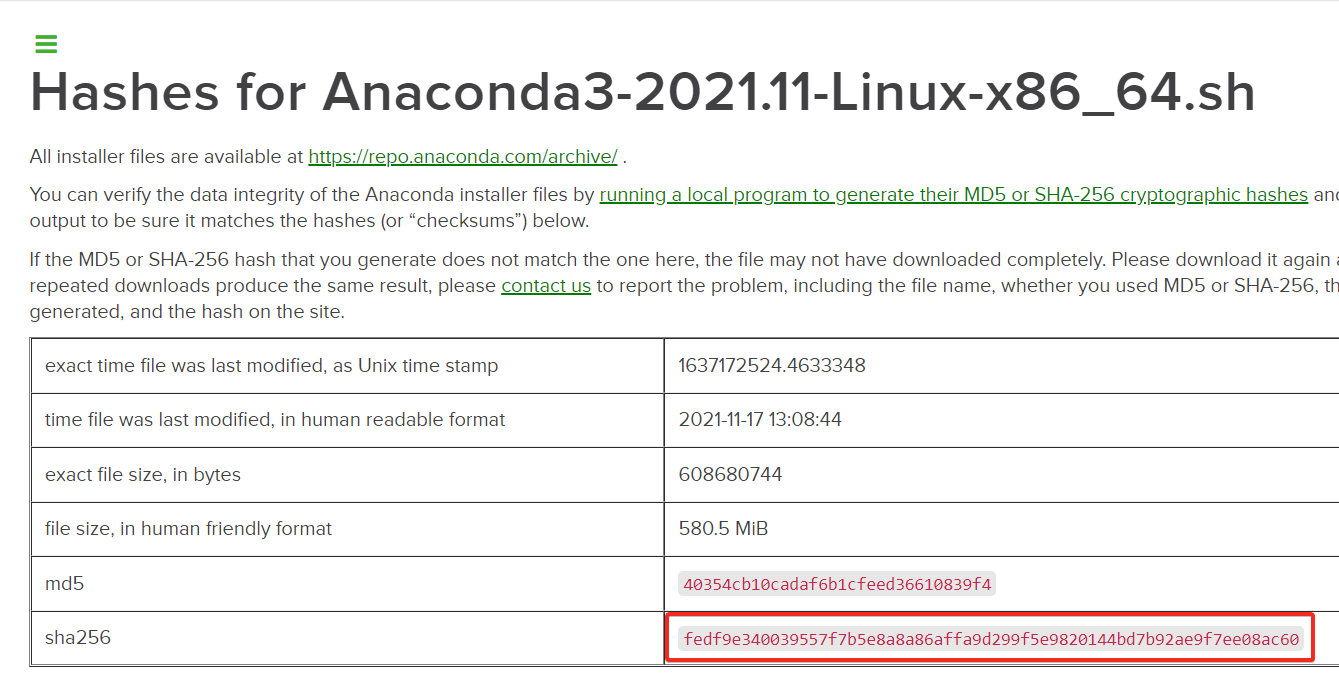
4. Run the sha256sum command below to generate the SHA-256 checksum of the downloaded file. Replace the path (/tmp/anaconda.sh) with the actual path on your server where you saved the installer.
This command verifies the data integrity of the installer with cryptographic hashes. Doing so ensures the downloaded file has not been tampered with and is exactly what was intended to be downloaded.
sha256sum /tmp/anaconda.shNote down the generated checksum to compare it with the sha256 checksum in the Anaconda package’s hashes (step six).

5. Next, navigate to the Anaconda hashes page on your browser.
Compare the generated checksum you noted in step five with the one listed in the sha256 checksum. If they match, you can proceed with installing Anaconda.
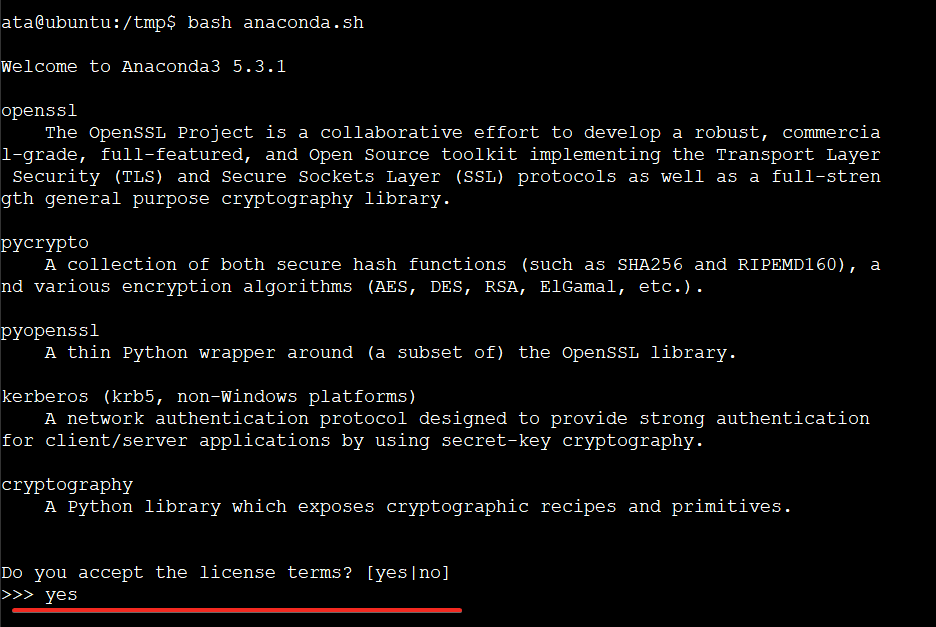
6. Execute the anaconda.sh script to install Anaconda on your server.
bash anaconda.shType yes at the prompt to access the license terms agreement.
7. Press Enter to continue the installation.
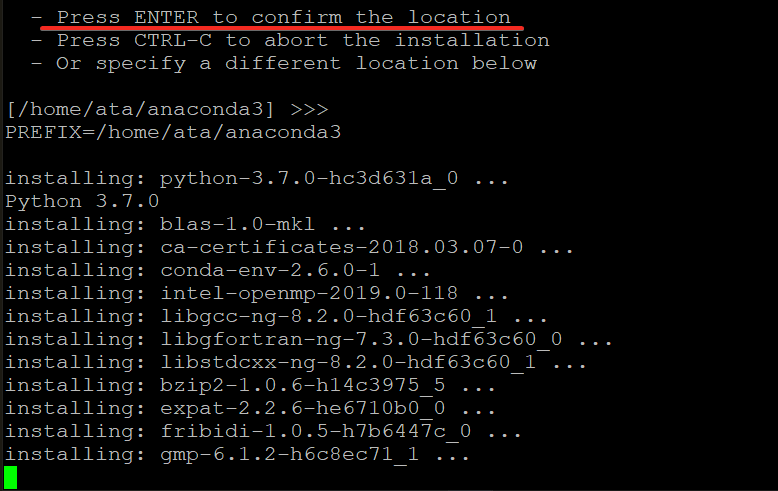
8. Now, type yes and press Enter when prompted to initialize Anaconda. This part appends the Anaconda installation path to your .bashrc file. Doing so lets you access the .bashrc file from your user account without using the full path.
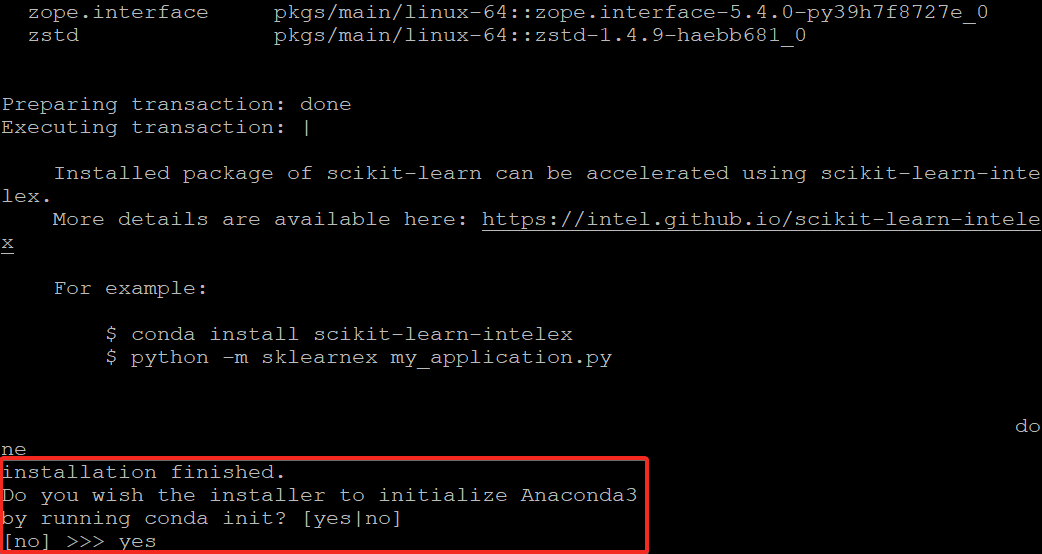
Once you have Anaconda installed, you will see the following output.
9. Run the command below to activate the default environment called base, a special environment used as the starting point for creating new environments. This environment comes with a set of some core system libraries and dependencies.
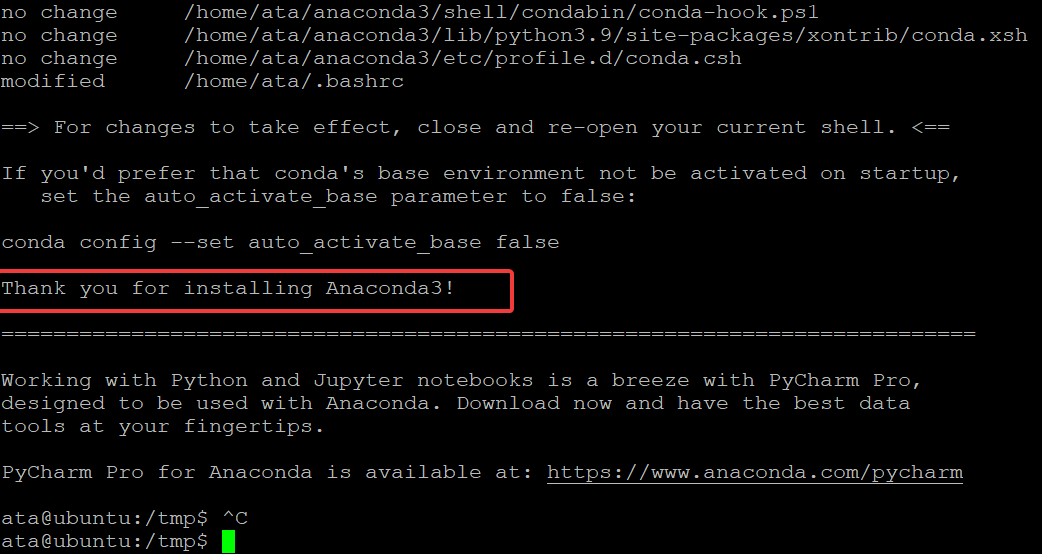
source ~/.bashrcYour prompt will change to include the name of the currently activated environment in parentheses. In this case, it’s (base), as shown below.
That’s it! You have successfully installed and activated Anaconda environments on your machine.

Creating a Password for JupyterLab
Now that you’ve activated the base environment, your JupyterLab instance will be accessible over the internet. While this may be convenient, it also creates a security risk as your JupyterLab server could be accessed by anyone who knows the URL of your JupyterLab server.
To mitigate this risk, you’ll need to set a password for your JupyterLab server. But first, you’ll have to create a configuration file. This file will be used to store your password hash and other configuration options for your server.
1. Run the below jupyter command to create a configuration file in your home directory.
JupyterLab is the latest version of Jupyter Notebooks, but the command to create a password hash is the same for both versions.
jupyter notebook --generate-configYou can see in the output below that Jupyter created the configuration file (jupyter_notebook_config.py) in the /home/ata/.jupyter directory. This directory is the default location for Jupyter Notebook configuration files.

2. Next, run the following command to generate the password hash.
jupyter notebook passwordYou’ll be prompted to enter and verify your password, as shown below. Ensure you provide a secure password and press Enter.

3. Finally, run the cat command below to print the configuration file’s contents.
cat /home/ata/.jupyter/jupyter_notebook_config.jsonYou should see a line that starts with “password” and its value, which is your password hash. Copy and save this hash to a safe location, as you will need it to log in to your JupyterLab server later.

Securing the JupyterLab Server With Let’s Encrypt SSL
You’ve now generated a password hash, but is it enough to secure your JupyterLab server? While a password is better than nothing, it’s still not as secure as an SSL/TLS. Fortunately, Let’s Encrypt is just around the corner to secure your server.
But before you can generate Let’s Encrypt SSL certificates, you first need to install the Certbot client. Certbot is an open-source tool that allows you to generate free Let’s Encrypt SSL certificates.
1. Run the following command to install certbot.
sudo apt install certbot -y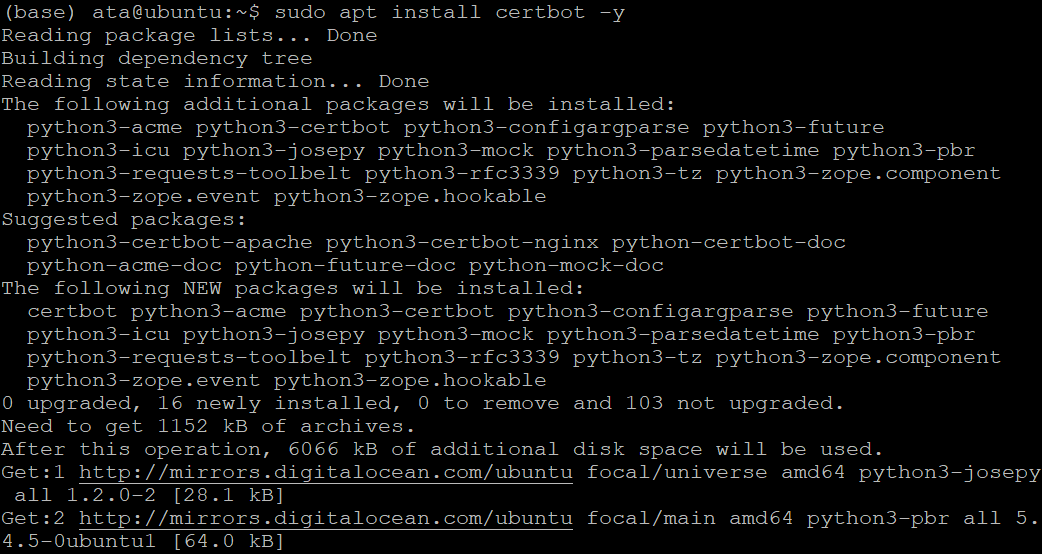
2. Run the following commands to allow access to ports :80 and :443, especially if your JupyterLab server is behind a firewall.
# Open port 80 for the initial verification process.
sudo ufw allow 80
# Open port 443 so that Certbot can renew your certificates automatically.
sudo ufw allow 443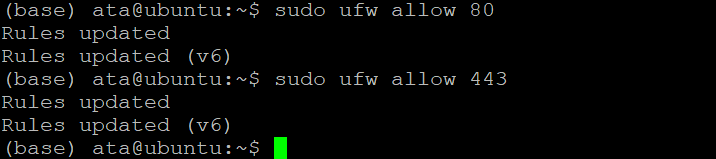
3. Finally, run the certbot command below to generate the SSL certificates (certonly) with the following command.
sudo certbot certonly --standaloneProvide your email address when prompted to receive email alerts about expiring certificates. Enter A to agree to the terms of service, and type Y and press Enter if you’re willing to share your email address with the Electronic Frontier Foundation.
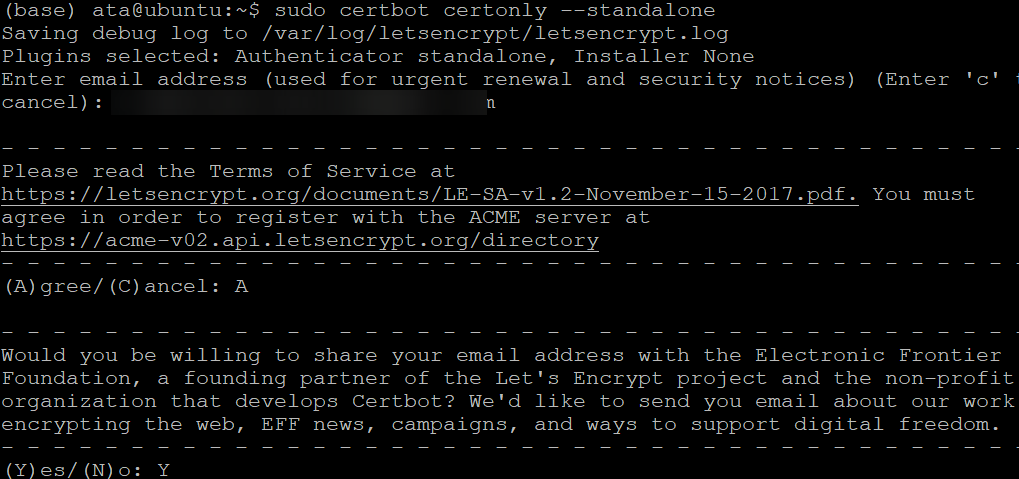
Provide your domain name when prompted, and press Enter. You’ll see the following output if the SSL certificates are generated successfully.
Below, you can see your SSL certificate has been saved in /etc/letsencrypt/live/your_domain.com.
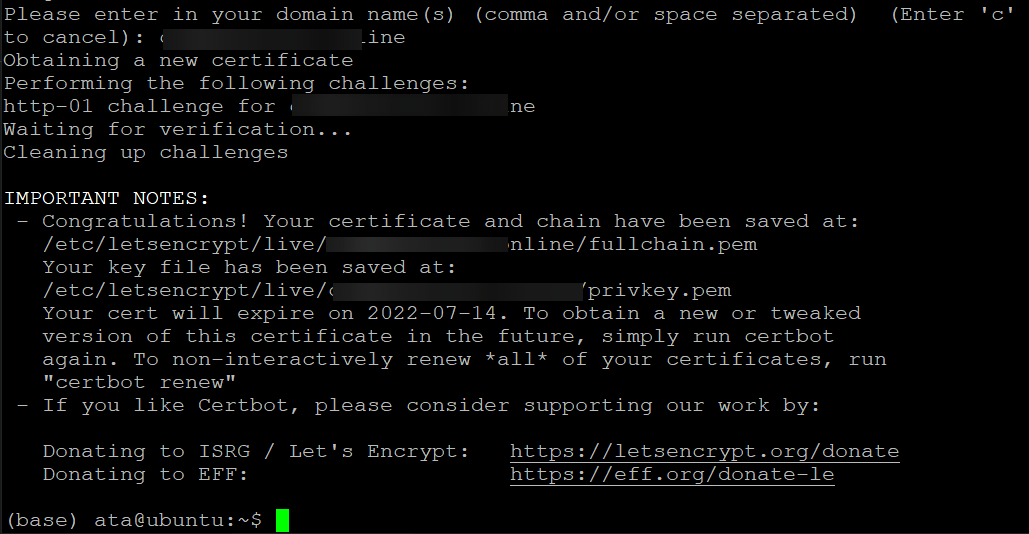
4. Lastly, run the ls command below to list the files in the /etc/letsencrypt/live/your_domain directory.
sudo ls -a /etc/letsencrypt/live/your_domain.comThe files shown below are your SSL/TLS key and certificate files. At this point, you can now configure JupyterLab to use these files for SSL/TLS encryption.

Configuring the JupyterLab Server
Now that you have all the pieces to configure your JupyterLab server, it’s time to put everything together.
1. In your text editor, open the JupyterLab configuration file (/home/ata/.jupyter/jupyter_notebook_config.py) in your text editor, and change the following lines.
2. Scroll down to the c.NotebookApp.certfile and c.NotebookApp.keyfile lines, as shown below.
Uncomment each line by removing the leading # character. Set each line’s value to your actual SSL/TLS certificate file (etc/letsencrypt/live/your_domain/fullchain.pem and /etc/letsencrypt/live/your_domain/privkey.pem).
These two lines tell JupyterLab to use your Let’s Encrypt SSL certificates for encryption and where to find them. As a result, your users can access your JupyterLab server using the https protocols.


3. Next, uncomment the c.NotebookApp.ip line and set the value to * to bind JupyterLab to listen to all IPv4 addresses instead of just the localhost address (127.0.0.1).
The default value for this setting binds JupyterLab to only the localhost address. So you change this line’s value if you want to allow access to your JupyterLab server from anywhere.

4. Uncomment the c.NotebookApp.open_browser line and set the value to False if your server does not have a GUI. If you don’t have a GUI on your server and try to open a browser tab automatically, JupyterLab will fail and generate an error.

5. Uncomment the c.NotebookApp.password line and set the value to the hashed version of your password. JupyterLab will use this password for authentication.

6. Finally, uncomment the c.NotebookApp.port line and set the value to 9000, the default port that JupyterLab uses. Save the changes to the configuration file, and close the text editor.

Starting the JupyterLab Server
You’re now able to install Jupyter Notebook on Ubuntu, but how do you know it’s working? You’ll need to allow JupyterLab to access the SSL certificates when the JupyterLab server starts. And to do so, you’ll need access to JupyterLab’s GUI.
1. First, run the chmod and chown commands below to give the ata user ownership of the Let’s Encrypt directory and files.
sudo chmod 750 -R /etc/letsencrypt
sudo chown ata:ata -R /etc/letsencrypt
2. Next, run the following command to start your JupyterLab server.
jupyter lab
Don’t close the terminal window because the server is still running in the foreground. If you accidentally close the window or your connection is interrupted, your JupyterLab server will shut down.
3. Open your web browser and navigate the https://your_domain:9000 URL to access your JupyterLab server’s login page.
Provide your password hash, and click the Log in button to access your JupyterLab server.

Once you enter the correct password, you will be logged into your JupyterLab server, as shown below.
JupyterLab provides a robust UI re-design of the classic Jupyter Notebook. The UI offers a more pleasing aesthetic, but it also comes with many features. These features are a great help for users to get their work done efficiently.
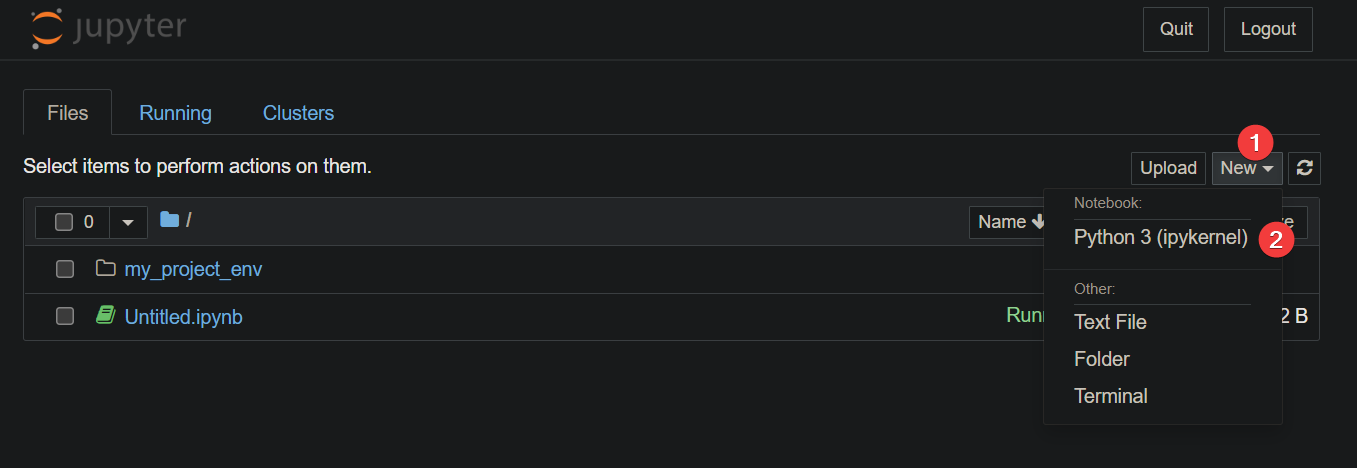
4. Now, click on the New drop-down button —> Python 3 to create a new Python 3 notebook document, as shown below.
Your browser redirects to a new page where you can start writing code in your notebook (step six).
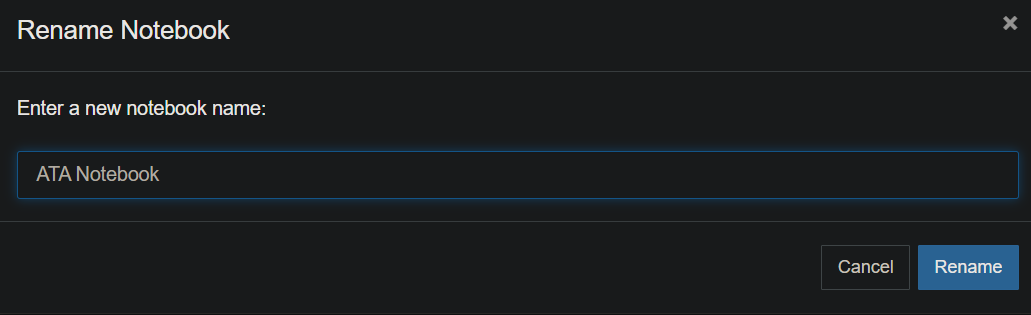
5. Provide a name for your notebook (ATA Notebook) in the box and click on the Rename button.
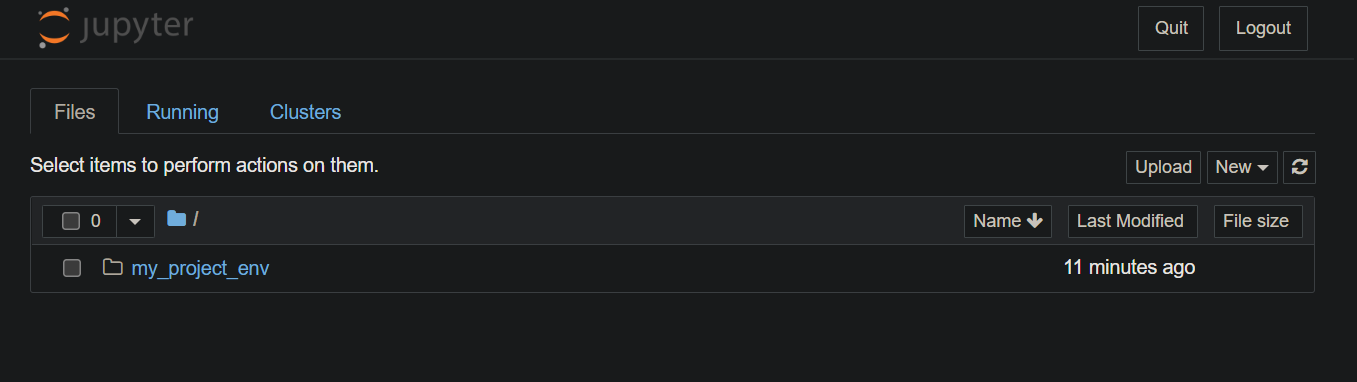
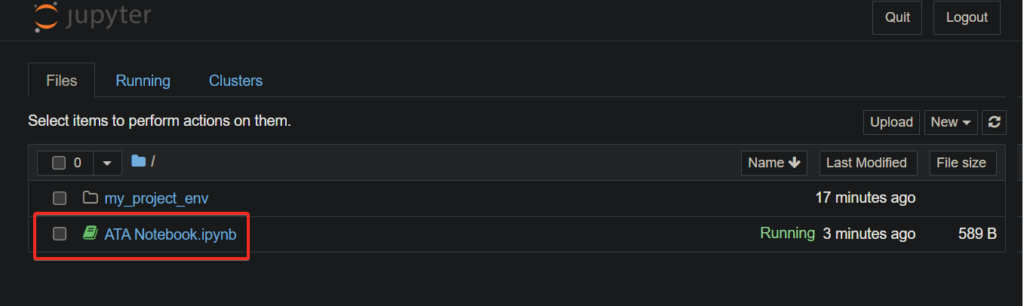
Your new ATA Notebook will be saved in the directory where you started your JupyterLab server. In this case, the notebook is held in the ata user’s home directory.
6. Navigate to the JupyterLab dashboard, and you’ll see the new notebook listed, as shown below.
Click on the ATA notebook to open it and start writing code.
7. Next, copy and paste the following code into your notebook, and press the Shift+Enter keys to execute the code.
This block code calculates the value of two squared (2²) and prints the result to the output cell.
x = 2 # Sets x value to 2
y = x**2 # Sets y value to the result of two squared (2²)
print(y) # Prints the value of y
The output (4) will be displayed in the next cell, as shown below, which indicates your JupyterLab server is working correctly.
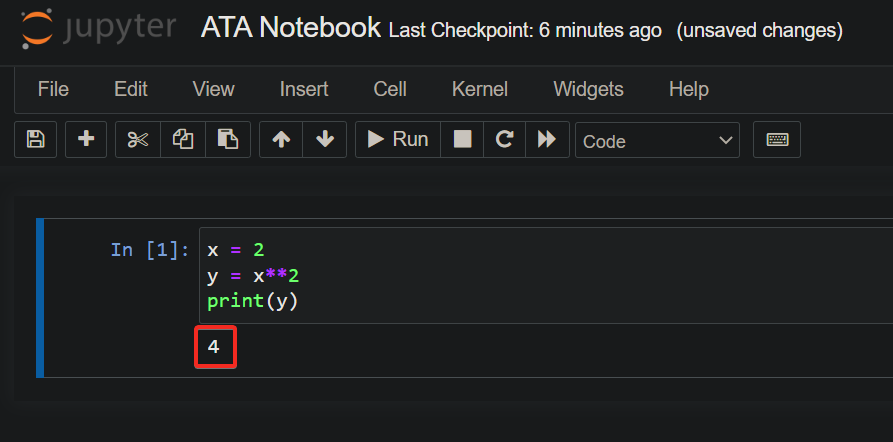
You can edit and re-execute the code cells to test out different values for x, then press CTRL+S to save the changes.
8. Lastly, return to the terminal window where your server is still running.
When you’re finished working with your JupyterLab server, press CTRL+C keys and enter Y to shut down the server.

Conclusion
In this tutorial, you’ve learned how to configure and install Jupyter Notebook on Ubuntu server. You’ve created a new Jupyter notebook document and wrote a sample code to test your JupyterLab is working.
At this point, you already have a fully functional JupyterLab server. But with this newfound knowledge, you can now develop data-driven applications and collaborate with other users on notebooks. Why not learn to analyze data, create charts and graphs, and much more?


