


Are you looking for a way to optimize and improve your website’s performance? Why not install Elasticsearch on Ubuntu? Elasticsearch is a powerful open-source search engine that helps you index and searches through large amounts of data quickly and easily.
Not a reader? Watch this related video tutorial!In this article, you’ll learn how to install Elasticsearch on Ubuntu and improve your website’s performance.
Read on to find out how to optimize your website like you never imagined!
Prerequisites
This tutorial will be a hands-on demonstration. If you’d like to follow along, be sure you have the following.
- An Ubuntu server. This tutorial uses Ubuntu 20.04.
- A user account with root privileges. Though this redundantly demonstrates
sudowith therootaccount, typicallysudois only necessary for a less-privileged account.
Installing Java on Ubuntu
Before getting your hands on Elasticsearch, you’ll first have to install Java on your server. Java installation is required for Elasticsearch to run.
You’ll install OpenJDK, the open-source Java Development Kit (JDK). This JDK is the recommended Java development environment for Elasticsearch.
While it’s possible to install Java after Elasticsearch, installing Java first is the best practice. Doing so ensures your environment is set up correctly and that there are no unexpected errors.
To install Java on your Ubuntu machine:
1. Run the apt update command to ensure your Ubuntu package repository is up-to-date.
sudo apt update -y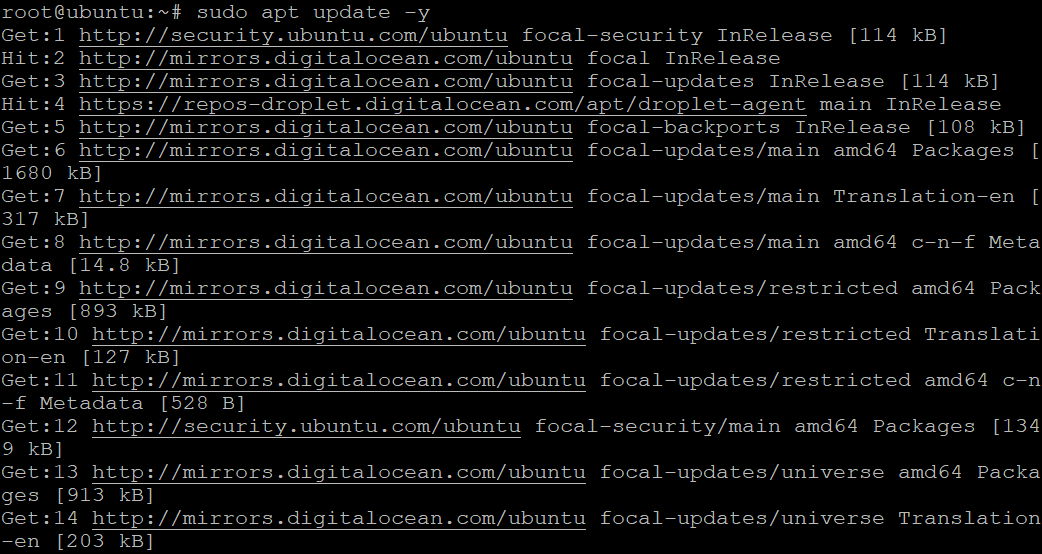
2. Next, run the apt install command to install OpenJDK (default-jdk).
You can install Java in other ways, but using the apt package manager is recommended to install Java on Ubuntu. apt ensures all required dependencies are installed.
sudo apt install default-jdk -y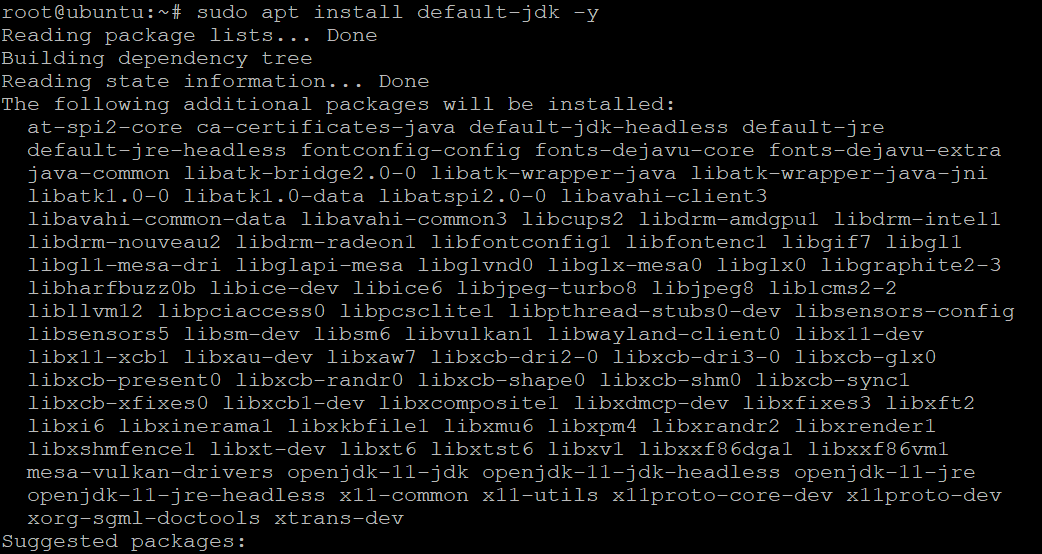
3. Lastly, run the command below to check the installed version of Java.
java -versionAs of this writing, the latest version below is 11.0.14.1, but yours might be different. This output indicates Java is installed correctly.

Install Elasticsearch on Ubuntu
Now that Java is installe d, you can install Elasticsearch on your server. Elasticsearch is not available in the Ubuntu repositories, so you’ll install it from a third-party source.
1. Run the apt-get install command below to install the apt-transport-https package. This package secures the communication between your Ubuntu server and the package repository.
sudo apt-get install apt-transport-https -y
2. Next, run the curl command below to add the Elasticsearch GPG key to your system (apt-key add). This key is used to verify the authenticity of the Elasticsearch package.
curl -fsSL https://artifacts.elastic.co/GPG-KEY-elasticsearch | sudo apt-key add -
3. After adding the GPG key, run the below command to add the latest Elasticsearch repository (https://artifacts.elastic.co/packages/7.x/apt stable main) to your system.
The -a flag is used to append the text to the /etc/apt/sources.list.d/elastic-7.x.list file. The elastic-7.x.list file is a list of files that contain a list of repositories, where your apt looks for packages to install.
Visit the Elasticsearch repository page to find other repositories with different versions of Elasticsearch
echo "deb https://artifacts.elastic.co/packages/7.x/apt stable main" | sudo tee -a /etc/apt/sources.list.d/elastic-7.x.listThe repository is added to your system, but the new repository is unusable until you update your apt-cache.

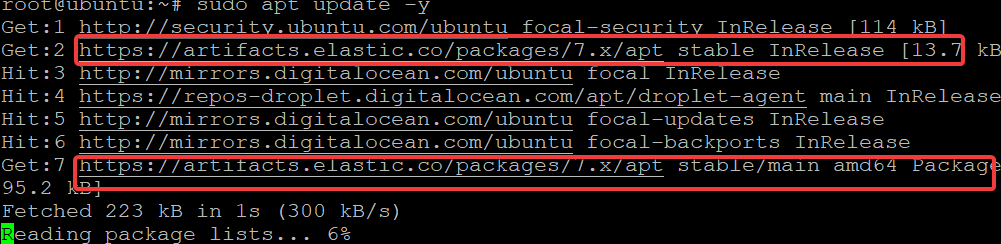
4. Now, run the apt update command below to update your apt-cache.
sudo apt update -yYou can see in the output below that the Elasticsearch repository has been added to your system.
5. Finally, run the apt install command below to install Elasticsearch on your server.
sudo apt install elasticsearch -y
Configuring Elasticsearch
You’ve completely installed Elasticsearch, but you’ll still have to configure Elasticsearch before using it. The main configuration file for Elasticsearch (elasticsearch.yml) is located in the /etc/elasticsearch directory.
You can find all configuration options available in the elasticsearch.yml file, and most of them are preconfigured. But you may need to change some of them according to your needs. And in this tutorial, you’ll only adjust the settings for the network host.
1. Open the elasticsearch.yml file in your favorite text editor.
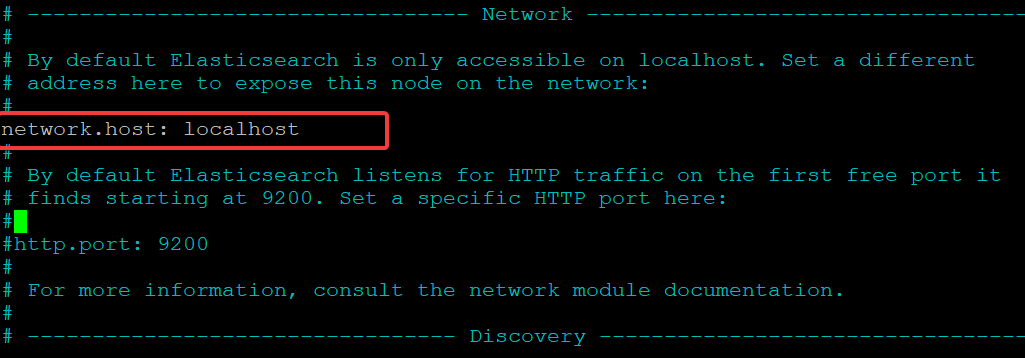
sudo nano /etc/elasticsearch/elasticsearch.yml2. Scroll down to the line that reads network.host, as shown below.
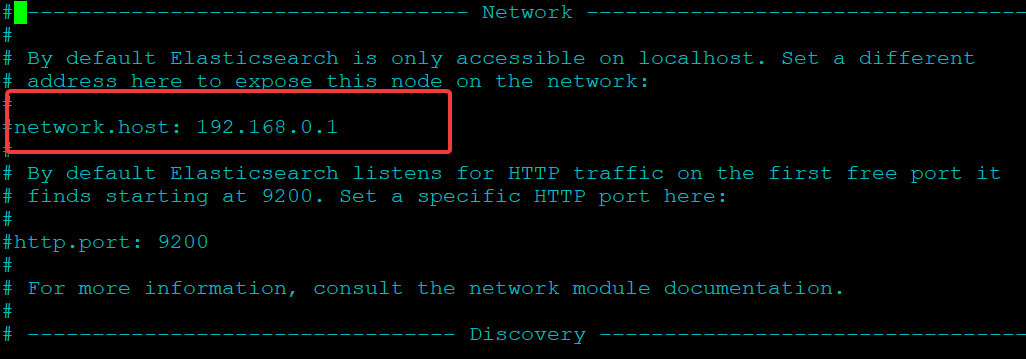
3. Uncomment the network.host line by removing the leading # symbol and replacing its value with localhost. Doing so increases security by restricting outside access to your Elasticsearch instance.
Save the changes and exit your editor.
Note that any redundant spaces in this document will cause parsing issues, leading to an error. Never add any extra spaces at the beginning and end of any lines, and only use spaces between dictionary keys and values.
4. Now, run each systemctl command below to reload the daemon and restart the elasticsearch service so that your changes take effect.
These commands don’t have output. But at this point, your Elasticsearch instance on port 9200 is now configured to allow traffic only from machines on your local network.
On port 9200, Elasticsearch listens for traffic from everywhere by default.
# Reload deamon
sudo systemctl daemon-reload
# Restart the elasticsearch service
sudo systemctl restart elasticsearch5. Run the command below to start the elasticsearch service and verify the service is running.
sudo systemctl start elasticsearch
systemctl status elasticsearch
As shown below, the Elasticsearch service should be started with the status showing active (running).

6. Lastly, run the following netstat command to verify your Elasticsearch server is listening on the localhost interface on port 9200.
netstat -plntu | grep "9200"You can see that the Elasticsearch process is running and listening on both the IPv6 and IPv4 loopback interfaces on port 9200, as shown below. 18718/java is the process ID (PID) for the Elasticsearch process.

Securing Elasticsearch Using UFW Firewall
Your Elasticsearch service is up, and naturally, you’d want to secure your Elasticsearch installation. But how? Ubuntu’s default firewall, UFW, is powerful enough and should suffice.
Your Elasticsearch server is accessible from the local network only, which is enough for developer and testing environments. But in a production environment, you’ll want to allow access to Elasticsearch only from specific hosts.
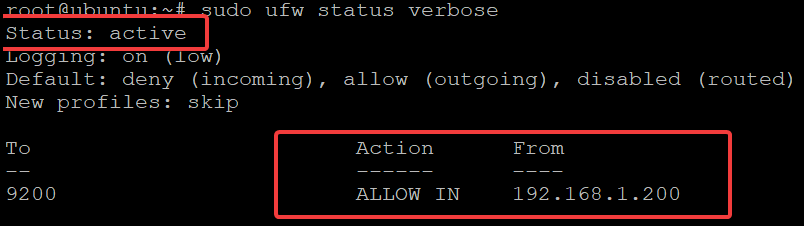
For example, your website may run on the server at 192.168.1.100, but you want to access the Elasticsearch data from a different machine on the network at 192.168.1.200. You can add a rule to allow traffic from 192.168.1.200 only.
Run the following command to add a UFW rule to allow traffic from 192.168.1.200 to your Elasticsearch instance on port 9200. Replace the IP 192.168.1.200 address with the one you want to allow traffic from.
sudo ufw allow from 192.168.1.200 to any port 9200

Now, run the ufw status command below to check the status of your UFW firewall.
sudo ufw status verbose
The output below shows the rule you added is active.
Perhaps you want to remove a rule. If so, run the following command. Removing unused rules is highly recommended to keep your firewall tightened up. Replace IP_ADD accordingly. sudo ufw delete allow from IP_ADD to any port 9200
Searching Through Documents with Elasticsearch
Your Elasticsearch installation is now secure, so feel free to start using it, searching through documents with the curl -XGET command. But first, you’ll fetch nodes information in your Elasticsearch cluster you can use to debug problems with your Elasticsearch installation.
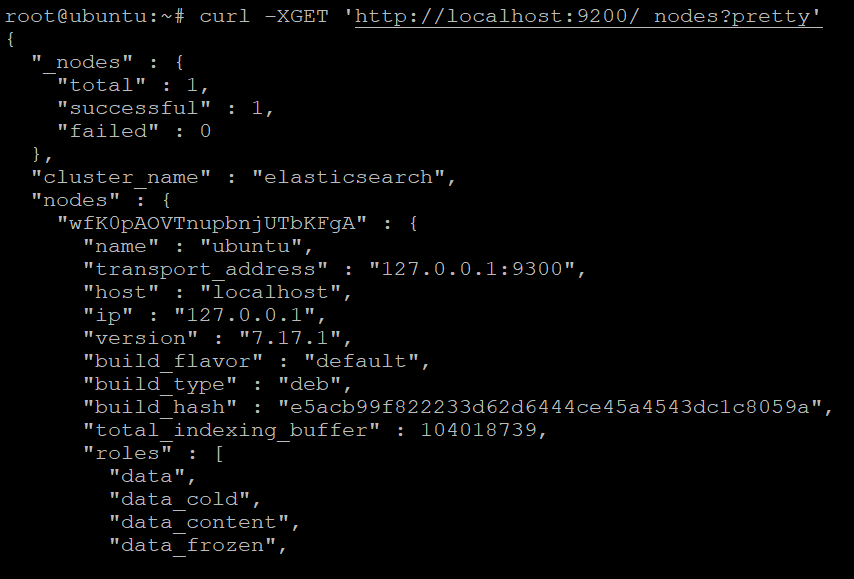
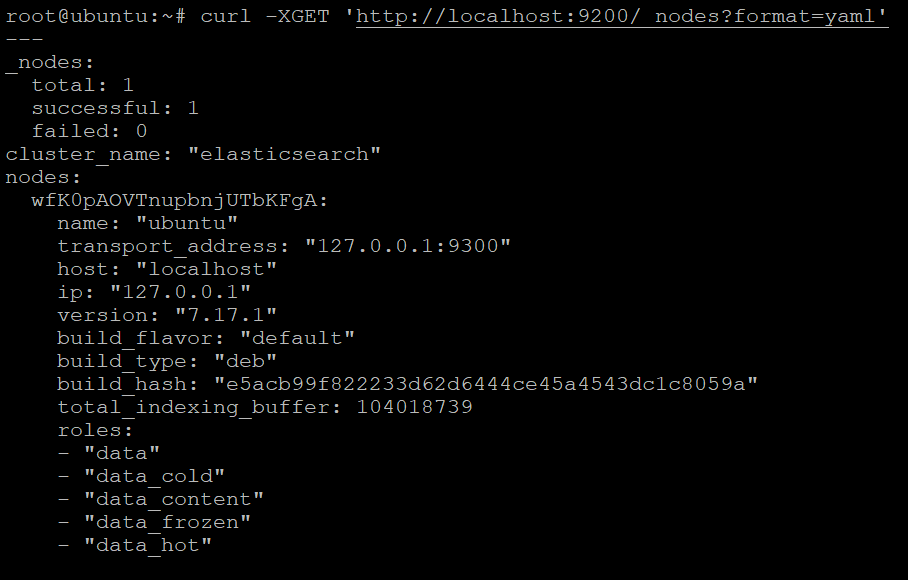
1. Run either of the below curl commands to get information (-XGET) about the nodes in your Elasticsearch cluster in human-readable or YAML format.
# Get information about the nodes in your Elasticsearch cluster in human-readable format
curl -XGET 'http://localhost:9200/_nodes?pretty'
# Get information about the nodes in your Elasticsearch cluster in YAML format
curl -XGET 'http://localhost:9200/_nodes?format=yaml'
You’ll see an output similar below when you choose the JSON format. You can use the JSON output below to debug problems with your Elasticsearch installation.
You’d get the below output instead if you choose the YAML format.
2. Next, run the below curl command to add an index called ata. An index in Elasticsearch is like a ‘database’ in a relational database, such as MySQL.
This command adds a JSON document (application/json) to the ata index and makes it searchable. 1 is the unique identifier for the document in the ata index.
Documents in an index are usually stored in JSON (JavaScript Object Notation) format. Your e-commerce website, for example, can have one index with product data related and another index with customer data related.
curl -H 'Content-Type: application/json' -X POST 'http://localhost:9200/ata/task/1' -d '{ "name": "Go to the mall." }'
Note that your index name should be lowercase only. Uppercase letters are not allowed in index names, and the same goes with special characters like \, /, *, ?, “, <, >, |, ` ` (space character). You’ll get an error message like shown below if you try to create an index with a name that is not valid.

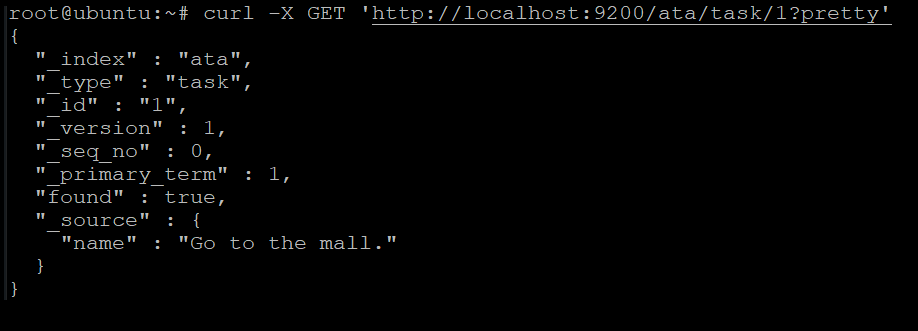
3. Run the following curl command to search for the document you just created in step two in more concise and human-readable JSON output (?pretty).
curl -X GET 'http://localhost:9200/ata/task/1?pretty'You will see the output in JSON format similar to the following.
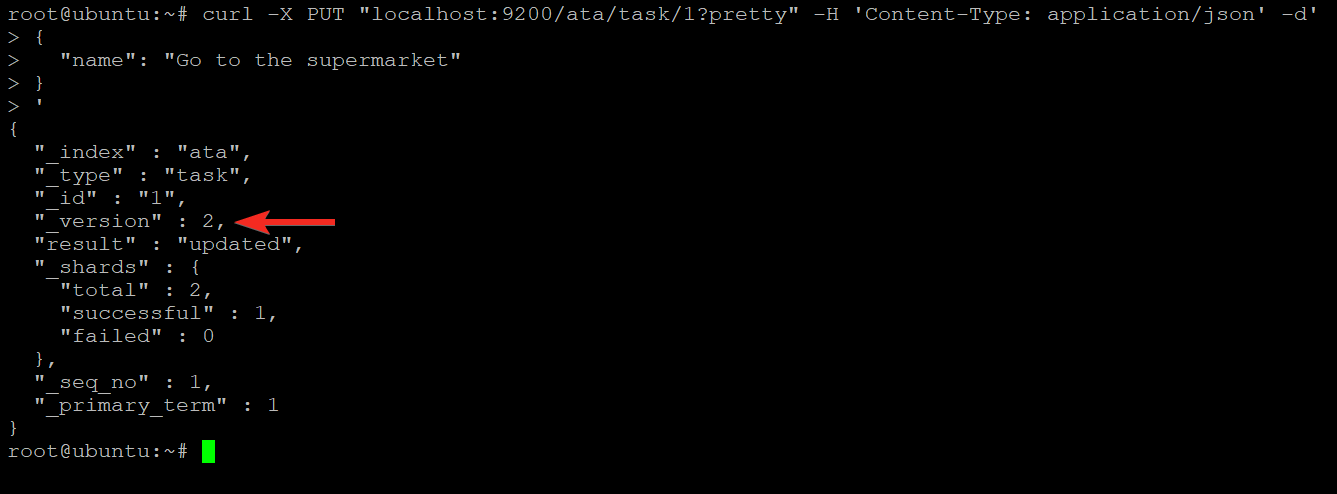
4. Now, run the command below to PUT a new value in the ata index with “Go to the supermarket”.
The PUT command replaces data in an existing document so long as you specify the same ID.
curl -X PUT "localhost:9200/ata/task/1?pretty" -H 'Content-Type: application/json' -d'
{
"name": "Go to the supermarket"
}
'
You can see below that this time the version number is 2. When you add a new document to an index, Elasticsearch sets the _version field to 1. When you update a document, Elasticsearch sets the _version field to 2.
The version number is incremented by one every time you update a document. This behavior lets you track the changes made to a document.
5. Run the command below to DELETE the ata index. Deleting unused indexes lets you save disk space.
This command deletes everything related to the specified unused index, such as its documents, shards, and metadata. So be careful before you use this command.
curl -X DELETE "localhost:9200/ata?pretty"
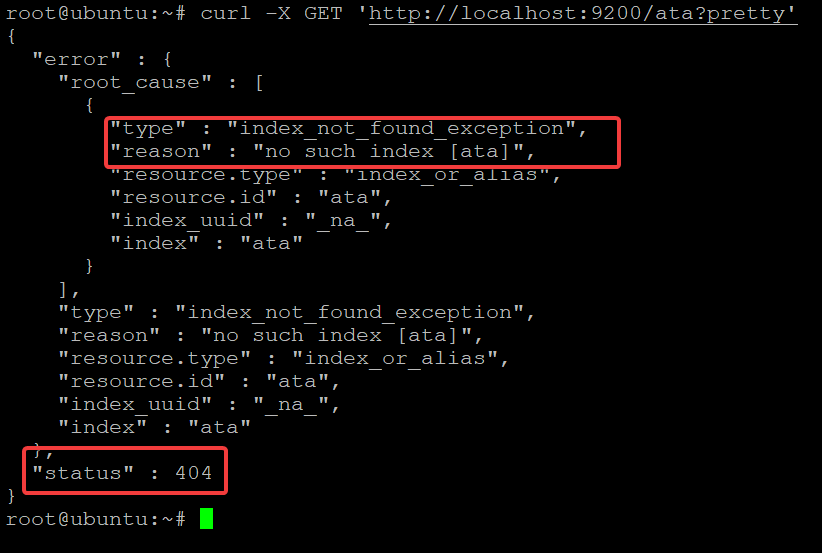
6. Finally, run the below command to check if the ata index is still available.
curl -X GET 'http://localhost:9200/ata?pretty'You’ll get a 404 “not found” message, as shown below, which indicates ata index has been deleted successfully.
Conclusion
In this article, you’ve learned how to install Elasticsearch on Ubuntu. You’ve added documents to an index, updated documents, and deleted unused indexes.
Elasticsearch is more than just a search engine that provides human-readable outputs in JSON and YAML format. Many data analysts, DevOps experts, and marketing professionals use Elasticsearch regularly.
Your Elasticsearch journey is just beginning. Why not start performing text analysis on the Star Wars movies to see what insights you can uncover? May the force be with you!


