


If you’re struggling with managing and maintaining software across your environment, you’re in for a treat. In this article, you’re going to learn how to install Chocolatey and get a handle on your software packages!
In this article, you’ll learn, hands-on, how to install Chocolatey, manage software and get a basic introduction to what makes this product tick.
Related: How to Create Your First Chocolatey Package
Prerequisites
This tutorial is going to be a walkthrough. If you plan to follow along, please be sure you have the following prerequisites fulfilled.
- Windows 10 – The tutorial will use Windows 10 1903.
- Windows PowerShell 5.1 (optional) – Although this isn’t technically required by Chocolatey, it is what all examples in this article will use.
For a full breakdown of all technical requirements, check out the Chocolatey Requirements page.
Installing Chocolatey
When getting started with Chocolatey, your first task will be downloading and installing the Chocolatey client. Technically, Chocolatey has a server component as well but for this article, you’ll be focusing on using the client to download, install and update software.
You can install Chocolatey in many different ways. In this article, you’re going to learn the most common way, using PowerShell.
For a detailed breakdown of installing the Chocolatey client in many different ways, check out the Chocolatey installation guide.
To install Chocolatey, the company provides a handy PowerShell script to execute on your system. Before you run the install script, you should first inspect it before downloading. You can find the script here.
Related: How to Run PowerShell as Administrator
With the PowerShell console open as administrator, download and execute the script all in one command.
The below code snippet:
- Ensures PowerShell can navigate the SSL certificate on the chocolatey.org server
- Downloads the script from https://chocolatey.org/install.ps1
- Runs the script once downloaded
- Adds the %ALLUSERSPROFILE%\chocolatey\bin folder to the PATH environment variable
[System.Net.ServicePointManager]::SecurityProtocol = 3072
Invoke-Expression ((New-Object System.Net.WebClient).DownloadString('https://chocolatey.org/install.ps1'))"
SET "PATH=%PATH%;%ALLUSERSPROFILE%\chocolatey\bin"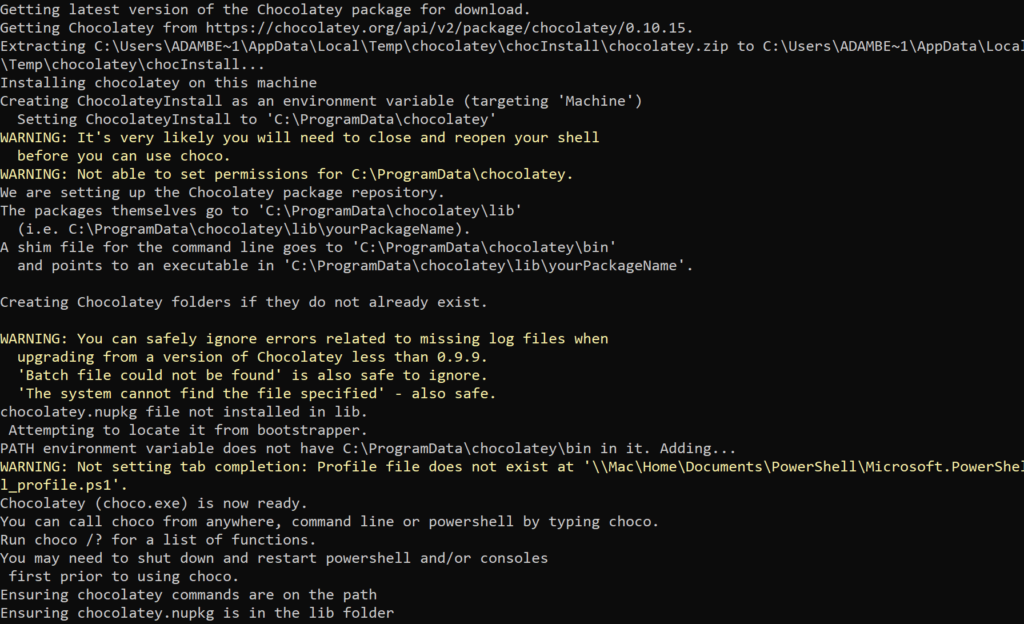
You may run into an error mentioning an execution policy. If so, your current execution policy may not allow script execution. To remedy this, be sure to relax your execution policy turning it to Unrestricted or RemoteSigned.
Verifying Installation
Once the PowerShell script has finished and you are returned back to the PowerShell console, confirm you can run the Chocolatey client called choco.exe.
When you run choco, you should see the installed version and some basic help information as shown below.
PS51> choco
Chocolatey v0.10.15
Please run 'choco -?' or 'choco <command> -?' for help menu.~~
Getting Help
One of the best things about the Chocolatey CLI client is its help system. The built-in help system does an excellent job of documenting all the functionality of Chocolatey.
To access the help system, provide the -? switch to the choco command as shown below.
You can see the Chocolatey client has various commands where you can perform many different functions to manage software.
PS51> choco -?
This is a listing of all of the different things you can pass to choco.

Commands

 * list - lists remote or local packages
 * find - searches remote or local packages (alias for search)
 * search - searches remote or local packages (alias for list)
 * info - retrieves package information. Shorthand for choco search pkgname --exact --verbose
 * install - installs packages from various sources
 * pin - suppress upgrades for a package
 * outdated - retrieves packages that are outdated. Similar to upgrade all --noop
 * upgrade - upgrades packages from various sources
 * uninstall - uninstalls a package
 * pack - packages up a nuspec to a compiled nupkg
 * push - pushes a compiled nupkg
 * new - generates files necessary for a chocolatey package from a template
 * sources - view and configure default sources (alias for source)
 * source - view and configure default sources
 * config - Retrieve and configure config file settings
 * feature - view and configure choco features
 * features - view and configure choco features (alias for feature)
 * setapikey - retrieves, saves or deletes an apikey for a particular source (alias for apikey)
 * apikey - retrieves, saves or deletes an apikey for a particular source
 * unpackself - have chocolatey set itself up
 * version - [DEPRECATED] will be removed in v1 - use `choco outdated` or `cup <pkg|all> -whatif` instead
 * update - [DEPRECATED] RESERVED for future use (you are looking for upgrade, these are not the droids you are looking for)


Please run chocolatey with `choco command -help` for specific help on
 each command.
If you’re ever stuck trying to figure out how to perform a specific action, check out the help system!
Finding Packages
Once you’ve got the Chocolatey client installed and running, it’s time to see what kind of packages are available to install. The client has three commands that allow you to do just that called list, search, and find. These commands scour a Chocolatey repository for available packages or to list packages on your machine.
Below you will find the breakdown and examples found in the help system.
PS51> choco list --help

List/Search Command

Chocolatey will perform a search for a package local or remote.

* choco list - lists remote or local packages
* choco search - searches remote or local packages (alias for list)
* choco find - searches remote or local packages (alias for search)

Usage:

choco search <filter> [<options/switches>]
choco list <filter> [<options/switches>]
clist <filter> [<options/switches>]

Popular Switch --localonly or -lo
Usage of -lo:

choco <search,list,find> --localonly
As an example, below is an example of enumerating all packages (list) installed on a local computer (-lo).
PS51> choco list -lo
Chocolatey v0.10.15
chocolatey 0.10.15
chocolatey-core.extension 1.3.3
GoogleChrome 77.0.3865.90
3 packages installed.
Inspecting Chocolatey Packages Before Downloading
Before you download a package, you should always understand what that package actually does. Luckily, you have the info command. This command finds details of packages located on a Chocolatey repository.
With choco info, you can find package attributes like package author, download count, checksum, source, and more.
Take a look at your options of running choco info below.
PS51> choco info --help

Info Command

Chocolatey will perform a search for a package local or remote and provide
detailed information about that package. This is a synonym for
`choco search <pkgname> --exact --detailed`.

* choco info pkgname - retrieves package information.
* Shorthand for choco search pkgname --exact --verbose
* Shorthand for choco search pkgname --exact --detailed


Usage:

choco info [<options/switches>]
For example, let’s say you need to install Google Chrome and you’ve noticed an available package called googlechrome. Run choco info googlechrome and notice what kind of information you can find.
PS51> choco info googlechrome
Chocolatey v0.10.15
GoogleChrome 77.0.3865.90 [Approved] Downloads cached for licensed users
Title: Google Chrome | Published: 9/18/2019
Package approved as a trusted package on Sep 18 2019 20:15:10.
Package testing status: Passing on Sep 18 2019 18:45:17.
Number of Downloads: 19851699 | Downloads for this version: 262131
Package url
Chocolatey Package Source: <https://github.com/chocolatey-community/chocolatey-coreteampackages/tree/master/automatic/googlechrome>
Package Checksum: 'v7bDDUTo21k31xqUW+1amzaEWjeOqsEgS3txYNRgRaO3Q7ZnkzYz4S69AxTFn4r0HUB5Wi7NHXZBag/OaJTPKA==' (SHA512)
Tags: google chrome web internet browser admin
Software Site: <https://www.google.com/chrome/browser/>
Software License: <https://www.google.it/intl/en/chrome/browser/privacy/eula_text.html>
Description: Chrome is a fast, simple, and secure web browser, built for the modern web.
Installing Packages
Enough getting information about packages. It’s time to actually get some software installed! To do so, use choco instal.
The choco install command is mighty and essential. If there is one command you should remember and become a pro at, it’s this one.
The choco install command installs a package or a list of packages you provide once you know what you need.
Run choco install --help to see what your options are.
PS51> choco install --help
 Install Command
 Installs a package or a list of packages
 Usage:
 choco install  [ ] []
     cinst  [ ] []
 Examples:
 choco install sysinternals
 choco install notepadplusplus googlechrome atom 7zip
 choco install notepadplusplus --force --force-dependencies
 choco install notepadplusplus googlechrome atom 7zip -dvfy
 choco install git -y --params="'/GitAndUnixToolsOnPath /NoAutoCrlf'"
 choco install git -y --params="'/GitAndUnixToolsOnPath /NoAutoCrlf'" --install-arguments="'/DIR=C:\git'"
     # Params are package parameters, passed to the package
     # Install args are installer arguments, appended to the silentArgs
     #  in the package for the installer itself
 choco install nodejs.install --version 0.10.35
 choco install git -s "'https://somewhere/out/there'"
 choco install git -s "'https://somewhere/protected'" -u user -p pass
Keeping Chocolatey Packages Updated
Once a package is installed, you will undoubtedly want to keep it up to date. This is a powerful feature of Chocolatey.
Once you have some packages installed, you will quickly find Chocolatey doesn’t just automatically keep packages updated in the background. The Chocolatey client doesn’t run as a service.
To update installed Chocolatey packages, you must invoke choco manually every time you need to upgrade. To do so, run the choco upgrade command along with the package you need to upgrade.
The upgrade command will install the package if the package doesn’t exist on the system.
Below you will find the breakdown and examples found in the help system.
PS51> choco upgrade --help
 Upgrade Command
 Upgrades a package or a list of packages. Some may prefer to use cup
  as a shortcut for choco upgrade. If you do not have a package
 installed, upgrade will install it.
 Usage:
 choco upgrade  [ ] []
 cup  [ ] []
 Examples:
 choco upgrade chocolatey
 choco upgrade notepadplusplus googlechrome atom 7zip
 choco upgrade notepadplusplus googlechrome atom 7zip -dvfy
 choco upgrade git -y --params="'/GitAndUnixToolsOnPath /NoAutoCrlf'"
 choco upgrade git -y --params="'/GitAndUnixToolsOnPath /NoAutoCrlf'" --install-args="'/DIR=C:\git'"
 Params are package parameters, passed to the package
 Install args are installer arguments, appended to the silentArgs
 in the package for the installer itself
 choco upgrade nodejs.install --version 0.10.35
 choco upgrade git -s "'https://somewhere/out/there'"
 choco upgrade git -s "'https://somewhere/protected'" -u user -p pass
 choco upgrade all
 choco upgrade all --except="'skype,conemu'"
You can upgrade all packages to the latest version by running
choco upgrade all.
Finding Local, Outdated Packages
What if you want to check if there is a new version of your package before you blindly run choco upgrade? You can use the outdated command. The outdated command scans through your installed packages and cross-references your designated package repository for potential package updates.
Take a look at what’s possible with choco outdated --help below.
PS51> choco outdated --help

Outdated Command

Returns a list of outdated packages.

* outdated - retrieves packages that are outdated. Similar to upgrade all --noop

Usage:

choco outdated [<options/switches>]

Examples:

choco outdated
choco outdated -s <https://somewhere/out/there>
choco outdated -s "'<https://somewhere/protected>'" -u user -p pass
For example, if you want to find all of the locally-installed packages that are out of date, you can do so using choco outdated.
PS51> choco outdated
Chocolatey v0.10.15
Outdated Packages
Output is package name | current version | available version | pinned?


Chocolatey has determined 0 package(s) are outdated.
Suppressing Package Updates
Keeping software up to date is definitely recommended but what if you have packages where you need to explicitly prevent that? Why would you want to do that?
One reason for suppressing updates would be to avoid update redundancy. For example, perhaps you may have just been looking to automate the initial install of a package. You don’t want to maintain the package’s entire software lifecycle.
Perhaps you need to make some exclusions when forcing Chocolatey to update all packages. In that case, you can pin packages.
When you run various Chocolatey commands, you will see a pinned attribute. For example, when running the outdated command, you can clearly see that attribute as shown below.
PS51> choco outdated
Chocolatey v0.10.15
Outdated Packages
Output is package name | current version | available version | pinned?
Below you will find the breakdown and examples found in the help system
PS51> choco pin --help

Pin Command

Pin a package to suppress upgrades.

This is especially helpful when running `choco upgrade` for all
 packages, as it will automatically skip those packages. Another
 alternative is `choco upgrade --except="pkg1,pk2"`.

Usage

	choco pin [list]|add|remove [<options/switches>]

Examples

	choco pin
	choco pin list
	choco pin add -n=git
	choco pin add -n=git --version 1.2.3
	choco pin remove --name git
* pin - suppress upgrades for a package
Uninstalling Chocolatey Packages
Finally, perhaps you’ve decided you no longer need software installed. Rather than manually going into Control Panel, finding the software, and removing it that way, use the choco uninstall command to make quick work of it.
The choco uninstall command removes one or many software packages all in one swoop.
Notice how to use the choco uninstall command via the help content below.
PS51> choco uninstall --help

Uninstall Command

Uninstalls a package or a list of packages.

Usage:

choco uninstall <pkg | all> [pkg2 pkgN] [options/switches]
cuninst <pkg | all> [pkg2 pkgN] [options/switches]

NOTE: `all` is a special package keyword that will allow you to
uninstall all packages.

Examples:

choco uninstall git
choco uninstall notepadplusplus googlechrome atom 7zip
choco uninstall notepadplusplus googlechrome atom 7zip -dv
choco uninstall ruby --version 1.8.7.37402
choco uninstall nodejs.install --all-versions
Playing it Safe Before Making Changes (choco whatif)
Automating software management can be a destructive task if not performed properly. Rather than making a lot of changes at once, it’d be smarter to first run a test to see what would have happened. Luckily, the Chocolatey client has a few parameters to do just that.
The WhatIf Switch
Every choco command has a switch called --whatif with aliases of --noop and --what-if. If these switches are used with a choco command, Chocolatey won’t actually perform the action but inform you what would have happened.
You can see an example below attempting to uninstall all packages on the local system but using the whatif switch to prevent actually doing anything.
PS51> choco uninstall all -whatif

Chocolatey v0.10.15
_ Chocolatey:ChocolateyUninstallCommand - Noop Mode _
Would have uninstalled chocolatey v0.10.15.
Would have uninstalled GoogleChrome v77.0.3865.90.
Would have uninstalled chocolatey-core.extension v1.3.3.
Confirming Actions
When you run choco install to install a package, you’re typically prompted to confirm if you want the installation process to continue. Choco also requires confirmation for additional packages that get called as a dependency for your initial package.
You can see below an example of how Chocolatey first prompts to install Firefox before actually performing the action.
PS51> choco install firefox
Chocolatey v0.10.15
Installing the following packages:
firefox
By installing you accept licenses for the packages.
Progress: Downloading Firefox 69.0.1... 100%

Firefox v69.0.1 [Approved]
firefox package files install completed. Performing other installation steps.
The package Firefox wants to run 'chocolateyInstall.ps1'.
Note: If you don't run this script, the installation will fail.
Note: To confirm automatically next time, use '-y' or consider:
choco feature enable -n allowGlobalConfirmation
Do you want to run the script?([Y]es/[A]ll - yes to all/[N]o/[P]rint):
The confirmation process is a failsafe, but it can slow you down. If you want the process to continue uninterrupted, add a switch of -y, --yes or --confirm at the end of your command.
Using the
-yswitch works well when running commands unattended such as in a scheduled task.
Next Steps
Now that you know how to install Chocolatey and use it at a high-level, where do you go from here? Now try to find a common piece of software you typically have to install and upgrade over and over again.
Try to build a script to manage that piece of software with Chocolatey to get your feet wet and begin learning more about this handy Windows package manager!


