


Have you ever had a brilliant idea in the wee hours of the morning but did not want to bombard your colleague’s inbox until a more reasonable hour? Why not learn how to schedule an email in Outlook? This email scheduling feature ensures your emails land at just the right time.
In this tutorial, you will learn how email scheduling works in Outlook so you can craft the perfect email, set the delivery time, and hit ‘Send’ with confidence.
Get ready to send emails with precision and panache!
Prerequisites
Before you embark on scheduling emails in Outlook, make sure you have the following in place:
- Microsoft Outlook installed on your computer.
- An email account configured in your Microsoft Outlook.
Configuring an Outlook Email’s Delivery Options
Now that you have the prerequisites, you can dive deeper into Outlook’s functionality in scheduling emails. Imagine having the power to control precisely when your important messages reach their recipients.
Becoming proficient in timing your emails for optimal impact involves adjusting the delivery settings as you send them.
To configure delivery options for your emails, follow these steps:
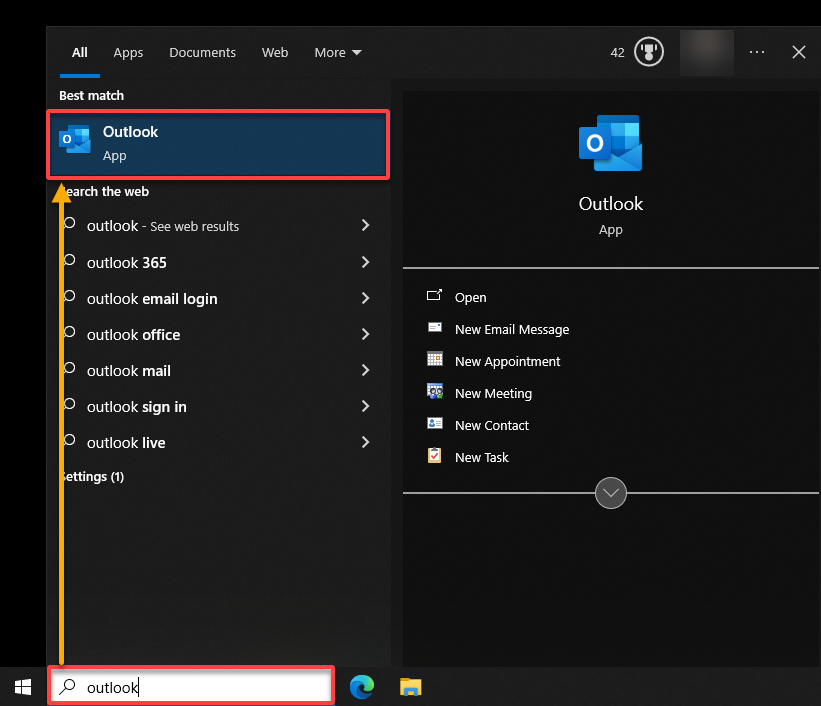
1. Launch Microsoft Outlook from your desktop or the Start menu.
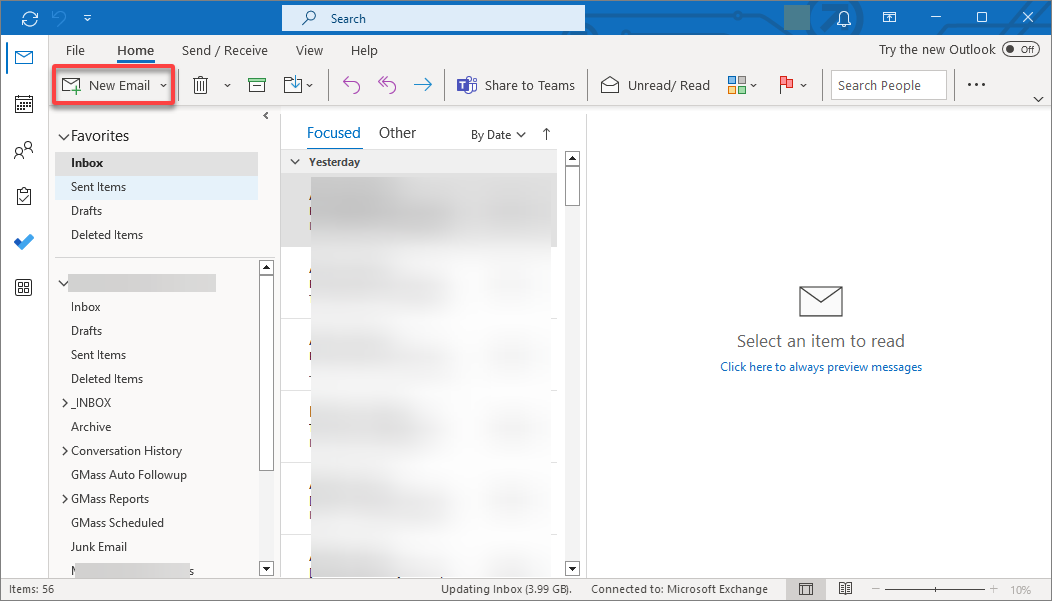
2. Once Outlook opens, click on the New Email button in the upper-left corner of the Outlook window, which opens a new email composition window (step three).
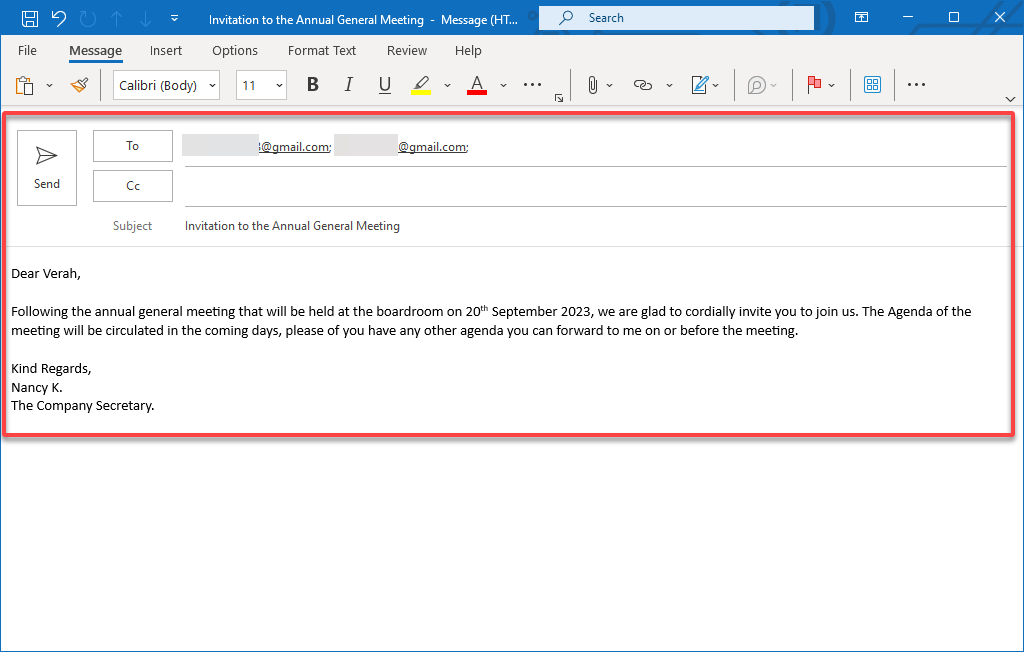
3. Next, compose an email with the following in the new email window:
- Input the recipient’s email address in the To field. You can also enter multiple email addresses separated by a semicolon ( ; ) if you wish to send the email to multiple recipients.
- Provide a relevant and descriptive email subject in the Subject field. A well-crafted subject line helps recipients understand the purpose of your email at a glance.
- Compose the body of your email.
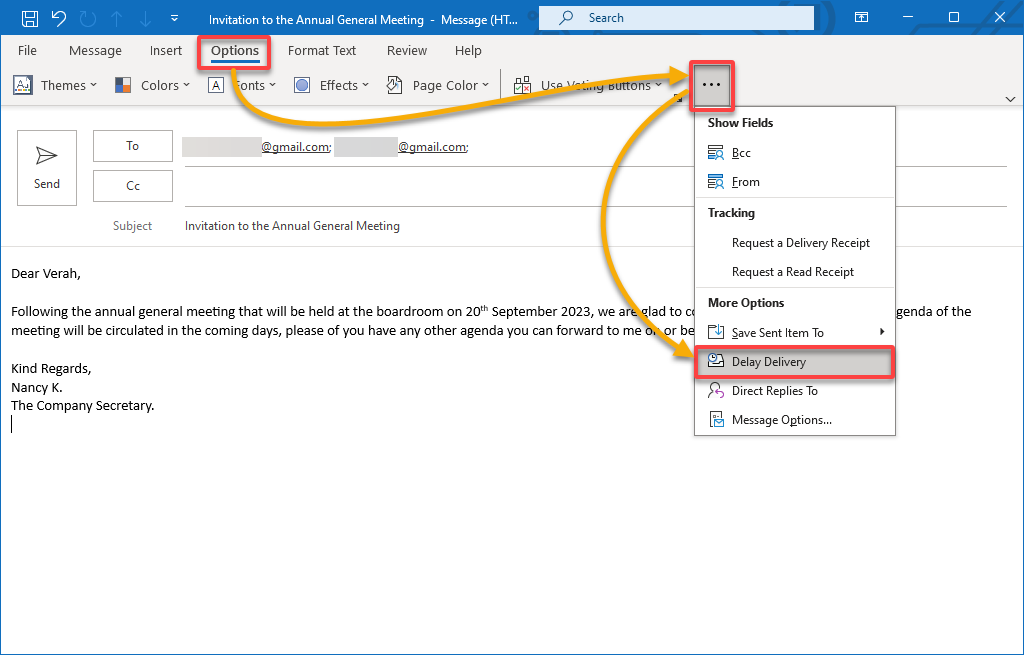
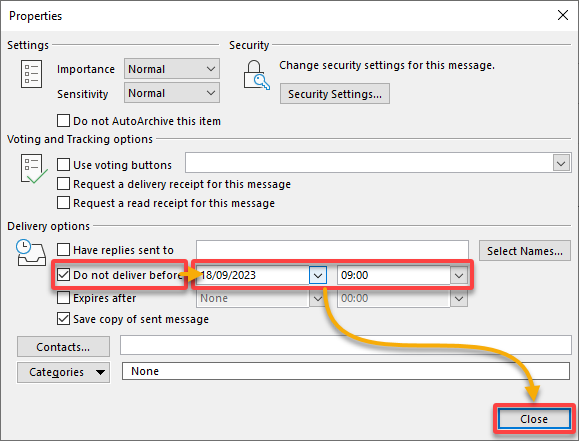
4. Now, navigate to the Options tab in the email composition window, click the ellipsis icon, and choose Delay Delivery to access the email’s properties dialog box (step five).
5. In the Properties dialog box, configure your email’s delivery options as follows:
- Under the Delivery options section, tick the Do not deliver before checkbox to enable delaying email delivery.
- Specify your email’s delivery date and time to ensure it arrives in the recipient’s inbox opportunely.
Once configured, click Close to save your changes.
6. Review your email one final time to ensure everything is accurate and complete. Give your email a final polish, like adding a cherry on top of a cake, and confidently hit that Send button.
💡 If you have accidentally hit send too soon, Do not fret! In Outlook, you still have the option to recall an email.
Kudos! You have skillfully set up an email schedule in Outlook, snugly tucked away in your Outlook outbox. Your email is now patiently waiting for the designated delivery time when it will gracefully depart automatically.

💡 If you send tons of sensitive emails with Outlook, consider email encryption with Office 365. Because sometimes even emails need a little ‘cloak and dagger’ action!
Crafting a Rule for Delaying All Emails
Delivery options work great to delay email deliveries, but what if you forgot to configure any of them? No worries! By creating a rule, Outlook lets you delay the delivery of all your outgoing emails. Think of this feature as your email’s ‘time-out’ corner — a moment to consider its life choices before heading out into the world.
But jokes aside, this feature can be a game-changer for ensuring every message is right before it leaves your inbox. A small step that can make a big difference in maintaining clear and effective communication.
To create a rule to delay all emails, carry out these steps:
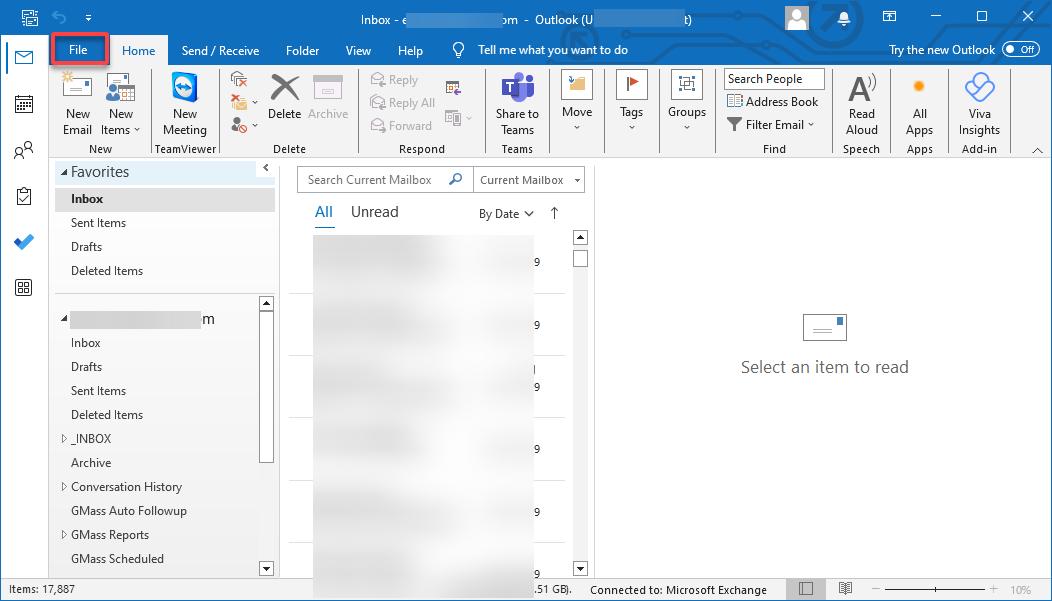
1. On Outlook, navigate to the File tab (upper-left) to view the Account Information page (step two).
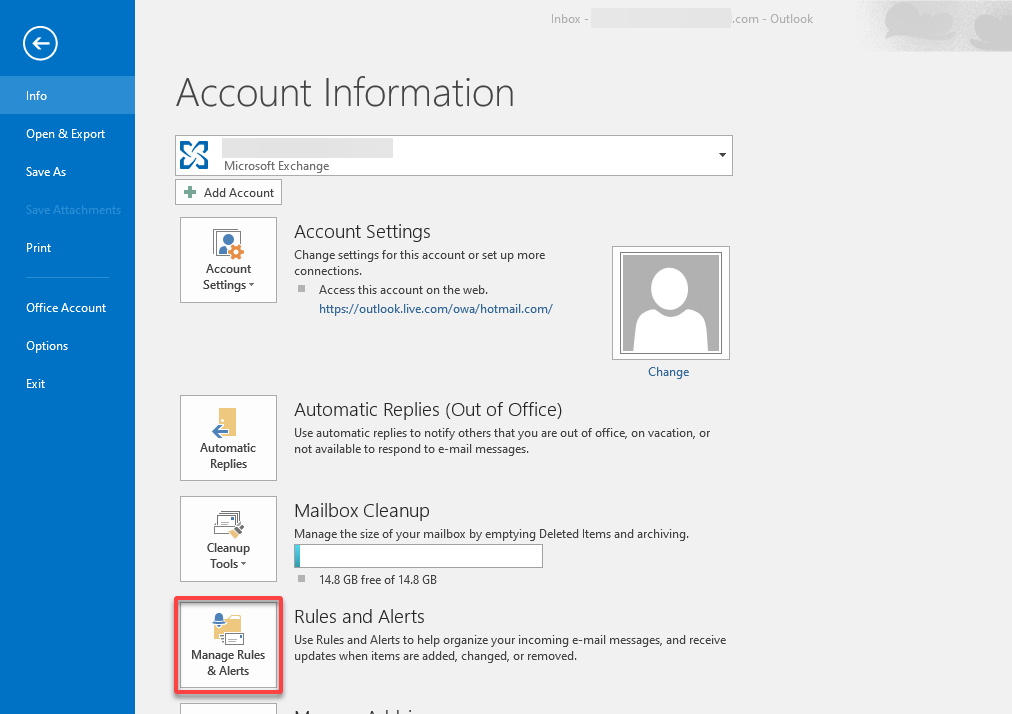
2. Next, click Manage Rules & Alerts to access all rules and alerts for your Outlook emails.
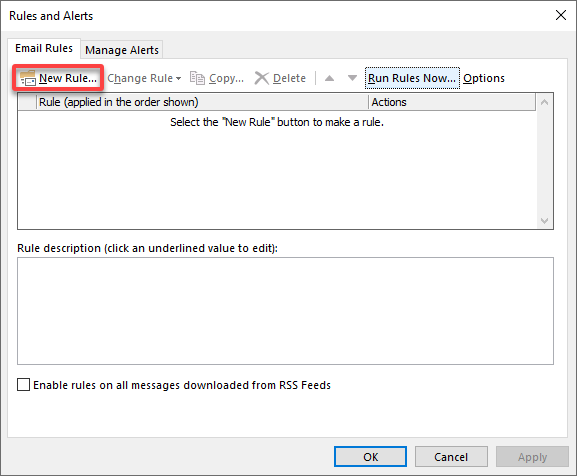
3. In the Rules and Alerts dialog box, click the New Rule button under the E-mail Rules tab. The Rules Wizard (step four) opens, where you can configure a new rule.
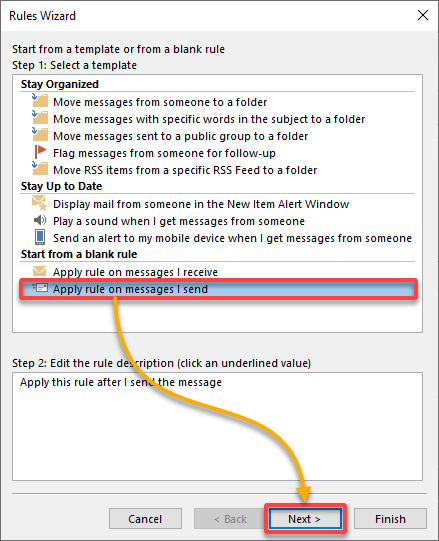
4. Now, choose the Apply rule on messages I send option under the Start from a blank rule section, and click Next.
This option lets you create a blank rule that enables you to set specific criteria or actions for emails you send, creating a safety net.
With this option, you can set rules that allow you to double-check your message before it takes flight. Think of this scenario as having a friend who taps you on the shoulder and says, “Hey, are you sure about this?”
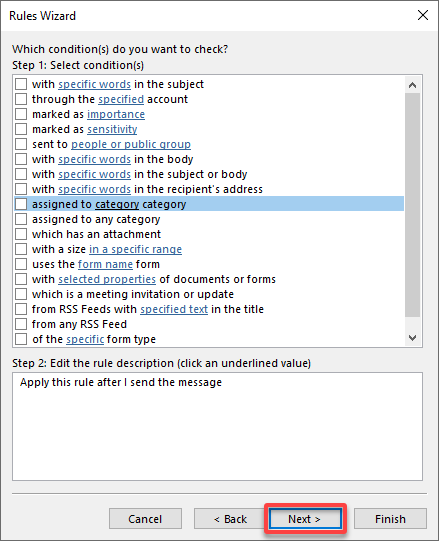
5. Leave the conditions in Step 1: Select conditions (s) blank, and click Next.
Leaving the conditions blank is like giving all your outgoing emails a universal pass. Like having a default setting for your emails, regardless of what is in your email, this rule applies.
This approach can save you time and effort, as you will not have to select conditions for each rule manually. But remember to use this approach judiciously, as it can lead to unintended consequences if not carefully considered.
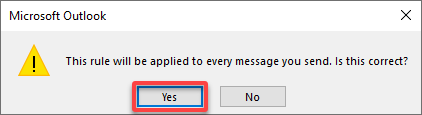
6. When prompted, click Yes, as shown below, to confirm applying the rule to all emails.
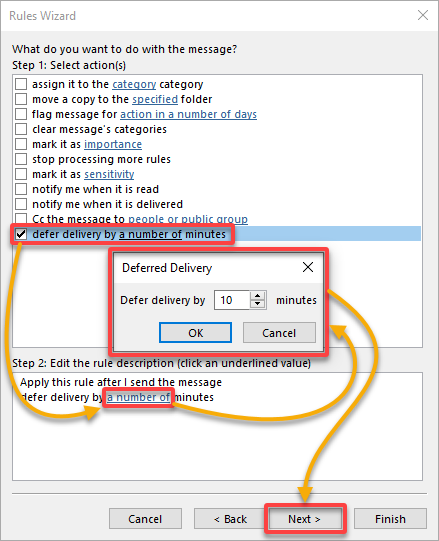
7. Next, select the actions the rule will take as you send an email. For this tutorial, configure the actions with the following:
- Step 1: Select action(s) – Tick the defer delivery by a number of minutes box.
This action gives you a little extra moment to ensure everything is correct before your email is sent off. - Step 2: Edit the rule description – Click the a number of hyperlink, and choose how long you wish to defer the delivery (in minutes).
After deferring delivery, click Next to save the changes and continue
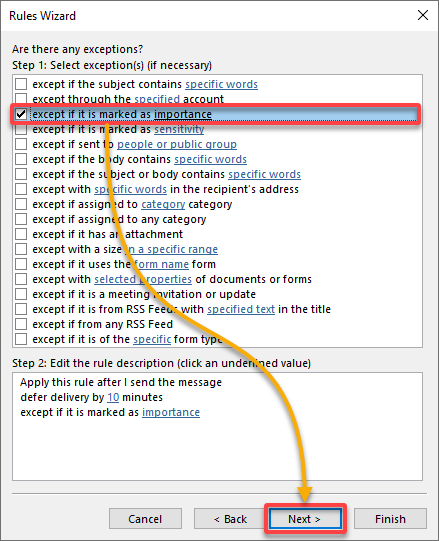
8. Configure any exceptions, such as not delaying the message if it is marked as importance, and click Next.
While you can skip this part, as it is optional, taking a moment here can save you from potential hiccups.
When configuring exceptions, you are customizing how this rule behaves. On that note, if there are specific conditions you want to exempt from this rule, this place is where you can set them up.
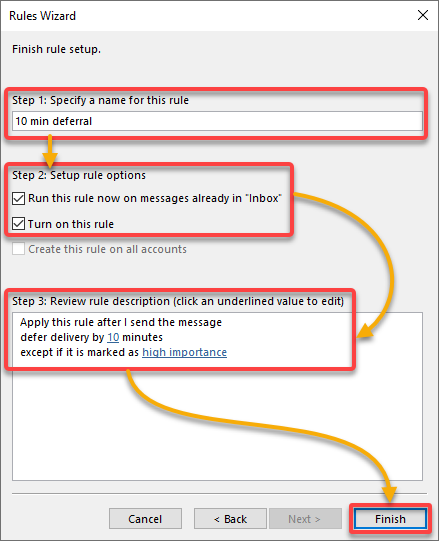
9. Finish the rule setup as follows:
- Step 1 – Provide a descriptive rule name (i.e., 10 min deferral).
- Step 2 – Set up some options on how you wish to run the rule.
- Step 3 – Review your rule description, and click Finish to finalize creating the new rule.
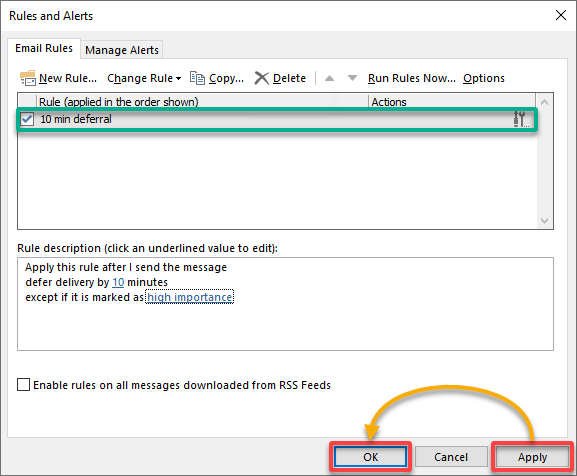
10. Finally, click Apply and OK in the Rules and Alerts dialog box to save the rule.
Well done! Going forward, your outgoing emails will wait for the designated number of minutes before being sent out. Unless, of course, you disable or delete this rule.
💡 If you ever have to re-hydrate your mailbox after a computer replacement or OS reinstall or move from one mail system to another, having an Outlook PST file is a lifesaver. A PST file contains all your email rules, ready for easy import, so you will not need to go through the hassle of manually reconfiguring them again.
Conclusion
You have just learned how to schedule an email in Outlook and unlocked a powerful time-saving feature in your Outlook arsenal. Through this tutorial, you have mastered the art of configuring delivery options and crafting rules that allow you to delay sending messages.
Now, you can confidently enhance your productivity and communication efficiency and ensure your emails reach their recipients at just the right moment. But don’t stop here! Why not dive into Outlook integrations with other software and services?
Discover the magic of seamlessly integrating Outlook with your task management app (like Microsoft To Do), note-taking tool (OneNote), or project management platform (Microsoft Planner). Watch as your workflow gets a turbo boost!


