


Accidentally hit the send button? It can happen to the best of us. In those frantic moments, Outlook’s Email Recall feature can be a lifesaver. This comprehensive guide will walk you through how to recall email in outlook, as well as the necessary conditions for a successful recall.
Ready to undo that email mistake? Let’s go!
What You Need to Recall Email in Outlook
Before we get into the steps, let’s ensure you have the following prerequisites to proceed:
- A Windows PC – Suitable for Windows 10 and Windows 7+.
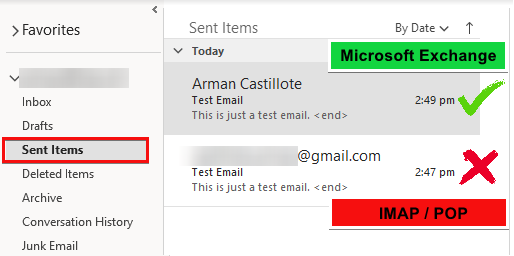
- Both sender and recipients should be on an Office 365 or a Microsoft Exchange account within the same organization and Exchange Server.
- Outlook 2007 or later versions.
Step-by-Step Guide to Recall Email in Outlook
If you’ve accidentally sent an inappropriate or incorrect email, the first thing you think is how to recall email in Outlook. Good thing is there is the Outlook Email Recall feature that can help you rectify the situation. Follow these steps:
1. Open Outlook.
2. Go to your Sent Items folder and select the email you wish to recall. Make sure it meets the criteria for a successful recall.
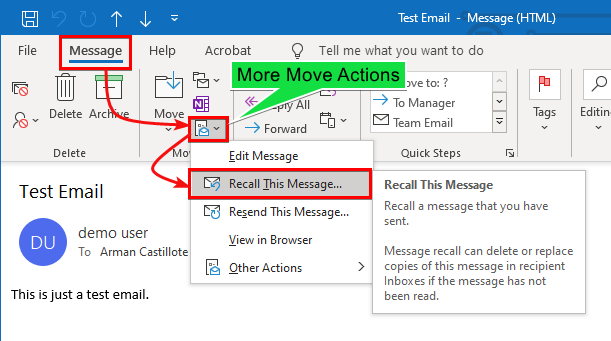
3. Click on the Message tab, then navigate to the Move section. Click more move actions and select Recall this Message.
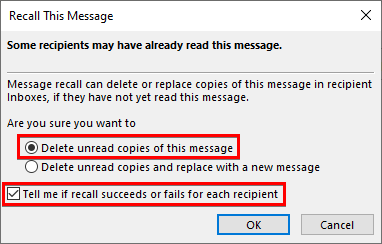
4. Choose the type of recall action you want to execute and click OK.
- Delete unread copies of this message – Removes the email from the recipient’s inbox if unread.
- Replace with a new message – Deletes the original and lets you send a new message.
- Notify me of the recall outcome – Sends you a success or failure notification.
How to Verify Your Email Recall Success
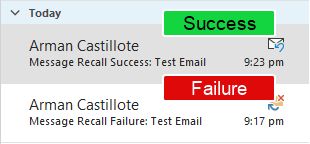
To confirm whether the recall email in outlook is successful, look for the recall status notification in your Inbox if you selected the “Notify me of the recall outcome” option.
Reasons Why Email Recall Might Fail
Recalling an email in Outlook isn’t foolproof. Various factors such as the recipient’s settings, email read status, and more can affect the recall outcome. Let’s discuss these potential pitfalls.
Email is Already Read
If the recipient has already read the email, or if it’s sent to a public folder and marked as read, the recall will fail.
Disabled ‘Automatically Process Requests’
If the recipient has disabled the ‘Automatically process requests and responses to meeting requests and polls’ feature, the recall email in outlook will be unsuccessful.
Email Moved from Inbox
If the email has been moved from the recipient’s Inbox, either manually or through a rule, the recall will not work.
Email Protected with AIP
If the email is protected by Azure Information Protection, the recall will be unsuccessful.
How to Recall an Email in Outlook.com
If you’re using Outlook.com, the Email Recall feature is not available. However, you can use the ‘Undo Send’ feature to achieve a similar outcome. Here’s how:
1. Log in to Outlook.com.
2. Navigate to Outlook settings by clicking the gear icon. Select ‘View all Outlook settings’.
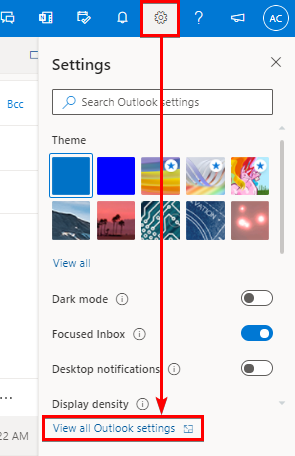
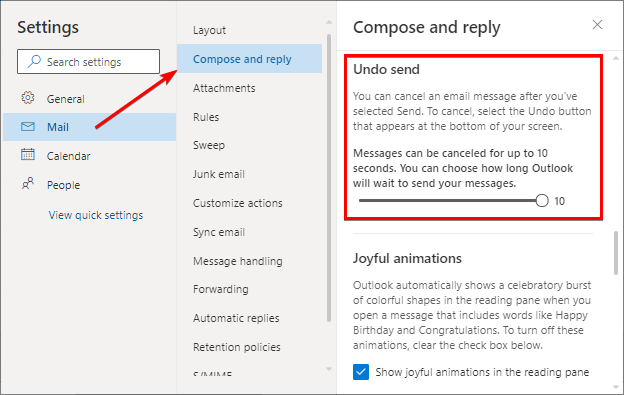
3. Go to ‘Mail’ -> ‘Compose and reply’. Adjust the ‘Undo send’ slider to your preferred time (max 10 seconds).
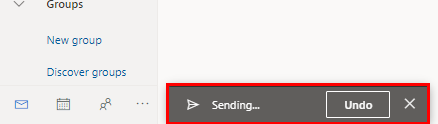
4. After sending an email, click ‘Undo’ to revert the sending process.
One of the best aspects of the “Undo” feature is that it’s incredibly straightforward to use. Once you have sent an email, you have a limited window—usually a few seconds to a minute—to click the ‘Undo’ button and stop the email from reaching its destination. This feature can be a real boon for anyone who often finds themselves hastily sending messages, only to regret it seconds later.
Using Undo Feature
Using the “Undo” feature is as easy as clicking a button. However, it’s essential to be swift and focused when using it. You’ll only have a limited amount of time to change your mind and click that ‘Undo’ button, so it’s advisable to stay alert right after hitting the ‘Send’ button. If you’re someone who finds themselves multi-tasking and juggling different responsibilities, it’s easy to get distracted and miss this short time frame, leaving your email to be sent as originally written.
Additional Considerations: Security and Privacy
Another critical factor to keep in mind when using the “Undo” or “Recall” features is the question of security and privacy. Suppose you’re sending sensitive information that you later decide shouldn’t be sent. In that case, the ‘Undo’ feature can give you that brief moment of reprieve to halt the email process. However, it’s crucial to remember that the ‘Undo’ option isn’t 100% foolproof, and sometimes network delays or recipient settings may still allow the email to be delivered.
If you’re dealing with highly sensitive information, it may be wise to consider additional layers of security, like encryption or multi-factor authentication, to protect your data. Always think twice before hitting the ‘Send’ button, especially when it involves confidential or sensitive material.
Final Thoughts
To be able to recall email in Outlook can be a lifesaver, but it’s not infallible. Knowing the prerequisites and limitations can help you make the most out of this feature. Will you use the email recall feature for your next “Oops!” moment?


