


If you’ve accidentally removed an Active Directory user, computer, or OU, did you know you can get it back? If enabled, the Active Directory recycle bin can help you recover that AD object.
Not a reader? Watch this related video tutorial!In this article, you’re going to learn how to enable and restore objects in no time with the Active Directory recycle bin!
If you need a fully-featured service to easily backup and restore Active Directory objects and a whole lot more, check out Veeam Backup & Replication.
How Does the Recycle Bin in Active Directory Work?
When you enable the recycle bin, it tells AD not to remove objects immediately from the AD database. There are two stages that occur when you remove an AD object.
Logically Deleted Objects
The moment you remove an AD object, you can consider that object “logically” deleted. When an object is “logically” deleted, it doesn’t actually get removed from the AD database. Instead, it’s simply hidden and moved to the CN=Deleted Objects container and the attribute isDeleted is set to TRUE on the object.
The amount of time that a logically deleted object can be recovered is set by the
msDS-deletedObjectLifetimeattribute. The default value is the same number of days as the Tombstone Lifetime which defaults to 180 days.
Tombstone Recycling
Once the logically deleted object exceeds the deleted object lifetime defined by the msDS-deletedObjectLifetime attribute, the object is considered tombstoned. At this point, the object is not recoverable.
After the msDS-deletedObjectLifetime time has been exceeded, the isRecycled attribute is set to TRUE and the isDeleted attribute remains TRUE. The tombstone lifetime then begins with a default of 180 days.
Once the AD object exceeds the tombstone lifetime, the object is then physically deleted from the database via garbage collection.
Enabling the Recycle Bin with ADAC
By default, the AD recycle bin isn’t enabled. To use this handy feature, you must manually enable it. Don’t forget until it’s too late!
To enable the recycle bin:
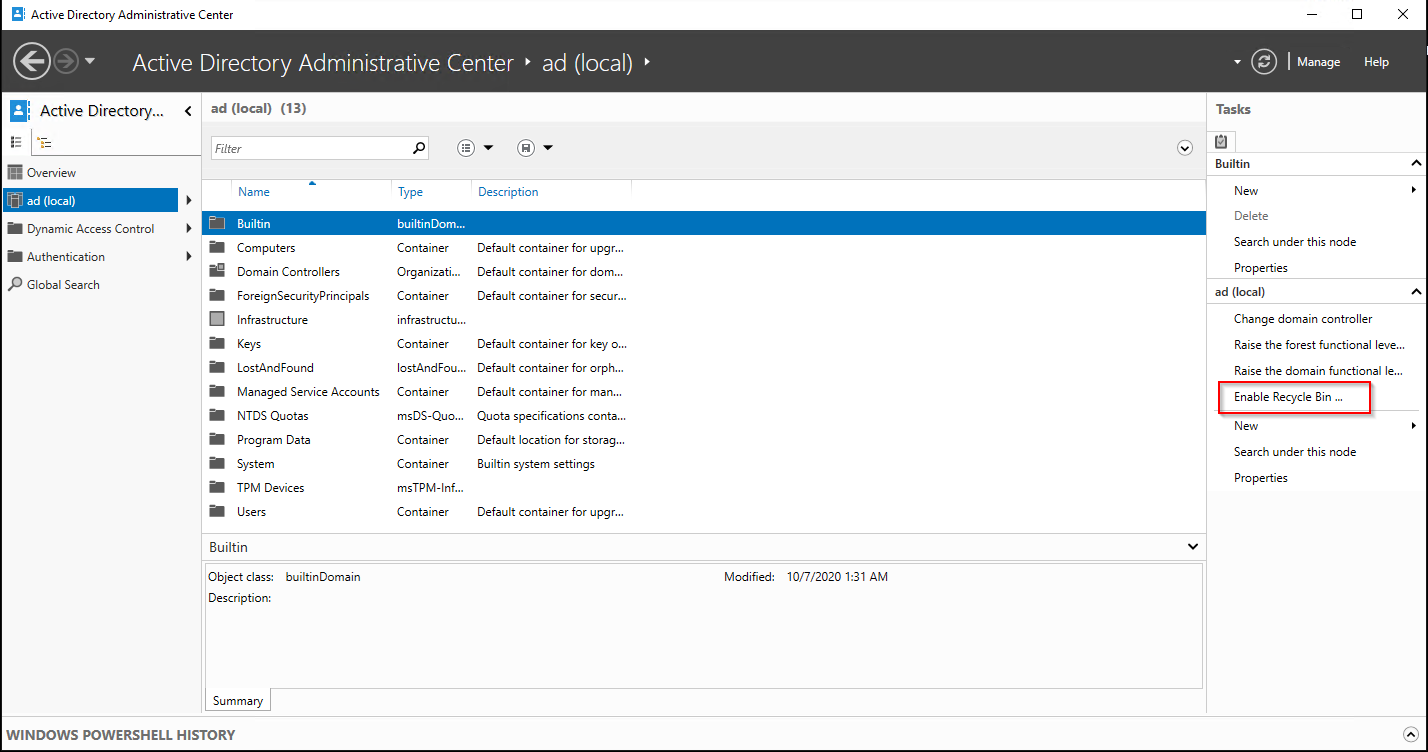
- Navigate to the Active Directory Administrative Center (ADAC) either on your domain-joined workstation or on a domain controller.
- Click on the domain located on the left-hand side and find the Tasks menu on the right-hand side.
- Click on the Enable Recycle Bin option to enable the recycle bin as shown below.
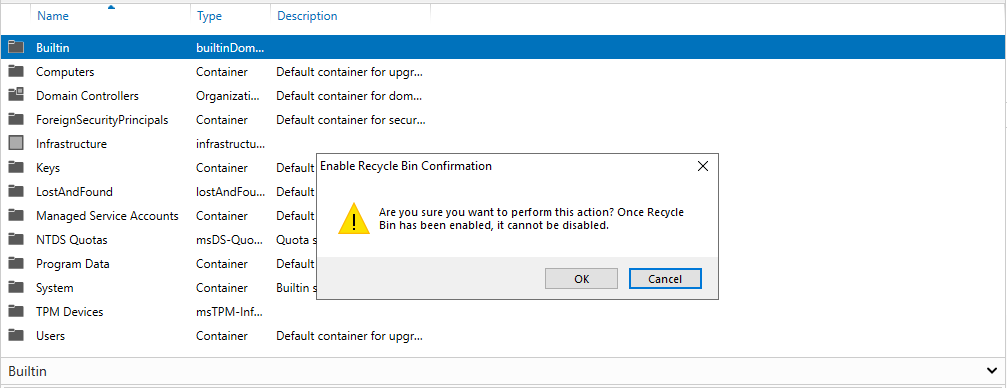
ADAC will then prompt with a confirmation to enable the recycle bin.
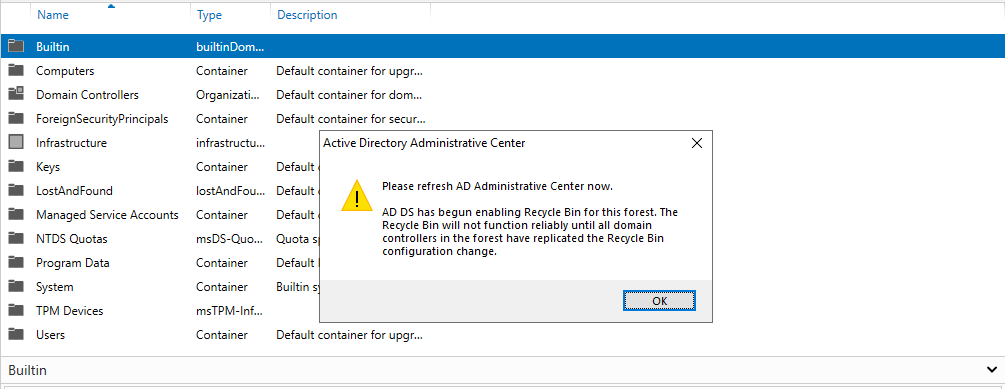
Depending on how large your domain is, it may take some time to propagate the settings.
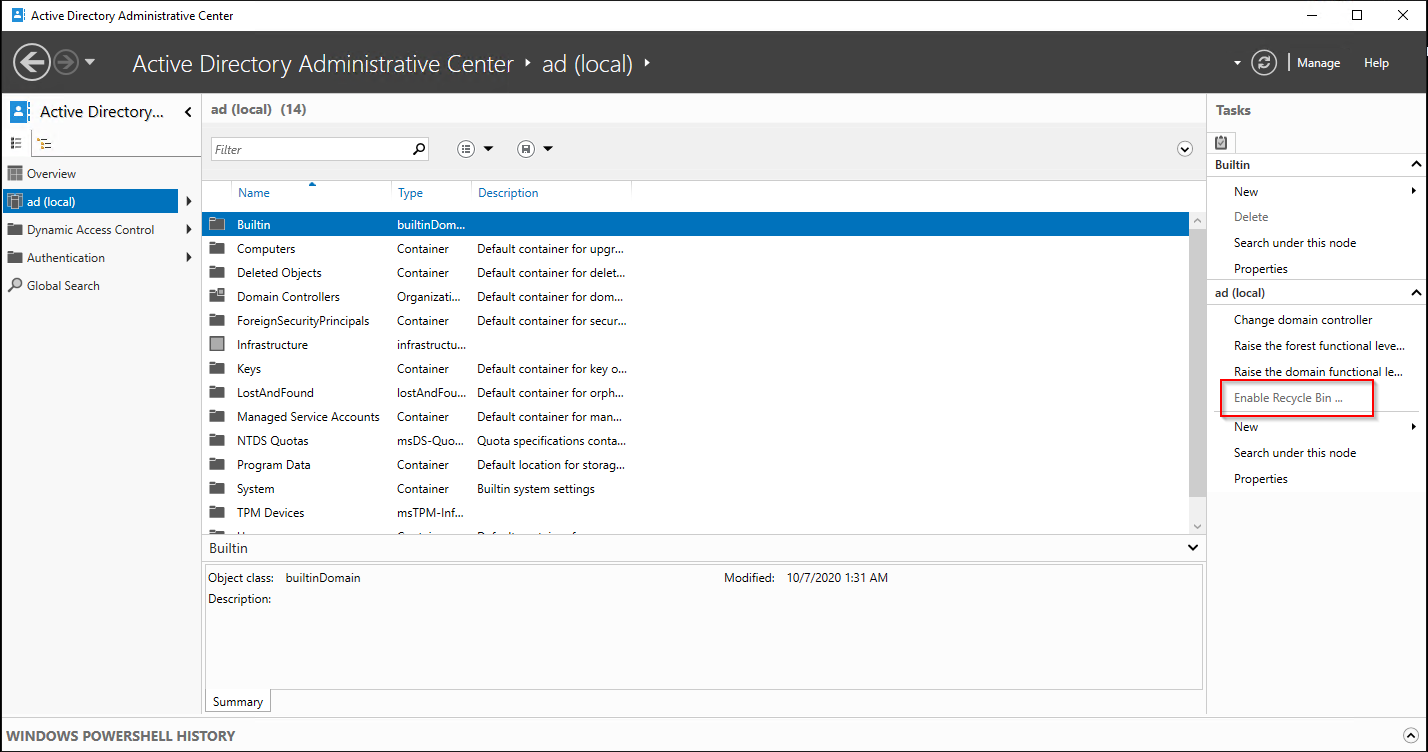
After a refresh, you should see that the Enable Recycle Bin option is now grayed out.
Enabling the Active Directory Recycle Bin with PowerShell
If, for some reason, you need to automate enabling the recycle bin, you can always do so with PowerShell and the Enable-ADOptionalFeature cmdlet.
Below is a code snippet you can use to enable the recycle bin while in PowerShell. The example below is enabling the recycling bin at the forest level for the ad.lc-test.local forest.
$Params = @{
  "Identity" = 'Recycle Bin Feature'
  "Scope"    = 'ForestOrConfigurationSet'
  "Target"   = 'ad.lc-test.local'
}

Enable-ADOptionalFeature @Params
Recovering Objects with the Active Directory Recycle Bin (ADAC)
Once you’ve enabled the recycle bin, you can now take advantage of it! Let’s first start by using ADAC.
After you’ve removed an object but before the tombstone lifetime expires:
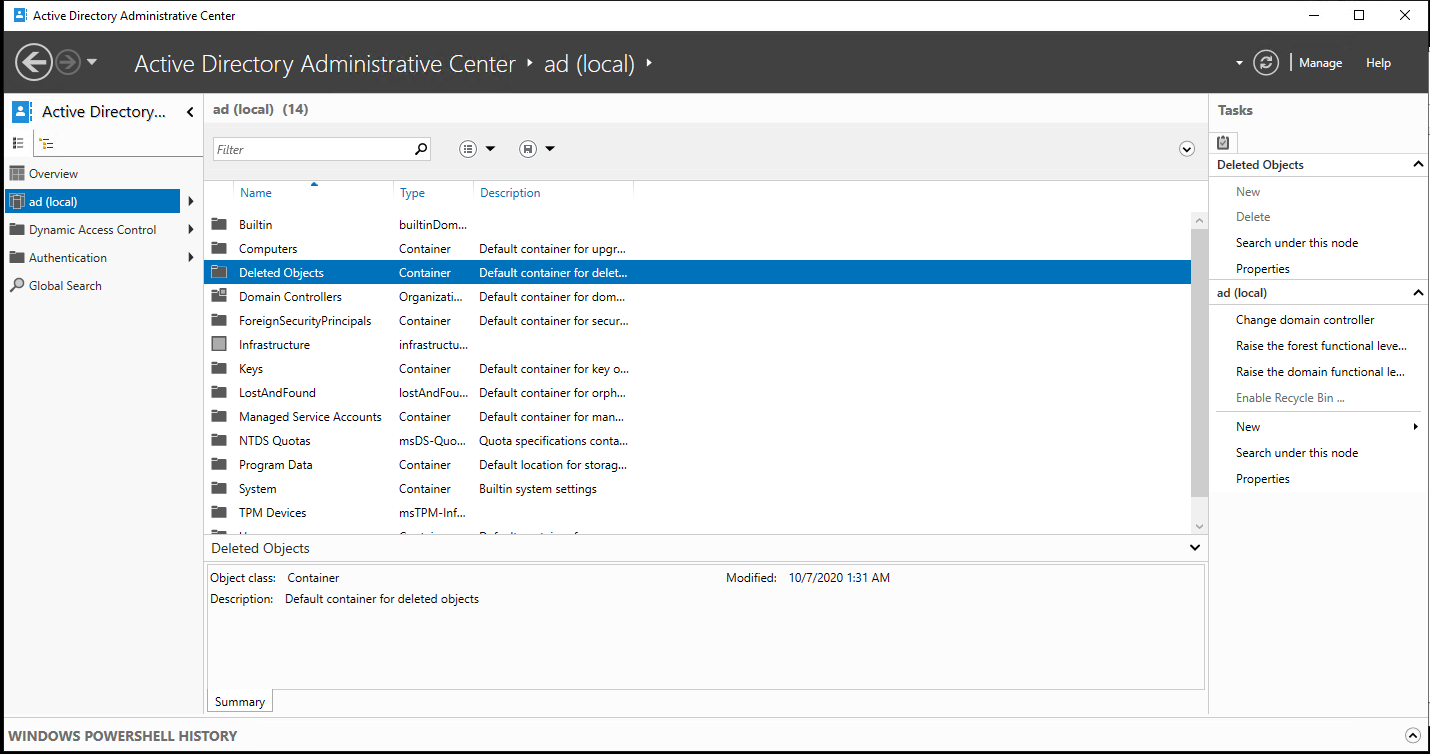
- Navigate to the Deleted Objects container in ADAC. This container holds all of the deleted Active Directory objects.
2. Next, locate the object to restore. In this case, we are looking for the TestUser2 object. On the right-hand Tasks menu, there are four options.
- Restore – Restore the object to its original organizational unit (OU).
- Restore To… – Instead of restoring the object to the original location, choose a different organizational unit to restore the object to.
- Locate Parent – This option will take you directly to the organizational unit that the object was contained within.
- Properties – View very limited properties such as Modified, Created, Object Class, Canonical Name, or Update Sequence Numbers (USN).
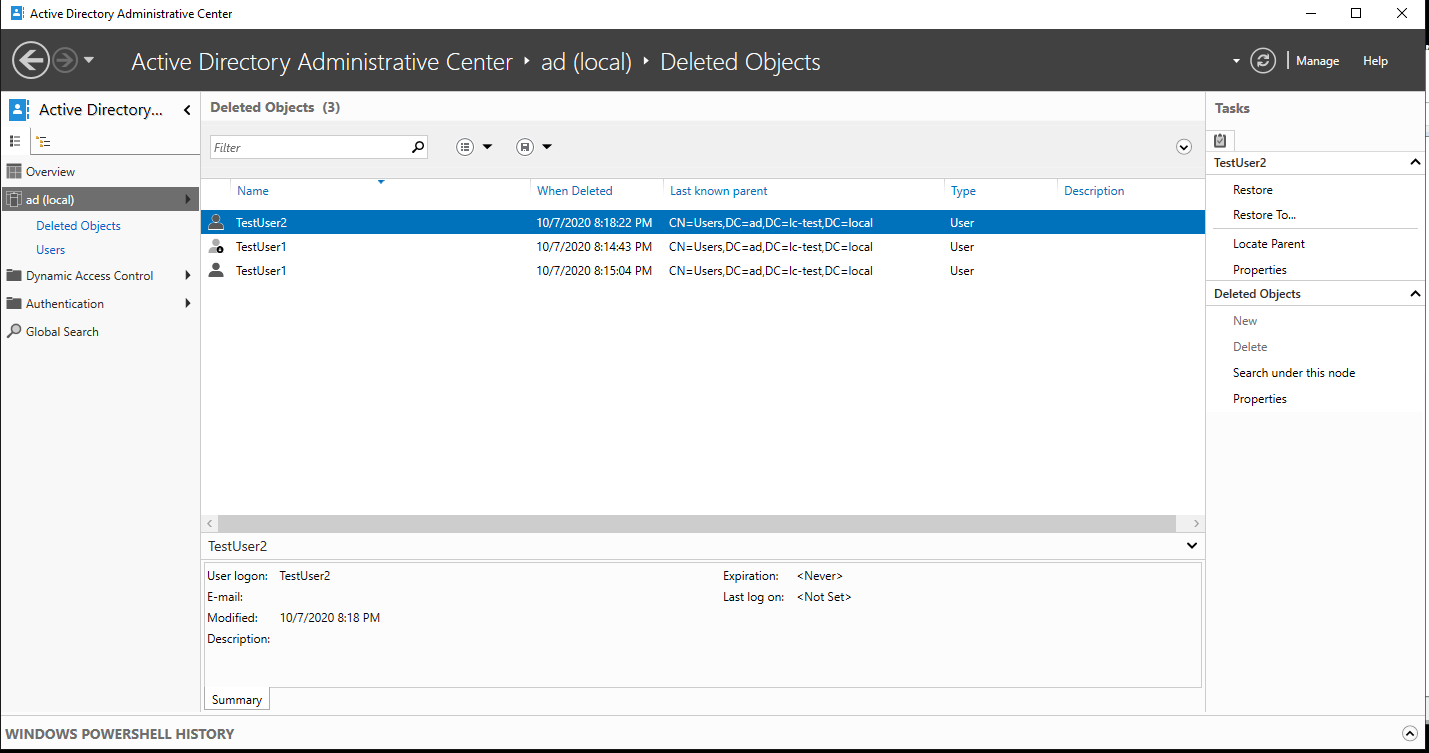
In this example, we will restore the object to its original organizational unit located in the Users containers.
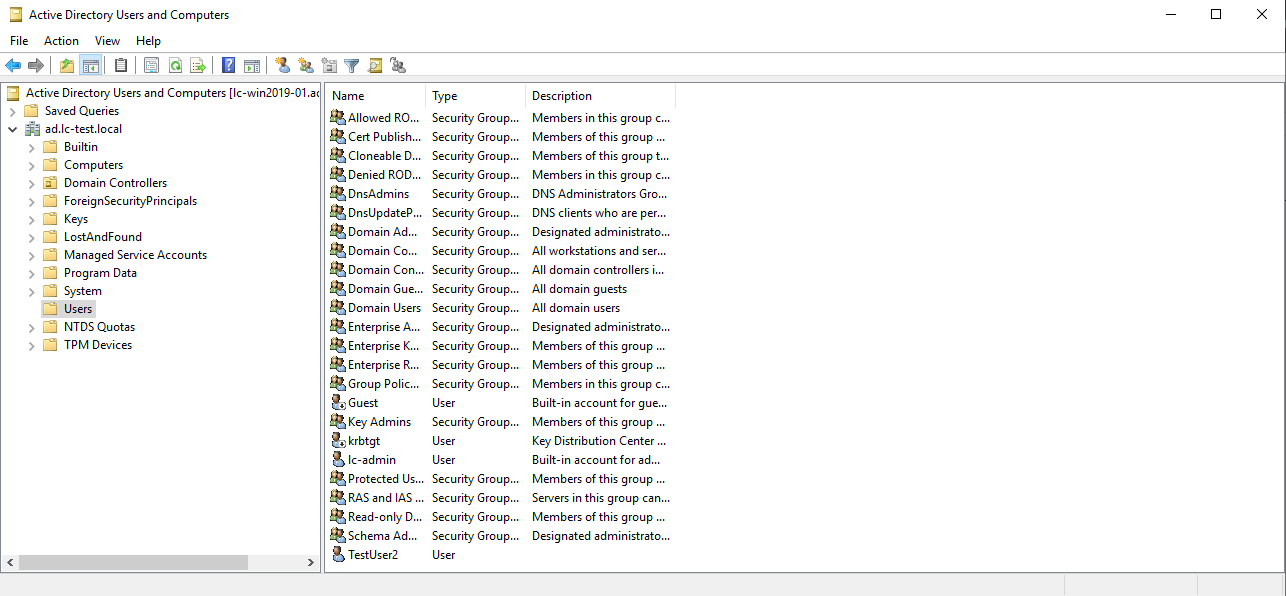
3. Clicking on the Restore button and as you can see below the object is now back under the Users OU.
Recovering Objects with the Active Directory Recycle Bin (PowerShell)
As useful as that technique, it’s often even easier and more scriptable using PowerShell to do the same tasks as done under the GUI. To restore an AD object with PowerShell:
- On a domain-joined computer or on a domain controller, open up PowerShell and find a deleted object. Ensure you have the ActiveDirectory module installed.
Related: How to Install the Active Directory Module
2. Locate the objects to delete with the Get-ADObject command.
Related: Get-ADObject: Reporting on Active Directory with PowerShell
You can find the object a few different ways but always use the IncludeDeletedObjects parameter. This parameter is necessary to find all of the objects in the Deleted Objects container.
If you run Get-ADObject by itself using a broad filter like -Filter *, you will see a ton of unnecessary results. To target only those results that should be in the recycle bin you can filter down the objects like so.
Related: Learning Active Directory and LDAP Filters in PowerShell
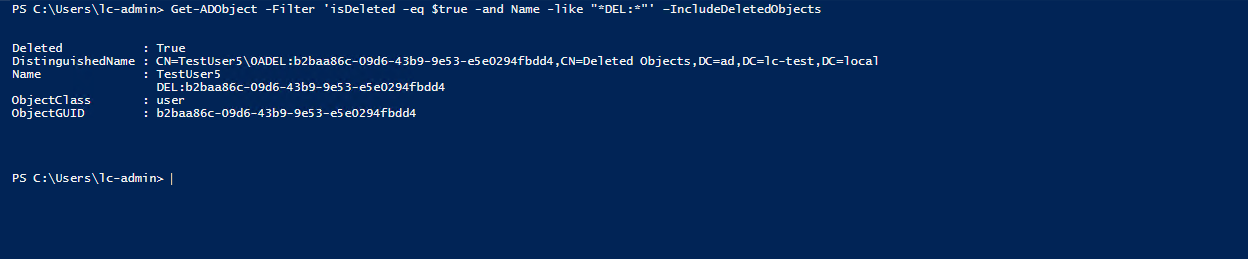
Instead, craft a filter to find all objects with an isDeleted attribute set to true with an account name containing the string *DEL:*. This filter should only returned deleted objects.
Get-ADObject -Filter 'isDeleted -eq $true -and Name -like "*DEL:*"' –IncludeDeletedObjects
Once you’ve found the objects with Get-ADObject, you can now pipe those objects to the Restore-ADObject command.
Get-ADObject -Filter 'isDeleted -eq $true -and Name -like "*DEL:*"' –IncludeDeletedObjects | Restore-ADObjectOnce the restore has (hopefully) occurred, you should then verify the object is back. To do so, run the Get-ADObject command again and confirm you no longer see the object returned. If not, you’re good to go!
You can also optionally run Get-ADUser or maybe Get-ADComputer to then ensure the object does show up.
Get-ADObject -Filter 'isDeleted -eq $true -and Name -like "*DEL:*"' –IncludeDeletedObjects

Get-ADUser -Identity 'TestUser5'
Emptying the Active Directory Recycle Bin
If you’d like to remove all of the recycled AD objects, you can do so with PowerShell. Find all of the deleted objects as done before and pipe them to the Remove-ADObject command as shown below.
In the example below, the Confirm parameter is set to false. Using this parameter will immediately delete each object without any confirmation!
Get-ADObject -Filter 'isDeleted -eq $true -and Name -like "*DEL:*"' -IncludeDeletedObjects | Remove-ADObject -Confirm:$falseChanging the Tombstone Lifetime
By default, the tombstone lifetime of the Active Directory recycle bin is 180 days. But maybe you’d like to change that. Again, using PowerShell, you can make it happen.
- First, find the existing lifetime to ensure it’s not already set as required using the code snippet below. The value is stored in the tombstoneLifetime AD attribute.
$ADNamingContext = (Get-ADRootDSE).configurationNamingContext

$Params = @{
  "Identity"   = "CN=Directory Service,CN=Windows NT,CN=Services,$ADNamingContext"
  "Partition"  = $ADNamingContext
  "Properties" = '*'
}

Get-ADObject @Params | Select-Object -Property tombstoneLifetime
2. Next, change the tombstone lifetime to something else. Let’s say you’d like to extend the lifetime to one full year or 365 days. You can do that by using the Set-ADObject cmdlet and passing it all of the required parameters below.
$ADNamingContext = (Get-ADRootDSE).configurationNamingContext

$Params = @{
  "Identity"  = "CN=Directory Service,CN=Windows NT,CN=Services,$ADNamingContext"
  "Partition" = $ADNamingContext
  "Replace"   = @{tombstoneLifetime='365'}
}

Set-ADObject @Params
This change will take affect immediately, no restart of any services needed.


