


Accessing and managing your Cloud Storage buckets can be a complex endeavor. Fortunately, Google Cloud Platform (GCP) provides an incredible tool to make the task easier — gsutil.
gsutil is a powerful command line utility that provides you fast access to hundreds of features that GCP’s Cloud Storage service offers. And in this tutorial, you will learn how to use gsutil through a series of examples demonstrating its many capabilities.
Read on and confidently manage your Cloud Storage buckets with ease!
Prerequisites
This tutorial will be a hands-on demonstration. To follow along, be sure you have a Google Cloud Platform (GCP) account — a free trial will suffice.
Creating a Google Cloud Project
Google Cloud projects allow you to organize resources, including storage buckets. But before creating a project, you must ensure that Cloud Shell is activated. Cloud Shell is a sandboxed command line environment pre-installed with the gsutil command line tool.
To create a Google Cloud Project:
1. Open your favorite web browser, and log in to the Google Cloud Console.
2. Next, click the Activate Cloud Shell icon (top-right) to activate the Cloud Shell.
You will see a pane at the bottom of your browser, as shown below, where you can run commands to interact with GCP services.

3. Once Cloud Shell is activated, run the following gcloud projects command in the Cloud Shell to create your project. You can name your projects differently. but this tutorial’s choice is gsutil-project-demo
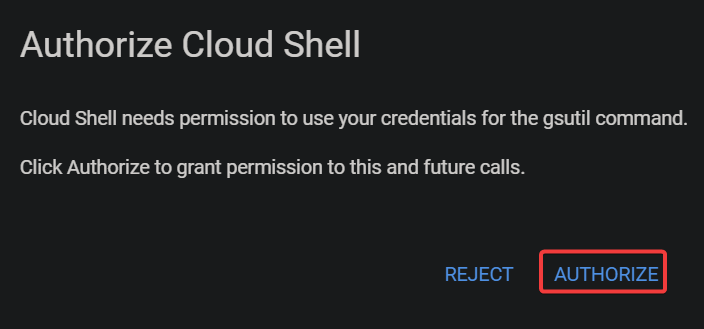
gcloud projects create gsutil-project-demo4. Now, click AUTHORIZE when prompted to allow the required permissions.
If successful, you will see a message like the one below.

5. Lastly, run the below gcloud config set command to set your newly created project (gsutil-project-demo) as the default project. As a result, all subsequent commands you issue in the Cloud Shell are executed against the default project. gcloud config set project gsutil-project-demo
gcloud config set project gsutil-project-demo
Creating a Bucket with gsutil
Your default project is set, and you are ready to work with the gsutil tool. What is the most basic operation that gsutil lets you perform? Create a bucket in the cloud to store and access your data.
The traditional storage options, like block storage and file storage, work fine when you have fewer data. But when your data starts to pile up, like Terabytes or Petabytes, you need a more robust and cost-effective storage option. Google Cloud Storage offers that option.
Run the gsutil command below to make a bucket (mb), but ensure you replace *gs://my-first-bucket54621* bucket name with your own that is globally unique.
💡 You can create as many buckets as you need, depending on the data you wish to store. But note that the bucket’s name must be in lowercase and should not contain any spaces or special characters.
Notice below that the bucket’s name is in URL form (*gs://my-first-bucket54621*). This URL helps you locate and access the data stored in your bucket faster. Unlike other storage solutions, you can even use an endpoint to access the bucket’s content.
gsutil mb gs://my-first-bucket54621As you can see below, the bucket has been successfully created.

But if the command fails, the reason might be the name of your bucket is already taken, and you will see an error message like the one below.

Uploading an Object to a Bucket
You have created a bucket in the Google Cloud Storage with gsutil, but that bucket is not serving any purpose if it is empty.
In this example, you will upload an object to your bucket using the gsutil tool. An object in Cloud Storage is like a file but contains much more extensive metadata. Each metadata is in key-value pairs that describe the object in more detail.
To upload an object to your bucket, follow these steps:
1. Run the curl command below to download an image of a cat from its URL and store it in Cloud Shell.
curl https://cloud.google.com/storage/images/kitten.png -o kitten.png
2. Next, run the following command to list (ls) the image (kitten.png) to ensure the file exists.
ls -la kitten.png
3. Now, run the below gsutil command to upload the file (kitten.png) into your Cloud Storage bucket (gs://my-first-bucket54621).
gsutil cp kitten.png gs://my-first-bucket54621
Rewriting an Object’s Metadata
Google Cloud Storage automatically generates a system of metadata when you upload the object. These default metadata can be the uploaded date, content type, storage class, and so on, which Cloud Storage uses as part of its object management.
In this example, you will rewrite existing metadata on the file you uploaded to your bucket. But first, you must view the metadata already set to the file.
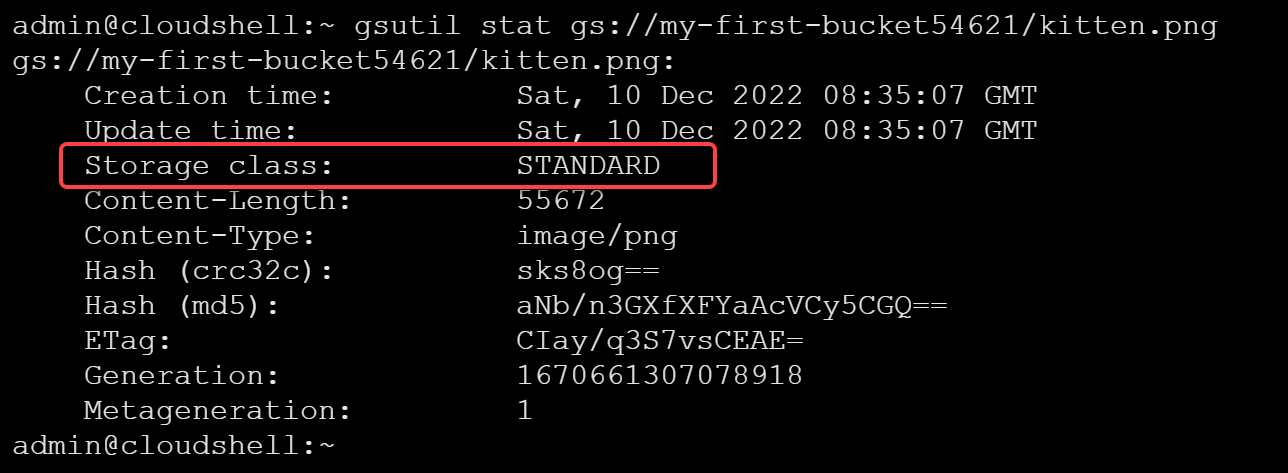
1. Run the gsutil stat command below to list the metadata already set to your image file.
gsutil stat gs://my-first-bucket54621/kitten.pngAs you can see below, many of the default metadata are set, like the Creation time, Update time, Storage class, and more.
Pick one metadata you want to set or rewrite, but this tutorial’s choice is the Storage class:STANDARD.
2. Next, run the below gsutil rewrite command to set (-s) the storage class of the uploaded object (kitten.png) from STANDARD to nearline.
gsutil rewrite -s nearline gs://my-first-bucket54621/kitten.png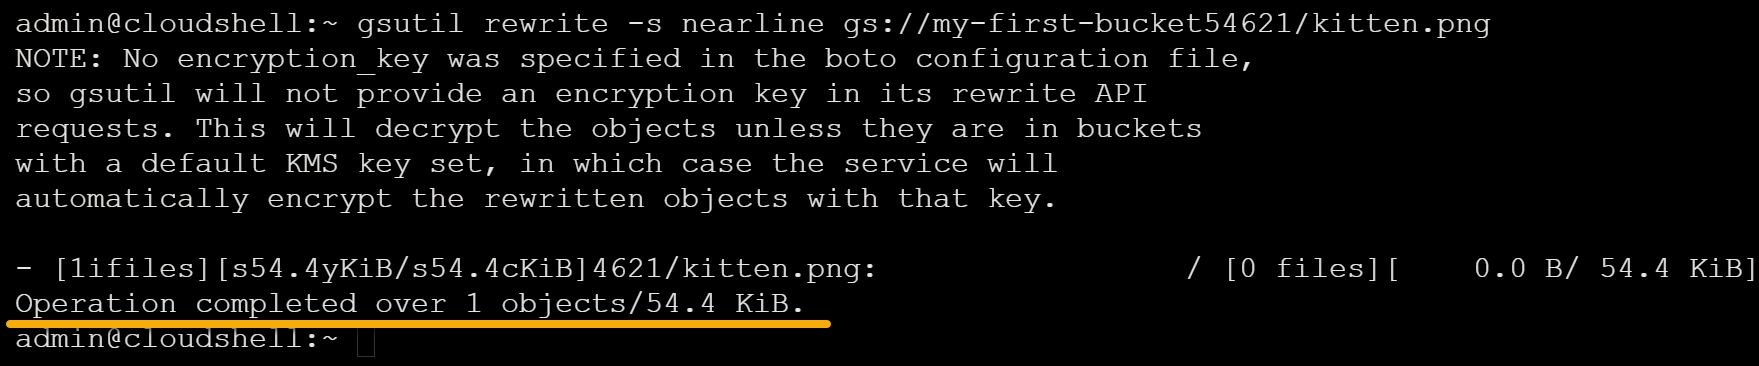
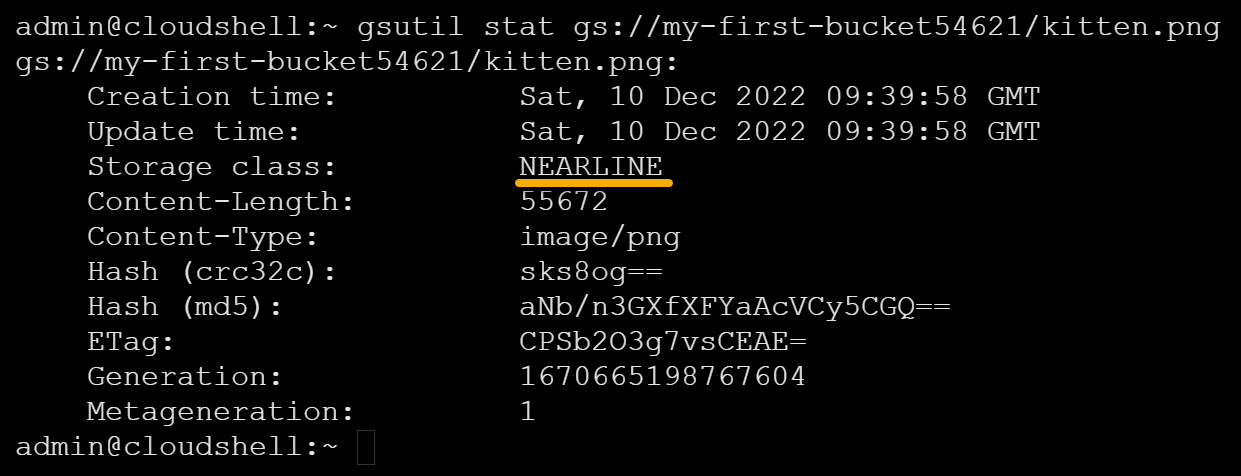
3. Rerun the gsutil stat command below to verify the changes to your file’s (*kitten.png*) metadata.
gsutil stat gs://my-first-bucket54621/kitten.pngBelow, you can see that this time the Storage class is set to NEARLINE as expected.
Setting a Custom Metadata to an Object
Rewriting an object’s metadata comes in handy for object management. But can you also set your own metadata instead of rewriting the existing ones? Yes! These custom metadata are anything that helps describe or identify your objects.
Run the below gsutil command to set custom metadata (setmeta). Ensure you replace the following with your own:
| KEY:VALUE | A metadata key and value pair for your object. This example uses animal_type as the KEY and cat as the VALUE. |
|---|---|
| gs://OBJECT_PATH | Your object’s path (URL) in your bucket (i.e., gs://my-first-bucket54621/kitten.png) |
💡 Do not start your key with
goog, as it is reserved for Google Cloud Storage. Additionally, do not use non-ASCII characters in your metadata key and value. Why? You might use an HTTP endpoint to access your objects, and non-ASCII characters will be rejected, which leads to an error.
gsutil setmeta -h "x-goog-meta-KEY:VALUE" gs://OBJECT_PATH
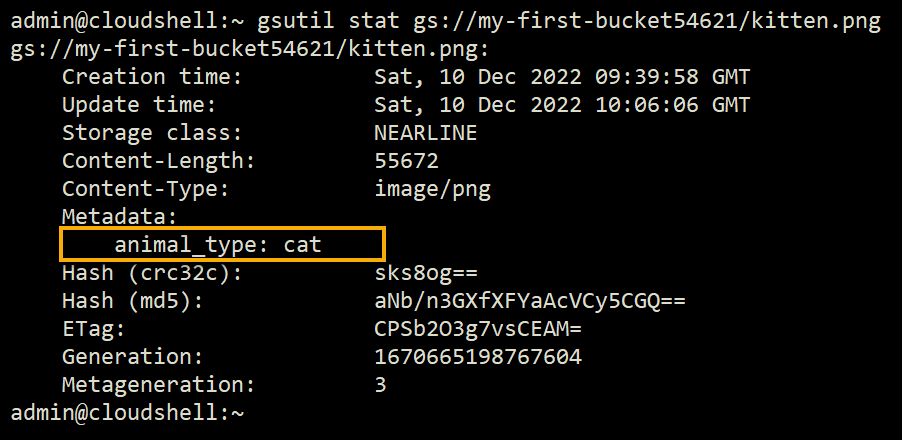
Now, run the following command to view your object’s (kitten.png) custom metadata.
gsutil stat gs://my-first-bucket54621/kitten.pngIf successful, you will see your newly-set custom metadata, as shown below.
Copying an Object to Another Bucket
As an admin, making copies of objects for backup is crucial. But how exactly do you copy objects? Worry not. The gsutil cp command allows you to copy objects from one another to another quickly.
To see the cp command in action, follow these steps:
1. Create a second bucket as you did in the “Creating a Bucket with gsutil” section, and name the bucket as you like. But this tutorial uses my-second-bucket1234 as the name for this second bucket.
2. Next, run the below command to copy (cp) the object kitten.png from your first bucket ( my-first-bucket54621) to your second bucket (my-second-bucket1234).
gsutil cp gs://my-first-bucket54621/kitten.png gs://my-second-bucket1234/kitten.pngThe object is copied to the second bucket, including its metadata.

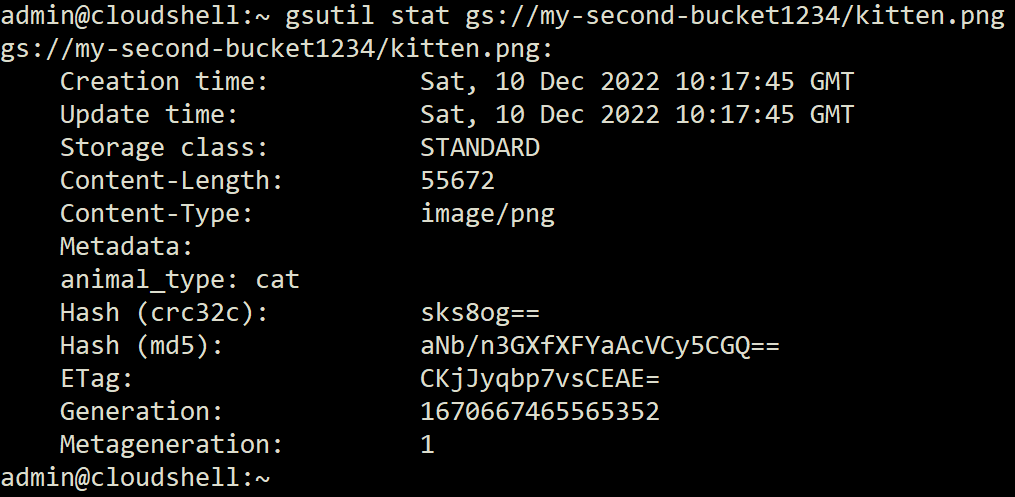
3. Now, run the following command to verify you have successfully copied the object (kitten.png) to your second bucket (my-second-bucket1234).
gsutil stat gs://my-second-bucket1234/kitten.pngIf successful, you will see the object in your second bucket with all its metadata intact, including custom ones, as shown below.
Deleting Objects and Buckets
Being charged for unnecessary storage consumption seem frustrating, especially when you set custom metadata. Why? Custom metadata is subject to storage charges aside from the object.
To avoid these charges, delete objects or buckets you no longer need with the following steps:
1. Run the following gsutil command to remove (rm) or delete an object (kitten.png) from your first bucket (my-first-bucket54621).
gsutil rm gs://my-first-bucket54621/kitten.pngYou have deleted the kitten.png object in your first bucket, but the same object still exists in your second bucket.

Next, run each command below to list the objects (kitten.png) in your first (my-first-bucket54621) and second (my-second-bucket1234) buckets.
gsutil ls -l gs://my-first-bucket54621/kitten.png
gsutil ls -l gs://my-second-bucket1234/kitten.png
The output below confirms that the kitten.png object no longer exists in your first bucket but is still in your second bucket.

3. Run the below commands to delete your two buckets recursively. These commands delete all the objects in each bucket and their associated custom metadata.
gsutil rm -r gs://my-first-bucket54621
gsutil rm -r gs://my-second-bucket1234
Notice below that the first command immediately removed your first bucket, while the second command removed the object before removing your second bucket.

Finally, run the below gcloud projects command to delete your Google Cloud project (gsutil-project-demo). This command deletes your project and all its associated resources.
gcloud projects delete gsutil-project-demoInput Y and press Enter when prompted to confirm deleting the project.
💡 After deleting a project, you will have a 30-day grace period if you ever change your mind and want to recover your project. Once the 30-day period has passed, the project and its resources are deleted and cannot be recovered.

Conclusion
As an alternative to the Google Cloud Console, gsutil lets you manage your Cloud Storage projects via Cloud Shell. And in this tutorial, you have learned how to use gsutil to create buckets, upload and copy objects, and delete unused ones to avoid recurring charges.
At this point, you can easily manage your Google Cloud projects from the Cloud Shell. But this tutorial can only cover the tip of the iceberg regarding what gsutil can offer.
With this newfound knowledge, why not use gsutil with Boto to automate your AWS cloud operations?


