


Google is one of the most popular cloud platforms and provides a range of options for those looking to set up a virtual machine. Have you heard about the Google virtual machine? No worries! You have come to the right place.
This tutorial will walk you through setting up a Google VM so that you can take advantage of the cloud platform.
Ready? Read on and start creating Google VMs for your workload!
Prerequisites
This tutorial will be a hands-on demonstration. To follow along, be sure you have a Google account and access to the Google Cloud Platform console (a free trial will suffice).
Creating a Project in Google Cloud
The first step in setting up a Google VM is creating a project in Google Cloud. A project is like a container for all the resources associated with your application. You will need this project to manage APIs, billing, users, and permissions.
You can create a new project using the gcloud CLI, the API, or Python. But in this tutorial, you will use the Google Cloud Console (GCC).
To create a new project in GCC:
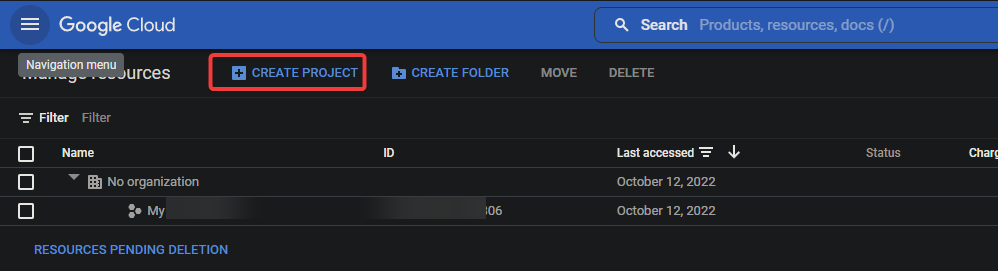
1. Open your web browser, and log into your Google account on the GCC’s Manage resources page.
2. Next, click the Create Project button, as shown below, to initiate creating a new project.
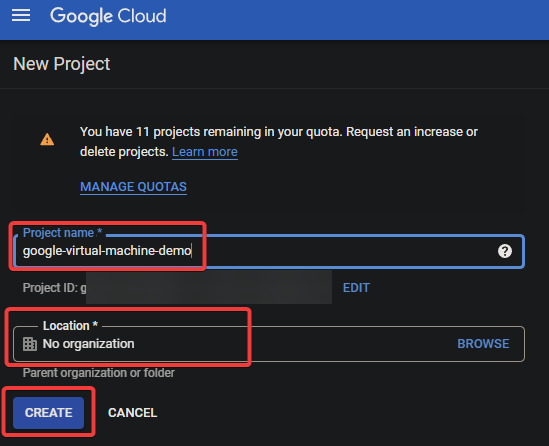
3. Lastly, configure the new project with the following:
- Project name – Provide a name for your project. Unlike the project ID, the project name does not need to be unique and can be changed later. This name can contain only regular characters and numbers, which must be between four and 30 characters.
- Location – Select a parent organization or folder if you have one, which helps you organize your resources. If none, this field can be left blank. Your newly-created project will be placed as a top-level project of its own.
- Click the CREATE button to create your project, which takes a while to complete.
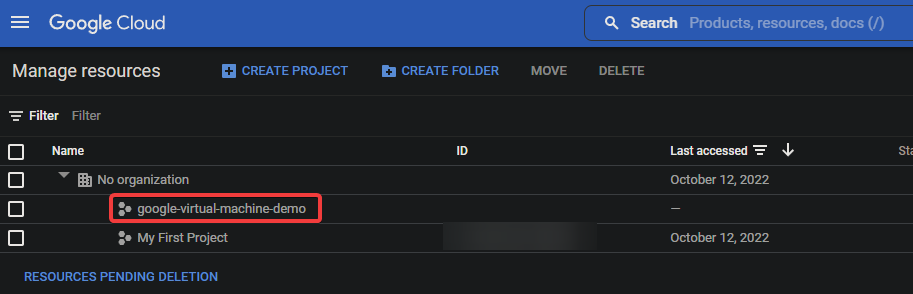
After a while, you will see your newly-created project on the Manage resources page, as shown below.
Creating a Google Virtual Machine from Scratch
With a project in place, you can now create your Google VM. You have a few different options in creating a VM from scratch or any of the following:
- Using an existing template.
- Using an existing image.
- Using a Google Cloud Marketplace image.
But in this tutorial, you will create a Google VM from scratch for complete control over the configuration of your VM. This option is for one-off tasks or when you don’t need to save your VM configuration as a template.
To create a VM from scratch in your GCC:
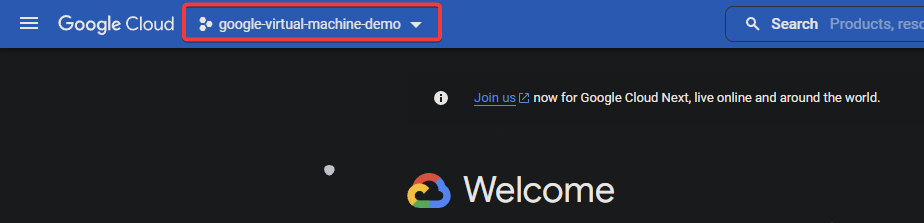
1. Select the project to use for the new VM from the project dropdown field (topmost) in the GCC.
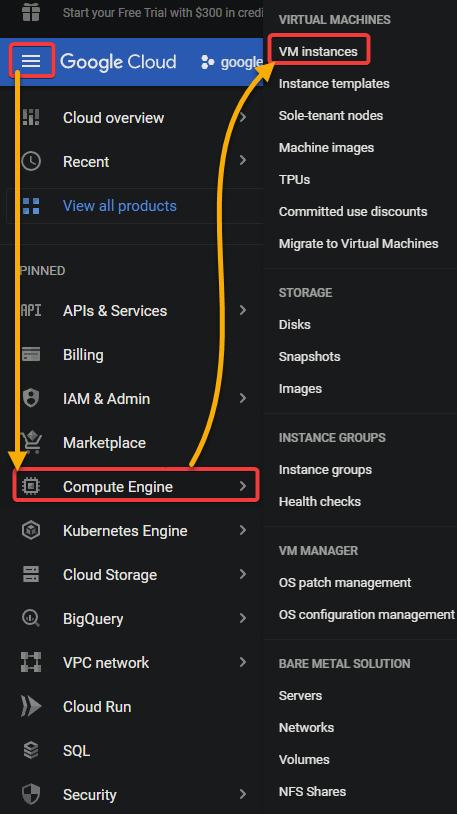
2. Next, click the navigation menu icon (top left) and Compute Engine → VM instances.
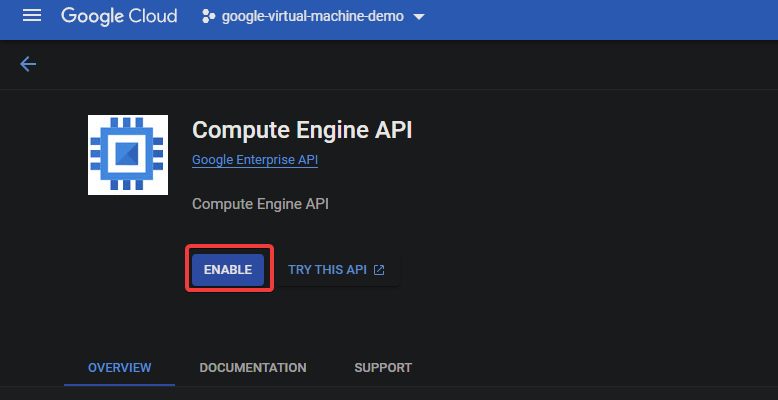
3. Click the ENABLE button to enable the Compute Engine API for your project (takes a few minutes), which is disabled by default for new projects.
Enabling this API allows you to create a VM instance in Google Cloud.
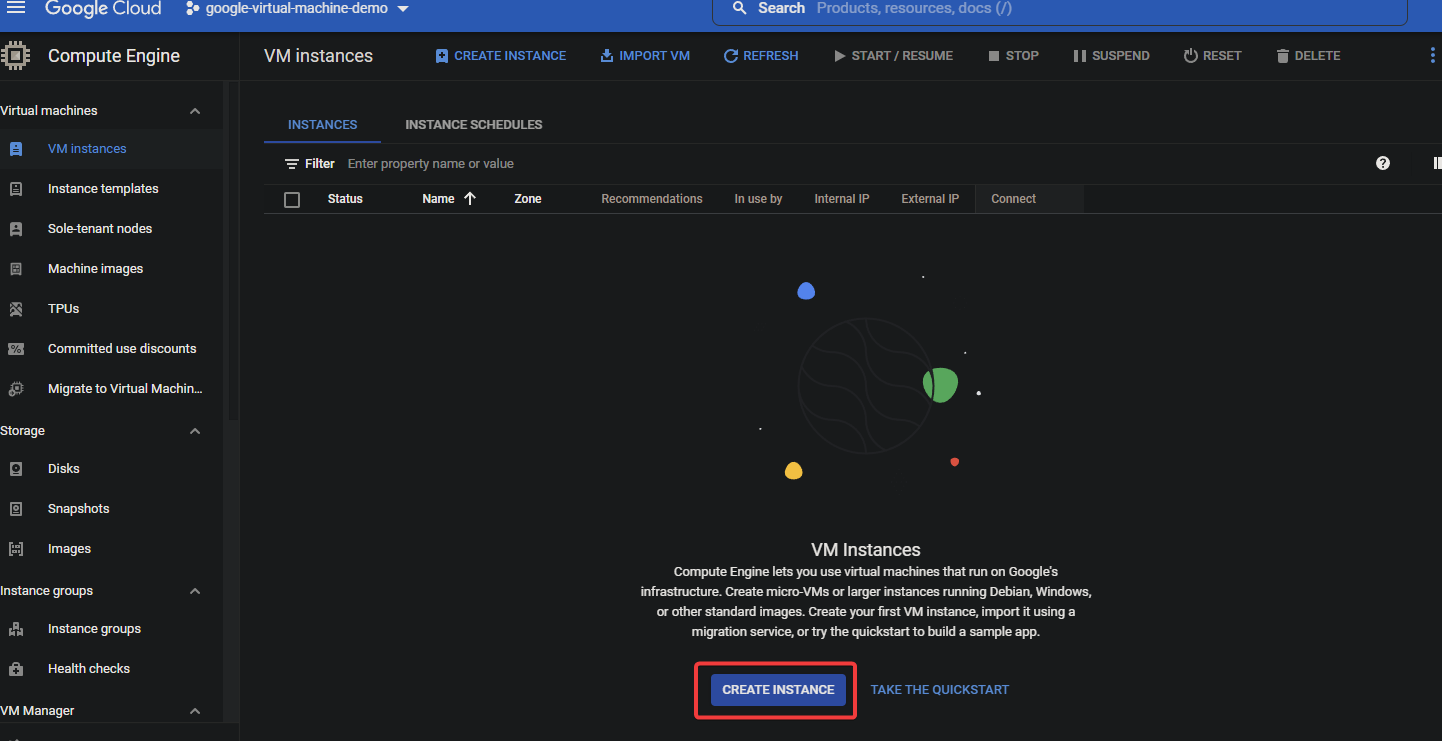
4. Now, click CREATE INSTANCE at the bottom to create your new VM.
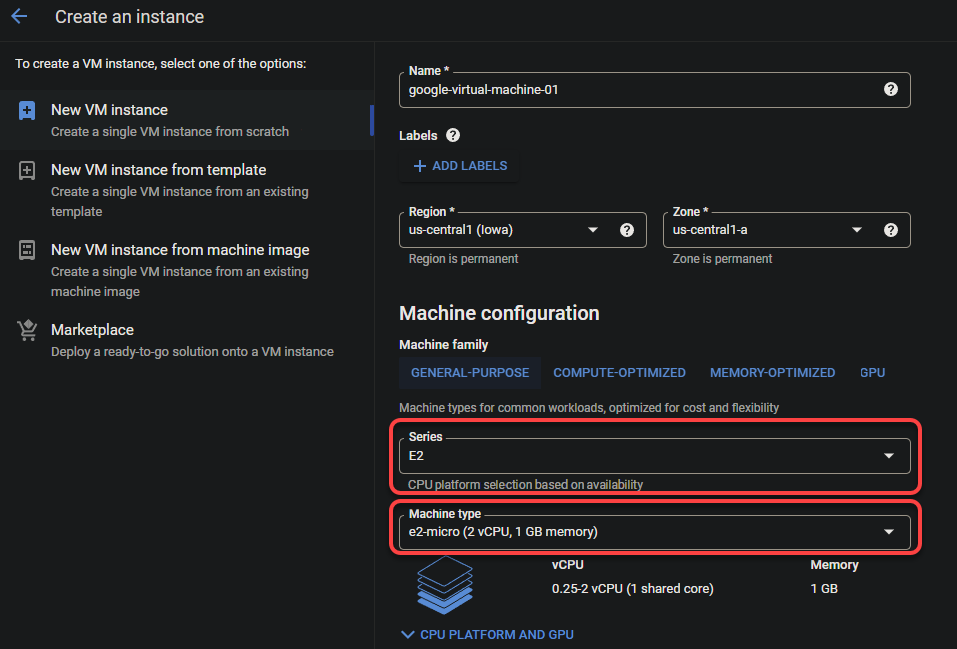
On the next page, select New VM instance, and provide the following information:
- Name – Provide a name for your VM, which can be anything but must contain only lowercase letters, numbers, and hyphens.
- Region and Zone – Select the region and zone where you want your VM to be located, which must be the closest to you or your users for the best performance.
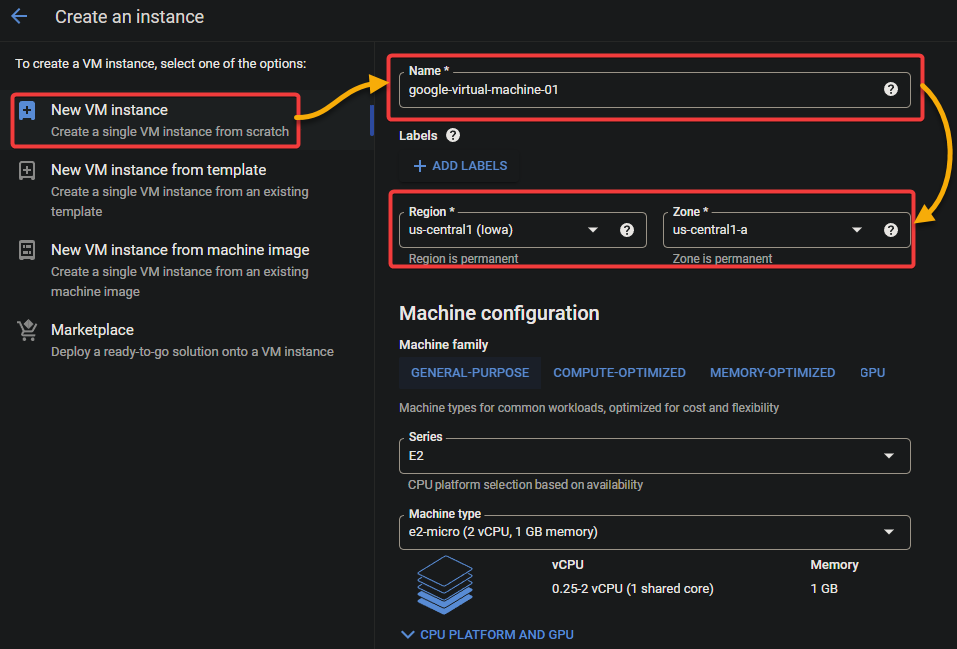
6. Next, set the machine configuration for the new VM with the following:
Machine family – Select a predefined machine configuration type, which determines the amount of CPU and memory resources allocated to your VM.
Below are the options available for the Machine family.
| General -purpose | Best price and performance for most applications. |
| General -purpose | Best price and performance for memory-intensive applications, such as SQL databases. |
| GPU-optimized | Best for certain graphics and machine learning applications. |
But for this example, choose General-purpose since this VM is for general use.
- Machine type – Select the machine type for your VM, which determines how many virtual CPUs and memory are allocated to your VM. For example, select e2-micro if you want to use the smallest machine type.
This configuration is helpful if you are using your VM for testing or development and do not need a lot of resources. This machine type has two virtual CPUs and 1GB of memory. But you can increase the machine type if you need more resources.
7. Scroll down and click CHANGE to select another boot disk type. The boot disk is the operating system and main software that your VM will use.
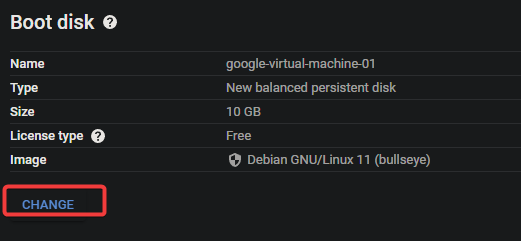
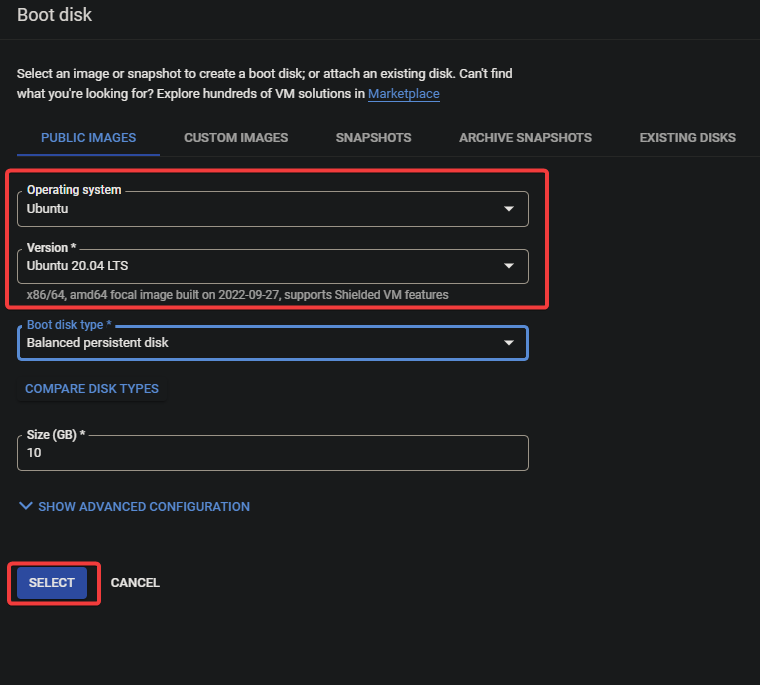
8. Now, configure the boot disk for your VM with the following:
- Operating system – You can use a Public image, such as Ubuntu, Windows Server, or Red Hat Enterprise Linux.
- Version – You can select a snapshot, a custom image, or select an existing disk. But for this tutorial, choose Ubuntu 20.04 LTS (free and popular).
- Click SELECT to confirm the image configuration.
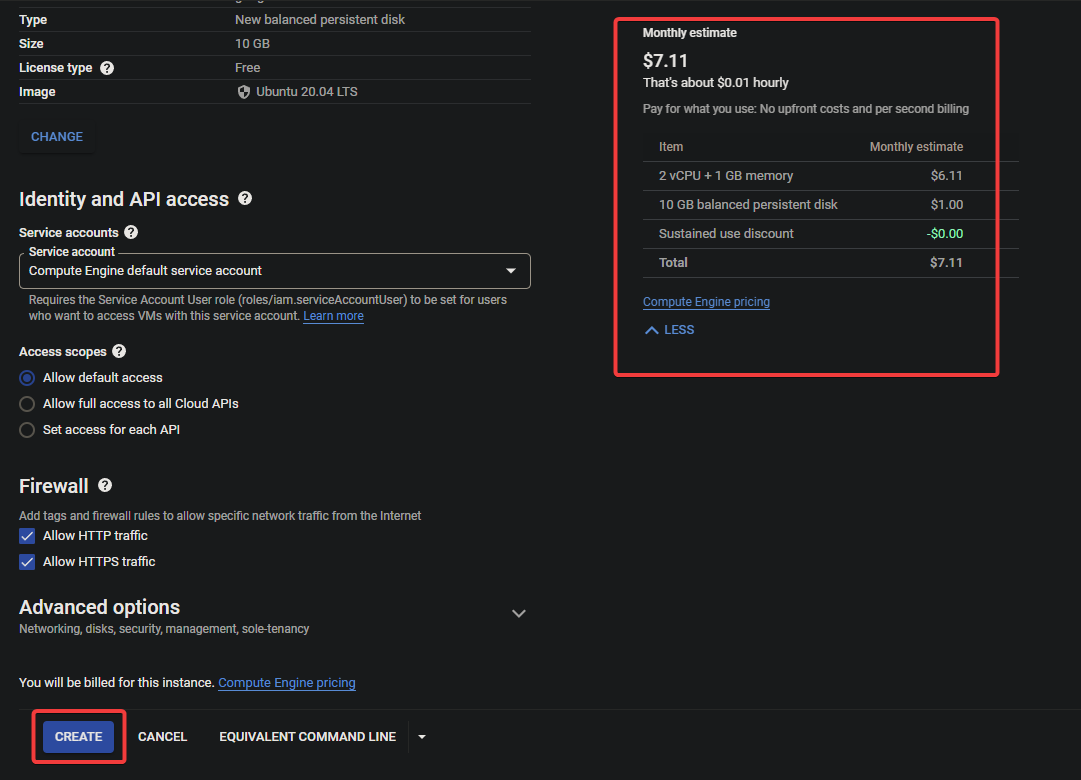
9. Keep other settings at their default and click CREATE (bottom-left ) to create your VM.
Below, you can see the Monthly estimate of how much your VM costs monthly (rightmost) based on your selected settings.
Wait for a few minutes while your VM is being created. Once complete, you will see the newly-created VM listed on the VM instances page.
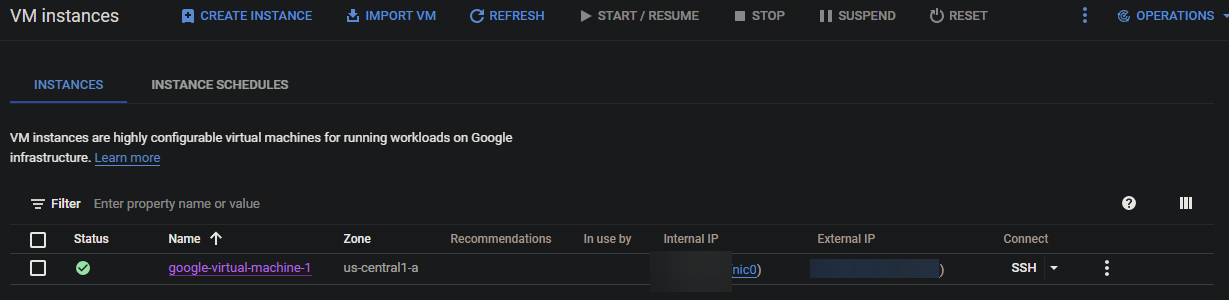
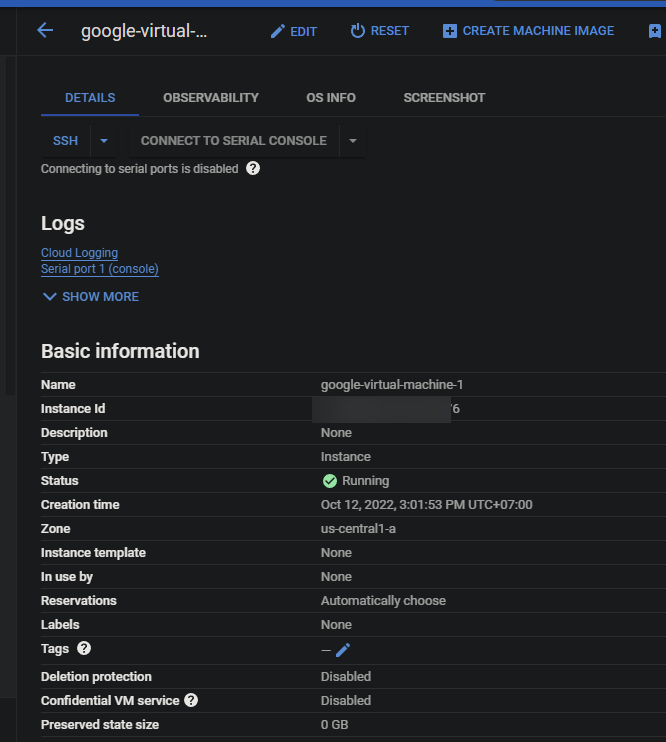
10. Lastly, click on the VM to open its details page and see more information about the Google VM.
From here on, you can perform operations like stopping or deleting the VM, changing its configuration, or connecting to your VM.
Connecting to Google VM
Once your VM is running, you will need to connect to it before you can use your VM. There are a few ways you can connect to your VM via a third-party SSH client like KiTTY or Google Cloud Shell.
To connect to your Google VM, you will use the built-in SSH client in your browser to connect to your VM.
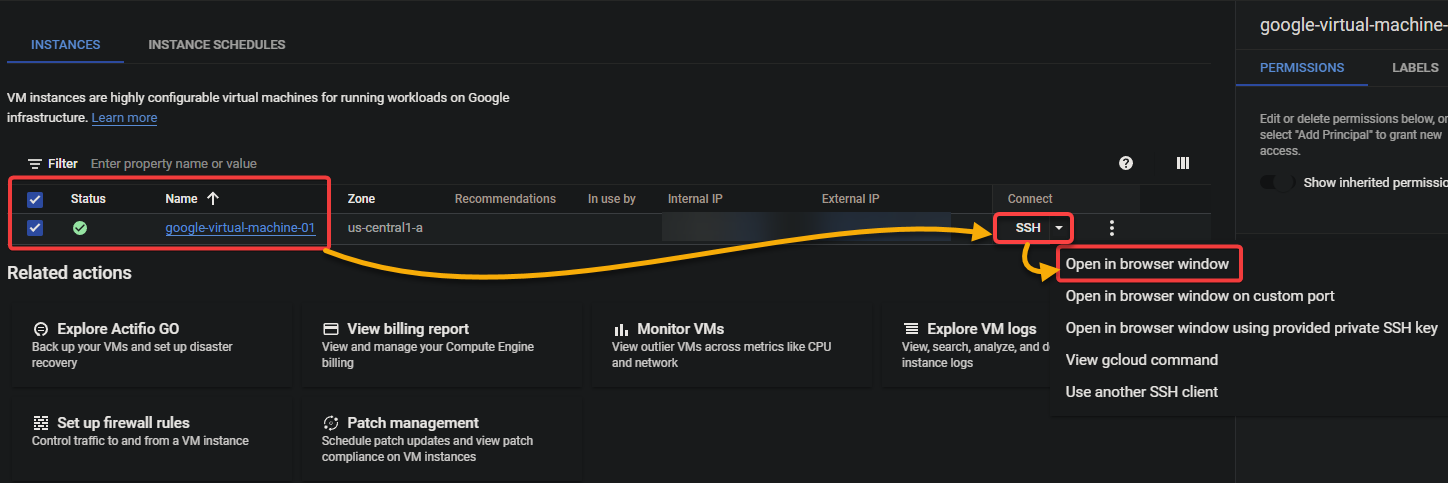
- On the VM instances page, tick the checkbox next to the name of the VM you want to connect to (google-virtual-machine-01).
2. Next, click the SSH dropdown menu and select Open in browser window to SSH into your VM via your web browser.
A new SSH-in-browser browser window opens, and you will be logged in automatically. You will see a command prompt that looks like the following, where you can run commands on your VM.
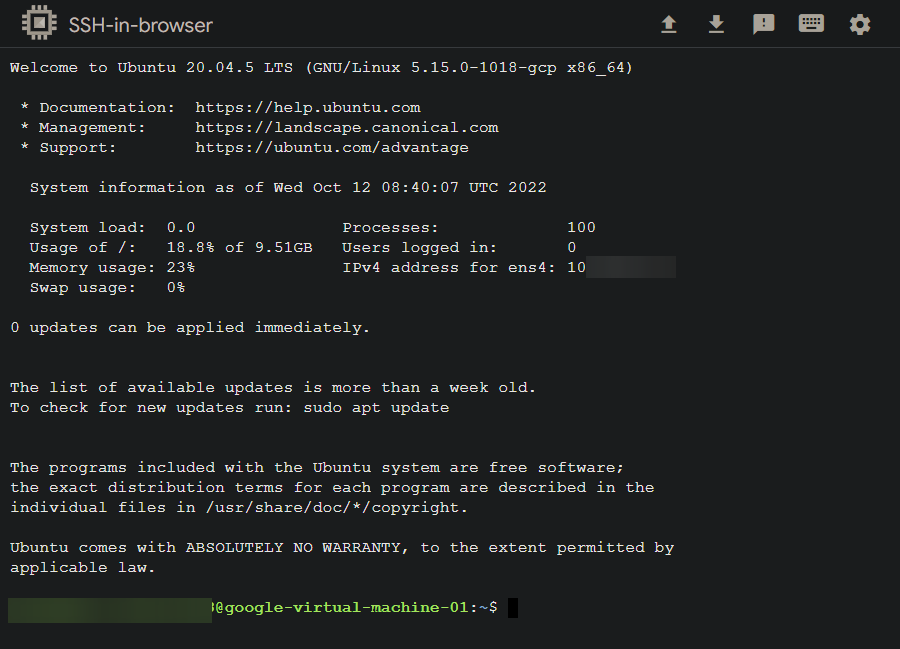
3. Now, run the exit command below to exit the SSH session.
exitCleaning up Resources
Incurring charges can be a pain, especially if you are unsure which services you are being charged for. When you are finished, avoid future charges by cleaning up resources, like deleting your VM.
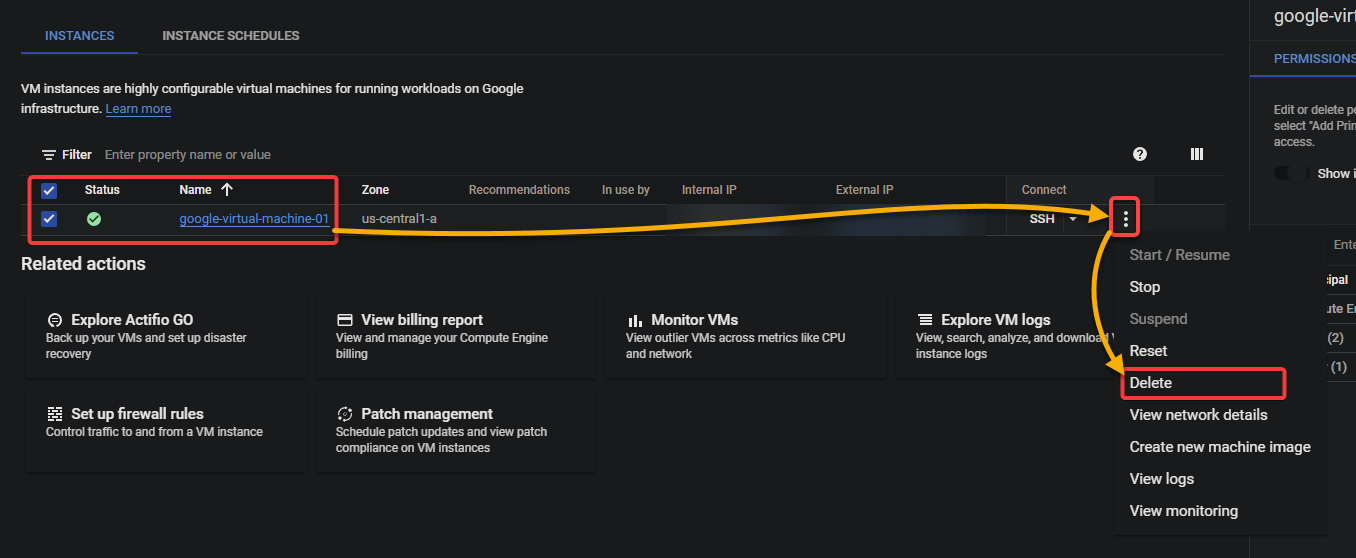
On the VM instances page on your GCC, tick the checkbox next to your VM, click the ellipsis icon, and choose the Delete option to delete the selected VM.
Always take caution before you delete a VM, as this action is irreversible.
Now, click DELETE on the pop-up window that appears to confirm the deletion.
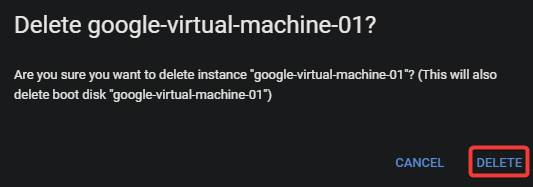
As you can see below, the deletion is in progress.

Conclusion
Google Cloud is a powerful platform that provides many options for configuring and managing virtual machines. And in this tutorial, you have learned how to create and connect to a Google VM. You also touched on accessing the VM’s terminal to run commands and cleaning up resources by deleting your Google VM to avoid recurring charges.
With this newfound knowledge, why not create a VM from an instance template to save yourself some time? Or create a VM using a Marketplace image to start quickly with a preconfigured development or production environment?


