

Authentication and authorization are the most critical components nowadays, and setting them up for security is good practice. And if you’re looking to centralize authentication and authorization for internet users, FreeRADIUS is one you should consider.
FreeRADIUS gives you full monitoring for every event on your users. And in this article, you’ll learn how to install and integrate FreeRADIUS and daloRADIUS on an Ubuntu server.
Read on and start centralizing authentication and authorization!
Prerequisites
This tutorial will be a hands-on demonstration. To follow along, ensure you have the following requirements:
- A Linux server – This demo uses the Ubuntu server 20.04 Focal Fossa.
- A LAMP Stack installed on your Ubuntu server.
- A root user or a non-root user with sudo/root privileges.
Installing the FreeRADIUS Server
FreeRADIUS is a free and open-source RADIUS software suite that provides centralized authentication, authorization, and accounting (AAA). At the same time, FreeRADIUS supports almost all authentication protocols and is also designed to be modular with high performance.
But before you can take advantage of FreeRADIUS, you’ll first have to install the FreeRADIUS server with additional packages for MariaDB database backend support.
1. Open your terminal and log in to your server.
2. Next, run the apt update command below to update and refresh the package index on your system. This command ensures you’re installing the latest version of packages.
sudo apt update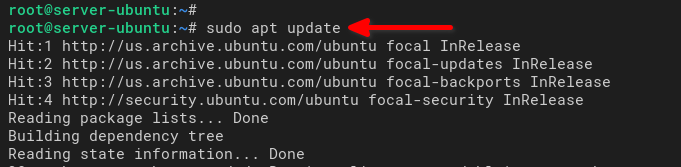
3. Lastly, run the following apt install command to install the following packages for the FreeRADIUS server on your Ubuntu system:
- The
freeradiuspackage is the main package of the FreeRADIUS server.
- The
freeradius-mysqlpackage supports the FreeRADIUS to use MySQL/MariaDB as the database backend.
- The
freeradius-utilspackage provides additional command-line tools for managing the FreeRADIUS server.
sudo apt install freeradius freeradius-mysql freeradius-utils -y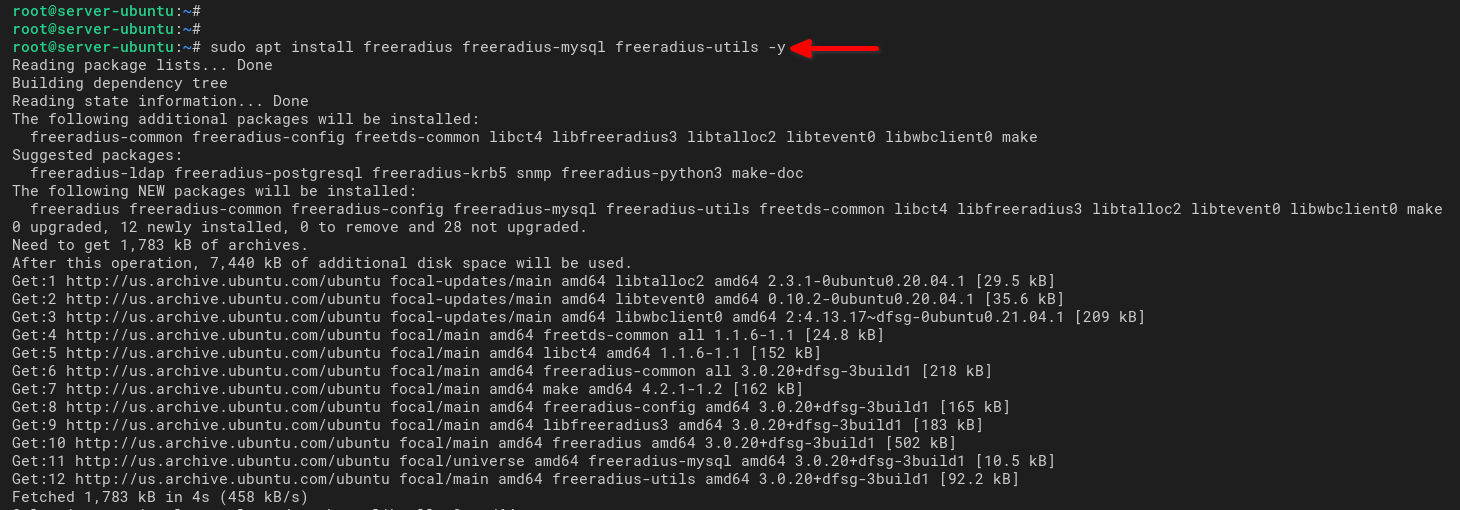
Creating MariaDB Database
After installing the FreeRADIUS package with the MySQL/MariaDB backend, you’ll create a new MariaDB database as the backend for FreeRADIUS.
The MariaDB backend lets you keep track of events on the FreeRADIUS environment and store all information permanently inside the database. This feature is useful for generating reports on FreeRADIUS.
To create a MariaDB database:
1. Run the mysql command below to log in to the MariaDB shell using the user root.
This command will prompt you for a password, be sure to input the correct password for the MariaDB root user.
sudo mysql -u root -p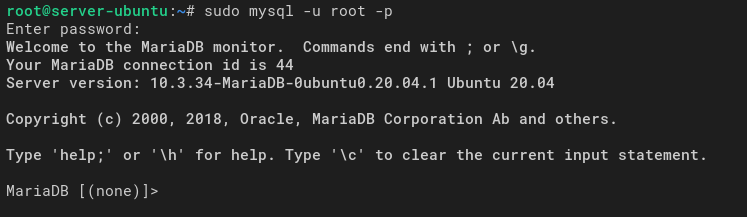
2. Next, run each following MariaDB query to create a new database and user for the FreeRADIUS. Be sure to change the detailed database name, user, and password, as you like.
# Create a new database named freeradiusdb
CREATE DATABASE freeradiusdb;

# Create a user named freeradiususer and allow to access freeradiusdb
GRANT ALL ON freeradiusdb.* TO freeradiususer@localhost IDENTIFIED BY "RadiusDatabasePassword";

# Reload tables privileges
FLUSH PRIVILEGES;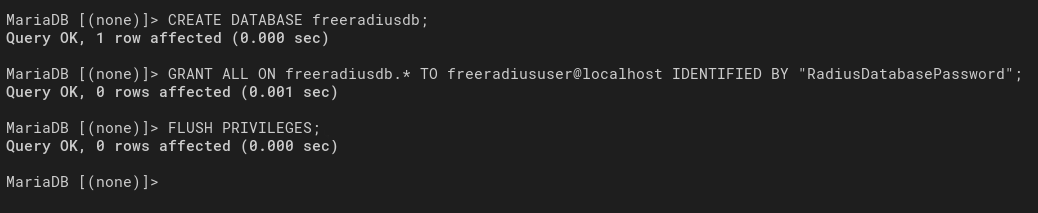
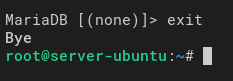
3. Lastly, type exit to log out from the MariaDB shell.
Configuring FreeRADIUS with MariaDB Database
You’ve just created the MariaDB database and user for the FreeRADIUS as the backend. But how do you enable the MariaDB database backend for FreeRADIUS? You’ll import the database schema to the FreeRADIUS database and edit the SQL configuration module.
1. Run the systemctl commands below to stop and verify the freeradius service. Make sure the status is inactive before configuring the FreeRADIUS server. Here’s how to use Ubuntu systemctl to control systemd.
# Stop freeradius service
sudo systemctl stop freeradius

# Verify freeradius status
sudo systemctl status freeradius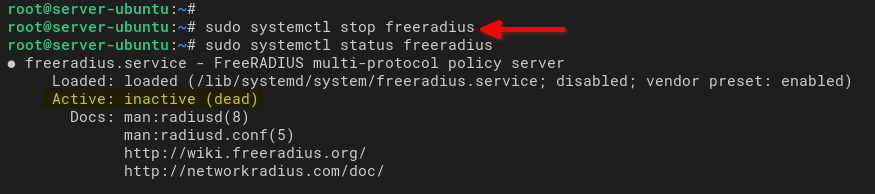
2. Next, run the mysql command below to import the FreeRADIUS database schema to the database freeradiusdb. Be sure to input the correct MariaDB root password.
mysql -u root -p freeradiusdb < /etc/freeradius/3.0/mods-config/sql/main/mysql/schema.sql
3. Run the mysqlshow command below to verify the database schema of the freeradiusdb database.
mysqlshow freeradiusdb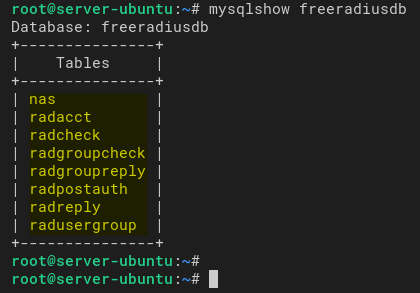
4. Next, edit the configuration /etc/freeradius/3.0/mods-available/sql using your preferred editor and change the following inside the sql {...} section:
- Change the
dialectvalue tomysqlas the database.
- Be sure to comment out the option
driver = "rlm_sql_null"by adding the#symbol at the beginning.
- Uncomment the
driver = "rlm_sql_${dialect}"option to enable MySQL/MariaDB backend by removing#symbol in front.
sql {
			dialect = "mysql"

			#driver = "rlm_sql_null"
			driver = "rlm_sql_${dialect}"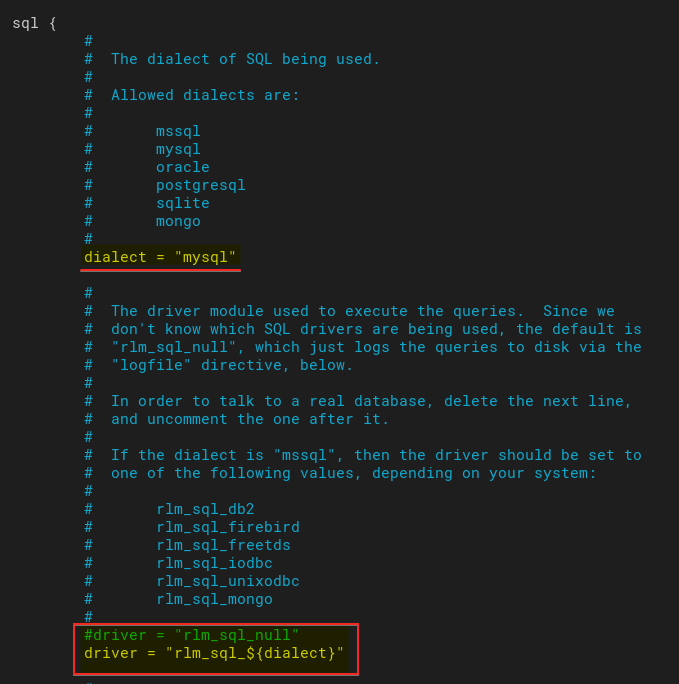
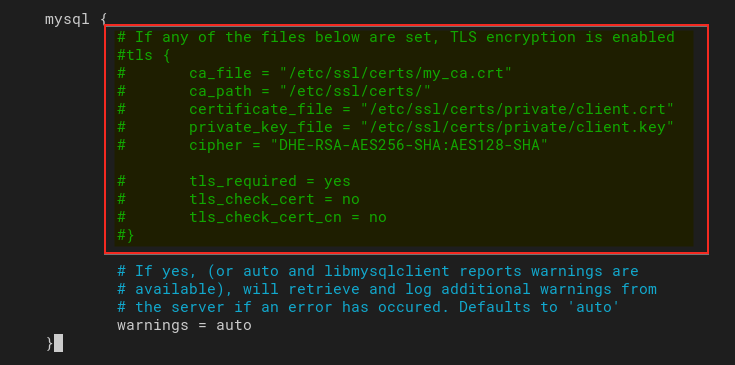
5. Look for the mysql {...} section, and comment out all TLS options to disable TLS support for the MariaDB database backend, as shown below.
In this tutorial, the FreeRADIUS server and MariaDB database are on the same server, so you do not need the MariaDB TLS support.
6. Scroll down under the # Connection info: line, input your MariaDB database name, user, and password for the FreeRADIUS, as shown below.
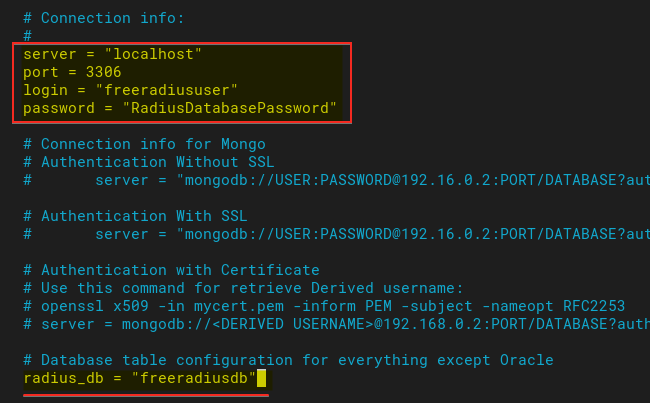
7. Uncomment the read_clients = yes option to allow FreeRADIUS clients to read from the nas table inside the FreeRADIUS database.
Save all the changes you made and close the file.

8. Now, run each command below to enable the MySQL/MariaDB module for FreeRADIUS. And change the ownership of the configuration file /etc/freeradius/3.0/mods-enabled/sql to the user and group freerad.
These commands don’t have outputs, but you’ll verify the freeradius service in the following step.
# Activate MariaDB/MySQL module FreeRADIUS
sudo ln -s /etc/freeradius/3.0/mods-available/sql /etc/freeradius/3.0/mods-enabled/
# Change ownership to freerad
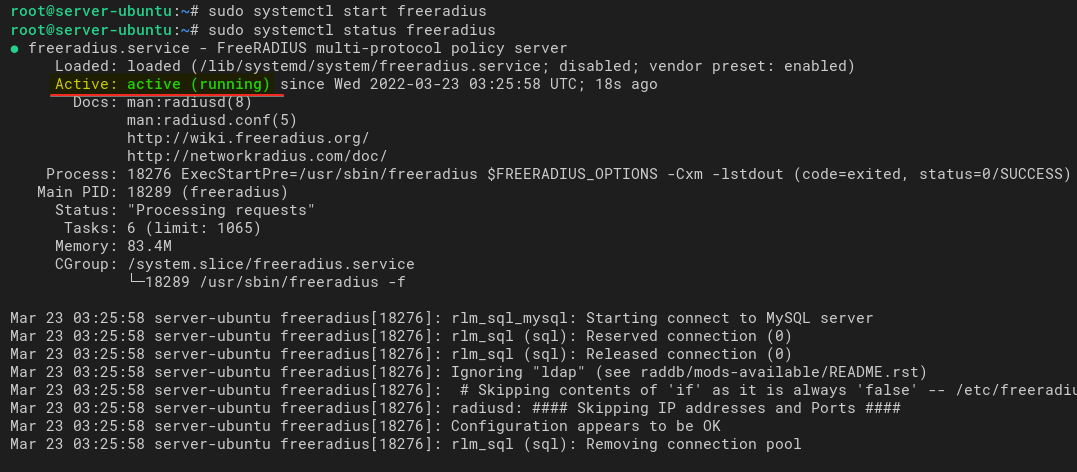
sudo chown -h freerad.freerad /etc/freeradius/3.0/mods-enabled/sql9. Lastly, run the following commands to start and verify the freeradius service.
# Start freeradius service
sudo systemctl start freeradius

# Verify freeradius status
sudo systemctl status freeradius
At this point, the new FreeRADIUS server is now running with the MariaDB database backend.
If your configuration is correct, you’ll see the freeradius service is active (running). And at the bottom log messages, you’ll see the FreeRADIUS connecting to the MySQL/MariaDB server.
Installing daloRADIUS
You now have a FreeRADIUS server running with the MariaDB database as backend support. But wouldn’t it be nice to have a GUI that provides user management for the FreeRADIUS server? Why not install daloRADIUS? daloRADIUS is a PHP-based web application for managing the FreeRADIUS server.
Apart from providing user management, daloRADIUS also provides graphical reporting, accounting and supports GIS (Geolocation).
To install daloRADIUS on your server:
1. Run each command below to change your current working directory to /var/www/html and download (wget) the daloRADIUS source code.
At the time of writing, the latest version of daloRADIUS is v1.3.
# Change working directory
cd /var/www/html/

# Download the daloRADIUS source code
wget https://github.com/lirantal/daloradius/archive/refs/tags/1.3.tar.gz2. Next, run each command below to extract (tar -xf) the daloRADIUS source code (1.3.tar.gz) and rename the extracted directory to daloradius.
# Extract daloRADIUS source code
tar -xf 1.3.tar.gz

# Verify extracted directory
ls

# Rename directory to `daloradius`
mv daloradius-1.3 daloradius

# Verify changed directory name to daloradius
ls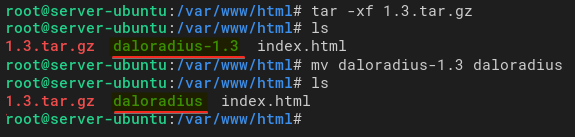
3. After extraction, run the below commands to import the database schema for daloRADIUS to the freeradiusdb database and verify the list of tables on the FreeRADIUS database.
Input your MariaDB root user password when prompted.
# import daloRADIUS database schema
mysql -u root -p freeradiusdb < /var/www/html/daloradius/contrib/db/fr2-mysql-daloradius-and-freeradius.sql

# verify database schema
mysqlshow freeradiusdb
Below, you can see a list of tables for FreeRADIUS and daloRADIUS from the freeradiusdb database.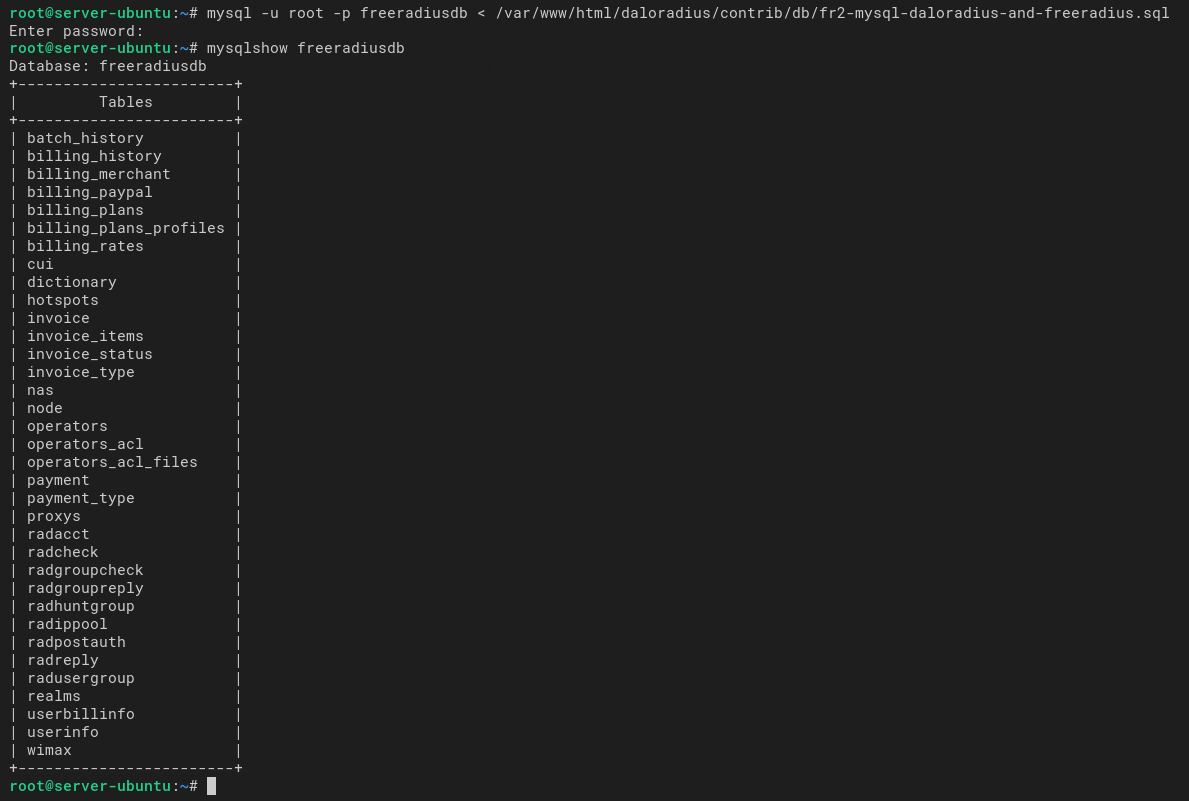
4. Now, run the cp command below. This command doesn’t have an output but copies the daloRADIUS configuration to /var/www/html/daloradius/library/daloradius.conf.php.
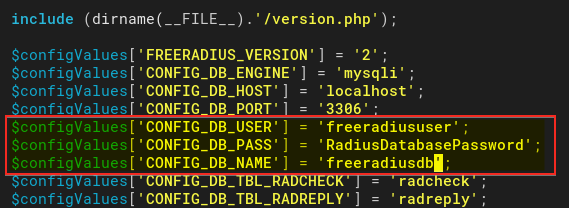
cp /var/www/html/daloradius/library/daloradius.conf.php.sample /var/www/html/daloradius/library/daloradius.conf.php5. Edit the /var/www/html/daloradius/library/daloradius.conf.php configuration using your preferred editor to set up the database configuration for daloRADIUS.
Change the database name (freeradiusdb), the user (freeradiususer), and password (RadiusDatabasePassword) below with your details.
Save the changes and close the file.
6. Next, run the below commands to perform the following, but without outputs:
- Change the ownership (
chown) of the/var/www/html/daloradiusdirectory towww-data.
- Allow Apache web-server to access daloRADIUS source code.
- Change the permission (
chmod) of the filedaloradius.conf.phpto0664to secure the configuration file.
# Change ownership to www-data
sudo chown -R www-data:www-data /var/www/html/daloradius/

# Change permission to 0664
sudo chmod 0664 /var/www/html/daloradius/library/daloradius.conf.php
7. Lastly, run the systemctl command below to restart the freeradius service and apply new changes, but without any output.
sudo systemctl restart freeradiusVerifying daloRADIUS Installation
You’ve now installed the daloRADIUS web application on your server. But how do you verify it’s working? You’ll access the daloRADIUS service and log in to access the daloRADIUS dashboard on your web browser.
Open your favorite browser and type your server IP address followed by the path /daloradius (i.e., http://172.16.1.10/daloradius). Doing so redirects your browser to the daloRADIUS login page.
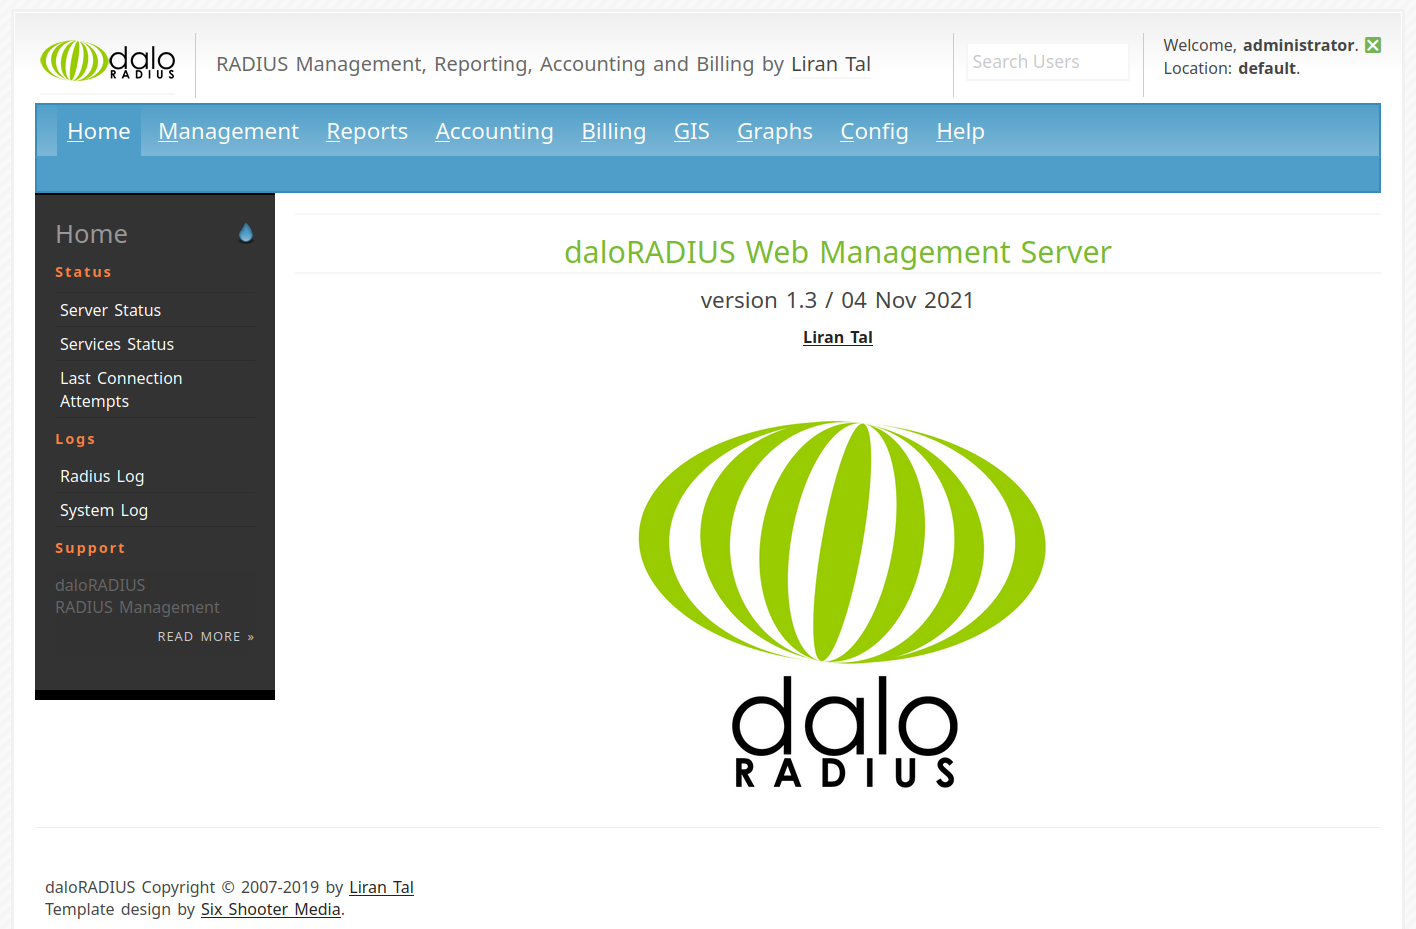
Enter the default user (administrator) and password (radius), and click Login Please to access the daloRADIUS dashboard.
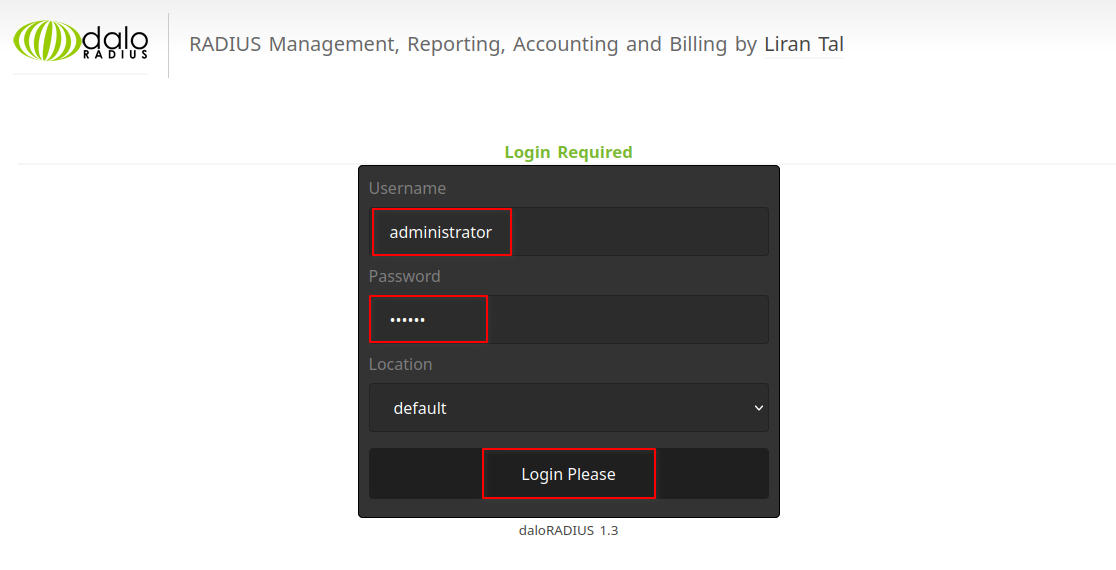
Now, you can tell your daloRADIUS installation works if you get to the dashboard shown below.
Setting up FreeRADIUS User with daloRADIUS
You now have access to the daloRADIUS dashboard, so feel free to create a new FreeRADIUS user from the daloRADIUS user manager. Doing so lets you verify that your daloRADIUS and FreeRADIUS installations work side-by-side.
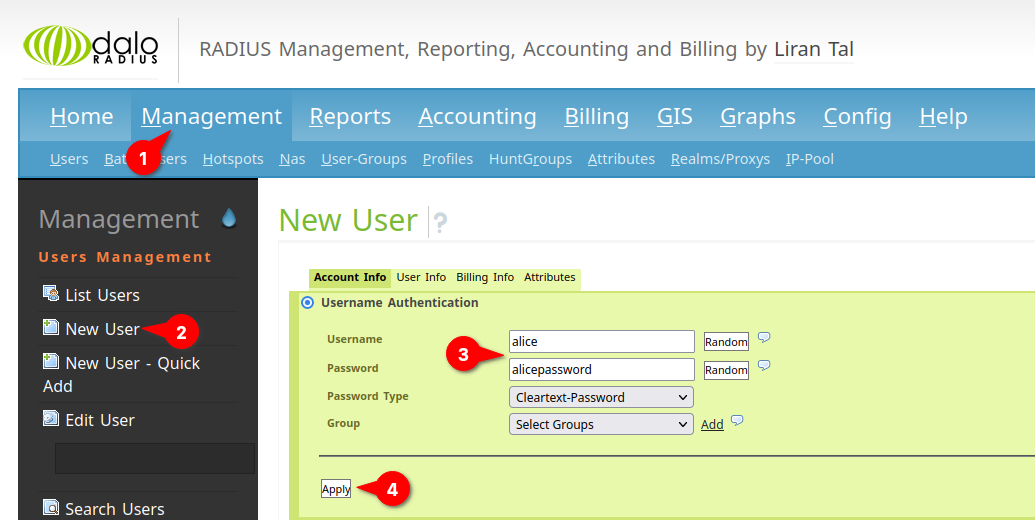
1. On the daloRADIUS dashboard, click the Management menu tab, and click the New User menu on the left panel.
Input the new user’s username and password, and click the Apply button. But in this tutorial, the username is alice, and the password is strongpassword.
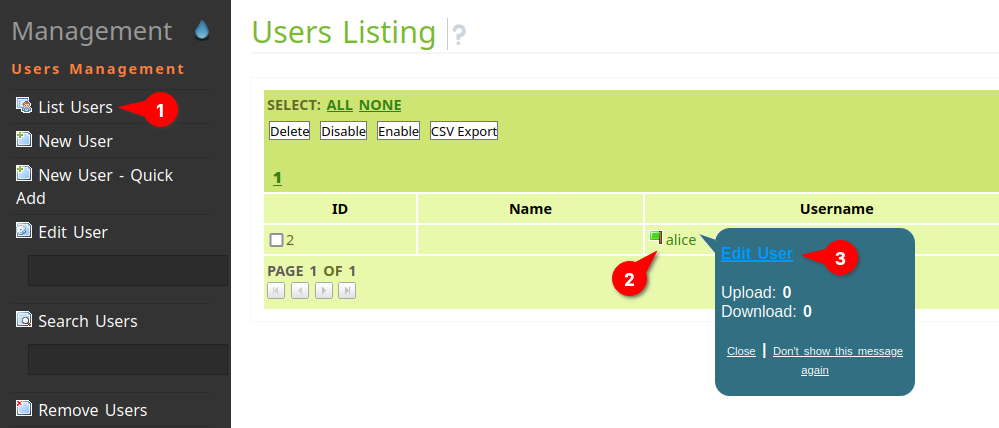
2. While still on the Management page, click the List Users menu to check available users on FreeRADIUS. You’ll see the new user alice is available on the list.
Click on the new user alice —> Edit User to access the user’s details.
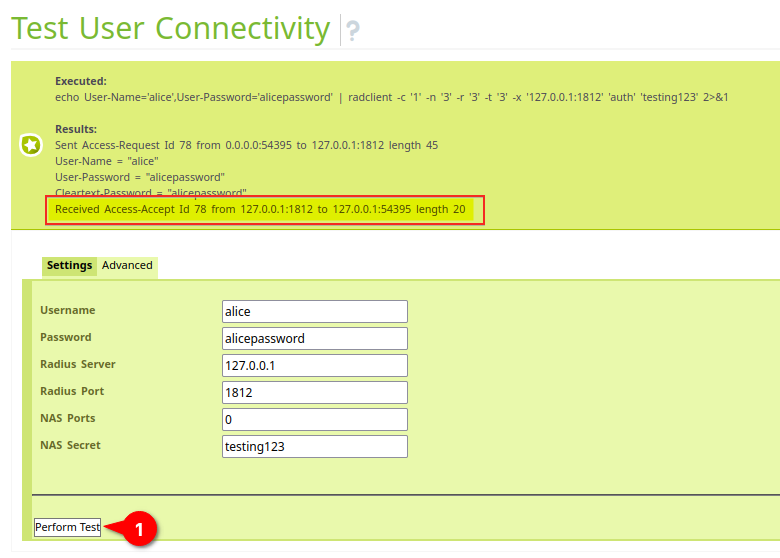
3. Now, click the Test Connectivity button to verify the user alice.
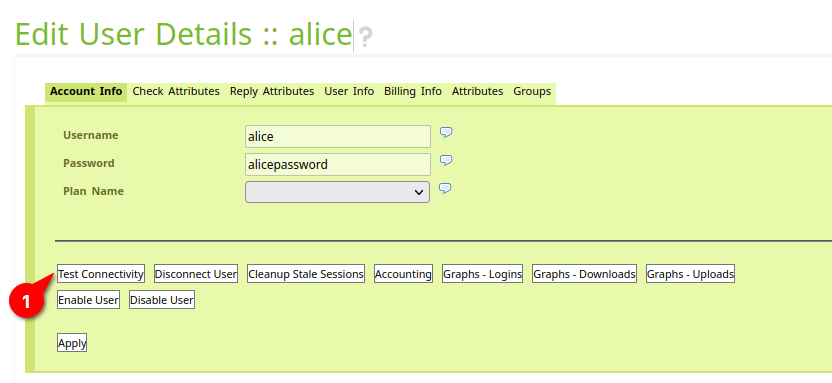
4. Lastly, click the Perform Test button to verify and authenticate the user against the FreeRADIUS server.
If you get a Received Access-Accept id … message, the new user alice is successfully authenticated against the FreeRADIUS server.
Setting Up Network Access Server (NAS) on daloRADIUS
You’ve learned how to authenticate a user from daloRADIUS against the FreeRADIUS server, indicating they work fine together. But is integrating FreeRADIUS and daloRADIUS to other network services possible? Yes! Network Access Server (NAS) will do the trick.
NAS is a gateway for the FreeRADIUS integration to the network services, such as Hotspot Login. So you’ll set up NAS before integrating FreeRADIUS and daloRADIUS to other network services.
In the daloRADIUS dashboard, click the Management menu tab —> Nas tab to access the NAS Management page.
Click the New NAS menu and enter NAS configuration details under New NAS Record with the following:
- Set the NAS IP/Host address to your router IP address. This tutorial uses a router with an IP address of 172.168.1.20.
- Set the NAS Secret that matches the secret on your router device. This tutorial uses the secret secretfromrouter in this tutorial.
- Select the NAS Type as your router device, or you can choose other.
- Set the NAS Shortname as your router device name. This tutorial uses the example router name pfsense.test.
- Click the Apply button to confirm the details and create a new NAS.

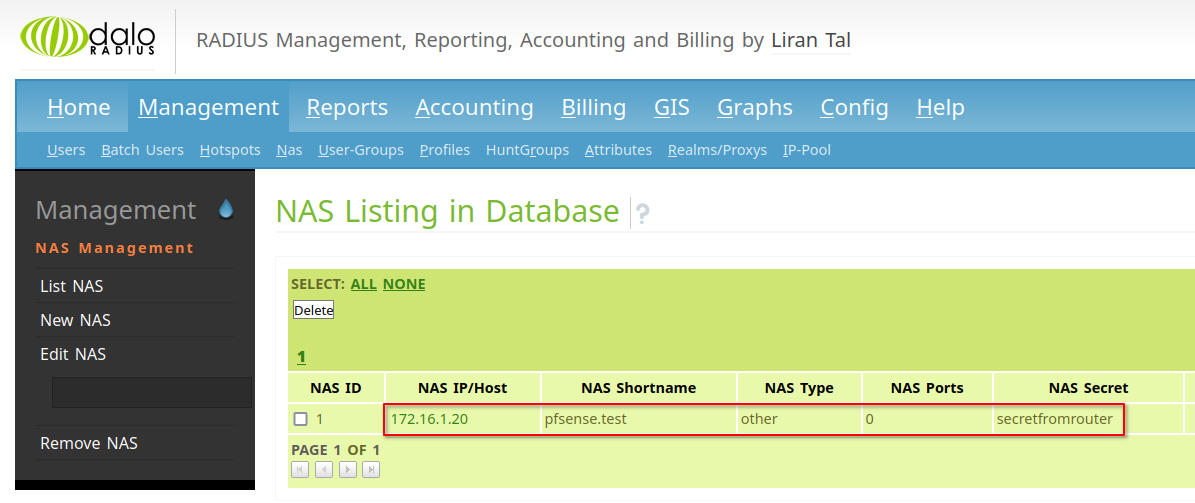
Now, click the List NAS menu to check available NAS on FreeRADIUS.
Below, you can see the new NAS with the IP address 172.16.1.20 and NAS Shortname as pfsense.test.
Conclusion
Throughout this tutorial, you’ve learned how to install the FreeRADIUS server with the MariaDB database backend. You’ve also created a FreeRADIUS user and integrated daloRADIUS with the FreeRADIUS server.
FreeRADIUS is one of the most popular software that provides centralized authentication and authorization, implementing the RADIUS networking protocol. And at this point, you’ve learned the basics of using daloRADIUS for managing FreeRADIUS users and NAS.
Why not integrate the FreeRADIUS server and daloRADIUS as a Captive Portal to your Network devices, such as Mikrotik and pfSense?


