

Manually provisioning and managing your applications servers or infrastructure can be a pain. Guessing the required amount of infrastructure resources could lead to overprovisioning. Why not consider taking advantage of Fargate AWS?
AWS Fargate lets you run containers on AWS that offer a serverless infrastructure, so you can spend more time focusing on application development. And in this tutorial, you will learn to deploy a simple containerized application with AWS Fargate.
Read on and avoid outages or downtime in your application!
Prerequisites
This tutorial will be a hands-on demonstration. To follow along, be sure you have the following:
An AWS account.
A container image – The tutorial uses a simple NodeJS application container image hosted on DockerHub.
What is Fargate AWS?
When you want the ease of serverless computing without the headache of managing servers, AWS Fargate is the perfect solution. But what is AWS Fargate anyway?
AWS Fargate is a serverless compute engine for containers that work with AWS ECS and Amazon Elastic Kubernetes Service (EKS). AWS Fargate is a convenient way to deploy and manage containerized applications in the cloud without having to manage any servers.
With AWS Fargate, you only need a container image, and you can launch your container in no time.
Provisioning Workload for AWS Fargate
Before deploying or running a container image using AWS Fargate, you need a way that determines the infrastructure your tasks and services are hosted on. How? You must first create a cluster in AWS ECS using the Fargate launch type.
To create a cluster, AWS ECS provides a step-by-step method as follows:
1. Open your favorite web browser, and log in to the AWS console.
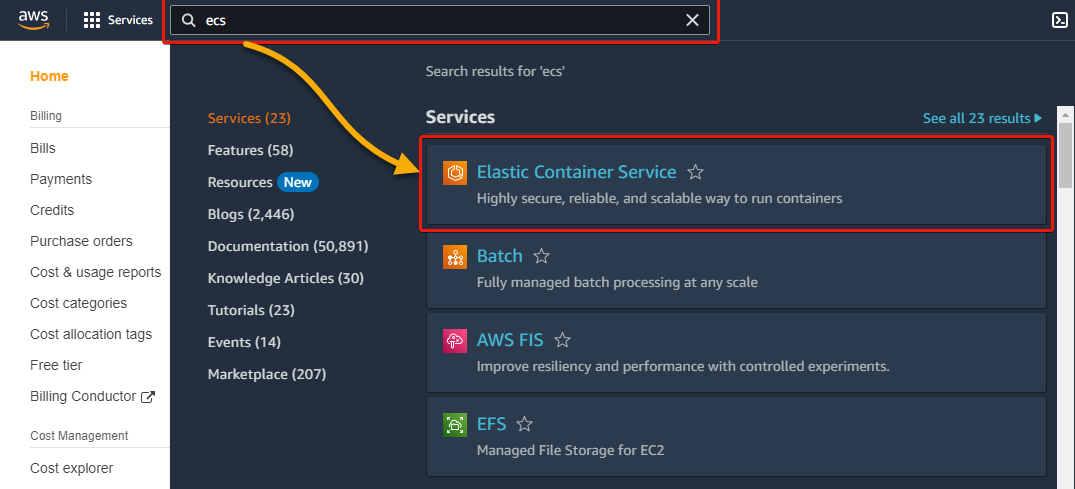
2. Next, search for ECS in the search bar, and click Elastic Container Service from the search results to access the ECS dashboard.  Accessing the ECS dashboard
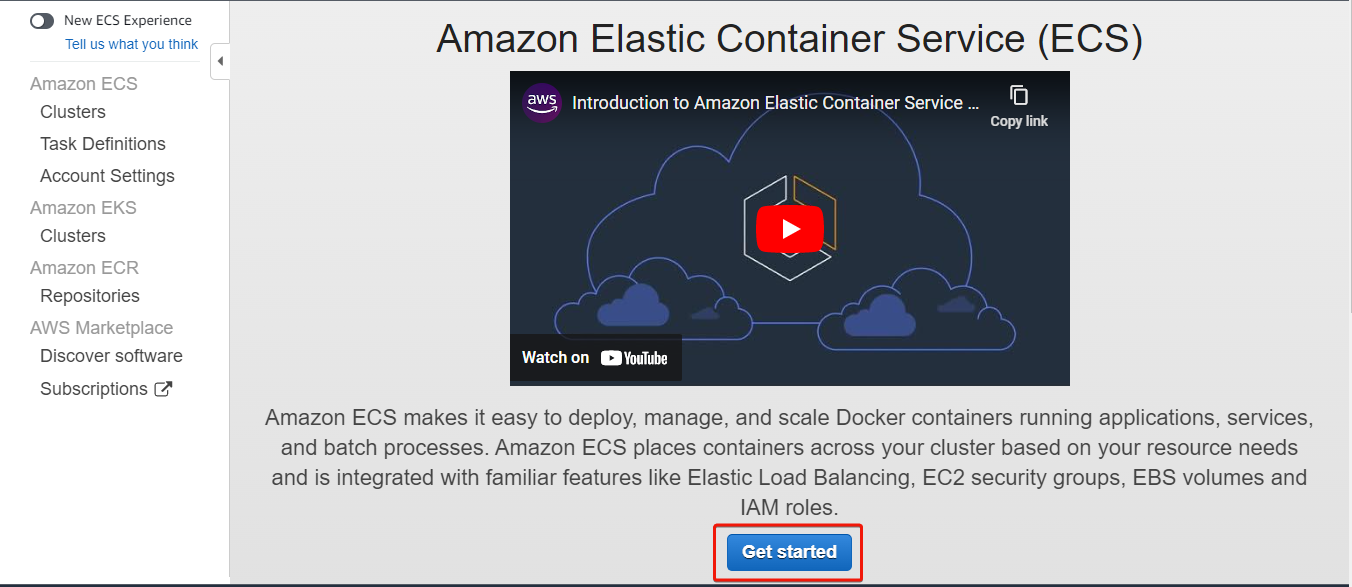
3. On the ECS dashboard, click Get started, and your browser redirects to a wizard page (step four).
💡 Note that if you have the New ECS Experience enabled, the pages will look different than the ones in this tutorial.
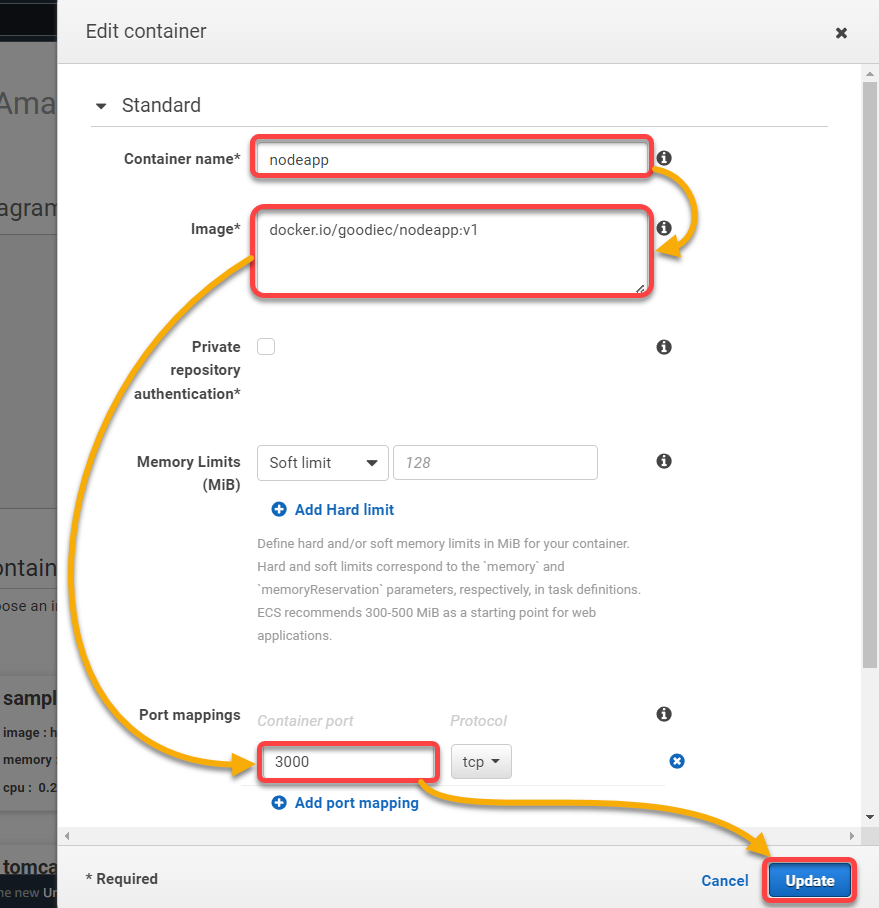
4. Now, in the Step1: Container and Task tab, select custom, and click Configure. A pop-up window appears (right-most), where you can input details of your container image (step five).
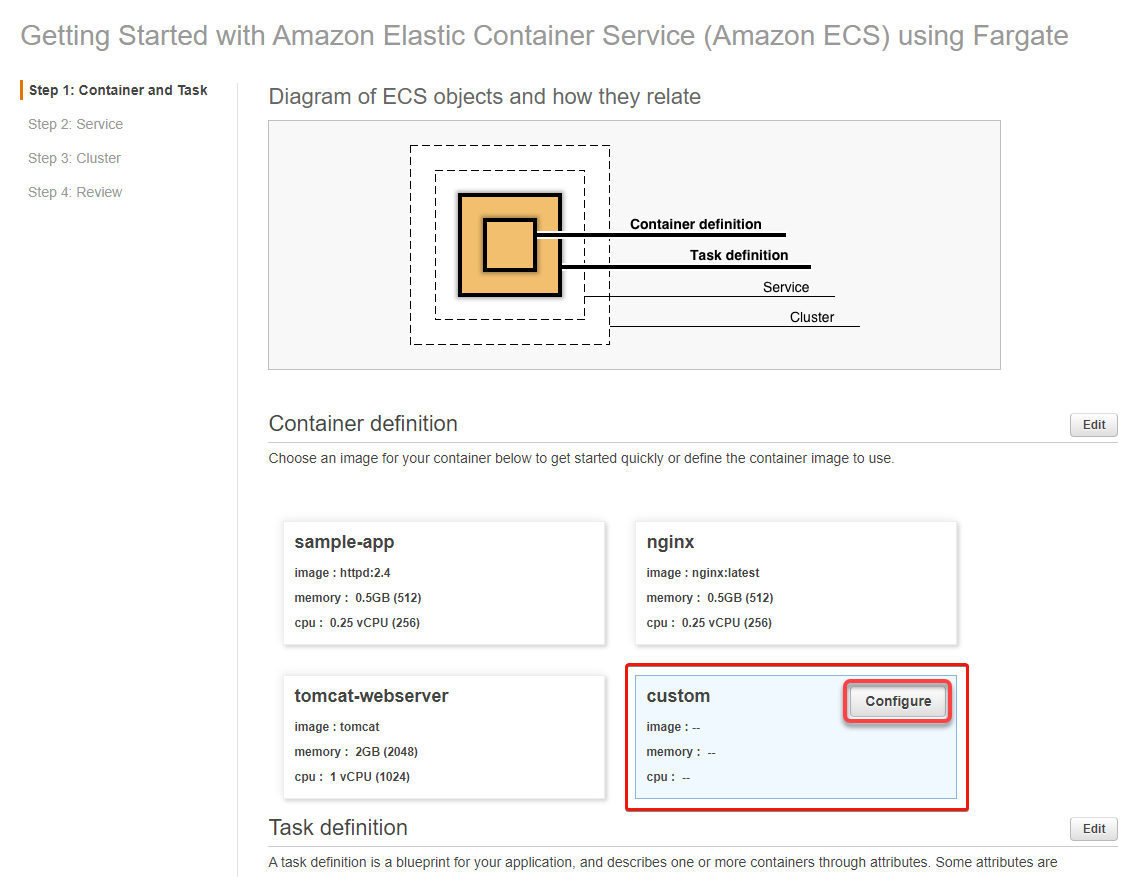
5. Edit the container details with the following:
- Container name – Provide a descriptive name for your container. This tutorial uses the nodeapp container name.Image – Input your container image URI (i.e., docker.io/goodiec/nodeapp:v1).Port mappings – Input the container port, which is 3000 for this tutorial.
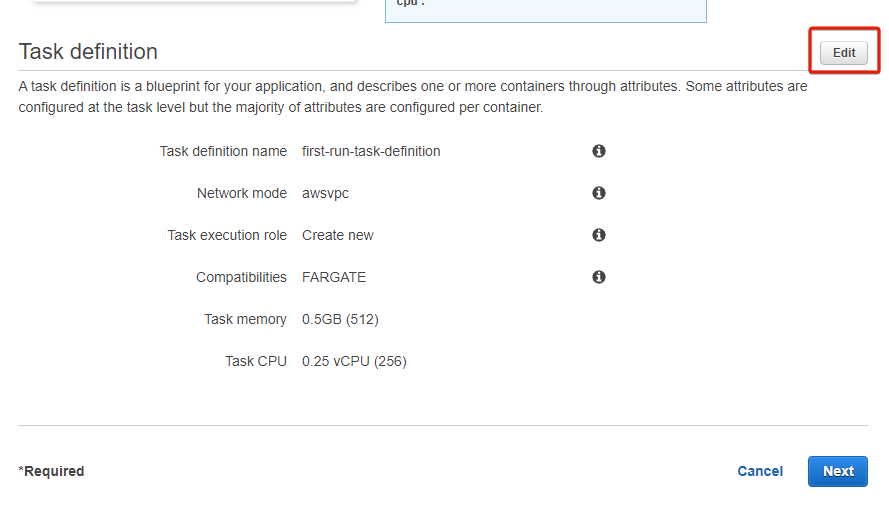
6. Back in the wizard page, scroll down to the Task definition section, and click Edit to make changes to the task definition.
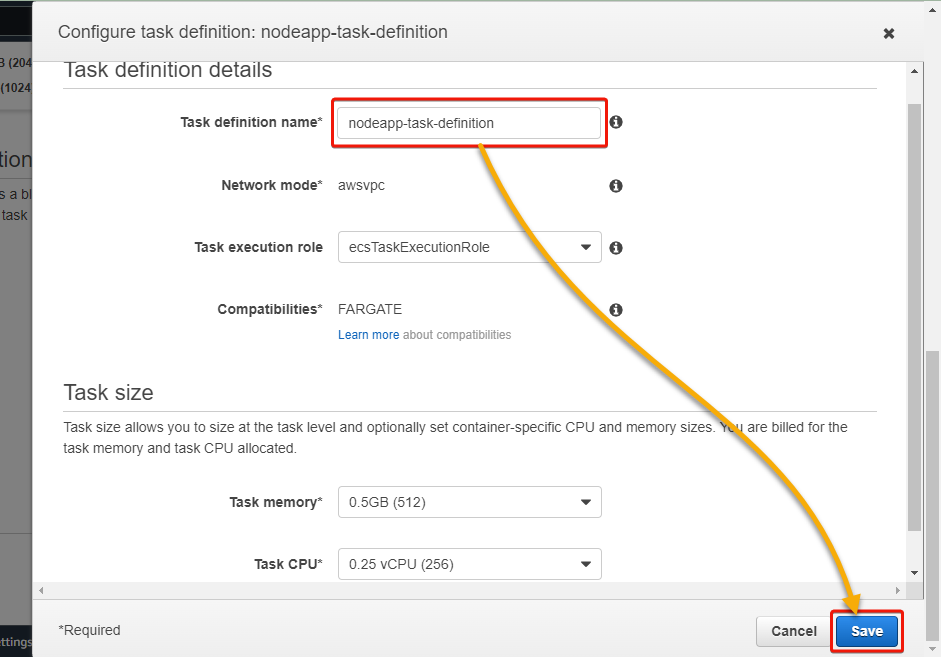
7. Edit the Task definition name (i.e., nodeapp-task-definition), leave the rest as default, click Save to save the changes, and close the pop-up window.
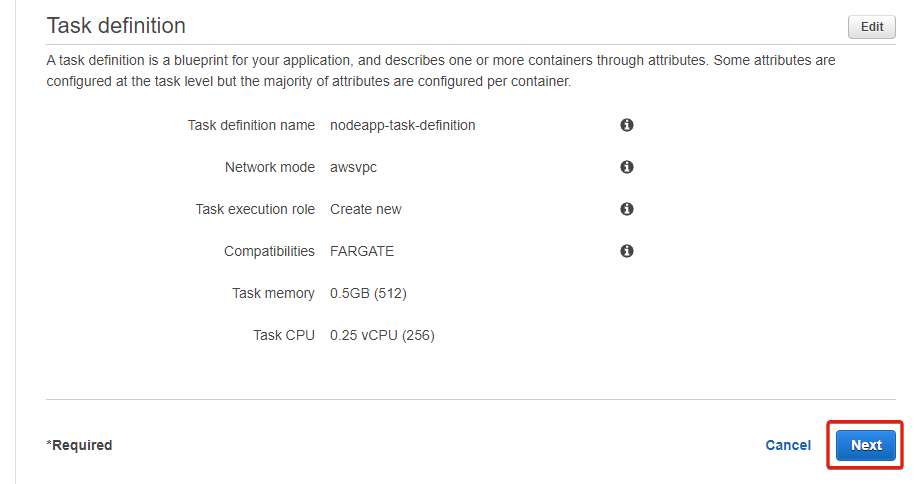
8. Once saved, click Next to confirm the settings. Your browser redirects to a page where you will define your service.
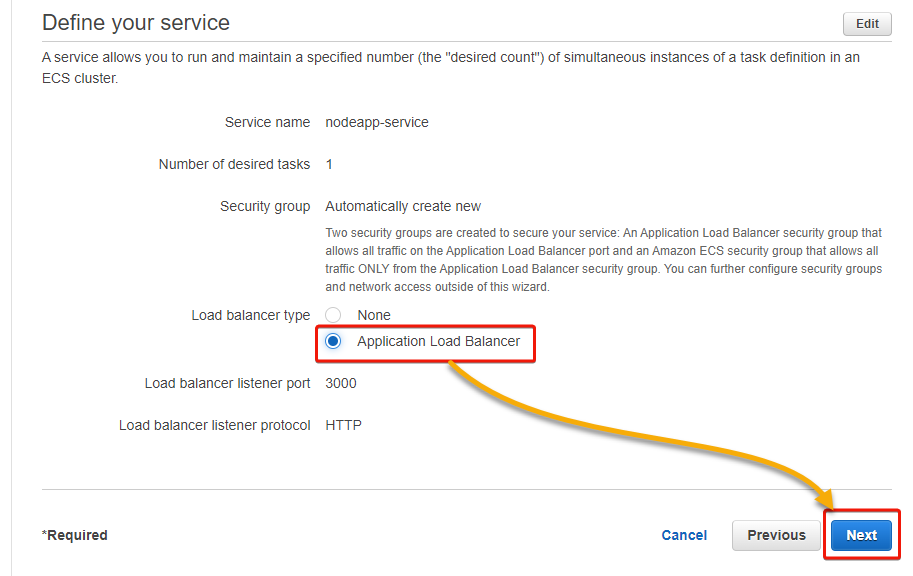
9. In the Define your service section, select the Application Load Balancer option as the load balancer type, leave the rest as default, and click Next.
This action creates an AWS Fargate-oriented ECS service, a specified number of tasks, and adds them to the load balancer’s target group.
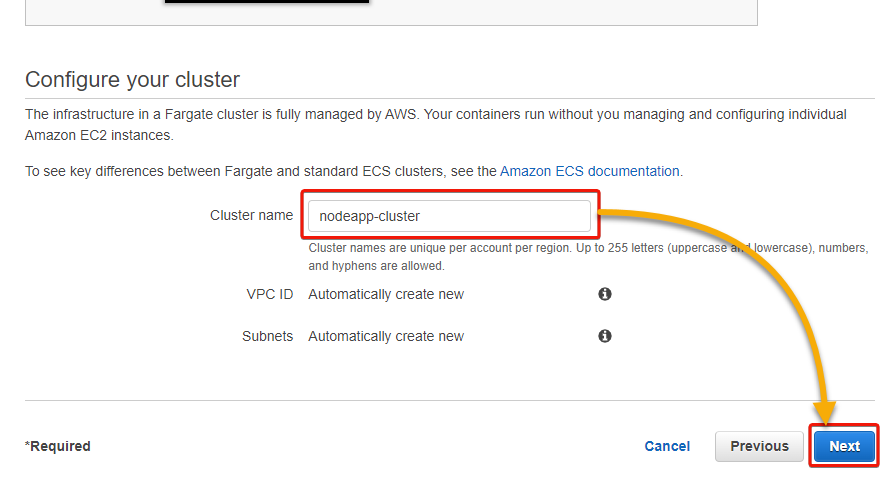
10. Scroll down to the Configure your cluster section, provide a Cluster name (i.e., nodeapp-cluster), and click Next.
The VPC and the subnets will be automatically created for the cluster.
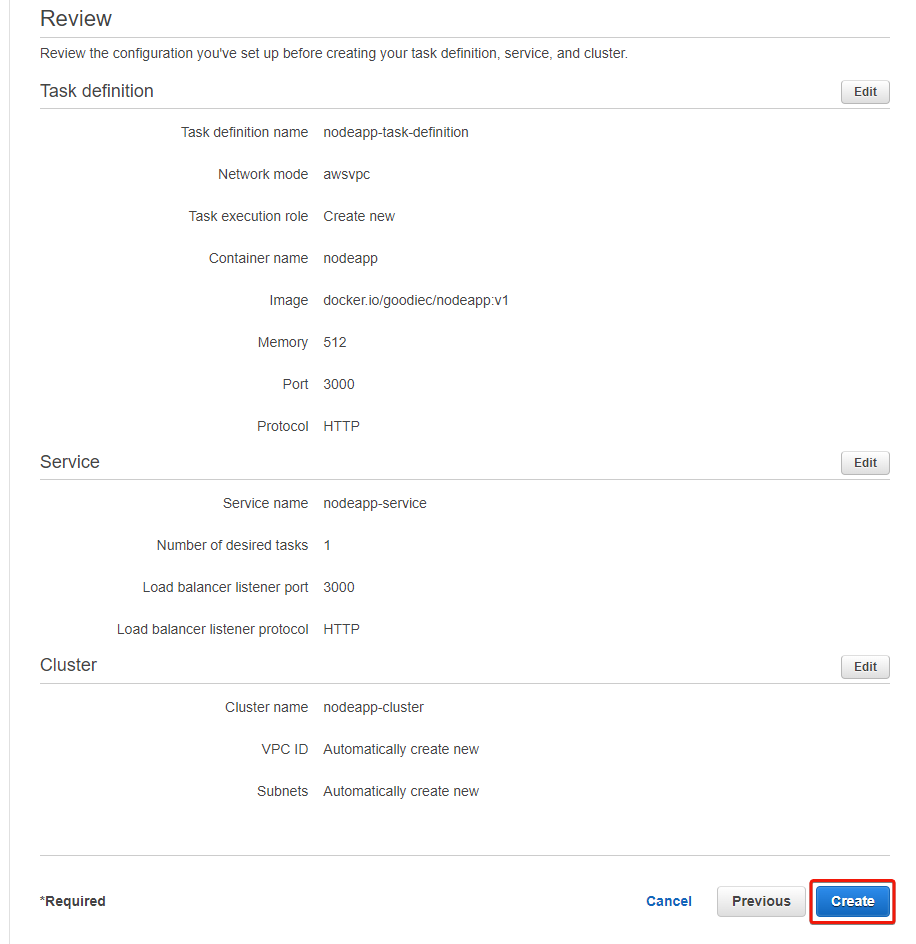
11. Review your selected settings/definitions (or click Edit on any section to make changes), and click Create to finalize creating the service.
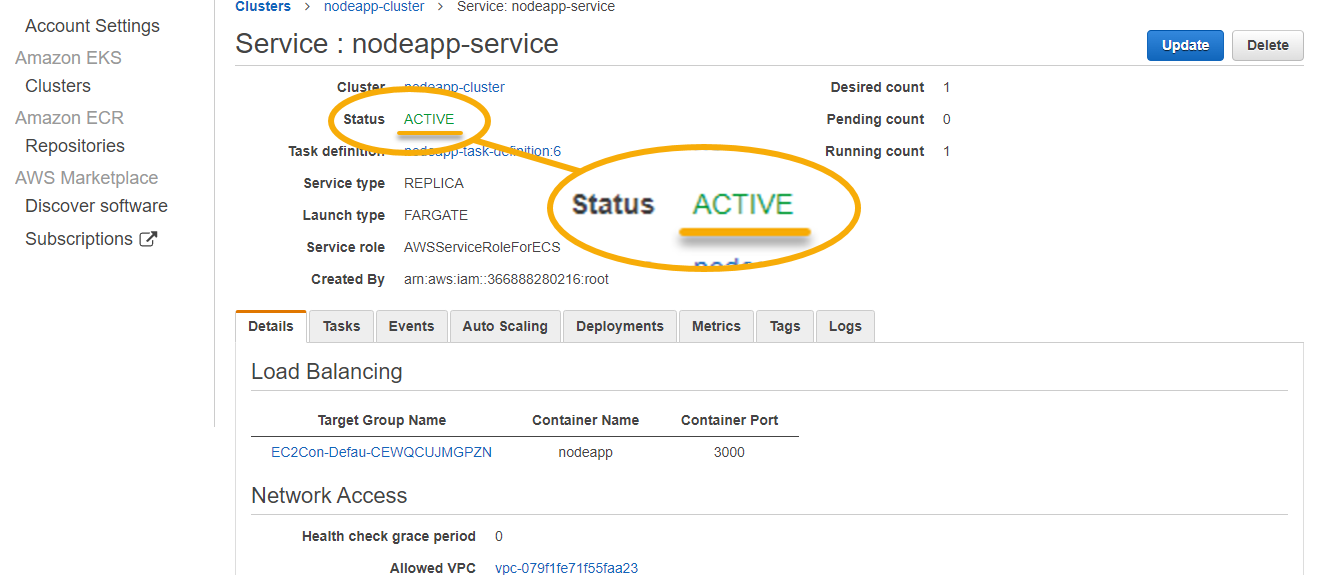
12. Lastly, click on View service to view the service details page after creating the service.
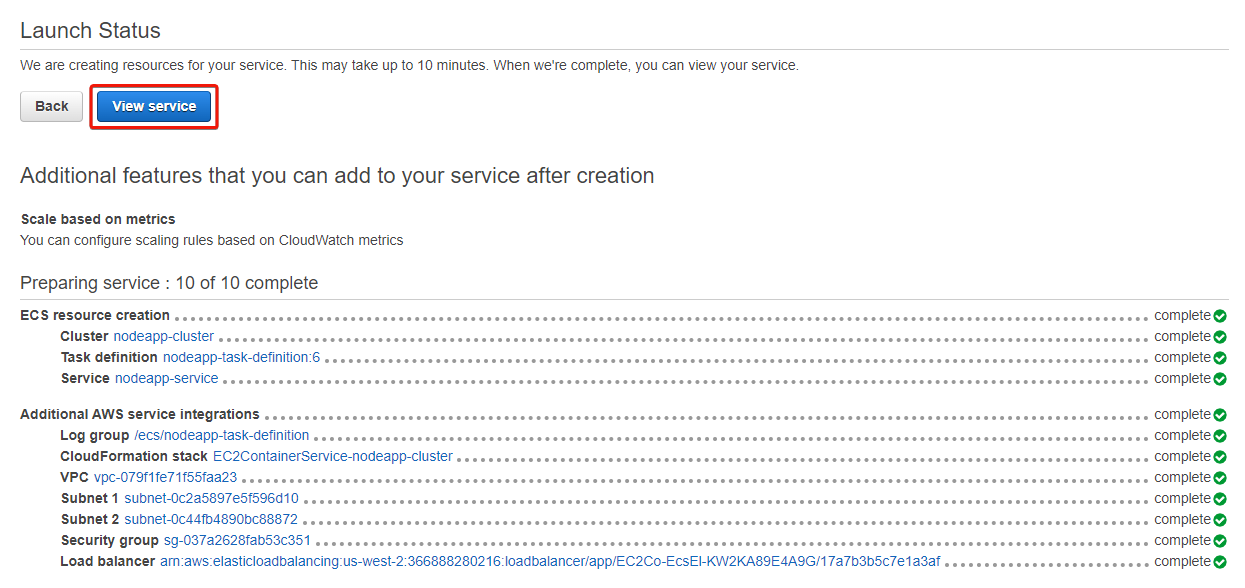
Below, you can see the details of the created service, which is currently ACTIVE.
Verifying the Container Deployment
You have successfully created the service, but how do you know the deployment works? First, you must get the public IP address or the DNS name of the load balancer, which you will use for this tutorial.
To get the DNS name of the load balancer:
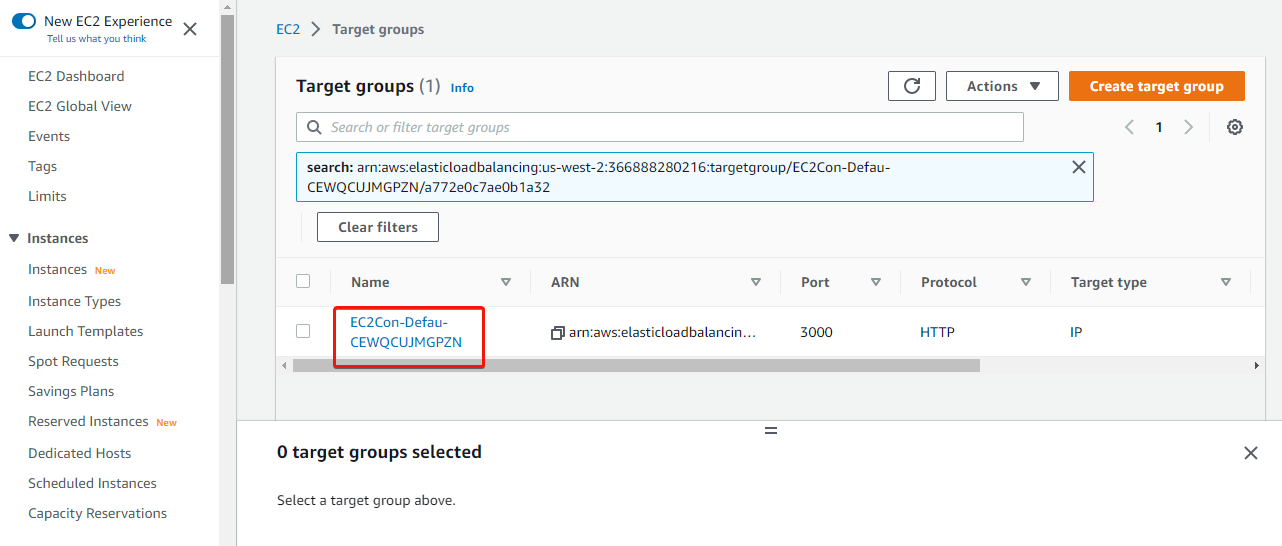
1. In the service page’s Details tab, click on the Target Group Name to access the target group.  Accessing the target group

2. Next, click on the target group’s name from the table to view its details.
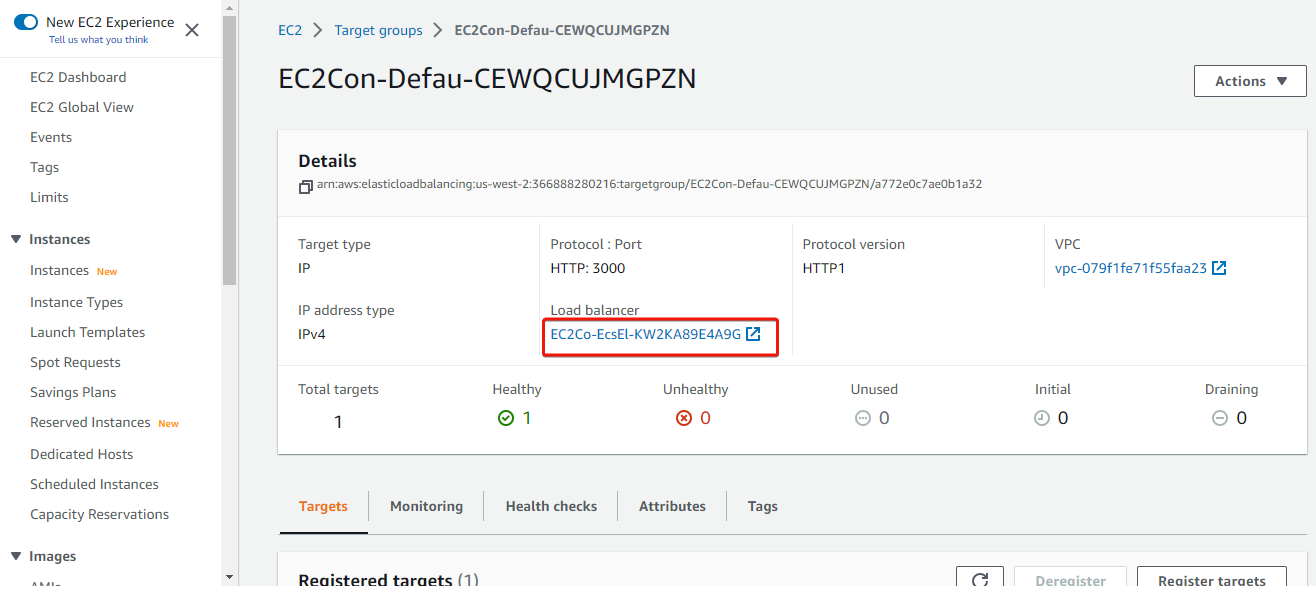
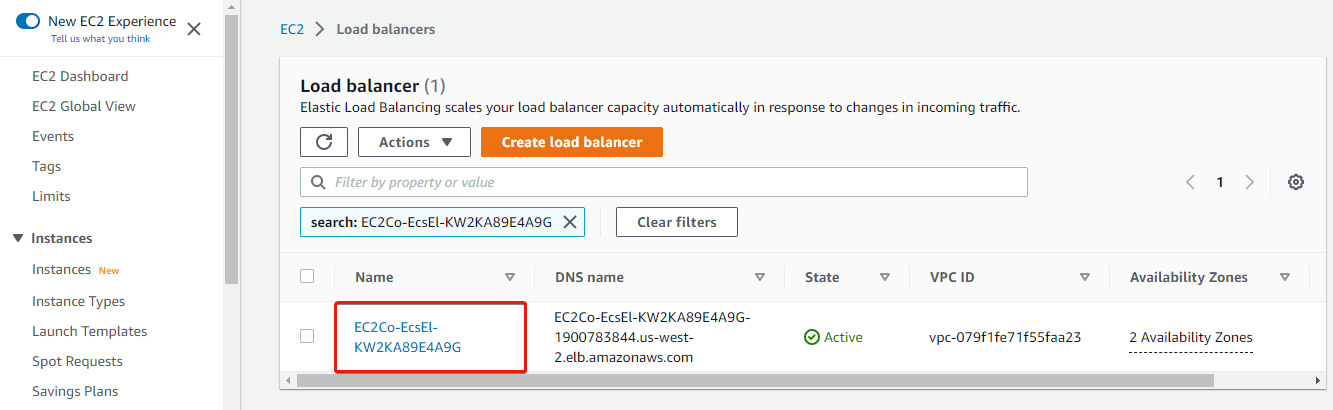
3. On the target group’s details page, click on the load balancer hyperlink to access the load balancer details.
4. Now, copy the DNS name from the table, as shown below.
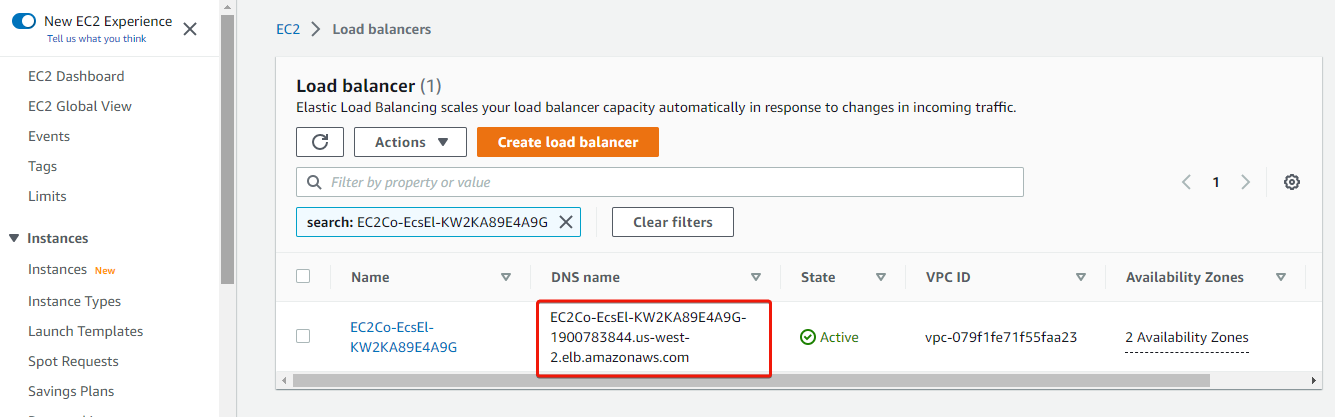
5. Open a new tab on your browser, and navigate to the DNS name you copied in the previous step.
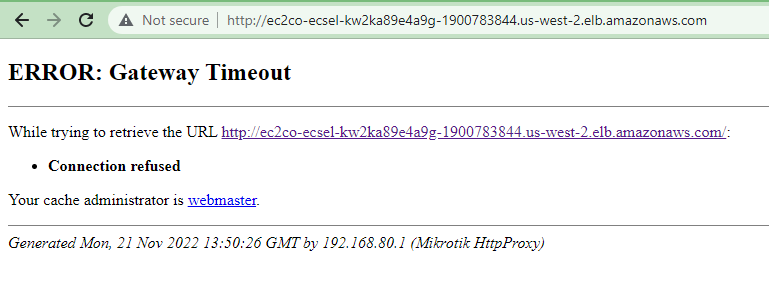
Accessing the app using just the IP or DNS name returns the error shown below since the container port 3000 is listening or is only open for requests.
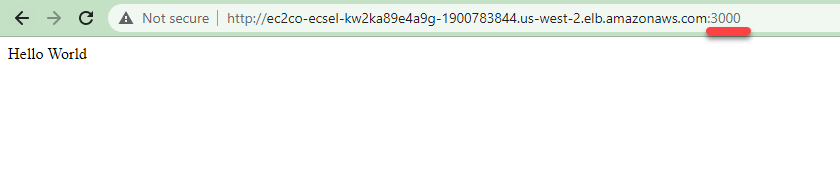
6. Lastly, append the container port to the DNS name (i.e., DNS_Name:PORT or IP_Add:PORT) to view the app, as shown below.
Adding a Listener for Port-Forwarding
You have successfully accessed your deployment via the DNS name of the load balance. But appending the container port to the DNS name each time you access your deployment can be tedious. How do you fix it? By adding a listener to forward requests to the target group and allow inbound traffic.
To add a listener for port-forwarding, follow these steps:
1. Navigate to the Load balancers page, and click on the load balancer name to access its details page.
2. Next, scroll down to the Listeners tab, and click Add listener to initiate adding a listener.
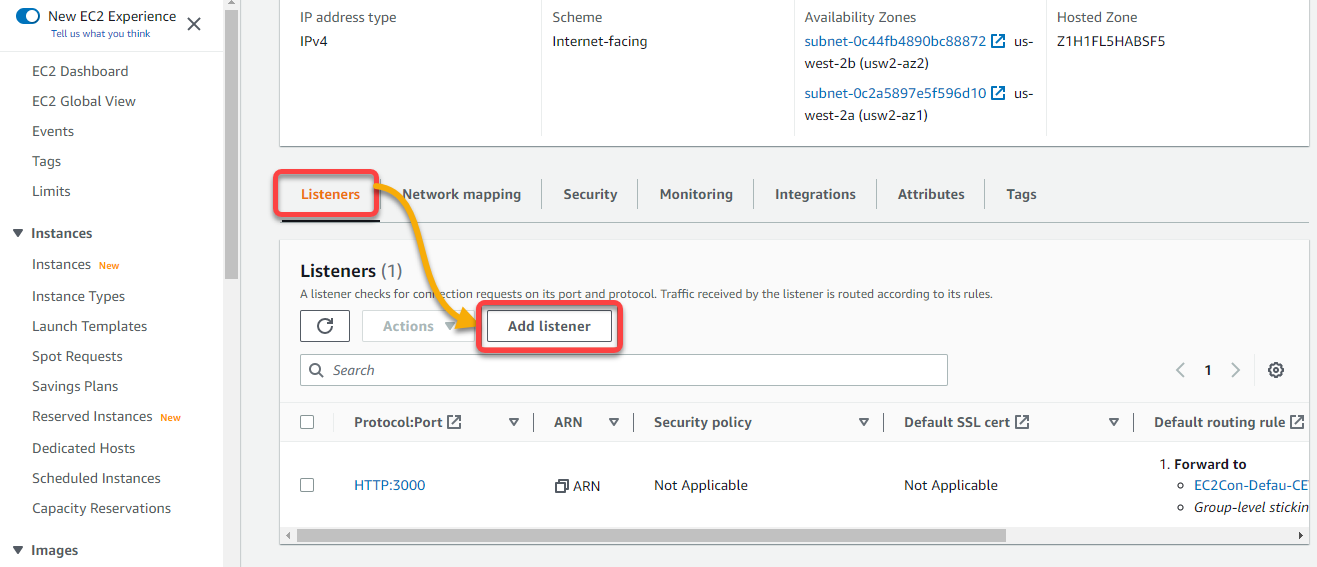
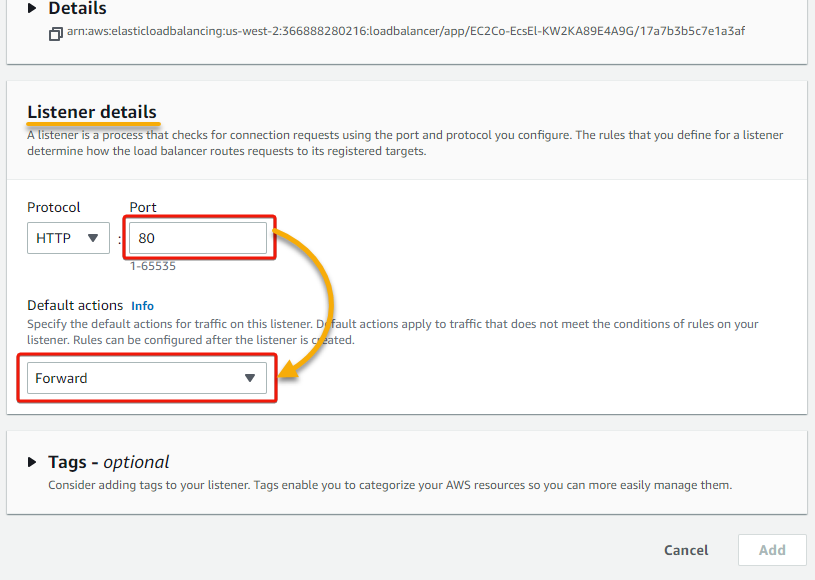
3. Under the Listener details section, input 80 as the Port, and select Forward from the Default actions dropdown field.
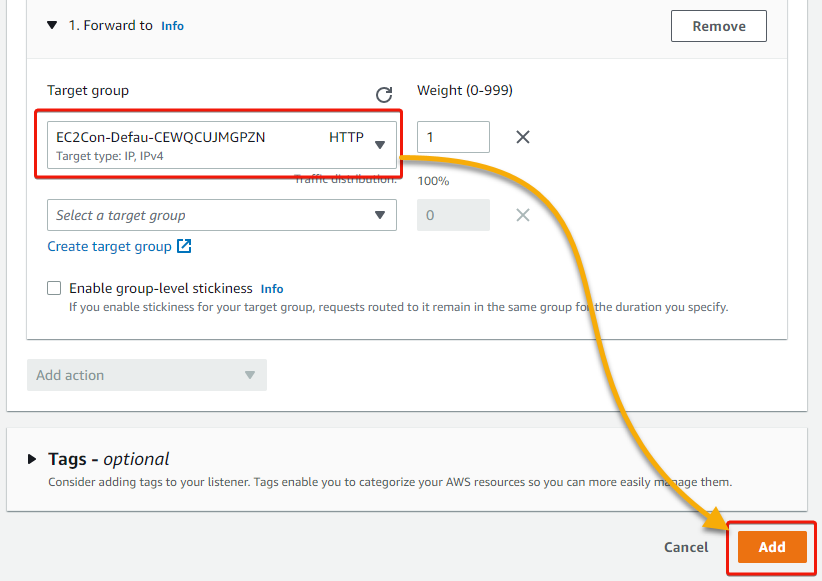
4. Now, select a target group associated with your ECS service on the Target group section that shows up, and click Add. This target group is where requests will be forwarded.
5. Once added, click the load balancer name to go back to the load balancer’s details page.

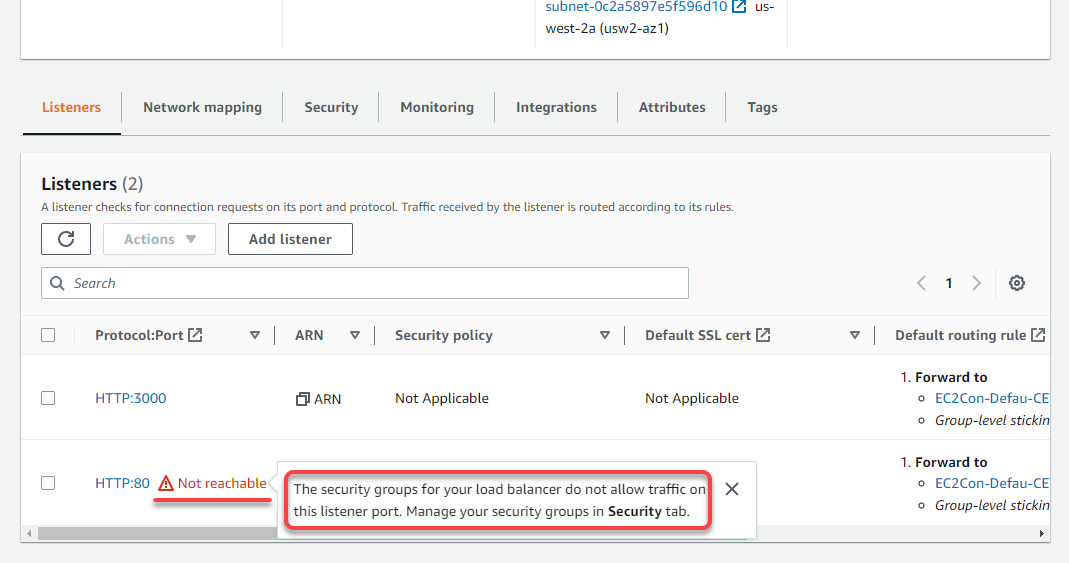
6. On the load balancer details page, hover your mouse over the Not reachable error message to see more about the error.
This error shows up because the load balancer’s security group does not allow traffic on the port you added (80).
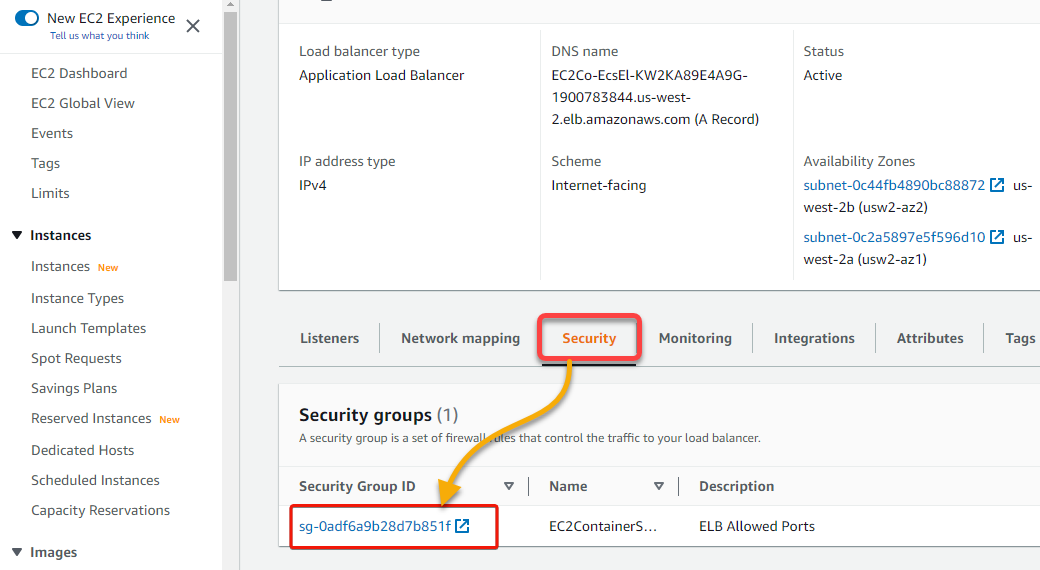
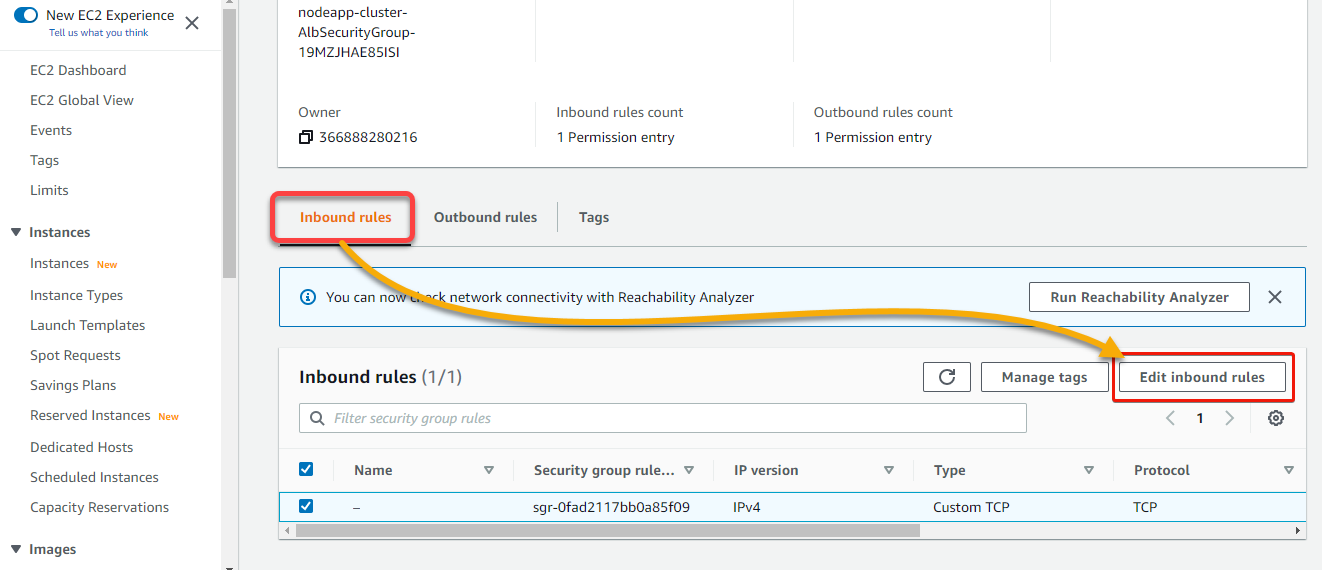
7. Navigate to the Security tab to access the security groups list, and click the Security Group ID from the list to view its details.
8. Under the Inbound rules tab, click Edit inbound rules to configure the selected inbound rule.
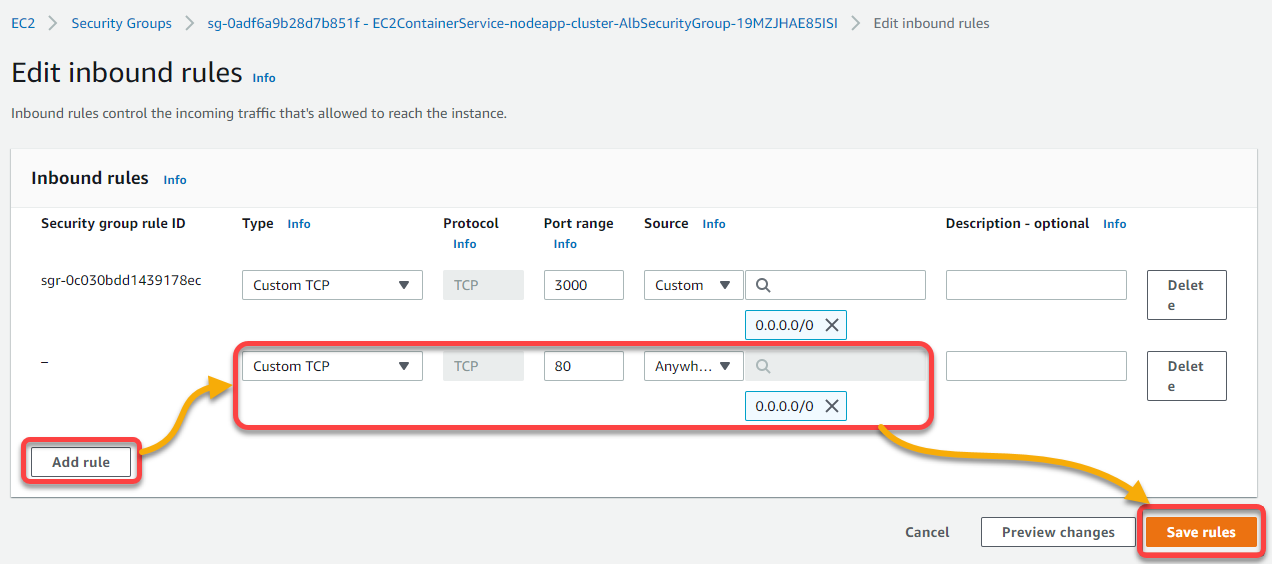
9. Click Add rule (lower-left), allow port 80 (HTTP traffic) from Anywhere and click on Save rules (bottom-right) to save the changes.
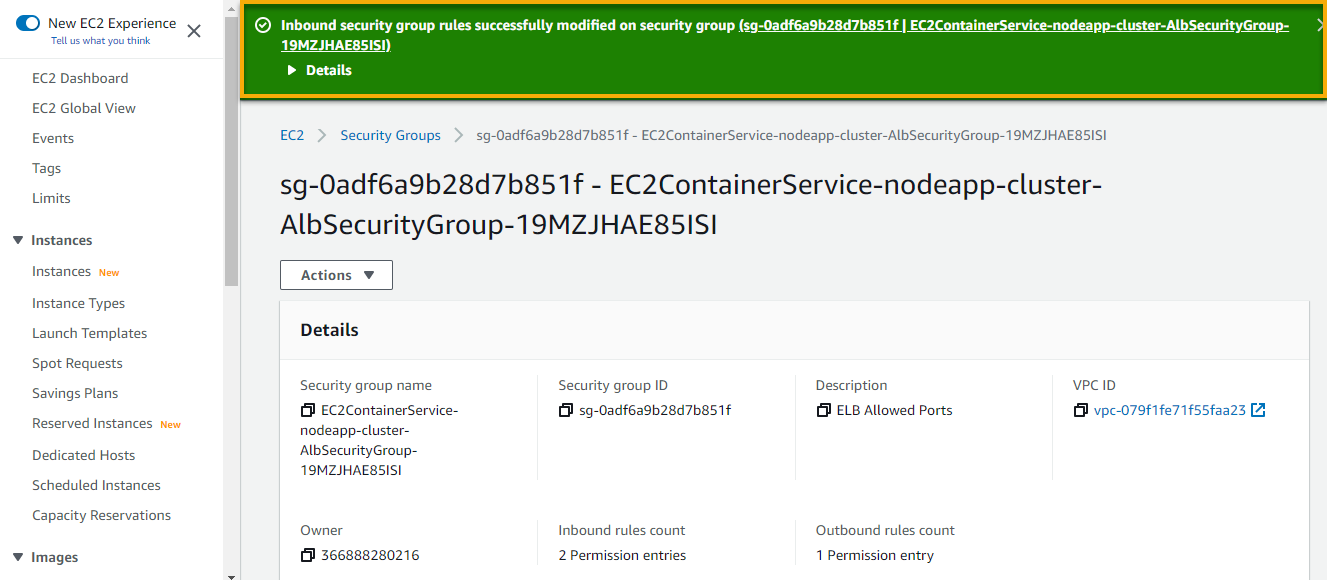
As shown below, you will see a success message if the rule is added successfully.
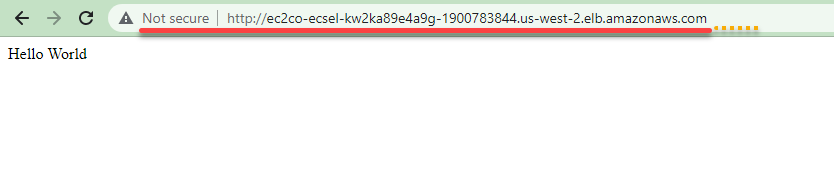
10. Finally, navigate to the DNS name again without appending port 80, and you will get the same page as below.
Conclusion
AWS Fargate is a convenient serverless infrastructure that can be used to deploy and run containers. And throughout this tutorial, you have learned containerizing and deploying applications without having to worry about server provisioning or management.
At this point, you can confidently get rid of unpredictable costs or underprovisioning resources.
Now, why not learn how AWS Fargate works with AWS CloudWatch for application and infrastructure monitoring? Take advantage of AWS Fargate now and enjoy the benefits of serverless infrastructure!


