

Are you looking to create a big-scale application but are worried about how you’ll manage it? Maintaining such a big-scale application is a big task. How do you think you’ll tackle this undertaking? What will happen if your server goes down?
Perhaps it’s time you consider moving your Docker containers to Amazon Elastic Container Service (ECS). Don’t be scared. This AWS ECS tutorial teaches you how to deploy your Docker application and never worry about scaling and downtime again!
ECS becomes easier once the AWS networking, IAM, and container pieces click together. If you want a structured learning path alongside this tutorial, compare AWS and container courses on Udemy before you buy.
Prerequisites
This tutorial will be a hands-on demonstration. If you’d like to follow along, be sure you have the following:
- An active AWS account – Register a free-tier account first if you don’t have one.
- Docker and AWS CLI must be installed on your computer – This tutorial uses Docker 20.10.20 and AWS CLI 2.8.3 on Ubuntu 20.04.
- An existing Docker image or a Dockerfile for building one – This AWS ECS tutorial uses a Docker image containing a web application serving a static website.
Creating a Repository in this AWS ECS Tutorial
To start with this AWS ECS tutorial, you first need to create a repository in Amazon Elastic Container Repository (ECR), where you’ll push your Docker image.
1. Open your favorite web browser and log in to AWS Management Console.
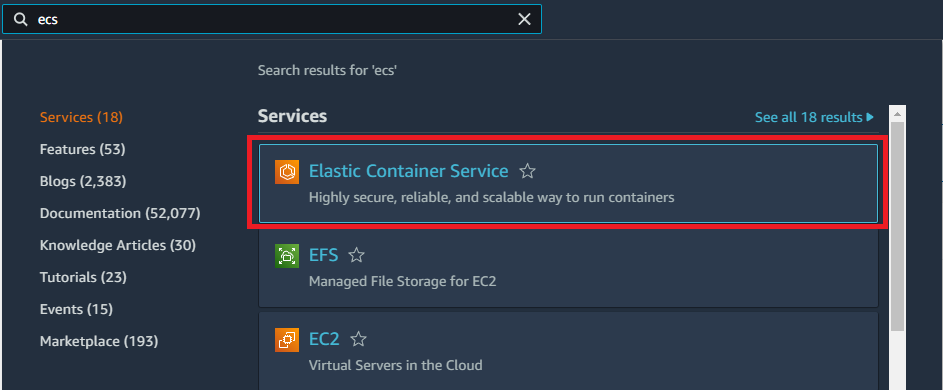
2. At the search bar, type in Elastic Container Service or ECS, and click Elastic Container Service from the results. Doing so will redirect you to the ECS page.
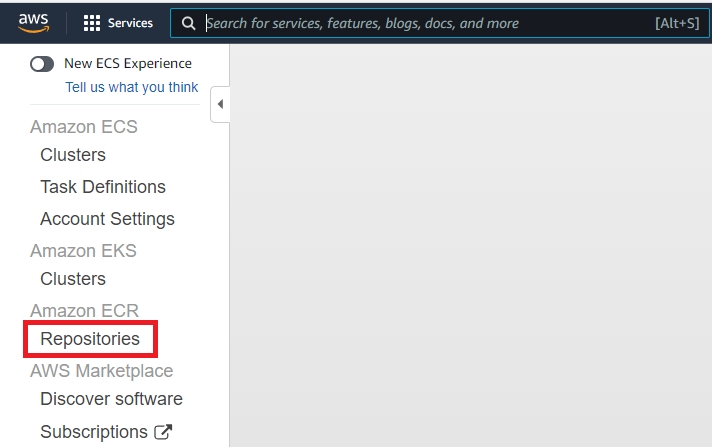
3. Click on the Repositories sidebar menu.
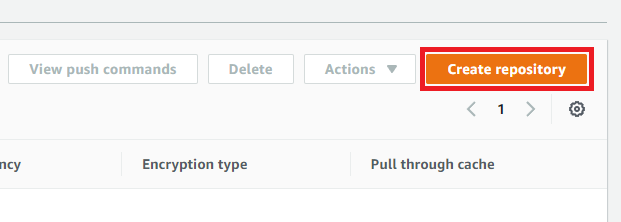
4. On the Repositories page, click on the Create repository button. Doing so will redirect you to a form to fill out and create the repository.
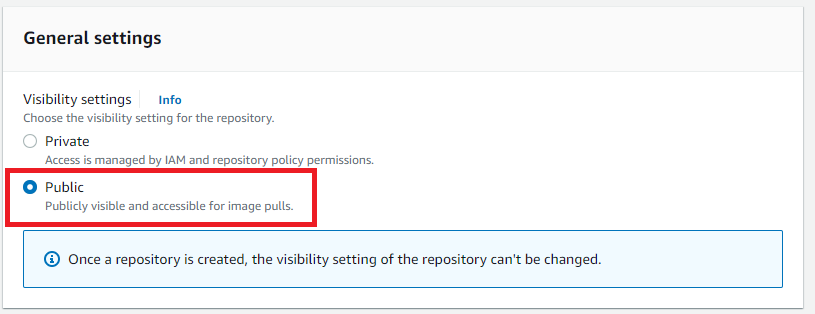
5. In the Create Repository form, select the visibility of the new repository — Public or Private. Select Public in this example so that the repository will be accessible everywhere.
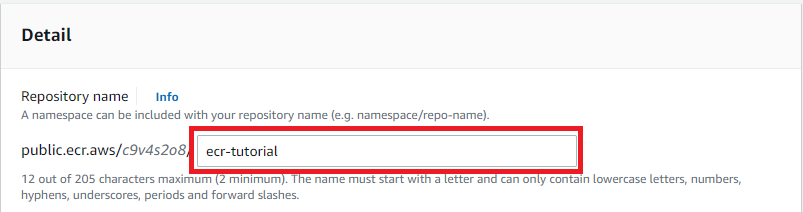
6. Next, enter the name of the new repository. Ensure that you follow the naming rules below.
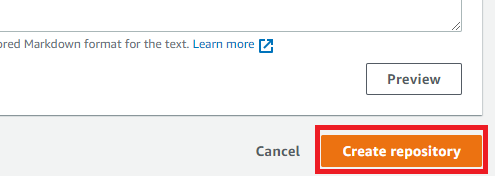
7. Lastly, scroll to the bottom of the page and click the Create repository button.
Pushing a Docker Image to ECR
Now that you’ve created the repository, the next step in this AWS ECS tutorial is to push the Docker image file to the repository.
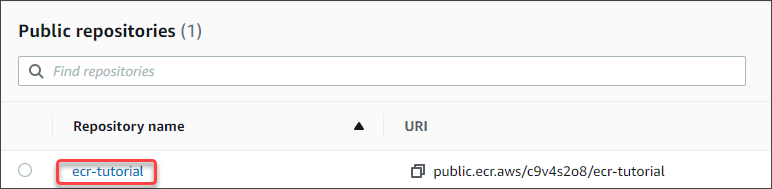
1. Click the new repository named ecr-tutorial to open it.
2. Click on the View push commands button to get the commands you must run on your computer to push an image to the repository.
As of this writing, AWS CLI is the only way to push Docker images to ECR.

3. Next, you should see a window similar to the one below. Copy the commands for later and click Close.
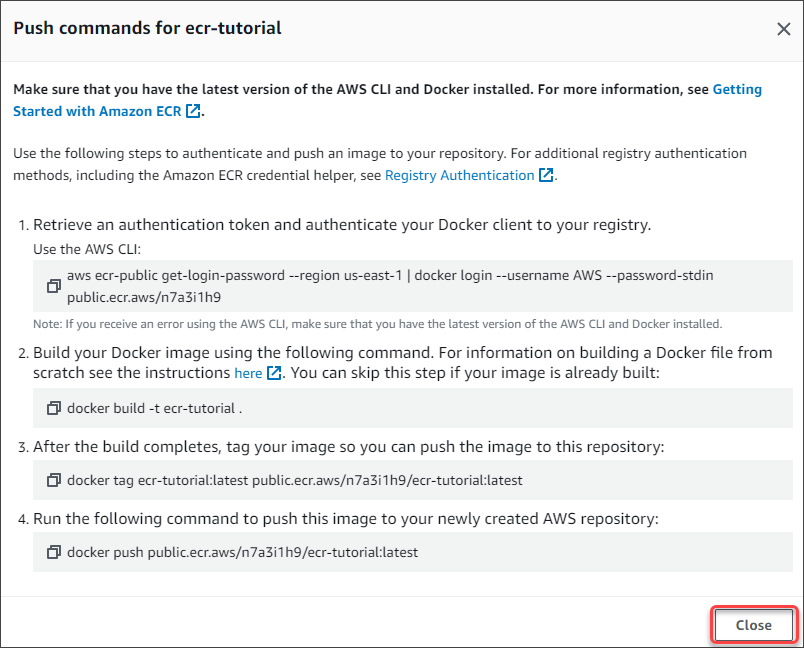
4. Now that you have the commands to push the Docker image to the repository, start by running the first saved command to authenticate your Docker client to the registry.
aws ecr-public get-login-password --region us-east-1 | docker login --username AWS --password-stdin public.ecr.aws/n7a3i1h9Wait to see a Login Succeeded message to confirm a successful login.

5. Next, execute the following command to build a new Docker image named ecr-tutorial for this AWS ECS tutorial.
Ensure that the Dockerfile file is inside the same directory. If you already have a Docker image with the same name as your repository in AWS ECS, skip this step.
This command builds an image with a website that displays the words “AWS ECS Tutorial @ AdamTheAutomator.com” listening on HTTP port 80.
docker build -t ecr-tutorial .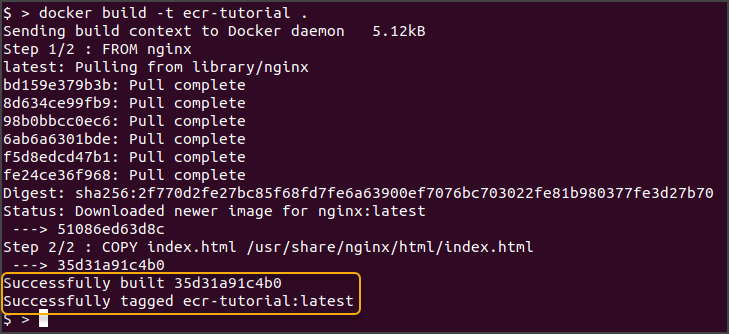
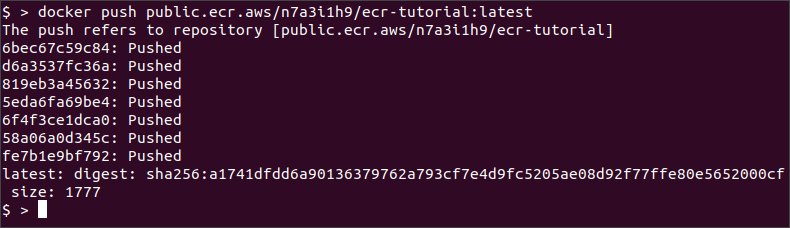
6. Now that you’ve built the Docker image, run the following command to tag the image with your repository prefix. This step enables you to push the image to your ECR repository later.
docker tag ecr-tutorial:latest public.ecr.aws/n7a3i1h9/ecr-tutorial:latest7. Finally, run the following command to push the Docker image to the repository.
docker push public.ecr.aws/n7a3i1h9/ecr-tutorial:latestThe push process can last several minutes depending on your image size, internet speed, and system capacity. This example took less than one minute to complete.
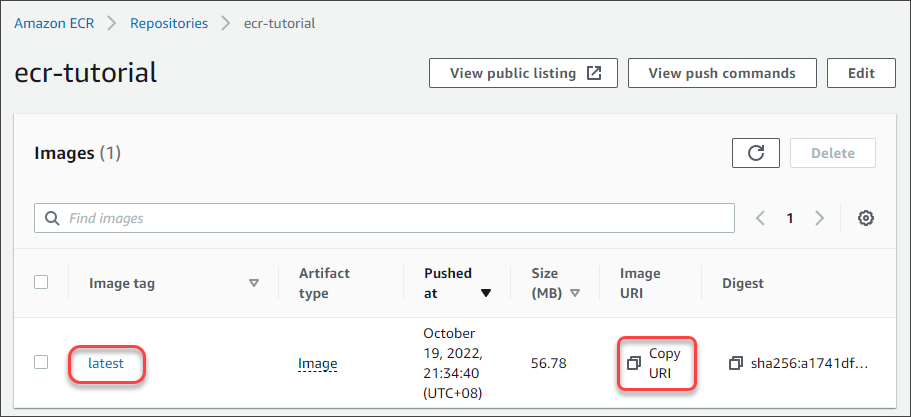
8. Lastly, open your repository in ECR and confirm that you can see the image you pushed. Click on Copy URI and paste it into Notepad or any note-taking program for later use.
Creating an ECS Cluster
You’ve successfully created a repository and pushed an image. But before deploying this image in a container, you must create the ECS cluster. Creating a cluster will create the required resources in the background.
Follow the below steps to create a new cluster in this AWS ECS tutorial.
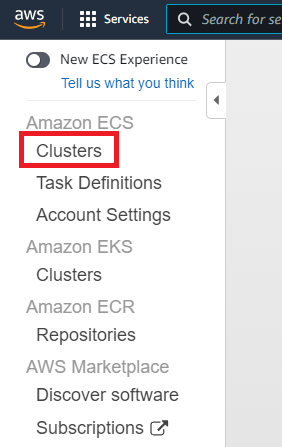
1. Navigate to the ECS page.
2. Click Clusters from the sidebar menu under the Amazon ECS heading.
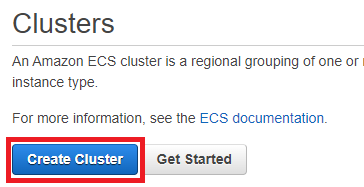
3. Click on Create Cluster to create a new cluster.
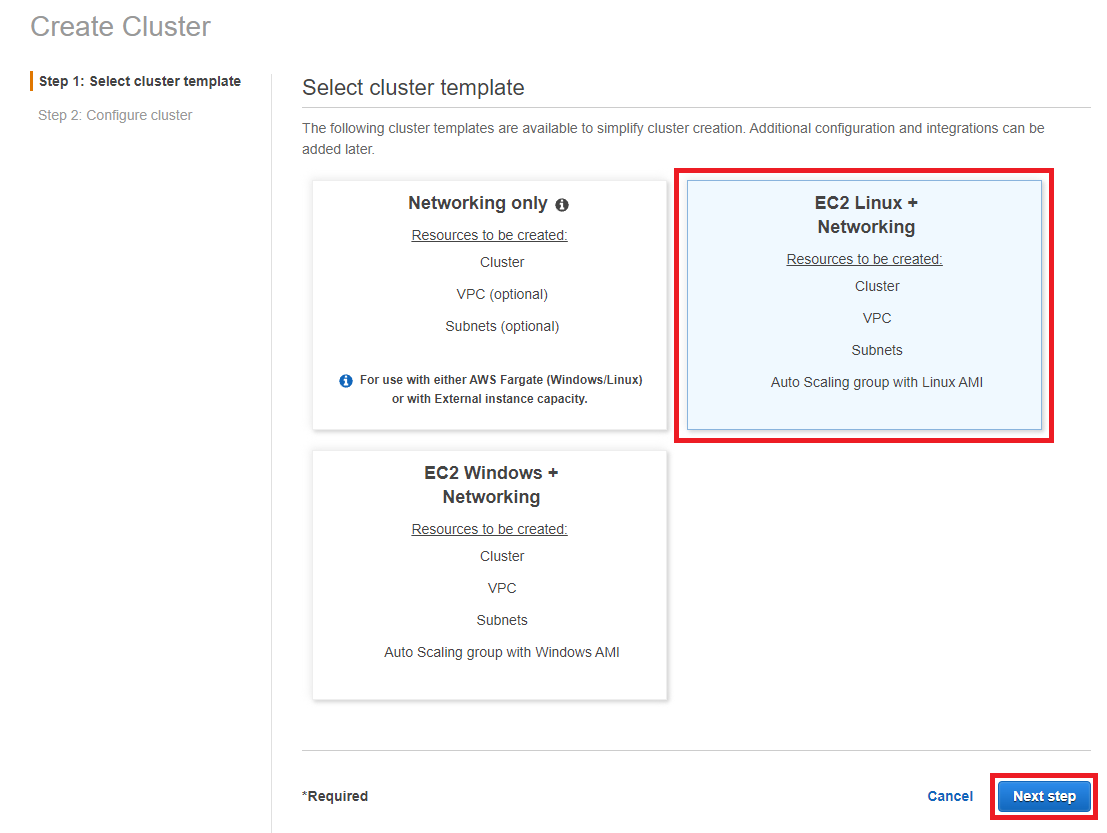
4. Select the EC2 Linux + Networking template, and click on the select button.
The EC2 Linux + Networking cluster is preferable for long-term production-level projects, while Networking only is suitable for small testing environments and short-term projects.
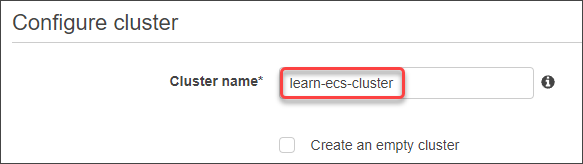
5. Next, enter the Cluster name. This example uses learn-ecs-cluster as the cluster name.
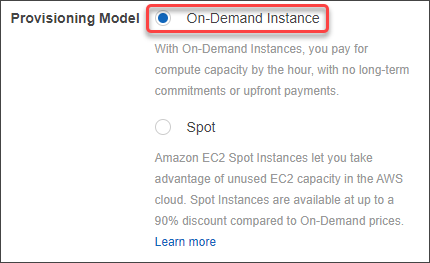
6. On the Provisioning Model, you have two options. The On-Demand Instance is the pay-as-you-go model, while the Spot model charges you a monthly fixed price. In this tutorial, choose the On-Demand Instanced model.
7. On the EC2 instance type, select the EC2 size that the ECS will provision. This example chooses the t2.micro instance type.
Refer to Amazon EC2 Instance Types for the list of available EC2 instance types.

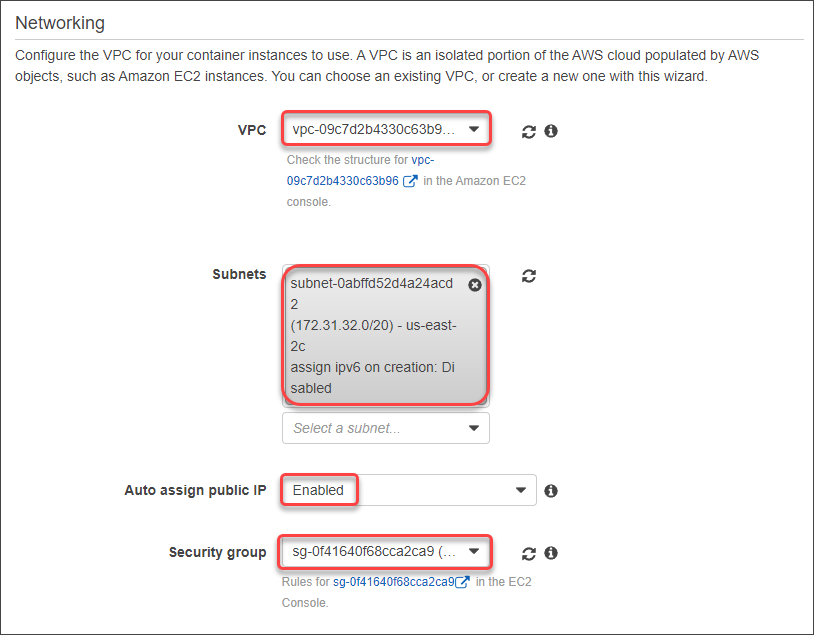
8. Under Networking, specify the VPC, Subnets, and Security Group for this cluster’s EC2 instance. Also, select Enable next to the Auto assign public IP so that the cluster assigns a public IP address to your instance.
Ensure that the Security group you choose has rules that allow access to your application’s required port(s).
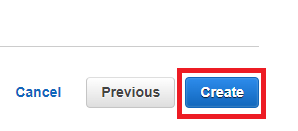
9. Now you’ve filled in all the cluster configurations, click on the Create button to create the cluster.
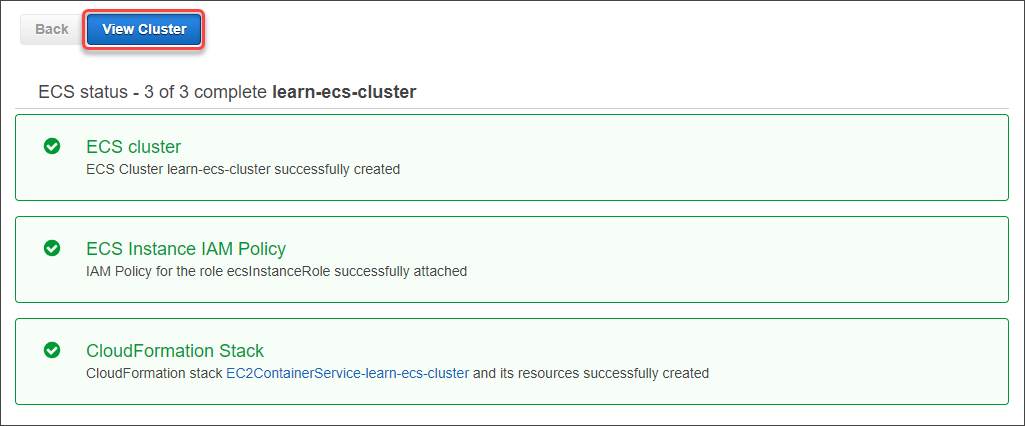
10. Once the cluster creation finishes, you will see a similar output to the one below. Click on the View Cluster button.
Creating a Task Definition
Your next step in this AWS ECS tutorial is creating the Task definition. The task definition specifies the container information, such as the quantity of the containers running in the task and what resources the container will consume.
In essence, creating a task definition in AWS ECS is like creating a Docker Compose (
docker-compose.yml) file on your computer.
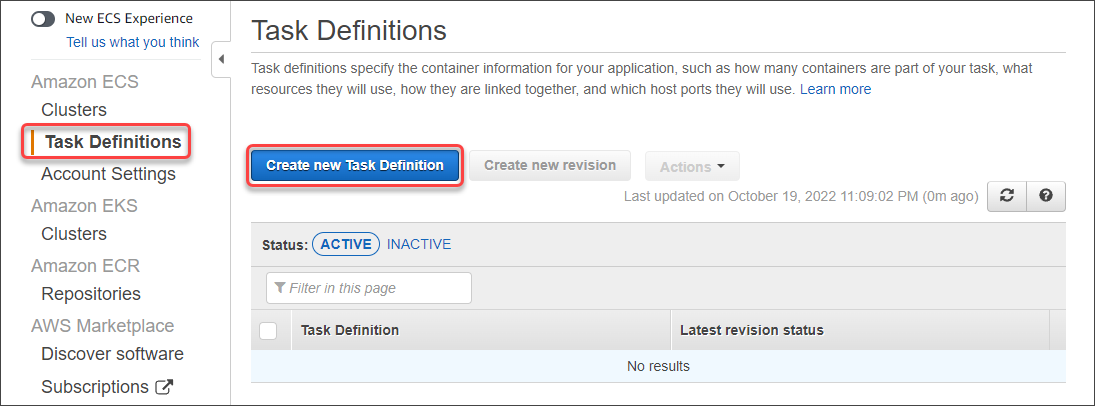
1. Click on the Task definition from the sidebar menu and the Create new Task Definition button.
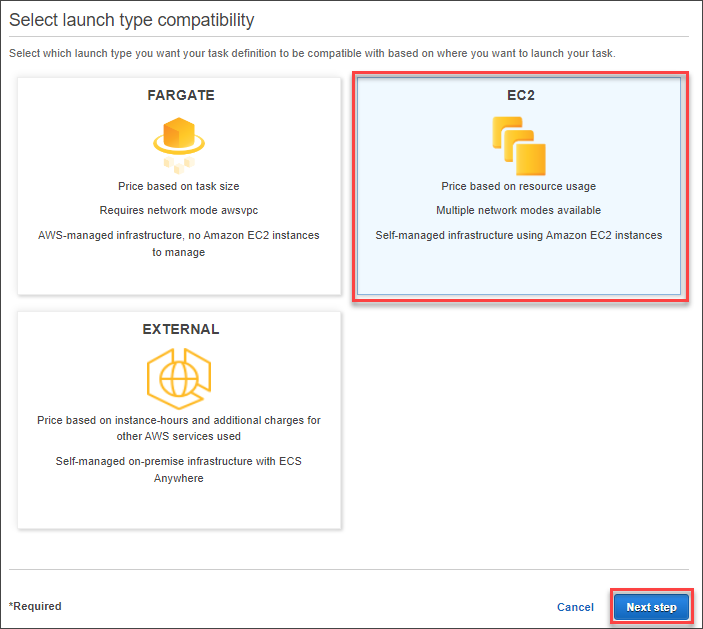
2. Select EC2 under the Select launch type compatibility heading because the cluster template uses the EC2 template. Click Next step.
3. Enter the Task definition name. The name can be anything you want, but choose a name that is descriptive of its purpose.

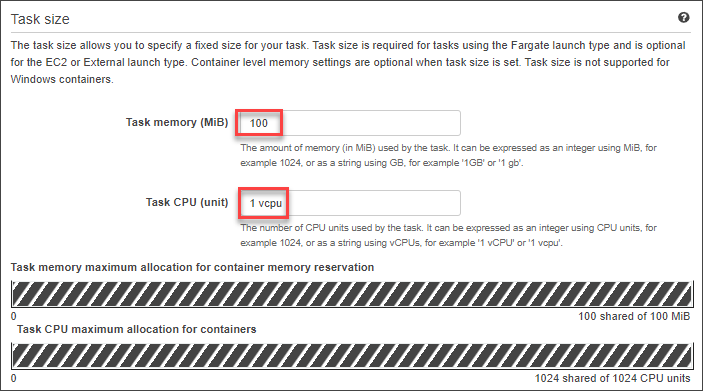
4. Under Task size, enter the adequate Task memory and Task CPU values based on your assessment of the task load. In this example, the values are 100 (MiB) and 1 vcpu (Unit), which are enough to run a basic web server.
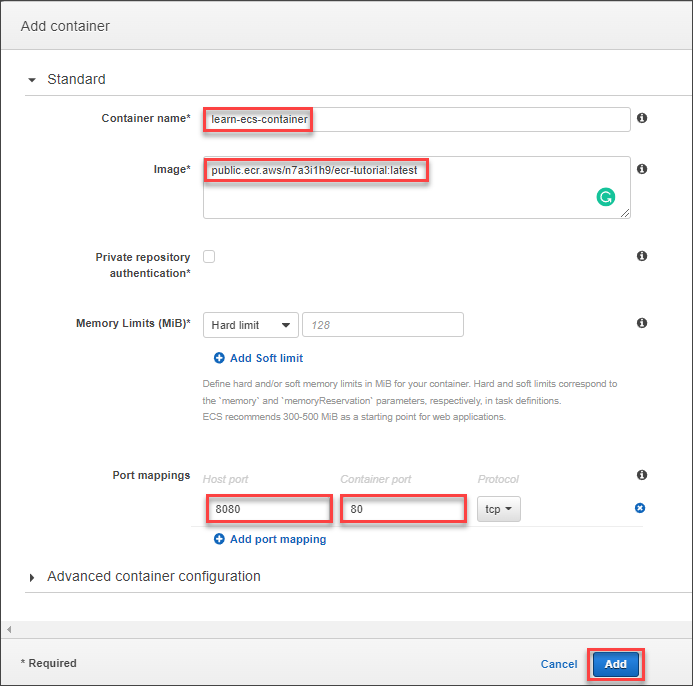
5. Now, click Add container to create the container definitions, which include the image URI, port mapping, and the container name, among others.

6. Next, enter the following information:
- Container name – This example uses the name learn-ecs-container.
- Image – This Docker image URI you copied earlier. This example will fetch the image at public.ecr.aws/n7a3i1h9/ecr-tutorial:latest.
- Port mappings – The host port and container port mapping. This example container will be accessible through the EC2 host’s port 8080, and the web server listens to port 80.
After configuring the container, click Add.
The new container definition appears on the list.

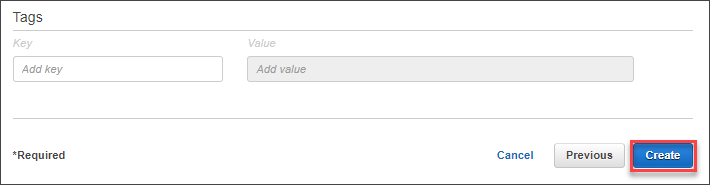
7. Lastly, scroll down to the bottom of the page and click Create.
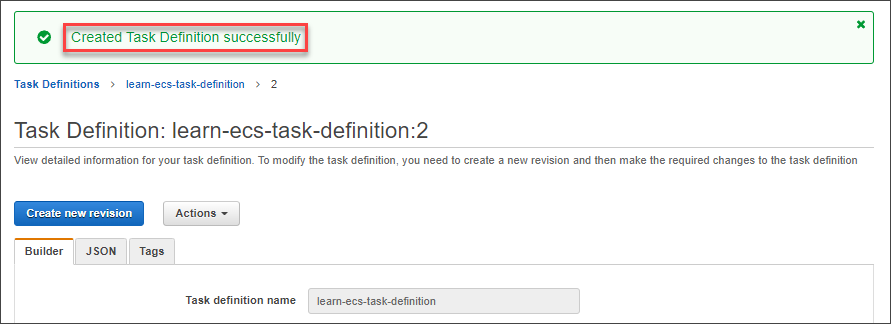
You will see a confirmation banner indicating the task definition creation was successful.
Running the Docker Container in ECS
The next step in this AWS ECS tutorial is to test whether your image and container deployment works. To do so, you must run a new task using the task definition you created.
1. Click Clusters → cluster name (learn-ecs-cluster).

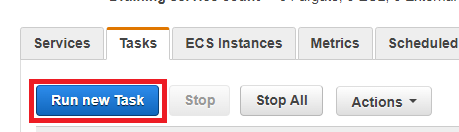
2. Click the Tasks tab and click on the Run New Task button.
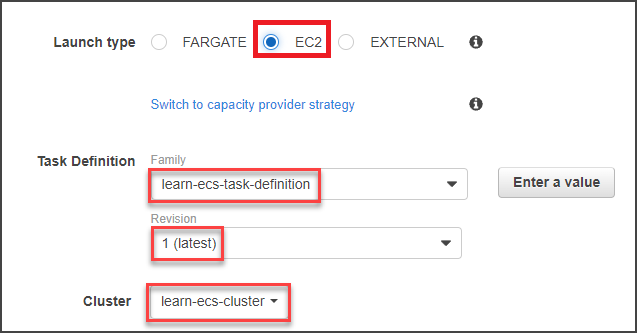
3. On the Run Task page, select EC2 as the Launch type. Assuming that you only have one Task Definition and Cluster, those values will auto-populate. If not, make sure to select the correct ones.
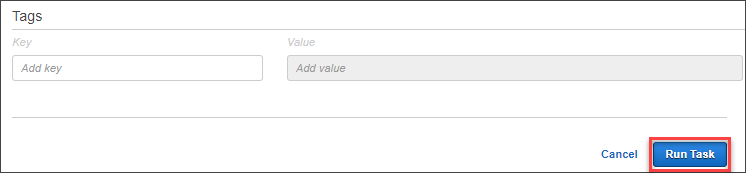
4. Scroll to the bottom of the page and click the Run Task button.
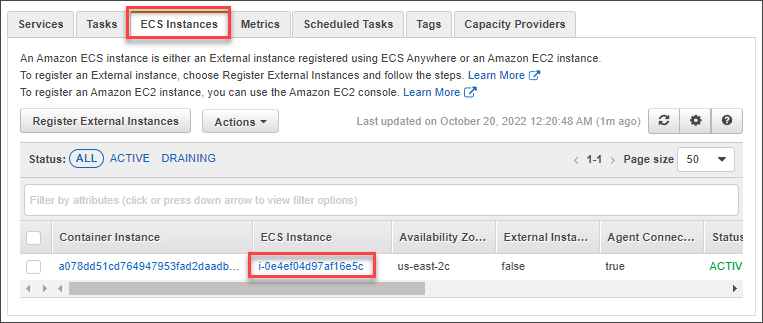
5. Once the task runs, click the ECS Instances tab and the ECS Instance link.
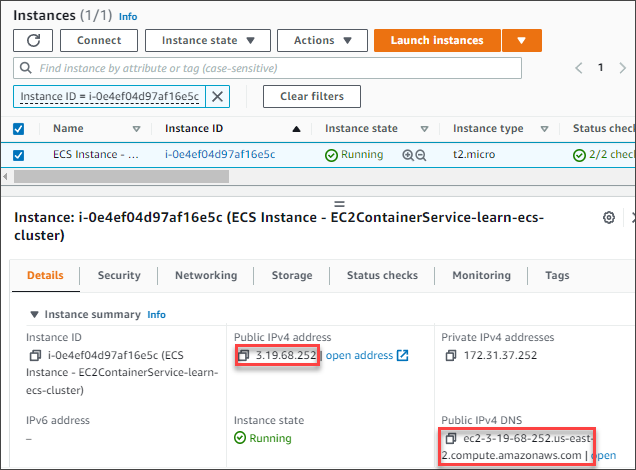
6. Next, copy the Public IPv4 address or Public IPv4 DNS. Either of these two addresses is what you need to access the Docker web application container.
7. Open a browser window and navigate the ECS instance IP address or DNS. Remember to append the host’s port number that you specified in the container’s port mapping.
Copy the ECS instance Public IP or DNS
# Public DNS
HTTP://ec2-3-19-68-252.us-east-2.compute.amazonaws.com:8080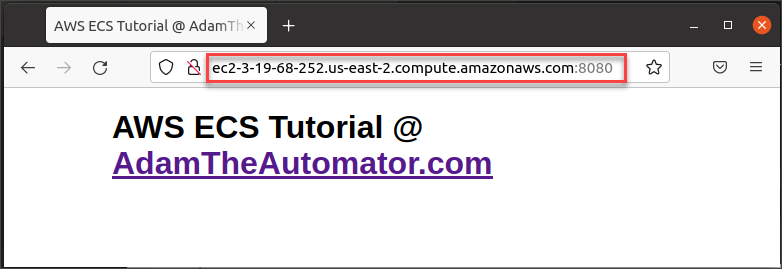
Conclusion
This AWS ECS tutorial taught you how to create a repository and push a Docker image. After which, you created a new cluster and deployed the Docker container running a web server.
Did this tutorial spark your interest? Do you think you’ll use AWS ECS in your future project?


