

So you’ve developed code. Great! Now you have to publish it to your users. But how? There are many ways to accomplish this but one of the most used is NuGet. NuGet is a technology that allows you to publish code in the form of packages for others. A NuGet server is a way to make it happen.
Not a reader? Watch this related video tutorial!NuGet has become popular mostly due to its widespread adoption as a package manager and its integration with Microsoft’s developer tools. The NuGet packaging system allows developers to bundle code into packages that you can then easily distribute for others to use.
NuGet has two main components; a client and a server. A NuGet server hosts a repository which then contains packages for distribution. The NuGet client is a client-based component that is used to create local packages and upload them to server repositories. Various clients then download these packages over HTTP/HTTPS.
NuGet.Server is the basis of all of the other NuGet products you’ll be learning about here. It’s important to first learn about NuGet.Server and how to set it up before diving into other alternatives.
By setting up plain ol’ NuGet.Server with IIS will give you a lot of background knowledge about how the other NuGet server products behave.
Prerequisites
Before we get too far, you’re going to need a few things to get NuGet.Server set up.
- Visual Studio – 2017 or newer is preferred and the Community Edition will work. This can be installed on a workstation and does not need to be installed on the server.
- ASP.NET and web development workload for Visual Studio.
- Windows Server – Any currently supported version of Windows Server version will work, but all of the screenshots have been taken on Windows Server 2019 Standard.
Note that you do not need NuGet.Server itself upfront. You are not required to manually download this ahead of time because it will be installed using the NuGet package manager integrated into Visual Studio.
Creating a Visual Studio Project
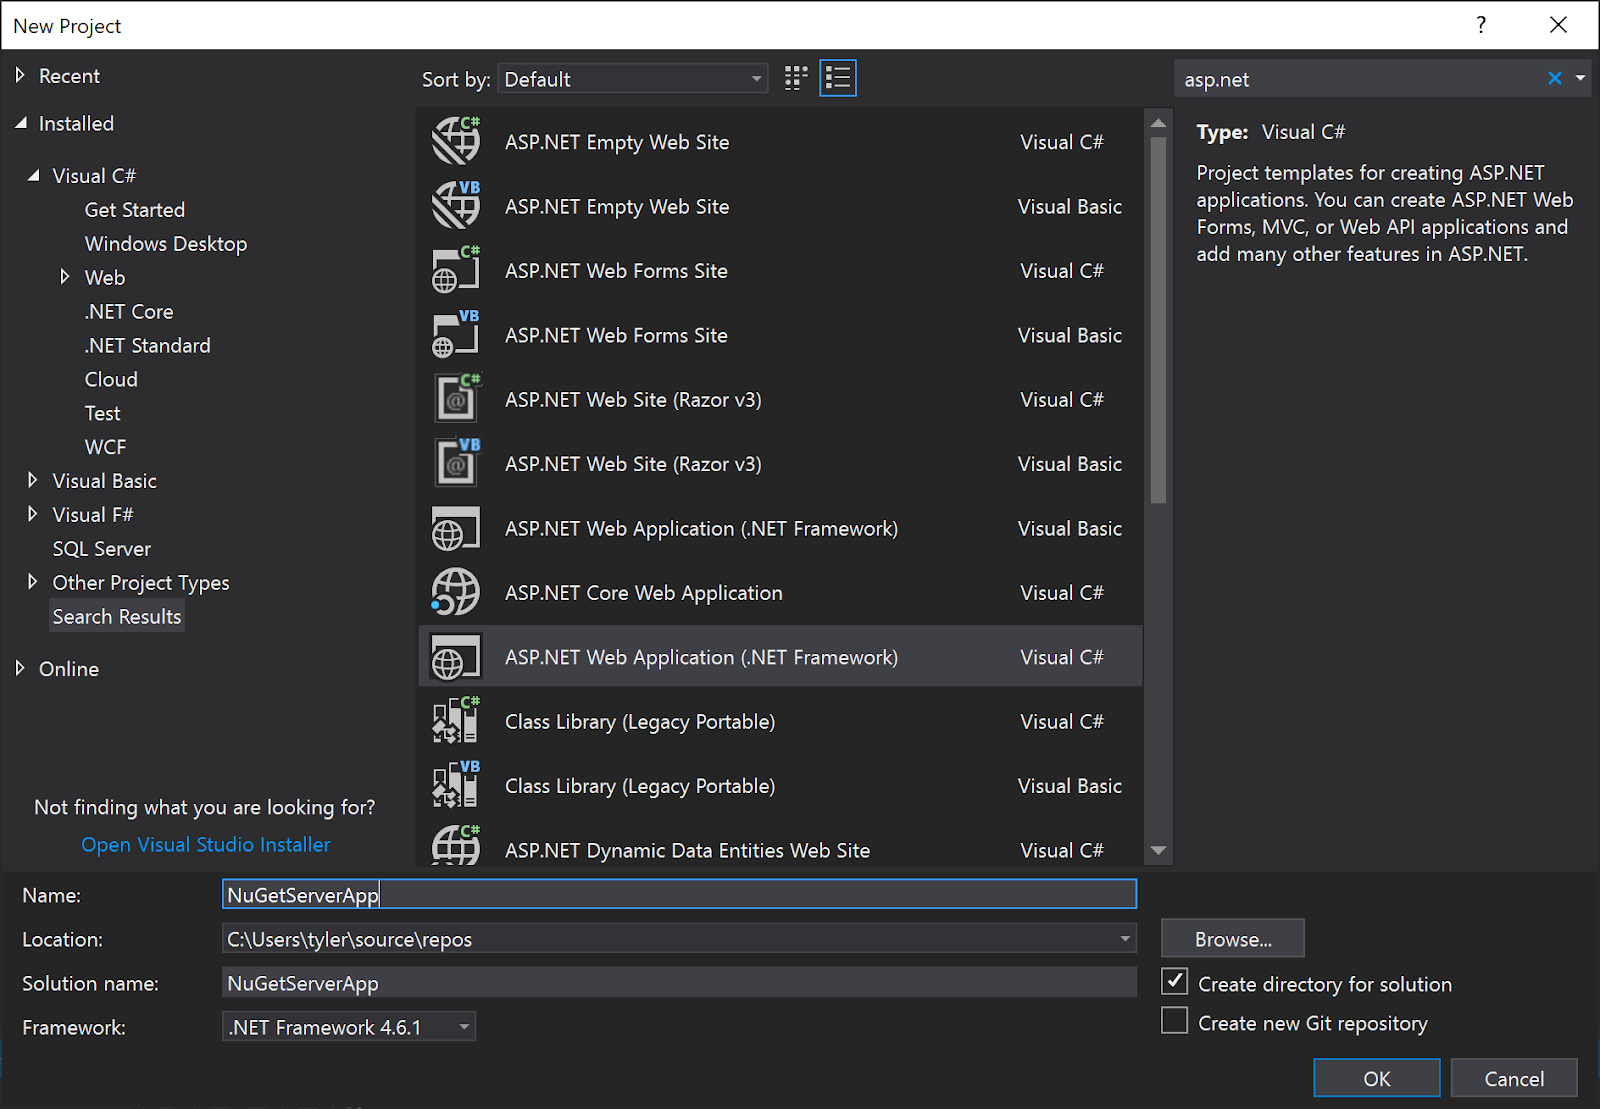
To get started creating a NuGet.Server, you’ll need to first create a project in Visual Studio. To do so, create a new project in Visual Studio with the ASP.Web Application (Visual C#) template as shown below.
You can name the app whatever you want except for NuGet.Server. If you name your app NuGet.Server, it will cause a name conflict with the package that you will download later causing headaches down the road.
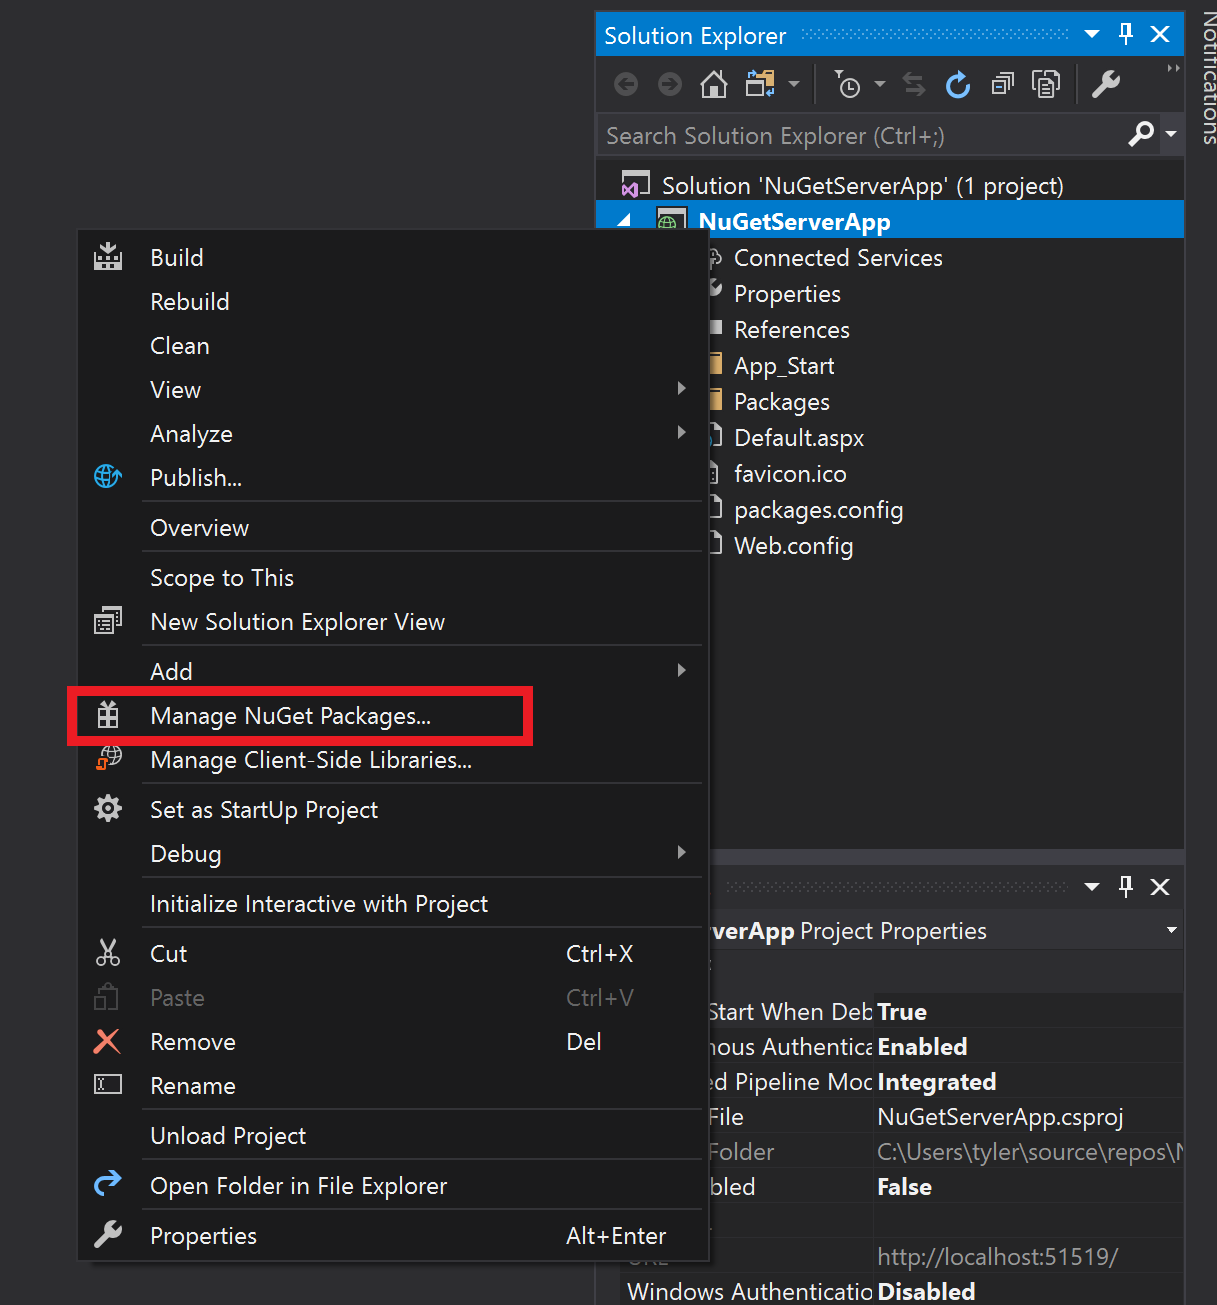
Next, select the empty template. This will create an empty web app, which you will use to install the NuGet.Server package into. To do this, right-click on the project in the Solution Explorer and select Manage NuGet Packages as shown below.
On the window that opens, search for NuGet.Server and select the version you want to install. Once selected, Visual Studio will start to download and install the dependencies into the project.
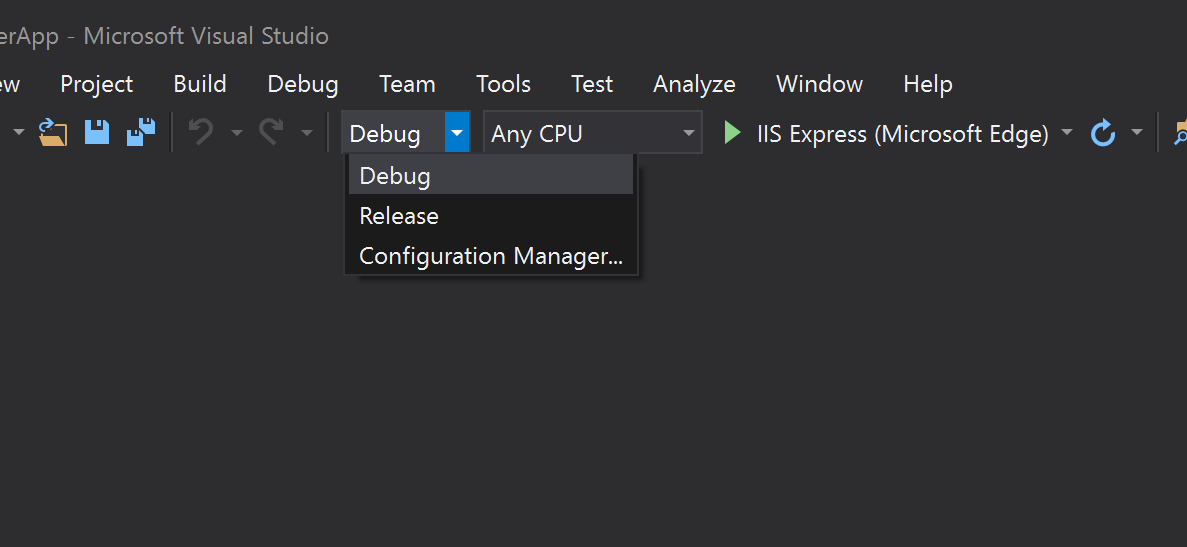
Once that is done, change the project from Debug to Release so that the final server does not include the debug logging.
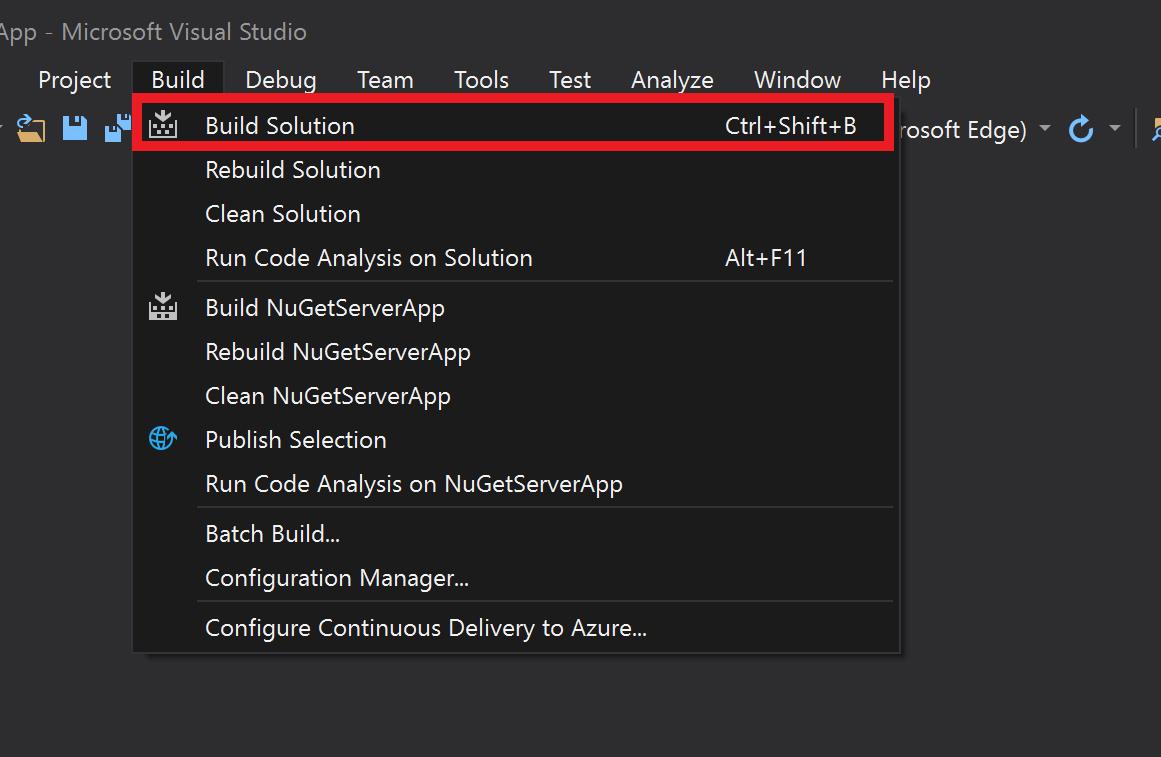
Next, build the project by clicking on the Build tab and selecting Build Solution.
If you left the repo location as default, the application will be built at C:\Users\<username>\source\repos\<AppName>\<AppName>. The folder will look something like what is shown below. You will need this project folder to copy to your web server.
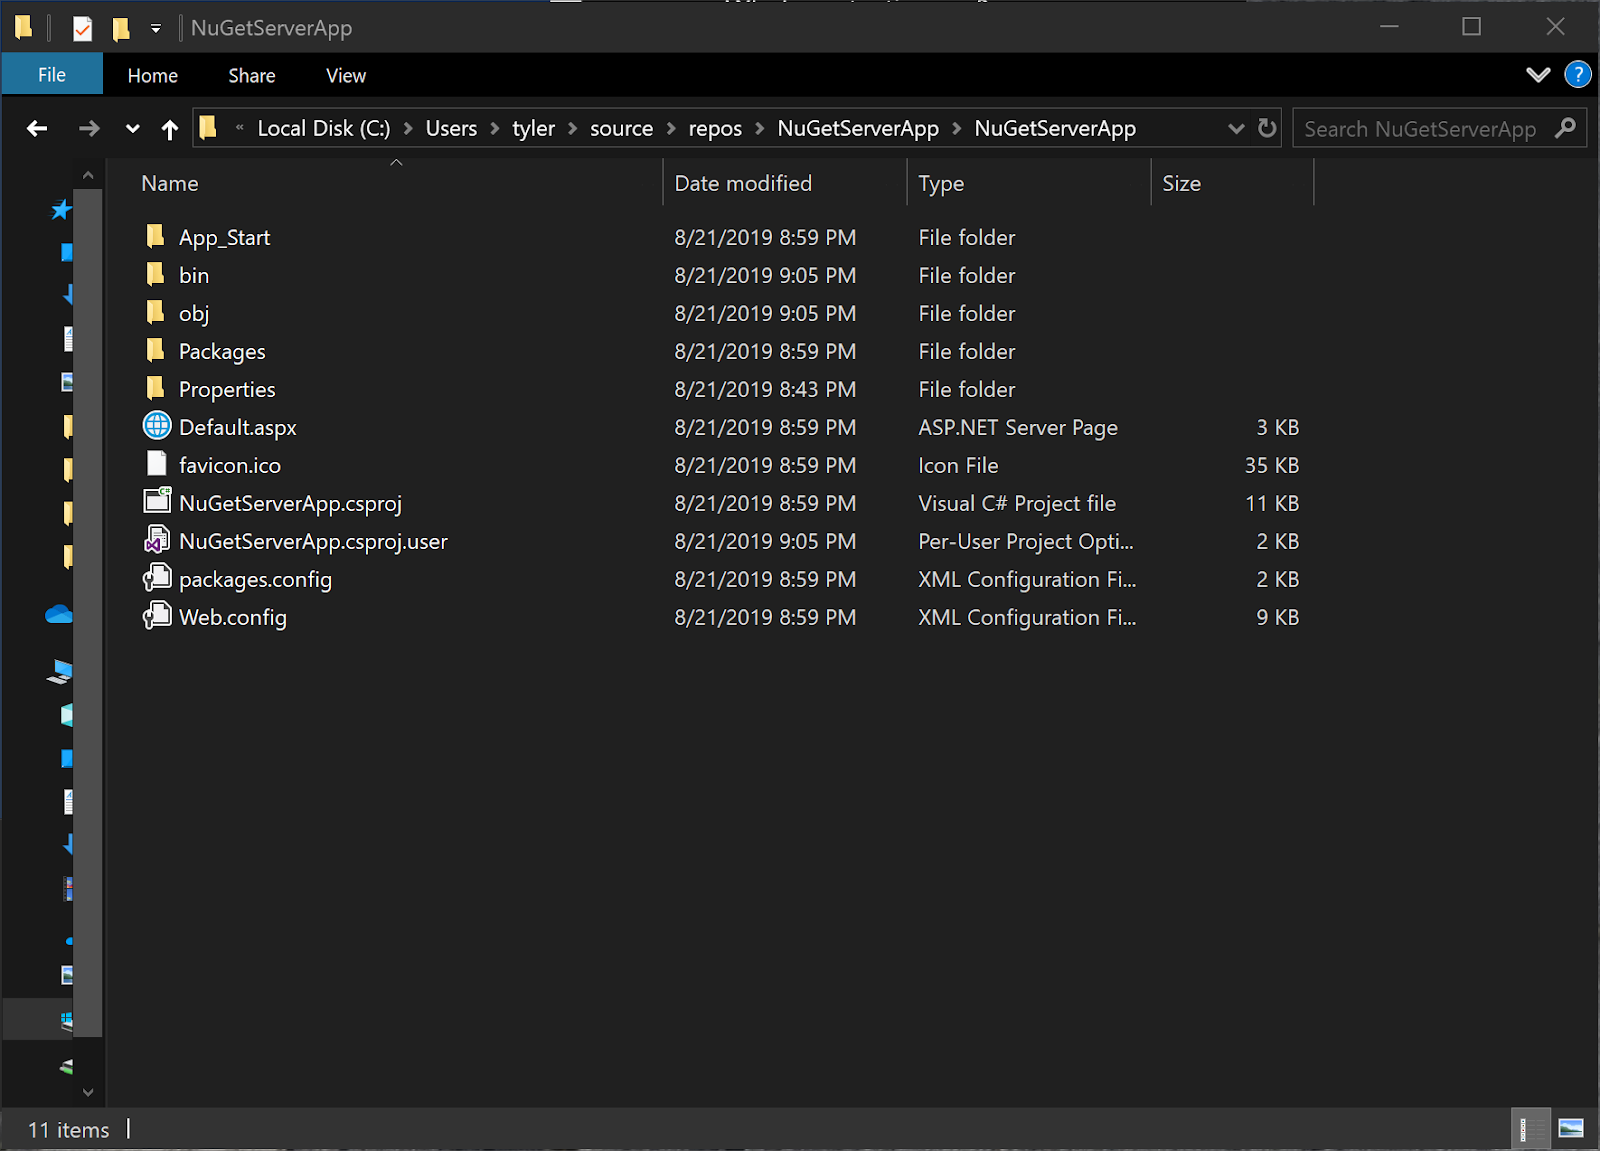
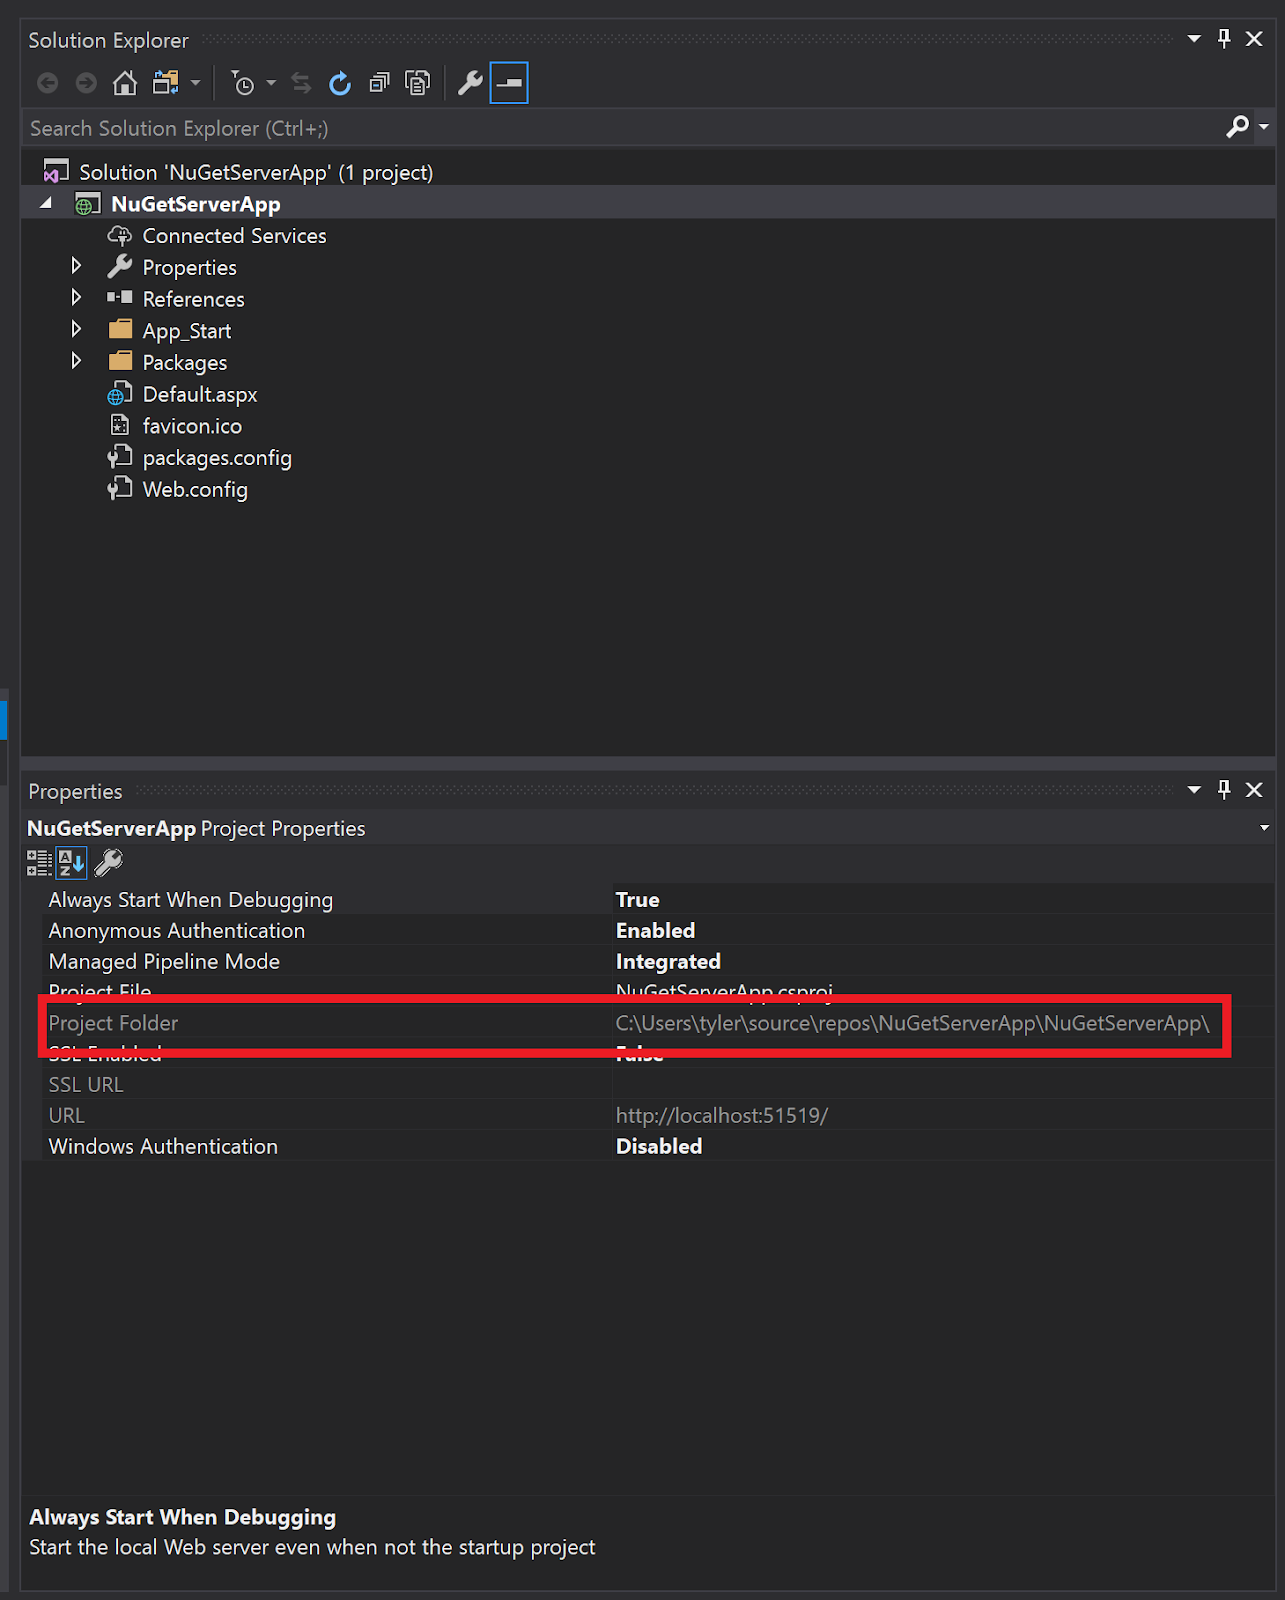
If you’re unsure of where your project folder is at, you can always see it in your properties for the project.
Installing the Windows features NuGet Server (IIS)
Next, install the Windows features NuGet.Server requires on the server. To install all the needed roles on your server, launch an administrative PowerShell session and run the Install-WindowsFeature cmdlet with all of the necessary features as shown below.
Install-WindowsFeature Web-Server,Web-Net-Ext45,Web-Asp-Net45,Web-ISAPI-Filter,Web-ISAPI-Ext -IncludeManagementToolsOnce the IIS role and other features are installed, copy over the project folder (probably C:\Users\<username>\source\repos\<AppName>\<AppName>) to a directory on your web server. The default location for web apps is C:\inetpub\wwwroot. This is the directory I will be assuming your project is in.
Prepping the Web Config
Next, you’ll need to inspect the web.config file on the web server. This file will be in the root of the build folder you copied to your web server. Open the web.config file with your favorite text editor. You will see two similar lines that start look like the following:
<compilation debug="true" targetFramework="<version>" />For example, see below.
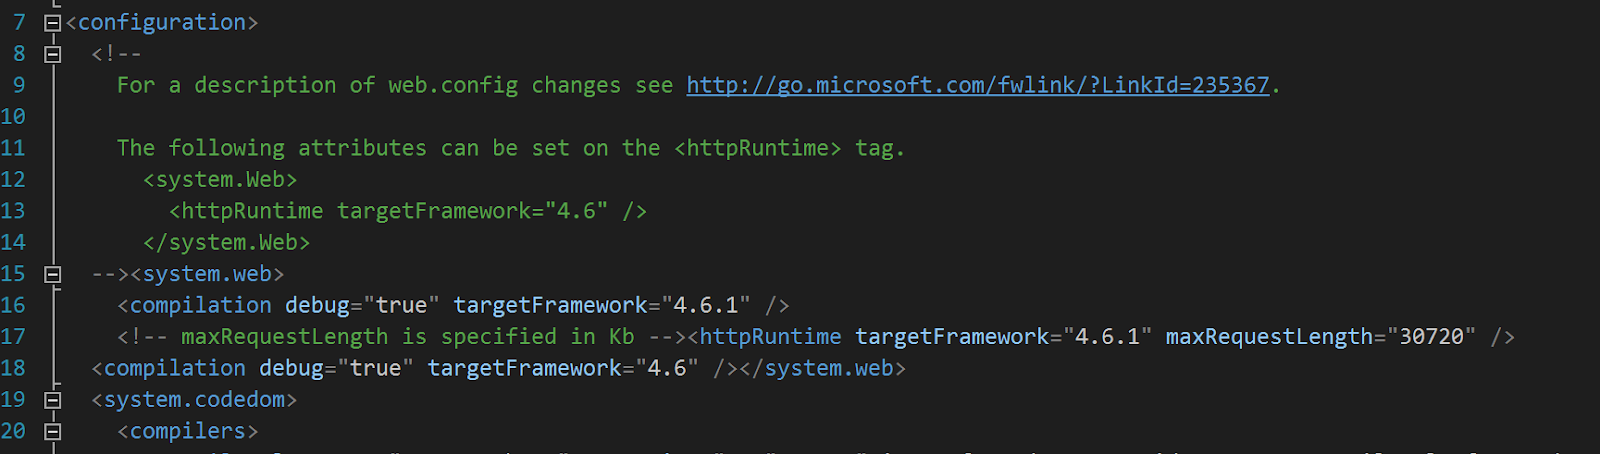
Remove one of the compilation lines and leave the one with the newer version.
Note: If you fail to do this, you will receive an internal server error message when you launch your webpage.
Configuring IIS
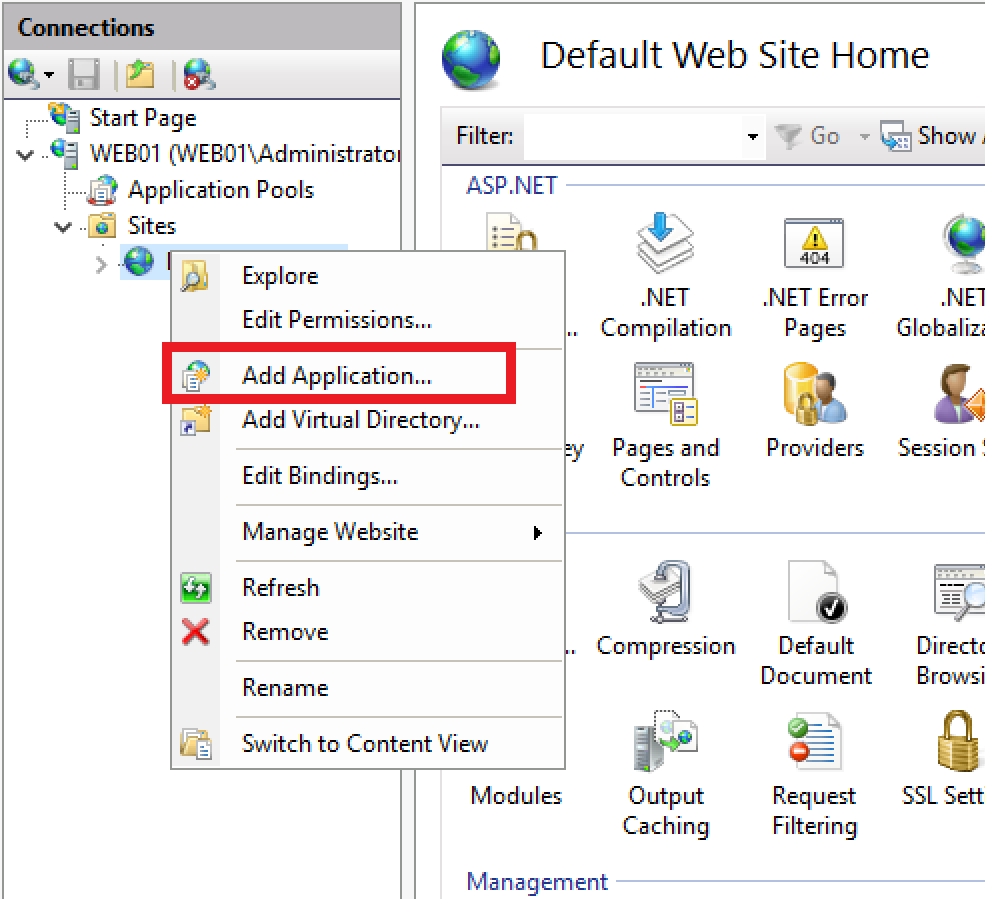
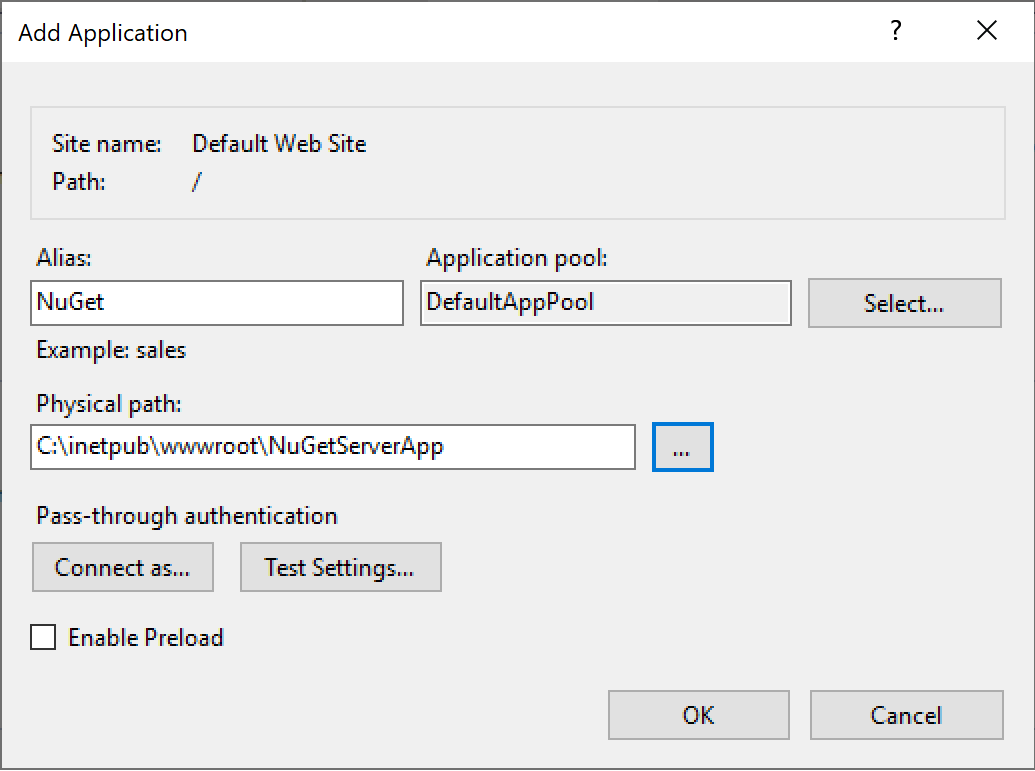
Now that you have the NuGet.Server files on your web server, open IIS manager, right-click on the default web site and select New Application as shown below.
Provide a name for the application. You can see an example of what you’ll be looking at below.
Now if you navigate to your web server URL you should see something like below.
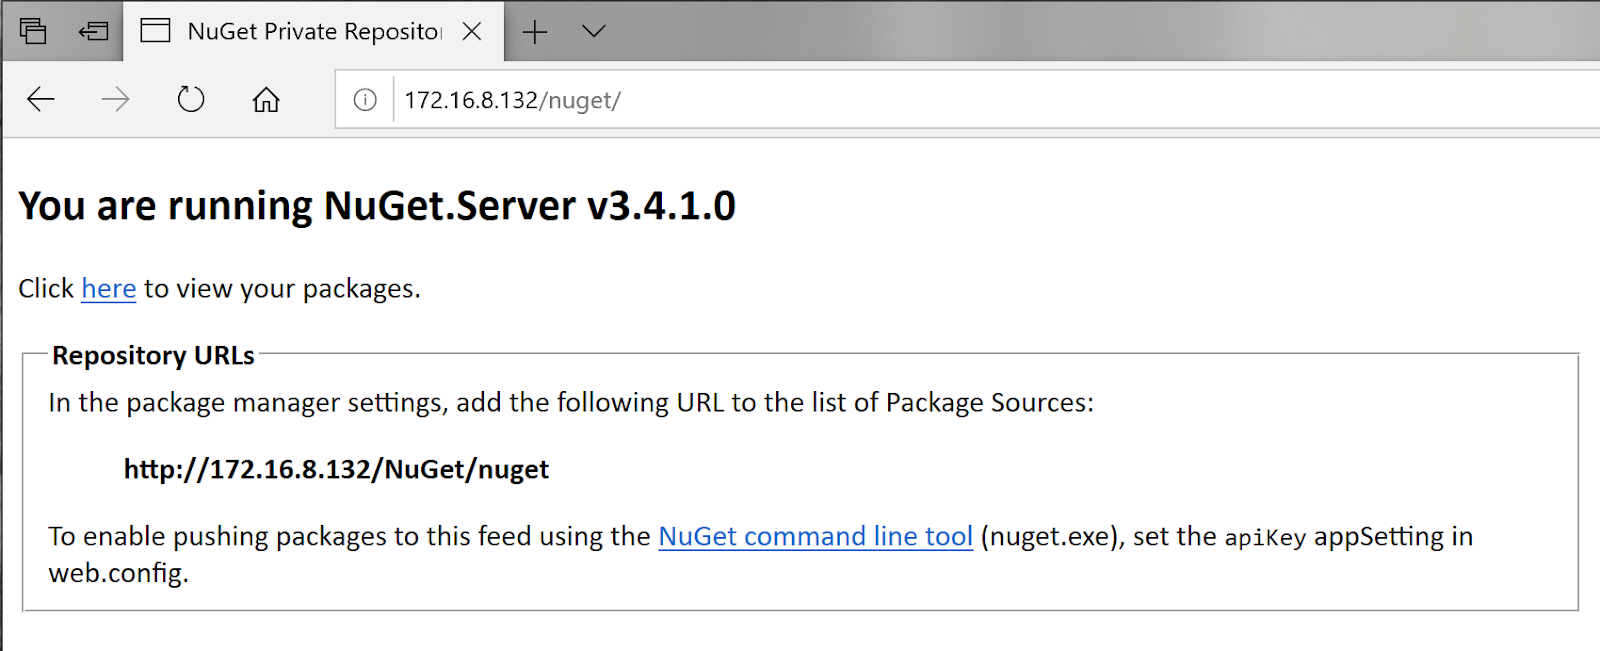
Take note of the package URI on the page. In the above example, it is http://172.16.8.132/NuGet/nuget. You will need this for later.
Changing the Packages Directory
By default, packages are stored in C:\inetpub\wwwroot\<AppName>\Packages. If you’d rather change that location, you can do so in the web.config file.
You can also map the package folder to another path. This could be used when you have a small drive that you have the web server files on, but you have another drive that is larger for containing the packages. To change the package path change the packagesPath value in the web.config.
Once you are done making your changes to the web.config file, restart the website to load the new settings. To do this, from IIS Manager, right-click on the website and select Manage Website and then on Restart as shown below.

Setting an API Key in web.config
Take a look at the web.config file snippet below. By default, the API key is blank. That’s a problem.
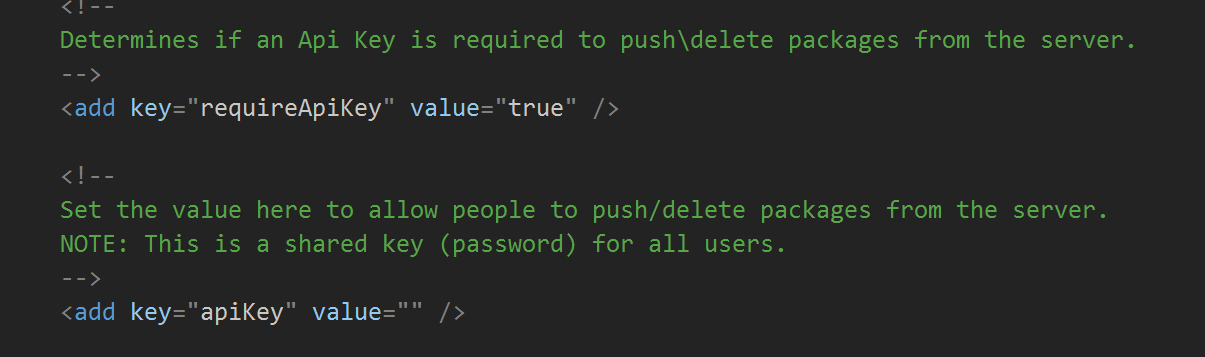
If you’d like to password protect your NuGet packages, you can add an API key here. When an API key is added, you will be required to use this every time you need to add or delete packages from the repository.
Once the key is added to the value for apiKey save the file. You can instead change the value for requireApiKey to false to not need an API key to add or delete packages.
Updating NuGet.Server
Now you have your NuGet.Server set up, what’s next? NuGet.Server is a Nuget package manager and has frequent updates that you will want to take advantage of.
To update a NuGet.Server, open your previous project. This is the same path where your project is built that you located earlier. Or if you open Visual Studio, it may be listed in your recent projects.
Once it is opened right-click on the project in the Solution Explorer and select Manage NuGet Packages. From here you can see all the packages that have updates. Select NuGet.Server and click update as shown below.
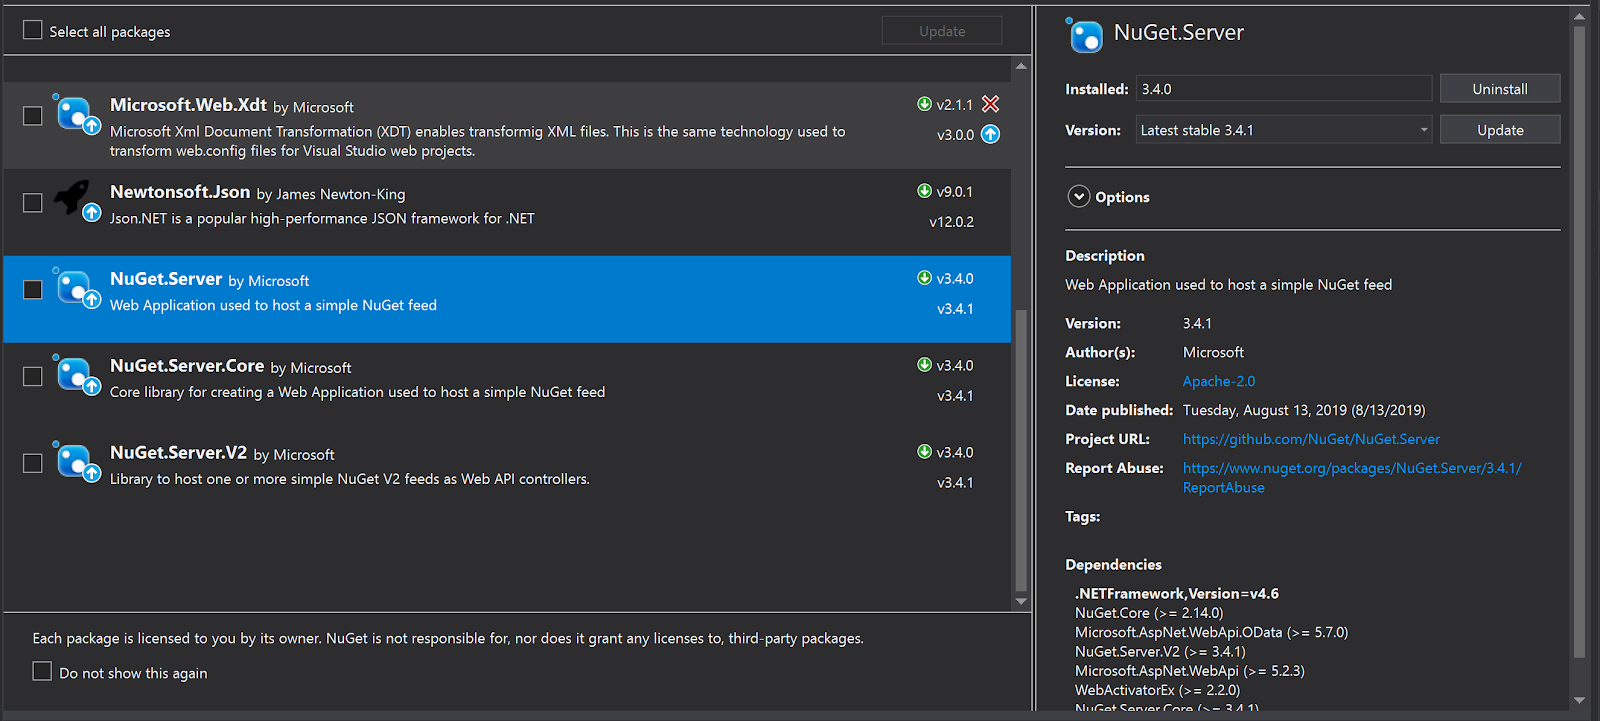
This will update NuGet.Server and all the dependencies that require updates. It’s that easy!
Next Steps
At this point, you should now have a brand new NuGet.Server instance running on your machine. Congratulations on setting that up! But this step is just the beginning.
Continue your journey and check out all of the other NuGet articles we have here on ATA!


