


Don’t you think having a fully managed cloud-based database that runs fast is always a great choice to store your data? A database that is cost-effective and provides storage capacity management? If yes, then welcome to Google Cloud SQL.
Not a reader? Watch this related video tutorial!Google Cloud SQL databases come with the lowest maintenance cost, automatic database provisioning backups, and whatnot. And in this tutorial, you’ll learn how to take advantage of Google Cloud SQL for your projects.
Read on to never worry about securing your data!
Prerequisites
This tutorial will be a hands-on demonstration. If you’d like to follow along, be sure you have the following:
- An active Google account.
- MySQL Workbench is installed in your system.
- A ready-made dummy MySQL database – This tutorial uses a dummy MySQL database called ata-dummy-db.sql.
Creating a Google Cloud SQL Instance
Google Cloud SQL is a platform that provides you with a fully managed relational database for MySQL, PostgreSQL, and SQL Server.
But before jumping into creating a database with Google Cloud SQL, you first need to get the Google Cloud SQL service from the Google Cloud Platform (GCP). You can either get the free trial or buy the complete service per your needs. But this tutorial will continue with the free trial.
To get Google Cloud SQL service, follow the steps below:
1. Open your web browser, and log in to your Google account.
2. Next, navigate the Google Cloud SQL product page, and click on the Try Cloud SQL free button. Your browser redirects to the Google Cloud signup page (step three).

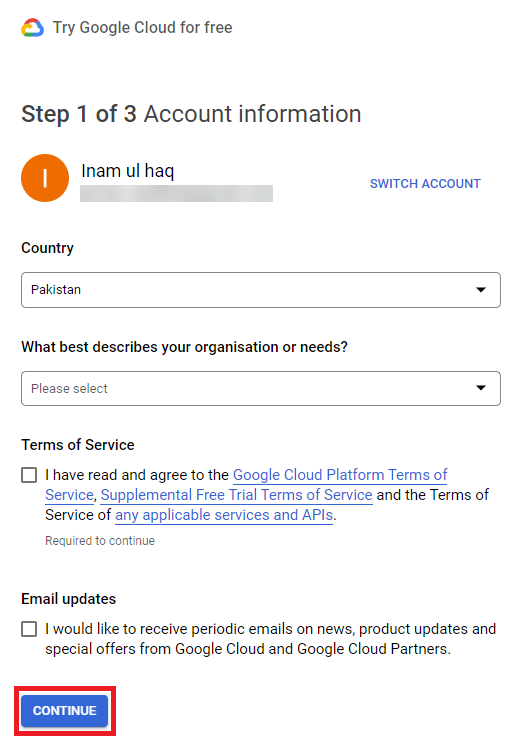
3. Fill up the required information, and click on the CONTINUE button.
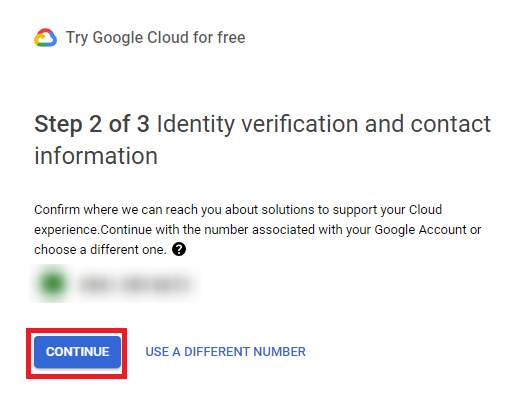
4. Now, confirm the mobile number and click on CONTINUE.
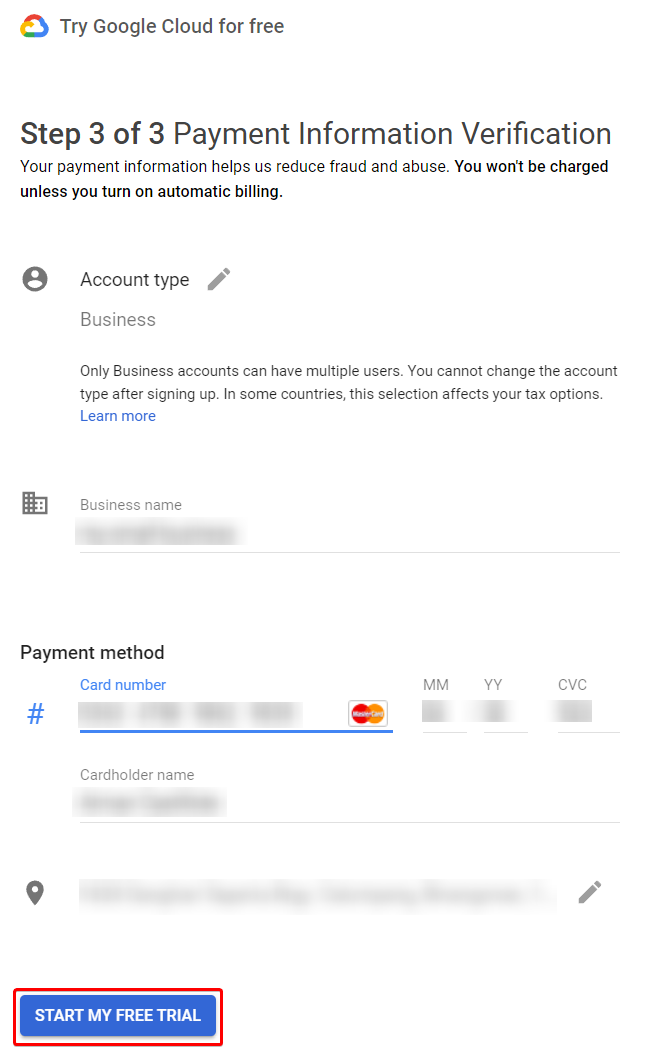
5. Provide your payment information, and click on START MY FREE TRIAL to start your Google Cloud trial. Doing so redirects your browser to your first Google Cloud SQL project.
The payment information is just required to start your trial, but you won’t be charged on the spot.
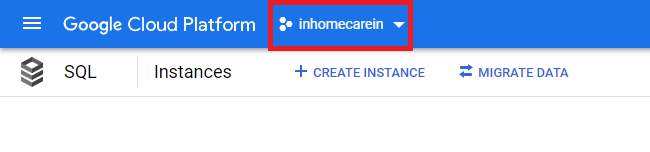
6. On your GCP dashboard, click on the default-created project name (top-left). A new modal appears on the screen where you’ll see the list of projects on your account.
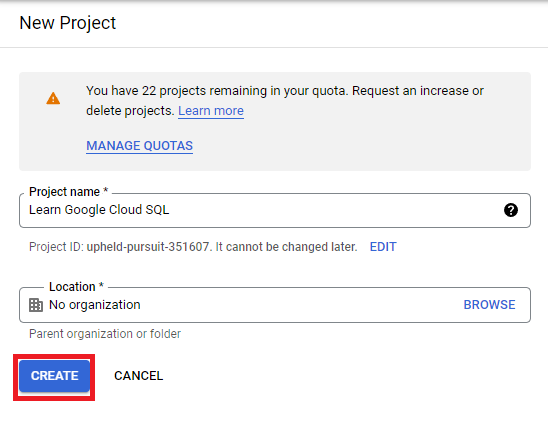
7. Next, click on NEW PROJECT on the pop-up window to initiate creating a new project.

8. Provide the required project information and click the CREATE button to create the new project.
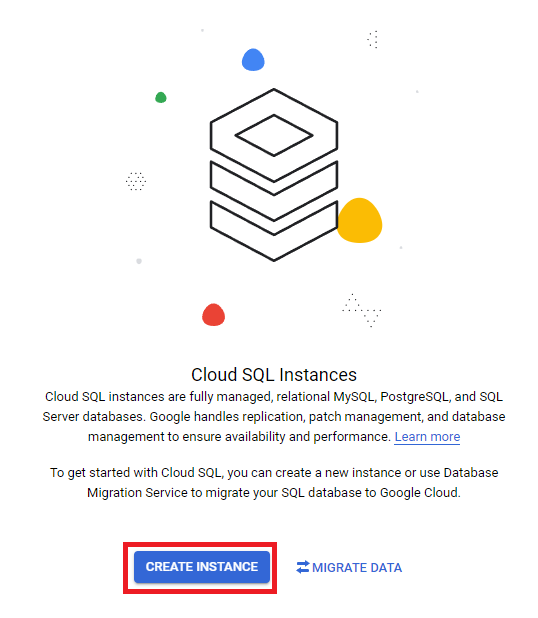
9. Now, click on the CREATE INSTANCE button to create your Cloud SQL instance. Your browser then redirects to a page where you’ll choose your database engine.
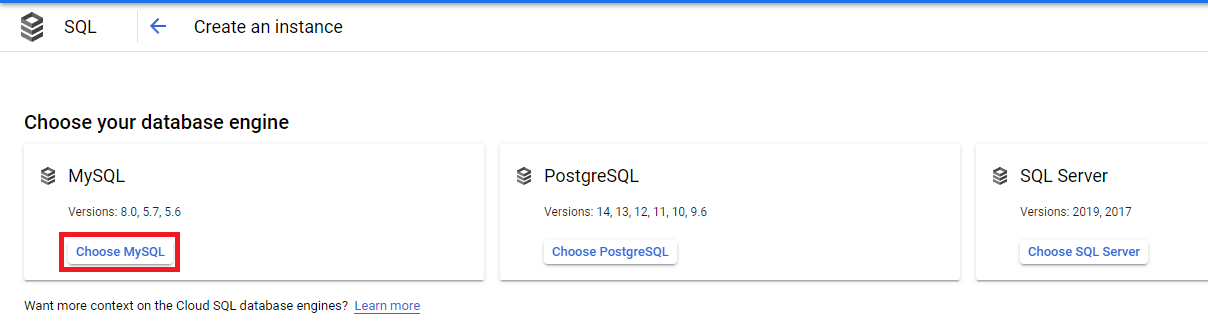
10. On your Cloud SQL instance page, click on Choose MySQL to initiate the creation of the instance that will hold MySQL databases.
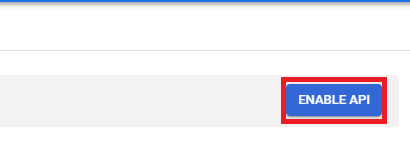
11. Click on the ENABLE API button (right-most) to enable the API for your project to create the MySQL database instance, which takes some time. Enabling API lets you connect and interact with your database via your web app/mobile app, etc.
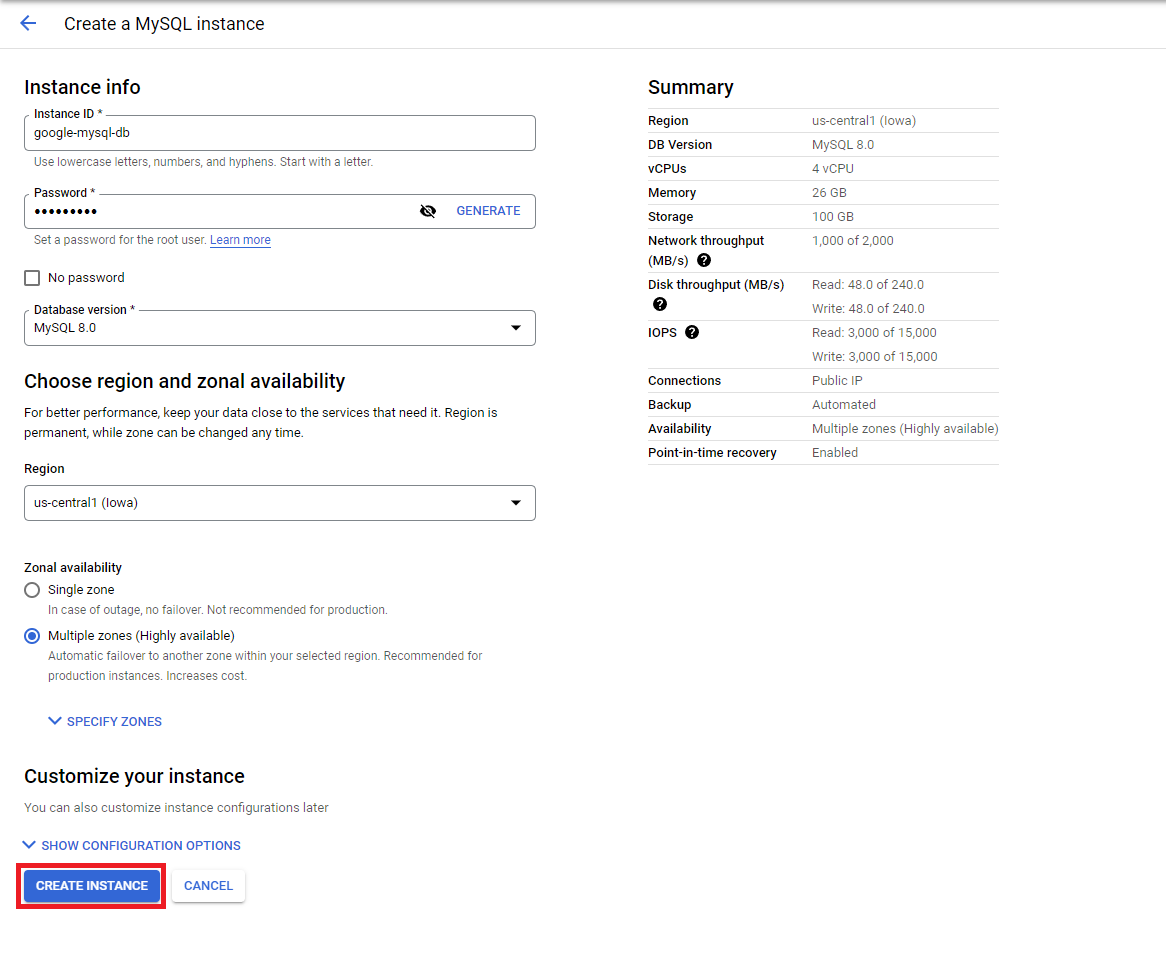
12. After enabling API, fill in the required information for your MySQL instance, and click on the CREATE INSTANCE button. Doing so creates your MySQL instance and redirects your browser to the Google Cloud SQL dashboard.
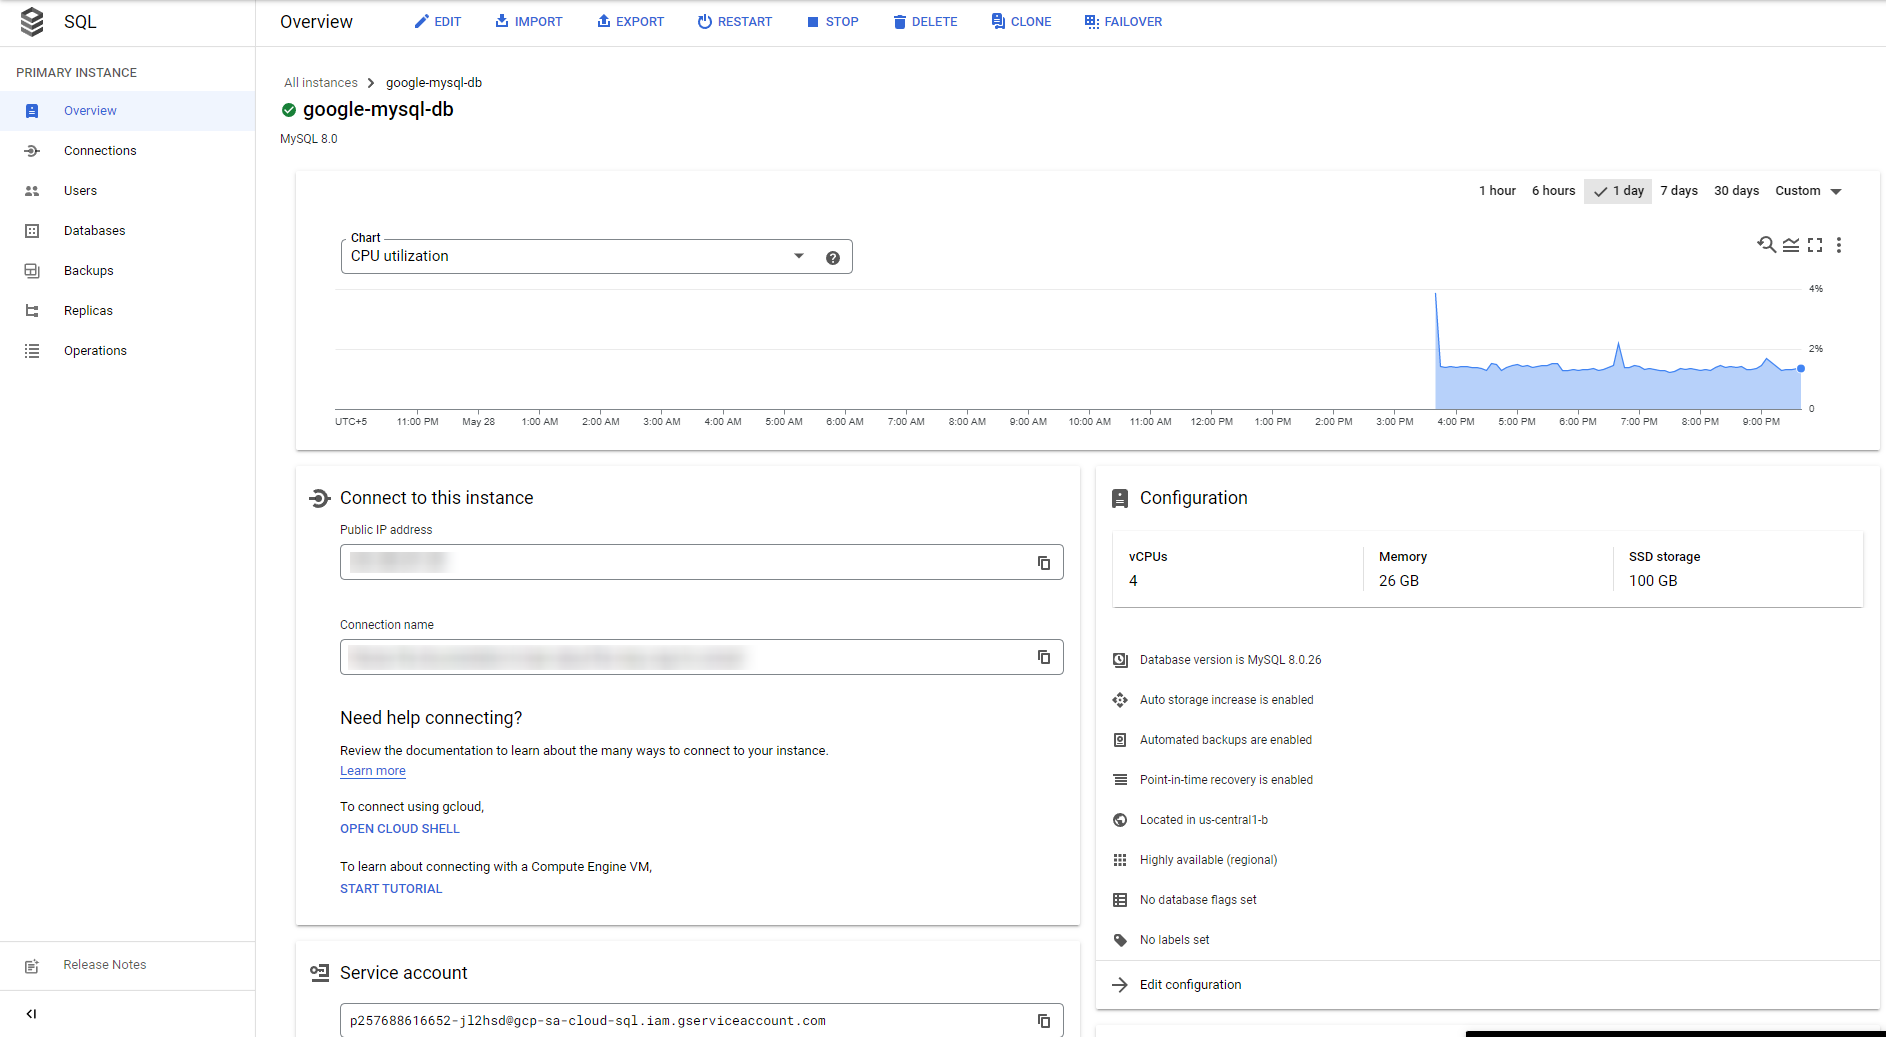
Congratulations! You’ve just created a MySQL instance in Google Cloud SQL, and below is your first look at Google Cloud SQL.
Provisioning a MySQL Database
You now have a MySQL instance at your disposal, so you’re ready to create your first MySQL database.
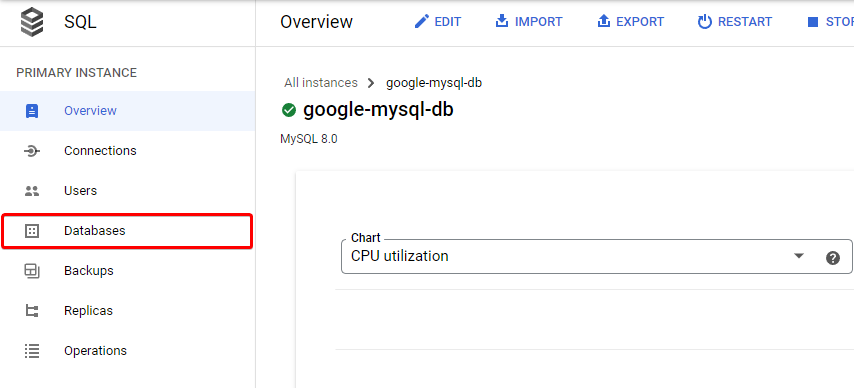
1. Click on Databases from the side menu bar to access the Databases page, where you’ll create your database.
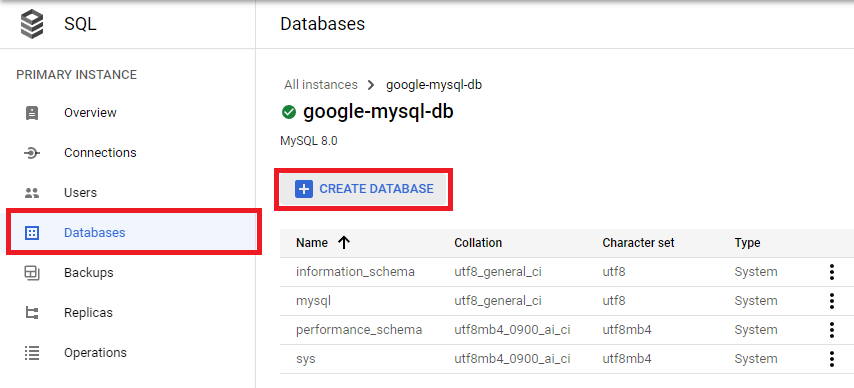
2. On the Databases page, click the CREATE DATABASE button to initiate the database creation process. A new right sidebar appears asking for basic information about the new database (step three).
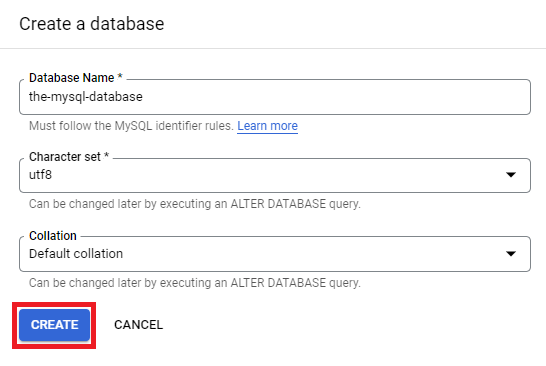
3. Lastly, provide your database information with the following:
- Database Name – Provide a unique name for your database.
- Character set and Collation – Choose your preferred character set and collation, but this tutorial’s choice is utf8 and Default collation.
A character set is a set of legal characters/symbols and encodings in a string, while a collation is a set of rules that defines how to compare and sort character sets.
- Click on the CREATE button to finalize creating the database.
The database name must start with an alphanumeric character and contain only the following: letters, numbers, dashes (-), and underscores (_).
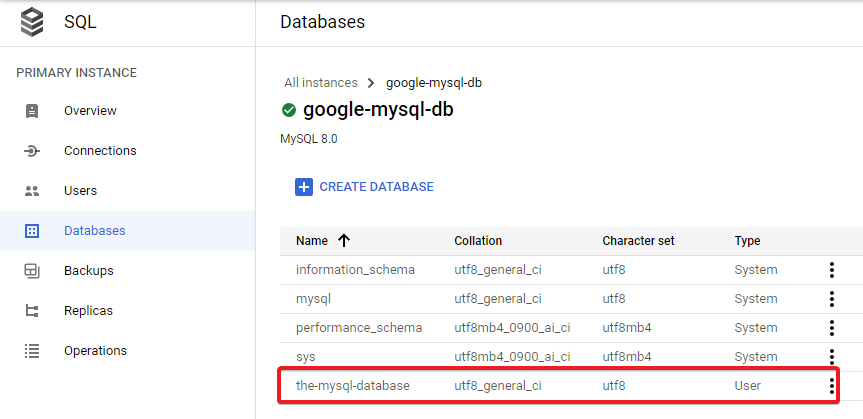
Database creation takes some time. But once created, you’ll see your newly-created database, as shown below.
Creating and Filling the Bucket in Google Cloud Storage
You’ve just created a new database, but it’s currently empty. So why not fill up your database? But first, you must have a bucket filled with data in Google Cloud Storage.
To put some data into your database:
1. Navigate to Google Cloud Storage on your browser.
2. Next, click CREATE BUCKET (top) on the Google Cloud Storage home page. Doing so redirects your browser to a page where you’ll fill up details for your bucket.

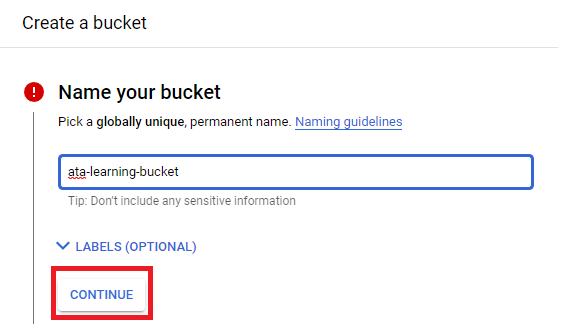
3. Provide a globally unique name for the bucket, and click on CONTINUE.
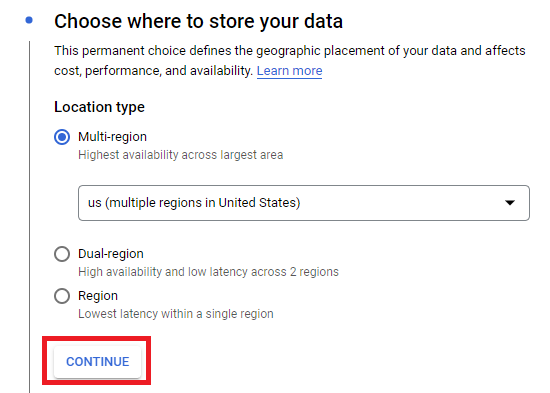
4. Now, choose the location type and region where to store your data, and click CONTINUE. The region depends on where your company or project is based.
The Multi-region is most recommended because of the highest availability.
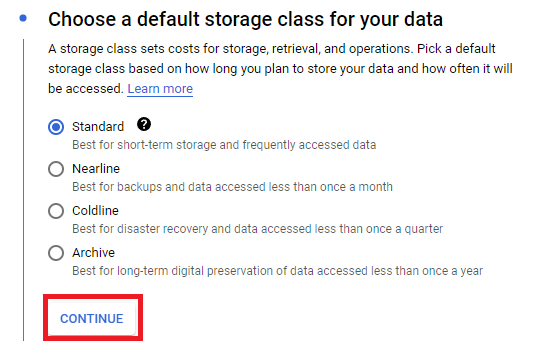
5. Choose a storage class for your data depending on your needs. But the best scenario is the Standard storage if you regularly need to access your data via web/mobile/application.
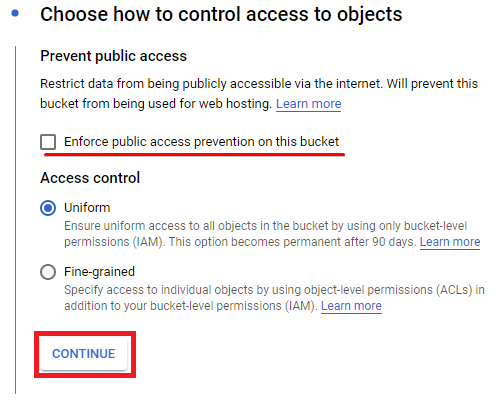
6. Now, choose how to control access to objects with the following, and click CONTINUE:
- Keep the Enforce public access prevention on this bucket option untick. Enabling this option prevents the bucket from being used for any web/mobile application.
- Choose Uniform for Access control to ensure access to all objects in the bucket.
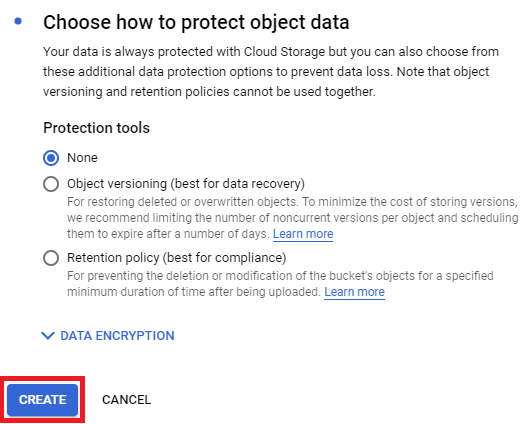
7. Choose any options as the protection layer’s company policy, and click on the CREATE button to create your bucket.
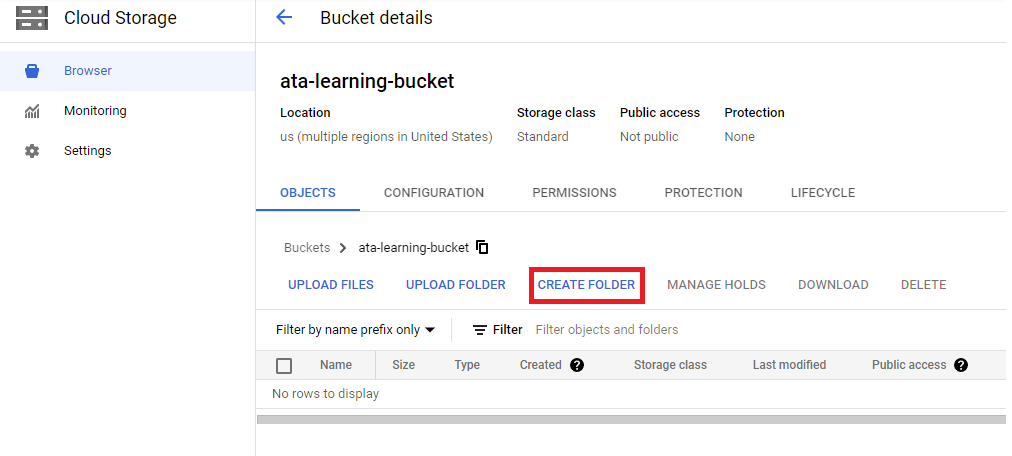
At this point, you’ve successfully created a bucket, and your browser redirects to the bucket’s overview page.
8. Since the bucket is empty, click on the CREATE FOLDER to create a new folder for your data.
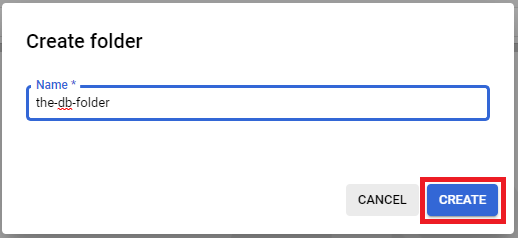
9. Provide the folder with your preferred name, and click the CREATE button to create the folder.
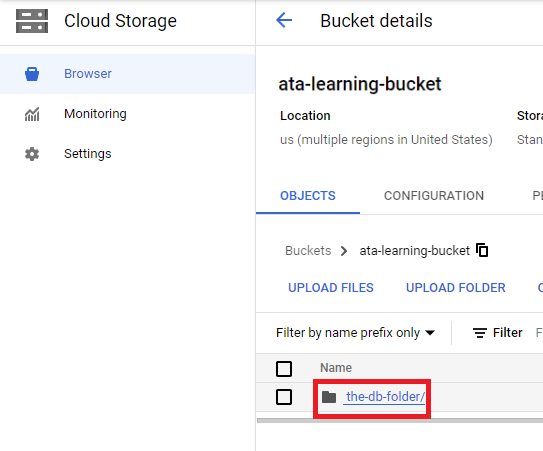
10. On the Bucket details page, click on the new folder’s name to access that folder.
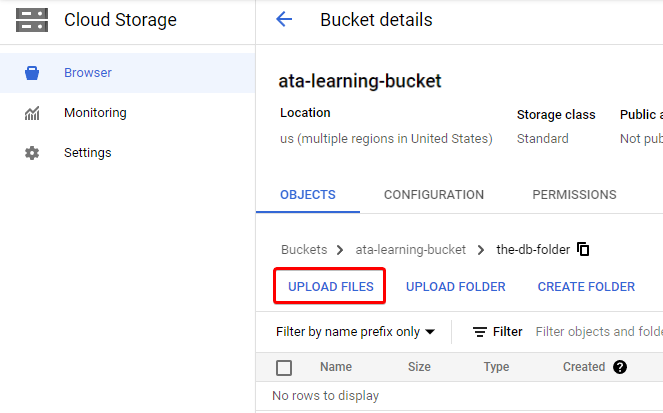
11. Now, click on UPLOAD FILES, and locate the dummy MySQL database (ata-dummy-db.sql) you made as a prerequisite for this tutorial.
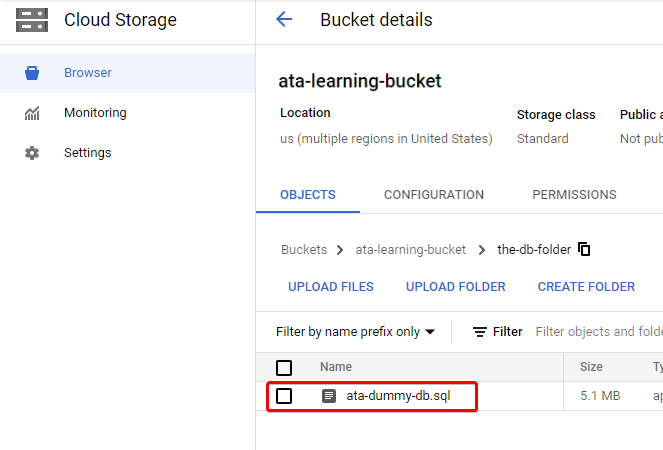
Below, you can see the uploaded MySQL database on your bucket folder (the-db-folder)
Importing Data from Google Cloud Storage to Google Cloud SQL
You now have the data available on your bucket, and it’s time to import data into your database available in Google Cloud SQL. For this tutorial, you’ll import the dummy SQL file you uploaded in the last step of the “Provisioning a MySQL Database” section.
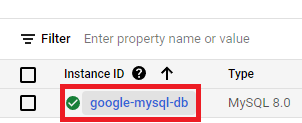
1. Navigate the Google Cloud SQL instances page in your browser, and you’ll see the list of available instances.

2. Next, click on your SQL instance to get access to its database.
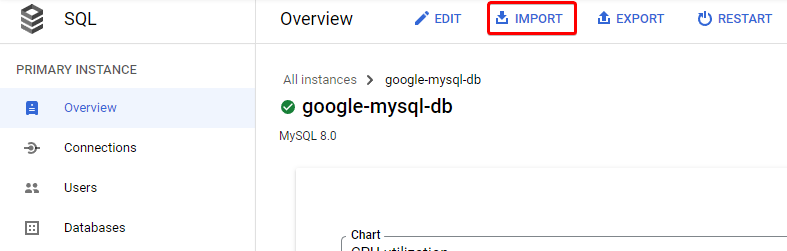
3. Click on the IMPORT button to initiate importing data to your SQL instance. Doing so redirects your browser to the Import data from Cloud Storage page (step four).
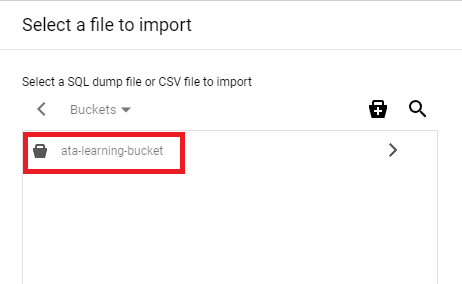
4. Now, click on BROWSE to locate the file to import. A new right-side pane appears with the list of available buckets (step five).

5. Double click on the bucket you created in step three of the “Creating and Filling the Bucket in Google Cloud Storage” section. Doing so lets you access the folder inside the bucket.
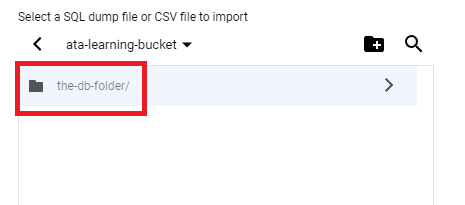
6. Now, double click on your bucket folder, which contains the SQL file you uploaded in the last step of the “Creating and Filling the Bucket in Google Cloud Storage” section.
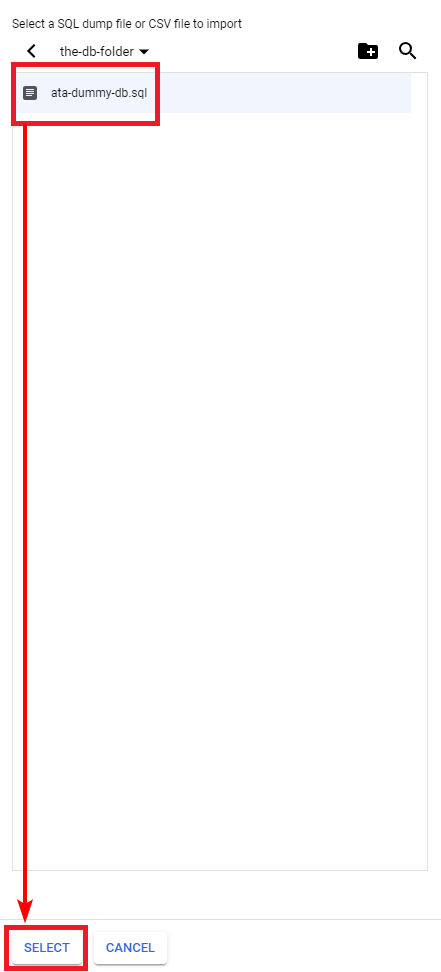
7. Select the SQL file, and click on the SELECT button to select the file you’ll import into your database. After selecting the file, the right side pane closes.
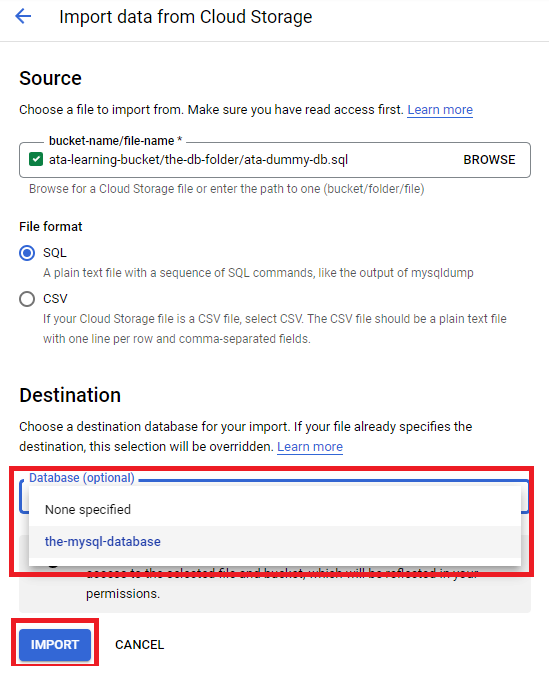
8. Lastly, select the database you created (the-mysql-database) in step three of the “Provisioning a Database” section as the destination database.
After selecting a database, click the IMPORT button to import the selected file.
Creating a Dedicated Google Cloud SQL Instance User
You’ve filled your database with some data, but to access your Google Cloud SQL instance, you’ll need to create a password-protected user.
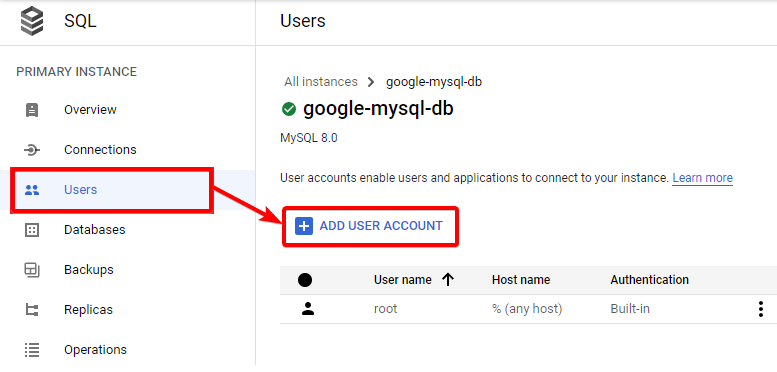
Click on Users on the side menu bar of the Google Cloud SQL instance page to access the Users page, then click on ADD USER ACCOUNT to initiate creating a new user.
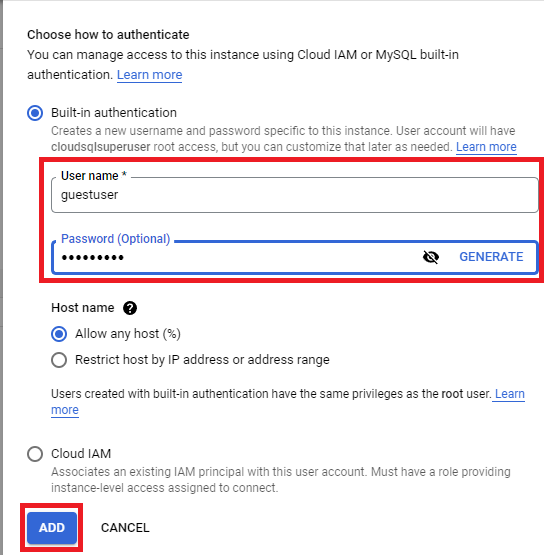
A sidebar opens where you can input credentials for the new user (step two).
Provide credentials for the new user in the User name and Password fields, and click on the ADD button to create the user account.
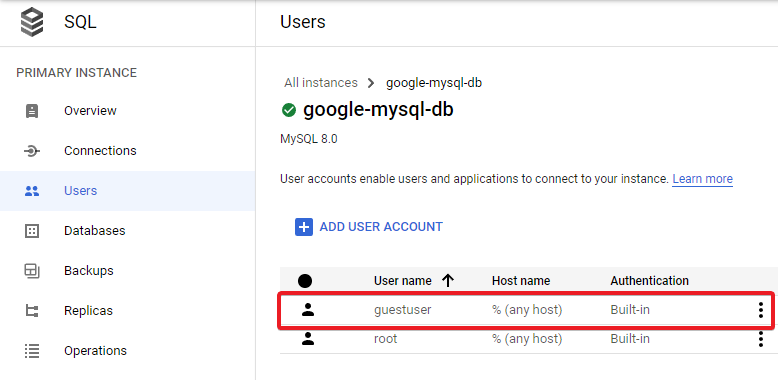
After creating the user, you’ll see the user listed, as shown below.
Accessing the Google Cloud SQL Database Using Cloud Shell
Now that you have SQL data added to your database in Google Cloud SQL, it’s time to test and access the data using the Cloud Shell.
1. Navigate to the Overview page of your SQL instance, and click on the OPEN CLOUD SHELL hyperlink under the Connect to this instance section. Doing so opens the Cloud Shell at the bottom of the page.

2. Run the following command on the Cloud Shell terminal to connect your SQL instance (google-mysql-db) as the new –user (guestuser) you previously created.
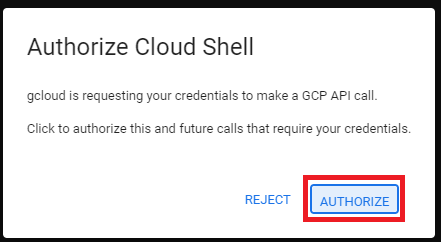
After running the command, a new pop-up box appears where you’ll confirm authorizing a Google Cloud connection (step three).
gcloud sql connect google-mysql-db --user=guestuser --quiet;
3. On the pop-up box, click on Authorize to complete providing authorization.
4. Now, provide the password you set for the new user (guestuser), and press Enter.

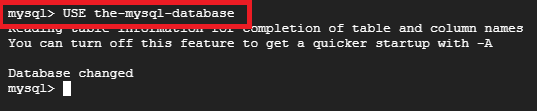
5. After accessing the SQL instance, run the below command and select the required database. Replace db-name with your database’s actual name.
USE db-nameYou can tell that you’ve successfully selected your database when you see the message that says Database changed, as shown below.
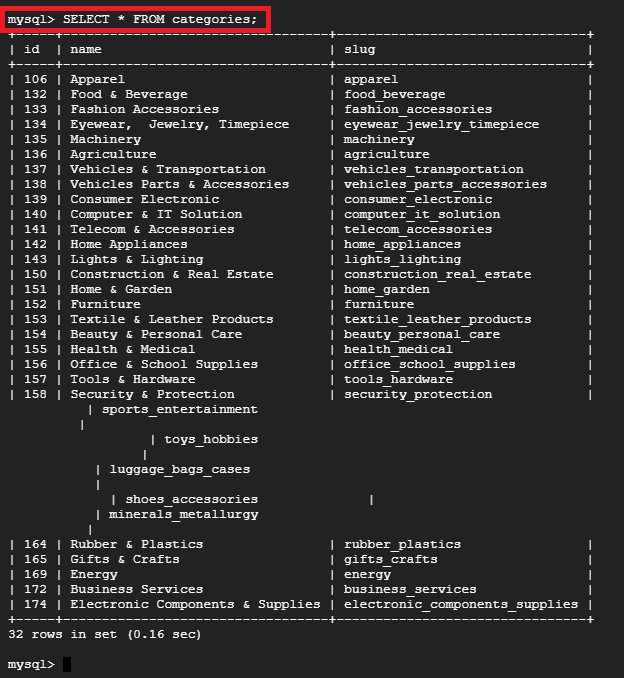
6. Finally, run the query below to SELECT and retrieve data FROM a table on the active database. Replace table_name with the actual table name on your database.
SELECT * FROM table_name;If you’re unsure which table to look up, run the below query to list all available tables in your database. SHOW TABLES;
You now have access to the database and its tables. At this point, you can already run any MySQL query to add/delete or update data available in your database.
Connecting Google Cloud SQL with MySQL Workbench
Managing your database via Cloud Shell works fine, but perhaps you like to work on your Cloud SQL database locally. If so, you’ll need MySQL Workbench on your machine. But first, you’ll have to connect your Google Cloud SQL to MySQL Workbench.
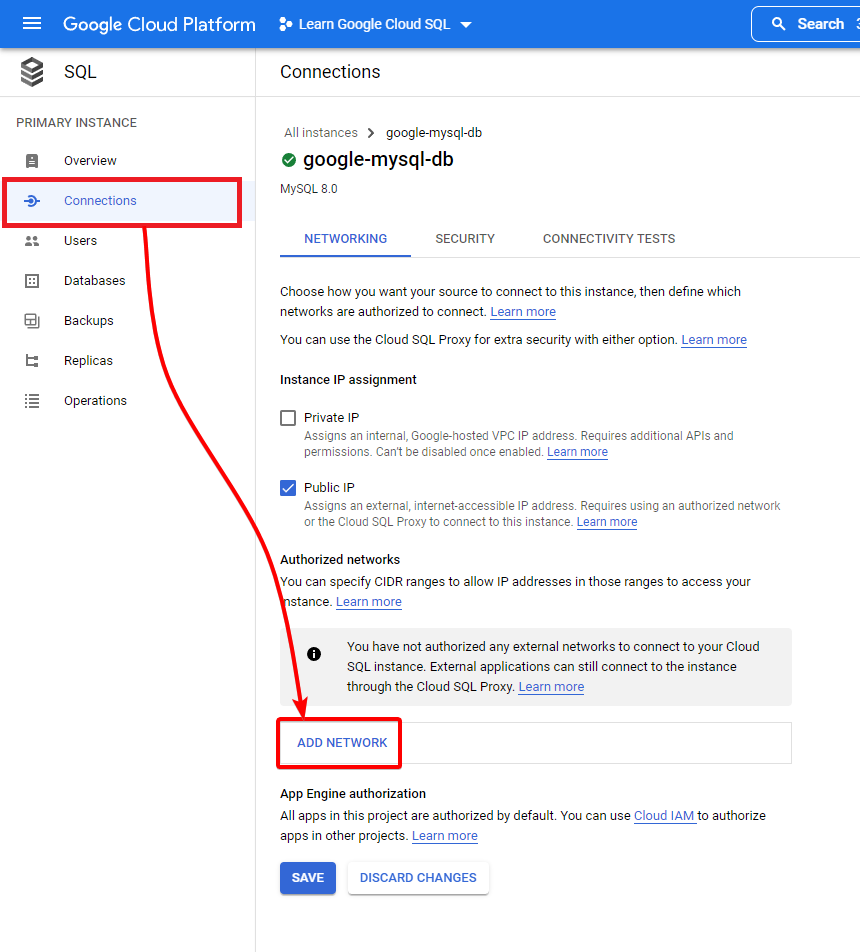
1. Click on Connections on the side menu bar of the Google Cloud SQL page to open the Connections page.
On the Connections page, click on the ADD NETWORK button to initiate adding your local network to your Google Cloud SQL instance.
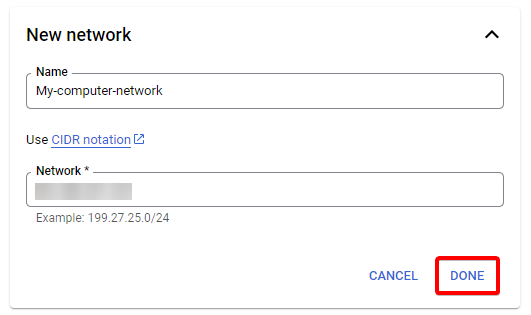
2. Provide a name of your choice for the new network and your network’s IP address, and click on the DONE button. Doing so stores your network details in the Google Cloud SQL instance.
This process establishes a connection between your local computer and your Google Cloud SQL instance.
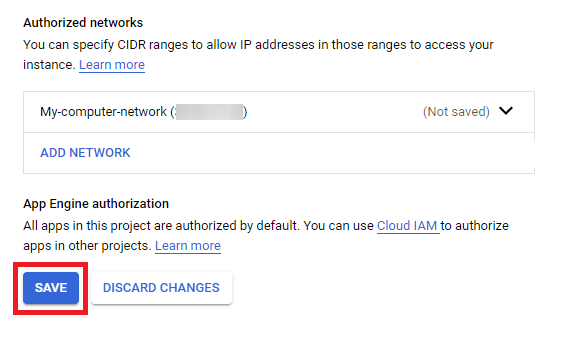
3. After adding your network details, click the SAVE button to save the new network.
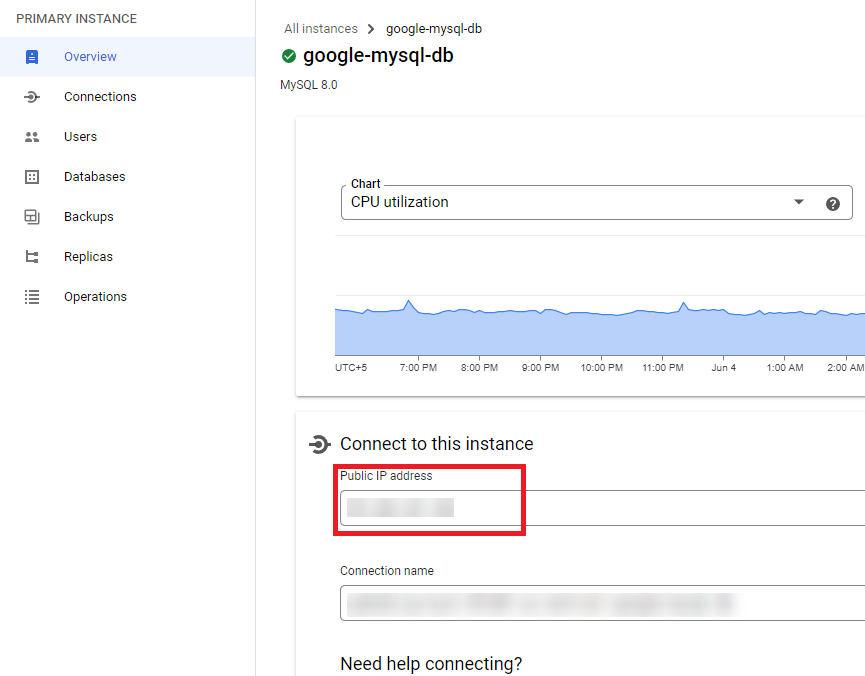
4. Now, go back to the Overview page, and copy the Public IP address available on that page.
5. Open the MySQL Workbench from your Start menu.
6. On MySQL Workbench’s welcome page, click on the new connection (+) icon to initiate a new connection between the Cloud SQL and MySQL workbench.
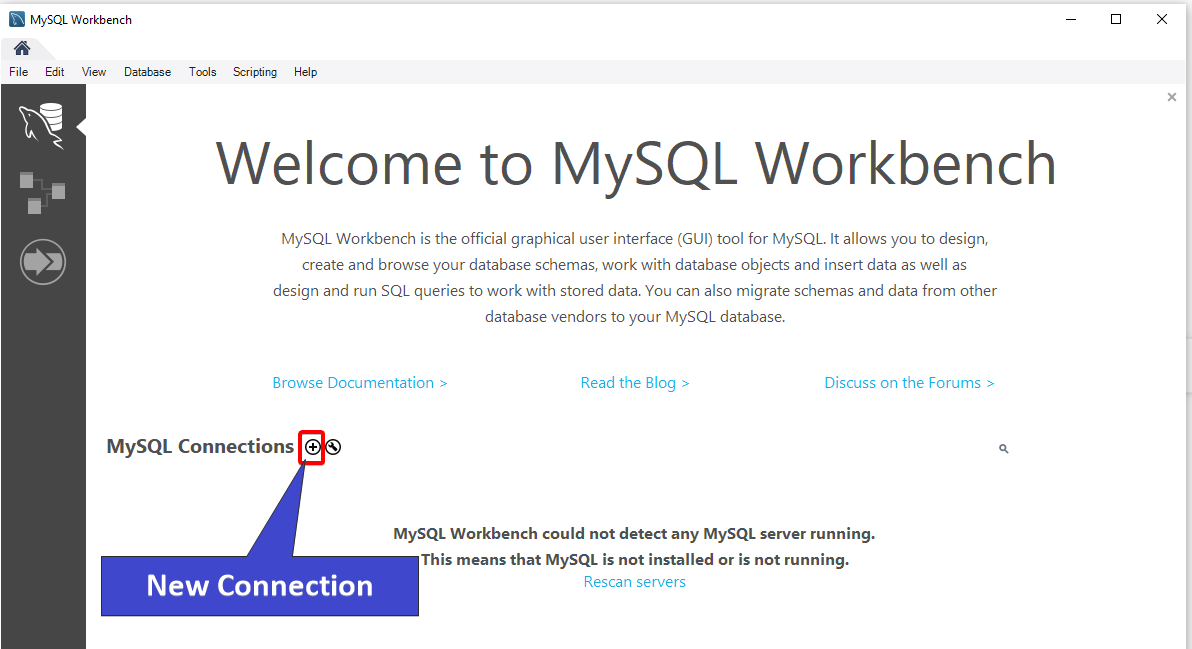
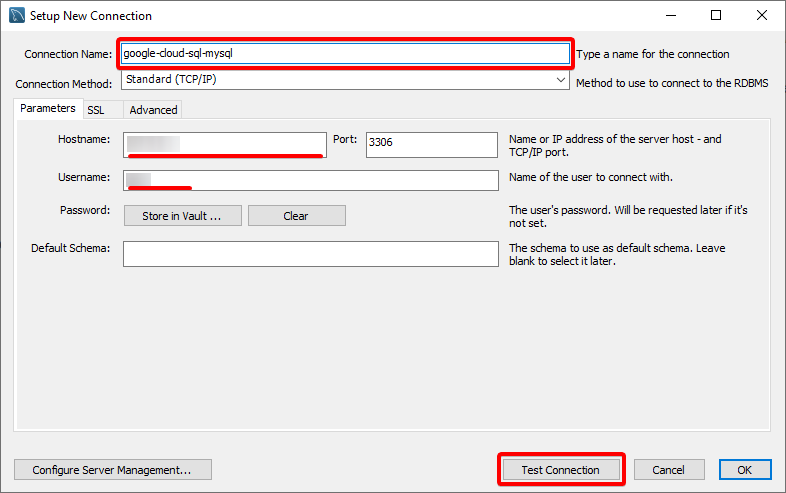
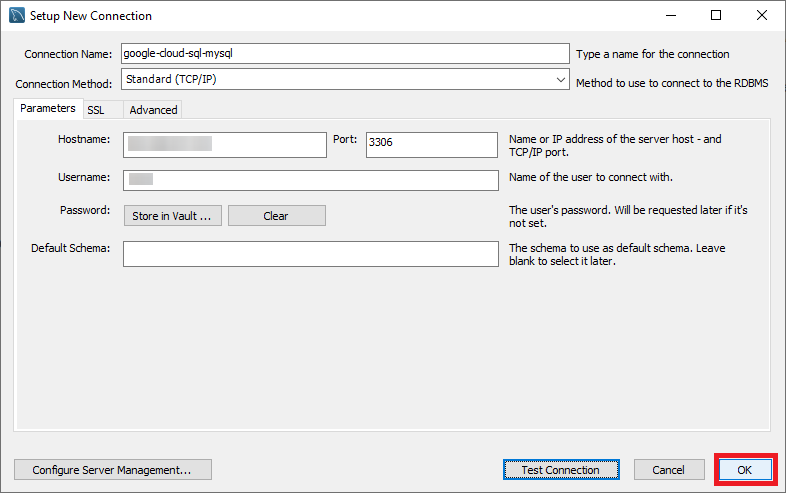
7. In the Setup New Connection wizard, configure the new connection with the following:
- Connection Name – Provide a name for the connection, but this tutorial’s choice is google-cloud-sql-mysql.
- Hostname – Input your Google Cloud SQL instance Public IP address you noted in step four.
- Username – Provide the username of your Google Cloud SQL MySQL database.
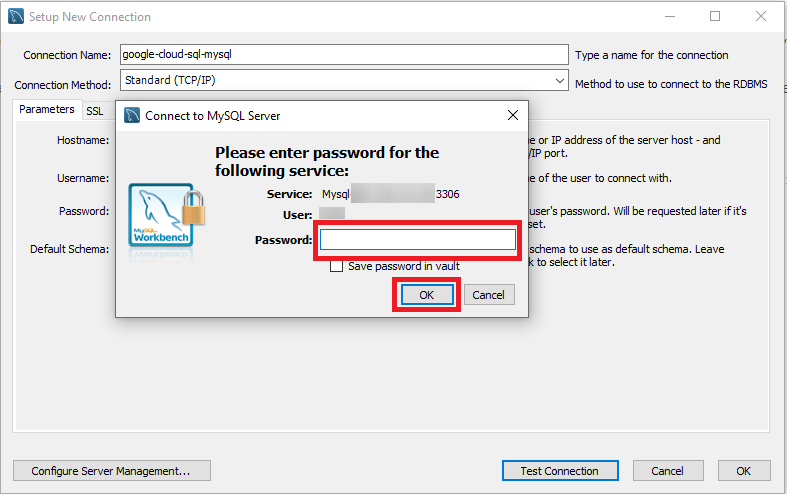
After providing the connection info, click the Test Connection button to test whether the settings are working. A pop-up window opens, where you’ll need to provide a password.
8. Provide the Password you set for your Google Cloud SQL MySQL database, and click OK to continue testing the new connection.
If all goes well, you’ll see a message box like the one below appears, confirming the successful connection.
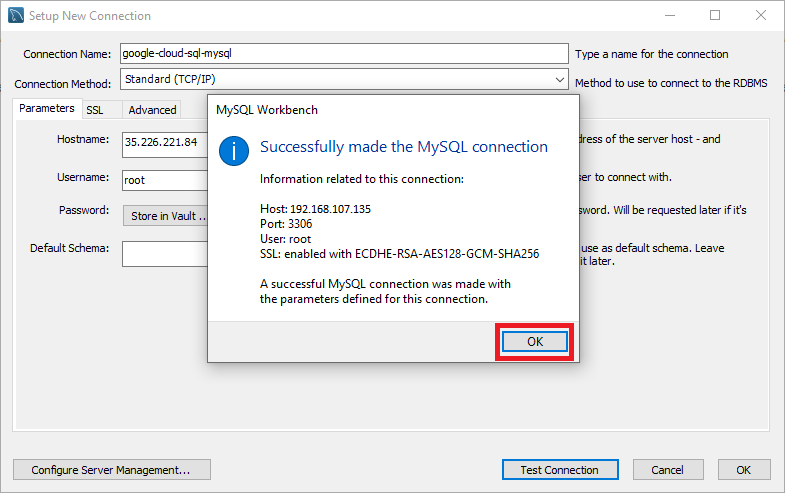
9. Now, click on the OK button to save the new connection. You’ll see a connection thumbnail on MySQL Workbench’s home screen in the following section.
Managing Google Cloud SQL Database via MySQL Workbench
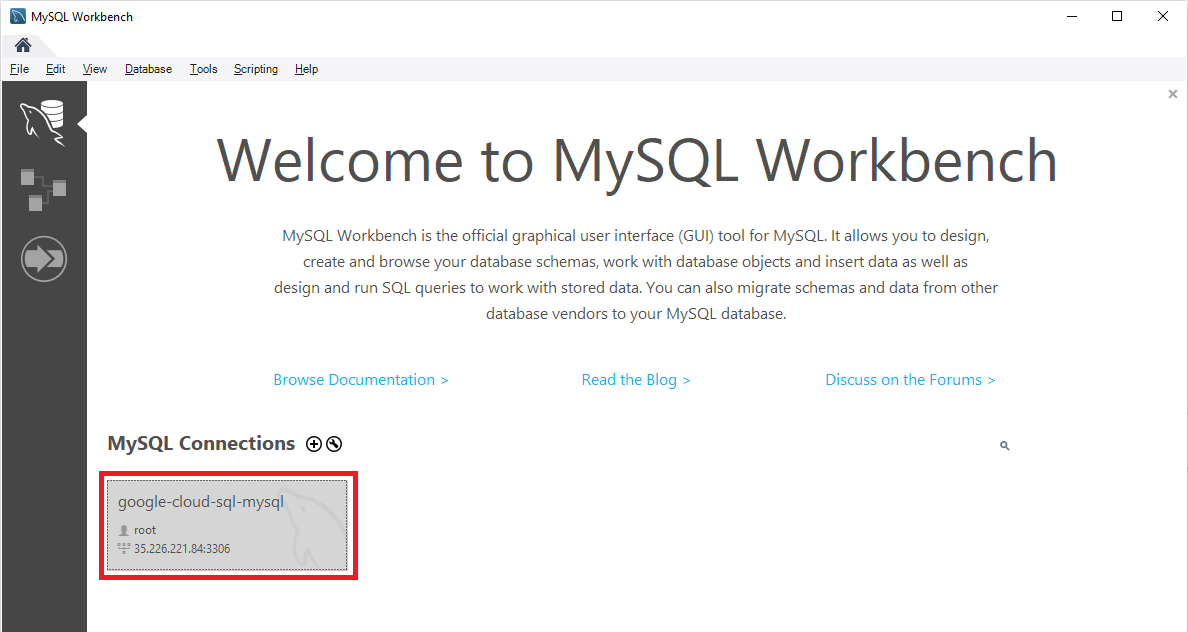
You’ve successfully connected to your Google Cloud SQL database. But can you manage your database on MySQL Workbench too? Yes! You’ll see the connection thumbnail on MySQL Workbench’s home page since you’ve added the new connection to your Google Cloud SQL database.
1. Click on the new connection thumbnail, as shown below, to access the Google Cloud SQL database.
When prompted, provide the root password again, and you’ll get access to your Google Cloud SQL dashboard via the MySQL Workbench.
2. Next, click on the Schemas tab (bottom-left) to open the list of databases.
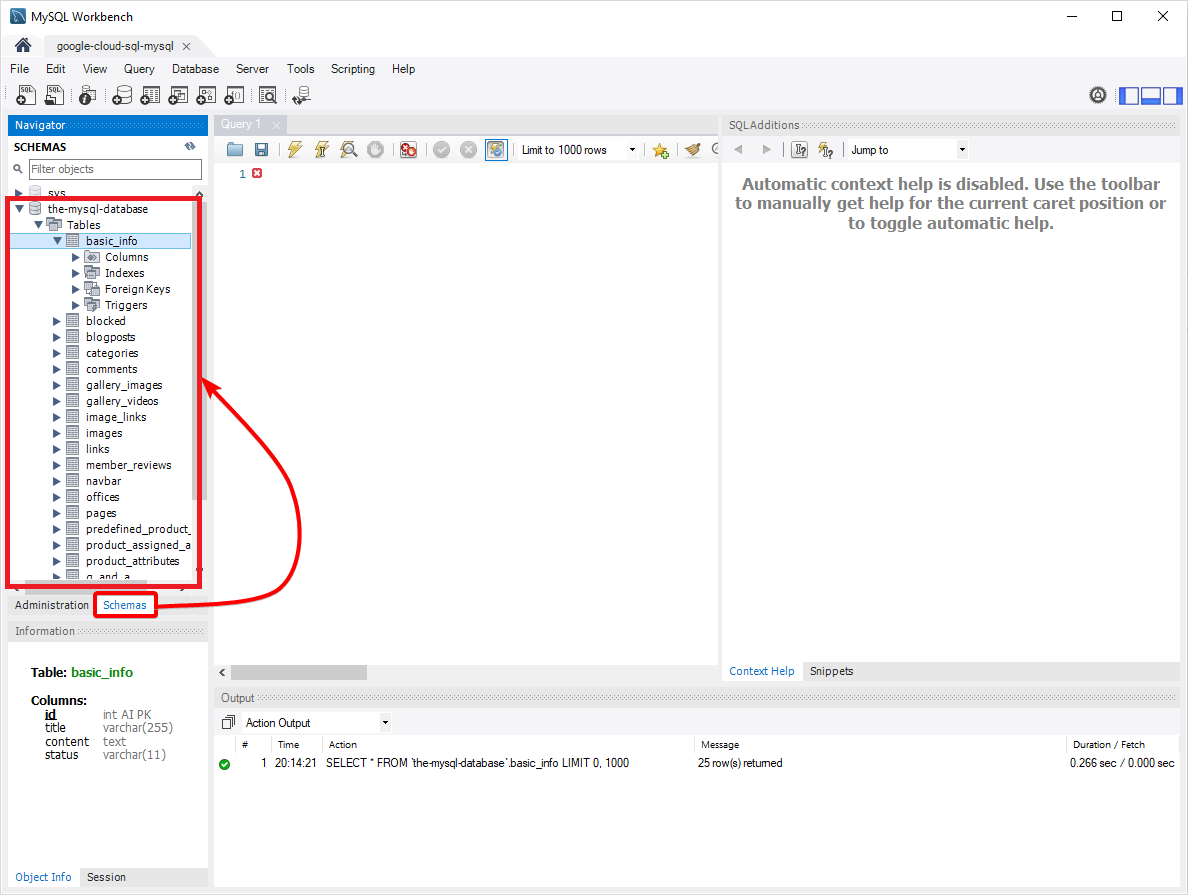
3. Finally, expand your database to see the tables available, as shown below.
Right click on any table available on your database, and click on the Select Rows – Limit 1000 option from the context menu to open the table with 1000 rows selected.
Now, your database is accessible and can be controlled and utilized locally!

Conclusion
In this tutorial, you’ve learned how to get started with Google Cloud SQL. You managed to create a Google Cloud instance where you added your database. Not only that, but you also connected your Google Cloud SQL database with your local environment to manage your data locally.
At this point, you’re one step closer to managing your databases via Cloud Shell or MySQL Workbench like a pro.
So what’s the next big project you’ll use Google Cloud SQL for database management?


